CHAPTER 8
DRAWING PORTRAITS
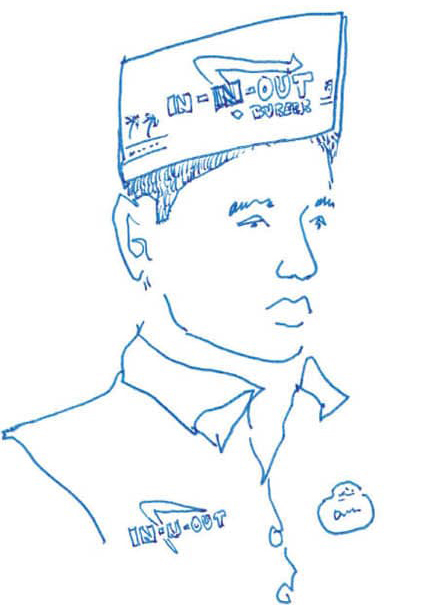
When I first began drawing people on the subway, I made a lot of drawings that looked like my subject and also a lot of drawings that didn’t. Though I was frustrated, I didn’t reject these portraits for their lack of accuracy. Rather I began to reconsider my criteria for what made a successful portrait. If my drawing didn’t look exactly like my subject, but had some elements that illuminated their spirit, I called that portrait a success.
We’ll learn to see the face as a series of simple, abstract shapes and lines and talk about how the challenges of drawing strangers in public can contribute to your strength as a portrait artist.
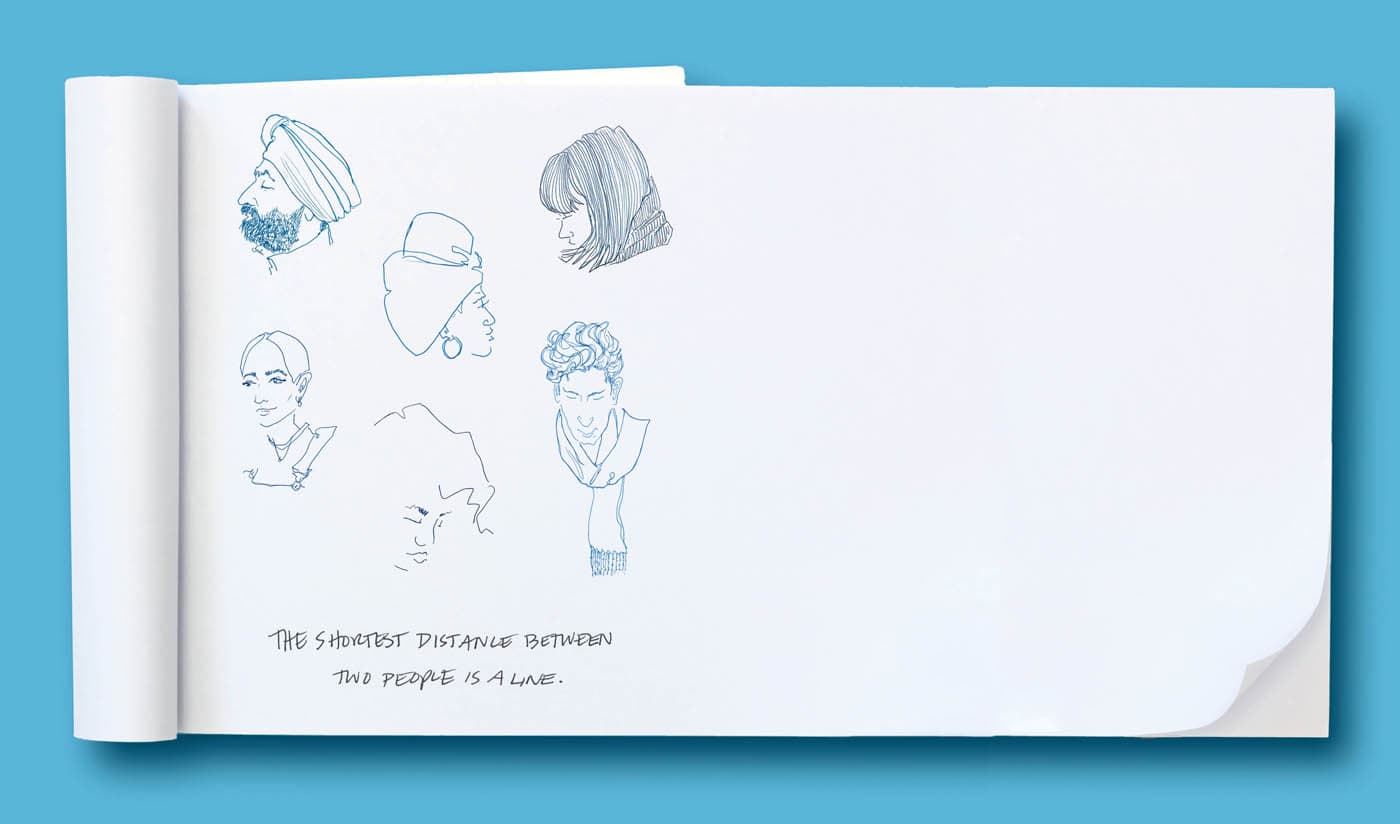
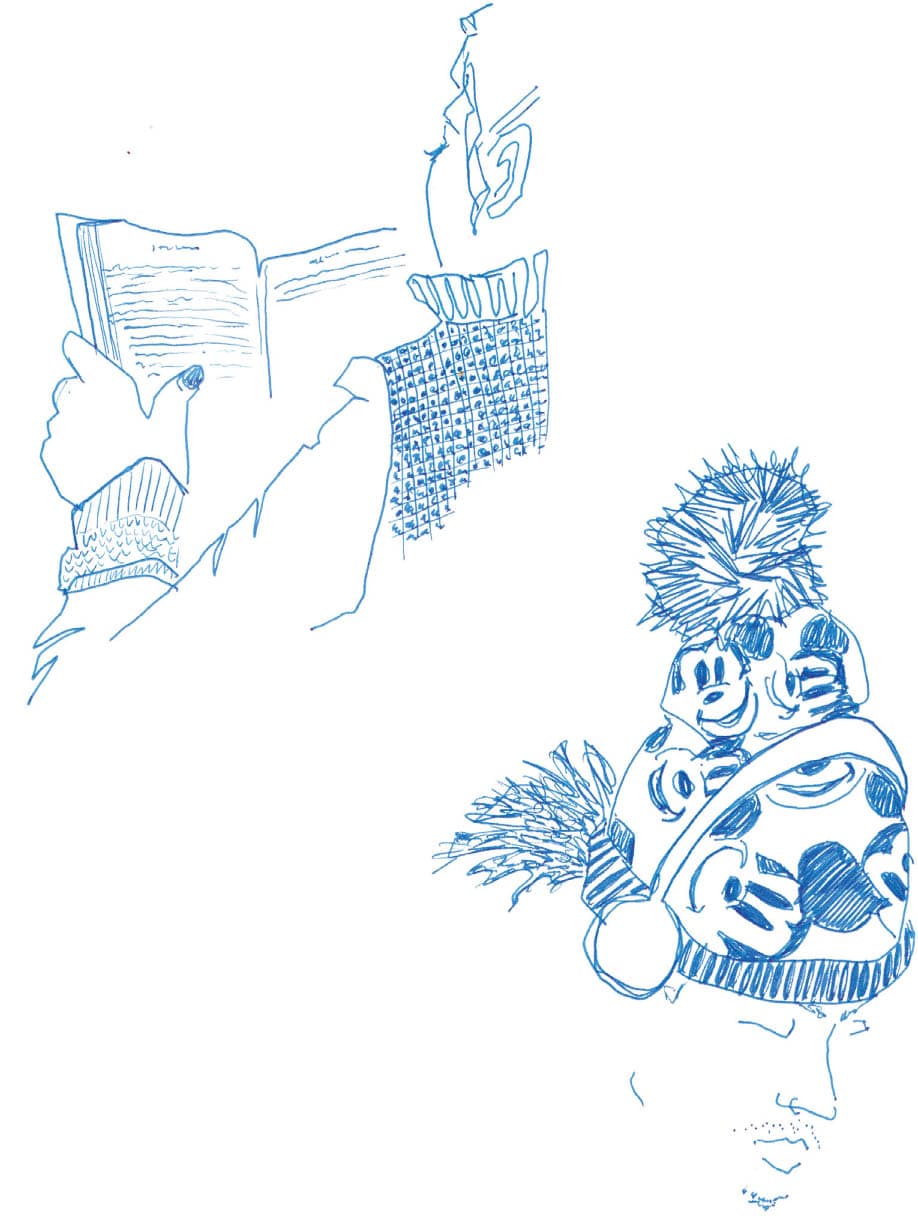
When it comes to drawing faces, don’t think about drawing a face! I’ll show you a method for portraiture that abstracts the features of the face into simple shapes and gestures using as few lines as possible. As you draw each feature, think about how to describe them: A nose can be aristocratic; strong lines communicate that. An eye can be kind; gentle or flexible lines show that softness. Your portrait reveals a story, so use each line as an investigation of your subject. We’ll map the face without using a grid. Instead we’ll travel from feature to feature, each one guiding the placement of the next. Think of yourself as an explorer charting the topography of the face, traveling in a path from top to bottom and from far side to near. You can adapt this method to suit your own unique style and approach, perhaps drawing features in a different order from what I suggest. Let time and repetition be your teachers and don’t give up if your first hundred portraits don’t come out perfectly. If your portrait doesn’t look exactly like your subject, do what I do, and say, “Somewhere in the world, someone looks like that—and that’s who I drew!” Choose a subject who’s sitting close enough to clearly see their face and is in three-quarter profile. When you have an emotional connection to someone, it can be difficult to see their face as a collection of abstract shapes. I suggest starting with drawing strangers. I draw whoever interests me. Everyone has a story that’s worth telling. If you’re lacking inspiration, zoom the room. To practice making candid portraits of strangers, look for places where people spend some sitting or standing still and are close enough to see the details of their faces, such as libraries, cafés, public transportation, airports, malls, parks, and building lobbies.A New Way to Think About Portraits
Finding and Choosing Models
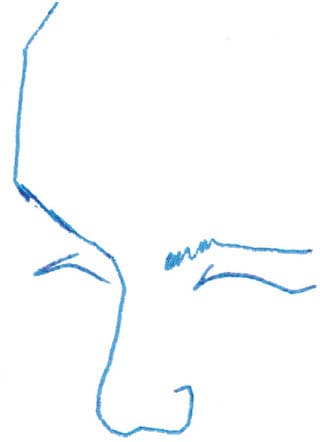
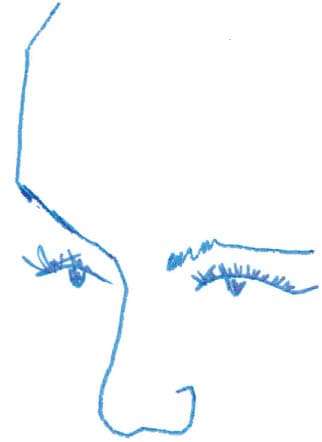
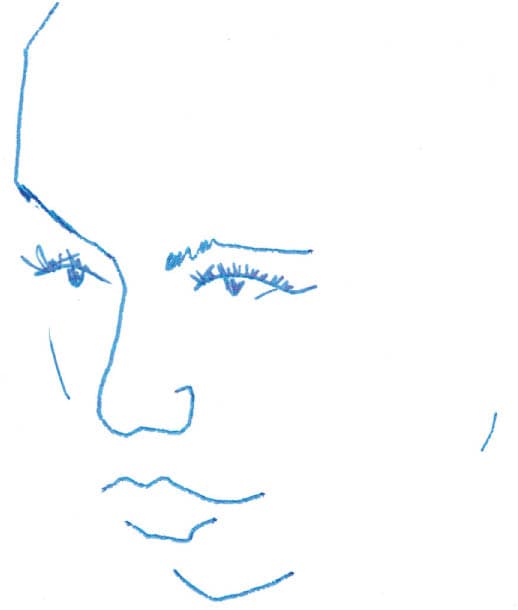
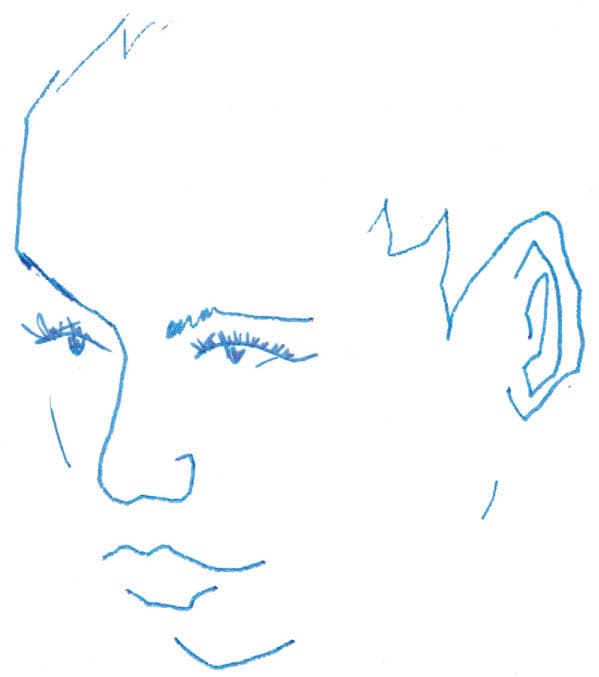
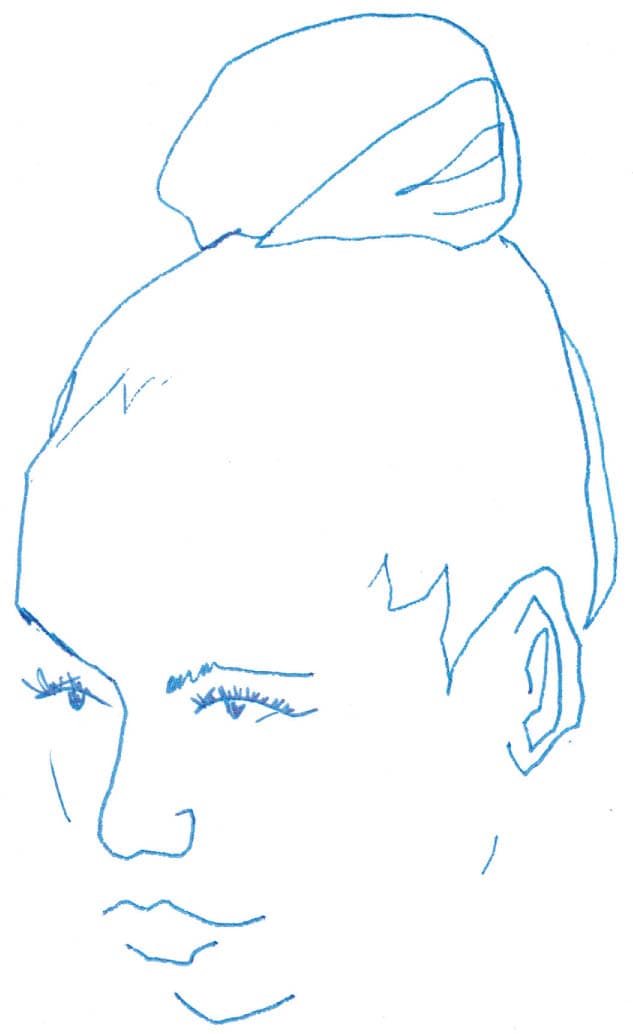
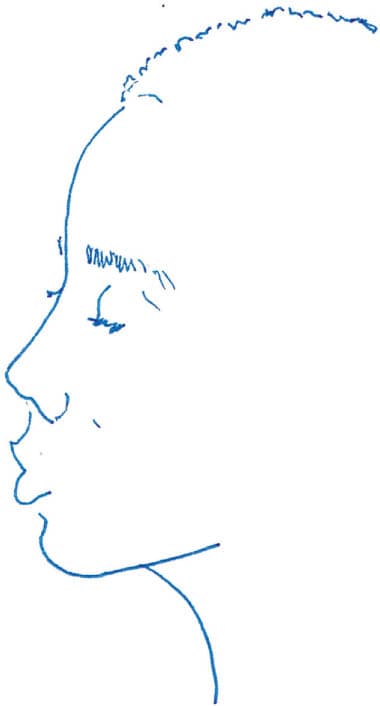
Here you’ll draw a three-quarter profile face by focusing on each of these features: forehead and brows; nose; eyes; mouth; chin, jawline, and cheeks; ear; and lastly, hair. 1. Draw the forehead and far eyebrow in one line. Trace the outline of the far side of the forehead and without picking up the pen, draw the shape of the brow, working inward toward the middle of the face. Think about how long or short these features are and consider the shape of the forehead. Does it bow out like an arch to meet the eyebrow or does it slope down like a triangle? Find the simple shape as you make your contour. 2. Drawing the second eyebrow defines the scale and width of the face. Determine its position by observing the relationship between the brows—are they close together or far apart? Observe the brow’s shape: peaked, rounded, or flat? Bushy or sparse? Use a single gesture to draw the eyebrow closest to you—don’t pick up the pen once you’ve begun to draw. You can add individual brow hairs later. 1. Notice the shape of the nose. Is it hooked, angular, straight, or sloped? Draw the nose in one line. Place your pen at the bridge of the nose (which begins at the innermost point of the far brow) and trace the topography of the nose, working down around the tip, the inside edge of the nostril, and continuing around to the outer edge of the nostril. 2. Depending on the nostril’s size and your perspective, you may need to draw some of the far nostril arch or interior. A little linework goes a long way to suggest these details. Start with small marks and add more if you need. The eyes convey a lot about the subject, but you don’t need a lot of linework to capture that essence. Communicate the basic shape of the eye in two lines: one representing the upper eyelid fold and the other representing the upper lash line. 1. Continuing to work from the far side of the face to the near side, draw the far eye. Using a single motion and working inward toward the nose, draw the shape of the upper eyelid fold. Next draw the upper lash line. If you’re overthinking this feature, abstract the eye into basic shapes like semicircles, almonds, or half ovals. Draw the near eye next. Start close to the nose and work to the outside. The closer eye is drawn slightly larger to show perspective. Match up the inner corners of the eyes to keep them on the same plane. 2. Add the iris. The iris is usually slightly covered by the lid, so draw it as a semicircle below the lash line. You can connect both ends of the semicircle to the lash line or leave the semicircle unattached on one end, which brings more life to the eye. Partly color in the semicircle, leaving some white space in the middle. Experiment with how much you color; leaving some white space off-center captures a glint in the eye. Next, add details such as eyelashes or eyeliner. 3. The line of the bottom eyelid can add a lot of character. Don’t feel the need to trace the whole bottom lid line, which can make the subject look overly tired or old. I added a bit of the outer corner of the bottom lid to give some smile to the eye. 4. If your subject has hooded eyes (where the eyelid is still visible when the eye is open), or their eyes are closed, you can still draw the eye in just two lines. 1. Draw the top lip. Position this on the face by using the bottom of the nose as a reference to judge the distance between the nose and mouth. Observe the shape of the top lip’s outer contour and draw it, keeping in mind the basic shapes of the lips, such as triangular points, rounded cupid’s bow arcs, or more of a straight line. 2. Draw the outer contour of the bottom lip, which conveys its fullness. A longer, more rounded line suggests a fuller, more protruding bottom lip. Don’t connect the lines of the top and bottom lip, as this can look cartoonish. A slight curl at the outer edge of the upper lip can turn a passive expression into a smiling or friendly one. Experiment to find more varied expressions. If someone has a pronounced philtrum (the little groove that runs between the nose and top lip), draw that as well. Just two or three lines can suggest the chin, jawline, and cheeks and enclose the shape of the face. You can draw the chin and jaw in a single line to give the impression of a firm jaw. Or draw the chin and jaw in two lines to express subtle details in that part of the face, such as a pronounced chin or a softer jawline. 1. Position the chin relative to its distance from the line of the bottom lip. Draw the chin, working from far side to near, keeping in mind the basic shape: square and angular or soft and round? You can extend the chin line to include a bit of the jawline as well. 2. Draw the jaw with a line that picks up a short distance from the chin. In this case, I wanted to suggest the edge of the jaw, so I drew a slightly curved line to show where the jaw turns toward the ear. Experiment with making this line short, long, or even omitting it. These variations can suggest a soft face; a leaner, more chiseled face; or a determined expression. 3. Now draw the cheekbones. For the cheekbone on the far side of the face, a short, curved line can indicate cherubic cheeks, while an angled line suggests high cheekbones. 1. Map the placement of the ear by noting the relationship of the top of the ear to the brow line: is it lower, higher, or in line? Determine the size of the ear by noting where the earlobe attaches. Does it align with the bottom of the nose or perhaps the corner of the mouth? Draw the ear, connecting the top and bottom points by tracing its outer contour, starting from the top. 2. Draw the ear’s inner folds. I like to have fun with these. A few squiggles is enough to suggest this detail. 1. Using a single line, trace the edge of the hairline, using the eyebrows as a reference to place the line. The hairline defines the forehead size and suggests the curve of the head. I drew just enough to suggest the peak of her forehead and her temple. 2. Add volume and shape by tracing the outline of the hair. I added a few lines to suggest the hair swirling into a spiraled bun.Exercise: Draw a Face in Three-Quarter Profile
Forehead and Brows


Nose

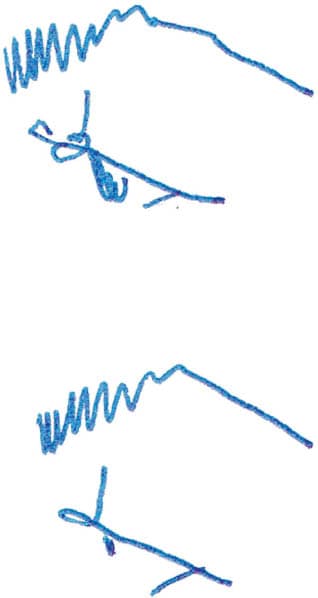
Eyes


Mouth

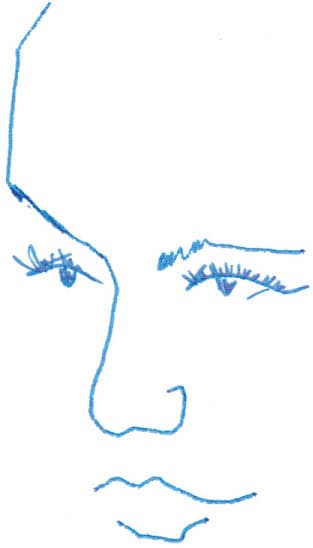
Chin, Jawline, and Cheeks


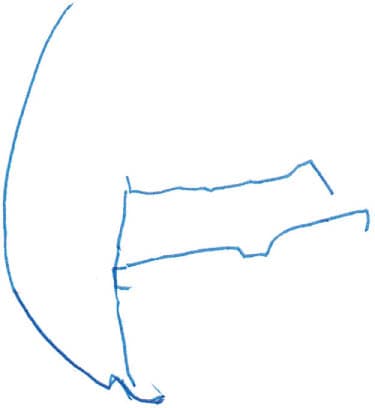
Ear


Hair
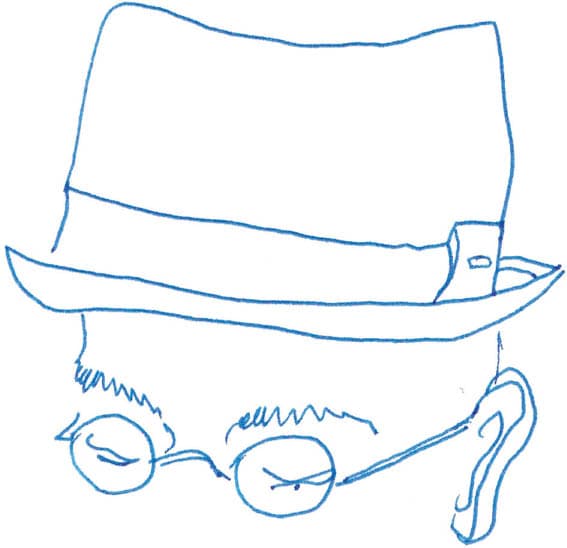
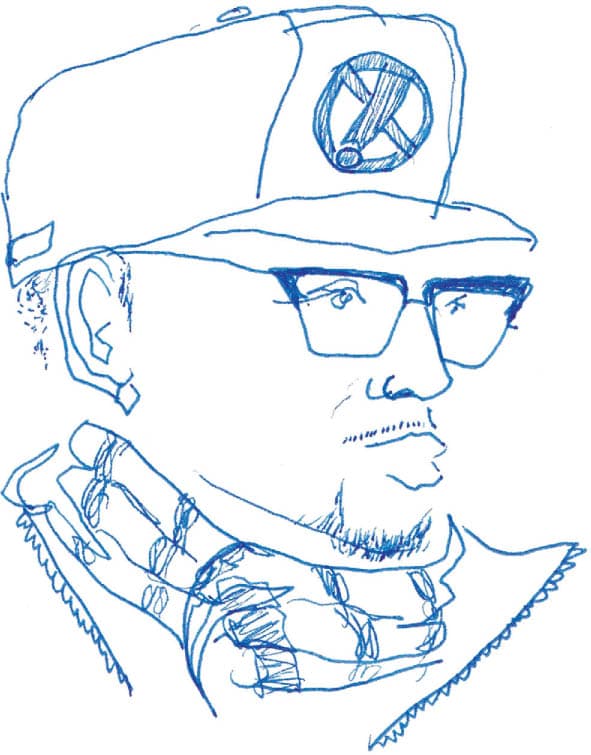
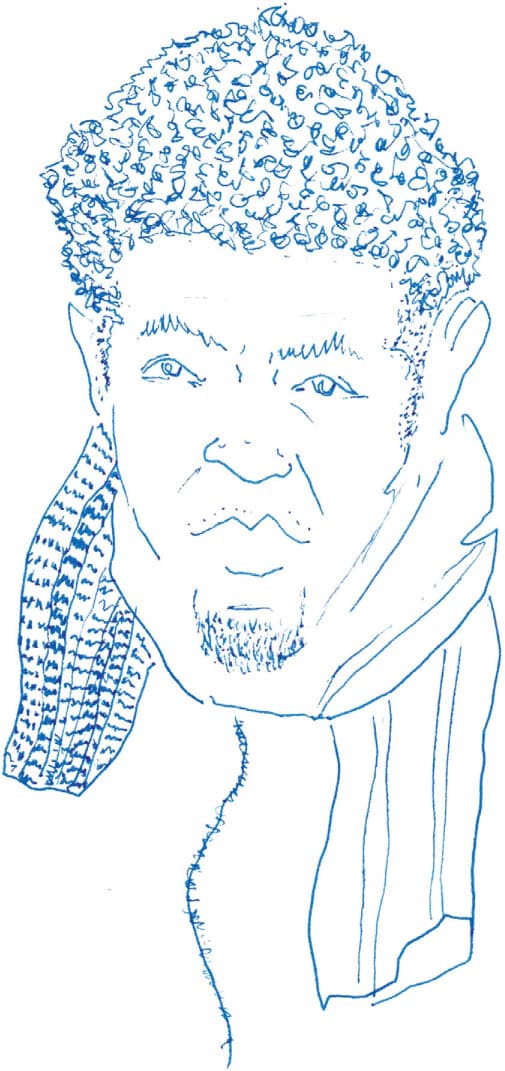
Look at your drawing and compare it to your subject. Now’s the time to add facial hair, piercings, dimples, smile lines, and other distinguishing features. You can also add the neck line and the details of the upper bust and chest. Be mindful of where you place the outline of the neck; too far forward and you’ll create a thick neck and short chin, and too far back and your subject will look like a bobblehead. Glasses add personality and frame the eyes, but they can be confusing to draw. Whether you’re drawing glasses straight on or in profile, block in the shape of the frames before drawing the brows, nose, and eyes. This sets the scale and makes it appear that the glasses are resting on the face. As you draw the brows, eyes, and nose behind the glasses, any details obscured by the frames are naturally left out. When drawing glasses on someone in profile (full or three-quarter), slightly compress the far-side lens so it appears farther away. Draw the top line of the glasses first. Draw the shape of the frame. Be specific and take your time to capture the shape and style of the frame. Add the eyes and brows behind the frame.Final Details
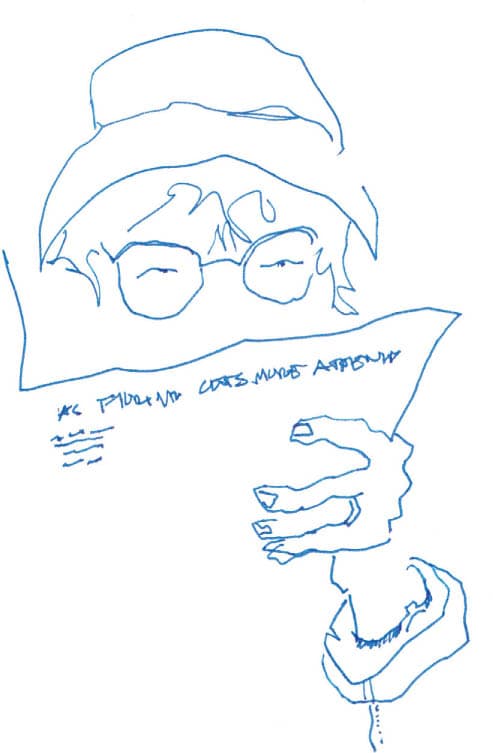
Drawing Eyeglasses


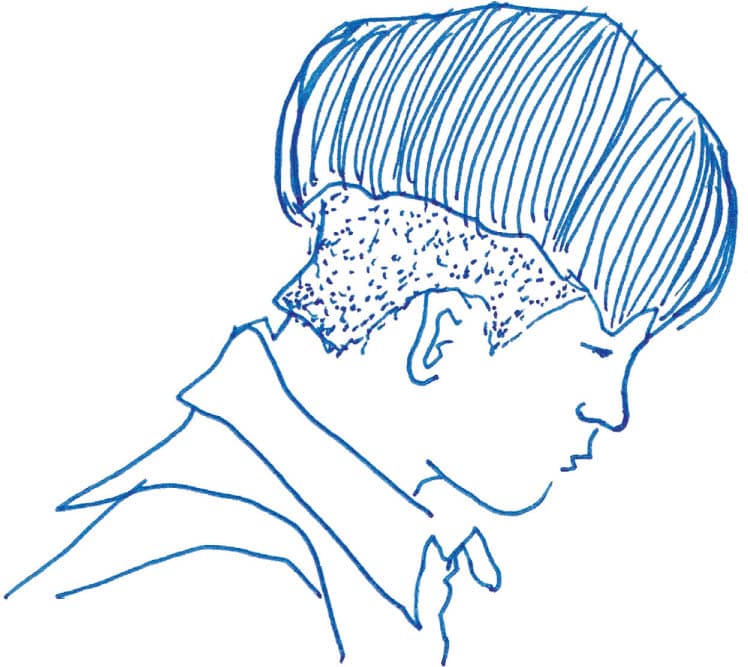
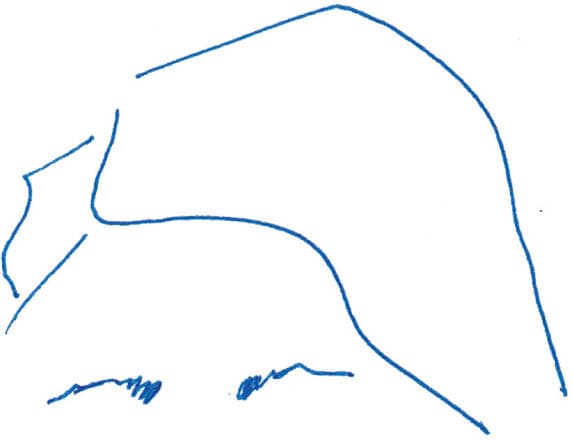
Think of a profile portrait as tracing the topography of just one plane of the face, in the same way you would create a silhouette of your subject. The process is similar to drawing a three-quarter profile, but here are a few tips: When drawing the eyes, the iris is semi oval, not a semicircle. You can also use a simple dot to suggest the iris. When drawing someone in full profile, block in the shape of the hair first. The outline of the hair then becomes a reference for where to place the brows. Try to imagine the skull underneath the hair and note that it curves like a question mark from the top of head to the base of the skull where it meets the neck. Draw the silhouette of the lips showing how they protrude from the face or add extra detail by drawing the inner contours of the lips. You can also choose not to enclose the head at all.Drawing Portraits in Profile


Drawing straight-on portraits can be tricky because the topography of the features, so clearly revealed in profile, is less clear head on. To compensate for this, pay attention to the way light and shadow suggest the features’ depth and definition. Light hitting your subject creates more shadow on one side of the face. To express the depth and shape of protruding or receding features (the nose, brow ridge, dimples, chiseled cheeks, under-eye bags, etc.), observe how these shadows fall and draw their contour on the more heavily shadowed side. If someone has strongly defined features, make symmetrical marks on both sides of the face. Use the same techniques and approach for a three-quarter profile, with the following tweaks: 1. Draw some of the hairline first as a reference for where to place the brows. 2. Set the nose by making a mark where the bridge meets the brow. If the bridge of the nose is angular and strong, draw a longer line. Draw the outer ridges of the nostrils, establishing the length and width of the nose. 3. Draw the tip of the nose. Remember the basic shapes: Is the tip of the nose pointy like a triangle, or wide and curvy? 4. To create more definition, add a contour line to define the shape of the bridge or the sides of the nose. A wide nose may not need any extra definition, but one that’s angular or sharp may need lines on either side of the bridge. When adding deep worry lines, brow furrows, dimples, and other expressive lines, use symmetrical marks. Otherwise, suggest them with a single mark on the shadowed side of the face. To draw the ear, you only need to suggest the upper curve of the ear and earlobe. You also may not need to draw both ears. Unless the person is truly facing you straight-on, one ear will be more visible than the other.Drawing Portraits Straight On


When I started drawing on the subway, I was not stealthy at all. Being observed changed people’s behavior, making it difficult to create truly candid portraits. So I learned how to go unnoticed while noticing others. Here are my tips for embracing your inner spy: If someone is curious or unhappy about what you’re doing, simply smile and be friendly. Offer to show them your sketch and let them know they inspired you to draw them because they are inspiring. This is usually enough to turn anyone’s concern into a nice moment of connection, especially once they see what you’re doing. That said, use common sense and don’t sketch people who seem dangerous or clearly don’t want to be drawn. If you’re drawing someone official like a police officer or soldier, ask permission first. Treat your subjects with curiosity, rather than being judgmental or making fun. This approach reflects back on you: Appreciating someone else’s unique characteristics makes you appreciate how unique you are. Remember: You are a work of art, and you’re sitting next to a masterpiece. In my quest to become a stealthy sketcher, I was inspired by a real-life spy who wrote about memorizing faces to record important details when taking photos was too dangerous. I challenged myself to memorize my subjects’ faces and eventually, in just a few glances, I could re-create an entire face. This skill is especially useful for avoiding unintentional staring contests, and for finishing portraits when a subject leaves while you’re still working. Since I didn’t go to spy school, I developed my own technique for drawing a face from memory: Once you start drawing out in the world, you’ll notice your models do strange things, like leave halfway through your drawing, as if they had no idea they were part of your impromptu art studio. Here are some tips for finishing a portrait from memory:How to Be Stealthy

Embrace Your Inner Spy
What If Your Cover Is Blown?
Memorizing Details
Practicing the Art of Letting Go