CHAPTER 5
DRAWING SCENES AND BACKGROUNDS
You’re out in public, and you’re ready to draw, but there’s so much going on.
Distilling a complex scene into something that makes visual sense and tells a story can be challenging. But you don’t have to feel overwhelmed deciding what to include and what not to include in your drawings.
We’ll discuss how to bring your own artistic order to the joyful chaos of the world. You’ll learn how to find your point of view and how to use compositional techniques to show relationships and tell stronger stories. You’ll also discover how to build a scene and easily manage scale and proportion without rulers or grids.
Your story is waiting. Let’s start telling it.
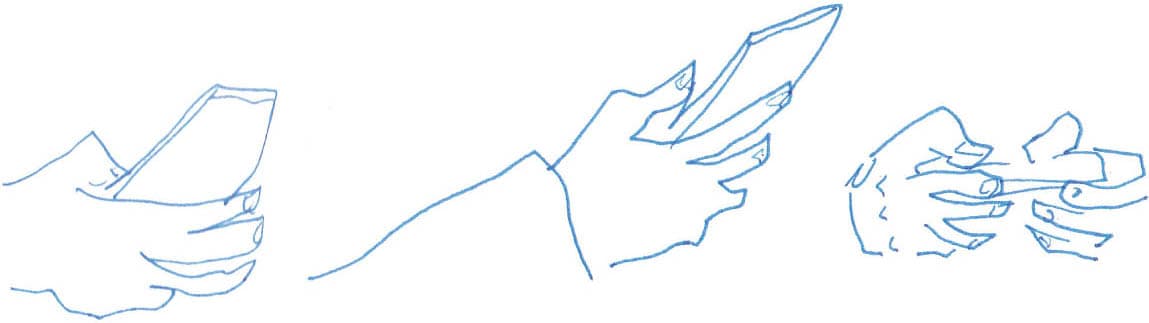
One of the lovely things about drawing from life is the way it makes you see the world. No matter where you go, the scene before you is no longer just another mundane, everyday place—it’s a potential source of inspiration for your next masterpiece. This transformation makes the commonplace more exciting, but it can also make it overwhelming. When everything is interesting, how do you decide what belongs on the page and what doesn’t? Because there are a million stories playing out in any given scene, it’s your job to see them and decide which you want to tell. I call the search for the story zooming. As I scan the room, I imagine myself as a camera lens, zooming in on smaller details or zooming out for the larger scene. In a café, I might zoom in and draw my hand resting on a cup of coffee. Or, I could zoom out a bit more and draw the nearby tables. Zooming out even farther, I could draw the whole café, or I could expand once more and notice the dog sitting patiently outside.Editing a Scene to Reflect What You See

The following two exercises ask you to first zoom the room and draw an entire scene and then change your perspective and focus on smaller details that tell individual stories. 1. Scan the room and ask questions about what you’re seeing; it can be tempting to dig right in and draw the first thing you see. Take a moment to absorb the energy of the space and choose the story you want to tell. Notice the energy, décor, body language, how people are dressed, and think about who people are and imagine their stories. 2. Think about what strikes you as interesting and wonder why. I was struck by a nearby couple whose conversation was occasionally interrupted by a shy laugh or awkward pause. I drew the couple, noting his listening eyes, her shy smile, and their open body language. Since they were closing down the place, I added a few empty tables and chairs and the waitress cleaning up at the end of her shift. 3. Zoom in and out to find different stories and new points of view. I saw a spontaneous still life before me: an endlessly refilled cup of coffee, a good book, a small vase of flowers, and my phone pushed off to the side. The sum of these parts added up to describe a slice of my life as I relaxed at a local café. Use the zoom the room technique to discover and draw three different stories from the same scene. Take thirty minutes to do this exercise. Use the time limit to prevent overthinking and spark creativity. 1. Zoom all the way out to tell the story of the entire scene you’re looking at. In a park, draw the whole playground including the children, parents, trees, and paths. At the airport, draw the travelers, gate agent, signs, and luggage filling the aisles, even the planes waiting outside. In a restaurant, draw the decor, plates of food, the diners, and waiters. If you’re struggling with rendering perspective, see here. 2. Zoom in a bit more. Tell the story of the two little girls playing tag, or the weary traveler asleep on their luggage, or the waiter pouring wine. 3. Zoom in even more. At the park, tell the story of a pair of shoes and socks left behind by their owner running barefoot through the grass. At the airport, draw the ticket anxiously clutched in a fearful flyer’s hand. In a restaurant, draw a drink garnish. After you’ve tried this exercise, notice how you see the world differently even when you aren’t holding your sketchbook.Exercises: Capture What You See
EXERCISE 1
Zoom the Room
EXERCISE 2
Change Your Point of View

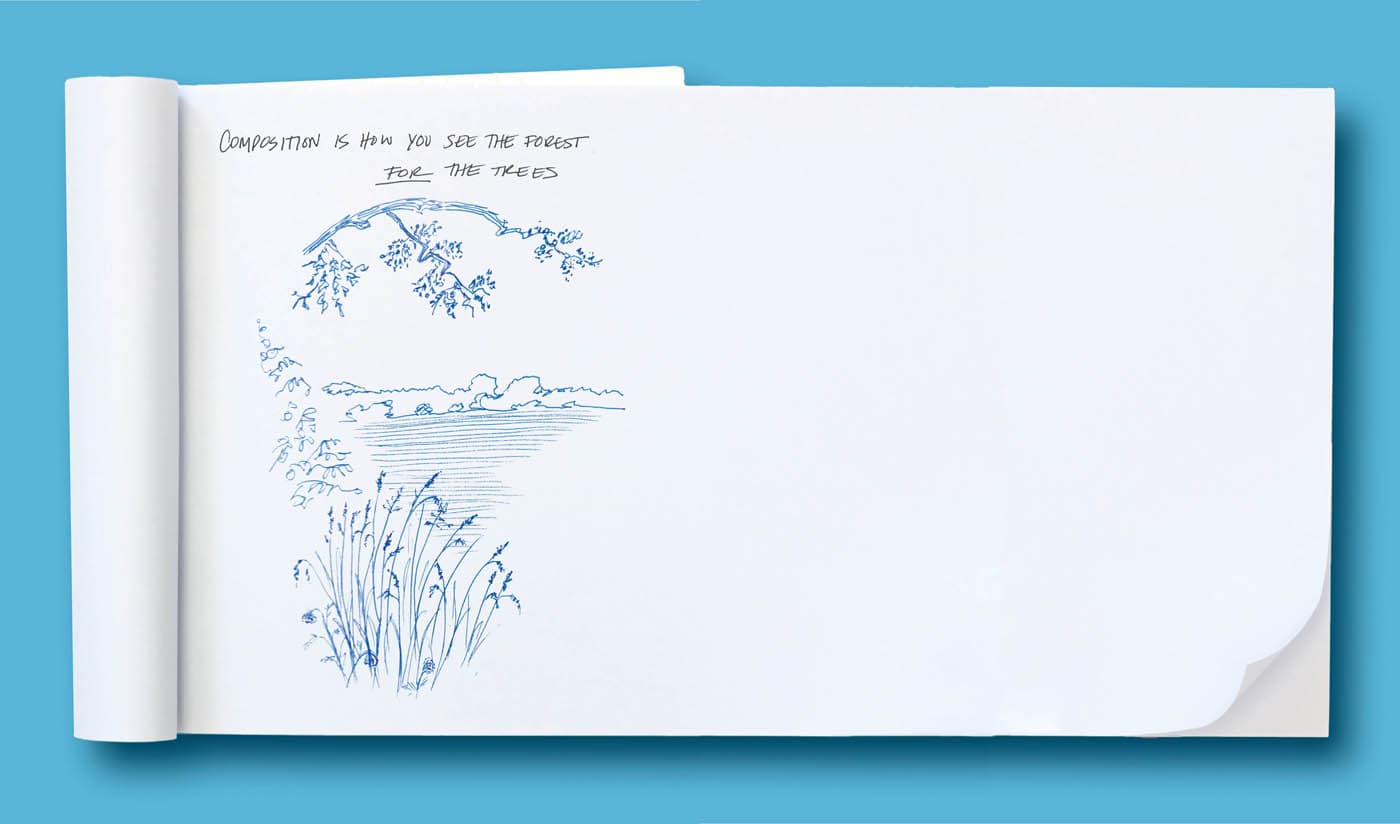
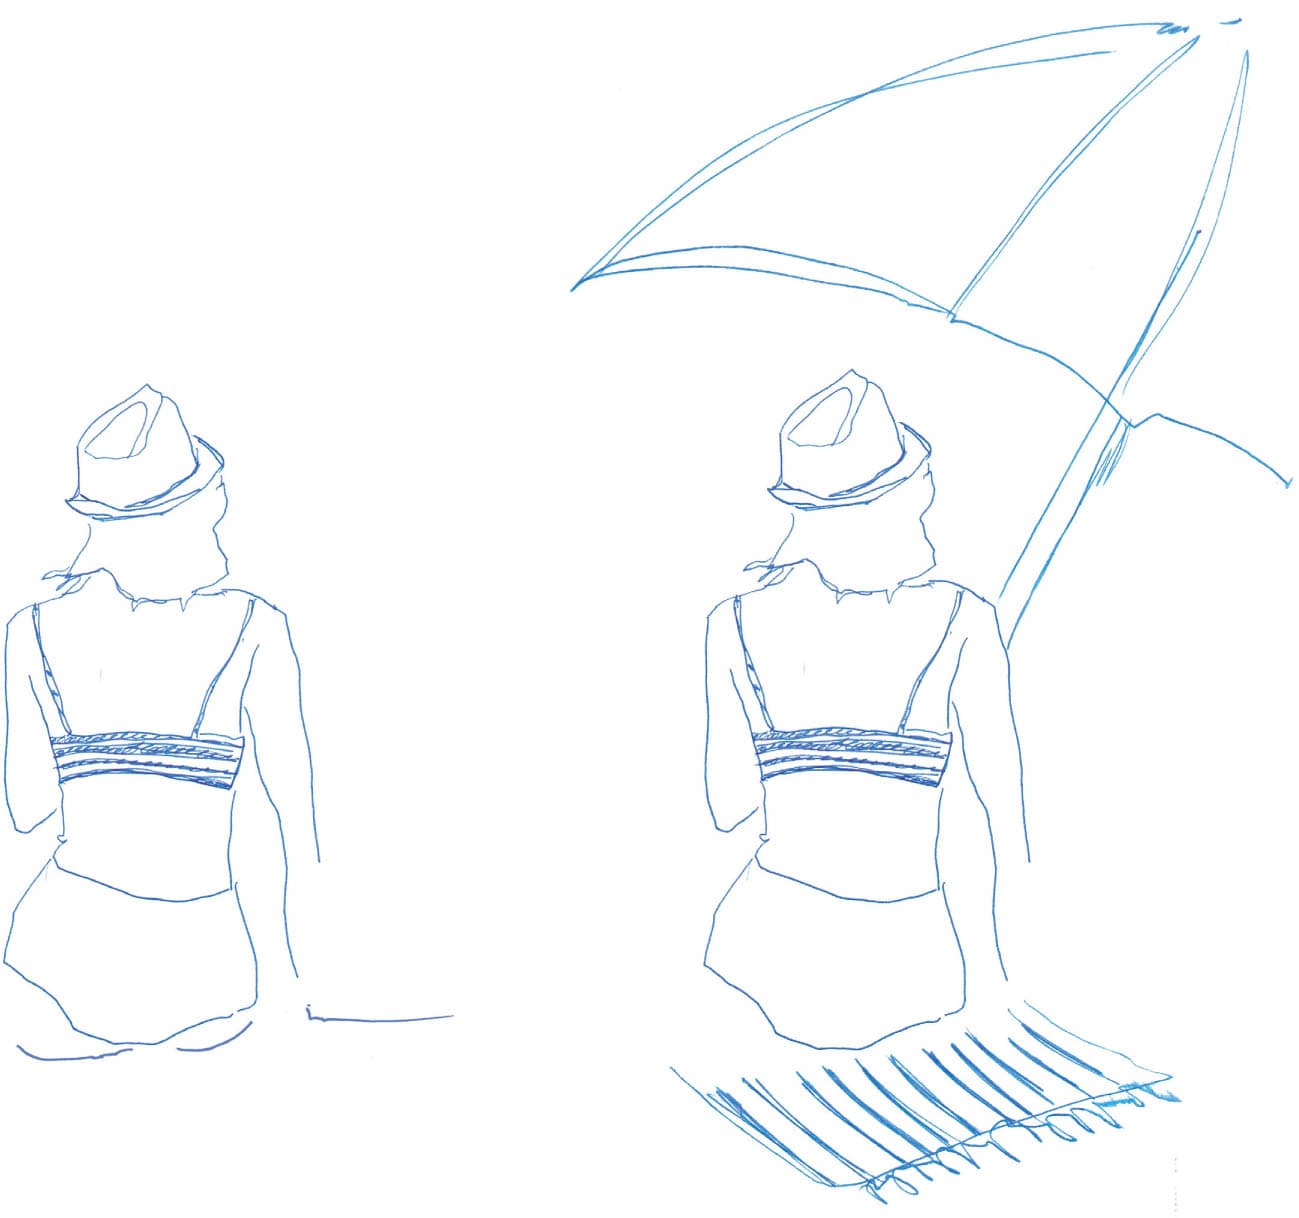
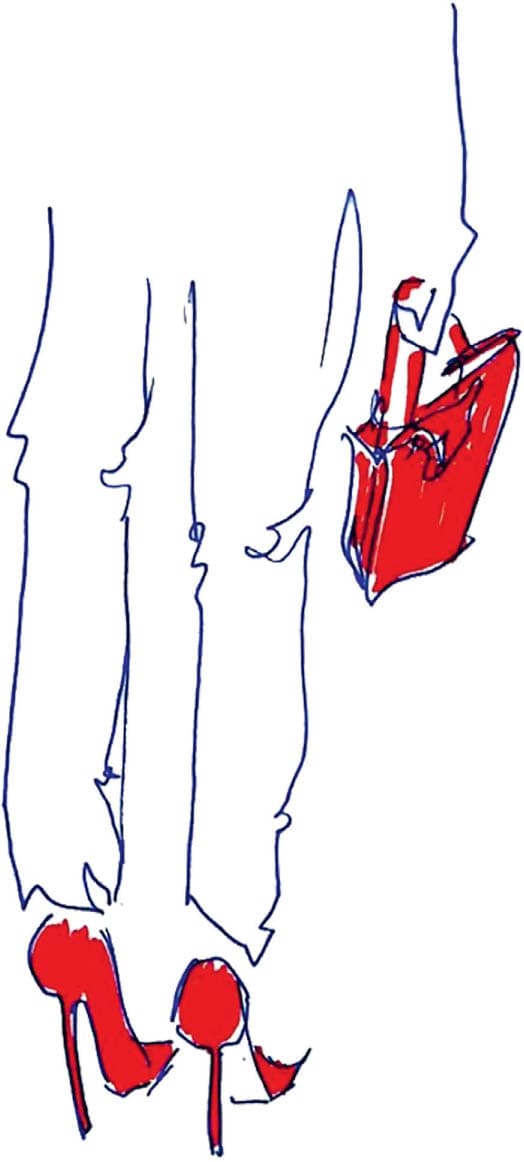
You’ve zoomed the room and found your story. This is where composition comes into play. Composition is the technique of assembling elements of your drawing in a way that effectively communicates your story and actively engages the viewer by inviting them into your scene. Instead of overwhelming you with lots of rules, I’m going to share three simple ideas for you to consider. Think of these ideas as tools, not rules—general principles whose main purpose is to help you be a clear and effective storyteller. Ever find yourself bopping along to the beat of a good song? That beat organizes the music into repeating patterns and gets listeners immersed in the song. Rhythm in a composition works in the same way. Visual rhythm happens when details or elements repeat, creating a feeling of organized movement. Our brains are attuned to visual rhythm because recognizing patterns is how we organize our world. Repeating themes, ideas, or visual elements create rhythm. Pattern is the repeating of an object or symbol all over the work of art and can often be found in fabrics and clothes. Rhythm is different from pattern, but pattern can help create rhythm. Repeating elements communicate with the viewer, underscoring themes or speaking to what isn’t shown. A row of subway commuters holding their phones creates a visual rhythm that speaks volumes about what is happening (hiding out in technology) and what isn’t (reading, engaging with the world). Balance is the distribution of the visual weight of objects, colors, texture, and space on the page. Think about your drawing as an old-fashioned scale. As you add elements to it, you can balance them in different ways to achieve different effects: Positive and Negative Space: When you draw, you affect the balance between the negative and positive space. The space you leave empty (negative space) says as much as the space you fill (positive space). Each has a role in creating balance. When creating a composition, think about how both kinds of space interact with each other to tell the full story. Visual Weight: As you add more elements, imagine you’re adding weights to a scale. Elements with more visual impact have a greater weight, and the eye will naturally focus on them. Increase visual weight by adding more detail, pattern, or color to an element. Play with areas of positive and negative space to direct the eye. Areas of detail attract the eye, and negative space gives it a place to rest. This single beachgoer looking out into negative space suggests a mood of contemplation or loneliness. Placing that same figure in a sea of people, or even adding an umbrella, changes the mood to something more fun or relaxed. Visual weight is like a spotlight on the stage, helping the viewer better follow the story. Here, a pop of color highlights the matching handbag and heels. This bottom-heavy composition creates a contrast between the high ceilings and formal space of the wedding reception, encouraging the eye to travel down to the crowded dance floor where the action is happening.
Scale and Placement: Where you place elements and how big you make them affect balance. To re-create the feeling of watching trapeze artists at the Big Apple Circus in New York City, I placed the performers in the top right corner and drew them on a small scale with few details. These compositional choices tell a story; the negative space becomes the air that our performers will fly through. Scale and placement and weight suggest the distance from the viewer and the danger of this high-flying entertainment. Have you ever gotten lost in a piece of art, wandering through the scene on a journey with your eyes and mind alone? This is movement. Movement is how your eye navigates an image and is a great way to engage viewers with your story. Rhythm and balance create movement, as do design elements like color, shape, or texture. Repeating field rows create rhythm and a strong visual path to pull the viewer in. The visual weight of the red pickup truck and dark silhouettes of cows grab attention, keeping the eye moving toward the simple outline of a forest and into the open sky.Using Composition to Tell Your Story
Rhythm


Balance


Movement

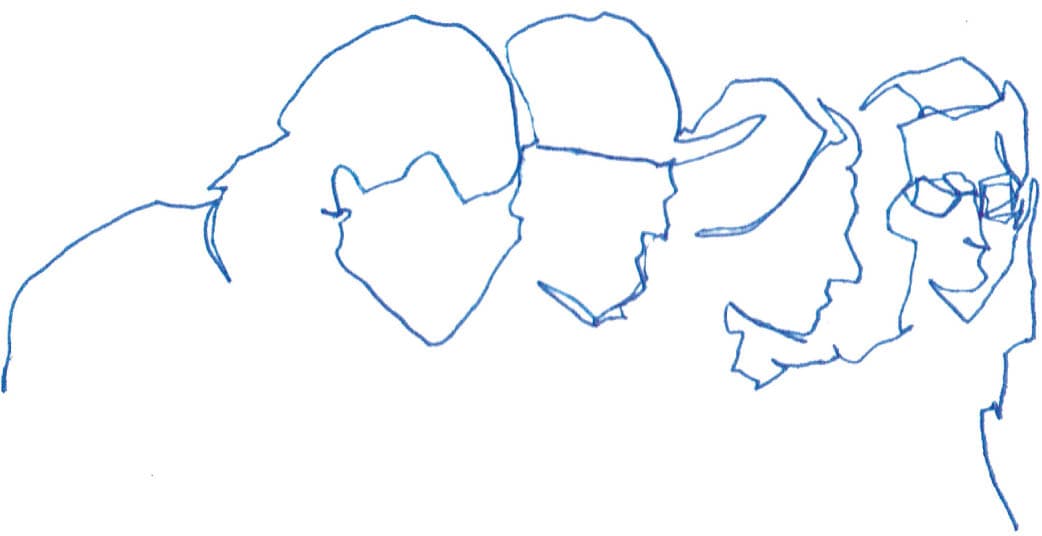
Composition not only communicates your story, but it also defines the relationships among the elements in the scene. See how the following drawings incorporate the principles of rhythm, movement, and balance to enhance the narrative. Rhythm: If you’re drawing a family portrait, rhythm can highlight shared traits, like this family where everyone has beautiful curly hair and cupid’s bow smiles. Balance: Use balance to convey emotional and physical relationships. Letting small things take up a lot of space increases their importance, like this drawing of pots and pans on a cramped stovetop in a New York City ramen shop. Movement: One flowing, unbroken line can merge two or more people into one, conveying intimacy and interconnectedness.Composition Underscores Connections


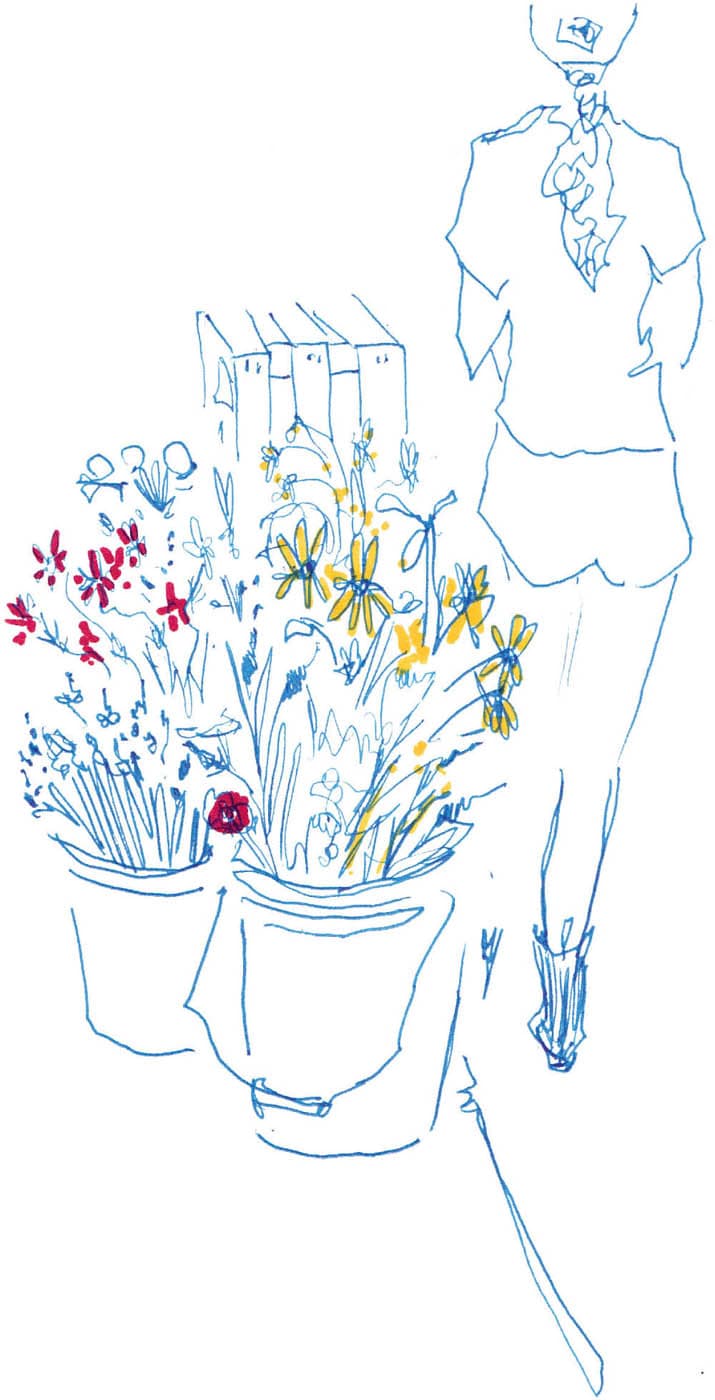
In the two exercises that follow, you’ll build a story using the principles of rhythm, balance, and movement to immerse the viewer into your setting. The process of creating an in-the-moment illustration is a mixture of planning and improvisation. Using compositional concepts organizes your approach as you work. Here’s how they helped me draw this farmer’s market vendor and her cheerful flower stall. 1. Choose a scene (don’t second-guess what inspires you) and begin your drawing with your hook. Mine was the daisy-like yellow flowers that caught my attention as I walked past the market stall. 2. Add more details to your story, considering how each element might engage your viewer. I drew the rest of the flowers, the buckets, and the table using compositional techniques to pull the viewer into the scene. The tangle of flowers and stems and pops of color create a heavier spot on the page (balance), and the red and yellow move the eye across the flowers (movement). I organized the chaos of the stems into a series of vertical lines (rhythm). (To see more on adding color, see here.) 3. Have you told the story you wanted? I considered making this a short story about lovely market flowers, but decided I wanted to add the vendor. As you add more elements, consider how composition can underscore the story. The flowers are the star of my story and the vendor is the secondary plot line. Compositional elements (weight, movement, and rhythm) lead the viewer to her after they pay attention to the flowers. 4. To keep the eye moving beyond the flowers to the vendor, I drew the crate behind the flowers. The repeating lines of the slats echo the leading line of the table (rhythm) and encourage the eye to move farther back into the piece (movement). 5. I drew the vendor from the top down. (See more on drawing figures). No advance planning was required to leave space for her. My viewpoint made that compositional choice for me, and she naturally fit into my drawing. You’re close to completing your drawing, so make sure you haven’t omitted any critical story elements. Are the who, what, why, (when, if it’s important) and where clear? 6. Provide more context of the setting. I drew the crates and baskets behind the vendor, adding more detail to the baskets (balance) to encourage the viewer to spend more time in the background with the vendor (movement). Assess the final composition by seeing if your eye travels the same path on the page as it does looking at the scene. If so, you’ve got a great composition, and your viewer will read your image in a similar way. (For more on drawing perspective, see here.) Zoom the room and find your story. Tell that same story three different ways, focusing on balance, then rhythm, and then movement. You’ll have three different drawings. Take no more than thirty minutes for this exercise.Exercises: Composition

EXERCISE 1
Creating a Compelling Composition


EXERCISE 2
One Story, Told Three Ways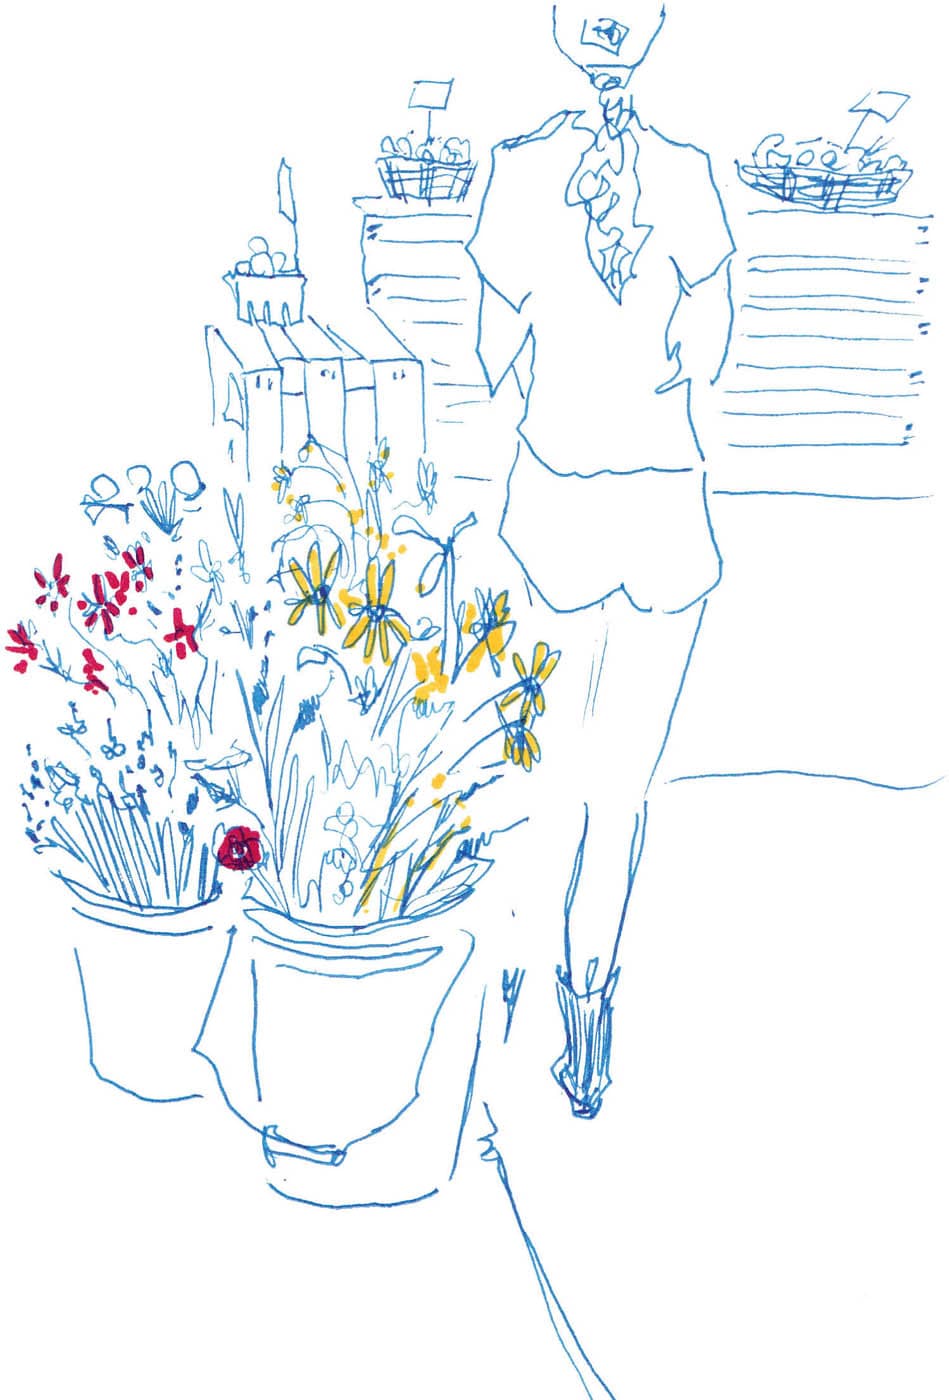
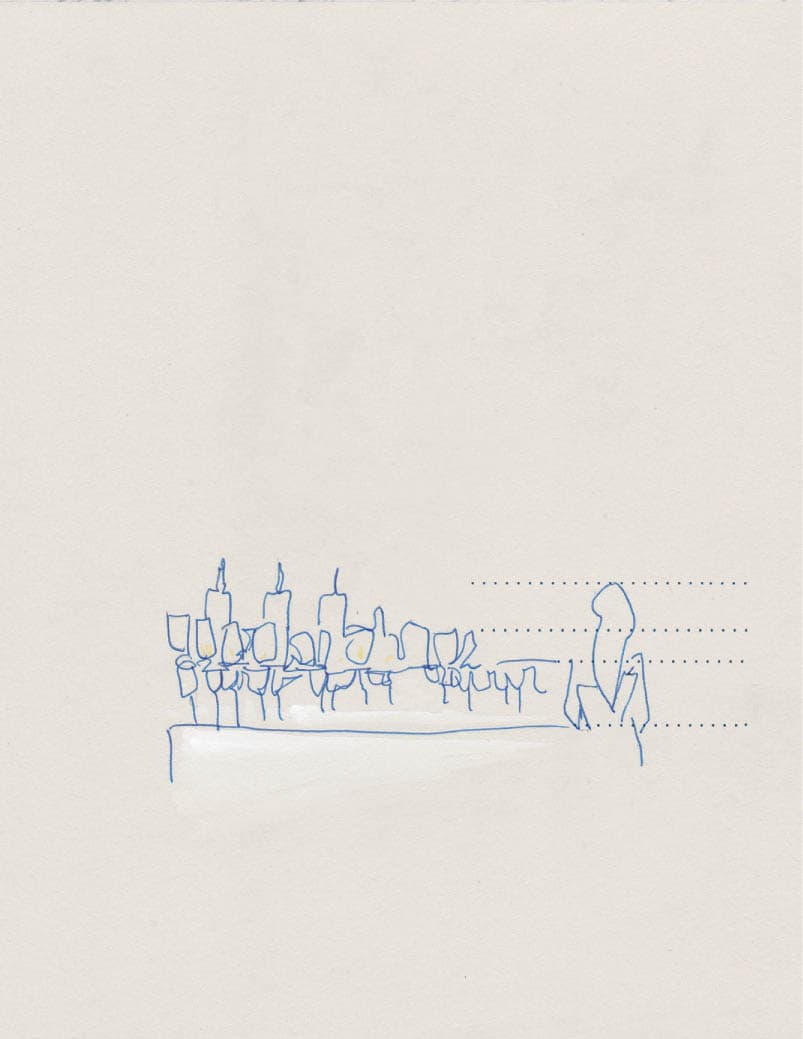
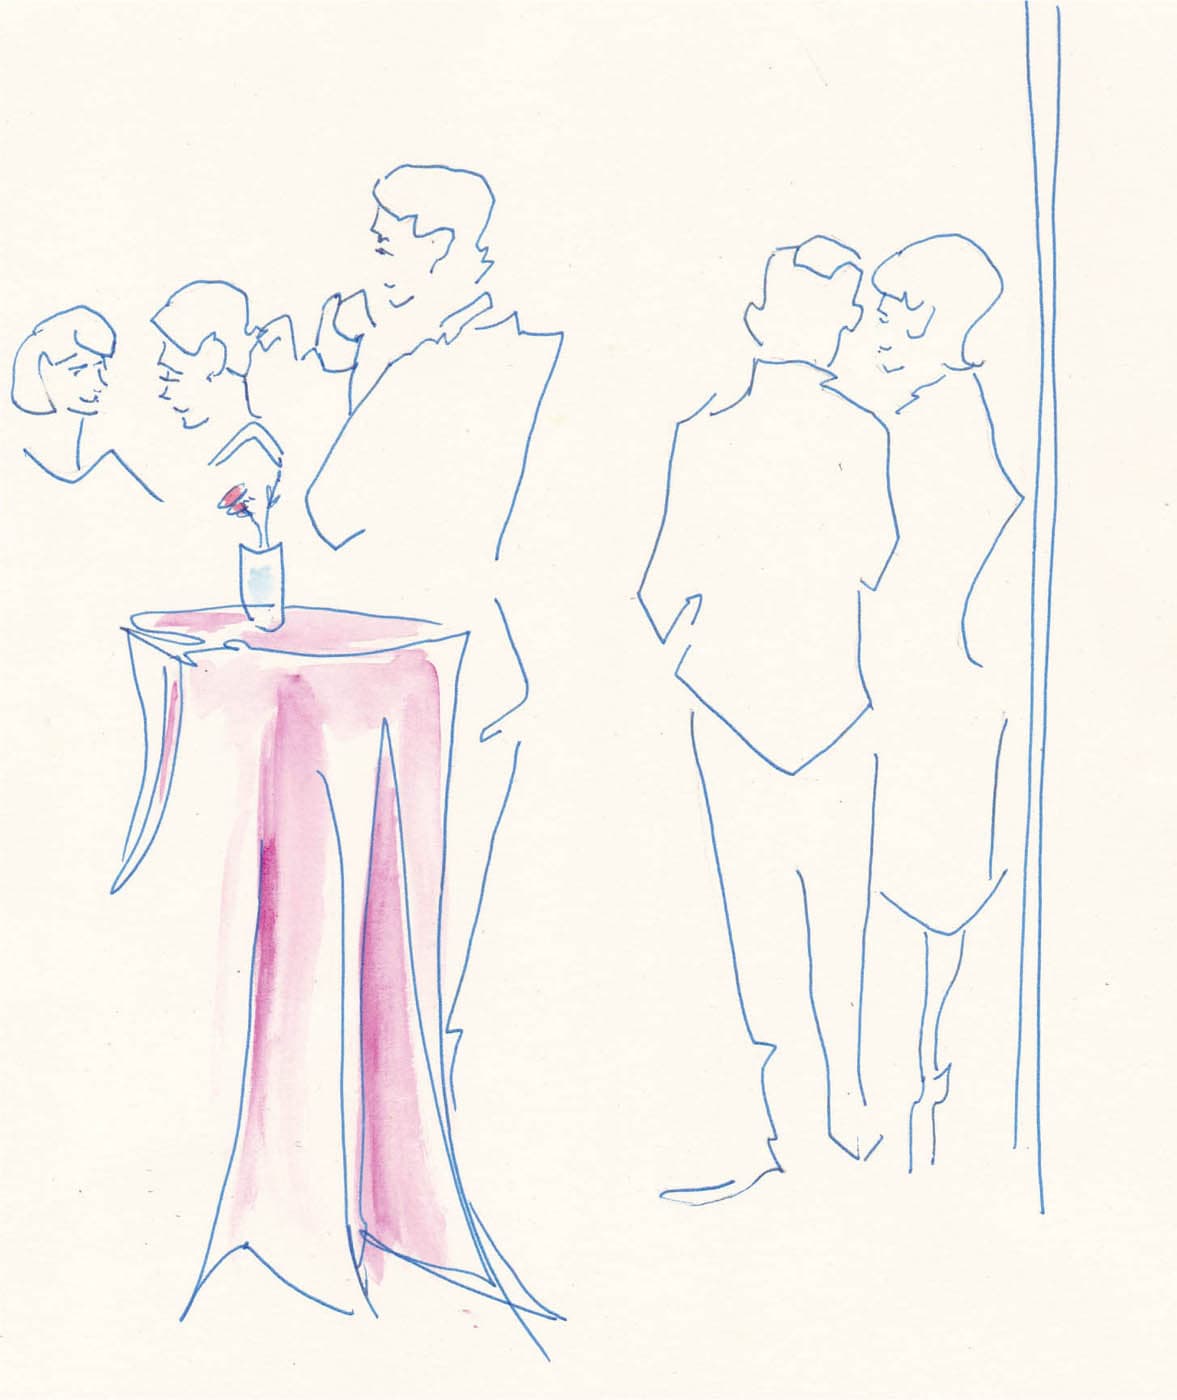
Because you’re drawing on the spot, there’s no time to build elaborate grids or complicated overlays to manage scale and proportion. To solve this problem, I use imaginary measuring sticks to determine proportion and scale. Proportion refers to the size of an object’s parts in relation to its other parts. Within a single person or element, you’re managing proportion. Scale refers to the size of objects in relation to each other. In scenes with multiple objects or people, you must manage the scale of those elements in relation to each other. For my method for establishing scale, the first element you draw becomes the measuring stick for the second element. After you’ve established this scale, you can determine the size of subsequent elements by measuring them against any existing element. This method works well for improvisational drawing because it’s flexible and relational. To create scale, you need to create a unit of measurement. When you’re drawing, you can turn an element into a measuring stick in a couple of ways: Impromptu Units of Measurement: When drawing a person, you can measure their figure by how many heads high they are. (For more on drawing figures, see here.) In this case, a head becomes your unit of measurement. When drawing figures of different heights, use this method to manage scale, so one figure might be a head taller than another. Points of Alignment: Choose a natural point of demarcation on each of your objects and note where those points align. The top of the head, the line of the shoulder, or the waist are great points of alignment on the human figure. When using this method to draw figures of different heights, use a point of alignment to determine comparative size. For example, the taller person’s jaw might hit at the same point as the top of the shorter person’s head, as in the family portrait on the previous page. For this exercise, you’ll take what you’ve learned about scale and proportion and apply that to drawing a scene that catches your eye, with an emphasis on how the elements relate to each other. 1. Draw your hook (for more information on drawing the hook, see here). This first element is your measuring stick. I was at a wedding, and I drew the bar where people were standing.
2. Draw the second element and use an impromptu unit of measurement or points of alignment to calculate the relationship to your measuring stick. My second element was an elegant woman waiting for her drink. I used points of alignment, noting that her waist aligned with the bar, her shoulders aligned with the first row of glasses, and the top of her head aligned with the bottlenecks.
3. Once you’ve drawn two elements in relation to each other, you’ve established a scale. Any new elements must be measured against any existing element, using either impromptu units of measurement or points of alignment.
4. I drew the bartender using his head as an impromptu unit of measurement. He was about two heads higher than the top of the glasses and about one head taller than the woman.
5. I included a painting of a sailor above the bar because it communicated the unique venue of this wedding: an art museum. The sailor was about as tall as the woman below, so she became my impromptu unit of measurement.
6. I estimated that the width of the frame was about the same height as the sailor’s face, so that became my impromptu unit of measurement. I added a few more details and some watercolor to complete my scene. Point Proven: Now that we’re at the end of the chapter, look at the drawing you did at the beginning. I told you so!Drawing Groups of People

EXERCISE
Managing Scale and Proportion