CHAPTER 7
DRAWING FIGURES
If you think of portraits as stories, faces comprise just one detail about people. Their hands, feet, and accessories; the way they sit, stand, or slouch; and the things and places they’re interacting with; all of these elements express something about who they are.
We’ll get to faces soon enough, but in this chapter, we’ll explore different elements we can use to create a person’s full portrait. We’ll talk about how to draw figures, feet, and hands and how to manage perspective. We’ll learn how to tell bigger stories by noticing smaller details. And, we’ll see how empathy and the power of suggestion are the secret ingredients to making quick, expressive portraits from head to toe.
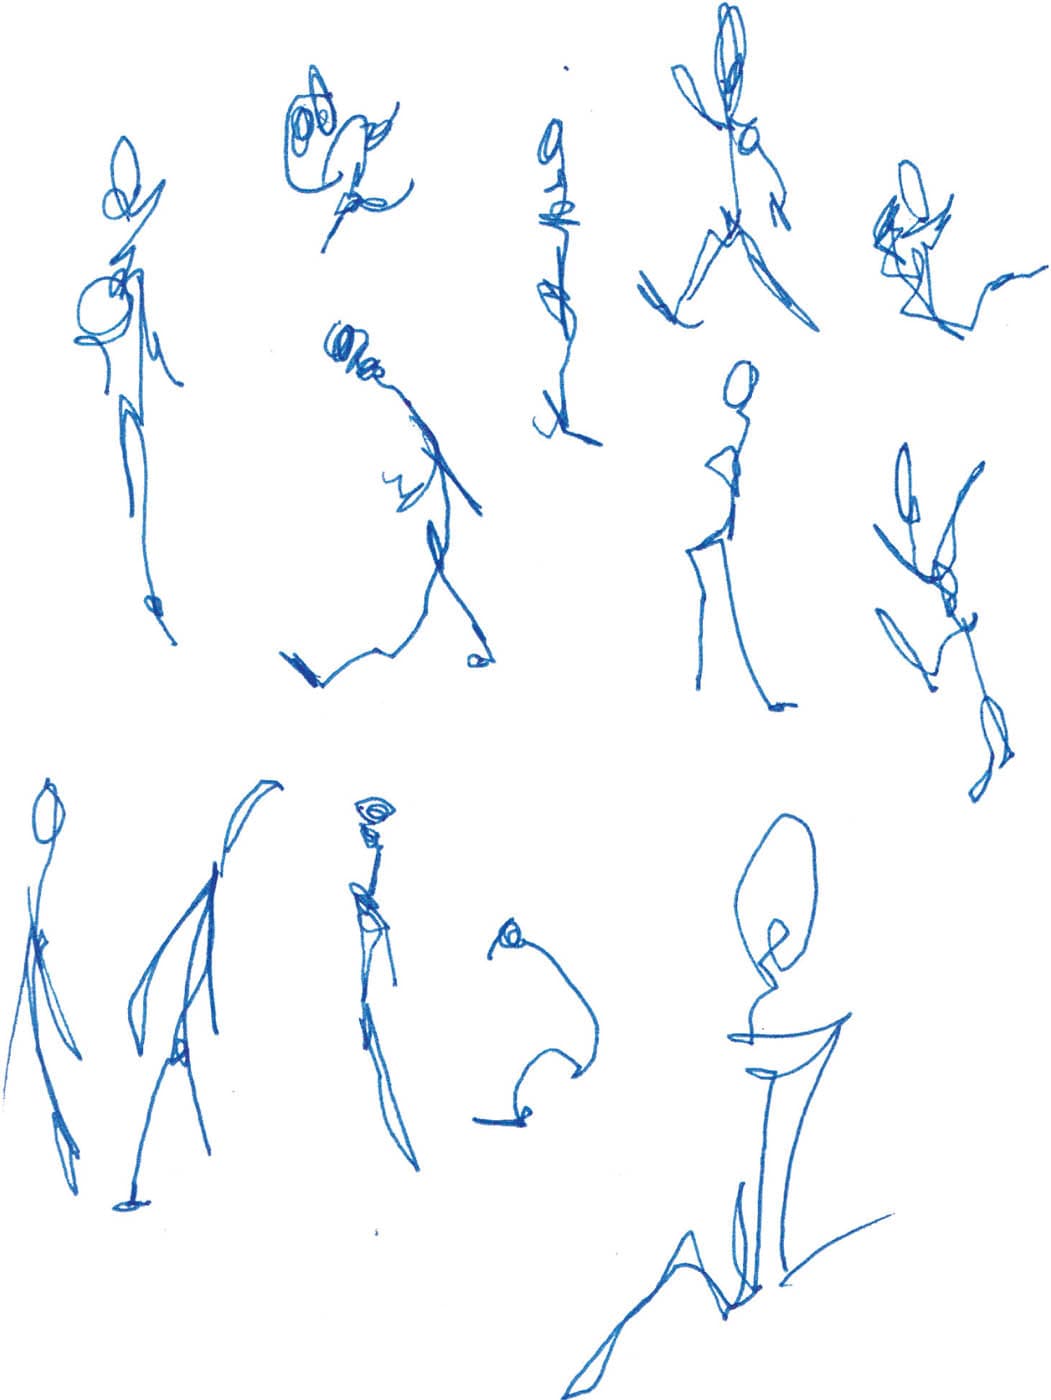
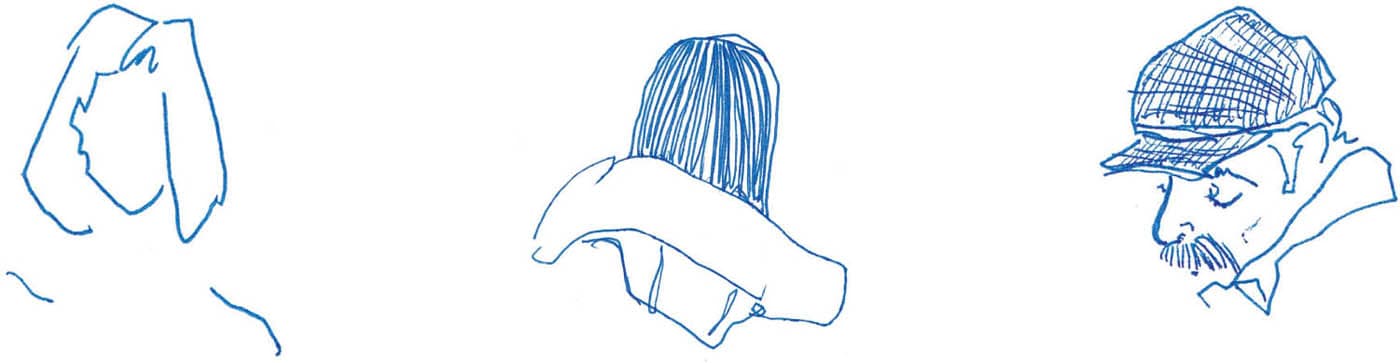
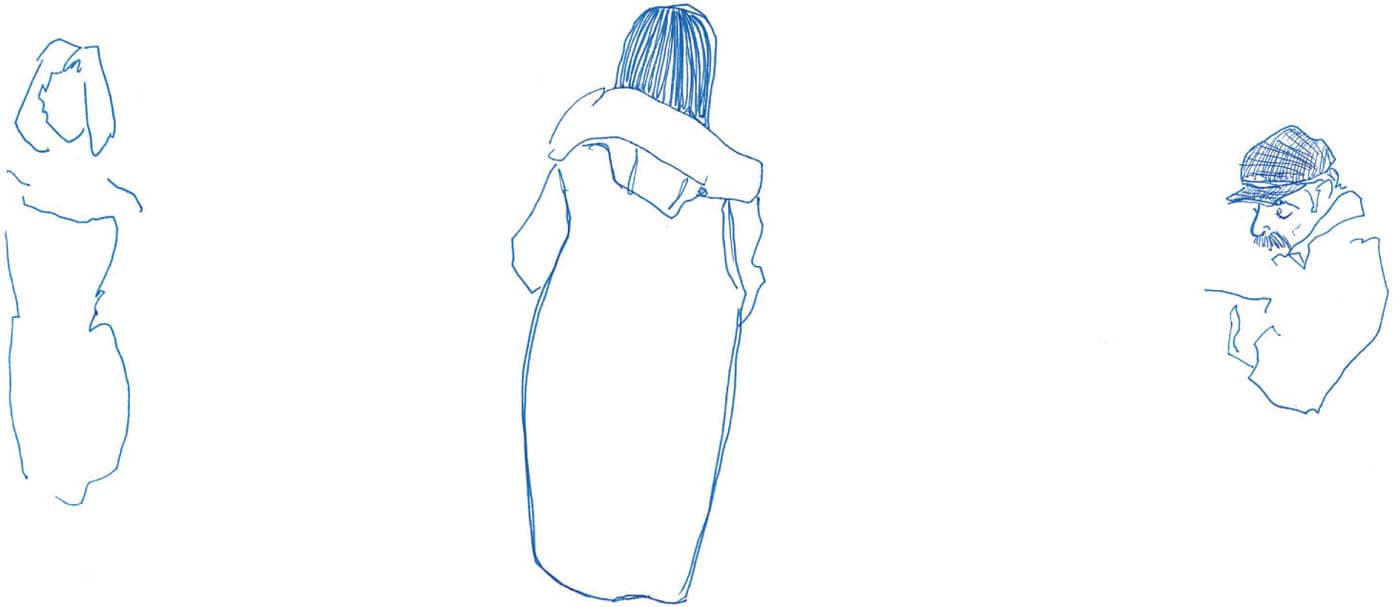
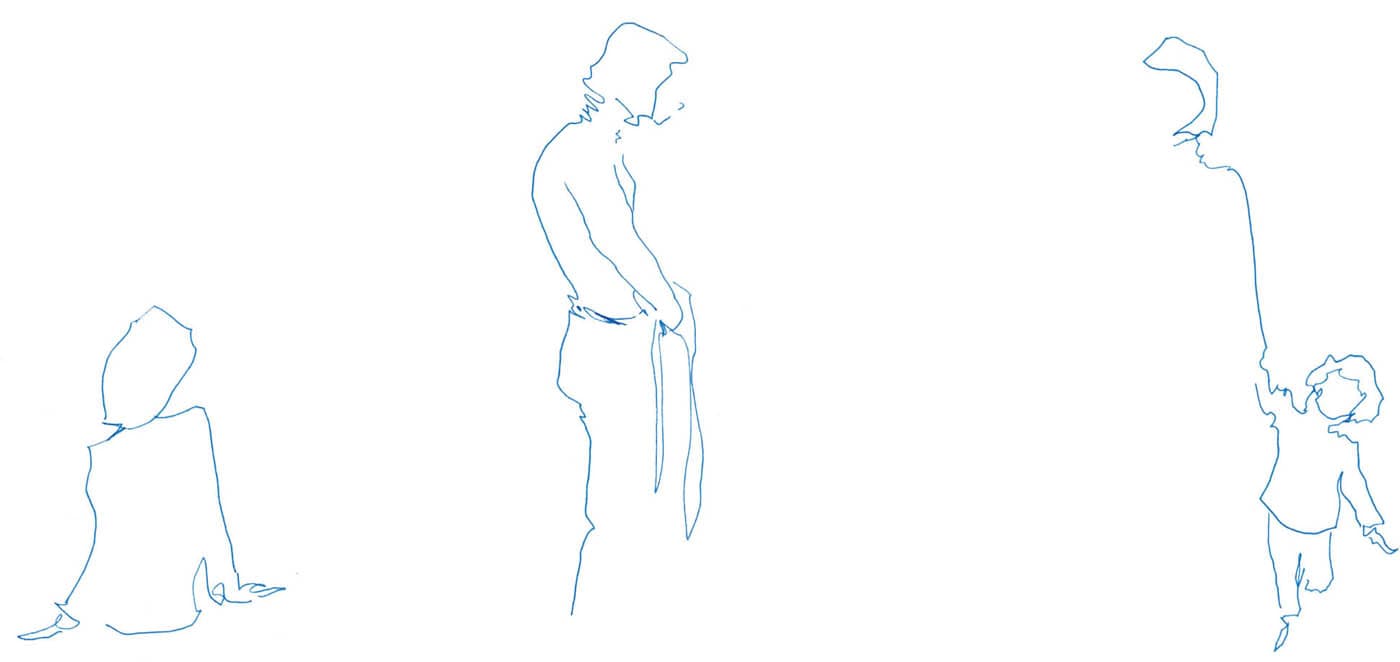
Drawing a person from head to toe can be intimidating. How can you possibly denote every joint and muscle and anatomical detail when you only have a few moments with your subject? I have good news for you—you can’t, but moreover, you don’t need to! Even something as simple as these scribbles are enough to communicate a figure. The suggestion of a head, body, and limbs is enough to trick us into seeing a figure because our brains are wired to quickly and subconsciously identify human forms. This is known as pareidolia, finding a meaningful image in a random visual pattern. This tendency is why we see animals in clouds, a man in the moon, or an octopus looking for a fight in a simple coat hook. In addition to instinctively seeking out the human form, our brains are also hardwired to interpret the emotional state of that form. Tapping into these instincts is how you can make a simple collection of lines something that is instantly recognizable as both human and emotional. With this secret superpower in mind, let’s draw figures, hands, and feet.Expressing the Human Form
Emotions shape us. When we’re sad, we curl into ourselves. When we feel confident, we stand tall. When we are relaxed, we drape into the shape of a chair, or along the length of a bed. You can experience this yourself by feeling and physically inhabiting these six cardinal emotions: happiness, sadness, fear, disgust, anger, and surprise. Notice what happens to your body when you feel each emotion—how your posture changes and your energy flows. Keep these physical sensations and gestures in mind. The way a person holds themself says something about who they are. If you learn to read other people’s body language, you’ll gain additional insights into their emotional state and understand how to draw their story. Look for the tells: the shy person who turns their toes in to take up minimal space, the confident person who spreads out, the relaxed person asleep on a stranger’s shoulder.Telling Stories: How Posture Reveals Emotion

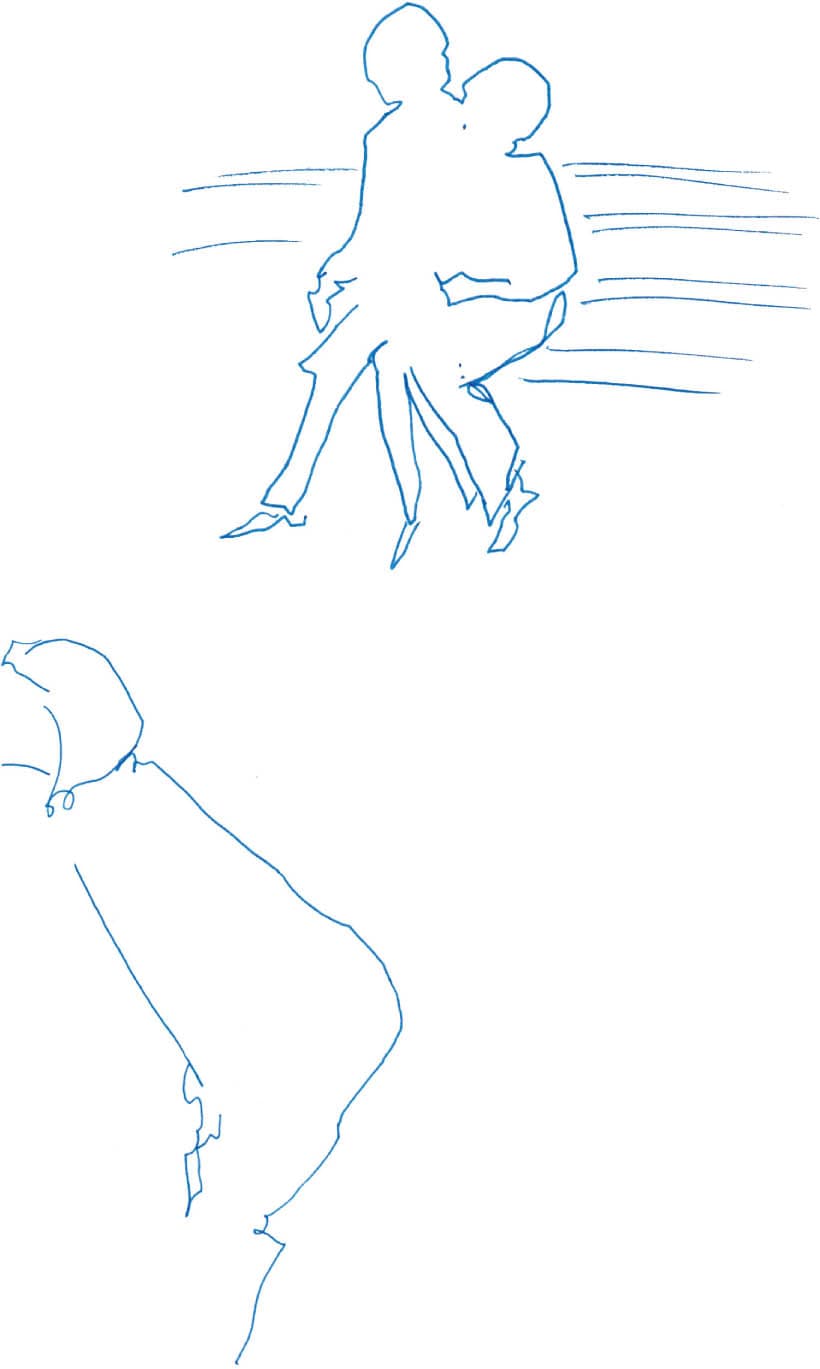
For the following two exercises, you’ll create figure drawings by choosing a person whose body language catches your attention and finding and drawing their expressive lines. 1. When drawing figures, look for the most expressive line of the body, the line that connects emotion to action from head to toe. Ballet is one of the best examples of emotion moving through the body. Dancers are pros at using the most expressive line to silently tell stories. The rest of us do this, though not always as dramatically. The most expressive line moves from head to toe, connecting both dancers.
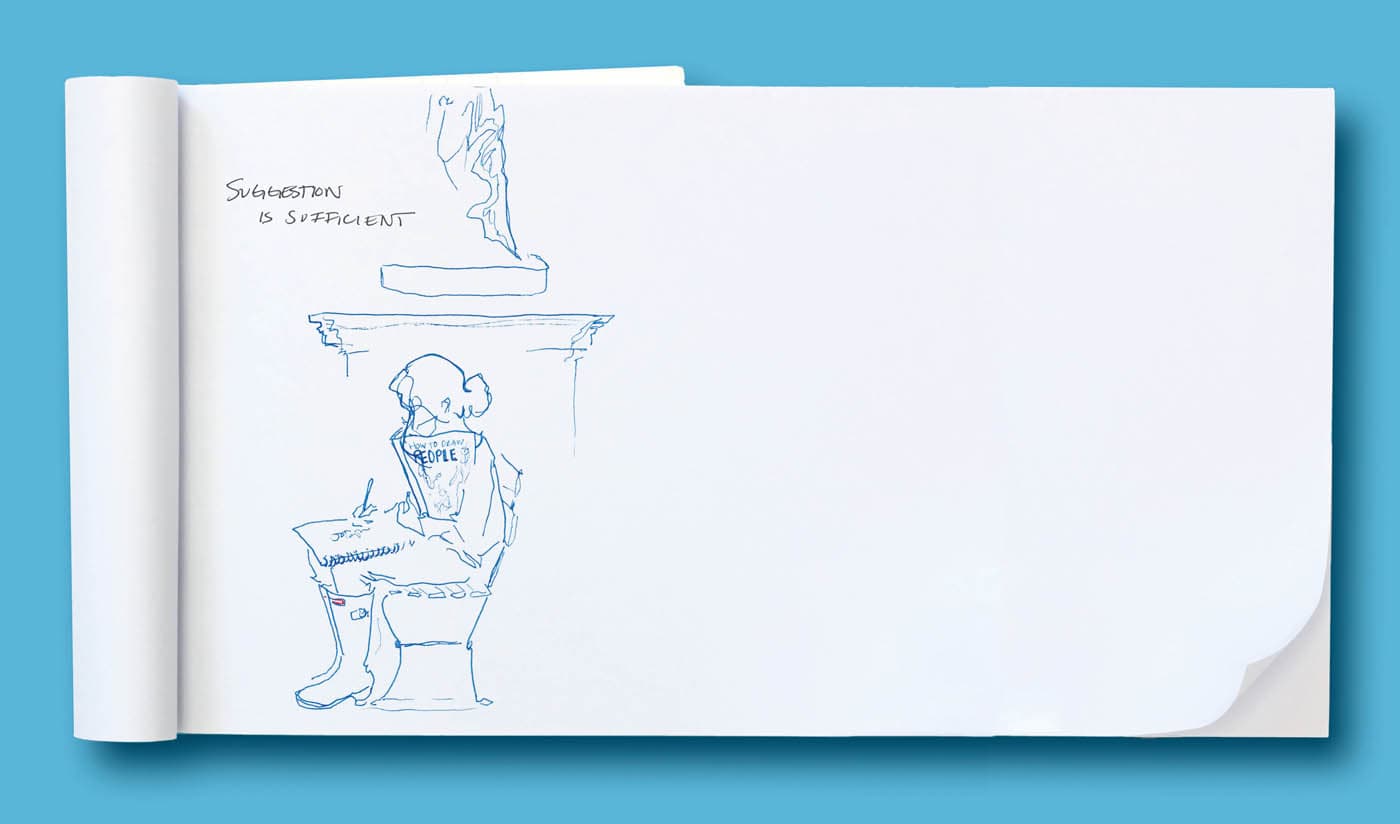
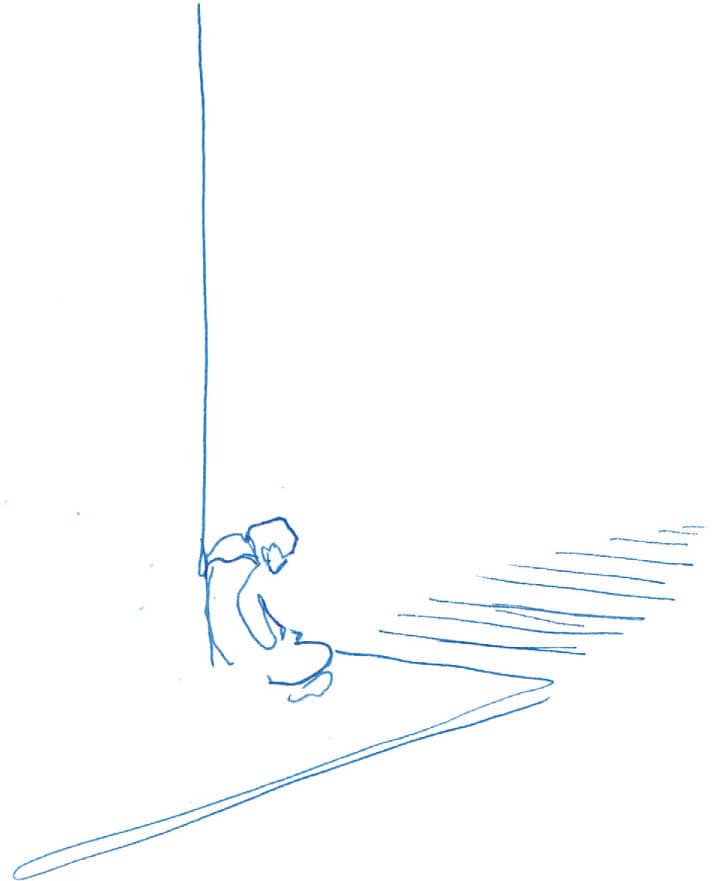
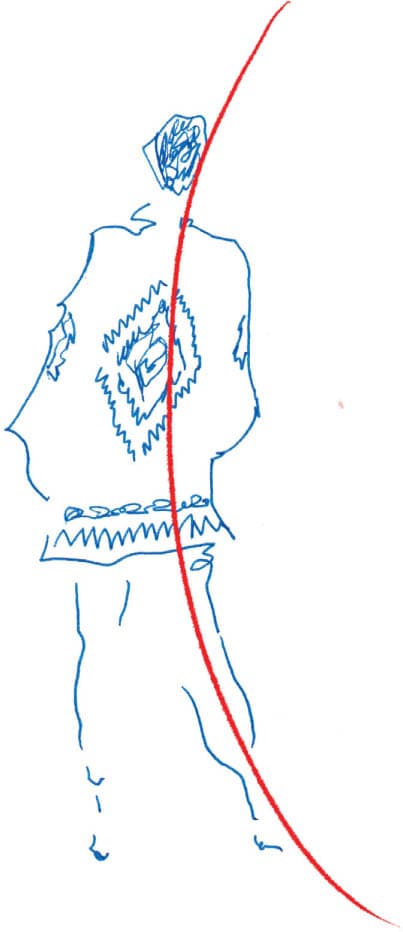
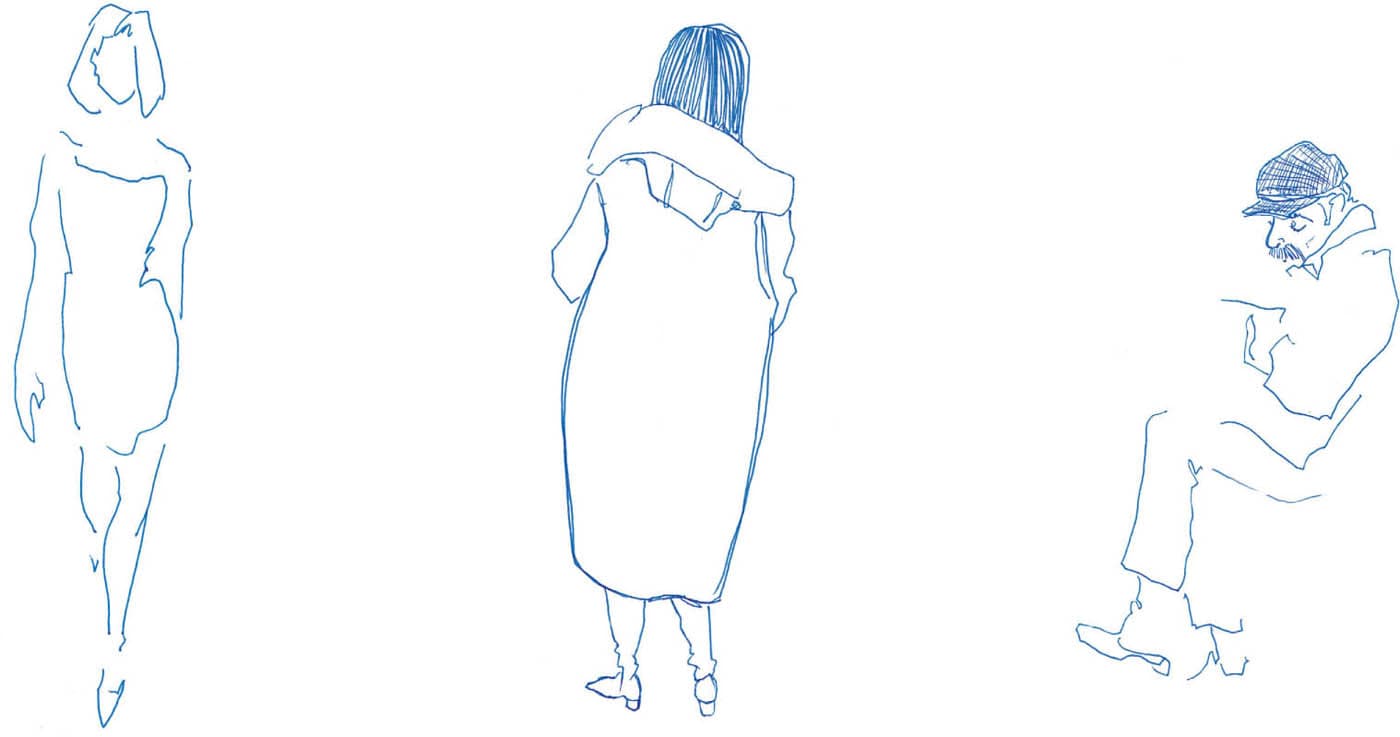
2. To create quick figure drawings that capture the essential feeling, energy, movement, or pose, look for the body’s most expressive line, and let that line be your guiding force as you draw the elements of the body. Add as much or as little detail to your figure as you want because the expressive line and the shape it creates speak directly to the emotion and anatomy of your subject. The most expressive line runs from the back of his tilted head down the length of his pants. Although this is a rough figure, you get the sense he is confidently interested in something. Would it surprise you to know he’s looking at a painting in a museum?
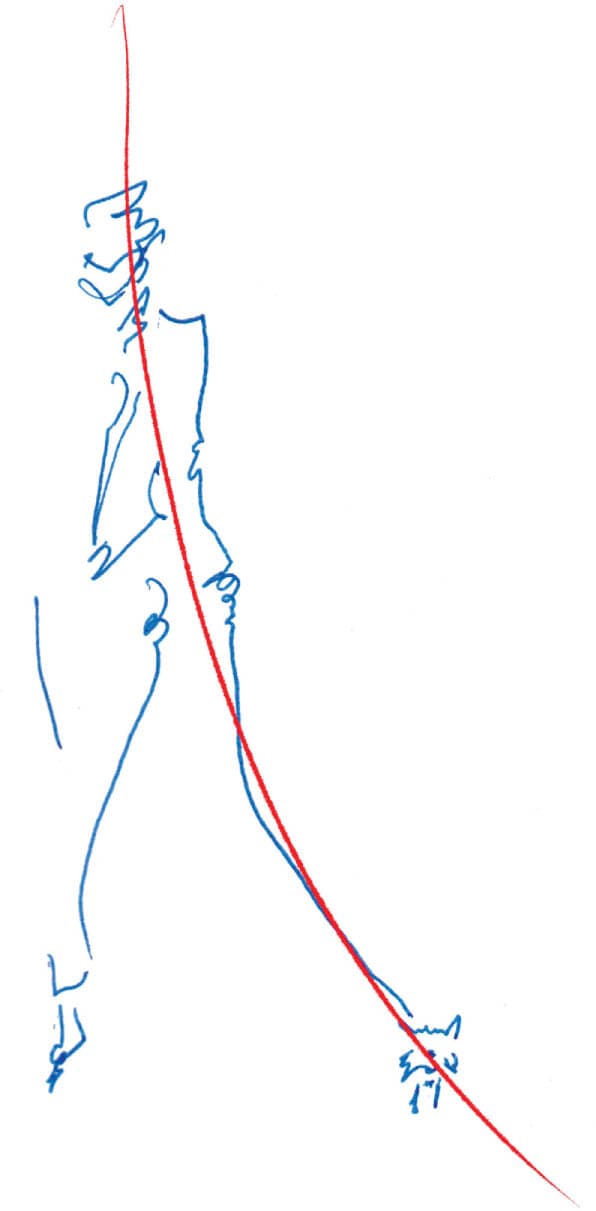
3. Look for someone standing or in motion and find the expressive line. For this woman, who was walking her dog, the line runs from the top of her head, through her arm, down the leash, to the tip of her tiny dog’s nose. There is tons of energy in this line. The most expressive line contrasts with the up and down energy of her standing leg.
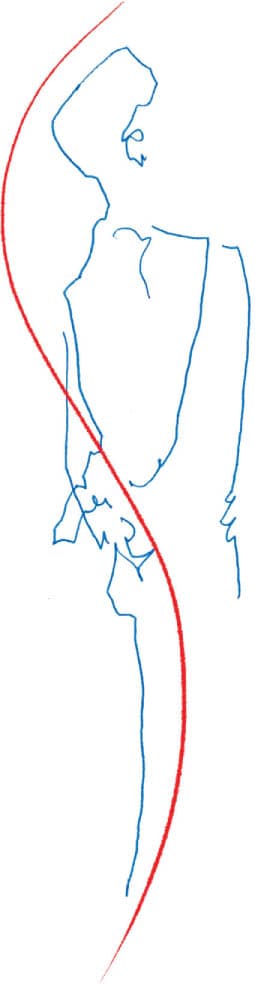
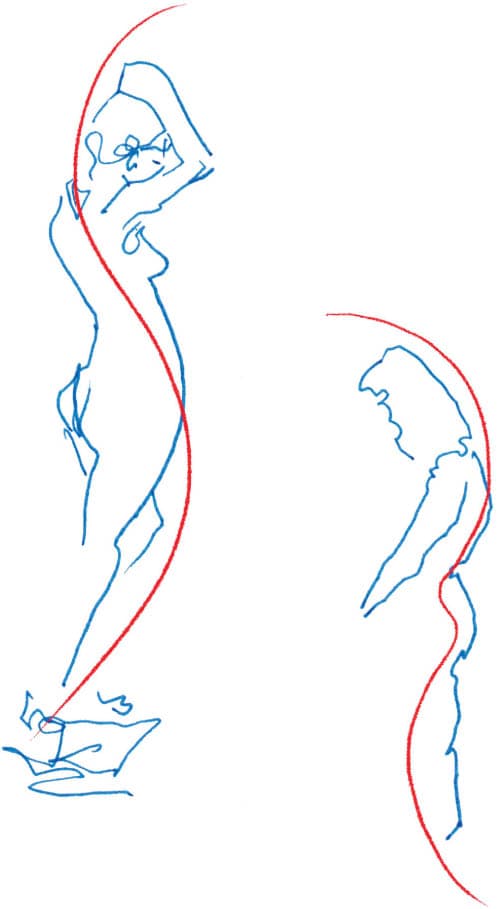
4. Notice contrasts and reflections. For more dynamic figures, look for postures where the most expressive line is juxtaposed against a contrasting line of energy or is mirrored, or reflected, by a similar one. If you’re having trouble finding the most expressive line, look for the following: Curves Lines SerpentinesExercises: Body Language
EXERCISE 1
Finding and Drawing a Figure Line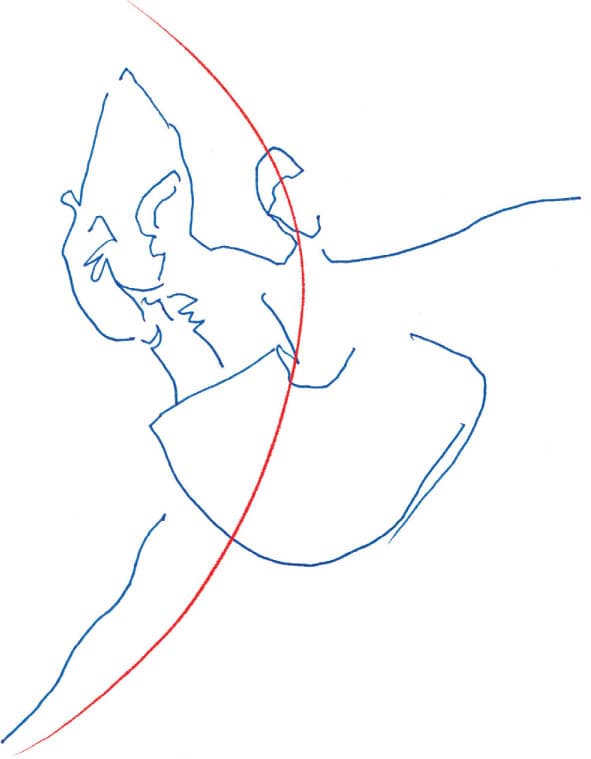

Use this simple approach to quickly draw figures to populate a scene or transcribe a powerful pose or movement. Remember: You don’t need to draw every part of a figure for it to be expressive and complete, only what’s important to you or the elements that express what’s exciting or interesting. You can draw a basic figure in these four steps or experiment with condensing steps one through three, letting the most expressive line lead your hand in one flowing motion. 1. Draw the head. Draw a rough outline of the shape of the hair and face or use the technique for drawing faces (see here). Pay attention to the head’s tilt or rotation. The body follows the head, which is the seat of motivation and inspiration. As such, the most expressive line often originates here. By starting at the head, you can trace this flow of intention through the body as you work your way down. Step 1 2. Draw the shoulders. Notice the angle of the shoulders and the distance between the chin and the shoulder line. The relationship between the shoulder and the head expresses emotion and is often the start of the most expressive line through the body. Step 2 3. Working down the length of the body, block in the shapes of the torso, arms, and legs. Use the contour drawing technique (see here) and focus on defining the exterior contours. Block in abstract shapes, each one representing a part of the body or clothing. A single line can define the shape of a limb or piece of clothing. Keep your lines fluid. Tap into tap into the body’s sense of movement as you block in the shapes. An overthinking mind will interrupt that flow. Don’t be afraid to exaggerate the shapes you see, this can highlight the most expressive line. Pay attention to points of contact, such as where the weight rests. For a seated figure, notice where the body flattens against the back and seat of a chair or how their feet press against the floor. For standing or striding figures, notice if one leg is carrying most of the weight and how. A few other things to note: Step 3 4. Refine the figure. Add select details to suggest anatomy, emphasize movement or pose, and reinforce the most expressive line. Wrinkled clothing shows how the body twists, bends, compresses, or stretches and suggests the underlying joints and skeletal structure. If they are visible, draw in points of anatomy such as collarbones, kneecaps, shoulder blades, defined muscles, or fingers and toes. Use flicks and swipes of your pen to suggest these details. Utilize contour drawing (see here) and pay attention to the most obvious topographical changes. Step 4Drawing Figures: The Basics

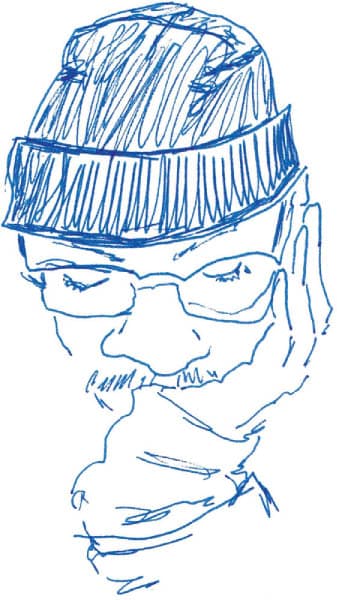
You don’t need someone to strike a pose for you to practice reading emotion and seeing the most expressive line. Take a walk to a café, or museum, or even the grocery store. Make at least 20 figure drawings of the people you see. Be efficient: Use as few lines as possible, focusing on the most expressive line. Get weird: You’ll make more expressive drawings if you aren’t afraid to make some wonky ones. Get loose: Focus on emotion, gesture, and suggestion over anatomical accuracy. Be bold: Imagine you’re a fancy, over-the-top artist and get your body involved in the process with big, swoopy hand gestures. To demonstrate the range of ways to quickly express a figure with emotion—even with a single line—I did this exercise on the way to the Metropolitan Museum of Art.Drawing Expressive Figures
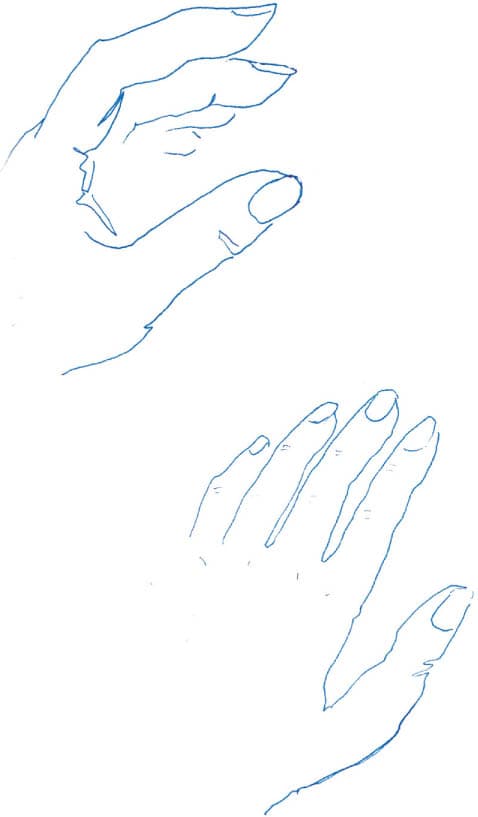
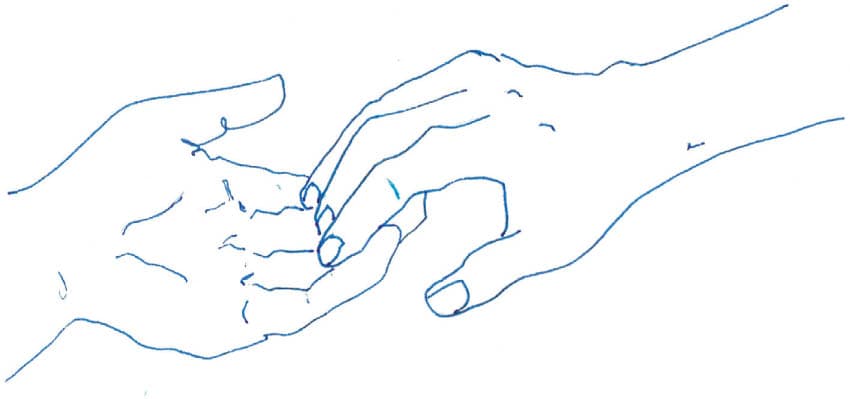
Hands are complicated human machinery. Without staring at a skeleton, it’s hard to understand exactly what our digits are up to as we grasp, wave, and wiggle. Here are a few facts about the general structure of hands that make it easier to understand what you’re seeing, ultimately making it easier to draw a hand, no matter what it’s doing.
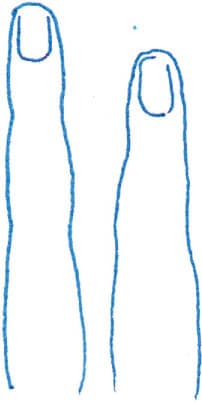
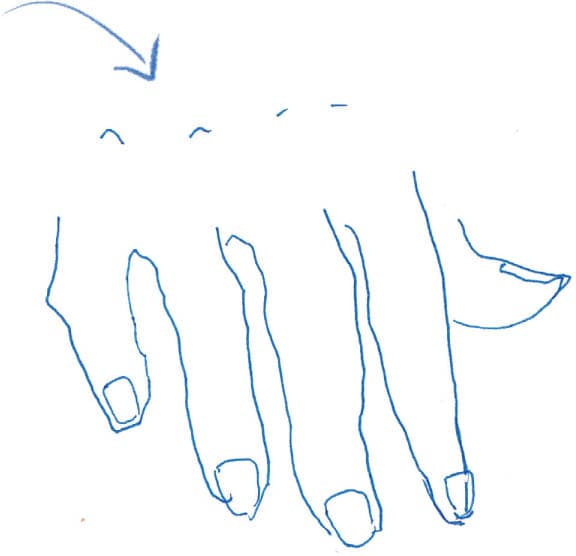
A finger has three joints and three segments, each of which is shorter than the last. A finger is wider at the bottom than it is at the top.
Thumbs follow the same rules as regular fingers, with the first segment attaching at the base and side of the palm. While the fingers have a lot of mobility, the palm doesn’t change shape. Open and close your hands to see this in action.
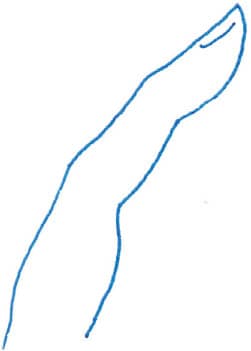
Remember, suggestion is sufficient.
A hand can be this simple. It can also be more detailed.Drawing Hands

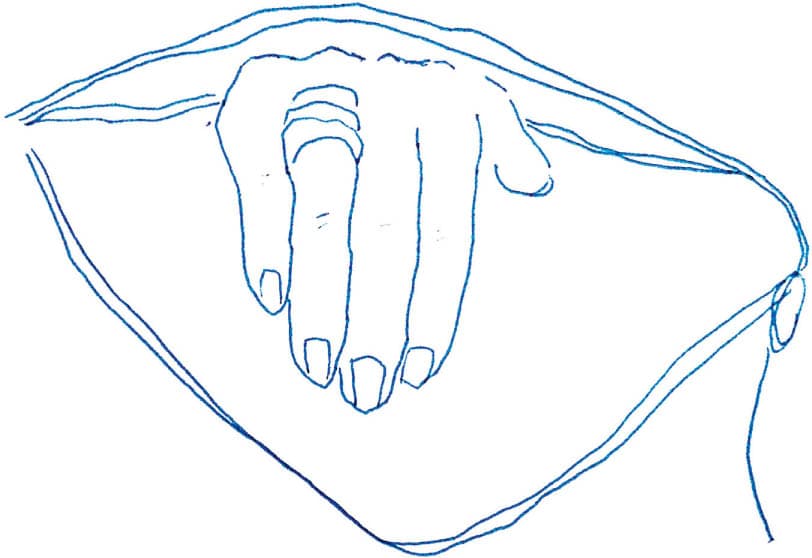
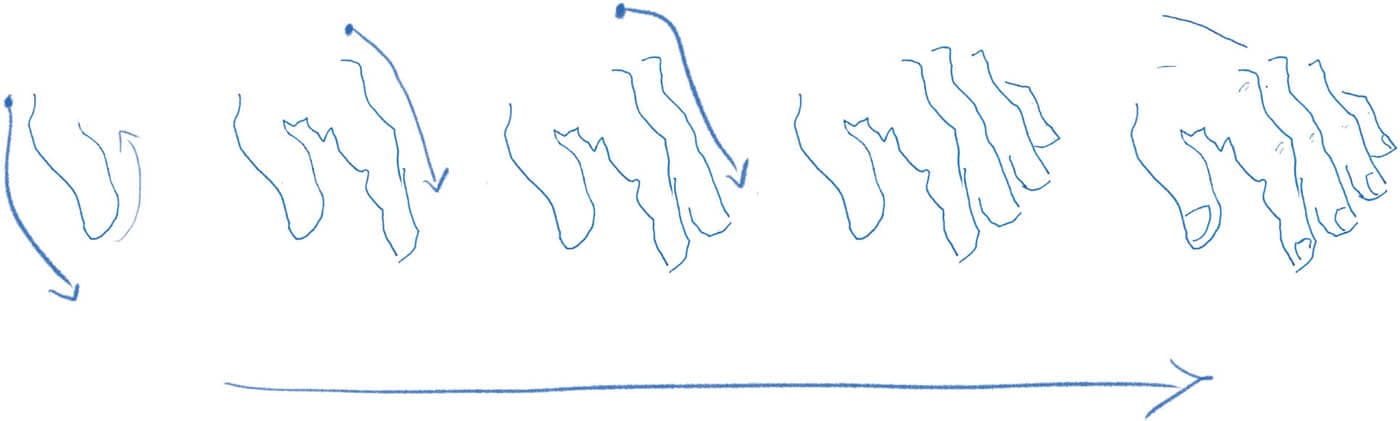
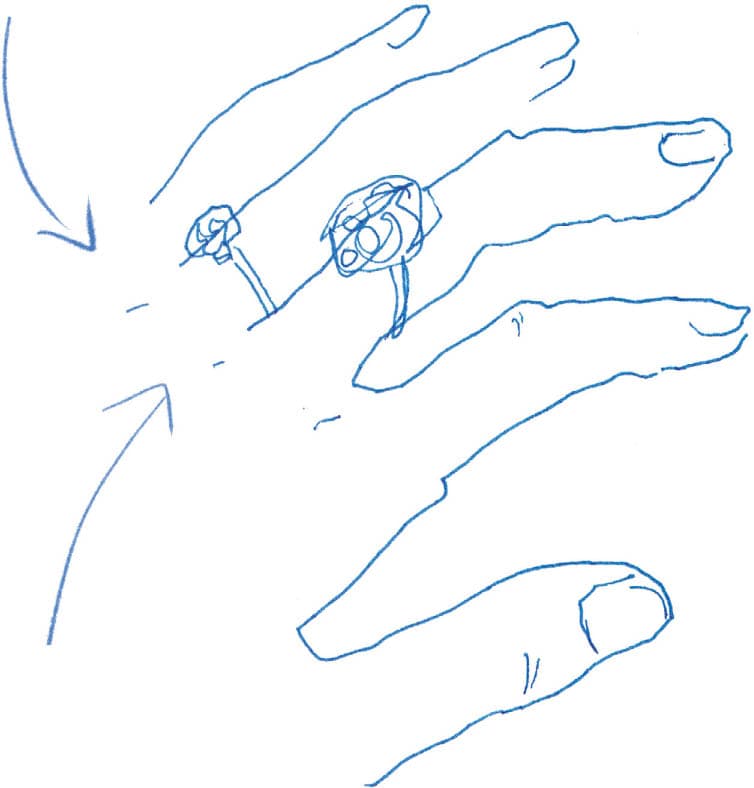
Draped loosely, gripped tightly, or anywhere in between, hands are expressive. Think of their actions as striking a pose. You may have few seconds to capture that pose or have more time if your subject is in a café reading a book. Think of these time constraints as the drawing equivalent of short-form writing or a novelistic approach in the level of details used to express their form. The following offers a general approach for drawing a hand. You can take more time with this process, adding more details and refined outlines, or you can work quickly, blocking in just the basic shapes. 1. Draw the fingers first, working sequentially and going from finger to finger. Start on one side of the hand and work toward the other. You can work from thumb to pinky or pinky to thumb. 2. Work in the same direction when drawing each finger. If you’re working from fingertip to knuckle, work that way for each finger. 3. As you draw, pay attention to the finger’s shape and length and the distance between each finger. Working from the knuckle down for each finger Working sequentially from thumb to pinky Once you’re finished drawing the fingers, add the shape of the hand to complete the drawing. You don’t need to draw the entire contour of the back of the hand or palm. Focus on the contours that emphasize the pose, such as the crook of a wrist or the crest of a thumb. Finish your drawing by adding details like the bumps and wrinkles of the knuckles, nails, tendons, and even jewelry. Upside down “v’s” and little marks represent knuckles Details: Adding rings, knuckles, and nails Length: Longer than pinky, shorter than middle finger Distance: Fingers that touch share a contour lineHow to Draw Hands
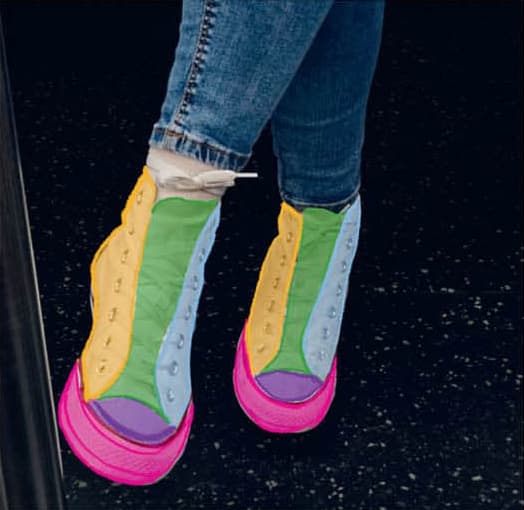
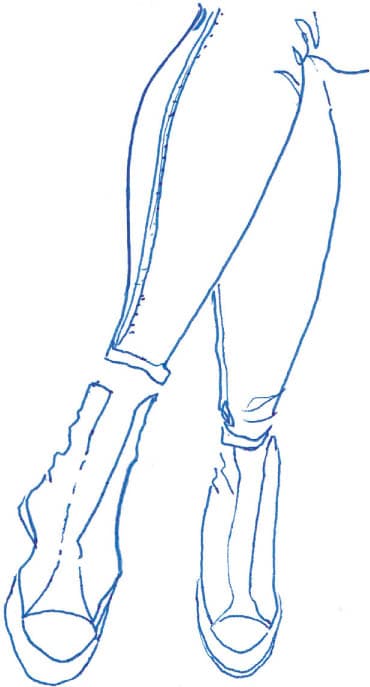
Stilettos or sneakers, oxfords or loafers, snow boots and booties, and everything in between—shoes reveal a lot about the places people go and who they are when they arrive. How people hold their feet also tells you a lot about them: crisscrossed, flat on the ground, shyly tucked, or even playing footsie, feet are expressive. To capture all that, you’ll need another kind of perspective. Perspective gives the impression of a subject’s height, width, depth, and position in relation to the things around it when viewed from a particular point. Feet stick out into space, they twist, turn, and point, and sometimes you can even see the top and bottom at the same time. This can make drawing feet pretty confusing, but it also offers a great opportunity to practice drawing perspective.Drawing Shoes and Feet
Learning Perspective through Finding Shapes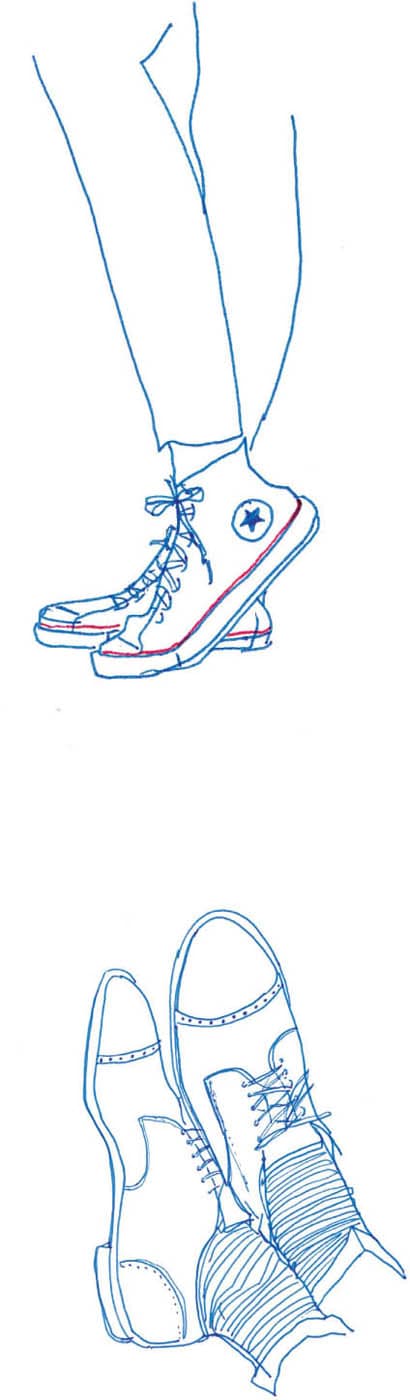
Perspective is shape. Instead of attempting to draw a shoe with a very complicated perspective, draw the collection of unique shapes that, when assembled, happen to look like a shoe. To do this, you must learn to see things differently. Each shoe on this subway commuter looks different: one is elongated and protrudes towards us, and one is compressed and recedes.
But, here’s how I see this pair of sneakers. I break the shoe into composite shapes which together create the sense of perspective we observe.
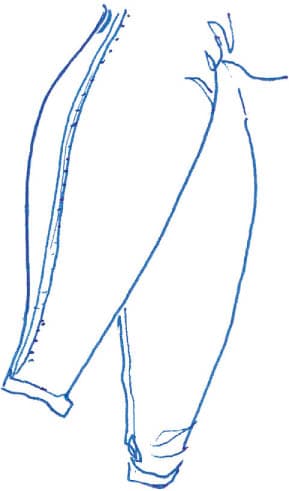
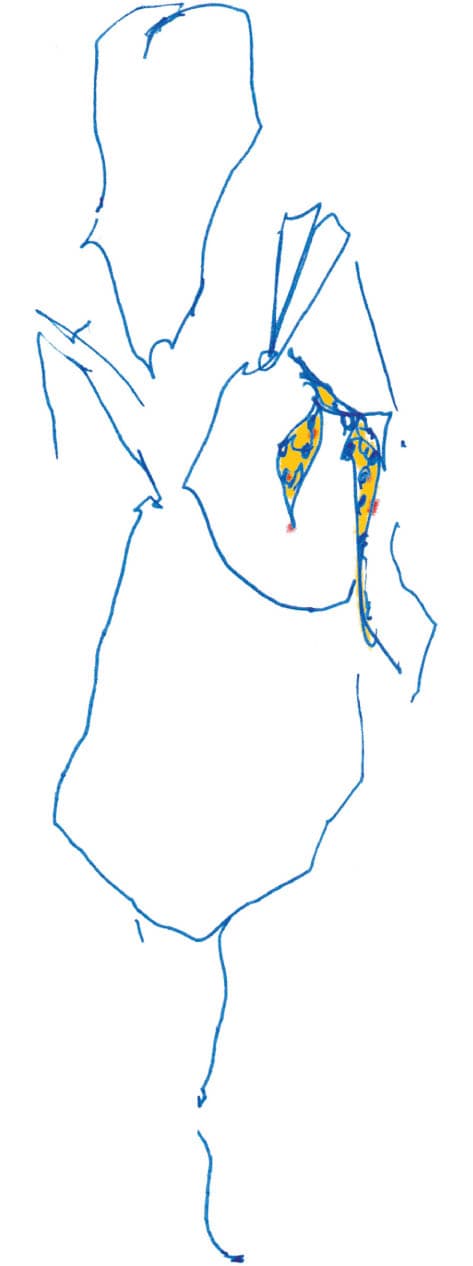
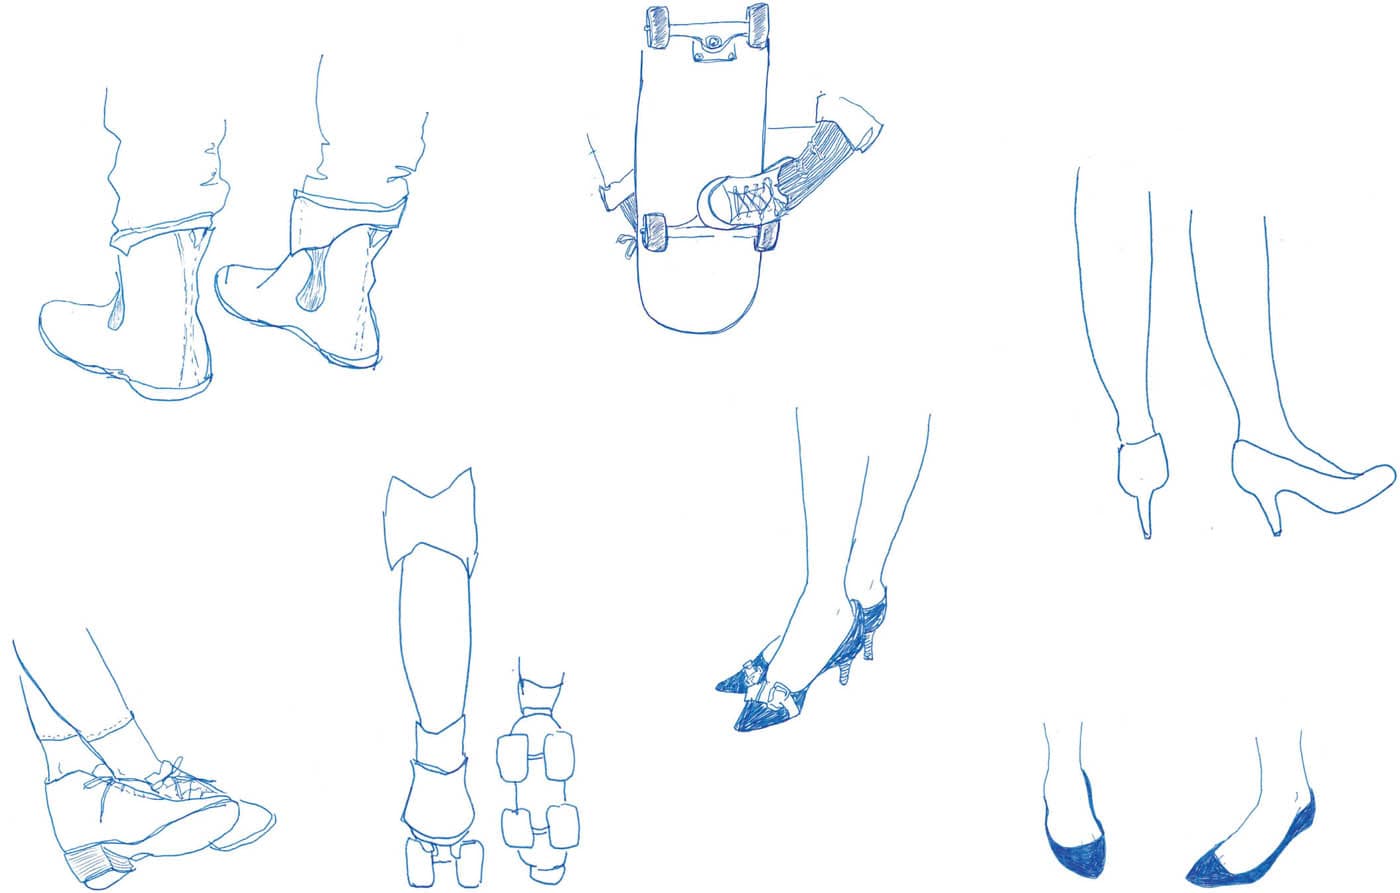
1. Start with your hook (see here). My hook is the woman’s legs.
2. Break your subject into unique shapes instead of one singular mass. Stop seeing the object (in this case, a shoe) and instead look for the composite, abstract shapes it’s composed of. Because of the way shoes are constructed, the seams are a great guide to see the shapes that create perspective. Draw the shapes that you visualize, beginning with the most obvious ones. The side of the shoe was clearest to me, so I drew it first.
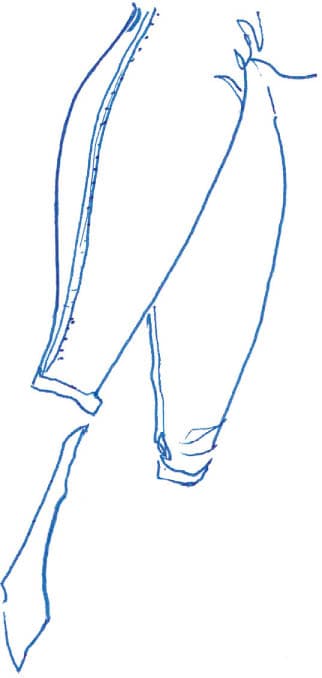
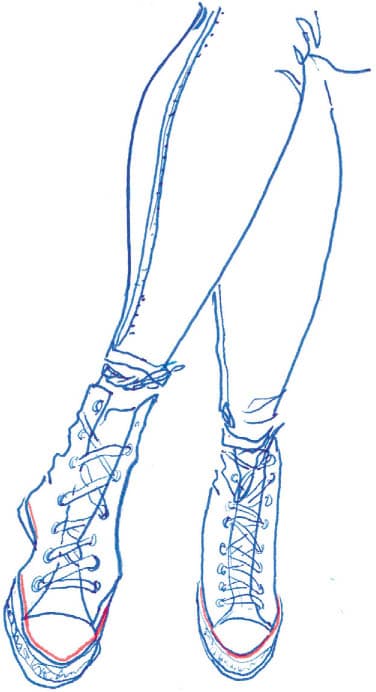
3. As you add each new shape, you’ll draw your subject with perspective built right in. This may look strange and abstract at first, but it will come together in the end—have faith. Draw the second shoe using the same process. Plan ahead and leave open spaces in the outline of your shapes where other details will intersect or rest on top. I left space to draw laces.
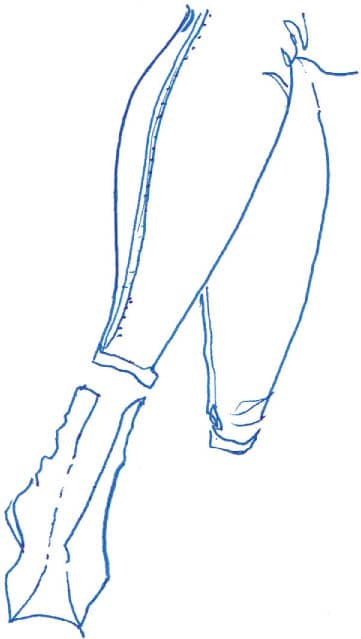
4. Zhuzh it up! Once you’ve blocked in the basic shapes, tweak them as needed. I drew over some of my original lines to correct them and nudge them into place.
5. Add finer details now, such as stitching, laces, or a pop of color. A simple street scene is distilled into basic shapes that show a narrowing road and progressively smaller buildings.Exercise: Drawing Shoes Using Perspective