CHAPTER 6
DRAWING NATURE AND ANIMALS
Nature is an excellent place for practicing the foundational skill of on-the-go drawing: observation. Natural things are full of life, and unlike people, they aren’t self-conscious or impatient.
I’ll show you how to quickly and expressively render the natural world, whether it’s an entire forest or a single potted plant. We’ll explore how to draw creatures that don’t stand still. (If your plants start moving, I can’t help you with that problem.) You’ll learn about capturing the spirit of animals, both tame and wild, with whom we share our world.
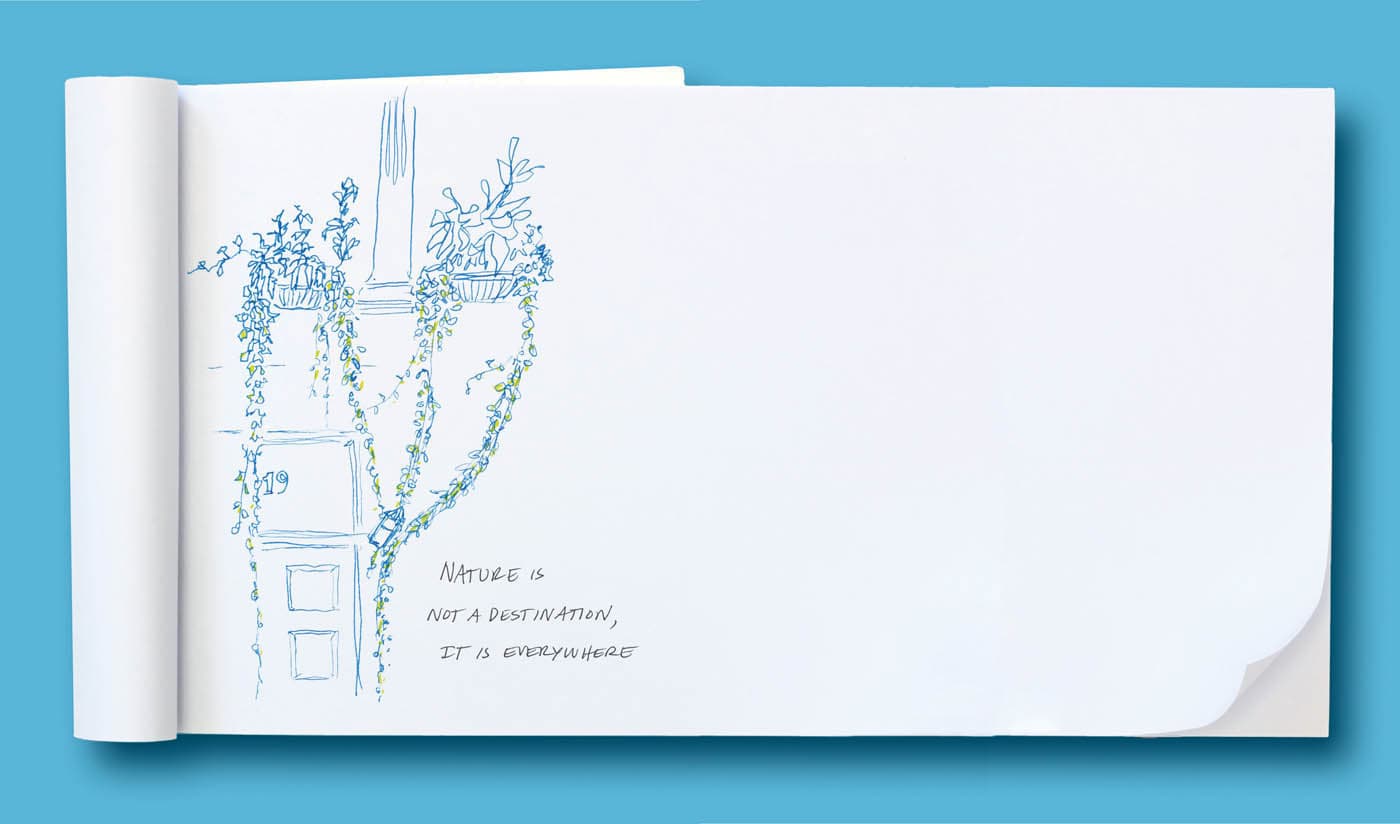
No matter where you live, you are never far from nature. Even a city like New York is full of nature, and not just in Central Park. It’s in bouquets at the bodega, tumbling out of produce bins in grocery stores, growing out of cracks in the sidewalk, and planted in window boxes. Although no one likes to admit it, pigeons are just doves by another name. Nature is everywhere, but sometimes you have to look for it. This physical exercise will help you do just that. Wander through your neighborhood and don’t stop until you’ve found at least ten different natural things. As you walk: Try this exercise again at the end of this chapter—this time, with your sketchbook in hand.Drawing Natural Scenes
Nature Safari Expedition

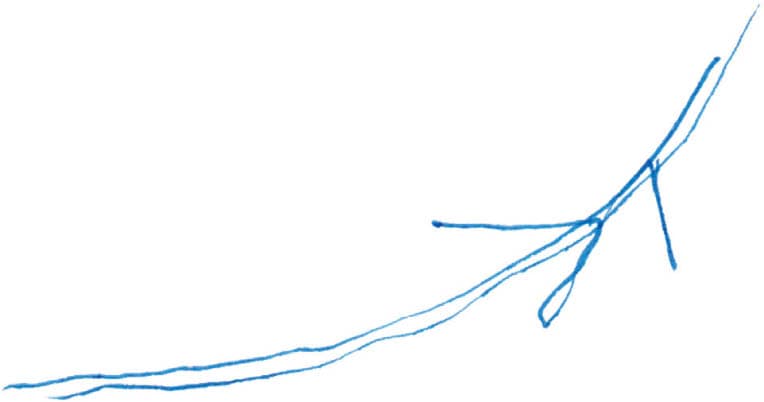
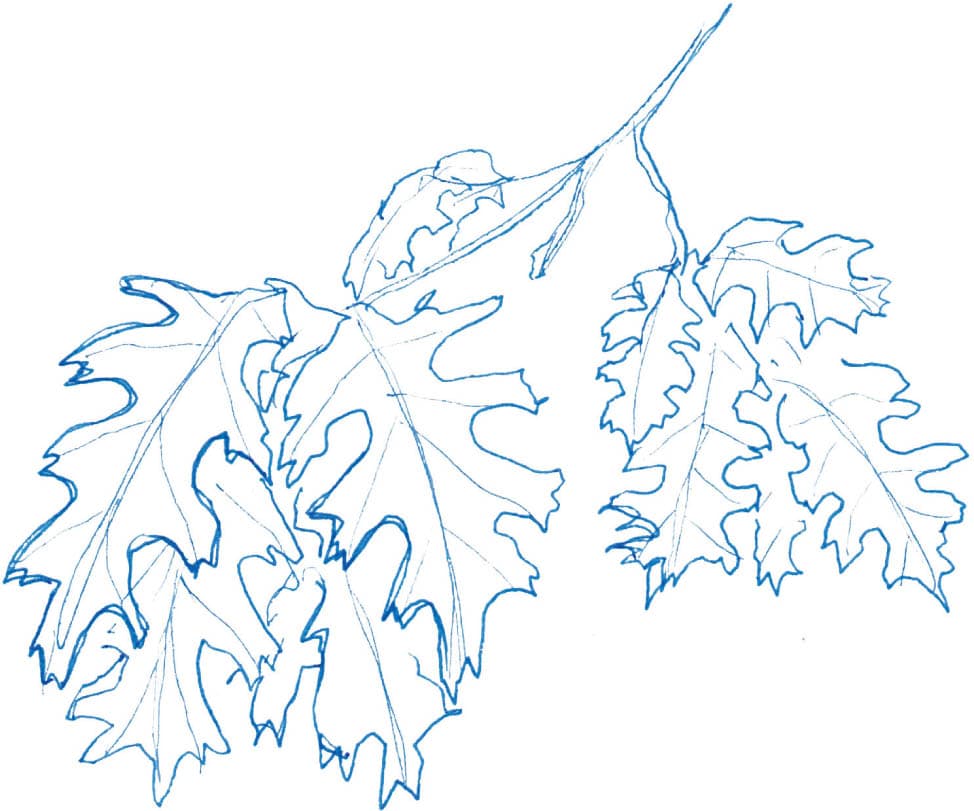
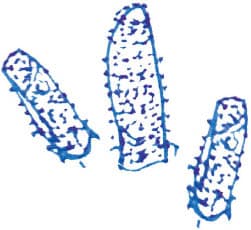
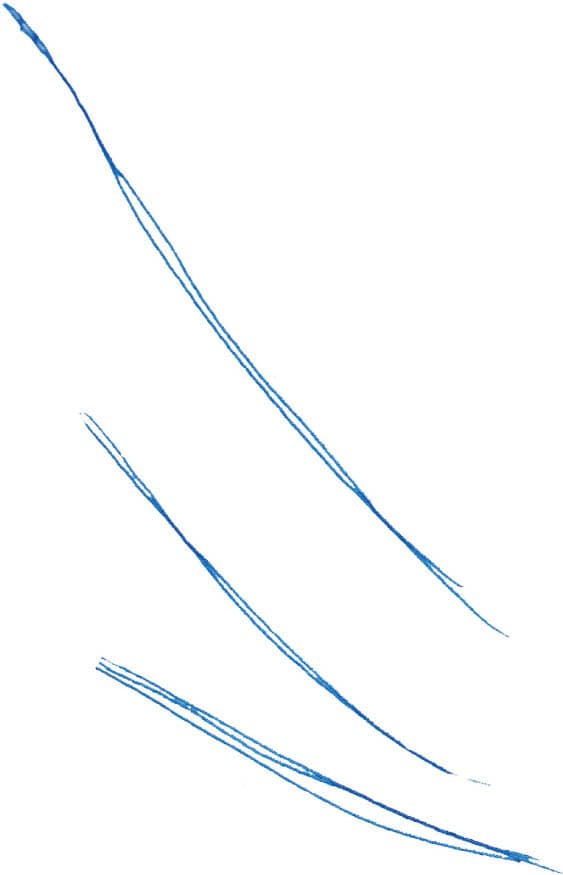
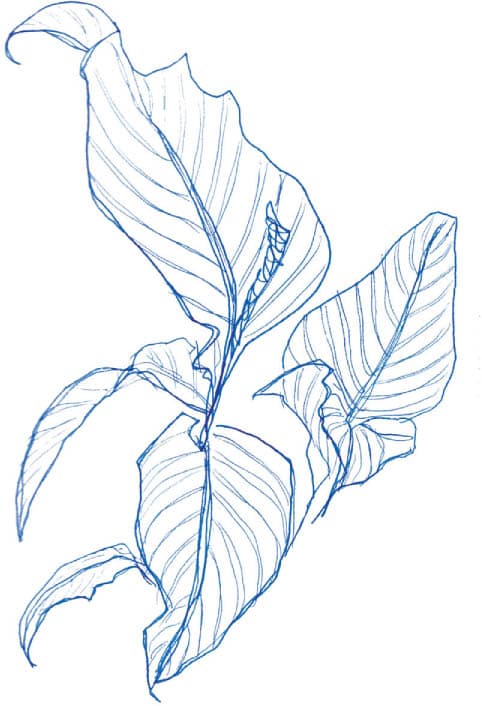
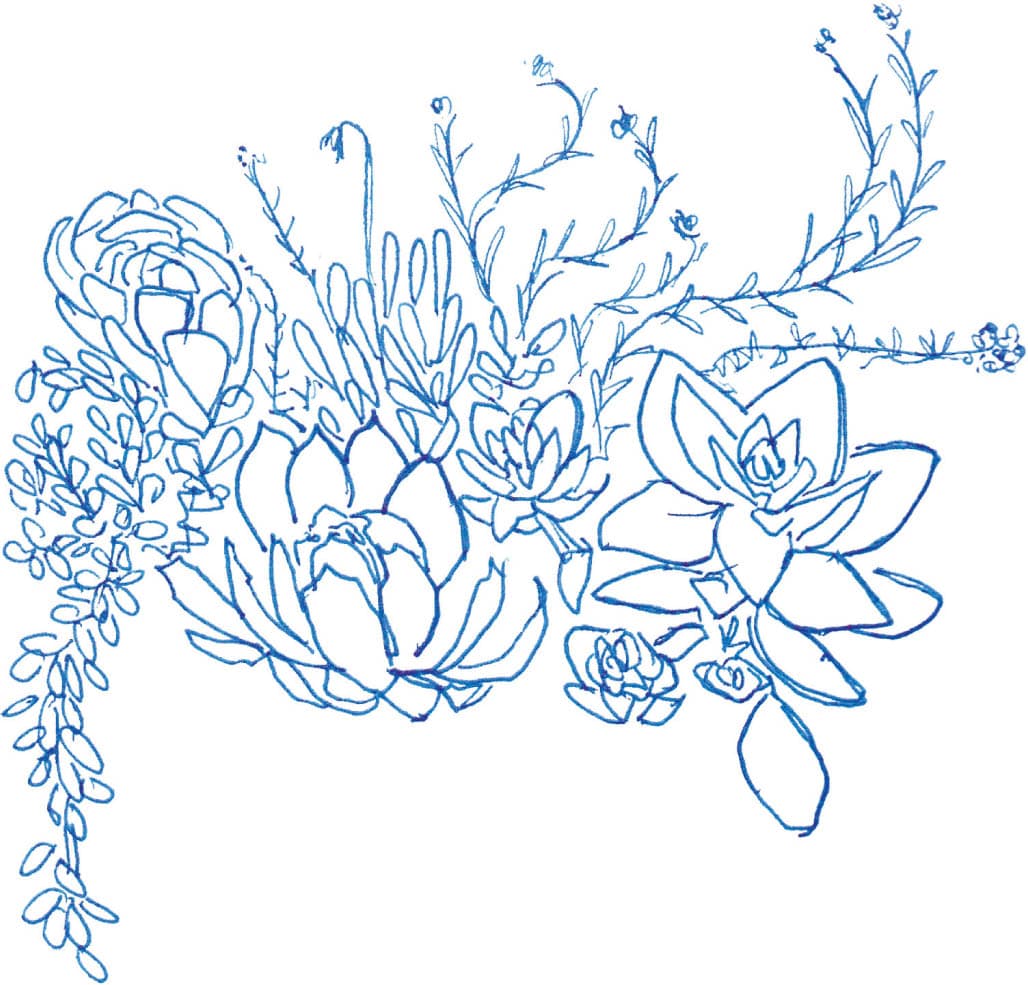
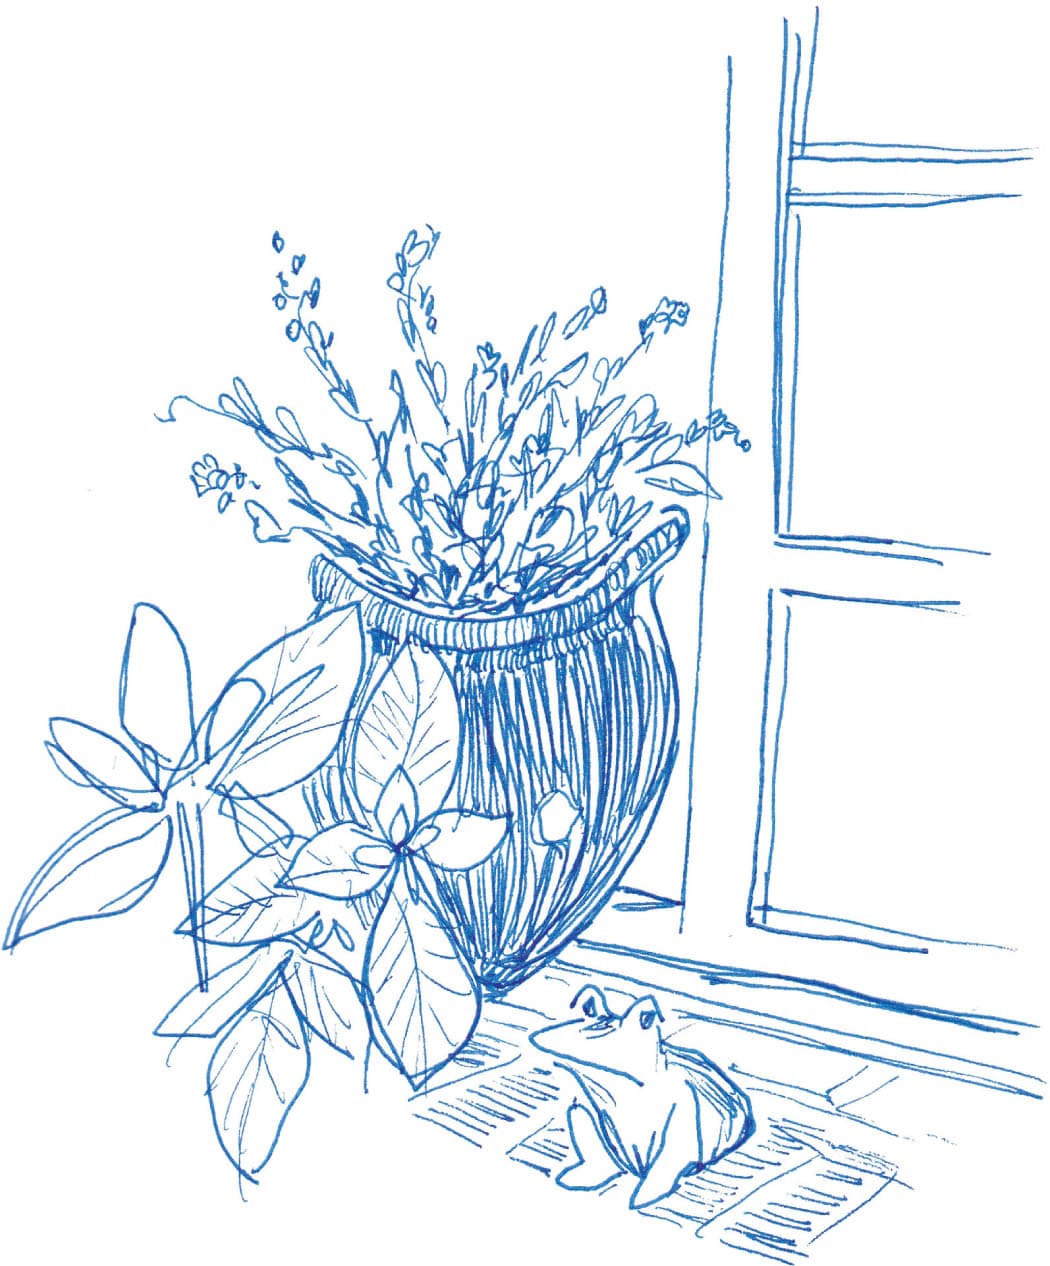
In the next three exercises, you’ll study a subject in nature and re-create its arrangements, patterns, and form in your drawing using the stamping technique. Natural things—especially botanicals—may seem chaotic, with branches and leaves going every which way. But when you observe them with a mind to find the underlying structures and patterns, you’ll discover a lot of symmetry and repetition in nature. You can use the process of interrogating the object (see here) to better understand your natural subject. Then, you can use a technique I call stamping to quickly layer and build your nature-focused illustrations. This technique incorporates memorizing repeating shapes and stamping them, or drawing them repeatedly, on the page. Once you understand what ingredients are used to make up a tree or a spray of flowers, you can add them at will. You don’t have to draw every detail, and you can spend more time focusing on your sketch and being more thoughtful with your composition. 1. Study the natural scene or object in front of you and look for patterns. Notice the shapes of leaves and petals. Observe the underlying structure that supports them; how do they attach or arrange themselves on a branch or stem? How do they grow? 2. I notice that the oak leaf is symmetrical, with four notched lobes on each side and one at the end. Once you know how to draw one side, you can draw the whole thing. 3. In this cluster of leaves, some can be seen straight on and some from the side. I apply what I see to create the side view stamp. 4. Look for the underlying structure of your subject; this could be a flower petal formation or the curved stems of tall reeds. These leaves grow from a branch. If we imagine all the leaves falling away, it would look like this. Once you understand the basic patterns and shapes, commit them to memory so that you can stamp, or repeat them, on the page. You can still look at your subject for reference as you work. 5. Add the repeating natural elements to your drawing using the memorized shape or pattern. It may help to first draw some of the underlying structure and then add your stamps. Or, you may prefer to stamp first and add the structure afterward. I drew the branch first, as a sort of scaffolding. I added leaf stamps using a mix of front and side views and smaller and larger leaves. To fill in behind the larger leaves and add volume, I drew just the part of the leaf I could see. 1. Observe: Take a moment to observe and find the hidden order and repeating patterns. Think of your observations like you’re creating a recipe and create an ingredient list. I noticed that each flower is made of three simple elements: a central column, petals, and a stem. column stamp without details single petal stamp leaves columns petals stems 2. Memorize: Memorize your observations so you can easily cook up your drawing in the next step. As you deepen your observation, think about what words come to mind and what stamp might represent them. I notice that the central columns of these flowers are lined with rows of thin filaments, the petals are paddle-shaped and the leaves grow in thin, arrow-shaped pairs. 3. Stamp: Assemble your ingredients to make the final dish and compose your image using your stamps. I drew the flower stems first, creating the underlying structure for layering the flower stamps. Next, I built each flower by stamping the column, petals, and leaves. I added the cone’s finer details last. Working this way, I was able to look at my page more and have more creative control. You can use this technique on larger natural scenes, too. I stamped crop rows, hedges, and trees for this view outside my train window. Even in quick sketches, you can create a sense of depth in scenes by distinguishing between foreground and background details. If you’re working in pen or other indelible media, create layers without crossing back over existing linework by first drawing what’s closest to you and then adding things in the background. You’ll naturally leave space for background details that fill in around foreground elements to create the illusion that things are resting on top of each other. 1. To draw a layered scene, block in the foreground shapes first and then work backward, away from you, blocking in the shapes of each receding layer. In this backyard scene, there are three layers: the leaves, the flower pot sitting on bricks, and the glass doors.
2. Draw the outline of the leaves in the foreground first and then tuck the outlines of each new layer behind the last. I outlined the flowerpot, roughed in the flowers, and sketched the frog. Finally, I added the outlines of the doors.
3. Once the overlapping shapes are blocked in, add finishing details, such as leaf veins, shadows, and textures. I added the veins on the leaves using the stamping technique, finished the flowers, marked the grooves of the bricks, added details to the toad’s face, colored in the large ceramic pot, and added emphasis to the areas of shadow.Exercises: Nature Drawings
Stamping: Re-creating Nature on the Go
EXERCISE 1
Drawing Oak Leaves


EXERCISE 2
Drawing a Cluster of Flowers


EXERCISE 3
Drawing a Backyard Scene, Working Foreground to Background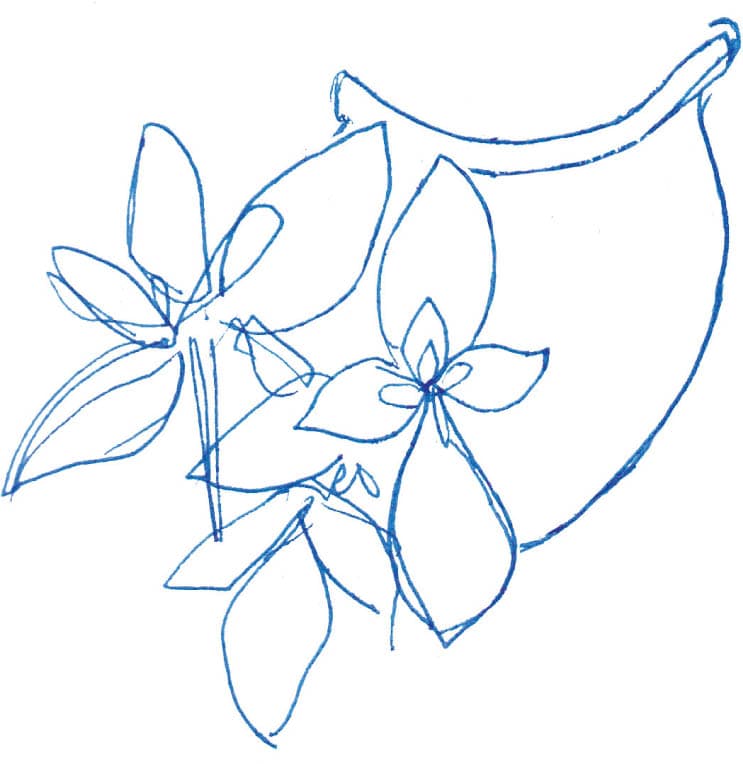
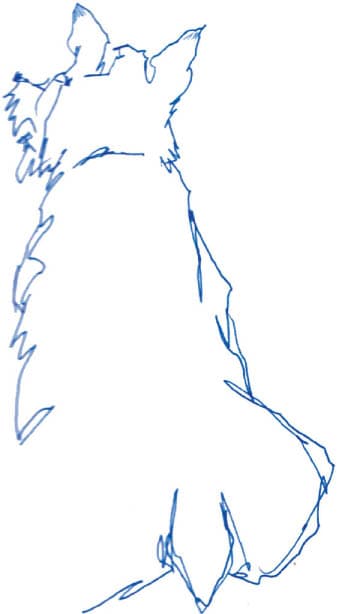
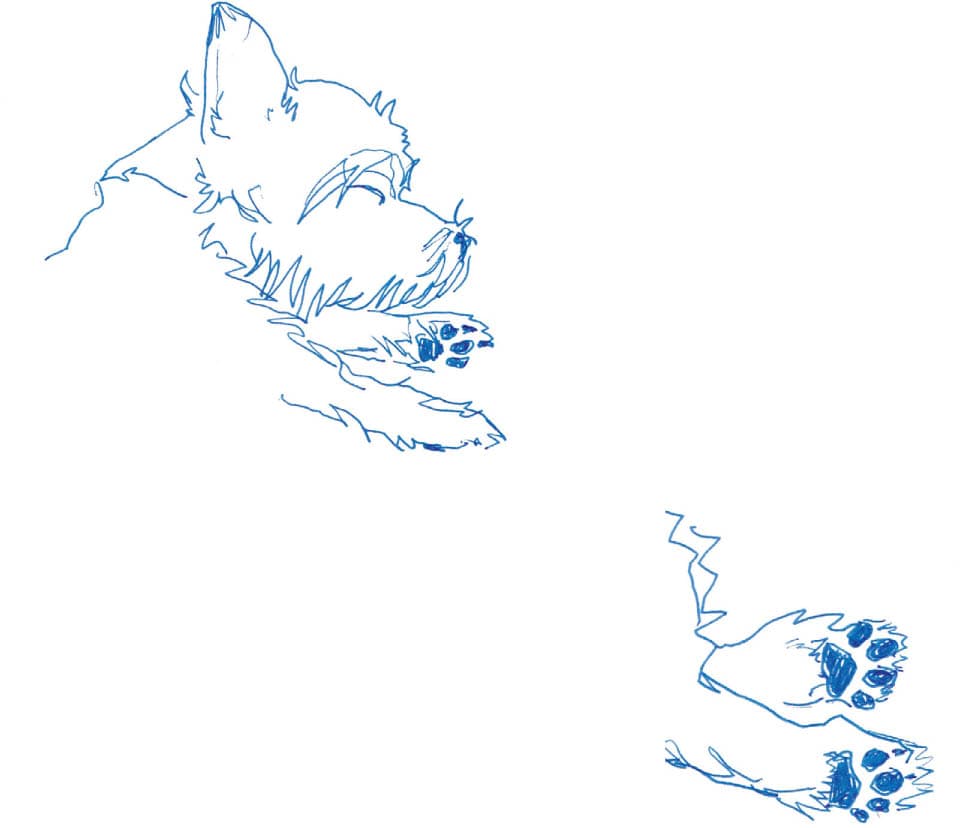
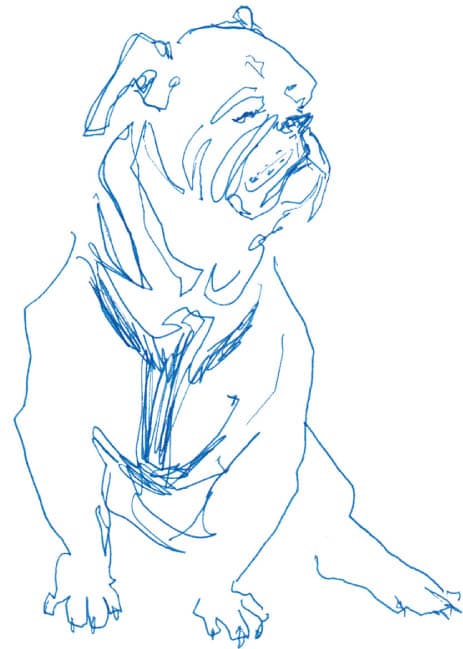
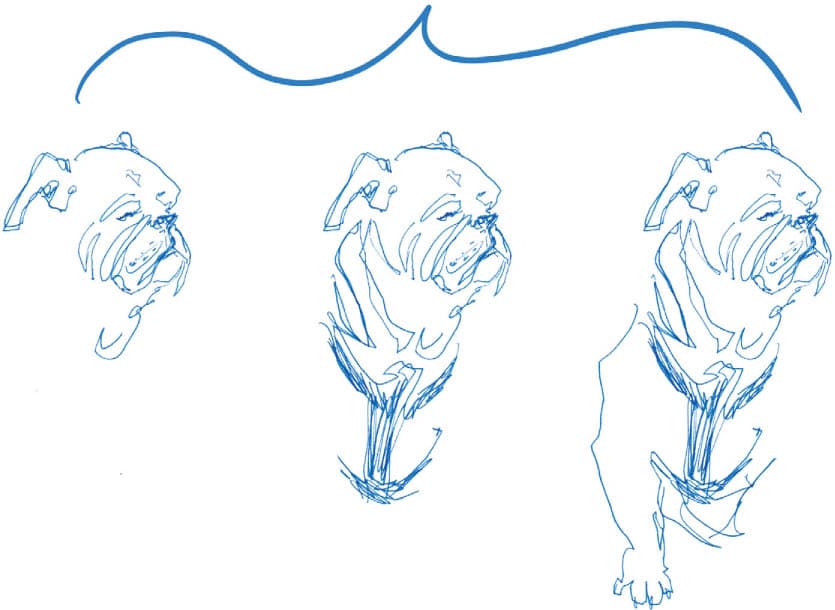
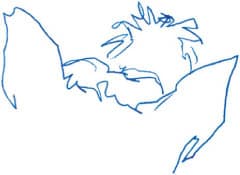
Animals are known for living in the moment, and you can sketch them in a minute—and be in the moment with them—using this fast, simple approach. In this four-step method for drawing an animal, you’ll proceed one section at a time, using your line to suggest texture and character, and adding your finishing details last. You can begin by working from the top down or by starting with your hook. No matter where you start, the process will be the same. 1. Visualize the animal as a series of distinct sections and basic shapes. Though you won’t draw these on the page, this exercise will help you simplify and understand what you’re about to draw. Step 1 I can only see three legs, so my shapes reflect the pose and my viewpoint. 2. Start drawing the head and work through each section, one at a time, using the contour line drawing technique (see here) to trace the outline. Depending on the animal’s pose, the top-most point may not be the crown of the head; it might be the nose or even the rump. Step 2 Draw the topmost point first. 3. Work each section to the same point of completion before you move onto the next. This helps to manage proportions and prevents overworking one section. Use your line to not only to define each section’s outer perimeter, but also to suggest its texture. I vary my line so that it communicates more than just shape. For a scruffy dog, my lines are messy because that’s the texture of its fur. If I were drawing an eel, I’d make my line slippery and fluid. Use as few lines as possible for each section. This maintains the flow of your drawing and connects each section to the next, so the animal feels alive, not disjointed. Refer to the blind-contour drawing exercise and let the topography of each section lead you to the next. Step 3 Work section by section, following the contours and tracing the topography. 4. Once the basic outline of each section is finished, determining the animal’s overall shape, add finer details. Try using the stamping technique for adding features (see here). Step 4 Add final details. A bird, with its sleeker shape, and seen from farther away, yields a simpler drawing, but the process is the same. Step 1 Simplify body shape Step 2 Work down from the crown toward next section Step 3 Define shapes and add sections Step 4 Stamp! This process is similar to drawing top-down, but you begin drawing with your hook instead of the animal’s top-most point. I use this method when some part of the animal catches my eye and I want to enter the drawing through that point, which could be a forelock, a curl of a tail, or a hunched shoulder. Here my terrier’s pricked-up ears are the hook; they also vie with the nose for the top-most part. Step 1 Visualize the shapes I can’t see her legs from my viewpoint Step 2 Draw the hook Step 3 Work the face first . . . I skipped Step 4 because I liked this simple sketch as is! I could have added a collar or individual hairs. . . . then down the body
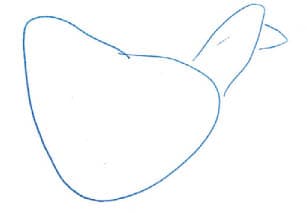
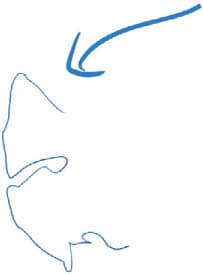
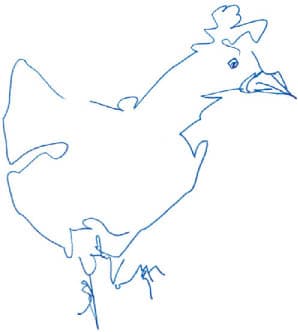
In this quick, 30-second sketch of a chicken, I drew the tail first, since the fin-like shape was the first thing that caught my eye on this fluffy-bottomed hen. Step 1 Visualize shapes Step 2 Eye-catching hook, captures the spirit of this hen Step 3 Working around the body, completing the head section, then body Step 4 Add eyes and legs!Drawing Pets and Other Animals
The Top-Down Method


Starting with the Hook


Drawing my dog Hildy is one of my favorite things to do. One of her favorite things to do is change her pose when I’m halfway through a drawing. This is the biggest challenge of drawing animals—they move! Over time, I noticed that if I was patient, my dog would eventually return to her original pose and I could finish my drawing. Animals (and people too) tend to have a limited repertoire of movements. If you’ve ever spent time watching a cat or dog, you’ll notice they rotate between a few movements and postures. They sit, they stand on all fours, they lie on their sides, they stretch, and they walk or run. All animals are like this. Here’s how to work with a shifting subject:
1. Work between multiple drawings: If you aren’t able to finish your drawing before your animal strikes a new pose, start a new drawing on that page or the next. As they rotate through their poses, you rotate through your drawings. When they return to a pose you were trying to capture, flip back to that page and complete your drawing.
2. Deepen your observations: Many details don’t change from pose to pose: the texture and coloring of fur or feathers, the way animals’ bodies are put together, their personality, and character. Each new drawing builds on the study required to make the previous one.
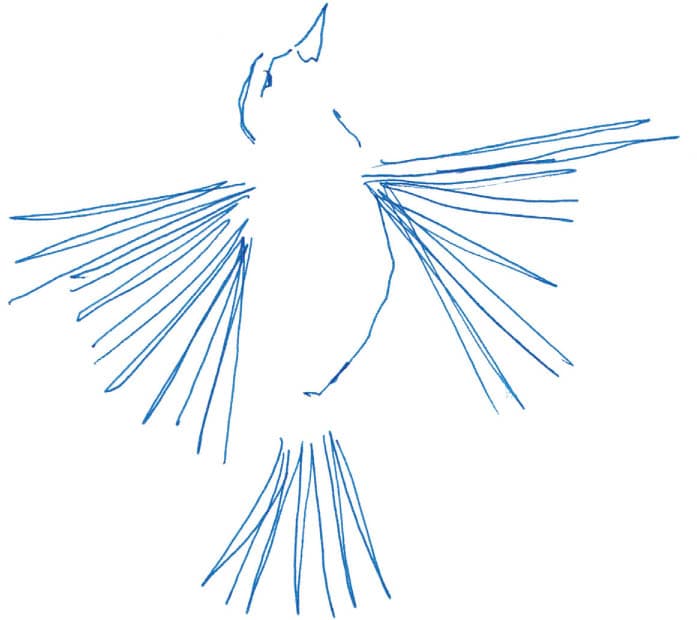
3. Take snapshots in your mind: There is repetition in motion. The legs of a galloping horse repeat the same series of movements in each stride. A squirrel extends its body the same way each time it jumps for a branch. Think of yourself like a sports photographer and snap your shutter each time the movement you want to capture is repeated, isolating the pose.
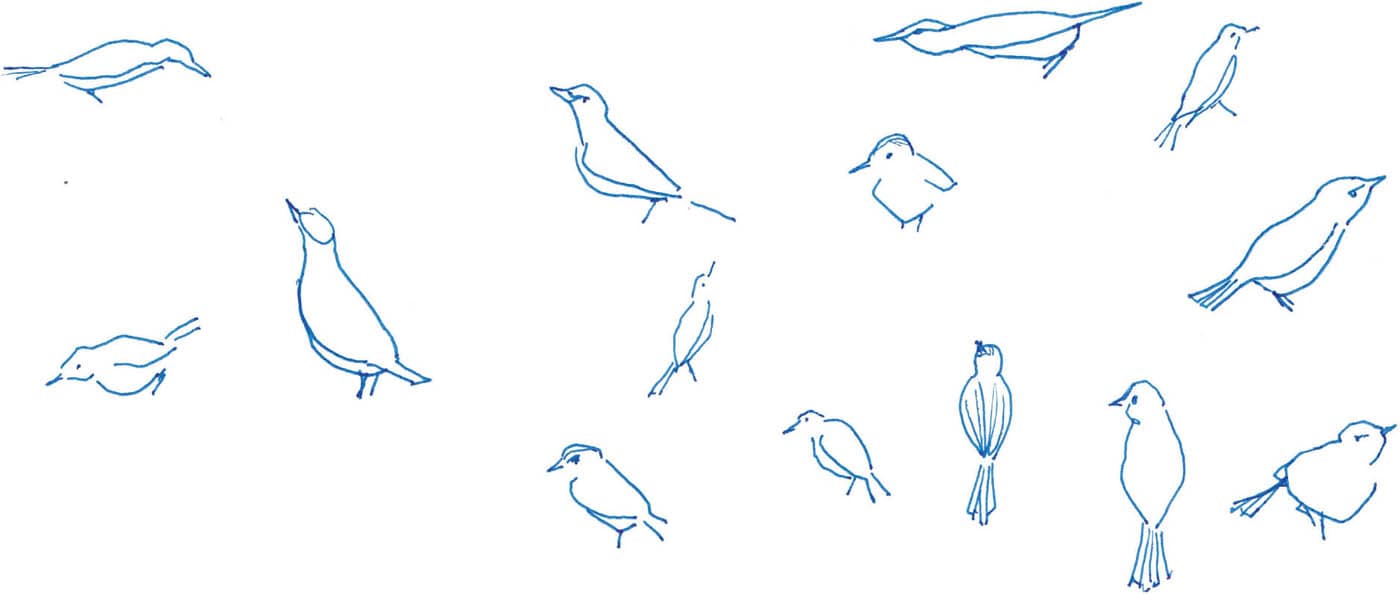
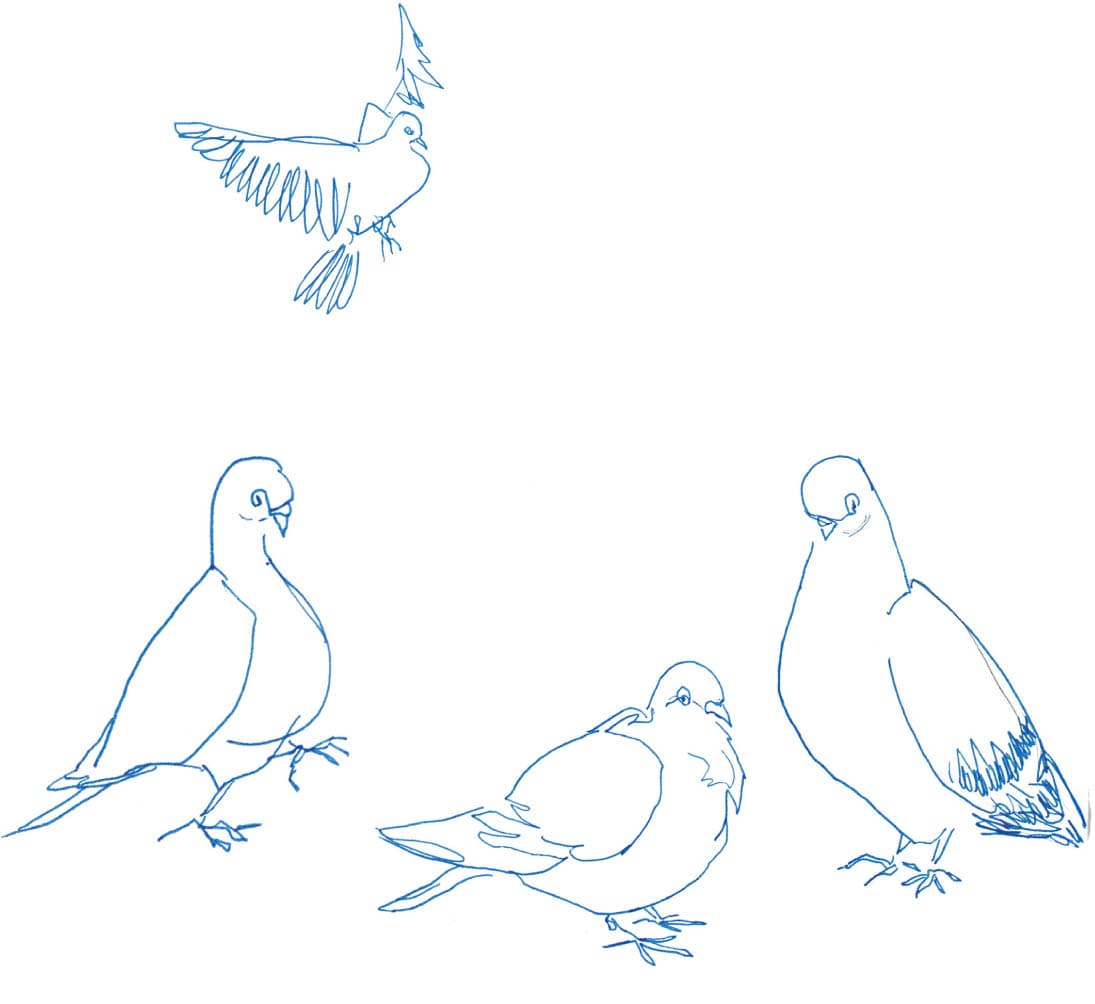
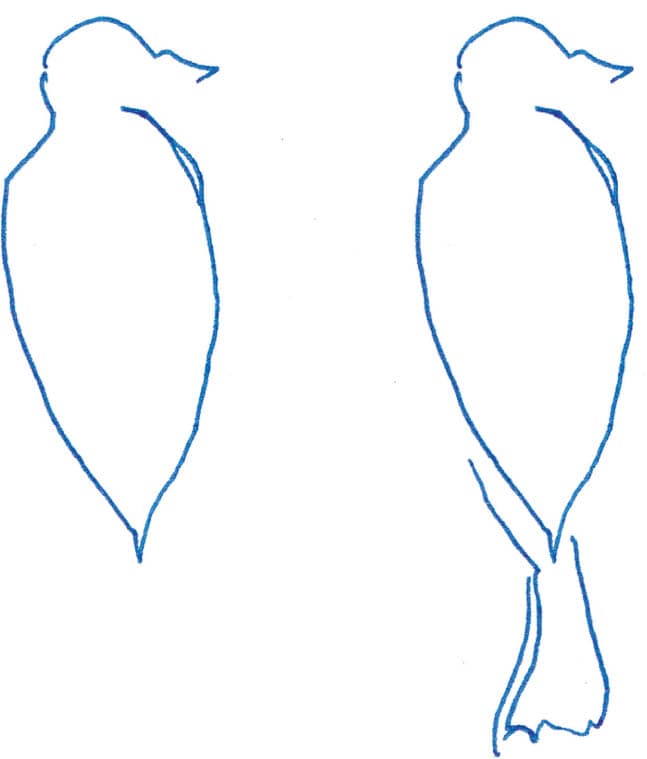
4. When taking your mental snapshots, notice where the weight is being carried; a gorilla, for example, walks with most of its weight resting on its fists, but a galloping horse can be momentarily airborne. Observe the shape and direction of the movement. The coiled energy of a cat about to pounce is reflected in its rounded body shape and is different from the reaching line of a leaping frog. Pay attention to the quality of the movement: Is it jaunty, stiff, smooth, or silly? Tap into that, and you’ll better capture their likeness. While drawing a flock of pigeons, I noticed that a few key characteristics made my pigeons feel “pigeon-y”: The hunch of the shoulder, the small head, long neck, and the pronounced breast were the most suggestive elements for communicating that these were pigeons and not some other bird.Drawing a Moving Target