
Lesson 10: Fine-Tuning Your Workflow

Once you become familiar with building web pages in Dreamweaver CC, you’ll find yourself using some features more often than others. In this lesson, you’ll learn how to save time by customizing the Dreamweaver environment to streamline your workflow.
What you’ll learn in this lesson:
- • Customizing panels and panel groups
- • Resizing the document window
- • Using guides and grids
- • Exploring the tag selector
Starting up
Before starting, make sure that your tools and panels are consistent by resetting your workspace. See “Resetting the Dreamweaver workspace” in the Starting up section of this book.
You will work with several files from the dw10lessons folder in this lesson. Make sure that you have loaded the dwlessons folder onto your hard drive from www.digitalclassroombooks.com/epub/dreamweavercc. See “Loading lesson files” in the Starting up section of this book.
Before you begin, you need to create site settings that point to the dw10lessons folder. Go to Site > New Site, or, for details on creating a site, refer to Lesson 2, “Setting Up a New Site.”
Customizing panels and panel groups
Panels can be moved, grouped, and docked to help keep everything you regularly use at your fingertips. In the next part of this lesson, you’ll create a custom workspace for CSS layouts. You’ll start by removing certain panels and repositioning the remaining panels.
1 Make sure your dw10lessons folder has been defined as a site as described in the Starting Up section. This first exercise does not require any of the lesson files as you will be focusing on the workspace.
To ensure you are starting from the same workspace as we are, choose Window > Workspace Layout > Compact. Then choose ‘Reset Compact’. You will now customize your panels.
2 Locate the CSS Designer tab, click the panel menu in the top right, and then choose Close Tab Group.
3 Double-click the Insert tab to close that panel. Click once on the Insert tab to show it again.
4 From the Window menu, choose CSS Designer to reopen that tab group.
5 Click once on the Files tab to expand that panel.

Click the Files tab to show the Files panel.
There are two panels within the CSS Designer panel group: CSS Designer and CSS Transitions. The CSS Transitions panel is currently hidden. In order to see both panels simultaneously, you’ll drag the CSS Transitions panel out of the tab group.
6 Click and hold the CSS Transitions tab. Drag this tab into your workspace to remove it from the CSS panel group. This now becomes a floating window, which you can keep floating if you want. Many users prefer to have all their panels within a single column, so you’ll add it back in now.

Dragging the CSS Transitions panel out of the CSS Designer panel group turns it into a floating window.
7 To keep the CSS Transitions panel from interfering with your workspace, you can dock it with the other panels. Place your cursor over the CSS Transitions tab at the top of the panel, and click and hold.
8 Drag the CSS Transitions panel immediately above the title bar of the CSS Designer panel group. Be careful here: if the entire CSS Designer panel is highlighted blue, you will be adding to the group. You are looking for a thin blue line above the CSS Designer tab; this indicates that you are creating a new group. When a solid line appears above the CSS Designer panel group, release the CSS Transitions panel to snap it into place.
9 If necessary, adjust the width and height of the panels by placing your cursor on the edges of any panel group. When the black double-arrow appears, you can click and drag to adjust as needed. When you’re finished, the panels should look similar to the example shown here. This configuration gives you quick access to the panels you’ll use the most when creating a CSS-based layout.

The customized panels.
10 Dreamweaver CC also has the same Icon view as the other applications in the Creative Suite. Click the double-arrows on the top-right corner of the entire column of panels; they will collapse to the icon view.
11 Click the Files icon; that group will expand so you can work with it. This group will temporarily stay open until you start working on the document or click another icon.
You can decide whether you prefer to work in the expanded panel view or the icon view. For now, you’ll return to the panel view.
12 Click the double-arrows to return to the expanded panel view.
13 To save this workspace, choose Window > Workspace Layout > New Workspace. When the New Workspace Layout dialog box appears, type CSS Layout into the Name text field and click OK.
14 Choose Window > Workspace Layout > Compact to switch to the default workspace; then choose Window > Workspace Layout > CSS Layout to switch back to the custom workspace you just created.
Using the Favorites tab on the Insert bar
To help organize the many options available in the Insert bar, Dreamweaver groups similar items into categories. You might already be using some items more often than others. The Favorites category is a great way to group commonly used items into one place for quick access.
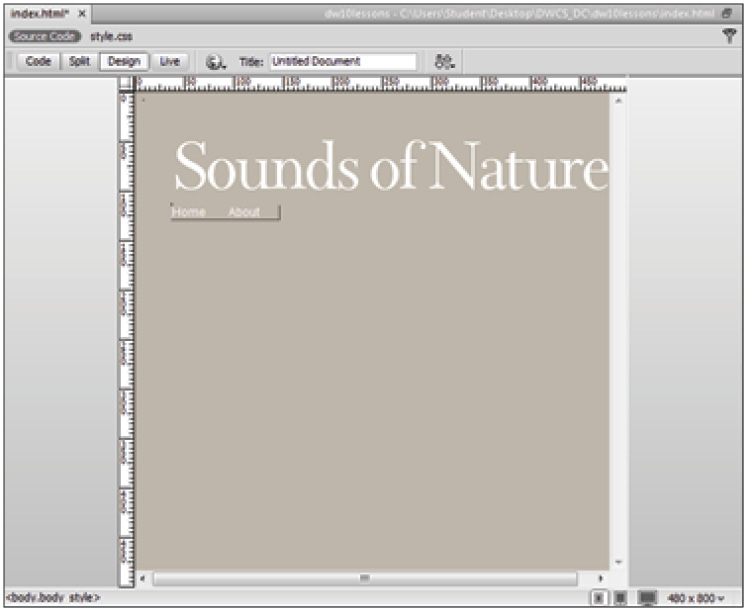
1 Double-click the index.html file in the Files panel. In this exercise, you’ll be inserting a number of images and AP Divs to create two pages in the Sounds of Nature website. These options are currently hidden within the Insert panel, so you’ll need to expand it.
2 Expand the Insert panel by clicking the Insert tab at the top of the panel. If necessary, adjust the heights of your available panels by dragging the borders between them.
The Insert panel has a large number of options available within numerous categories. If you find yourself inserting the same objects over and over, you might want to group them. You can do this with the Favorites category of the Insert panel.
3 Select the Favorites category from the Insert panel’s drop-down menu. Right-click (Windows) or Ctrl+click (Mac OS) in the empty gray area beneath the Favorite category, and choose Customize Favorites from the resulting context menu. The Customize Favorite Objects dialog box appears.
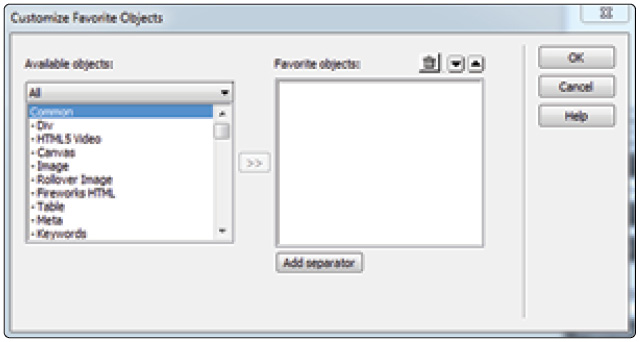
Right-click (Windows) or Ctrl+click (Mac OS) in the empty gray area beneath the Insert panel’s Favorite category and choose Customize Favorites.
4 On the left side of the Customize Favorite Objects dialog box, the list of available objects is organized by the tabs, which indicate where each object can be found in the Insert bar. Select Image, then click the Add button (>>) in the middle of the dialog box.

Select Image and click the Add button.
5 Locate Div from the list of available objects; then click the Add button. Click OK. The Favorites category now features the Image and Div elements.
Resizing the document window
If you’re familiar with any page layout or graphics programs, adjusting the size of the window in which you’re working is probably something that you do regularly. However, when you’re working on web pages in Dreamweaver, it’s a good idea to think carefully about the size of your document. Because a number of different hardware and software configurations might be used to view your content, it can be tricky to make sure your website looks acceptable on every user’s computer. In the next part of this lesson, you’ll resize the document window to make sure the Sounds of Nature website is being designed with the target audience in mind.
1 Index.html should still be open in your document window. If not, open it now. Also, make sure you’re in the Design view. If necessary, click the Design button in the Document toolbar.
2 Look at the very bottom of your document window; there are several controls relating to the Window Size on your screen.

A. Mobile Size (480 × 800). B. Tablet Size (768 × 1024). C. Desktop Size (1000 × 620). D. Window Size.
Pay particular attention to the numbers 1000 × 484 in our figure; this is the Window Size. It is quite likely your numbers will be different. This number represents the full width Dreamweaver is capable of displaying given the user’s screen size. Because we are using a monitor set to 1024 × 768, this is as wide as Dreamweaver can display the page on our screen.
3 Click the Window Size numbers to access a menu. The default setting is actually set to the Full Size option. Dreamweaver calculates these numbers instantly.
You will also that see there are other monitor size options in this menu. From the menu, choose the option that reads 1260 × 875. What happens on your screen depends on the size of your monitor. On our 1024 × 768 monitor, a scroll bar appears that allows us to scroll over to the right of the document. Generally speaking, you can leave this setting to Full Size unless you have a specific need to preview your page in different size screens.
 The second value seen in this step, 1280 × 1024 Maximized, refers to the true size of the page as if the user were maximizing their browser window to the fullest. The 1260 × 875 number is a more realistic estimate of the available space a web browser would occupy on the screen (accounting for browser features, such as scroll bars).
There are three monitor icons that will allow you to change the window size to three different presets.
4 Click the first icon to the left of the Window Size numbers. This is the Mobile Size (480 × 800) preset.
The Mobile Size preset changes the dimensions of the screen to 480 pixels wide by 800 high.
This will set the window size to 480 pixels wide by 800 high and have the effect of cropping your current page. The goal here is to show you the window size as if you were viewing the site with a mobile device. Although this can be a useful feature, it’s a bit deceptive. Dreamweaver is not trying to reproduce the behavior of a web browser on a smartphone; it’s simply limiting the width and height of your current window.
A more sophisticated method of designing your pages for mobile devices is covered in Lesson 16, “Responsive Design and Layout for Mobile Devices.”
5 Click the next icon to the right, which is the Tablet size. Note the change in the screen. Click the last icon, which is the Desktop view and is set to 1000w, indicating the width of the screen is 1000px and the height is unspecified. All these settings can be useful if you want to see how your designs appear in these different size screens. Just remember that there is no substitute for seeing your design in a web browser.
6 Click the Window Size menu, and then click the Full Size option to set the screen back to the maximum amount of space on your monitor.
Using guides
In Lesson 5, “Creating Page Layouts with CSS,” you learned how absolute-position divs can be added to a page for precise layout. Guides can be a useful tool for absolute-position divs, as well as the other types of layout techniques, because they allow you to line up and measure different elements on your page. In this exercise, you’ll add an absolute-position div to index.html, and then place an image inside the div. First, you’ll draw some guides to help you size and position the div.
1 If your rulers are hidden, choose View > Rulers > Show to turn them on.
 Rulers can use inches, centimeters, or pixels in Dreamweaver. Because pixels are the most common unit of measurement on the Web, they are the default. If you prefer inches or centimeters, right-click (Windows) or Ctrl+click (Mac OS) on the rulers to access a context menu where you can choose your preferred unit. In this lesson, you’ll be using pixels, so it’s a good idea to stick with them for now.
2 Click inside the vertical ruler on the left side of your document window, and then drag a guide into the center of the page. Notice, as you drag, that a yellow box appears with the pixel number of your horizontal ruler. When you let go and move your cursor off the ruler, it will disappear.
Dragging a guide manually is useful, but you can also set a guide’s position precisely.
3 Double-click this guide to open the Move Guide dialog box. From this dialog box, you can set an exact location for guides. This feature can be especially helpful when building a web page based on sketches or mockups.
4 Type 38 in the Location text field and click OK. The guide is repositioned 38 pixels from the left side of the document.
5 Create another vertical guide and set its position to 494 pixels, either by dragging it to this position or setting its value precisely.
What if you wanted to determine the exact width between these two guides you just added? Instead of using a calculator, you can allow Dreamweaver to do it for you.
6 Press and hold the Ctrl (Windows) or Command (Mac OS) key and move your cursor across the three sections of your page as defined by the guides. A blue line with arrows on either end indicates the distance between each of your guides, as well as the distance between guides and the edge of the document window. Between the two guides, you can now see that the width is exactly 456 pixels.

Press and hold Ctrl (Windows) or Command (Mac OS) and hover over the vertical areas defined by guides.
7 Drag two horizontal guides down from the ruler at the top of the document window. Double-click each of them, and then use the Move Guide dialog box to position one of them 152 pixels from the top of the document, and the other 380 pixels from the top of the document.
8 Next, you’ll create an absolute-position div and start adding some content; but first make sure that Snap to Guides is turned on, by choosing View > Guides > Edit Guides. The Guides dialog box appears, with a number of options for customizing your guides.
If you happen to be using a color in your web page that makes the guides hard to see, you can change their color here. Also, the Lock Guides option can be a helpful way to avoid accidentally repositioning guides. For now, make sure Snap to Guides is checked and click OK.

The Guides dialog box allows you to change the color of guides and turn snapping on and off.
9 Now that your guides are set up, you’re ready to add some content. With the Favorites category selected in the Insert panel, click the Div object.
10 In the Insert Div dialog box that appears, you can leave Insert set to At insertion point and type photo for the ID. Then click OK to create the div.
Next, you will use the CSS Designer panel to style this div as a absolute positioned div, which will allow you to resize and reposition it on the page.
11 With the newly created #photo div selected, click styles.css in the Sources pane, then click the Add Selector button in the Selectors pane. Dreamweaver will suggest the Selector name .body_style #photo. Change this to simply read #photo and press Enter (Windows) or Return (Mac OS).
12 Click the Layout button in the Properties panel and scroll down to the position property. Click the word static and select absolute from the menu.
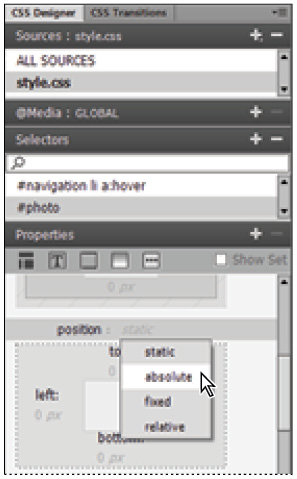
Set the position property of the #photo div to absolute.
13 The #photo div will now be displayed with a blue border, resize handles, and a tab in the top left corner. If the div does not appear this way at first, click the Design view button to refresh the layout. Click the tab in the top left corner and drag the div to align with the top left corner of the guides you created earlier.

Drag your newly-created div into position using the guides you added earlier.
14 Position your cursor over the handle on the lower-right corner of your newly-positioned div, then drag downward to expand it to fill the rectangular area created by the four guides.
15 Select the placeholder text and press Delete to remove it from the div. With your cursor positioned inside the div, select the Image object in the Favorites category of the Insert panel.
16 In the Select Image Source dialog box, select hp_photo.jpg from the images folder inside the dw10lessons folder, and click OK (Windows) or Open (Mac OS). The hp_photo.jpg image fits nicely inside the div you created.
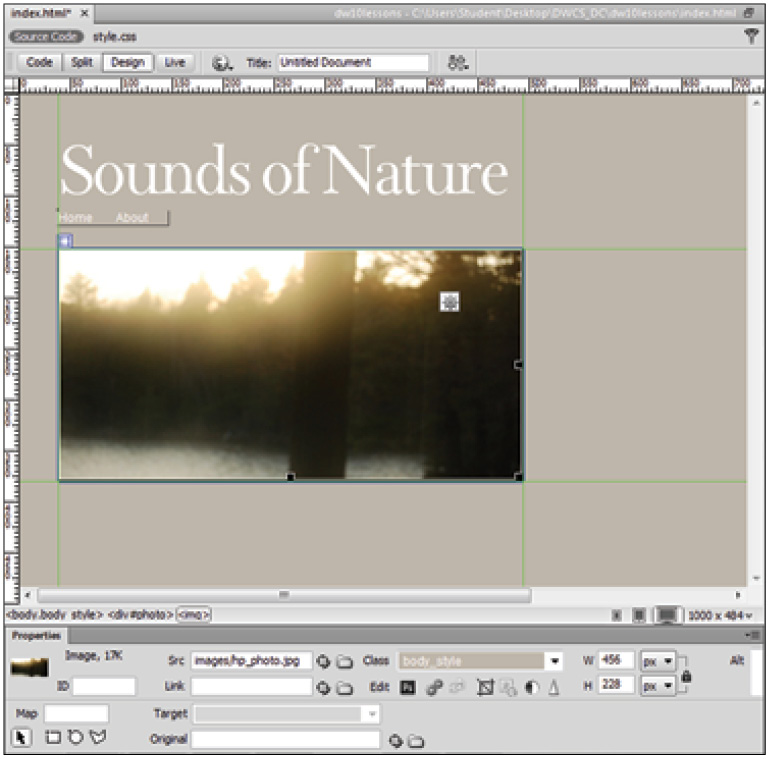
The hp_photo.jpg image placed inside of the absolute-position div.
17 Choose File > Save and leave index.html open.
Using grids
Much like guides, grids are a great way to help keep your layout precise and uniform. In the next part of this lesson, you’ll be adding absolute-position divs and images to the About page of the Sounds of Nature website. Creating a custom grid will help you align and evenly distribute these new elements on the page.
1 Double-click the about.html file in your Files panel to open the About page. You might notice that this page has a white background and uses a default typeface. Later on, you’ll use the tag selector to change this.
2 Choose View > Grid > Grid Settings to open the Grid Settings dialog box. Much like the Guides dialog box, the Grid Settings dialog box can be used to specify the grid color and turn on snapping. Type #CCCCCC in the Color text field and check Show Grid and Snap to Grid to turn the grid on and enable snapping.
3 For this layout, type 38 in the Spacing text field and make sure pixels are selected as the unit of measurement. Choosing a spacing of 38 pixels creates a series of squares that are 38 pixels high by 38 pixels wide. Click Apply to preview the grid settings, then click OK.
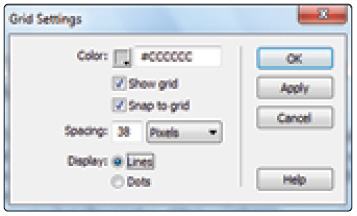
The Grid Settings dialog box.
4 With the grid established, add the absolute-position divs that will house your images. Using the techniques described in steps 9–13 above, create a square, absolute-position div that is 3 grid units wide and 3 grid units high and place it to the left of the paragraph. When prompted, name the new div ID box_1 and name the new Selector #box_1.

Create a square, absolute-position div.
5 Using the same techniques as in step 4, create a second absolute-position div one grid unit below the first. When prompted, name the new div ID box_2 and name the new Selector #box_2.
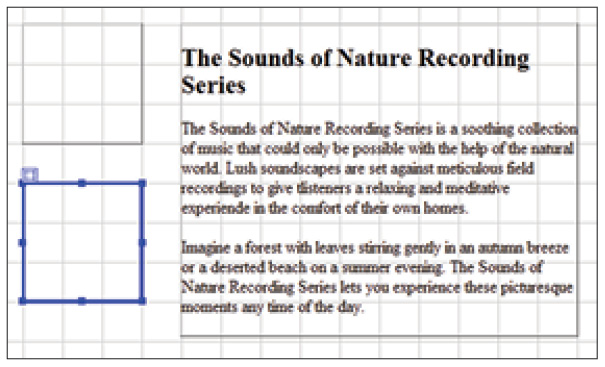
Draw a second absolute-position div one grid unit below the first.
6 Click inside the first div and delete the default text. With the cursor still inside the div, click the Image element in the Favorites category of the Insert panel.
7 In the Select Image Source dialog box, select tree.jpg from the images folder inside the dw10lessons folder, and click OK (Windows) or Open (Mac OS). The tree image is positioned inside the div on your page.
8 Repeat steps 6 and 7 to add forest.jpg to the second div.

The about.html page after inserting the tree and forest images.
9 Choose File > Save and leave about.html open for the next part of this lesson.
The tag selector
In HTML, the organization of elements takes the form of a family tree. In the previous two exercises, you created absolute-position divs and then inserted images into them. In HTML terms, all these images are children of the divs within which they reside. The tag selector is a feature of Dreamweaver that allows you to select HTML elements based on their relationship to one another. The tag selector has been used in previous sections of this book, but in this exercise you’ll use it to apply a single style that will affect the entire about.html page.
1 With the About page open, click once on the forest image that you inserted at the end of the last exercise. At the bottom-left corner of the document window are a number of HTML tags. This is the tag selector. The <img> tag at the end of this line is highlighted to indicate that the forest.jpg image is selected. In addition, the Property Inspector displays information and options related to this image.

With the forest image selected, the <img> tag in the tag selector is highlighted and the Property Inspector displays information and options related to this image.
2 In the tag selector, click the <div#box_2> tag to the left of the <img> tag. Notice that the options in the Property Inspector change to reflect the selected div. In this case, you’ve selected the parent of the forest image.
3 To further illustrate this relationship, choose Edit > Select Child from the main menu. The <img> tag becomes highlighted in the tag selector, and the Property Inspector changes to reflect the selected element.
4 Now, select <body> on the far-left side of the tag selector. The Property Inspector displays options and information related to the <body> tag. Click the CSS button in the Property Inspector if necessary and then, from the Targeted Rule drop-down menu, choose body_style.

With the <body> tag selected in the tag selector, choose body_style from the Targeted Rule drop-down menu.
Because many CSS properties are inherited throughout the document, it is possible to write generalized rules that will be applied to all the elements on a page. In this case, body_style changes the font and text color for the entire document because every element is a descendant of the body.
5 Choose File > Save All and leave about.html open for the next part of this lesson.
Tiling documents
By default, Dreamweaver organizes open documents with a series of tabs in the upper-left corner of the document window. If you’d like to compare documents, or you simply prefer to use separate windows for each document, the tiling option provides an alternative for viewing open files. Next, you’ll use this feature to simultaneously view the index page and the about page of the Sounds of Nature website.
1 Both index.html and about.html should still be open. If they are not, open them now.
2 Choose Window > Tile Vertically (Windows) or Window > Tile (Mac OS). This will send the two pages into two windows side-by-side. This feature can be useful for dragging and dropping objects from one page to another or to work on both pages if you have a big enough monitor.
The fastest way to group these two pages back together is different depending which platform you are on, Windows or MacOS.
3 On the Mac, click the index.html tab, drag it to the about.html tab, and then release it. They will now be grouped as tabs again. On Windows, the best way to group the two document windows again is to click the maximize button in the top right corner of one of the documents.
4 Choose File > Close All to close the open files.
Self study
In this lesson, you followed a predetermined workflow that was tailored toward producing two pages in the Sounds of Nature website. The key to creating a streamlined workflow is planning ahead. Imagine you were creating a website for a local bakery. Make some sketches of what the pages would look like. In Dreamweaver, spend some time setting up a workspace that would make building the bakery website easier. Think about which elements you might use the most. Then, use the guides and the grid to help create a layout that reflects the sketches you made earlier.
Review
Questions
1 Is it possible to resize the document window to preview how a web page will appear on different users’ monitors?
2 How can you position guides on the page without dragging them?
3 Are tabs the only way to organize open documents?
Answers
1 Yes. The Window Size drop-down menu at the bottom of the document window contains a number of preset sizes that correspond to common monitor sizes.
2 To more exactly position guides, simply double-click any guide to open the Move Guide dialog box.
3 No. If you prefer to use tiling, you can choose Window > Tile Vertically or Tile Horizontally to place two documents side by side. (On a Mac OS, you can choose Window > Tile.)