Chapter 3. Halo 2 Easter Eggs
Hacks 21–29: Introduction
Although the skulls (see Chapter 2) are interesting, they certainly aren’t the only Easter eggs in Halo 2. There are plenty of other surprises for gamers to enjoy. For more information about Halo 2 Easter eggs, refer to http://halo.bungie.org, http://www.highimpacthalo.org, and http://bungie.net. This chapter describes some of the other Easter eggs that have been discovered, but there are no doubt a few more out there, so pay close attention in your travels through the Halo 2 universe.
See the Grunts Dance with Macho Man
The Gravemind cut scene shows the idolatry of the Grunts.
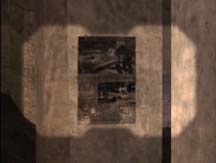
When I first heard about this one, I thought that it was a fake egg, but it turns out that it’s real. At the beginning of the Gravemind level, there is a cut scene with a group of dancing Grunts in the background. With the grunts is some sort of poster. If you look closely, you’ll see that it’s a cardboard cutout of a guy lifting his shirt (see Figures 3-1 and 3-2).

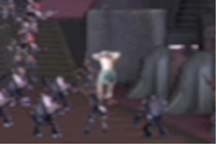
All you have to do to see this egg is start a Legendary difficulty game on the Gravemind level. You do not have to play any of the level or play any of the previous levels on the Legendary difficulty setting. When the cut scene begins, watch the back of the room—you’ll see the circle of Grunts. The little guys are clearly dancing with something.
There were rumours circulating on the Net that the model was Bungie’s Jason Jones. However, after some time, an observant gamer noticed the cutout in one of the Bungie office videos (on Bungie.net). The cutout is actually inside Jones’s office—he may or may not have been the model.
Locate Secret Messages in Multiplayer Maps
Bungie leaves cryptic messages throughout the Halo 2 levels.
Although some have suggested that all Halo 2 multiplayer levels contain secret messages from Bungie, Halo 2 fans have only found a couple.
One of the messages is located near the Beaver Creek Sniper Rifle. To find the message, make your way to the Blue base and up the ramp to the rifle. Next to the Sniper Rifle cave there is a small ledge that snipers often use. On this ledge, there is a pile of rocks that you can knock down to the creek. If you move the largest of the rocks, you will be able to make out a message written on the rock wall. You can see it much more clearly if you back away from the wall and look at it from the right angle. The message reads, “WHY AM I HERE? -Not Sid” (see Figure 3-3).
The other confirmed sighting of the Sid messages is on the Coagulation map. Start off at the Red base and make your way to the cave that houses the Invisibility and Active Camouflage powerups. From the Red base, this cave is on the right side of the map—behind the teleporter exit (see Figure 3-4).

After you enter the cave, there are two ways to go: through an opening on the left that looks down on a pool of water, or along a path that leads down to the water’s edge. When you come to this fork, stay to the left and go right up to the edge without jumping down into the water. Look down at the Invisibility pyramid and then turn 90 degrees to your left. Right next to you, on the cave wall, you will see the message “Not SID WAS HERE” (see Figure 3-5).
In case you are wondering about the meaning of Not Sid, he is one of the multiplayer map designers at Bungie. However, no one seems to know exactly which designer.
Uncover the Hidden Art Galleries
Access the hidden galleries on the Limited Edition DVD.
This egg is specific to the Limited Edition Halo 2 DVD. In each menu of the DVD, hold down the Xbox DVD remote’s left arrow button for 10 seconds. This will allow you to see some hidden art galleries. (If you are viewing the DVD on a different DVD player, you may have to press the left button about 60 times to get to the art gallery.)
If you do not do anything with the DVD menu for a while, you will hear a soldier’s voice telling you to push play. The art gallery trick will not work once this guy starts talking, but if you wait until the DVD menu screen cycles to the beginning of the music, then the trick will work again.
If you haven’t seen it yet, you should also take a look at the surround sound “Audio test.” When you choose this option, you’re treated to an entertaining animation.
Read the Master Chief Poster
Even the USMC has been known to use propaganda.
At the beginning of the Outskirts level, you will crash land in Old Mombassa. Look around this level and you can find posters that feature the Master Chief. Some of the posters clearly show scenes from the 2004 Halo 2 E3 prerelease demo (see Figure 3-6).
This poster can also be found in the Foundation multiplayer map (see Figure 3-7).

Customize the Zanzibar Signage
Alter the Zanzibar “NO SWIMMING” sign.
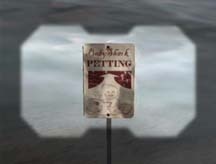
The Zanzibar beachfront features helpful signs that warn of sharks in the water. These signs usually read, “DANGER NO SWIMMING” (see Figure 3-8).
However, some Halo 2 fans discovered that the signs change if the Xbox system clock is set to specific dates. To try this, open the Xbox dashboard and go to the Settings page. Choose the Clock settings and change the month and day to 7. Seven is known to be a special number for Bungie Studios—for example, their fan club is called “the 7th Column.”
Start a game on the Zanzibar map and check the signs. In addition to an image of a bloodied dog’s head, the sign will read, “ARE YOU FINDING LING LING’S HEAD?” (see Figure 3-9).


There are other combinations that clearly map to holidays. Change your date to January 1, and you will see the entertaining message “Baby Shark PETTING” (see Figure 3-10).
Halloween is also celebrated with its own sign. This one features an otherwise happy person getting bisected. Change your date to October 31 for the “CARNAGE ZONE” and December 25 for yet another version of the sign. We all know that Christmas is often a time for SOFFISH (read: I don’t know what SOFFISH means), so the Bungie gang brings you a warning message. You’ll have to try these last two out for yourself.
For more information about this wily and elusive fish, refer to this URL: http://www.bungie.net/Inside/soffish/Soffish.html.
In case you’re worried about the hassle of resetting the date on your Xbox, fear not. If you use Xbox Live, the system will reset your clock when you sign in.
Kick Around a Soccer Ball
If you’re looking for an interactive Easter egg, then the giant Halo 2 soccer ball is probably your best choice. Some people in the Halo community came up with an elaborate way to get at this Easter egg. The general idea was to lure a Banshee through the Metropolis tunnels and then hijack it just before a cut scene. Refer to the Scarab gun hack [Hack #29] for more information about this technique. Jacking a Banshee allows gamers to fly to the location of the egg. However, a more straightforward method is available.
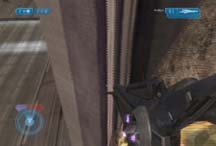
First, you will need to grab the Sputnik skull [Hack #16] . This will allow you to grenade jump considerably higher than normal. Next, make your way through Metropolis until you pass by a water fixture and reach the mission objective “Regroup with Marine forces in the city-center.” This is just past the location of the Catch skull [Hack #10] . After the water fixture, you will come out into an open street and the soccer ball building will be straight in front of you (see Figure 3-11).
Grenade jump [Hack #2] from the ledge at the base of the building to the area that has been damaged (see Figures 3-12 and 3-13).
After that, it’s a simple matter of jumping on the iron bars to get up to the top of the roof. You will need to jump on three different broken girders to get to the roof (see Figure 3-14).
Once you have jumped up the girders, you can simply crouch jump [Hack #1] up to the level of the soccer ball. After jumping to the roof, the room with the Catch skull is only a short walk to your right (see Figure 3-15).


The giant ball is hiding in a dark room just around the corner (see Figure 3-16).
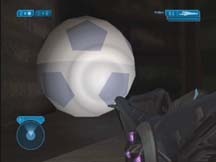
Many people have commented that the soccer ball is one of the most random Easter eggs that they have seen. Have fun kicking it around (see Figure 3-17).

Collect the Hidden Sword on Outskirts
Arm yourself with a hidden Plasma Sword.
This egg can change the Outskirts experience considerably. For example, on the lower difficulty level, you won’t be able to find a Plasma Sword anywhere near the location of this hidden blade.
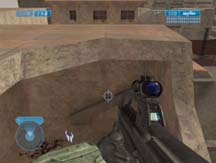
To get to the location of the sword, start by following the steps to get to the top of Outskirts [Hack #32] . Once you have made it to the upper levels, you will be able to see a broken highway below you. Jump down to this highway and then jump across to the other side. To get above the other side of the highway, it is possible to crouch jump from the ledge. However, it will be easier to use a grenade jump [Hack #2] —it’s even easier if you collect the Sputnik skull [Hack #16] first (see Figure 3-18).

Once you have crossed to the other side of the highway, it’s a straight line to your goal. Run along the building tops until you pass the building pictured in Figure 3-19.

Once you are on top of this building, move to the back and then look down and to the left; you will see the Plasma Sword lodged in the building. Next to the blade, there appears to be a grave (see Figure 3-20) and the name “REX.” Some say that this is the name of a level designer, but maybe Rex is the name of a Covenant warrior buried in the roof.
Once you have collected the hidden sword, you can continue across the rooftops toward the hotel Zanzibar (see Figure 3-21). Then you can jump down and let the Covenant feel the sting of your blade.

Hidden Swords on Delta Halo
Arm yourself with more hidden Plasma Swords.
To find these hidden gems, you will need to play the Delta Halo level until you reach the mission objective entitled “Push through the Covenant-held ruins.” This is the same area where you find the Envy skull [Hack #13] .
When you enter the area, look for a large stone slab at the end of a ledge; it is blocking a secret door. This is the same stone that you jump on to get the Envy skull.
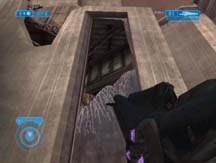
You can either use explosions to get it out of the way or you can jump around to a back entrance. To blast the block out of the way, you can use the Scorpion or grenades (see Figure 3-22).

Once you have moved the stone out of the way, you will be able to crouch through the small opening (see Figure 3-23).

Once inside the dark room, you will see some dead Grunts and two Plasma Swords (see Figure 3-24).

If you want to avoid having to move the stone, you can enter by the back door instead. To do this, make your way to the ledge where the Envy skull [Hack #13] spawns on Legendary mode. Once you reach the skull location, drop down to the next ledge—do not drop all the way down to the main courtyard. On this second ledge, you will find the back door to the sword room (see Figure 3-25).
The back door will give you access to the same room. Once inside, turn to your left; you’ll see the other side of the stone block that is wedged in the secret doorway.

Super Weapon on Metropolis
Add a Scarab Gun to your arsenal.
This hack allows you to use the weapon from the Covenant Scarab tank. The Scarab is the giant spider-like vehicle that you face on the Metropolis level. Sgt. Johnson uses a Scarab to “open” the doors on The Great Journey level.
The Scarab gun Easter egg is a portable version of the Scarab vehicle’s main weapon. The gun was originally located in hex code by a group of Halo modders. The hex code reference for the Scarab gun looks like this:
	Scarab Main Gun Handheld 0D7D8ED8 A86FAB80 0DE12FA8 FD541B93 1,124b
	scenariosobjectscovenantmilitaryscarabweaponsmain_gun
	scarab_main_gun_handheld
Next, the modders switched the Warthog vehicle models with Banshees and explored the marine base area of Metropolis from the air. They located the gun on top of one of the sky bridges, floating above an orange cone. The Scarab gun actually uses the model of a Plasma Rifle.
Reaching the gun without modding was the next challenge. FrogBlast solved this by finding a glitch with a loading zone. This glitch allows a player to have a Banshee in the second part of the level.
To find the weapon, start a campaign game on the Metropolis level. You should play on Normal difficulty or above. The reason for this is that you need the Banshee to be aggressive enough to follow you. In addition, you will have a much easier time if you grab the Sputnik skull [Hack #16] before you attempt to get the gun. This changes the physics of Halo 2 by lowering the mass of certain objects. Having the Sputnik skull will make it easier for you to knock things around and you will be able to melee the Banshee into place.
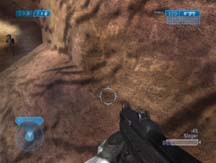
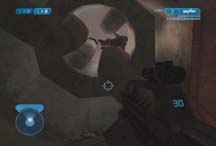
When the level begins, get into the Warthog and drive over the bridge until you reach the tunnel entrance. At this point, hijack one of the Ghosts that comes out of the tunnel, and destroy everything except for one of the Banshees. Drive slowly down the tunnel, making sure that the Banshee is following you (see Figure 3-26). If the Banshee does not follow you, you should double check to make sure that you aren’t playing on the Easy difficulty setting.

When you are luring the Banshee down the tunnel, you must watch it care-fully. If you don’t stay close to it, it can disappear at checkpoints. If this happens, and reverting to the last checkpoint does not get you back to where you were, then you should reboot your Xbox without saving the game. This will get you back to where you last saved the game.
In general, you will want to stay in your stolen Ghost as much as possible. When the Banshee gets stuck, you can try to lure it to you or you can melee it into a better position. Even with the Sputnik skull, it isn’t easy to get the Banshee to cooperate—there will be many times when it acts like a fly on a window. The positive effect of the Banshee’s disorientation is that it is trivial to hijack it.
When the Warthog carrying marines comes into view, blow it up immediately. If you let the Marines have their way, they will destroy the Banshee. Making sure that the Banshee is still following you, drive over the first barrier and proceed to take out all the Covenant forces in the area. Make sure that the Banshee is never too far away or it will disappear.
When the area is clear, find the Banshee again (it will most likely be stuck in the debris) and melee it several times. You will not destroy it by hitting it.
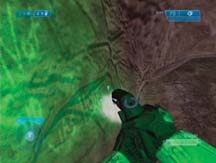
However, the melee attack will make the Banshee follow you again. Slowly move into the red room on the right side of the tunnel, after the second barrier. Remember, the Banshee should still be following you. Next comes the hard part—the Banshee will attempt to fly up a vertical shaft. If it goes up this shaft, it will never come back down (see Figure 3-27).
You will have to revert to the last checkpoint if it does this. Instead of letting it go up the vertical shaft, you want to move the Banshee into the smaller tunnel that leads to the next loading zone. Shoot the Banshee’s wings off and then Melee it into the tunnel. As soon as the Banshee gets into the tunnel, jack it and ride it through the cut scene. In Figure 3-28 you can see the Banshee next to the tunnel entrance (the tunnel is on the right side of the image).

If you jack the Banshee at the right time, the message “Loading…done” appears, at which time you must be pressing X and be in the process of hijacking the Banshee. The craft will now be on the other side of the loading zone with you as the pilot (see Figure 3-29).

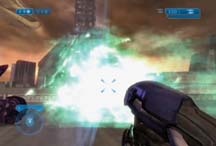
Fly to the sky bridge, grab the gun, and have some fun! (see Figure 3-30)

The gun appears to be a normal Plasma Rifle (see Figure 3-31).

Just be careful not to shoot the ground at your feet. Once you have this weapon, you almost have to feel sorry for the Covenant (see Figure 3-32).