Administrators in enterprise settings face a number of added challenges when writing scripts. They must configure scripts to run against different computers at different times, they must track script progress, and they must maintain the security of the administrator password when running scripts that require administrative privileges. In addition, administrators need options to collect, save, and report the data returned by their scripts. The scripting techniques presented in this chapter help administrators meet the unique challenges of using scripts in an enterprise setting.
In This Chapter
In some ways, the notion of an “enterprise-enabled” script is a misnomer. In most cases, a script written to run on a single stand-alone computer can run unchanged in an enterprise setting. The fact that the script runs on the only computer you manage or that it runs on one of the thousands of computers you manage is irrelevant.
The question, however, is whether you want that script to run unchanged in an enterprise setting. Suppose you have an inventory script that needs to run regularly on a number of computers. You can choose to place a copy of that script on each computer and then run the script locally. Typically, the script will run faster; after all, anything run locally runs faster than the same item run remotely. However, running separate copies of a script, one on each computer, can lead to logistical problems. For example, how will you deploy the script to each computer? What happens if you need to modify the script? How will you make sure you modified every copy? How can you ensure that each script runs as scheduled? If something goes wrong, whom do you notify, and how do you notify them?
As an alternative to running separate copies of the script, one on each computer, you can run your script from a central workstation, successively connecting to each computer, retrieving the inventory information, and then connecting to the next computer. This approach eliminates many logistical problems; for example, it is easy to deploy and modify the script because only a single copy of the script exists. At the same time, however, this approach creates a different set of problems. How do you configure a script so that it can run against multiple computers? What happens if the script needs to run against one set of computers on Monday and another set on Tuesday? If all your scripts run from a central workstation, how do you know which scripts are active at any given time?
Although this might appear to be a no-win situation, a number of simple scripting techniques are available to help you meet the challenges of using scripts in an enterprise setting. These challenges include the need to:
Retrieve arguments for running the same script against different computers at different times.
Create alerts that can be directed to the appropriate administrator, even if that administrator is not physically near the computer experiencing the problem.
Collect and save large quantities of data.
Sort, filter, and display data in a manner that lets you spot potential problems at a glance.
Identify the scripts that are running at any given moment and determine how (or even if) those scripts are progressing.
Maintain the security of administrative passwords for scripts that require administrative privileges.
This chapter presents possible solutions to each of these challenges.
In an enterprise setting, it is common to have a generic script that is designed to run at different times against different computers. For example, you might have a script that backs up and then clears the event logs on a computer. You might run this script every Monday against your domain controllers, every Tuesday against your Dynamic Host Configuration Protocol (DHCP) servers, and every Wednesday against your print servers.
To carry out this task, you might create separate scripts, one for the domain controllers, one for the DHCP servers, and so on. On Monday, you run the domain controller script, on Tuesday you run the DHCP script (which is identical to the domain controllers script except for the set of computers it runs against), and so on.
This works fine as long as you do not have to modify the script. However, what happens if you decide to have the script extract selected records to a text file before backing up and clearing the event logs? In that case, you will need to modify each version of the script, a process that is both time consuming and error prone.
Instead of creating separate scripts, each one with the computer names hard-coded, you might type in the appropriate command-line arguments each time you run a script. For example, to run the script against three mail servers, you could use a command similar to this:
cscript Backuplogs.vbs MailServer1 MailServer2 MailServer3
Assuming that your script has the code for parsing command-line arguments, this approach lets you run the script against a different set of computers any time you want.
Or at least you can do this as long as you have no more than two or three computers being passed as command-line arguments. But what if you need to run the script against 50 mail servers? In that case, you have to type in the names of all 50 computers anytime you run the script. What if you need to run the script against 85 print servers? Trying to pass all these computer names as command-line arguments will be extremely tedious, highly susceptible to typing mistakes, and likely exceed the maximum number of characters allowed in a command-line command.
Instead of typing command-line arguments, you can retrieve these arguments from a text file, a database, or even the Active Directory® directory service. By separating the arguments from the script, you can overcome the problems inherent in using command-line arguments: You do not have to worry about the time required to type 100 server names, you do not have to worry about typographical errors, and you do not have to be concerned with the maximum number of characters allowed in a command-line command.
In addition, this approach lets you add or delete computer names simply by editing the outside data source. Modifying a script requires someone with scripting knowledge and scripting experience; it is much easier to find someone capable of opening a text file and deleting the name of a computer recently decommissioned.
Many of the sample scripts in this chapter work by retrieving arguments from an outside data source (for example, a text file or a database), storing those arguments in a Dictionary object, and then looping through the elements in the Dictionary and running the script by using each argument.
This is done for primarily for the sake of efficiency. As an alternative, the scripts could instead:
Connect to the outside data source.
Retrieve the first argument.
Run the script by using the first argument.
Connect to the outside data source again, retrieve the next argument, and so on.
Although this approach works, it requires repeated calls to the data source. If the data source resides on a second computer, located across the network, the script will have to make continual calls across the network. This leaves the computer, and your script, prone to any number of network-related difficulties. For example, the remote computer where the data source resides could temporarily lose network connectivity, meaning that the script could no longer retrieve the computer names.
To avoid this issue, the scripts in this chapter make a single call to retrieve all the command-line arguments, and then store these arguments in a Dictionary object. The Dictionary, which is stored in local memory, is then used as the argument repository. (For more information about the Dictionary object, see “Script Runtime Primer” in this book.)
To run a single script against multiple computers you can include each computer name as a command-line argument. For example, this command runs the script Monitor.vbs against Server1, Server2, and Server3:
Cscript Monitor.vbs Server1 Server2 Server3
This works fine for a script that runs against two or three computers, but it is far less effective for scripts that need to run against scores of computers. For scripts that must run against more than a handful of computers, you will likely find it much more efficient to store the list of computer names in a text file; your script can then open the text file, read in each computer name, and then run against each of these computers. Not only is this efficient, but your text file need be no more complicated than this:
atl-dc-01
atl-dc-02
atl-dc-03
atl-dc-04
You can read arguments into a script by using the FileSystemObject. In the script shown in Listing 17.1, the FileSystemObject is used to read a list of server names from a text file; each name is then stored as a key-item pair with a Dictionary. This demonstration script then successively runs against each name in the Dictionary, connecting to the computer and reporting the number of services installed on that computer.
Note
This might not be the most practical use of an enterprise script; you rarely need to know how many services are installed on a computer. However, the actual activity performed by the script is irrelevant; the important aspect is how the script reads server names from a text file and then connects to each computer. A trivial task such as reporting the number of services installed was chosen simply to keep the focus on connecting to multiple computers and not on the activity carried out after each connection is made.
Scripting Steps
Listing 17.1 contains a script that retrieves arguments from a text file. To carry out this task, the script must perform the following steps:
Create a constant ForReading, and set the value to 1.
This constant will be used to open the text file in read-only mode. Opening the file in read-only mode ensures that the script cannot inadvertently overwrite the contents of that file.
Create an instance of the Dictionary object.
The Dictionary object will be used to store server names as those names are read from the text file.
Create an instance of the FileSystemObject.
Use the OpenTextFile method to open the text file.
You must specify two parameters when opening a text file: the path to the file and the mode in which to open the file. In this script, the path is C:ScriptsServers.txt, and the file is opened in read-only mode.
Set the counter variable i to 0.
The counter variable will be used as the key to each element in the Dictionary. The name of the server will be used as the item associated with each key. For more information about Dictionary keys and items, see “Script Runtime Primer” in this book.
The counter is initially set to 0 because, in VBScript, the first element in an array is element 0. Although any value can be used as a Dictionary key, setting the first element to 0 gets you used to the notion of working with 0 as the first number instead of 1.
Create a Do Until loop that continues until each line of the text file has been read.
You can identify the end of the text file by looping until the property AtEndOfStream is True. When this property is True, that means the entire file has been read. The script will then automatically exit the loop.
Use the ReadLine method to read the first line in the text file and store the value in strNextLine.
Because each line of the text file consists of a server name, strNextLine will contain the name of a server. If the first line in the text file is atl-dc-01, the value of strNextLine will also be atl-dc-01.
Use the Add method to add the counter variable i and the value of strNextLine to the Dictionary.
Increment the value of i.
Repeat the process with the next line in the text file. After the last line of the text file has been read, the Dictionary will consist of a set of items equivalent to the lines in that text file. For example, suppose the text file contains the following lines:
atl-dc-01
atl-dc-02
atl-dc-03
atl-dc-04
In that case, the Dictionary will consist of the following key-item pairs:
0       atl-dc-01
1       atl-dc-02
2       atl-dc-03
3       atl-dc-04
Set the value of the variable strComputer to the value of the first item in the Dictionary (for example, atl-dc-01). The variable strComputer will then represent the name of the first computer the script must connect to.
Use a GetObject call to connect to the WMI namespace rootcimv2 on the remote computer (as specified by strComputer), and set the impersonation level to “impersonate.”
Use the ExecQuery method to query the Win32_Service class.
This query returns a collection consisting of all the services installed on the computer.
For each server the script connects to, use the Count property to echo the server name and the number of installed services.
Repeat the process using each item in the Dictionary.
Example 17.1. Retrieving Arguments from a Text File
 1 Const ForReading = 1
 2 Set objDictionary = CreateObject("Scripting.Dictionary")
 3 Set objFSO = CreateObject("Scripting.FileSystemObject")
 4 Set objTextFile = objFSO.OpenTextFile _
 5     ("c:scriptsservers.txt", ForReading)
 6 i = 0
 7 Do Until objTextFile.AtEndOfStream
 8     strNextLine = objTextFile.Readline
 9     objDictionary.Add i, strNextLine
10     i = i + 1
11 Loop
12 For Each objItem in objDictionary
13     StrComputer = objDictionary.Item(objItem)
14     Set objWMIService = GetObject("winmgmts:" _
15     & "{impersonationLevel=impersonate}!\" & strComputer& "
ootcimv2")
16     Set colServices = objWMIService.ExecQuery _
17         ("SELECT * FROM Win32_Service")
18     Wscript.Echo strComputer, colServices.Count
19 Next
It is not unusual to have a script that needs to run against a different set of computers at different times. For example, you might have a monitoring script that occasionally runs against your Domain Name System (DNS) servers. At other times, you might run this same script against your DHCP servers. To ensure that the script runs against the correct set of computers, you can have separate text files, one containing the list of DNS servers and the other containing the list of DHCP servers. In this case, simply having the script read in the contents of a particular text file will not suffice; after all, the name of the text file to be read might change each time the script is run.
One way to have the same script run against a different set of computers at different times is to use the appropriate text file name as a command-line argument. To run the script against your DNS servers, you pass the script the name of the text file (for example, Dns_servers.txt) that contains the list of DNS servers. To run the script against the DHCP servers, use a different text file name (for example, Dhcp_servers.txt) as the command-line argument. In either case, the script opens the text file, reads in the computer names, and then runs against each of those computers.
For example, if you are running a script under Cscript, you can include the appropriate text file name as part of the command string that starts the script:
cscript monitor.vbs dns_servers.txt
Alternatively, you can use My Computer or Windows Explorer to drag the icon for the text file onto the icon for the script file. Any time you drag and drop a file onto a script file, the script file uses the dropped file name as an argument.
To illustrate how this works, this two-line script snippet echoes the path name for any file that is dragged onto the script file in Windows Explorer. If you drag a file onto the icon for this script, a message box appears, echoing the path of the file name:
Set objArgs = Wscript.Arguments
Wscript.Echo objArgs(0)
To use a file name as an argument, you need to make two minor modifications to the script shown in Listing 17.1. First, you need to create an instance of the WSH Arguments collections; this requires a single line of code:
Set objArgs = WScript.Arguments
Second, you need to modify the portion of the script that actually opens the text file. In Listing 17.1, the file path is hard-coded into the script:
Set objTextFile = objFSO.OpenTextFile _
    ("c:scriptsservers.txt", ForReading)
In the script shown in Listing 17.2, the file path is not hard-coded. Instead, the script opens the file supplied as the command-line argument:
Set objTextFile = objFSO.OpenTextFile(objArgs(0), ForReading)
Scripting Steps
Listing 17.2 contains a script that uses a text file as a command-line argument. To carry out this task, the script must perform the following steps:
Create an instance of the Wscript Arguments collection.
Create a constant ForReading, and set the value to 1.
This constant will be used when the text file is opened in read-only mode.
Create an instance of the Dictionary object.
The Dictionary object will be used to store server names as those names are read from the text file.
Create an instance of the FileSystemObject.
Use the OpenTextFile method to open the text file.
You must specify two parameters when opening a text file: the path to the file and the mode in which to open the file. In this script, the path is not hard-coded (for example, C:ScriptsMyservers.txt). Instead, the path is designated by the variable objArgs(0), which represents the first element in the arguments collection.
This argument could have been supplied either by typing the file path at the command line or by using drag and drop to drop the icon for the text file on the icon for the script file. For example, if your script is named Monitor.vbs and you type the following command at the command prompt, objArgs(0) will be equal to C:ScriptsServerNames.txt:
cscript Monitor.vbs C:ScriptsServerNames.txtAs indicated by the second parameter, ForReading, the file is opened in read-only mode.
If you want to use multiple text files as command-line arguments, you need to modify the script so that it loops through the entire Arguments collection. For more information on looping through the Arguments collection, see “WSH Primer” in this book.
Set the counter variable i to 0.
The counter variable will be used as the key to each element in the Dictionary. The name of the server will be used as the item associated with each key.
Create a Do Until loop that will continue until each line of the text file has been read.
You can identify the end of the text file by looping until the property AtEndOfStream is True.
Use the ReadLine method to read the first line in the text file and store the value in strNextLine.
Because each line of the text file consists of a server name, strNextLine will contain the name of a server.
Use the Add method to add the counter variable i and the value of strNextLine to the Dictionary.
Increment the value of i.
Repeat the process with the next line in the text file.
Set the value of the variable strComputer to the value of the first item in the Dictionary (for example, atl-dc-01). The variable strComputer will then represent the name of the first computer the script must connect to.
Use a GetObject call to connect to the WMI namespace rootcimv2 on the remote computer (as specified by strComputer), and set the impersonation level to “impersonate.”
Use the ExecQuery method to query the Win32_Service class.
This query returns a collection consisting of all the services installed on the computer.
For each server the script connects to, echo the server name and the number of installed services.
Repeat the process using each item in the Dictionary.
Example 17.2. Using a Text File as a Command-Line Argument
 1 Set objArgs = WScript.Arguments
 2 Const ForReading = 1
 3 Set objDictionary = CreateObject("Scripting.Dictionary")
 4 Set objFSO = CreateObject("Scripting.FileSystemObject")
 5 Set objTextFile = objFSO.OpenTextFile(objArgs(0), ForReading)
 6 i = 0
 7 Do While objTextFile.AtEndOfStream <> True
 8     strNextLine = objTextFile.Readline
 9     objDictionary.Add i, strNextLine
10     i = i + 1
11 Loop
12 For Each objItem in objDictionary
13     StrComputer = objDictionary.Item(objItem)
14     Set objWMIService = GetObject("winmgmts:" _
15     & "{impersonationLevel=impersonate}!\" & strComputer& "
ootcimv2")
16     Set colServices = objWMIService.ExecQuery _
17         ("SELECT * FROM Win32_Service")
18     Wscript.Echo strComputer, colServices.Count
19 Next
Databases are especially useful if you have scripts whose arguments might vary each time the script is run. For example, you might have a script that backs up a separate set of computers each day. Although this information can be stored in a text file, you would need to parse the entire text file each time the script ran, picking out the computers of interest. By contrast, you can construct a database query that will retrieve only the computers scheduled to be backed up on a given day. This approach is more efficient than reading through and parsing a text file.
Table 17.1 shows a simple database listing computer names and the day of the week each computer is scheduled for a full backup.
Table 17.1. Sample Backup Schedule Database
ComputerName | BackupDay |
|---|---|
Server1 | Monday |
Server2 | Wednesday |
Server3 | Friday |
Server4 | Monday |
To create a script that runs against the appropriate computers on the appropriate days, you simply include code that limits data retrieval to a specific day. For example, this SQL query returns only the set of computers designated for backup on Thursday:
"SELECT * FROM Computers WHERE BackupDay = 'Thursday'"
By including additional fields within the table, you can construct an all-purpose database that contains the arguments for many of your scripts. For example, additional fields might indicate the date to back up and clear event logs, the dates and times for performance monitoring, or the list of services to be checked on a routine basis.
Scripting Steps
Listing 17.3 contains a script that retrieves arguments from a database. (The database and the database table must exist before this script can run.) To carry out this task, the script must perform the following steps:
Create three constants — adOpenStatic, adLockOptimistic, and adUseClient — and set the value of each to 3.
These constants will be used to configure the CursorLocation, CursorType, and LockType for the connection.
Create an instance of the ADO Connection object (ADODB.Connection).
The Connection object makes it possible for you to issue queries and other database commands.
Create an instance of the ADO Recordset object (ADODB.Recordset).
The Recordset object stores the data returned from your query.
Use the Connection object Open method to open the database with the Data Source Name Inventory.
Be sure to append a semicolon (;) to the Data Source Name.
Set the CursorLocation to 3 (client side) by using the constant adUseClient.
Use the Recordset object Open method to retrieve all the records from the ServerList table.
The Open method requires four parameters:
The SQL query (“SELECT * FROM ServerList”)
The name of the ADO connection being used (objConnection)
The cursor type (adOpenStatic)
The lock type (adLockOptimistic)
Use the MoveFirst method to move to the first record in the recordset.
Set the value of the variable strComputer to the value of the ComputerName field in the recordset. The variable strComputer will then represent the name of the first computer that the script must connect to.
Use a GetObject call to connect to the WMI namespace rootcimv2 on the remote computer (as specified by strComputer), and set the impersonation level to Impersonate.
Use the ExecQuery method to query the Win32_Service class.
This query returns a collection consisting of all the services installed on the computer.
Echo the server name and the number of installed services (determined by using the Count property).
Use the MoveNext method to move to the next record in the recordset, and repeat the process until the end of the recordset has been reached.
Close the recordset.
Close the connection.
Example 17.3. Retrieving Arguments from a Database
 1 Const adOpenStatic = 3
 2 Const adLockOptimistic = 3
 3 Const adUseClient = 3
 4 Set objConnection = CreateObject("ADODB.Connection")
 5 Set objRecordset = CreateObject("ADODB.Recordset")
 6 objConnection.Open "DSN=Inventory;"
 7 objRecordset.CursorLocation = adUseClient
 8 objRecordset.Open "SELECT * FROM ServerList" , objConnection, _
 9     adOpenStatic, adLockOptimistic
10 objRecordSet.MoveFirst
11 Do While Not objRecordSet.EOF
12     strComputer = objRecordSet("ComputerName")
13     Set objWMIService = GetObject("winmgmts:" _
14     & "{impersonationLevel=impersonate}!\" & strComputer& "
ootcimv2")
15     Set colServices = objWMIService.ExecQuery _
16         ("SELECT * FROM Win32_Service")
17     Wscript.Echo strComputer, colServices.Count
18     objRecordSet.MoveNext
19 Loop
20 objRecordset.Close
21 objConnection.Close
Large organizations typically have more than one system administrator. In addition, those administrators generally are not responsible for managing the entire network; instead, they most likely have been delegated control over some subset of the network. For example, Administrator A might be responsible for managing users and computers in the Finance department, while Administrator B might be responsible for managing users and computers in the Human Resources department.
To facilitate system administration, Active Directory is often designed to mimic these management areas. Instead of placing all computer accounts in the Computers container, computer accounts might be put in organizational units (OUs) that correspond to these management areas. Thus all the accounts for computers belonging to the Finance department would be placed in the Finance OU, and all the accounts for computers belonging to the Human Resources department would be placed in the Human Resources OU.
Structuring Active Directory in this fashion not only facilitates system administration but also of benefits script writers. For example, suppose you need to write a script that takes a hardware inventory or checks the service pack version for all the computers under your control. If those computer accounts — and only those computer accounts — are stored in the same Active Directory container, you do not have to create a text file or database from which to extract computer names. Instead, you can simply bind to the appropriate Active Directory container and retrieve all the computer names from there.
Binding to Active Directory also ensures that you will have the most up-to-date list of computers, without having to do additional work to maintain a text file or database containing computer names.
To retrieve a list of computer names from Active Directory, use Active Directory Service Interfaces (ADSI) and:
Bind to the desired container.
Set the Filter property to Computers. This ensures that the query will return only computer accounts.
Use a For-Each loop to return the common name (CN) of each computer that has an account in the Active Directory container. The returned list might look similar to the following, depending on the common names of the computers:
atl-dc-01
atl-dc-02
atl-dc-03
atl-dc-04
Listing 17.4 contains a script that retrieves arguments from an Active Directory container. To carry out this task, the script must perform the following steps:
Create an instance of the Dictionary object.
The Dictionary object will be used to store server names as those names are read from Active Directory.
Set the counter variable i to 0.
The counter variable will be used as the key to each element in the Dictionary. The name of the server will be used as the item associated with each key.
Bind to the Computers container in Active Directory.
Because Computers is a container, you must use the syntax CN=Computers. If you were binding to an OU (for example, the Finance OU), you would use the syntax OU=Finance OU.
Use the Filter property to limit data retrieval to computer accounts.
This prevents the script from attempting to run against user accounts or any other noncomputer objects that might be stored in this container.
For each computer in the Computers container, use the Add method to add the counter variable i and the common name of the computer to the Dictionary.
Increment the value of i.
Repeat the process with the next computer in the container.
Set the value of the variable strComputer to the value of the first item in the Dictionary (for example, atl-dc-01). The variable strComputer will then represent the name of the first computer that the script must connect to.
Use a GetObject call to connect to the WMI namespace rootcimv2 on the remote computer (specified by strComputer), and set the impersonation level to “impersonate.”
Use the ExecQuery method to query the Win32_Service class.
This query returns a collection consisting of all the services installed on the computer.
For each server the script connects to, echo the server name and the number of installed services (determined by using the Count property).
Repeat the process using each server name stored in the Dictionary.
Example 17.4. Retrieving Arguments from an Active Directory Container
 1 Set objDictionary = CreateObject("Scripting.Dictionary")
 2 i = 0
 3 Set objOU = GetObject("LDAP://CN=Computers, DC=fabrikam, DC=com")
 4 objOU.Filter = Array("Computer")
  5 For Each objComputer in objOU
 6     objDictionary.Add i, objComputer.CN
 7     i = i + 1
 8 Next
 9 For Each objItem in objDictionary
10    StrComputer = objDictionary.Item(objItem)
11    Set objWMIService = GetObject("winmgmts:" _
12    & "{impersonationLevel=impersonate}!\" & strComputer& "
ootcimv2")
13    Set colServices = objWMIService.ExecQuery _
14        ("SELECT * FROM Win32_Service")
15    Wscript.Echo strComputer, colServices.Count
16 Next
One limitation of both Microsoft® Visual Basic® Scripting Edition (VBScript) and Windows Script Host (WSH) is the fact that neither language has any built-in functions for displaying output in anything but the most basic of formats. Because of this, script output is typically displayed in a command window by using a series of Wscript.Echo commands. This is acceptable for scripts that display a single item of information per line; for example, you might have a script that reports the name of each service installed on a computer:
Alerter
Application Management
Ati HotKey Poller
Computer Browser
Indexing Service
However, Wscript.Echo is far less than useful for scripts that display multiple items on a single line. For example, the following output displays three separate service-related properties: service display name, service start mode, and service state. Unfortunately, these properties and their values are difficult to distinguish from one another because of the way they are displayed:
Alerter Auto Running
Application Management Manual Running
Ati HotKey Poller Auto Stopped
Computer Browser Auto Running
Indexing Service Manual Stopped
If you have scripts that display a large amount of data, you might not want to simply echo values to the command window; instead, you might prefer to use one of the following techniques to help make your script output easier to read and understand:
Display script output in table form in a command window.
Display script output in a browser window, taking advantage of the formatting capabilities available using HTML.
Use the tabular data control to display script output in a table within a browser window.
Although the command window offers little in the way of formatting options, it is possible to at least align output in table format. Simply displaying multiple properties one after another, all on the same line, usually results in confusion; who really knows what to make of a command window display such as this:
Alerter Auto Running
Application Management Manual Running
Ati HotKey Poller Auto Stopped
Computer Browser Auto Running
Indexing Service Manual Stopped
However, that same data, displayed in the same command window, is remarkably easy to read and interpret when displayed in tabular format:
Alerter                                    Auto             Running
Application Management                     Manual           Running
Ati HotKey Poller                          Auto             Stopped
Computer Browser                           Auto             Running
Indexing Service                           Manual           Stopped
To display data in tabular format, you need to use fixed-width columns. With fixed-width columns, you determine in advance the number of characters that will be displayed in each column in the table. In the preceding example, the following column widths — based on a command window 80 characters wide — are used:
Column 1: 50 characters
Column 2: 17 characters
Column 3: 13 characters
After you decide on the widths for each column, you must then ensure that each item displayed in the table takes up the requisite number of spaces. This is done by using the following procedure on each item of data:
Determine the number of characters in the item. The Len function is used to return the number of characters in a string. For example, the code
Len("dog")returns the value 3 because there are three characters in the word dog.Subtract the number of characters in the string from the predetermined column width. This tells you how many additional character spaces must be added to the string to fill out the column. For example, if the word dog is to be displayed in a column 10 characters wide, you subtract the number of characters in dog (3) from the column width (10).
Use the Space function to append blank spaces to the end of the string, expanding the string to fill the entire column. In the example shown in step 2, you need to append seven spaces to the end of the word dog. Because blank spaces count as characters, adding seven spaces makes the string ten characters long: the letters d, o, and g, and the seven blank spaces.
The net result is that each item of data expands to fill the column width, even if many of the characters in that item are blank spaces. For example, the word dog expands to 10 characters (the underscores represent blank spaces in the string):
d o g -------
A subset of VBScript functions that can be used to format data for display in the command window are shown in Table 17.2. In addition to the functions listed in the table, VBScript also includes functions you can use to display numbers and dates in a specific manner. For more information about these functions (such as FormatNumber, FormatDate, and FormatPercent), see “VBScript Primer” in this book. The discussion of formatting output used in the “VBScript Primer” chapter is similar to the discussion in this chapter.
Table 17.2. VBScript String Formatting Functions
Function | Description |
|---|---|
Len | Returns the number of characters in a string. For example, this code returns the value 15, because “This is a test.” contains 15 characters: strTestString = "This is a test." intCharacters = Len(strTestString) Wscript.Echo intCharacters |
Left | Returns the number of specified characters beginning from the left of a string. For example, this code returns the string “This is”, the first seven characters in the test string: strTestString = "This is a test." strCharacters = Left(strTestString, 7) Wscript.Echo strCharacters |
Returns the number of specified characters beginning from the right of a string and working backward. For example, this code returns the string “ a test.”, the last seven characters in the test string: strTestString = "This is a test." strCharacters = Right(strTestString, 7) Wscript.Echo strCharacters | |
Space | Appends the specified number of spaces to the end of the string. For example, this code returns the string “This is a test.---------------”, with the hyphens representing the 15 blank spaces appended to the end of the string: strTestString = "This is a test." strCharacters = strTestString & Space(15) Wscript.Echo strCharacters |
Scripting Steps
Listing 17.5 contains a script that displays formatted script output in a command window. To carry out this task, the script must perform the following steps:
Create a variable to specify the computer name.
Use a GetObject call to connect to the WMI namespace rootcimv2, and set the impersonation level to “impersonate.”
Use the ExecQuery method to query the Win32_Service class.
This query returns a collection consisting of all the services installed on the computer.
For each service in the collection, determine the number of spaces that must be appended to the service display name to ensure that the name takes up 50 spaces.
This is done by setting the variable intPadding to 50 (the number of spaces in the first column of the display) minus the length of the service display name (determined by using the Len function). For example, if the service display name contains 23 characters, intPadding is equal to 27 (50–23).
Determine the number of spaces that must be appended to the service start mode to ensure that the name takes up 17 spaces.
This is done by setting the variable intPadding2 to 17 (the number of spaces in the second column of the display) minus the length of the service start mode (determined by using the Len function). For example, if the start mode contains 4 characters (such as a start mode of Auto), intPadding is equal to 13 (17–4).
Set the variable strDisplayName to the service display name plus enough blank spaces to make the display name take up 50 characters.
To do this, set strDisplayName to the display name of the service, and then use the Space function to add the proper number of blank spaces. The proper number of blank spaces is configured by using intPadding as the parameter for the Space function.
The net result of using the Space function will be similar to this (the hyphens indicate blank spaces added to the service name):
Application Management

Application Management-----------------------------
Set the variable strStartMode to the service start mode, plus enough blank spaces to make the start mode occupy 17 characters.
Echo strDisplayName, strStartMode, and the service state.
Example 17.5. Displaying Tabular Output in a Command Window
 1 strComputer = "."
 2 Set objWMIService = GetObject("winmgmts:" _
 3     & "{impersonationLevel=impersonate}!\" & strComputer& "
ootcimv2")
 4 Set colServices = objWMIService.ExecQuery _
 5     ("SELECT * FROM Win32_Service")
 6 For Each objService in colServices
 7     intPadding = 50 - Len(objService.DisplayName)
 8     intPadding2 = 17 - Len(objService.StartMode)
 9     strDisplayName = objService.DisplayName & Space(intPadding)
10     strStartMode = objService.StartMode & Space(intPadding2)
11     Wscript.Echo strDisplayName & strStartMode & objService.State
12 Next
When the script runs under CScript, it displays formatted output similar to the following:
Alerter                                 Auto                Running

Application Management                  Manual              Running

Ati HotKey Poller                       Auto                Stopped

Computer Browser                        Auto                Running

Indexing Service                        Manual              Stopped
By using the various string manipulation functions found in VBScript, you can display data in tabular format within the command window. This makes the data easier to analyze but only partly compensates for the limitations found in the command window. For example, no VBScript function lets you use multiple fonts and multiple colors within the command window. Likewise, no VBScript method lets you easily print data from within the command window. Instead, you must copy the entire data set (assuming that the data does not exceed the command window display buffer), paste the data into another application, and then print the data.
If you prefer to use formatting that goes beyond a tabular display or if you would like the ability to print the returned data, you might consider outputting information to Internet Explorer rather than the command window. Unlike the command window, Internet Explorer lets you use multiple fonts and multiple colors; you can even include graphics within your output. In addition, you can use the Print function of the browser to print the data, without having to copy and paste it into another application.
In the examples that follow, you do not create a Web page (that is, an .HTM file). Instead, you use VBScript to instantiate an instance of Internet Explorer, and you then use VBScript commands to control that instance of the browser. This is possible because Internet Explorer provides an Automation object model that can be controlled from within a script. You can use this object model to create an instance of Internet Explorer and then do such things as:
Configure the user interface (for example, hide or display the address bar or set the window size).
Open a specific file or navigate to a specific URL.
Dynamically show or hide the browser window based on specified conditions.
Write data to the page displayed in the browser window.
In fact, nearly all the functionality of Internet Explorer is exposed through the Automation object model. Some of the properties and methods especially useful to script writers are shown in Table 17.3.
Table 17.3. Internet Explorer Properties and Methods
Property/Method | Description |
|---|---|
Application | Used with the CreateObject method to return an instance of Internet Explorer. For example: Set objExplorer = _
CreateObject("InternetExplorer.Application")
|
Busy | Returns a Boolean value indicating whether Internet Explorer is still loading or performing some other activity. This is often used at the start of a script to ensure that Internet Explorer is fully loaded before any other script actions take place. Your script might check the Busy status and, if True, pause for a specified amount of time and then check again. As soon as Busy is False, the script can proceed. For example: Do While (objExplorer.Busy)
Wscript.Sleep 250
Loop
|
FullScreen | Boolean value that sets the Internet Explorer window mode. If True, the window is maximized, and the status bar, toolbar, menu bar, and title bar are hidden. |
Height | Sets the height of the Internet Explorer window in pixels. |
Width | Sets the width of the Internet Explorer window in pixels. |
Left | Sets the position of the Internet Explorer window relative to the left side of the screen. For example, this command positions the window 200 pixels from the left side of the screen: objExplorer.Left = 200 |
Top | Sets the position of the Internet Explorer window relative to the top of the screen.For example, this command positions the window 100 pixels from the top of the screen: objExplorer.Top = 100 |
MenuBar | Toggles the display of the menu bar on or off. If 0, the menu bar is not visible; if 1, the menu bar is displayed. |
StatusBar | Toggles the display of the status bar on or off. If 0, the status bar is not visible; if 1, the status bar is displayed. |
StatusText | Sets the text in the status bar. |
ToolBar | Toggles the display of the toolbar on or off. If 0, the toolbar is not visible; if 1, the toolbar is displayed. |
Visible | Determines whether Internet Explorer is visible on the screen. Any instance of Internet Explorer you create will not be visible until you set this property to 1. To hide a running instance of Internet Explorer, set the value to 0. |
Loads the specified document in the Internet Explorer window. To load a blank document Set the property to “about:blank”. For example: ObjExplorer.Navigate "about:blank" To load a file Specify the file name, prefacing the path with the file:// designator. For example: ObjExplorer.Navigate "file://c:scripts To load a Web page from a URL Specify the URL, prefacing the path with the http:// designator. For example ObjExplorer.Navigate "http://www.fabrikam.com" | |
Quit | Closes Internet Explorer and terminates the object instance. |
Refresh | Updates the Internet Explorer instance. |
Internet Explorer also exposes several other objects that let you not only control the behavior of the browser but also dynamically control the contents of the browser window. For example, you might create an instance of Internet Explorer and open a blank Web page. You can then use the Document object to dynamically change the contents of that Web page.
This has nothing to do with creating pages for the World Wide Web. In fact, you still create files with the .vbs file name extension; you do not create Web pages with the .htm file name extension. Instead, you use a script to open Internet Explorer and then use a combination of scripting code and HTML tags to redirect the script output to the browser window.
Creating an Instance of Internet Explorer
You can use Internet Explorer as a display device by creating an instance of the browser and then issuing the appropriate commands to:
Configure the user interface.
Navigate to the desired pages.
Write information to the document that is currently loaded.
To create an instance of Internet Explorer, use the CreateObject method and the ProgID InternetExplorer.Application. For example, this line of code creates an instance of Internet Explorer and assigns it to the object variable objExplorer:
Set objExplorer = CreateObject("InternetExplorer.Application")
After the object has been created, you can control it by using the object variable assigned to that instance of Internet Explorer. For example, this command will hide the toolbar:
objExplorer.ToolBar = 0
Any commands you issue will affect only the instance of Internet Explorer you created. If you have multiple copies of the browser running, a command to hide the toolbar will hide only the toolbar in the instance of Internet Explorer under the control of your script. The toolbar will remain visible in any other instances of Internet Explorer that are running.
Scripting Steps
Listing 17.6 contains a script that creates an instance of Internet Explorer. To carry out this task, the script must perform the following steps:
Create an instance of Internet Explorer.
Use the Navigate method to open a blank Web page.
This is done by using “about:blank” as the method parameter. You can also open a URL or a file by passing the appropriate path to the Navigate method. For example, you can open the file C:ScriptsService_data.htm by using this code:
objExplorer.Navigate "file://c:scriptsservice_data.htm"
Configure various Internet Explorer properties, such as the height and width of the window, and hide items such as the toolbar and status bar.
Set the Visible property to 1 to display the instance on the screen. Internet Explorer will not appear on the screen unless you set the Visible property to 1.
Example 17.6. Creating an Instance of Internet Explorer
1 Set objExplorer = CreateObject("InternetExplorer.Application")
2 objExplorer.Navigate "about:blank"
3 objExplorer.ToolBar = 0
4 objExplorer.StatusBar = 0
5 objExplorer.Width = 300
6 objExplorer.Height = 150
7 objExplorer.Left = 0
8 objExplorer.Top = 0
9 objExplorer.Visible = 1
When the script in Listing 17.6 is run, you will see a blank Web page similar to that shown in Figure 17.1.
Web pages provide an alternative to displaying script output in the command window. Unlike the command window, Web pages support a wide array of formatting options, including color, fonts, and graphics. This lets you display script output in a manner that is much easier to decipher at a glance than output displayed in the command window. For example, you might use red to format the status of any services that are stopped. That way, an administrator can verify that all services are up and running without having to stop and read through the entire display. Figure 17.2 shows a simple example of how you might display service status information.

Perhaps the easiest way to display real-time data is to use the WriteLn method. With this method, you can use a script to open a blank Web page and then send HTML code to the page. Each time you send information to the Web page by using WriteLn, that information is appended to the end of the page. For example, this code writes the numbers 1 through 5 to a Web page, without any formatting of any kind:
objDocument.Writeln "1"
objDocument.Writeln "2"
objDocument.Writeln "3"
objDocument.Writeln "4"
objDocument.Writeln "5"
The resulting Web page will look like this:
12345
To place each number on a separate line, include the HTML tag <BR> as part of the WriteLn parameter:
objDocument.Writeln "1<BR>"
objDocument.Writeln "2<BR>"
objDocument.Writeln "3<BR>"
objDocument.Writeln "4<BR>"
objDocument.Writeln "5<BR>"
The revised Web page will look like this:
1
2
3
4
5
You can include any HTML tags as part of the WriteLn parameter; in that regard, dynamically creating a Web page is no different than using a text editor to write an .htm file. For example, to write text formatted with the <H2> heading level, use code similar to this:
objDocument.Writeln "<H2>This is an H2 heading</H2>"
Scripting Steps
Listing 17.7 contains a script that displays data in a Web page. To carry out this task, the script must perform the following steps:
Create an instance of Internet Explorer.
Open a blank Web page by navigating to “about:blank”.
Configure various Internet Explorer properties, such as the width and height of the window, and hide items such as the toolbar and status bar.
Set the Visible property to 1 to display the instance on the screen.
Create an object reference to the Document object.
Prepare the Web page for writing by opening the Document object (objDocument.Open).
Use HTML tags to:
Set the page title.
Set the background color (bgcolor) to white.
Insert a table that fills 100% of the document width.
Create the initial table row with two columns: one labeled Service and the other labeled State.
Create a variable to specify the computer name.
Use a GetObject call to connect to the WMI namespace rootcimv2, and set the impersonation level to “impersonate.”
Use the ExecQuery method to query the Win32_Service class.
This query returns a collection consisting of all the services installed on the computer.
For each service in the collection, create a new row in the table. Each row has two columns, one containing the service name and the other containing the service state.
Use HTML tags to mark the end of the table, the document body, and the document head.
Example 17.7. Displaying Data in a Web Page
 1 Set objExplorer = CreateObject("InternetExplorer.Application")
 2 objExplorer.Navigate "about:blank"
 3 objExplorer.ToolBar = 0
 4 objExplorer.StatusBar = 0
 5 objExplorer.Width = 800
 6 objExplorer.Height = 570
 7 objExplorer.Left = 0
 8 objExplorer.Top = 0
 9 objExplorer.Visible = 1
10
11 Do While (objExplorer.Busy)
12 Loop
13
14 Set objDocument = objExplorer.Document
15 objDocument.Open
16
17 objDocument.Writeln "<html><head><title>Service Status</title></head>"
18 objDocument.Writeln "<body bgcolor='white'>"
19 objDocument.Writeln "<table width='100%'>"
20 objDocument.Writeln "<tr>"
21
22 objDocument.Writeln "<td width='50%'><b>Service</b></td>"
23 objDocument.Writeln "<td width='50%'><b>State</b></td>"
24 objDocument.Writeln "</tr>"
25
26 strComputer = "."
27 Set objWMIService = GetObject("winmgmts:" _
28     & "{impersonationLevel=impersonate}!\" & strComputer& "
ootcimv2")
29 Set colServices = objWMIService.ExecQuery _
30     ("SELECT * FROM Win32_Service")
31
32 For Each objService in colServices
33     objDocument.Writeln "<tr>"
34     objDocument.Writeln "<td width='50%'>" & objService.DisplayName & "</td>"
35     objDocument.writeln "<td width='50%'>" & objService.State & "</td>"
36     objDocument.Writeln "</tr>"
37 Next
38
39 objDocument.Writeln "</table>"
40 objDocument.Writeln "</body></html>"
41 objDocument.Write()
42 objDocument.Close
The WriteLn method allows you to add information to a Web page: Each time you call the WriteLn method, the new data is appended to the bottom of the page. This works fine in many situations. For example, if you want to extract a particular set of records from an event log, you can display those records in a Web page by using WriteLn. The fact that WriteLn appends these records one right after the other is no problem — in fact, that is exactly what you want it to do.
In other cases, however, you might want to periodically clear the screen to make room for new information. For example, if you have a script that monitors printer status every 15 minutes, you want the initial printer status displayed in the Web page. When the printer status is resampled, you probably do not want the second set of data to be appended to the end of the first set. Instead, you want to clear the browser screen and display only the current set of data.
One quick way to clear the browser screen is to create a TextRange object that encompasses the entire document and then set the Text property of that object to nothing. A TextRange object represents text within an HTML element; these elements include the document body, a button, a text box, and any other element that has a Text property.
For example, this code creates a TextRange object that encompasses the entire body of the document and then clears that object by setting the Text property to an empty string (“”):
Set objTextRange = objDocument.body.CreateTextRange() objTextRange.Text = ""
Although Internet Explorer provides an excellent alternative to displaying script output in a command window, you can encounter a problem if the browser window is closed before your script finishes running. For example, you might have a script that creates an instance of Internet Explorer and then writes service information to the document window. If Internet Explorer is closed before you finish writing the service information, the script will fail; this occurs because the script is attempting to write to an instance of the browser that no longer exists.
To avoid this problem, you can configure your script to respond to Internet Explorer events. When Internet Explorer is closed, the browser triggers an onQuit event. Your script can watch for this event and take the appropriate action when it occurs. For example, the script might create a new instance of Internet Explorer, or it might use the Wscript.Quit method to terminate itself.
When creating this instance of Internet Explorer, you must use the Wscript CreateObject method; this is the only way to add event handling to a script. To enable event handling, CreateObject requires two parameters: the ProgID “InternetExplorer.Application” and a second argument consisting of a name to be given to the event handler. This name typically bears some relation to the created object followed by an underscore. For example, this code assigns the name IE_ to the entity responsible for handling Internet Explorer events:
Set objExplorer = WScript.CreateObject("InternetExplorer.Application", "IE_")
Although you do not have to follow this naming convention, it does make it easier for someone to read your script and understand how it works.
The event handler then watches for events triggered by Internet Explorer. When an event occurs, the event handler checks the script to see whether any procedures should run in response to that event. For example, this procedure causes the script to terminate itself any time the onQuit event is detected:
Sub IE_onQuit()
   Wscript.Quit
End Sub
In other words, any time the browser window is closed (thus triggering the onQuit event), the script will terminate itself. The script will thus automatically quit any time Internet Explorer quits.
You can create other procedures to respond to other events as well. For example, to respond to the onLoad event fired by Internet Explorer, create a procedure named IE_onLoad().
Note
Event handling will not work with all scripts. WSH scripts automatically terminate themselves when the last line of code is run; in some cases, therefore, the script will terminate itself before the Internet Explorer event can be fired. If this is a problem, you might have to use Wscript.Sleep to pause the script for a specified amount of time, or you might have to create a loop that keeps the script running until a particular event is detected.
Scripting Steps
Listing 17.8 contains a script that terminates itself when the browser window closes. To carry out this task, the script must perform the following steps:
Use the Wscript CreateObject method to create an instance of Internet Explorer, and assign the name IE_ to the event handler responsible for monitoring Internet Explorer events.
Open a blank Web page by navigating to “about:blank”.
Configure various Internet Explorer properties, such as the width and height of the window, and hide items such as the toolbar and status bar.
Set the Visible property to 1 to display the instance on the screen.
Create an object reference to the Document object.
Prepare the Web page for writing by opening the Document object (objDocument.Open).
Create a variable to specify the computer name.
Use a GetObject call to connect to the WMI namespace rootcimv2, and set the impersonation level to “impersonate.”
Use the ExecQuery method to query the Win32_Service class.
This query returns a collection consisting of all the services installed on the computer.
For each service in the collection, use the WriteLn method to write the service display name and a carriage return/linefeed (<BR>) to the browser window.
Because this is a demonstration script, a two-second pause (Wscript.Sleep 2000) is inserted after each service name is written to the browser. This ensures that the script will continue running long enough for you to close the browser window.
Create a subroutine named IE_onQuit(). This subroutine will be called whenever Internet Explorer is closed.
If the subroutine is called (meaning Internet Explorer has been closed), use the Wscript.Quit method to terminate the script.
To demonstrate how the script responds to Internet Explorer events, start the script and then close the browser window before all the service names have been written. When the browser window closes, the script will automatically terminate itself without generating an error.
Example 17.8. Stopping a Script When Internet Explorer Closes
 1 Set objExplorer = WScript.CreateObject _
 2     ("InternetExplorer.Application", "IE_")
 3 objExplorer.Navigate "about:blank"
 4 objExplorer.ToolBar = 0
 5 objExplorer.StatusBar = 0
 6 objExplorer.Width = 400
 7 objExplorer.Height = 250
 8 objExplorer.Left = 0
 9 objExplorer.Top = 0
10 objExplorer.Visible = 1
11 Set objDocument = objExplorer.Document
12 objDocument.Open
13 strComputer = "."
14 Set objWMIService = GetObject("winmgmts:" _
15     & "{impersonationLevel=impersonate}!\" & strComputer& "
ootcimv2")
16 Set colServices = objWMIService.ExecQuery _
17     ("SELECT * FROM Win32_Service")
18 For Each objService in colServices
19     objDocument.Writeln objService.DisplayName & "<BR>"
20     Wscript.Sleep 2000
21 Next
22 Sub IE_onQuit()
23    Wscript.Quit
24 End Sub
Although you can control Internet Explorer from a separate script, you will have to include code to repeatedly ensure that the browser is still running. If you do not, you will encounter problems such as:
The browser is closed, and an error occurs when the script attempts to update a browser instance that no longer exists.
The browser is closed, but the script continues to run. (Without additional coding, closing the browser will not stop the script.) This can be confusing, especially if you restart the script and now have two copies of the same script running in parallel.
Embedding the script code inside a Web page enables you to overcome these problems. When you embed the code, the Web page and the script are linked together; closing the Web page will also terminate the script. However, this introduces a new set of problems. Because Internet Explorer is designed for use over the Internet, it has a number of built-in security precautions that prevent Web sites from harming the local computer in any way. For example, if you include Windows Management Instrumentation (WMI) or another ActiveX® control in a Web page, a message box similar to the one shown in Figure 17.3 will appear when the script is run.

In turn, the script will suspend itself until you click Yes. This means you cannot create a Web page that can refresh itself (for example, a Web page that periodically updates the status of all the printers on a print server). Each time the page queries the WMI service, the “unsafe for scripting” message box will appear and the script will pause until you click Yes.
One way to work around the security issues inherent in Internet Explorer is to embed your script within a hypertext application (HTA) rather than an HTML file. In its simplest form, an HTA is nothing but a Web page with the .hta file name extension rather than the .htm file name extension. In fact, you can convert any Web page to an HTA just by changing the file name extension.
However, HTAs run in a different process (Mshta.exe) than do HTML files. This allows HTAs to bypass Internet Explorer security. (Of course, HTAs still respect such things as operating system security and the NTFS file system security.) HTAs are fully trusted applications, meaning that you will not receive any security warnings when using objects such as WMI or the FileSystemObject.
Although HTAs respond to the same commands that can be issued to an instance of Internet Explorer, a number of additional attributes are available through the HTA object model. Several of these attributes are listed in Table 17.4.
Table 17.4. HTA Object Model
Attribute | Description |
|---|---|
ApplicationName | Sets the name of the HTA. |
Border | Sets the type of border used for the HTA window. Values include:
|
BorderStyle | Sets the style of the content border in the HTA window. Values are:
|
Caption | Yes/No value specifying whether the HTA displays a title bar. The default value is Yes. |
Icon | Sets the path name of the icon that appears in the upper-left corner of the HTA window. The icon can be either a .ico or a .bmp file. If not specified, a generic application icon is used. |
ID | Sets the identifier for the <HTA:Application> tag. This property is required if you need to write a script that returns the attributes of the HTA. |
MaximizeButton | Yes/No value specifying whether the HTA displays a Maximize button in the title bar. The default value is Yes. |
MinimizeButton | Yes/No value specifying whether the HTA displays a Minimize button in the title bar. The default value is Yes. |
ShowInTaskbar | Yes/No value specifying whether the HTA is shown in the Windows taskbar.Regardless of the value set for this property, the HTA will always appear in the list of applications that are accessible when you press ALT+TAB. The default value is Yes. |
SingleInstance | Yes/No value specifying whether more than one instance of this HTA can be active at any given time. For this property to take effect, you must also specify the ApplicationName attribute. The default value is Yes. |
SysMenu | Yes/No value specifying whether the HTA displays the System menu in the title bar. The System menu is displayed in the upper-left corner of the HTA window and provides access to menu items such as Minimize, Maximize, Restore, and Close. The default value is Yes. |
WindowsState | Sets the initial size of the HTA window. Values are:
|
HTML applications require no special coding; you can create an HTA simply by changing the .htm file extension of a Web page to .hta. However, by adding the <HTA:Application> tag to the Web page code, you can gain additional control over how the HTA will be displayed on the screen and which elements of the user interface will be available. To configure any of these elements, include the <HTA:Application> tag and the appropriate elements within the Web page <HEAD> tag.
For example, the following code snippet prevents the HTA from being displayed in the taskbar:
<HTA:Application
    ShowInTaskbar = No
>
Scripting Steps
Listing 17.9 contains HTML tags for creating a sample HTA file. Type this code into a text editor, and then save it with the .hta file name extension.
To create an HTA file, you must:
Insert the beginning <HTML> and <HEAD> tags.
Insert the <HTA:Application> tag. Within this tag, set the configuration options for the HTA file. In this example, these options include setting Border to Thick and BorderStyle to Complex.
Insert the ending </HEAD> tag.
Insert the <BODY> tag, and then insert the body of the Web page, using standard HTML tags.
Insert the </BODY> and </HEAD> tags.
Example 17.9. Creating an HTA File
 1 <HTML>
 2 <HEAD>
 3 <HTA:Application
 4     Border = Thick
 5     BorderStyle = Complex
 6     ShowInTaskBar = No
 7     MaximizeButton = No
 8     MinimizeButton = No
 9 >
10 </HEAD>
11 <BODY>
12 This is a sample HTA.
13 </BODY>
14 </HTML>
A sample HTA that displays service information is shown in Listing 17.10. In this script, the code to retrieve service information and to write that data to the browser window is included in a window_onLoad procedure. This procedure automatically runs anytime the Web page is loaded. As a result, service information will be displayed anytime you start (or refresh) the HTA.
Example 17.10. Using an HTA to Display Service Information
 1 <HTML>
 2 <HEAD>
 3 <HTA:Application
 4     Border = Thick
 5     BorderStyle = Complex
 6     ShowInTaskBar = No
 7     MaximizeButton = No
 8     MinimizeButton = No
 9 >
10 <SCRIPT LANGUAGE="VBScript">
11 Sub window_onLoad
12     Set objDocument = self.Document
13     objDocument.open
14     strComputer = "."
15     Set objWMIService = GetObject("winmgmts:" _
16         & "{impersonationLevel=impersonate}!\" & strComputer & "
ootcimv2")
17     Set colServices = objWMIService.ExecQuery _
18         ("SELECT * FROM Win32_Service")
19     For Each objService in colServices
20         objdocument.WriteLn objService.DisplayName & "<br>"
21     Next
22 End Sub
23 </SCRIPT>
24 </HEAD>
25 <BODY>
26 </BODY>
27 </HTML>
The script shown in Listing 17.10 provides a quick and easy way to display data. Like most standard Web pages, however, it does not allow you to manipulate that data in any way. The data cannot be sorted; instead, it is displayed in the order it is returned by WMI. Sorting is not the only limitation of this script; in addition, you cannot retrieve information for all the services on a computer and then choose to display only those services that are running. To filter the data display, you would need to edit and rerun the script so that it returns only the services that are running. To again look at all the services, you would need to re-edit and rerun the script.
The tabular data control (an ActiveX control that is installed with Internet Explorer) provides a way to display data in tabular format. But the tabular data control does more than just make it quick and easy to display data in a table. By adding a few lines of code, you can sort this data any way that you want; for example, you can sort a list of services by name, by status, by the service account under which they run, or by any other property in your data set. Likewise, you can also filter the data dynamically; for example, you can show all the services, dynamically hide all the services that are not running, and then dynamically show all the services again. This can all be done without having to refresh the page or requery the data set.
With the tabular data control, you do the following:
Save the data to be displayed to a text file (typically a comma-separated values file). The first row in the text file is the field headers; subsequent rows represent the field data for a record.
For example, a text file containing service information might look like this:
Service Name,Service Type,Service State

Alerter,Share Process,Running

AppMgmt,Share Process,Running

Ati HotKey Poller,Own Process,Stopped
Insert the tabular data control in the Web page. As part of this process, indicate the path to the text file containing the data to be displayed. The code for inserting the tabular data control looks similar to this (the individual parameters are explained in Table 17.5):
<OBJECT id="serviceList" CLASSID="clsid:333C7BC4-460F-11D0-BC04-
0080C7055A83">
   <PARAM NAME="DataURL" VALUE="c:scriptsservice_list.csv">
   <PARAM NAME="UseHeader" VALUE="True">
   <PARAM NAME="TextQualifier" VALUE=",">
</OBJECT>
Table 17.5. Tabular Data Control Properties
Property
Description
DataURL
Specifies the location of the data file. This can be either a URL or a file path.For example, this parameter sets the DataURL to C:ScriptsService_List.csv:
<PARAM NAME="DataURL"
VALUE="c:scriptsservice_list.csv">
FieldDelim
Identifies the field delimiter, the character used to mark the end of a field in the data file. By default, this is the comma. To set the field delimiter to another character, use the HTML value for that character. This example sets the field delimiter to the tab character:
<PARAM NAME = FieldDelim VALUE = "	">
TextQualifier
Specifies characters that might surround data fields in a text file. For example, in this file, the field delimiter is the comma, and the text qualifier is the quotation mark:
Ken, Myer, "Human Resources"
Identifies the character used to mark the end of each row of data. The default value is the newline character (NL), which simply means that new lines are denoted by pressing ENTER at the end of the previous line.
UseHeader
Specifies whether the first line of the data file contains field headers. The default value is False.
Sort
Specifies the sort order for the table. For more information, see “Sorting Data by Using the Tabular Data Control” later in this chapter.
Filter
Provides the ability to display a subset of records based on specific criteria. For more information, see “Filtering Data by Using the Tabular Data Control” later in this chapter.
Create the initial data row for the table. Instead of inserting data into this row, you set the Datafld (data field) property for each cell to correspond to a particular field in the text file. If your text file includes the field headers Service Name, Service Type, and Service State, you would set the Datafld property for the first cell in the table to Service Name, the Datafld property for the second cell to Service Type, and the Datafld property for the third cell to Service State.
The actual HTML code might look like this:
<TR>
<TD><DIV datafld="Service Name"></DIV></TD>
<TD><DIV datafld="Service Type"></DIV></TD>
<TD><DIV datafld="Service State"></DIV></TD>
</TR>
After you have created the initial row, all subsequent rows in the table are created dynamically when the text file is read. Setting up one row in the table results in multiple rows (one for each line in the text file) being displayed when the Web page is opened.
You can also use other HTML formatting in creating your table. For example, if you want to display the Service Name in bold, you can insert the HTML tag for bold (<B>):
<TD><B><DIV datafld="Service Name"></DIV></B></TD>
The tabular data control supports the properties shown in Table 17.5.
Scripting Steps
Listing 17.11 contains a Web page that displays script output by using the tabular data control. To carry out this task, the Web page must include the following:
The starting <HTML> and <BODY> tags.
An <OBJECT> tag used to insert the tabular data control. You must specify an id for the control as well as this CLASSID:
clsid:333C7BC4-460F-11D0-BC04-0080C7055A83.
In addition, specify the following parameters:
DataURL, along with the path to the comma-separated-values file.
UseHeader, indicating that the first row in the comma-separated-values file contains header information.
TextQualifier, indicating that the comma is used to separate items within each row of the text file.
An <H2> tag used to provide a heading for the page.
A table, with the datasrc set to #serviceList (the id assigned to the tabular data control, prefaced by the pound sign [#]). This means that the table will derive its data from the tabular data control. If your id is serviceInformation, the datasrc is set to #serviceInformation.
A <THEAD> and <TR> tag to mark the first row in the table. Three <TD> tags are used to indicate individual columns in the table:
Computer
Service
Status
A <TBODY> and <TROW> tag used to delineate the data columns. Each column must specify a datafld used in the header row of the text file:
System Name
Display Name
Service State
Ending tags for the table, body, and HTML.
Example 17.11. Displaying Data by Using the Tabular Data Control
 1 <HTML>
 2 <BODY>
 3 <OBJECT id="serviceList" CLASSID="clsid:333C7BC4-460F-11D0-BC04-0080C7055A83">
 4    <PARAM NAME="DataURL" VALUE="c:scriptsservice_list.csv">
 5    <PARAM NAME="UseHeader" VALUE="True">
 6    <PARAM NAME="TextQualifier" VALUE=",">
 7 </OBJECT>
 8 <H2>Current Service Status</H2>
 9 <table border='1' width='100%' cellspacing='0' datasrc=#serviceList>
10 <THEAD><TR>
11 <TD>Computer</TD>
12 <TD>Service</TD>
13 <TD>Status</TD>
14 </TR>
15 </THEAD>
16 <TBODY>
17 <TR>
18 <TD><B><DIV datafld="System Name"></DIV></B></TD>
19 <TD><DIV datafld="Display Name"></DIV></TD>
20 <TD><DIV datafld="Service State"></DIV></TD>
21 </TR>
22 </TBODY>
23 </TABLE>
24 </BODY>
25 </HTML>
One limitation of WMI and the WMI Query Language is that you cannot sort by a particular item. For example, when you retrieve information about the print queues installed on a computer, the returned data is always sorted by print queue name. There is no way to sort by the number of items currently in the queue or by the number of jobs that have been printed.
One way to work around this limitation is to save the data to a comma-separated-values file and then use the tabular data control to display the data. Using the tabular data control, you can specify any sort order you want. This is done by including the SortColumn parameter and specifying the column name (as it appears in the text file header) as the parameter value. For example, adding this line of code to Listing 17.11 sorts the service information by service state:
<PARAM NAME="SortColumn" VALUE="Service State">
To sort by multiple columns (for example, sorting first by service state and then by display name), set the value to the appropriate column names, separating the names with semicolons:
<PARAM NAME="SortColumn" VALUE="Service State;Display Name">
By default, data is sorted in ascending order (A through Z, 0 through 9). To sort in descending order (Z through A, 9 through 0), prefix a minus sign (–) to the column name. For example:
<PARAM NAME="SortColumn" VALUE="-Service State">
To ensure that data is sorted correctly, you can also specify the field type within the text-file header. If you do not specify the field type, all data will be sorted as if it consists of text strings. That means numeric data will be sorted like this:
1
11
2
27
3
Field types recognized by the tabular data control are shown in Table 17.6.
Table 17.6. Field Types Recognized by the Tabular Data Control
Field Type | Description |
|---|---|
String | Text data. This is the default value if a field type is not specified. |
Date | Date values. The Date type can be optionally followed by a space and the letters D, M, and Y in any order. These indicate how the date has been formatted. For example, if the date is formatted Day/Month/Year (22/10/2001), you use DMY as the optional parameter. |
True/False or Yes/No values. For True, you can use any of the following:
For False, you can use any of the following:
| |
Int | Integer (positive or negative) value. |
Float | Number (positive or negative) values containing a decimal point. The decimal separator used by the float type is determined by the Language property of the operating system. |
To specify field types within the text file header, append a colon and the field type to each field name. For example:
Service Name:Text,Local Service:Boolean,Install Date:Date MDY
Scripting Steps
Listing 17.12 contains a Web page that displays script output by using the tabular data control. In this example, the output is sorted by Service State. To carry out this task, the Web page must include the following:
The starting <HTML> and <BODY> tags.
An <OBJECT> tag used to insert the tabular data control. You must specify an id for the control as well as the CLASSID
clsid:333C7BC4-460F-11D0-BC04-0080C7055A83.
In addition, specify the following parameters:
DataURL, along with the path to the comma-separated-values file.
UseHeader, indicating that the first row in the comma-separated-values file contains header information.
TextQualifier, indicating that the comma is used to separate items within each row of the text file.
SortColumn, which specifies the datafld to be sorted on (Service State).
An <H2> tag used to provide a heading for the page.
A table, with the datasrc set to #serviceList, the id assigned to the tabular data control. This means that table will derive its data from the tabular data control.
A <THEAD> and <TR> tag to mark the first row in the table. Three <TD> tags are used to indicate individual columns in the table:
Computer
Service
Status
A <TBODY> and <TROW> tag used to delineate the data columns. The three columns must specify a datafld used in the header row of the text file:
System Name
Display Name
Service State
Ending tags for the table, body, and HTML.
Example 17.12. Displaying Sorted Data by Using the Tabular Data Control
 1 <HTML>
 2 <BODY>
 3 <OBJECT id="serviceList" CLASSID="clsid:333C7BC4-460F-11D0-BC04-0080C7055A83">
 4    <PARAM NAME="DataURL" VALUE="c:scriptsservice_list.csv"> <PARAM
 5 NAME="UseHeader" VALUE="True">
 6    <PARAM NAME="TextQualifier" VALUE=",">
 7    <PARAM NAME="SortColumn" VALUE="Service State">
 8 </OBJECT>
 9 <H2>Current Service Status</H2>
10 <table border='1' width='100%' cellspacing='0' datasrc=#serviceList>
11 <THEAD><TR>
12 <TD>Computer</TD>
13 <TD>Service</TD>
14 <TD>Status</TD>
15 </TR>
16 </THEAD>
17 <TBODY>
18 <TR>
19 <TD><B><DIV datafld="System Name"></DIV></B></TD>
20 <TD><DIV datafld="Display Name"></DIV></TD>
21 <TD><DIV datafld="Service State"></DIV></TD>
22 </TR>
23 </TBODY>
24 </TABLE>
25 </BODY>
26 </HTML>
Data can also be filtered by using the tabular data control. This capability can help administrators quickly spot items of interest. For example, if an administrator is interested only in services that are currently stopped, he or she can use a filter to display only those services. In this way, a single data source can serve multiple purposes. Otherwise, you might have to save information about stopped services to one text file and information about paused services to another text file.
To create a filter for the tabular data control, set the value for the Filter parameter to the name of the column to be filtered, and set the criteria for which records are to be included or excluded. For example, this line of code creates a filter that will limit data retrieval to those records for which the Service State is Stopped:
<PARAM NAME="Filter" VALUE="Service State = Stopped">
Note
Although it is beyond the scope of this chapter to demonstrate, both filtering and sorting can be done interactively. For example, you might configure your Web page so that each time you click a column heading, the data is sorted by that column.
Scripting Steps
Listing 17.13 contains a Web page that displays script output by using the tabular data control. In this example, a filter is applied so that only services that are stopped are displayed. To carry out this task, the Web page must include the following:
The starting <HTML> and <BODY> tags.
An <OBJECT> tag used to insert the tabular data control. You must specify an id for the control as well as the CLASSID:
clsid:333C7BC4-460F-11D0-BC04-0080C7055A83.
In addition, specify the following parameters:
DataURL, along with the path to the comma-separated-values file.
UseHeader, indicating that the first row in the comma-separated-values file contains header information.
TextQualifier, indicating that the comma is used to separate items within each row of the text file.
Filter, which specifies the datafld and value to be filtered on (ServiceState = ’Stopped’).
An <H2> tag used to provide a heading for the page.
A table, with the datasrc set to #serviceList, the id assigned to the tabular data control. This means that table will derive its data from the tabular data control.
A <THEAD> and <TR> tag to mark the first row in the table. Three <TD> tags are used to indicate individual columns in the table:
Computer
Service
Status
A <TBODY> and <TROW> tag used to delineate the data columns. The three columns must specify a datafld used in the header row of the text file:
System Name
Display Name
Service State
Ending tags for the table, body, and HTML.
Example 17.13. Displaying Filtered Data by Using the Tabular Data Control
 1 <HTML>
 2 <BODY>
 3 <OBJECT id="serviceList" CLASSID="clsid:333C7BC4-460F-11D0-BC04-0080C7055A83">
 4    <PARAM NAME="DataURL" VALUE="c:scriptsservice_list.csv">
 5    <PARAM NAME="UseHeader" VALUE="True">
 6    <PARAM NAME="TextQualifier" VALUE=",">
 7    <PARAM NAME="Filter" VALUE="Service State = Stopped">
 8 </OBJECT>
 9 <H2>Current Service Status</H2>
10 <table border='1' width='100%' cellspacing='0' datasrc=#serviceList>
11 <THEAD><TR>
12 <TD>Computer</TD>
13 <TD>Service</TD>
14 <TD>Status</TD>
15 </TR>
16 </THEAD>
17 <TBODY>
18 <TR>
19 <TD><B><DIV datafld="System Name"></DIV></B></TD>
20 <TD><DIV datafld="Display Name"></DIV></TD>
21 <TD><DIV datafld="Service State"></DIV></TD>
22 </TR>
23 </TBODY>
24 </TABLE>
25 </BODY>
26 </HTML>
As noted previously, one of the major limitations of the WMI Query Language (WQL) is the fact that you cannot specify a sort order of any kind; all you can do is request a collection of data and then display the data in the order in which WMI returns it. For example, service instances are always returned in alphabetical order. You cannot modify your WQL query to instead sort the data by service state or by the user account under which the service runs.
If you want to display data in an alternative fashion (and if you do not want to use the tabular data control), you will have to write code that can sort and then display the data. Traditionally, script writers have done this by placing the data in an array and then using sorting algorithms (such as the “bubble sort”, an algorithm that iterates through a list of elements, swapping adjacent pairs that are out of order) to sort the data.
Unfortunately, these sorting algorithms can become quite complicated, particularly if the data set contains a number of fields (service name, service status, service account, and so forth). A much easier way to sort information is to place this information in a disconnected recordset and then use a single line of code to sort the information.
A disconnected recordset is essentially a database that exists only in memory; it is not tied to a physical database. You create the recordset, add records to it, and then manipulate the data, just like any other recordset. The only difference is that the moment the script terminates, the recordset, which is stored only in memory, disappears as well.
To use a disconnected recordset to sort data, you must first create the recordset, adding any fields needed to store the data. After you have created the fields, you then use the AddNew method to add new records to the recordset, using the same process used to add new records to a physical database. After the recordset has been populated, a single line of code can then sort the data on the specified field. For example, this line of code sorts the recordset by the field ServiceAccountName:
DataList.Sort = "ServiceAccountName"
Scripting Steps
Listing 17.14 contains a script that sorts data by using a disconnected recordset. To carry out this task, the script must perform the following steps:
Create constants named adVarChar (value = 200) and MaxCharacters (value = 255). These constants are used when creating fields for the disconnected recordset; they set the data type to variant and the maximum number of characters to 255.
Create an instance of the ADO Recordset object.
Use the Fields.Append method to add two fields to the recordset: ServiceName and ServiceState.
Open the recordset.
Use a GetObject call to connect to the WMI namespace rootcimv2, and set the impersonation level to “impersonate.”
Use the ExecQuery method to query the Win32_Service class.
This query returns a collection consisting of all the services installed on the computer.
For each service in the collection, use the AddNew method to add a new record to the recordset. For each new record:
Set the value of the ServiceName field to the name of the service.
Set the value of the ServiceState field to the state (running, stopped, paused, resuming) of the service.
Use the Update method to update the recordset with the new record.
After all the records have been added, use the Sort method to sort the recordset by ServiceState.
Use the MoveFirst method to move to the first record in the recordset.
For each record in the recordset, echo the service name and the service state. The output will be sorted by service state.
Example 17.14. Sorting Data by Using a Disconnected Recordset
 1 Const adVarChar = 200
 2 Const MaxCharacters = 255
 3 Set DataList = CreateObject("ADOR.Recordset")
 4 DataList.Fields.Append "ServiceName", adVarChar, MaxCharacters
 5 DataList.Fields.Append "ServiceState", adVarChar, MaxCharacters
 6 DataList.Open
 7 strComputer = "."
 8 Set objWMIService = GetObject("winmgmts:" _
 9     & "{impersonationLevel=impersonate}!\" & strComputer& "
ootcimv2")
10 Set colServices = objWMIService.ExecQuery _
11     ("SELECT * FROM Win32_Service")
12 For Each Service in colServices
13     DataList.AddNew
14     DataList("ServiceName") = Service.Name
15     DataList("ServiceState") = Service.State
16     DataList.Update
17 Next
18 DataList.Sort = "ServiceState"
19 DataList.MoveFirst
20 Do Until DataList.EOF
21     Wscript.Echo DataList.Fields.Item("ServiceName") _
22         & vbTab & DataList.Fields.Item("ServiceState")
23 DataList.MoveNext
24 Loop
System administrators often find themselves working with large amounts of data. For example, consider a simple task such as inventorying computer hardware. If you have 10,000 computers in your organization, this task will result in an enormous amount of data. Although this data can be stored in a text file, your ability to view, modify, and analyze that data will be limited, to say the least. Instead, it is typically better to store large amounts of data in a database.
Most databases have an import feature that allows you to import data stored in other formats (such as text files). Because of this, you can save retrieved data as a text file and then open your database application and import the data. Needless to say, it would be much faster and much easier if your scripts could directly interact with a database. Using ActiveX Data Objects, scripts can do just that.
ActiveX Data Objects (ADO) are part of the Universal Data Access (UDA) technology that provides access to information across the enterprise. Like its predecessor, Open Database Connectivity (ODBC), UDA provides a common interface for communicating with SQL databases. However, UDA goes beyond database connectivity to provide access to information that is not stored in relational databases; for example, you can access information stored as part of an e-mail service, a file system, or a hierarchical database such as Microsoft Indexing Service.
Note
ADO is sometimes referred to as ADO/OLE DB (OLE Database). This is because ADO serves as the scripting and application-level programming interface, while OLE DB serves as the system-level programming interface. ADO is required when working with scripting languages; system-level programming languages such as C++ can bypass ADO and work directly with OLE DB.
Although a complete discussion of the ADO object model is beyond the scope of this book, two objects are particularly important to administrators who need to connect to databases when writing scripts. These two objects, the Connection object and the Recordset object, are explained in more detail in Table 17.7.
Table 17.7. ADO Objects
Description | |
|---|---|
Connection | Manages the connection between your script and the database. The Connection object is used to open the database but does not return any data. The Recordset object is used to return data. |
Recordset | Contains the data returned by your query. The data is contained in rows (referred to as records) and columns (referred to as fields). Each column is stored in a Field object in the Recordset Fields collection. Recordsets are returned by using SQL commands such as “SELECT * FROM Hardware”. A recordset can represent all the records in a database or a subset, depending on how you construct your SQL queries. |
Using a DSN
To connect to a database by using ADO, you must have an OLE DB data provider; this data provider serves as the mechanism that connects you to a particular type of database (SQL Server, Microsoft Access, Active Directory, and so on). Although you can connect directly to a database by including the provider name and the path to the database as part of the connection string, a simpler method of connecting to a database is to create a data source name (DSN) for the database.
A DSN stores all the information required to connect to a database. If you create a DSN for a database, you can connect to that database by using a single line of code (for example, objConnection.Open "DSN=Inventory;"), without having to know the provider name or the physical path to the database. If you change the path to the database (for example, by moving the database to a faster hard disk), you can change the DSN rather than modifying all the scripts that connect to that database.
![]() To create a DSN
To create a DSN
Open Administrative Tools, and then click Data Source (ODBC).
On the System DSN tab in the ODBC Data Source Administrator dialog box, click Add.
In the Create New Data Source wizard, follow the prompts to create a DSN for your database. The steps will vary depending on the type of database. (For example, the steps required to create a DSN for a SQL Server database are different from those required to create a DSN for a Microsoft Access database.)
When you connect to the database in a script, you will make the connection by using the DSN you create with this wizard, not the name of the database itself. The ADO examples used in this chapter connect to the database by using a DSN.
To connect to a database by using ADO, you follow the same standard procedure regardless of the type of database to which you are connecting. Your script must:
Create instances of the Connection and Recordset objects.
Use the Connection object Open method to connect to the DSN for the database.
Use the Recordset object Open method to retrieve data from the desired table within the database.
When using the Recordset object Open method, include both a standard SQL command (for example, “SELECT * FROM Inventory”) and parameters specifying CursorLocation, CursorType, and LockType. These parameters are described in more detail in Table 17.8.
Table 17.8. Parameters for the Recordset Object Open Method
Property | Description |
|---|---|
CursorLocation | Data structure that holds the results of any query you make. Cursors can be stored either on the server or on the client. In general, it is better to store the cursor on the client; this tends to improve performance (because the data is stored locally) and places less strain on the database server. To set the CursorLocation to the client, set the value of the constant adUseClient to 3. |
CursorType | Allows you to browse a recordset in different ways: some cursors allow you to move backward and forward in a recordset, while other cursors limit you to moving forward only. If you set the CursorLocation to the client, you must set the CursorType to adOpenStatic (value = 3). This type supports scrolling forward and backward in the recordset but does not show changes made by other users. This is because the cursor is operating on data cached on the client computer rather than directly from the database. |
LockType | Determines how (and if) a recordset can be updated. Recordsets can be set to read-only, or they can be configured to allow updates. For most scripts, the LockType can be set to adLockOptimistic (value = 3). With this setting, the record being edited is not locked (that is, no restrictions are placed on another user accessing that record) until you call the Update method. |
When you are finished with the database connection and the recordset, use the Close method to close both objects.
Listing 17.15 contains a script that creates an ADO connection. To carry out this task, the script must perform the following steps:
Create three constants — adOpenStatic, adLockOptimistic, and adUseClient — and set the value of each to 3.
These constants will be used to configure the CursorLocation, CursorType, and LockType for the connection.
Create an instance of the ADO Connection object (ADODB.Connection).
The Connection object makes it possible for you to issue queries and other database commands.
Create an instance of the ADO Recordset object (ADODB.Recordset).
The Recordset object stores the data returned from your query.
Use the Connection object Open method to open the database with the DSN Inventory.
Be sure to append a semicolon (;) to the DSN name.
Set the CursorLocation to 3 (client side) by using the constant adUseClient.
Use the Recordset object Open method to retrieve all the records from the Hardware table.
The Open method requires four parameters:
The SQL query (“SELECT * FROM Hardware”)
The name of the ADO connection being used (objConnection)
The cursor type (adOpenStatic)
The lock type (adLockOptimistic)
Close the recordset.
In an actual production script, of course, you would probably do something with a recordset besides just opening and closing it.
Close the connection.
Example 17.15. Connecting to an ADO Database
 1 Const adOpenStatic = 3
 2 Const adLockOptimistic = 3
 3 Const adUseClient = 3
 4 Set objConnection = CreateObject("ADODB.Connection")
 5 Set objRecordset = CreateObject("ADODB.Recordset")
 6 objConnection.Open "DSN=Inventory;"
 7 objRecordset.CursorLocation = adUseClient
 8 objRecordset.Open "SELECT * FROM Hardware" , objConnection, _
 9     adOpenStatic, adLockOptimistic
10 objRecordset.Close
11 objConnection.Close
Many enterprise scripts are designed to take data from multiple sources (for example, all the event logs on all your domain controllers) and then combine that information into a single database. This is typically done for two reasons: It creates a central repository for this data, and it makes it possible for you to use database tools to analyze the data.
To copy information to a database, your script must create a new record for each piece of information retrieved. (For example, a new record must be added to the database for each event retrieved from an event log.)
You use the AddNew method to add new records to a database. After you have opened a connection to a database and a recordset, do the following:
Call the AddNew method.
Specify the name of each field and the value for the new record. For example, if the database includes a field named ComputerName and you want to add a new computer named WebServer, use code similar to the following:
objRecordset("ComputerName") = "WebServer"Use the Update method to write the new record to the database. The AddNew method by itself does not save the new record.
You can use the AddNew method only if the recordset can be updated. If you opened the recordset in read-only mode, any attempt to add a new record will fail.
Listing 17.16 contains a script that adds a new record — the name of a sound card — to a database. To carry out this task, the script must perform the following steps:
Create three constants — adOpenStatic, adLockOptimistic, and adUseClient — and set the value of each to 3.
These constants will be used to configure the CursorLocation, CursorType, and LockType for the connection.
Create an instance of the ADO object (ADODB.Connection).
The Connection object makes it possible for you to issue queries and other database commands.
Create an instance of the ADO Recordset object (ADODB.Recordset).
The Recordset object stores the data returned from your query.
Use the Connection object Open method to open the database with the DSN Inventory.
Be sure to append a semicolon (;) to the DSN name.
Set the CursorLocation to 3 (client side) by using the constant adUseClient.
Use the Recordset object Open method to retrieve all the records from the Hardware table.
The Open method requires four parameters:
The SQL query (“SELECT * FROM Hardware”)
The name of the ADO connection being used (objConnection)
The cursor type (adOpenStatic)
The lock type (adLockOptimistic)
Use a GetObject call to connect to the WMI namespace rootcimv2, and set the impersonation level to “impersonate.”
Use the ExecQuery method to query the Win32_SoundDevice class.
This query returns a collection consisting of all the sound cards installed on the computer.
For each sound card in the collection, use the AddNew method to create a record for that sound card in the database.
For each sound card, use the values obtained from the Win32_SoundDevice class to update the database fields ComputerName, Manufacturer, and ProductName.
Use the Update method to write the new record to the database.
Close the connection.
Example 17.16. Adding New Records to a Database
 1 Const adOpenStatic = 3
 2 Const adLockOptimistic = 3
 3 Const adUseClient = 3
 4 Set objConnection = CreateObject("ADODB.Connection")
 5 Set objRecordset = CreateObject("ADODB.Recordset")
 6 objConnection.Open "DSN=Inventory;"
 7 objRecordset.CursorLocation = adUseClient
 8 objRecordset.Open "SELECT * FROM Hardware" , objConnection, _
 9     adOpenStatic, adLockOptimistic
10 strComputer = "."
11 Set objWMIService = GetObject("winmgmts:" _
12     & "{impersonationLevel=impersonate}!\" & strComputer& "
ootcimv2")
13 Set colSoundCards = objWMIService.ExecQuery _
14     ("SELECT * FROM Win32_SoundDevice")
15 For Each objSoundCard in colSoundCards
16     objRecordset.AddNew
17     objRecordset("ComputerName") = objSoundCard.SystemName
18     objRecordset("Manufacturer") = objSoundCard.Manufacturer
19     objRecordset("ProductName") = objSoundCard.ProductName
20     objRecordset.Update
21 Next
22 objRecordset.Close
23 objConnection.Close
Many enterprise scripts require you to perform an action on multiple records in the database. For example, you might have a script that updates the hardware inventory for a set of computers. The script needs to connect to the database, locate the record for the first computer, and apply any required updates. The script must then repeat the process for each computer being inventoried.
It is possible to create an SQL query that returns only the name of computer being updated (for example, “SELECT * FROM Inventory WHERE ComputerName = ’WebServer’”). However, if your script must update 100 computers, this would require 100 separate SQL queries being passed to the database server, one for each computer being updated. A more efficient approach might be to download the entire set of computers and then use the Recordset object Find method to locate each computer as needed.
The Find method requires two steps:
Set the criteria for the method. For example, to find a computer named WebServer, set the criteria as follows:
strSearchCriteria = "ComputerName = 'WebServer'"
Apply the method. For example:
objRecordSet.Find strSearchCriteria
You can use the Recordset object EOF (end-of-file) property to determine whether a record was found. If EOF is True, this means the recordset has been searched from beginning to end and no record was found. This is important because your script will fail if it attempts to take action on a record that does not exist. For example, you might use the Find method to locate a particular record and then use the Delete method to delete that record. If the record does not exist, however, both the Delete method and your script will fail.
Using the Find method also helps you eliminate duplicate records within a database. For example, when creating an inventory of your computers, you probably want one record per computer; you do not want multiple records for the computer WebServer. To prevent the possibility of creating duplicate records, follow a procedure similar to this:
Take the inventory on a computer (for example, WebServer).
Search the recordset for a computer named WebServer.
If a computer named WebServer is found, update the record with the current inventory information.
If a computer named WebServer is not found, use the AddNew method to create a record for WebServer.
Scripting Steps
Listing 17.17 contains a script that finds a record in a recordset. To carry out this task, the script must perform the following steps:
Create three constants — adOpenStatic, adLockOptimistic, and adUseClient — and set the value of each to 3.
These constants will be used to configure the CursorLocation, CursorType, and LockType for the connection.
Create an instance of the ADO Connection object (ADODB.Connection).
The Connection object makes it possible for you to issue queries and other database commands.
Create an instance of the ADO Recordset object (ADODB.Recordset).
The Recordset object stores the data returned from your query.
Use the Connection object Open method to open the database with the DSN Inventory.
Be sure to append a semicolon (;) to the DSN name.
Set the CursorLocation to 3 (client side) by using the constant adUseClient.
Use the Recordset object Open method to retrieve all the records from the Hardware table.
The Open method requires four parameters:
The SQL query (“SELECT * FROM Hardware”)
The name of the ADO connection being used (objConnection)
The cursor type (adOpenStatic)
The lock type (adLockOptimistic)
Set the variable strSearchCriteria to ComputerName = ’WebServer’.
The variable strSearchCriteria will serve as the search criteria for the Find method.
Use the Find method to locate the computer named WebServer.
Use the EOF property to verify whether the record can be found:
If the record cannot not be found (because EOF = True), echo the string, “Record cannot be found.”
If the record is found (because EOF = False), echo the string, “Record found.”
Close the recordset.
Close the connection.
Example 17.17. Finding Records in a Recordset
 1 Const adOpenStatic = 3
 2 Const adLockOptimistic = 3
 3 Const adUseClient = 3
 4 Set objConnection = CreateObject("ADODB.Connection")
 5 Set objRecordset = CreateObject("ADODB.Recordset")
 6 objConnection.Open "DSN=Inventory;"
 7 objRecordset.CursorLocation = adUseClient
 8 objRecordset.Open "SELECT * FROM Hardware" , objConnection, _
 9     adOpenStatic, adLockOptimistic
10 strSearchCriteria = "ComputerName = 'WebServer'"
11 objRecordSet.Find strSearchCriteria
12 If objRecordset.EOF Then
13     Wscript.Echo "Record cannot be found."
14 Else
15     Wscript.Echo "Record found."
16 End If
17 objRecordset.Close
18 objConnection.Close
Scripts often need to update existing records rather than add new records to a database. For example, with an inventory script you do not want to add a new record each time the script is run. If you did, you would end up with multiple records for the same computer. Instead, you want to update the existing record for each computer, replacing the old inventory data with the newly retrieved data.
To update a record by using ADO, do the following:
Connect to the recordset.
Connect to the appropriate record. This is typically done by using the Find method to locate an individual record.
Set the new values as needed.
Use the Update method to apply the changes to the database.
Scripting Steps
Listing 17.18 contains a script that updates a record in a database. To carry out this task, the script must perform the following steps:
Create three constants — adOpenStatic, adLockOptimistic, and adUseClient — and set the value of each to 3.
These constants will be used to configure the CursorLocation, CursorType, and LockType for the connection.
Create an instance of the ADO Connection object (ADODB.Connection).
The Connection object makes it possible for you to issue queries and other database commands.
Create an instance of the ADO Recordset object (ADODB.Recordset).
The Recordset object stores the data returned from your query.
Use the Connection object Open method to open the database with the DSN Inventory.
Be sure to append a semicolon (;) to the DSN name.
Set the CursorLocation to 3 (client side) by using the constant adUseClient.
Use the Recordset object Open method to retrieve all the records from the Hardware table.
The Open method requires four parameters:
The SQL query (“SELECT * FROM Hardware”)
The name of the ADO connection being used (objConnection)
The cursor type (adOpenStatic)
The lock type (adLockOptimistic)
Set the variable strSearchCriteria to ComputerName = ’WebServer’.
The variable strSearchCriteria will serve as the search criteria for the Find method.
Use the Find method to locate the computer named WebServer.
Use a GetObject call to connect to the WMI namespace rootcimv2, and set the impersonation level to “impersonate.”
Use the ExecQuery method to query the Win32_SoundDevice class.
This query returns a collection consisting of all the sound cards installed on the computer.
For each sound card in the collection, use the values obtained from the Win32_SoundDevice class to update the database fields ComputerName, Manufacturer, and ProductName.
Use the Update method to write the new record to the database.
Close the recordset.
Close the connection.
Example 17.18. Updating Records in a Database
 1 Const adOpenStatic = 3
 2 Const adLockOptimistic = 3
 3 Const adUseClient = 3
 4 Set objConnection = CreateObject("ADODB.Connection")
 5 Set objRecordset = CreateObject("ADODB.Recordset")
 6 objConnection.Open "DSN=Inventory;"
 7 objRecordset.CursorLocation = adUseClient
 8 objRecordset.Open "SELECT * FROM Hardware" , objConnection, _
 9     adOpenStatic, adLockOptimistic
10 strSearchCriteria = "ComputerName = 'WebServer'"
11 objRecordSet.Find strSearchCriteria
12 strComputer = "."
13 Set objWMIService = GetObject("winmgmts:" _
14     & "{impersonationLevel=impersonate}!\" & strComputer& "
ootcimv2")
15 Set colSoundCards = objWMIService.ExecQuery _
16     ("SELECT * FROM Win32_SoundDevice")
17 For Each objSoundCard in colSoundCards
18     objRecordset("ComputerName") = objSoundCard.SystemName
19     objRecordset("Manufacturer") = objSoundCard.Manufacturer
20     objRecordset("ProductName") = objSoundCard.ProductName
21     objRecordset.Update
22 Next
23 objRecordset.Close
24 objConnection.Close
There will undoubtedly be times when you want to delete a record or set of records from a database. For example, you might decommission the DNS Server service on a computer; in turn, you will then need to delete that computer from the database table that contains the names of your DNS servers. Or suppose you maintain three months of performance monitoring information in a database. Each month you will need to delete some of the old data to make room for the new data. For example, in April you will need to delete the data for January. After you add the April data, the database will again contain data for three months: February, March, and April.
To delete a record by using ADO, do the following:
Connect to the recordset.
Connect to the appropriate record. This is typically done by using the Find method to locate an individual record.
Use the Delete method to delete the record.
When you use the Delete method to delete a record, the record will be deleted as soon as the method is called. You do not need to use the Update method to apply the changes. No warning of any kind will be issued before the record is deleted.
Scripting Steps
Listing 17.19 contains a script that deletes a record from a database. To carry out this task, the script must perform the following steps:
Create three constants — adOpenStatic, adLockOptimistic, and adUseClient — and set the value of each to 3.
These constants will be used to configure the CursorLocation, CursorType, and LockType for the connection.
Create an instance of the ADO Connection object (ADODB.Connection).
The Connection object makes it possible for you to issue queries and other database commands.
Create an instance of the ADO Recordset object (ADODB.Recordset).
The Recordset object stores the data returned from your query.
Use the Connection object Open method to open the database with the DSN Inventory.
Be sure to append a semicolon (;) to the DSN name.
Set the CursorLocation to 3 (client side) by using the constant adUseClient.
Use the Recordset object Open method to retrieve all the records from the Hardware table.
The Open method requires four parameters:
The SQL query (“SELECT * FROM Hardware”)
The name of the ADO connection being used (objConnection)
The cursor type (adOpenStatic)
The lock type (adLockOptimistic)
Set the variable strSearchCriteria to ComputerName = ’WebServer’.
The variable strSearchCriteria will serve as the search criteria for the Find method.
Use the Find method to locate the computer named WebServer.
Use the Delete method to delete the record for the computer named WebServer.
Close the recordset.
Close the connection.
Example 17.19. Deleting Selected Records from a Database
 1 Const adOpenStatic = 3
 2 Const adLockOptimistic = 3
 3 Const adUseClient = 3
 4 Set objConnection = CreateObject("ADODB.Connection")
 5 Set objRecordset = CreateObject("ADODB.Recordset")
 6 objConnection.Open "DSN=Inventory;"
 7 objRecordset.CursorLocation = adUseClient
 8 objRecordset.Open "SELECT * FROM Hardware" , objConnection, _
 9     adOpenStatic, adLockOptimistic
10 strSearchCriteria = "ComputerName = 'WebServer'"
11 objRecordSet.Find strSearchCriteria
12 objRecordset.Delete
13 objRecordset.Close
14 objConnection.Close
There will also be times when you need to clear a database table, deleting all the records. For example, suppose at the end of each month you import event log records into a database and then run a series of statistical analyses on that data. At the end of the next month, you might want to clear the table; that way, the next set of records imported into the database will not commingle with any previous records.
Although you can clear a database by finding and deleting each record individually, a better and faster approach is to use an SQL Delete query to delete all the records in a single operation.
Scripting Steps
Listing 17.20 contains a script that deletes all the records in a database table. To carry out this task, the script must perform the following steps:
Create three constants — adOpenStatic, adLockOptimistic, and adUseClient — and set the value of each to 3.
These constants will be used to configure the CursorLocation, CursorType, and LockType for the connection.
Create an instance of the ADO Connection object (ADODB.Connection).
The Connection object makes it possible for you to issue queries and other database commands.
Create an instance of the ADO Recordset object (ADODB.Recordset).
The Recordset object stores the data returned from your query.
Use the Connection object Open method to open the database with the DSN Inventory.
Be sure to append a semicolon (;) to the DSN name.
Set the CursorLocation to 3 (client side) by using the constant adUseClient.
Use the Recordset object Open method to delete all the records from the Hardware table.
The Open method requires four parameters:
The SQL query (“DELETE * FROM Hardware”). The exact query used to delete all the records will vary depending on your database. Some SQL databases use “DELETE FROM Hardware”, without the asterisk, instead.
The name of the ADO connection being used (objConnection).
The cursor type (adOpenStatic).
The lock type (adLockOptimistic).
Close the connection.
Example 17.20. Deleting All Records in a Database Table
 1 Const adOpenStatic = 3
 2 Const adLockOptimistic = 3
 3 Const adUseClient = 3
 4 Set objConnection = CreateObject("ADODB.Connection")
 5 Set objRecordset = CreateObject("ADODB.Recordset")
 6 objConnection.Open "DSN=Inventory;"
 7 objRecordset.CursorLocation = adUseClient
 8 objRecordset.Open "DELETE * FROM Hardware" , objConnection, _
 9     adOpenStatic, adLockOptimistic
10 objConnection.Close
As a security precaution, administrators are encouraged to log on to computers by using a typical user account, one without administrative privileges. This means that administrators must supply alternate security credentials (in the form of a user name and a password) to run scripts that require administrative privileges. Although this is good advice, it does have at least possible two drawbacks:
If you hard-code the administrator password within the script itself, the password is visible to anyone who has access to the script.
If you type the administrator password in response to a prompt (either at the command line or in a VBScript Input box), the password is not masked in any way. This means that the password you type on the screen will be clearly visible to anyone looking at the monitor.
In turn, this creates a dilemma for system administrators. On the one hand, they are discouraged from logging on to a computer by using the administrator account. On the other hand, neither VBScript nor WSH provides a method for masking passwords as they are entered. As a result, typing a password can be considered as big a security hole as logging on as an administrator.
Fortunately, both VBScript and WSH support COM automation. As a result, you can tap the capabilities found in Internet Explorer to provide password masking for your scripts.
You can use Internet Explorer as a way to enter passwords. To mask passwords using Internet Explorer, you need to:
Create a Web page to use as the form. The Web page must contain, at a minimum:
A password box for entering the password.
An OK button, to be clicked after a password has been entered.
A hidden text field. When the OK button is clicked, the value of the hidden text field is changed. The script used to open the Web page monitors this text field for changes. Because the value will change only when the OK button is clicked, the script will pause until this change is detected.
For example, the HTML coding might look like this:
<SCRIPT language="VBScript">
    <!--
        Sub OKButton_OnClick
            OkClicked.Value = 1
        End Sub
    '-->
</SCRIPT>
<BODY>
Please enter your password: <INPUT TYPE=password Name = "PasswordBox"
size="20">
<P>
<INPUT NAME="OKButton" TYPE="BUTTON" VALUE="OK" >
<P>
<input type="hidden" name="OKClicked" size="20">
</BODY>
Create a script that opens the Web page and waits for the password to be entered.
Provide a mechanism for the script to identify the password that was typed in the password box.
Scripting Steps
Listing 17.21 contains a script that masks passwords entered in Internet Explorer. (To actually use the script, you will have to create the file C:ScriptsPassword.htm.) To carry out this task, the script must perform the following steps:
Use the Wscript CreateObject method to create an instance of Internet Explorer, and assign the name IE_ to the event handler responsible for monitoring Internet Explorer events.
Use the Navigate method to open the Web page C:ScriptsPassword.htm.
Configure various Internet Explorer properties, such as width and height, and hide items such as the toolbar and the status bar.
Set the Visible property to 1 to display Internet Explorer, opened to the correct page and properly configured.
Use a Do loop to pause the script until the OK button in Internet Explorer has been clicked.
This is done by periodically checking the value of a hidden text field named OKClicked. If this text box is empty, the script sleeps for 250 milliseconds and then checks again. When the OK button is clicked, the value of this text box is set to 1. At that point, the script exits the loop.
Set the value of the variable strPassword to the value of the PasswordBox text box. This is the name of the text box in Internet Explorer where the user typed the password.
Use the Quit method to close Internet Explorer.
Pause for 250 milliseconds.
Echo the value of strPassword. In a production script, you would probably not echo the value of strPassword but instead would use it to connect to a resource of some kind.
Example 17.21. Masking Passwords in Internet Explorer
 1 Set objExplorer = WScript.CreateObject _
 2     ("InternetExplorer.Application", "IE_")
 3 objExplorer.Navigate "file:///c:scriptspassword.htm"
 4 objExplorer.ToolBar = 0
 5 objExplorer.StatusBar = 0
 6 objExplorer.Width = 400
 7 objExplorer.Height = 250
 8 objExplorer.Left = 0
 9 objExplorer.Top = 0
10 objExplorer.Visible = 1
11 Do While (objExplorer.Document.All.OKClicked.Value = "")
12     Wscript.Sleep 250
13 Loop
14 strPassword = objExplorer.Document.All.PasswordBox.Value
15 objExplorer.Quit
16 Wscript.Sleep 250
17 Wscript.Echo strPassword
The script shown in Listing 17.22 shows how a masked password can be retrieved from Internet Explorer, and then used to connect to a remote computer and install a software package. In line 10, the variable strPassword, which contains the value typed by the user, is used to connect to the remote computer. This is done rather than hard-coding the password in the script.
Example 17.22. Using a Password Masked in Internet Explorer
 1 Const wbemImpersonationLevelDelegate = 4
 2
 3 Set objExplorer = WScript.CreateObject _
 4     ("InternetExplorer.Application", "IE_")
 5 objExplorer.Navigate "file:///c:scriptspassword.htm"
 6 objExplorer.ToolBar = 0
 7 objExplorer.StatusBar = 0
 8 objExplorer.Width = 400
 9 objExplorer.Height = 250
10 objExplorer.Left = 0
11 objExplorer.Top = 0
12 objExplorer.Visible = 1
13 Do While (objExplorer.Document.All.OKClicked.Value = "")
14     Wscript.Sleep 250
15 Loop
16 strPassword = objExplorer.Document.All.PasswordBox.Value
17 objExplorer.Quit
18
19 Set objWbemLocator = CreateObject("WbemScripting.SWbemLocator")
20 Set objConnection = objwbemLocator.ConnectServer _
21     ("WebServer", "rootcimv2", "fabrikamadministrator", _
22          strPassword")
23 Set objSoftware = objConnection.Get("Win32_Product")
24 errReturn = objSoftware.Install("\atl-dc-02scripts1561_lab.msi",,True)
E-mail is one of the most important avenues of communication within large organizations, and for good reason. E-mail is not dependent on time or place; messages can be sent at any time of the day or night, and they can be accessed from practically anywhere. The fact that it might be after hours or that you do not know the physical location of the recipient is no deterrent to sending information via e-mail.
For that matter, the fact that no human being is present is also no deterrent to sending information via e-mail. You can include code that enables your scripts to send e-mail in response to a specified event. For example, a monitoring script can be coded so that it sends an e-mail message anytime disk space begins to run low on a server. An inventory script can retrieve information and then, instead of saving that information to a file, e-mail it to the appropriate administrator.
You can use the Collaboration Data Objects (CDO) technology to incorporate e-mail messaging within a script. CDO includes a COM component (Cdosys.dll) that can be used to send e-mail messages by using either the SMTP or the NNTP protocol. These messages can be sent even if the SMTP or NNTP service is not installed locally; you can use CDO to send messages as long as the SMTP or NNTP service is installed somewhere on your network.
The CDO automation library defines a number of objects, including the Message object, which represents a complete e-mail message. In turn, the Message object has a number of interfaces, including the IMessage interface. This interface is used to perform such tasks as addressing, adding content to, and sending a message.
Some of the key properties of the IMessage interface are shown in Table 17.9.
Table 17.9. IMessage Interface Properties
Property/Method | Description |
|---|---|
AddAttachment | Enables you to add an attached file to the message. As the AddAttachment parameter, specify the full path name of the file to be attached. |
From | E-mail address of the primary author of the message. This property is optional; if left blank, the From property will be set to the value of the Sender property, assuming a value for this property has been configured. If neither the From property nor the Sender property is configured, the script will fail. |
ReplyTo | E-mail address or addresses that replies should be sent to. |
Sender | E-mail address of the person who actually sent the message. This does not have to be the same address as the From property. If the From and Sender properties refer to the same person, you do not need to configure the Sender property. |
Subject | Specifies the subject line for the e-mail message. |
TextBody | Plain-text representation of the actual e-mail message. |
To | Specifies recipients of the message. |
Enabling a script to send automated e-mail messages provides a way for your script to send realtime alerts whenever a particular event occurs (for example, when the script runs, when the script finishes, or when the script encounters a problem of some kind). Alerts are commonly used in system administration scripting, but these notices are typically displayed either by using pop-up message boxes or by recording an event in the event log. Although both of these techniques are useful, they require someone to either physically sit at the computer where the message box is displayed or continually monitor the event log for the occurrence of new events.
By contrast, e-mail alerts can be directed to a particular administrator or group of administrators regardless of their physical location; administrators can receive these alerts even if they are offsite. Because most administrators read their e-mail more often than they read event logs, there is a greater chance that they will respond quickly to the e-mail alert. With the new generation of PDAs and cell phones that can be used to check e-mail, the ability to programmatically send alerts using this technology becomes even more valuable.
E-mail can be sent from any Microsoft® Windows® 2000–based computer by using CDO.
Scripting Steps
Listing 17.23 contains a script that sends an e-mail message by using CDO. To carry out this task, the script must perform the following steps:
Create an instance of a CDO e-mail message.
Set the values for the From, To, Subject, and TextBody properties of the message.
Use the Send method to send the message.
For this script to work, the SMTP service must be installed on the computer where the script is being run.
Example 17.23. Sending E-Mail from a Script
1 Set objEmail = CreateObject("CDO.Message")
2 objEmail.From = "[email protected]"
3 objEmail.To = "[email protected]"
4 objEmail.Subject = "Atl-dc-01 down"
5 objEmail.Textbody = "Atl-dc-01 is no longer accessible over the network."
6 objEmail.Send
The script shown in Listing 17.23 can be used as long as the SMTP service is installed on the computer where the script is running. Obviously, this poses a problem: Most likely, you do not want the SMTP service to be installed and running on every one of your computers.
Even if the SMTP service is not installed on the computer, you can still send e-mail from a script as long as the SMTP service is installed somewhere on your network. To do this, your script must include code that specifies the properties of the computer and the SMTP service that will be used to send the message.
Each e-mail Message object has an associated Configuration object that defines configuration settings for sending the message. These settings are stored as fields within the Configuration object; each field is a Uniform Resource Identifier (URI) that contains information for the configuration setting. The three URIs required to send an SMTP e-mail message are shown in Table 17.10.
Table 17.10. Required URIs for Sending SMTP E-Mail Messages
Configuration Field | Description |
|---|---|
SendUsing | Indicates how the message is to be sent. Values are:
The full name for this field is: http://schemas.Microsoft.com/cdo/configuration/sendusing |
SmtpServer | DNS name or IP address of the SMTP server through which messages are sent. The full name for this field is: http://schemas.Microsoft.com/cdo/configuration/smtpserver |
SmtpServerPort | The port on which the SMTP server listens for connections. This is typically port 25. The full name for this field is: http://schemas.Microsoft.com/cdo/configuration/smtpserverport |
Listing 17.24 contains a script that sends e-mail from a computer that is not running the SMTP service. To carry out this task, the script must perform the following steps:
Create an instance of a CDO e-mail message.
Set the values for the From, To, Subject, and TextBody properties of the message.
Specify the configuration properties for the remote SMTP server. In this script, those properties and their values are:
SendUsing. This property is set to 2, meaning that the SMTP service is not installed on this computer. Messages must instead be sent by using the computer specified in the SMTPServer property.
SMTPServer. This property is set to MySMTPHost, the name of the SMTP server on this hypothetical network. If the name of your SMTP server is MailServer1, set this property to MailServer1.
SMTPServerPort. This property is set to 25, the default SMTP port for most computers.
Use the Send method to send the message.
Example 17.24. Sending E-Mail Without Installing the SMTP Service
 1 Set objEmail = CreateObject("CDO.Message")
 2 objEmail.From = "[email protected]"
 3 objEmail.To = "[email protected]"
 4 objEmail.Subject = "Server down"
 5 objEmail.Textbody = "Server1 is no longer accessible over the network."
 6 objEmail.Configuration.Fields.Item _
 7     ("http://schemas.microsoft.com/cdo/configuration/sendusing") = 2
 8 objEmail.Configuration.Fields.Item _
 9     ("http://schemas.microsoft.com/cdo/configuration/smtpserver") = _
10         "MySMTPHost"
11 objEmail.Configuration.Fields.Item _
12     ("http://schemas.microsoft.com/cdo/configuration/smtpserverport") = 25
13 objEmail.Configuration.Fields.Update
14 objEmail.Send
System administration scripts typically run without displaying a user interface of any kind. This is due to the nature of many of these scripts. For example, you might have a script that runs at 4 A.M., checks the size of all your event logs, and — if necessary — backs up and clears the logs that are nearly full. Not only would you have little need for a user interface with a script like this, but, even if you provided one, no one would be present to view it.
Many scripts have no need to display a user interface for other reasons as well:
Users are not distracted by a user interface. Scripts can run in the background, and users can continue doing their work without interruption.
Users cannot easily stop a script from running. Without a user interface, the only way to stop a script from running is to terminate the script process.
Many scripts complete their tasks so quickly that a user interface would be superfluous. For example, a script that does nothing but verify that a particular service is still running can probably complete its job in one or two seconds. There is little need to construct a user interface for a script that will display that interface for only a second or two.
On the other hand, at times the lack of a user interface can be a disadvantage:
It is difficult to tell what scripts, if any, are running on a computer. Even Task Manager is of little use in this regard: Task Manager will report how many instances of WScript or CScript are running on a computer, but it cannot tell you which scripts are running in those instances.
It is impossible to tell how much progress, if any, a script is making. In fact, it is sometimes difficult to tell whether a script is even running or if it has become hung. For example, Task Manager reports how much CPU time a script is using, but even 0 percent does not mean a script has stopped responding; it might mean the script is waiting for data to arrive over the network.
In an enterprise setting, it is useful to know which scripts are running on a computer. For example, you might have a script that copies events from an event log. Depending on how the script has been written, it might take an hour or more to complete its task. If so, you probably do not want to inadvertently start a second copy of the script.
Likewise, if the script has stopped responding, you need to know that as soon as possible. That way, you can terminate the process and restart the script. Otherwise, you might wait for over an hour only to discover that the script has failed and must be restarted.
Although scripting languages provide little in the way of user interface elements, you can still track script progress either by taking advantage of Internet Explorer or by using the standard output capabilities of CScript.
It is difficult to track absolute script progress — that is, to report that a script is 63 percent complete. Although this is possible in some cases, usually too many variables are involved to enable you to accurately predict when a script will finish. For example, anything from increased network traffic to a new process starting on the local computer can increase the amount of time required to complete a script.
Because of this, the progress indicators used in this chapter do one of two things: They simply note that a script is currently running, or they report relative progress. For example, the progress indicator might note that a connection is being made to a remote computer; after the connection is made, the indicator might note that data is being retrieved. However, no effort is made to estimate how long it will be before data retrieval is complete. Although it is possible to create progress indicators that do this, the code required for the progress indicator would be longer and more complex than the code required to carry out the primary function of the script.
If you feel that a script needs a progress indicator, it is recommended that you use a graphical progress indicator; after all, if visual cues are important, your progress indicator should be visually compelling. Perhaps the easiest way to add a graphical progress indicator to your scripts is to use Internet Explorer.
By the way, this is true even if the script runs in a command window under CScript; Internet Explorer can be instantiated and used as a progress indicator even if the script is running from the command line.
One way to indicate progress by using Internet Explorer is to display a message in the browser. In some cases, you might want to display a single message (“Please wait ....”) and then have the message disappear when the script is finished. Alternatively, you might want to periodically change the message to reflect whatever the script is doing. For example, if you have a script that stopped a service, waited two minutes, and then restarted the service, you might display these messages in the browser:
Stopping service....
Waiting two minutes before restarting service....
Restarting service....
Regardless of the number or the type of messages you choose to display, you can display custom messages within Internet Explorer by configuring the InnerHTML property of the document body. This replaces the entire document body with the specified text. For example, this code clears the document and displays the message, “Service retrieval in progress.”:
objExplorer.Document.Body.InnerHTML = "Service retrieval in progress."
You can also use standard HTML tags to include formatting when setting the InnerHTML property. For example, this code uses the < B> tag to display the message in bold:
objExplorer.Document.Body.InnerHTML = "<B>Service information retrieved.</B>"
There are two important points to keep in mind when using Internet Explorer as a progress indicator:
Closing Internet Explorer will not necessarily terminate the script. However, it is possible to code your script so that closing Internet Explorer will stop the script from running.
If Internet Explorer is closed and your script attempts to manipulate the nonexistent object, an error will occur.
To prevent this, use On Error Resume Next statement within the script. Anytime you attempt to manipulate Internet Explorer, check the error number. If the error number is anything other than 0, that means a problem occurred, and it is likely that Internet Explorer is no longer available. In that case, you must decide whether you want your script to terminate itself, continue without a progress indicator, or generate a new instance of Internet Explorer.
For information about a way to overcome these problems, see “Stopping a Script When Internet Explorer Is Closed” in this chapter.
Scripting Steps
Listing 17.25 contains a script that tracks script progress by using Internet Explorer. To carry out this task, the script must perform the following steps:
Create an instance of Internet Explorer.
Open a blank Web page by navigating to “about:blank”.
Configure the user interface settings, and then show Internet Explorer by setting the Visible property to True.
Set the InnerHTML property of the document to the message “Retrieving service information. This might take several minutes to complete.”
Use a GetObject call to connect to the WMI namespace rootcimv2, and set the impersonation level to “impersonate.”
Use the ExecQuery method to query the Win32_Service class.
This query returns a collection consisting of all the services installed on the computer.
For each service in the collection, pause for 200 milliseconds. This is done simply to ensure that the progress indicator remains on the screen long enough for you to view it.
Set the InnerHTML property of the document to the message “Service information retrieved.”
Pause for 3 seconds (3,000 milliseconds). This pause is inserted simply to give the user a chance to see the message that service information has been retrieved.
Use the Quit method to dismiss Internet Explorer.
Example 17.25. Tracking Script Progress by Using Internet Explorer
 1 Set objExplorer = CreateObject("InternetExplorer.Application")
 2 objExplorer.Navigate "about:blank"
 3 objExplorer.ToolBar = 0
 4 objExplorer.StatusBar = 0
 5 objExplorer.Width = 400
 6 objExplorer.Height = 200
 7 objExplorer.Left = 0
 8 objExplorer.Top = 0
 9 Do While (objExplorer.Busy)
10     Wscript.Sleep 200
11 Loop
12 objExplorer.Visible = 1
13 objExplorer.Document.Body.InnerHTML = "Retrieving service information. " _
14     & "This might take several minutes to complete."
15 strComputer = "."
16 Set objWMIService = GetObject("winmgmts:" _
17     & "{impersonationLevel=impersonate}!\" & strComputer& "
ootcimv2")
18 Set colServices = objWMIService.ExecQuery _
19     ("SELECT * FROM Win32_Service")
20 For Each objService in colServices
21     Wscript.Sleep 200
22 Next
23 objExplorer.Document.Body.InnerHTML = "Service information retrieved."
24 Wscript.Sleep 3000
25 Wscript.Quit
The script shown in Listing 17.26 displays a message when the script starts and then displays a second message when the script ends. To create a more dynamic progress bar, you might want to do something to indicate the intermediate steps taken by the script. This can be as simple as displaying an asterisk (*) inside the browser window each time a service is retrieved and acted upon.
To create a dynamic progress indicator, you can use the WriteLn method to write information to the browser each time the script takes a particular action. As a result, you end up with a progress indicator similar to the one shown in Figure 17.4. Each time a service is retrieved and acted upon, another asterisk is added to the browser window.
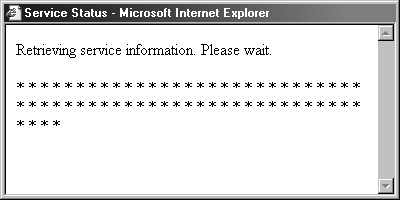
Tip
By using different fonts, you can create a progress indicator that uses solid bars or dots rather than asterisks. For example, the letter “n” in the Wingdings font looks like this:![]() .
.
Scripting Steps
Listing 17.26 contains a script that tracks script progress dynamically by using Internet Explorer. To carry out this task, the script must perform the following steps:
Create an instance of Internet Explorer.
Open a blank Web page by navigating to “about:blank”.
Configure the user interface settings, and then show Internet Explorer by setting the Visible property to True.
Create a reference to the Internet Explorer Document object, and then use the Open method to make a connection to the Document object. This allows your script to use commands such as WriteLn to write information to the browser window.
Use the WriteLn method to create a title for the page, set the background color (bgcolor) to white, and create the message “Retrieving service information. Please wait.” In addition to the message text, the HTML paragraph tag (<p>) is included. This ensures that the “progress bar” will be written on a separate line.
Use a GetObject call to connect to the WMI namespace rootcimv2, and set the impersonation level to “impersonate.”
Use the ExecQuery method to query the Win32_Service class.
This query returns a collection consisting of all the services installed on the computer.
For each service in the collection, use the WriteLn method to write an asterisk (*) in the browser window.
Use the WriteLn method to write the message “Service information retrieved” to the browser window.
Pause for 4 seconds (4,000 milliseconds). This pause is inserted simply to give the user a chance to see the message that service information has been retrieved.
Close the Document object, and use the Quit method to dismiss Internet Explorer.
Example 17.26. Tracking Dynamic Script Progress by Using Internet Explorer
 1 Set objExplorer = CreateObject("InternetExplorer.Application")
 2 objExplorer.Navigate "about:blank"
 3 objExplorer.ToolBar = 0
 4 objExplorer.StatusBar = 0
 5 objExplorer.Width = 400
 6 objExplorer.Height = 200
 7 objExplorer.Left = 0
 8 objExplorer.Top = 0
 9 objExplorer.Visible = 1
10
11 Do While (objExplorer.Busy)
12 Loop
13
14 Set objDocument = objExplorer.Document
15 objDocument.Open
16 objDocument.Writeln "<html><head><title>Service Status</title></head>"
17 objDocument.Writeln "<body bgcolor='white'>"
18 objDocument.Writeln "Retrieving service information. Please wait. <p>"
19
20 strComputer = "."
21 Set objWMIService = GetObject("winmgmts:" _
22     & "{impersonationLevel=impersonate}!\" & strComputer& "
ootcimv2")
23 Set colServices = objWMIService.ExecQuery _
24     ("SELECT * FROM Win32_Service")
25
26 For Each objService in colServices
27     objDocument.Writeln "*"
28 Next
29
30 objDocument.Writeln "<br>Service information retrieved."
31 objDocument.Writeln "</body></html>"
32 Wscript.Sleep 4000
33 objDocument.Close
34 objExplorer.Quit
If you are using Internet Explorer as a progress indicator, you might want to change the mouse pointer to an hourglass; this will help emphasize the fact that an operation is in progress. The mouse pointer can be configured by setting the cursor style to one of the values shown in Table 17.11.
Table 17.11. MousePointer Values
Description | |
|---|---|
Crosshair | Simple crosshair. |
Default | Platform-dependent default cursor; usually an arrow. |
Hand | Hand with the first finger pointing up, as when the user moves the pointer over a link. |
Help | Arrow with question mark, indicating that help is available. |
Wait | Hourglass or watch, indicating that the program is busy and the user must wait. |
To change the mouse pointer, create a reference to the Internet Explorer Document object, and then set the cursor style to the appropriate value. For example, to display an hourglass while the script runs, use this code:
Set objDocument = objIE.Document
objDocument.body.style.cursor = "wait"
To reset the cursor later in the script, use this code:
objDocument.body.style.cursor = "default"
Because it is often difficult to report absolute script progress (for example, to note that a script is 37 percent complete), an alternative approach is to display a pseudo progress indicator that simply informs the user that an operation is in progress. For example, in Figure 17.5 an instance of Internet Explorer is used to note that a script operation is in progress. Instead of tracking the percentage of the operation that is complete, however, the dialog box merely displays a ticking clock and the message, “Please wait while service information is retrieved. This might take several minutes to complete.”
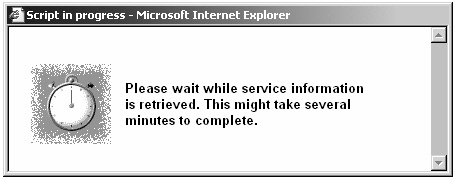
To use this type of progress indicator, start by creating an HTML file that includes both an animated GIF (for example, a ticking clock or a moving hourglass) and any other message you want the user to see. In your script, you create an instance of Internet Explorer and then use the Navigate method to open the HTML file. When the script completes, you then use the Quit method to close Internet Explorer.
Listing 17.27 contains a script that tracks script progress by displaying a pseudo progress indicator. This progress indicator is simply a Web page that includes an animated .GIF and a message asking the user to please wait. (The assumption is that you have already created this Web page.) To carry out this task, the script must perform the following steps:
Create an instance of Internet Explorer.
Open the HTML page by navigating to “file://c:scriptsprogress.htm”.
Configure the user interface settings, and then show Internet Explorer by setting the Visible property to True.
Create a reference to the Internet Explorer Document object.
Set the cursor style to wait.
Pause for 5 seconds (5,000 milliseconds). This is done simply to keep the browser window open long enough for you to see the progress indicator.
Use the Quit method to dismiss Internet Explorer.
Example 17.27. Using an Animated .GIF as a Progress Indicator
 1 Set objIE = CreateObject("InternetExplorer.Application")
 2 objIE.navigate "file://c:scriptsprogress.htm"
 3 objIE.left=200
 4 objIE.top=200
 5 objIE.height=175
 6 objIE.width=450
 7 objIE.menubar=0
 8 objIE.toolbar=0
 9 objIE.addressbar=0
10 objIE.statusbar=0
11 objIE.visible=1
12 Do While (objIE.Busy)
13     Wscript.Sleep 200
14 Loop
15
16 Set objDocument = objIE.Document
17 objDocument.body.style.cursor = "wait"
18 Wscript.Sleep 5000
19 objIE.Quit
Running a script in a command window does not preclude you from using Internet Explorer as a way to track script progress; an Internet Explorer instance can be created and controlled from CScript in the same way it can be created and controlled from WScript.
At the same time, however, it is unusual for a command-line utility to generate a graphical progress indicator. Users might not recognize that the script running in the command window is tied to the progress indicator running in Internet Explorer. Because of this, you might want progress to be tracked in the same command window where the script is running.
Although you can track progress in a command window, there are at least two limitations:
There are few formatting options available to you beyond using blank spaces and a mixture of lowercase and uppercase letters.
You cannot erase the contents of the command window. For example, you might want to display a message such as, “Now completing Step 1 of 5.” When this step is finished, you might want to erase the window and display, “Now completing Step 2 of 5.” This cannot be done from a script. Even the cls command cannot be called from within a script; the command will run, but it will run within a new window that is automatically spawned. It will not clear the command window in which the script is running.
Of course, you can use Wscript.Echo to periodically display progress messages in a command window. For example, you might have script output that looks similar to this:
C:Scripts>cscript services.vbs
Now completing Step 1 of 5.
Now completing Step 2 of 5.
Now completing Step 3 of 5.
Now completing Step 4 of 5.
Another approach commonly used with command-line utilities is to display a series of dots (periods) as a script progresses:
C:Scripts>cscript services.vbs
Retrieving service information. This might take several minutes.
........................................................................
Each time the script performs a subtask, a new dot is written to the command window. However, this cannot be done by using Wscript.Echo. Each time you call Wscript.Echo, the value is written to a new line. Because of this, your progress indicator would look like this:
C:Scripts>cscript services.vbs
Retrieving service information. This might take several minutes.
.
.
.
.
To append text to the command window, you must instead use the Wscript.StdOut.Write method and write each new value to the standard output stream.
Important
You can write to the standard output stream only if the script is running under CScript. If a script running under WScript attempts to write to the standard output stream, an “invalid handle” error will result.
Scripting Steps
Listing 17.28 contains a script that tracks script progress in a command window. To carry out this task, the script must perform the following steps:
Echo the message, “Processing service information. This might take several minutes.”
Create a variable to specify the computer name.
Use a GetObject call to connect to the WMI namespace rootcimv2, and set the impersonation level to “impersonate.”
Use the ExecQuery method to query the Win32_Service class.
This query returns a collection consisting of all the services installed on the computer.
For each service in the collection, use the Write method to write a period (.) to the standard output stream.
A production script would probably do additional processing during this stage (for example, saving service information to a database). In this sample script, service information is retrieved but no additional action is taken.
Use the WriteLine method to write a blank line to the standard output.
Echo the message, “Service information processed.”
Example 17.28. Tracking Script Progress in a Command Window
 1 Wscript.Echo "Processing information. This might take several minutes."
 2 strComputer = "."
 3 Set objWMIService = GetObject("winmgmts:" _
 4     & "{impersonationLevel=impersonate}!\" & strComputer& "
ootcimv2")
 5 Set colServices = objWMIService.ExecQuery _
 6     ("SELECT * FROM Win32_Service")
 7 For Each objService in colServices
 8     Wscript.StdOut.Write(".")
 9 Next
10 Wscript.StdOut.WriteLine
11 Wscript.Echo "Service information processed."
Scheduled tasks (also referred to as scheduled jobs) provide a way to schedule activities to run on a computer at specific days and at specific times. Because scheduled tasks are run by the Task Scheduler service, these tasks can be run regardless of whether a user is logged on to the computer.
Scheduled tasks are useful in several ways:
They help ensure that important activities are carried out on a regular basis.
If you need to run an inventory script every week, you can schedule the script to run automatically every Friday instead of sending out weekly reminders to users and relying on them to manually run the script.
They help minimize disruptions to users and to the network.
A backup program can require a considerable amount of processing power on a computer and use a considerable amount of network bandwidth. To minimize the impact of this program, you can schedule it to run late at night, when network traffic is at a minimum. Scheduled tasks will run even if no one is logged on to the computer.
They are persistent.
When you create a scheduled task, you create a file stored in a special folder (systemrootTasks). These files are not deleted unless you specifically delete them. As a result, scheduled tasks persist regardless of how many times a computer is restarted.
Comparing Win32_ScheduledJobs and the Task Scheduler
Working with scheduled tasks is complicated by the fact that Windows 2000 includes two sets of task-scheduling APIs:
Task Scheduler APIs, used by the Scheduled Tasks wizard. These tasks cannot be scripted.
AT APIs, used by At.exe. These tasks can be scripted using the WMI class Win32_ScheduledJob.
A comparison of the two kinds of task-scheduling APIs is shown in Table 17.12.
Table 17.12. Task-Scheduling APIs
Task Scheduler APIs | AT APIs |
|---|---|
Tasks can run under any valid user account; you specify the account name and the password when you create the task. | Tasks must run under the same account as the scheduler service. By default, this is the LocalSystem account, although you can configure the service to run under a different account. |
Tasks can be scheduled to start at logon, at system startup, or whenever the system is idle. | Tasks can be run only at specific times (for example, 3:00 P.M. every Tuesday). |
Task durations can be specified. For example, you can schedule a task to run for one hour and then stop. This is useful for monitoring scripts: they can be scheduled to run for a specified amount of time, and then be shut down. | Task durations cannot be specified. To run a task for a specific amount of time (for example, one hour) you must include code within the task itself that will terminate the script at the appointed time. |
Tasks can be given any file name (for example, Compact Database.job). | Tasks are automatically assigned a name that uses the format Atx. job, with x representing consecutive integers (At1.job, At2.job, At3.job, and so forth). |
Tasks created using the Task Scheduler APIs are invisible to the Win32_ScheduledJob class. | Tasks created using the AT APIs can be opened and modified using Scheduled Tasks. |
You cannot modify a task created using the AT APIs. Instead, you need to delete the task and then create a new one in its place. For example, to change a task scheduled to run on every Tuesday so that it instead runs every Friday, you need to delete the Tuesday task and then recreate the task, making sure that it is scheduled to run on Fridays.
You can use Scheduled Tasks to modify a task created by using the AT APIs. If you do this, however, that task will no longer be available to the Win32_ScheduledJob class. The task will still run, but you will not be able to enumerate or delete it by using WMI because the Scheduled Tasks tool adds properties to the job that are not supported by the AT APIs. The task will also “disappear” from WMI if you give it a name with any format other than Atx. job.
Scheduled tasks can save a great deal of work for administrators, especially if these tasks are well coordinated for minimal impact on users, computers, and the network. However, poorly planned scheduled tasks can cause a number of problems.
For example, if multiple tasks are scheduled to run at the same time, some tasks might interfere with other tasks. Likewise, CPU-intensive or network-intensive tasks scheduled to run at inopportune times might negatively affect users or the network.
To help ensure that tasks are carried out on a regular basis, but without adversely affecting users or the network, it is important for administrators to know which tasks are scheduled to run on their computers and when they are scheduled to run. Enumerating your scheduled tasks can help you minimize the impact of these activities on an individual computer and on the network as a whole.
The Win32_ScheduledJob class can be used to enumerate the following items about the scheduled tasks on a computer:
Which task is scheduled to run.
When the task is scheduled to run.
What happened the last time the task was scheduled to run. (That is, did the task run as expected, or did it fail?)
Scheduled task properties available through the Win32_ScheduledJob class are shown in Table 17.13.
Table 17.13. Win32_ScheduledJob Properties
Property | Description |
|---|---|
Caption | Short description (one-line string) of the task. |
Command | Name of the command, batch program, or binary file (along with commandline arguments) that the schedule service will use to invoke the job. Example: “defrag /q /f” |
DaysOfMonth | Days of the month when the job is scheduled to run. If a job is to run on multiple days of the month, these values can be joined in a logical OR. For example, if a job is to run on the 1st and 16th of each month, the value of the DaysOfMonth property will be 1 OR 32768. Values include:
|
Description | Description of the object. |
ElapsedTime | Length of time that the job has been executing. |
InstallDate | Date the job was created. |
InteractWithDesktop | Boolean value indicating that the specified job is interactive (meaning a user can give input to a scheduled job while it is executing). |
JobID | Identifier number of the scheduled task. |
JobStatus | Status of execution the last time this job was supposed to run. Values are:
|
Notify | User to be notified upon job completion or failure. |
Owner | User that submitted the job. |
Priority | Urgency or importance of execution of a job. |
RunRepeatedly | Scheduled job should run repeatedly on the days that the job is scheduled. If FALSE, the job is run once. |
StartTime | UTC time to run the job, in the format: YYYYMMDDHHMMSS.MMMMMM ± UUU Where YYYYMMDD must be replaced by ********. The replacement is necessary because the scheduling service allows jobs to be configured to run only once or to run on a day of the month or week. A job cannot be run on a specific date. For example, ********123000.000000–420 means that the task should run at 12:30 P.M. Pacific time with daylight saving time in effect. In the Universal Time Coordinate (UTC) format:
|
TimeSubmitted | Time that the job was created. |
UntilTime | Time after which the job is invalid or should be stopped. |
Listing 17.29 contains a script that enumerates the scheduled tasks on a computer. To carry out this task, the script must perform the following steps:
Create a variable to specify the computer name.
Use a GetObject call to connect to the WMI namespace rootcimv2 on the computer, and set the impersonation level to “impersonate.”
Use the ExecQuery method to query the Win32_ScheduledJob class.
This query returns a collection consisting of all the scheduled tasks created for the computer.
For each scheduled task in the collection, echo the task properties.
Example 17.29. Enumerating Scheduled Tasks
 1 strComputer = "."
 2 Set objWMIService = GetObject("winmgmts:" _
 3     & "{impersonationLevel=impersonate}!\" & strComputer & "
ootcimv2")
 4 Set colScheduledJobs = objWMIService.ExecQuery _
 5     ("SELECT * FROM Win32_ScheduledJob")
 6 For Each objJob in colScheduledJobs
 7     Wscript.Echo "Caption: " & objJob.Caption
 8     Wscript.Echo "Command: " & objJob.Command
 9     Wscript.Echo "Days Of Month: " & objJob.DaysOfMonth
10     Wscript.Echo "Days Of Week: " & objJob.DaysOfWeek
11     Wscript.Echo "Description: " & objJob.Description
12     Wscript.Echo "Elapsed Time: " & objJob.ElapsedTime
13     Wscript.Echo "Install Date: " & objJob.InstallDate
14     Wscript.Echo "Interact with Desktop: " & objJob.InteractWithDesktop
15     Wscript.Echo "Job ID: " & objJob.JobID
16     Wscript.Echo "Job Status: " & objJob.JobStatus
17     Wscript.Echo "Name: " & objJob.Name
18     Wscript.Echo "Notify: " & objJob.Notify
19     Wscript.Echo "Owner: " & objJob.Owner
20     Wscript.Echo "Priority: " & objJob.Priority
21     Wscript.Echo "Run Repeatedly: " & objJob.RunRepeatedly
22     Wscript.Echo "Start Time: " & objJob.StartTime
23     Wscript.Echo "Status: " & objJob.Status
24     Wscript.Echo "Time Submitted: " & objJob.TimeSubmitted
25     Wscript.Echo "Until Time: " & objJob.UntilTime
26 Next
To run a program or script at a specified time on a specified date, you must create a scheduled task that contains the following information:
Scheduled tasks can be created on local computers by using the Scheduled Task Wizard. However, this wizard cannot be used to schedule tasks on remote computers (or to simultaneously schedule tasks on more than one computer). If you need to create scheduled tasks on remote or multiple computers, you can use the command-line tool At.exe or create a custom script by using the WMI class Win32_ScheduledJob.
The Win32_ScheduledJob Create method can be used to create scheduled tasks on a computer. The Create method requires the parameters shown in Table 17.14. Parameters not required for a specific task should be left blank.
Table 17.14. Win32_ScheduledJob Properties Available to the Create Method
Property | Description |
|---|---|
Command | Name of the executable program, batch file, or script to be run. |
StartTime | UTC time to run the job. This is of the form YYYYMMDDHHMMSS.MMMMMM(+-)OOO, where YYYYMMDD must be replaced by ********. Example: ********123000.000000–420, which implies 12:30 P.M. Pacific time with daylight saving time in effect. |
RunRepeatedly | Indicates whether the scheduled job should run repeatedly on the days that the job is scheduled. The default is FALSE. This parameter is optional. |
DaysOfWeek | Days of the week when the task should be run. Values are:
To run the task on multiple days, use a logical OR to combine values. For example, to run a task on Tuesday, Thursday, and Saturday, use the following code:
To run a task on multiple days, you must set the RunRepeatedly parameter to True. |
DaysOfMonth | Days of the month when the job is scheduled to run; used only when the RunRepeatedly parameter is True. This parameter is optional. |
Indicates whether the specified job should be interactive (meaning that a user can give input to the scheduled job while it is executing). The default is False. This parameter is optional and is rarely set to True. In general, the reason to use a scheduled task is to allow a task to be carried out without any user interaction. | |
JobID | Identifier number of the job. This parameter is a handle to the job being scheduled on this computer. |
When a scheduled task is created, one of the error codes shown in Table 17.15 is returned, indicating the success or failure of the procedure.
Table 17.15. Win32_ScheduledJob Error Codes
Error Code | Description |
|---|---|
0 | The scheduled task was successfully created. |
1 | The request is not supported. |
2 | The user did not have the necessary access. |
8 | Interactive Process. |
9 | The directory path to the service executable file was not found. |
21 | Invalid parameters have been passed to the service. |
22 | The account under which this service is to run either is invalid or lacks the permissions to run the service. |
Scripting Steps
Listing 17.30 contains a script that schedules a task on a computer. To carry out this task, the script must perform the following steps:
Create the constant RUN_REPEATEDLY and set the value to True.
This constant will be used to indicate that the scheduled task should run repeatedly. If set to False, the scheduled task will run once and then never run again.
Create the constants MONDAY, WEDNESDAY, and FRIDAY and set the respective values to 1, 4, and 16.
These constants represent the days of the week when the script is scheduled to run.
Use a GetObject call to connect to the WMI service.
Retrieve an instance of the Win32_ScheduledJob class.
Call the Create method, specifying the following:
Name of the executable file or script to be scheduled.
In this example, the file is Monitor.exe.
The time that the task is scheduled to run (12:30 P.M.) in UTC format. The eight asterisks indicate that the year, month, and day are irrelevant. Only the time itself (123000, meaning 12:30:00) is important.
Whether the job should run repeatedly or just once.
The constant RUN_REPEATEDLY, with the value True, means that the job should run repeatedly.
The days of the week on which the job should run.
The constants MONDAY, WEDNESDAY, and FRIDAY indicate the days of the week when the task should run.
The days of the month on which the job should run.
This parameter is left blank because the job is scheduled to run on specific days of the week.
Whether the task needs to interact with the user.
This parameter is left blank because the task does not need to interact with the user.
The variable name (JobID) that will hold the identification number assigned to the new job.
If the operation succeeded, echo the Job ID assigned to the new task.
Example 17.30. Scheduling a Task
 1 strComputer = "."
 2 Set objService = GetObject("winmgmts:" & strComputer)
 3 Set objNewJob = Service.Get("Win32_ScheduledJob")
 4 errJobCreated = objNewJob.Create _
 5     ("Monitor.exe", "********123000.000000-420", _
 6         True , 1 OR 4 OR 16, , , JobID)
 7 If Err.Number = 0 Then
 8     Wscript.Echo "New Job ID: " & JobID
 9 Else
10     Wscript.Echo "An error occurred: " & errJobCreated
11 End If
When a scheduled task is no longer needed on a computer, it should be deleted. If a task is not deleted, it will continue to run as scheduled. This can create problems that might be a minor irritant (running a monitoring program whose data is no longer needed) or that might be extremely destructive (deleting files and folders that should not be deleted).
Scheduled tasks can be deleted using the Win32_ScheduledJob Delete method. There are two ways to delete scheduled tasks:
Delete a single scheduled task. To delete a single scheduled task, your script needs to connect to the specific task (using the JobID as a unique identifier) and then call the Delete method.
Delete all the scheduled tasks on a computer. To delete all the scheduled tasks on a computer, your script needs to retrieve a list of all the scheduled tasks, connect to each one, and then individually delete each task.
Scripting Steps
There are multiple ways to delete scheduled tasks:
Deleting a single scheduled task.
Deleting all the scheduled tasks on a computer.
Deleting a single scheduled task
Listing 17.31 contains a script that deletes a scheduled task on a computer. To carry out this task, the script must perform the following steps:
Use a GetObject call to connect to the WMI service.
Retrieve the instance of the Win32_ScheduledJob class where the JobID = 1.
JobID is a unique identifier for the specific task. The file name in this case is At1.job.
Use the Delete method to delete the job.
Example 17.31. Deleting a Single Scheduled Task
 1 strComputer = "."
 2 Set objService = GetObject("winmgmts:\" & strComputer)
 3 Set objInstance = objService.Get("Win32_ScheduledJob.JobID=1")
 4 objInstance.Delete
Deleting all the scheduled tasks on a computer
Listing 17.32 contains a script that deletes all the scheduled tasks on a computer. To carry out this task, the script must perform the following steps:
Use a GetObject call to connect to the WMI service.
Use a second GetObject call to connect to the Win32_ScheduledJob class.
For each scheduled job, store the JobID in the variable intJobID.
Connect to the individual job, specifying the value of intJobID as the JobId.
Because the Delete method will not work on a collection, you must individually connect to each scheduled task and then use the Delete methods to remove the tasks one by one.
Use the Delete method to delete the scheduled task.
Example 17.32. Deleting All the Scheduled Tasks on a Computer
 1 strComputer = "."
 2 Set objService = GetObject("winmgmts:\" & strComputer)
 3 Set colScheduledTasks = objService.ExecQuery _
 4     ("SELECT * FROM Win32_ScheduledJob")
 5 For Each objTask in colScheduledTasks
 6     intJobID = objTask.JobID
 7     Set objInstance = objService.Get_
 8         ("Win32_ScheduledJob.JobID=" & intJobID & "")
 9     objInstance.Delete
10 Next