
Entering and Editing Text
One “key” secret to the iPad’s success—sorry about the pun—may be its successful use of an onscreen keyboard as a practical alternative to a physical keyboard. The relatively large size of the iPad screen, compared to smartphone screens, provides the sheer screen real estate necessary for an onscreen keyboard that can largely replace a physical keyboard. Careful engineering by Apple helps bridge the remaining gap.
It’s common for new iPad users to buy a physical keyboard as part of their purchase, for the sake of productivity—then find that they rarely use it. Like the iPad itself, the onscreen keyboard is so convenient, while being “good enough” to get the job done, that it replaces a conventional solution.
Complementing the iPad’s breakthrough success with onscreen keyboards, the device also provides other features to help enter and edit text. Placing the cursor within text and selecting start and end points for cut, copy, and paste are among the operations that the iPad makes practical, if not always easy.
In this chapter you can learn in some depth about how to get text into your iPad. As people increasingly use their iPads as an alternative to carrying around a laptop, onscreen keyboarding and text editing skills might make the difference for you in getting the most out of your iPad.
Typing on the Onscreen Keyboard
People who use or comment on the iPad often have a hard time describing the difference between an iPad, and how they use it, versus a laptop or desktop computer. The biggest difference between the two is in text input, because the most often-used method for entering text is via the iPad’s onscreen keyboard.
It’s easy to use an external keyboard with the iPad, and the cursor keys on an external keyboard can replace some of the functionality of a mouse. However, just about all iPad users use the onscreen keyboard at least some of the time, and most use the onscreen keyboard most or all of the time.
Using the onscreen keyboard, you’re likely to find that data entry is roughly half as fast on an iPad as on a computer. You may find that you pick and choose which tasks you complete on each device so as to avoid doing heavy data entry on the iPad.
You can optimize your ability to enter text on the iPad in two ways. The first is by using an external keyboard, as mentioned in the cross reference. The other way is by getting good at using the touchscreen. Use the information in this section to get a feel for the onscreen keyboard, and then practice, practice, practice.
Typing Basics
The iPad’s onscreen keyboard is easy to use and effective. Whereas there have been complaints about onscreen keyboards in the past—“typing on glass” is still not as fast or efficient as using a physical keyboard—the iPad onscreen keyboards are about as good as it gets. The relatively large size of the iPad’s screen (compared to, say, the iPhone) and Apple’s clever engineering make using the iPad onscreen keyboard quite easy.
To use the keyboard, tap in any area onscreen that requires text or numeric input. The keyboard appears, as shown in Figure 4.1.

Figure 4.1. The onscreen keyboard “morphs” to fit your needs.
To enter characters, simply tap the appropriate keys. Following are some highlights of text entry:
• Single capital letters: To enter a single capital letter, tap the Shift key once and then tap a letter.
• Shift Lock: You have to turn this on to use it, as described in the next section, “Activating and Using Caps Lock.”
• Automatic end of sentence: To end a sentence, tap the spacebar twice. The iPad adds a period to the end of the last word you typed, inserts a space, and then makes the next letter a capital letter.
• Digits and special characters: The digits 0[nd]9 and a host of special characters are available by tapping the .?123 key (when on the alphabetic keyboard) or the #+= key (when on the numeric keyboard). See the next section for details.
• Additional characters and variations: To see variations on keys, such as an accented “e” or a “u” with an umlaut, or an upside-down question mark or exclamation point as used in Spanish, tap and hold a key. Variations appear, as shown in Figure 4.2.

Figure 4.2. Individual keys on the onscreen keyboard are packed with variations and related special characters.
• Typamatic Backspace key: The Backspace key is what used to be called typamatic, back in the days of electric typewriters. That is, if you hold it down, it keeps going, faster and faster. When you hold down the Backspace key, it first deletes single characters; then, after about 25 characters, it switches to deleting entire words, at the rate of a few words per second.
• Use international keyboards: Add or remove international keyboards by choosing Settings > General > Keyboard. (That’s the Settings app, General area, Keyboard option.) If additional keyboards are available when you type, you can access them by tapping the Next Keyboard key.
• Hiding the keyboard: Tap the Hide Keyboard key in the lower-right corner of all keyboards to hide the keyboard. Tap anywhere onscreen where you can enter text to bring the onscreen keyboard back.
Positioning the Cursor
Getting the cursor to the exact spot you want it is a bit different on the iPad. There’s no mouse, of course, and there are no cursor control keys on the onscreen keyboard. (Apple’s Bluetooth keyboard for iPad, like most other such keyboards, has one.) You position the cursor using the touchscreen.
The iPad provides support to help you do this accurately, but using it properly requires a bit of practice. After you master the technique, you can use it when selecting text as well. Doing so is described in the “Selecting Text” section, later in this chapter.
These steps show you how to position the cursor.
![]() LET ME TRY IT
LET ME TRY IT
Putting the Cursor in the Right Spot
1. Press and hold your finger near the spot you want to edit, on the same horizontal line.
In the area above your finger, the iPad displays the text inside a magnifying glass, with the cursor in the center of the magnifying glass.
2. Slide your finger horizontally on the line of text to put the cursor right where you need it.
Verify the location of the cursor by watching the center of the magnifying glass, rather than your finger.
3. When the cursor is in the right spot, lift your finger.
Don’t drag or roll your finger as you lift it, or the cursor ends up one character off the desired location—an all too common result of this process.
Activating and Using Caps Lock
Some things in life are simply a mystery, and one of them is why iOS—the operating system shared between the iPhone and the iPad—requires users to turn on the caps lock capability in Settings before it can be used. I suppose it makes some kind of sense to turn it off, if needed, but making the “off” setting the default seems strange.
Oh well, it’s quicker to fix it than to talk about it. Follow these steps.
![]() LET ME TRY IT
LET ME TRY IT
Turn On Caps Lock and Use It
1. On the Home screen, tap Settings. The Settings app appears.
2. Tap General. The General screen appears.
3. Tap Keyboard. The Keyboard screen opens.
4. Drag the Enable Caps Lock switch to On. The iPad enables the Caps Lock capability.
5. To use Caps Lock, double-tap the Shift key, or tap both Shift keys at once.
The Caps Lock keys on the onscreen keyboard both display a blue background, showing you that Caps Lock is on.
6. To turn Caps Lock off, tap either Shift key.
Using the iPad’s Five Main Keyboards
The iPad onscreen keyboard has some tricks hidden up its sleeve. The configuration of the keyboard can change at the tap of a key or when you turn the iPad enough to change its orientation.
For instance, when you need to type in a URL, the onscreen keyboard changes so that the spacebar is removed. Instead of a spacebar, you see a period key, a slash key, and a key that reads .com. Because Web addresses don’t use spaces, Apple removed the spacebar and inserted keys that make sense when entering a URL.
There are actually five different versions of the keyboard that you frequently see when using the iPad. In addition to the main text entry keyboard, as shown in Figure 4.2, there are four others.
The first is the URL keyboard. This comes up when using the Safari browser app, with the entry point in the URL area. The URL keyboard is like the alphabetic keyboard, but with period, slash, and .com keys instead of the spacebar.
The second alternative is the numeric keyboard (with special characters), as shown in Figure 4.3. To access this keyboard, tap the .?123 key on the alphabetic or URL keyboard.
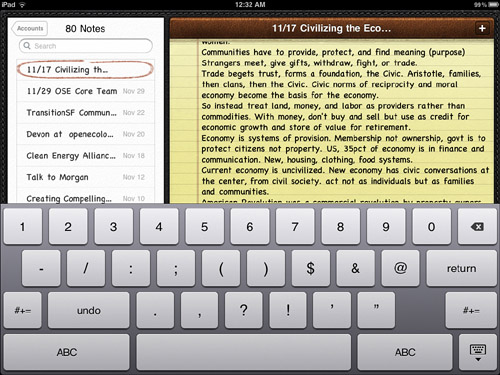
Figure 4.3. The numeric keyboard includes the digits 0[nd]9 and 15 special characters.
The special characters are
- / : ; ( ) $ & @ . , ? ! ′ 0
The third alternative is the special characters keyboard, as shown in Figure 4.4. To access this keyboard, tap the #+= key on the numeric keyboard.
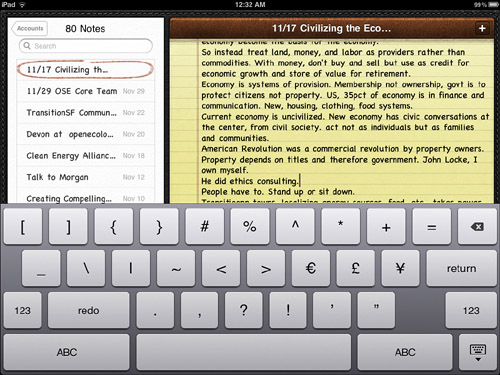
Figure 4.4. The special characters keyboard includes 25 special characters.
The following special characters appear:
[ ] { } # % ^ * + = _ | ~ < > € £ ¥ . , ? ! ′ 0
Note that the last six characters—the bottom row of the three rows of characters—are the same on both the numeric keyboard and the special characters keyboard.
The final alternative is the split keyboard, shown in Figure 4.5. The split keyboard was introduced in Fall 2011. It’s actually two miniature half-keyboards, which together take up much less screen space than the full keyboard. The split keyboard is great for use with your thumbs.

Figure 4.5. The split keyboard is a whole new approach to typing, especially if you’re all thumbs.
The split keyboard also has its own versions of the URL, numeric, and special characters keyboards. These have the same keys as the full versions described previously, but in the split-screen layout.
I personally found the keys on the split-screen keyboard just a little too small for my thumbs. When first trying the feature, I had the idea that you could resize the split-screen keyboard to fit your needs; but I sadly found that isn’t the case. While practice makes perfect, you may need to be more dexterous than me to make good use of the split-screen keyboard.
Working with Predictive Text
When you type with the iPad, its onboard dictionary “watches” as you type and suggests a word based on the first characters you enter. As you type more characters, the suggested word is likely to change. When you tap the spacebar or a punctuation mark, or tap Return, the suggested word appears—not the characters you typed, unless they’re the same.
This functionality is both powerful and maddening. Many of your typing mistakes are automatically fixed by the iPad, to the extent that you can allow yourself to be somewhat sloppy in your typing. In many cases, you can skip entering an apostrophe, for instance. (But in other cases, you do have to enter it, which can get confusing.)
However, many unusual words that you want to enter aren’t recognized. For instance, starting to type the word “Smithsonian” generates the suggested alternative “Smithsonite.” This seems harmless enough when the iPad enables you to complete the word you want and use it.
It’s quite frustrating, though, when the iPad replaces the word you want to type with the word it thinks you want to use. (It almost seems like it’s putting in the word it thinks you should use.) For instance, a popular slang term for “very” is the word “hella,” especially in and around Oakland, California. “I hella heart that” means “I like that very much.”
However, if you try to type that you “hella heart” something on your iPad, the iPad Dictionary changes “hella” to “hellas” (“Hellas”, with a capital “H”, is the word for “Greece” in Greek). To enter “hella,” you have to explicitly reject the Dictionary’s choice, or it will make the change for you.
Follow these steps to use—or ignore—the Dictionary.
![]() LET ME TRY IT
LET ME TRY IT
Working with the Dictionary
1. Start typing a word on the iPad screen.
In many cases, a word suggested by the Dictionary appears underneath the word you’re typing, as shown in Figure 4.6.

Figure 4.6. The Dictionary suggests a completed or alternative version of the word you’re typing.
2. To accept the suggested word, type a space, punctuation mark such as a comma, or a return character.
The suggested word appears in place of the characters you typed.
3. To begin to reject the suggested word, finish typing your word, but don’t type a space, punctuation mark, or a return character.
This is difficult, as you are probably in the habit of typing a space or other character without additional mental effort after typing a word. However, typing a space, punctuation mark, or return character replaces your word with the suggested word, which is not only frustrating, but also costs you an opportunity to retrain the Dictionary.
4. To finish rejecting the suggested word, tap the suggestion to dismiss it.
The Dictionary notes both the word you actually entered and the word you rejected. It will now be more likely to accept your word in the future; the more times you reject the alternative in favor of “your” word, the more likely “your” word will be accepted going forward.
 SHOW ME Media 4.1—Working with Predictive Text
Access this video file through your registered Web Edition at my.safaribooksonline.com/9780132709590/media or on the DVD for print books.
You can turn auto-correction on or off; see Chapter 18, “Customizing Your iPad,” for details. However, there is no option to leave auto-correction on, but not let it replace characters that you actually type with different characters. For instance, when I type “hella” and a space, I don’t want that changed to hellas, overriding my space to end the word. When I type “hel” and a space, though, I might sometimes want that changed to Hellas.
Keyboards in Portrait Versus Landscape Mode
Each of the iPad’s keyboards has two versions: portrait and landscape. Both versions have exactly the same keys; however, the keyboard is much bigger in landscape mode and takes up almost half the screen, as opposed to roughly one-fourth in portrait mode. See Figure 4.6 for an example of the keyboard in landscape mode.
This makes for an interesting trade-off. You may find that typing is more accurate in landscape mode; however, you can see so much less of the screen that you lose a lot of information. In some cases, for instance when entering text into a form on a web page, working in landscape mode can make it quite difficult to see what you’re doing.
Holding the iPad in your hands, you can use either a portrait or landscape keyboard one-handed with your index finger or two-handed with your thumbs. When you set the iPad on your lap or your legs, on a desktop or tabletop, or put it in a stand, you may type with two hands, just as you can with a physical keyboard. (Although the iPad keyboard, even in landscape mode, is still only about half the area of the physical keyboard on a medium-sized laptop.)
Experiment to see how you work best. One optional piece of equipment that may help is the appropriate iPad case sold by Apple.
For the original iPad—now often called the “iPad 1” to differentiate it from the newer, thinner, lighter iPad 2—Apple sells the iPad Case, shown in Figure 4.7. The iPad Case has a clever notch that enables you to flip the back into it, creating a stand that makes the iPad work like an old-fashioned lap desk. (Lap desks date back to the precomputer days of relying on pen and paper, or even quill and ink.) The iPad Case works only in landscape mode; other cases and stands may support just one of the two modes or both modes.

Figure 4.7. The iPad Case creates a small lap desk with your iPad front and center.
For the iPad 2, Apple created the iPad Smart Cover. You have to see it in action to fully understand it—it’s a flat cover, when placed on the iPad, that attaches via magnets to the edge of the device. However, the cover has four slats lengthwise across it, so you can roll it into a triangular shape, still attached to the iPad. You can use this triangular wedge as a kind of pillow for the long edge of the iPad, forming a different kind of “lap desk” than with the iPad Case for the original iPad.
Figure 4.8 shows the Smart Cover in use, but again, you really have to try it yourself to get the idea. I find the magnetic attachment too weak to use the “lap desk” alignment as flexibly as I’d like—sitting on a couch or sitting up in bed, for instance. It’s very clever, though.

Figure 4.8. The Smart Cover for the iPad 2 is flexible and fun to use.
There’s a bit of Steve Jobs lore that applies here, too. The Smart Cover leaves the back and edges of the iPad 2 exposed to scratches and scrapes. When asked about this, Jobs calls this kind of wear “weathering” and suggests that it makes the device more attractive, giving it character over time. It’s a nice thought. If you don’t agree, though, you may want to get a more traditional, full cover for the iPad 2.
Cutting, Copying, Pasting, and Defining Text
The iPad has been described as a device best suited for consuming information—for surfing Web pages, listening to music, and watching videos created by others. It’s said to be much weaker for creating information—for writing, creating Web pages, drawing and painting onscreen, or creating audio or video.
Although the iPad is indeed excellent for consuming information, many new apps, including art apps with amazing capabilities, undermine this claim. However, the core question may be the iPad’s capability to support rapid, accurate text entry. Even many multimedia works begin as a written email message and then are spelled out in a word processing document or even an Excel spreadsheet. If you can’t enter and edit text and numbers on the iPad easily, its utility for creating any kind of information is undermined.
Fortunately, the iPad outperforms many people’s expectations for text entry. Although entering text on a laptop, for instance, is easier, the iPad is quite adequate for the purpose. And the iPad has advantages that make it a viable option when the alternatives—most notably, a personal computer or handwritten notes—fail to perform adequately.
For example, my iPad is a great tool for taking notes in meetings. It’s better than a paper notebook and pen because it’s more efficient. In particular, I can easily take notes during a meeting, and then clean them up a bit and email them to participants immediately afterward.
Before the iPad, I often took notes on paper and then promised to transcribe them and email them afterward, but only managed it about half the time. With the iPad, this important (to me) task is easy.
This can be seen as a kind of “stupid pet trick,” replacing a $5 paper notepad with an iPad that costs $500, minimum. At those prices, the iPad should, perhaps, do 100x more than the notepad. However, although not necessarily 100x better, the iPad is indeed a lot better. It saves time and effort and helps me get more done.
The iPad has many advantages over a laptop as well, including convenience, unobtrusiveness, light weight, and long battery life. There are many situations in which it’s worth carrying an iPad, but wouldn’t be worth carrying a laptop. One is at the airport—where, 10 years ago, Macs dominated business class, now you see more and more iPads.
As mentioned earlier, the iPad is only roughly half as effective as a laptop or desktop computer for heavy work. However, its convenience and other advantages make it perfect for lighter demands. For this reason, many business travelers take the iPad on the plane and then continue with the iPad at their destinations, or alternate the iPad with a computer that travels as checked baggage on the flight. This approach definitely lightens the load and hassle of taking a laptop as part of carry-on luggage.
You also can easily define words with the iPad—a capability that was added in the Fall of 2011. Just select any single word. For most words, your iPad will offer a Define option alongside Cut, Copy, and Paste (or Replace). Tap Define to see a dictionary definition of the word. This is a fun and useful capability, and helps you disambiguate homonyms as well. (Which means, it helps you separate out words like “there” and “their”, if you become uncertain as to which you need in a given spot.)
For all these uses, the ability to select, cut or copy, and then paste text are vital underpinnings to getting the most out of your iPad. Getting dictionary definitions of words is useful, too. Practice these tasks; your increased effectiveness can help you do more than others with your iPad.
 TELL ME MORE Media 4.2—Productivity on the iPad
Access this audio recording through your registered Web Edition at my.safaribooksonline.com/9780132709590/media or on the DVD for print books.
![]() LET ME TRY IT
LET ME TRY IT
Cutting and Copying Text
1. Open the email message, Note, or other document that contains the text you want to select.
2. Display the text onscreen. If possible, rotate your iPad, scroll, and then zoom in to the extent that you can see the text you want to select and not much else.
3. Start the selection process. Tap and hold on the first word of text, if possible, or nearby, if not. For editable text, you also need to tap the Select button.
The iPad displays the word as selected and shows selection handles around it, as shown in Figure 4.9. The left handle displays at the starting point of the selection; the right handle marks the end point.

Figure 4.9. Tap and hold a word to display selection handles.
4. Mark the end of the selection by dragging the handle of the endpoint of the selection to the right and down, as shown in Figure 4.10.
Figure 4.10. Drag the endpoint selection handle to change the size of the selection.
As you drag the endpoint, the size of the selection increases.
5. If the text is not editable, as on a web page, you see a button above the text, Copy. (You can’t Cut, because you can’t edit the text.) If the text is editable, as in a Note or an email message, you see two buttons, Copy and Cut.
Tap the corresponding button to copy or cut the text. You can copy or paste between applications. For instance, I sometimes copy the signature information from an email—name, address, phone number, and so on—and paste it into the Notes field of a contact, and then copy each piece from there into the appropriate field of the contact.
Pasting Text
1. Open the app and document—the email message, Note, or other document—that contains the spot where you want to paste text.
2. Tap to place the cursor where you want to insert the text. If you want to replace existing text with the pasted text, select the text you want to delete.
3. Tap the cursor. The iPad displays the buttons shown in Figure 4.11.

Figure 4.11. Tap the cursor and then tap Paste to paste selected text.
4. Tap Paste. The iPad pastes the selected text into the selected spot or replaces the selected text with the pasted text.
5. If the text is not editable, as on a web page, you see a Copy button above the text. If the text is editable, as in a Note or an email message, you see two buttons: Copy and Cut.
Tap a corresponding button to copy or cut the text.
SHOW ME Media 4.3—Copying and Pasting Text
Access this video file through your registered Web Edition at my.safaribooksonline.com/9780132709590/media or on the DVD for print books.
![]() LET ME TRY IT
LET ME TRY IT
Defining a Word
1. Open the app and document—the email message, Note, or other document—that contains the spot where you want to get the definition of a word. Or, type the word whose definition you want to get.
2. Tap to place the cursor in or next to the word you want to define. Choose Select from the options that appear. If you have selected a single word, Define will be included in the options that appear for the selection (alongside Cut, Copy, and either Paste or Replace).
3. Tap Define. A definition appears, as shown in Figure 4.12.

Figure 4.12. Tap Define to see a dictionary definition of the selected word.
4. Tap anywhere to clear the definition.
Copying and Pasting Images
Belying its reputation for being creatively limited, the iPad makes it easy to copy and paste images.
![]() LET ME TRY IT
LET ME TRY IT
Copying and Pasting an Image
1. Find an image that you want to copy and tap and hold it.
Options appear, as shown in Figure 4.13.

Figure 4.13. Tapping on an image gives you options.
2. Tap Copy. The iPad stores a copy of the image in memory.
3. Open the app and, if applicable, the document where you want to paste the image, similar to the steps provided in Pasting Text, in the previous section.
4. Position the cursor at the exact location where you want the image to appear.
It may be hard to move the image after you paste it, so it’s worthwhile to position the insertion point carefully instead.
5. Tap the cursor. Your iPad gives you options, including Paste.
6. Tap Paste. Your iPad pastes the image into the selected location. To undo the paste, shake your iPad, just as you can do after pasting text.