
5. Template Basics
You might not realize this, but you’ve already been working with templates as soon as you opened Word and started typing in text. Turns out every document in Word, including blank ones, are built with templates. If you’ve never worked directly with templates before, this chapter is just for you. Not only does this chapter define them and introduce you to all the ones available in Word, but you’ll also learn how to create your own. Templates might sound a little intimidating at first, but after you know how they work and what to do with them, you’ll soon be using them like a pro.
Understanding Templates
A template is a pattern or boilerplate document that gives you a starting point for building documents. Most templates offer preset formatting and placeholder text which you can replace with your own text. The placeholder text is there to give you an idea of the type of text you can use in the document, as well as an idea of what the preassigned formatting looks like.
Think of a template as a sort of overlay or design guide you place on a document that acts as a pattern as to what goes where. You can use all kinds of templates for all kinds of purposes. For example, you can find templates for creating invoices that have built-in columns and rows for typing in purchase orders, prices, and totals. A fax template, as another example, might include fields for typing in fax numbers, the company name, contact information, and a logo that you can replace with your own company logo.
With an online connection, you can find templates for faxes, cover letters, résumés, calendars, brochures, newsletters, photo albums, award certificates, flyers, and more on the Microsoft Office website. Plus, new ones are added to Microsoft’s online content all the time.
So what’s the difference between a template and a regular document, you might ask? Template files utilize a special file format and extension. If you turn on the file extension display in Windows Explorer, you can see Word template files listed with the .DOTX, .DOTM, or .DOT extensions. (See Chapter 4, “Document Basics,” to learn more about file types.) Don’t let the special file format confuse you, however. When you assign a template, you’re just placing a style overlay onto a regular Word document file, so the document remains a regular .DOC file type. It doesn’t suddenly become a template itself. It merely utilizes the design guide.
The beauty of templates is you can customize them to suit your own needs. You’re not stuck using all the placeholder elements a template offers. You can pick which ones you want to use and discard the rest. You can even make a new template out of an existing template or create your own new template that’s more tailored to future documents you want to build.
Applying a Template
You can apply a template to an existing document, or you can start a new document based on a template of your choice. To start a new document based on a template, click the Ribbon’s File tab and click New. This displays a screen similar to Figure 5.1 listing templates you can peruse.
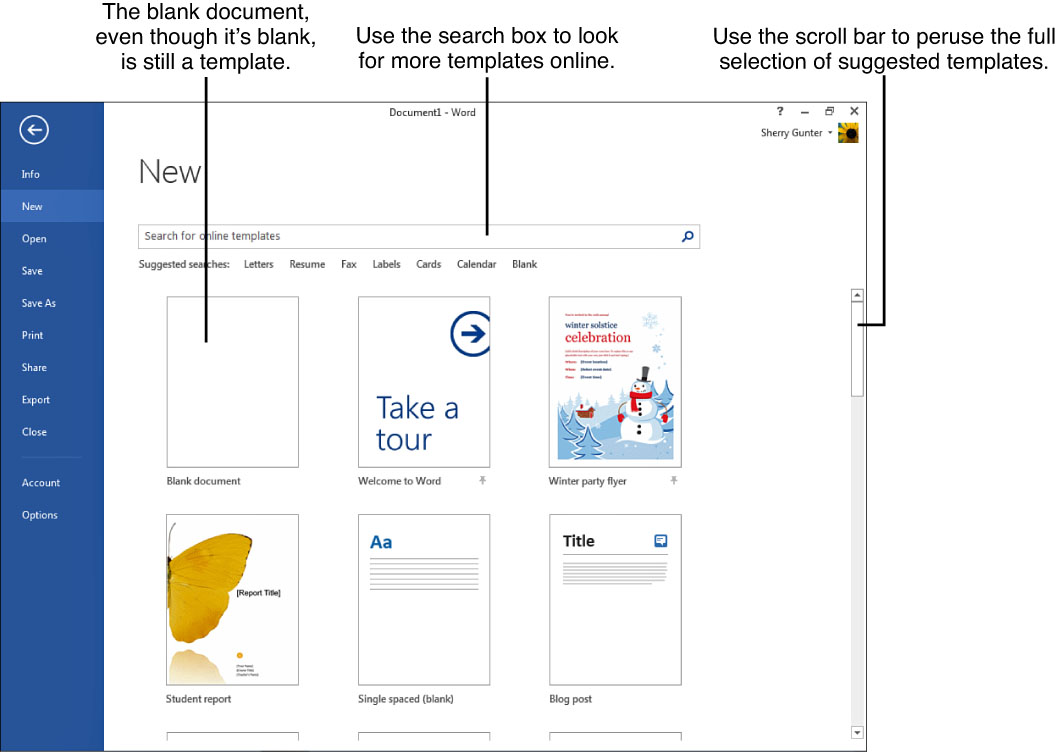
FIGURE 5.1 You can find templates listed on the New page.
The top of the page offers a search box you can use to look for a particular kind of template, and lists some search categories you can inspect with a simple click. Or you can use the scroll bar to scroll along and view various templates displayed in the window. When you find something you actually want to use, just click it to select it. A smaller screen pops up, similar to Figure 5.2, with details about the template, its popularity rating, and a button you can click to download and apply the template. If the template suits you, click the Create button. If not, click the Close button (X) or use the navigation arrows to view more template descriptions.
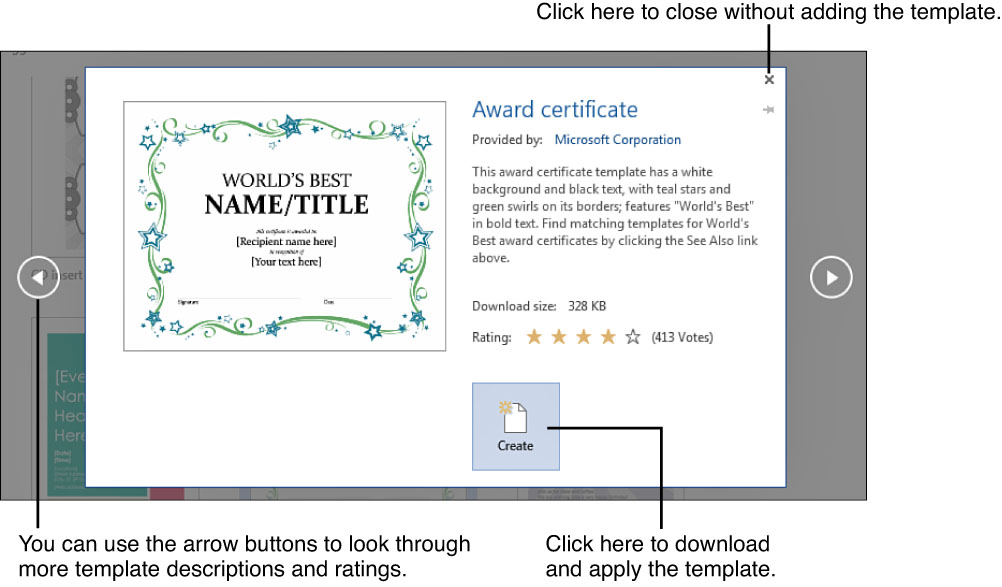
FIGURE 5.2 Read more about the template and decide whether you want to download and apply it or not.
![]() Tip
Tip
If you find yourself using the same template over and over again, you can pin it so it’s always on the top of the list of templates on the New page. To do so, move the mouse over the template you want to pin and click the pushpin icon in the bottom-right corner of the highlighted template. The pushpin icon toggles on and off; a vertical pushpin indicates the template is pinned, a horizontal pushpin means the template is not pinned.
As soon as you download a template, Word applies it to a new document. You’ll need to save the file when you finish adding your own text and fixing it the way you want (see Chapter 4 to learn more about saving files). The template you downloaded is automatically added to your template library. Check out the template I added, shown in Figure 5.3. Word created a new document file for me and slapped the template right on it. The file is not saved yet, so it’s still sporting the Document2 filename at the top.
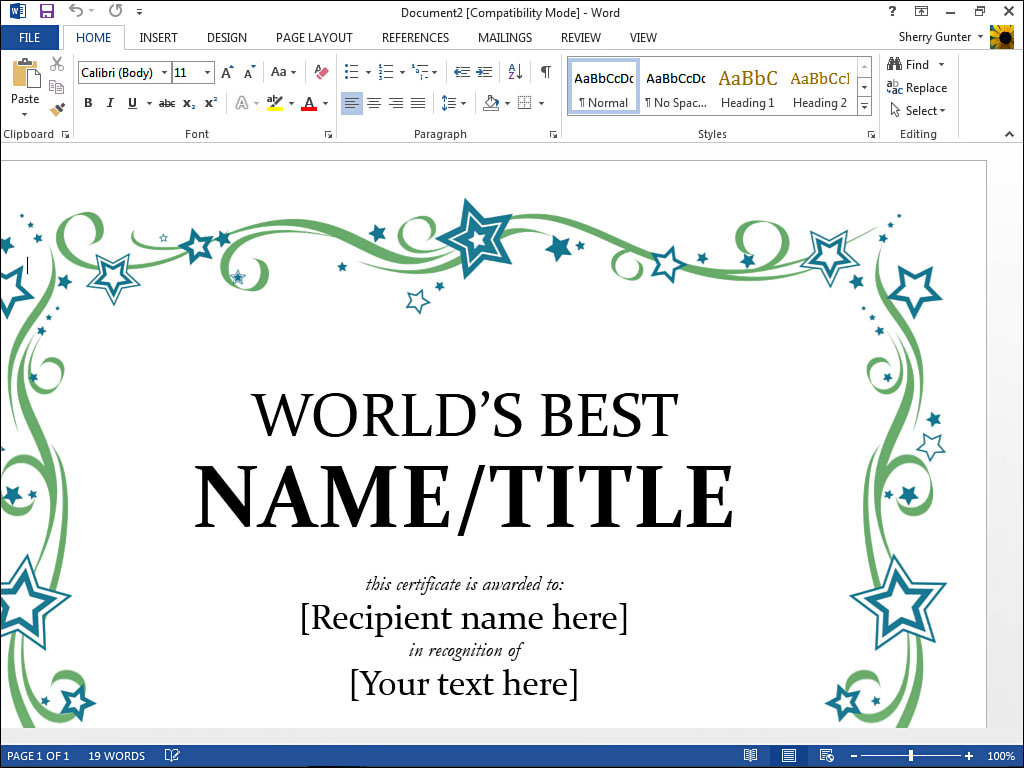
FIGURE 5.3 Here’s a newly applied template.
To start filling in a template, click the placeholder box and type away. Any placeholder text is replaced with the new text you add, as shown in Figure 5.4. Text blocks are easily moved around and formatted in Word. As soon as you click a box, it’s selected and surrounded by selection handles, which you can drag to resize the box.
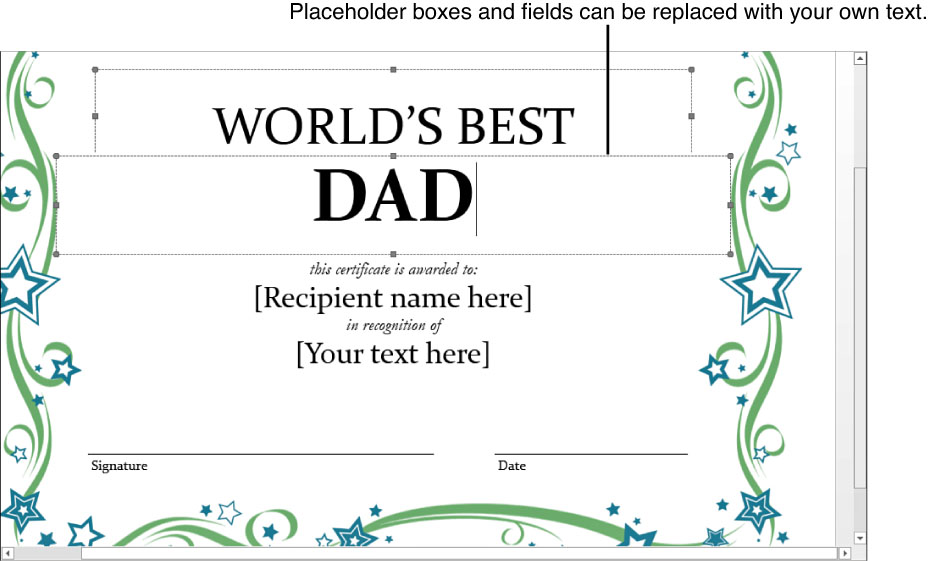
FIGURE 5.4 You can add your own text as needed to make the document your own.
![]() Note
Note
You can apply templates from older versions of Word, or templates you have created and stored elsewhere. Click the Ribbon’s File tab, then click Options in the left pane. This opens the Word Options dialog box. Click Add-Ins. Click the Manage drop-down arrow at the bottom of the dialog box and select Templates, and then click the Go button. This opens the Templates and Add-ins dialog box. You can click the Attach button to navigate to the folder or drive where your template file is stored, then open the template and attach it to your document.
Finding More Templates
You can use the search box on the New page to look for more templates online. Tapping into the vast resources of the Microsoft Office website, you can look for specific types of templates based on the keyword(s) you enter. With the New page displayed (click the Ribbon’s File tab and click New to display it), click in the search box and type in your search word. Press Enter or click the Search button and a page opens displaying any matching results (see Figure 5.5). Naturally you’ll need an online connection to utilize this feature.
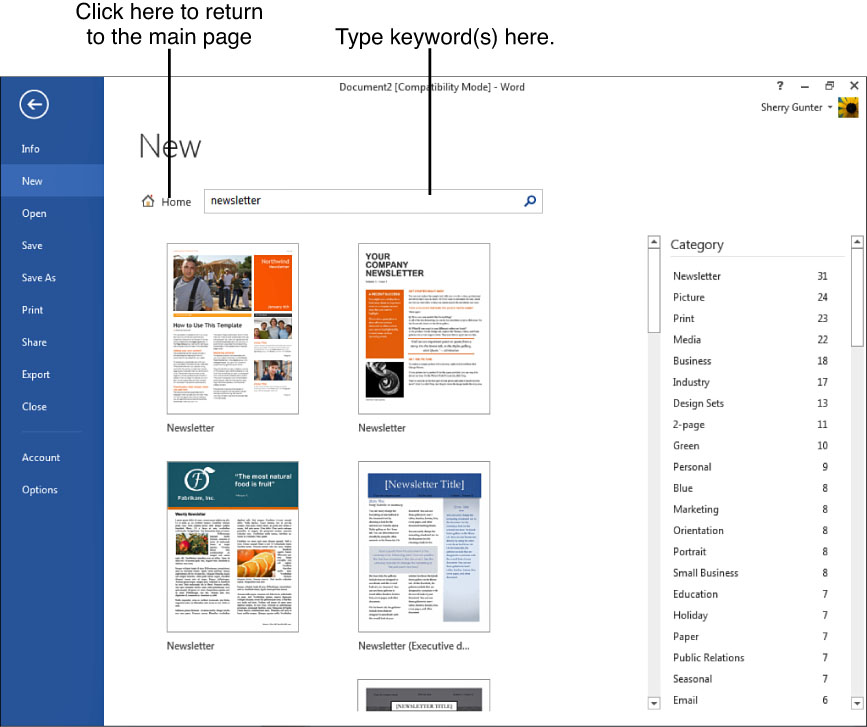
FIGURE 5.5 Use the Search feature to look for more templates online.
Click the Home button to return to the main New page. Also on the New page, just below the search box, is a list of suggested search categories. You can click a category to view a list of corresponding templates.
![]() Note
Note
By default, Word 2013 saves templates in the following folder path: %appdata%MicrosoftTemplates. If you type this path into the Explorer window’s Address bar, you can view all the template files stored within the default folder.
You can also use your web browser to check the Office website for more templates. Browse to office.microsoft.com and click the Templates link, and then click the link for Word. The web page displays all kinds of templates, categories, and links. When you find a template you want, you can click the Download button and make it yours. You’ll be prompted to save the file to a folder you designate, or you can choose the default Templates folder as its home.
Finding downloaded templates can sometimes be a bit frustrating, especially if you don’t remember to specify a folder. You can use Explorer to search for templates (.dotx file extensions). In the Explorer search box, type *.dot or *.dotx to search for all templates, or if you know the exact name, you can type it in instead.
Saving Templates
You can turn any document into a template file to reuse, or after customizing a template, you can turn it into a new template to apply again and again. When you have finished making the document look just the way you want and are ready to save it as a template file, follow these steps:
1. Click File.
2. Click Save As.
3. Click Browse.
4. Navigate to the folder or drive where you want to store the file; for best results, save your templates in the Custom Office Templates folder in the Documents library.
5. Click the Save as type drop-down arrow (see Figure 5.6).

FIGURE 5.6 You can save any file as a template using the Save as type drop-down arrow.
6. Click Word Template (*.dotx).
7. Type in a name for the template.
8. Click Save.
When you save new templates, Word lists them in a new category on the New page. As shown in Figure 5.7, you can click the Personal category to view the templates stored in your Custom Office Templates folder.
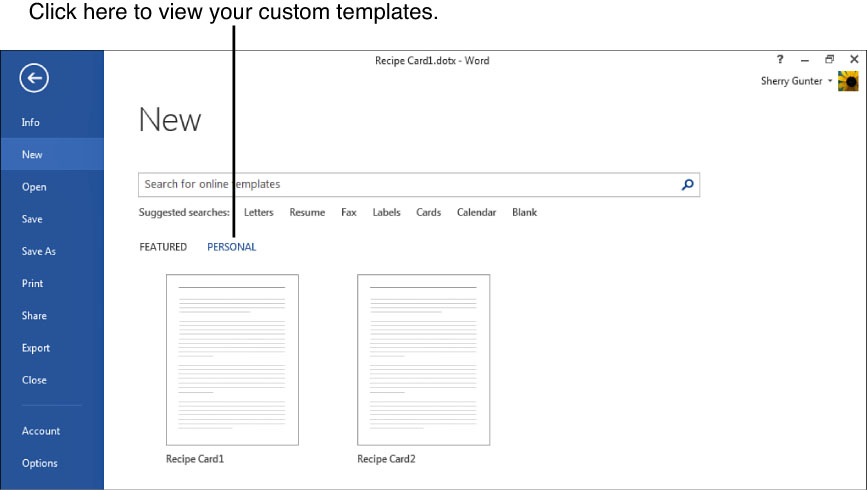
FIGURE 5.7 The Personal category lists your custom template files.