Chapter 3. Vision and Voice
In Chapter 2, we talked about all the basic concepts and first steps that you take to get off the launch pad with your media project. In this chapter, we’ll explore the process of developing longer projects. We’ll also provide in-depth technical information on cameras and lighting to help you refine and improve the quality of your shots and shoot closer to the image that you see in your mind when you pre-visualize your project.
In the last chapter, we discussed some of your key music choices in the categories of soundtrack and score. Now we’re going to discuss another key audio element that you may wish to bring into the mix: voiceover narration.
At the end of this chapter you’ll work through a project that will benefit from the better understanding you’ll have of how to control your image and the quality of the narration that accompanies it. By layering these new elements over those introduced in previous chapters, your work in this chapter should reflect a higher level of experience and sophistication and the greater number of options available to you as an audiovisual artist (see FIGURE 3.1).

After you start undertaking longer projects—whether documentary, fiction, or a hybrid of the two—you’ll start working with larger crews and longer schedules. This is where the rubber really hits the road.

Developing the Idea
When you are developing your idea, the two production skills of communication and organization become the keys to your success, so much so that you cannot succeed without these skills.
But before we get into all that, we’re going to go back to the beginning and ask these pesky questions: What in the heck do I write about? Why do I want to do this anyway?
These are great questions, and even if you think you already know what you are looking to produce and why, it’s worthwhile to take some time to define the actual goal of your project because that can vary tremendously and can determine how much effort, resources, time, heart, and cash you put into your project.
Why Am I Doing This?
We’re going to be asking a lot of questions about your project in this chapter, and the first one is, why are you doing this?
To some, this might seem like a theoretical query without much practical application. But one of the most important exercises you can do before starting on a journey of media creation is to determine what your goals are for your project in a perfect world and what you’d like to achieve as a result of making your project. Let’s say you finish your project and realize it exactly as you see it in your mind. What will be the impact of your labor of love, and what response do you hope it will elicit from your audience?
You also need to ask yourself the following questions:
![]() Where will it be shown?
Where will it be shown?
![]() Who will see it?
Who will see it?
![]() What kind of companies (Helllooooo, Pixar!) or organizations (Helllloooo, Kickstarter!) might be interested in buying/optioning/supporting/helping me fund my script?
What kind of companies (Helllooooo, Pixar!) or organizations (Helllloooo, Kickstarter!) might be interested in buying/optioning/supporting/helping me fund my script?
Answering some of these fundamental questions can give you a lot of direction as you develop your script.
Young artists just starting out as producers and storytellers can benefit from listing some of the things they want to do with their finished work, such as the following:
![]() Expressing themselves
Expressing themselves
![]() Winning film festivals (see FIGURE 3.2)
Winning film festivals (see FIGURE 3.2)

![]() Communicating outrage
Communicating outrage
![]() Recording that perfect skateboarding trick
Recording that perfect skateboarding trick
![]() Exploring a great love
Exploring a great love
![]() Making their friends laugh
Making their friends laugh
![]() Meeting other people who like doing video projects
Meeting other people who like doing video projects
![]() Showing their work to the mayor of Los Angeles
Showing their work to the mayor of Los Angeles
![]() Documenting their heritage, history, and cultural pride
Documenting their heritage, history, and cultural pride
![]() Winning cash prizes
Winning cash prizes
![]() Completing senior portfolios
Completing senior portfolios
![]() Getting into USC’s Cinematic Arts program
Getting into USC’s Cinematic Arts program
![]() Examining a social problem
Examining a social problem
![]() Winning video cameras and other great gear
Winning video cameras and other great gear
![]() Gaining a sense of something they like to do that they’re good at
Gaining a sense of something they like to do that they’re good at
![]() Earning the respect of others for creating something amazing
Earning the respect of others for creating something amazing
![]() Feeling good about themselves
Feeling good about themselves
![]() Winning internships at exciting companies
Winning internships at exciting companies
![]() Getting jobs in tech and entertainment companies
Getting jobs in tech and entertainment companies
![]() Designing websites
Designing websites
![]() Making friends
Making friends
![]() Influencing people
Influencing people
And a whole lot more.
Media artists find out who they are by figuring out who they care about and what they love. For the artist, life, work, and art are interchangeable. Each one feeds the others. So if you’re ever having a hard time getting started on a project, take a minute and ask yourself the following questions:
![]() What do you love?
What do you love?
![]() What do you care about?
What do you care about?
![]() What makes you mad?
What makes you mad?
![]() What is working in this crazy world that’s worth paying tribute to?
What is working in this crazy world that’s worth paying tribute to?
Once we encountered a young artist who believed that there was nothing he was interested in, nothing he wanted to make a media piece about, and nothing that was worth doing. He thought and thought until he remembered that there was one thing that ticked him off.
The lights on his street were out, and no one came to fix them. His mom wouldn’t let him go out and play. Bingo. Boy Who Only Wants to Play vs. Government Bureaucracy. Boom. Pitchable project.
He wrote up a pitch and started to tape himself calling the city to ask why the lights weren’t fixed on his block. When the city representatives asked who he was, he told them he was a documentary filmmaker.
The lights came back on that night.
Such is the power of media.
Or maybe the city reps saw Supersize Me (2004), a documentary where a single filmmaker took on the entire McDonald’s corporation and compelled the company, along with the public, to recognize and address the health risks caused by its food.
Where Do You Begin?
Once you have determined what you are interested in, you must figure out what will make your film interesting to watch and by whom. In other words, you have to think not only about the intention of your project but who will like it and where it will be seen.
A crew recently completed a short video project called Guilty about a young man who needs money for college. The only way he thinks he can get it is by stealing iPads and other expensive gadgets.
This project came about because that group was discussing gangster and crime genre movies that they liked, such as Scarface (1983) and Dead Presidents (1995). Soon they found themselves discussing and watching excerpts from older films such as the original Scarface (1932) and The Public Enemy (1931), which inspired these artists to transfer their unfinished piece to black and white.
They were all inspired by the material and the project to do their jobs with dedication and the desire to learn and do well. As a result, they completed a work that was exceptionally polished and compelling.
The director won scholarships to college media programs and was accepted into a leading arts program in Hollywood.
However, despite its high quality, the work was not accepted into many festivals because of its 15-minute length. Most festivals are looking to program student works that are 12 minutes and shorter.
The filmmakers discussed a couple of strategies for shortening their piece, but ultimately they decided they weren’t interested in making changes because the original film had captured what they wanted. For them, making the film they wanted was more important than getting into a film festival.
With that end result in mind, as you choose and then refine the subject of your project, ask yourself what it is about the topic that is most interesting and original to you. Virtually all projects, from PSAs to shorts to feature-length blockbusters, have something in them that the filmmakers felt was interesting to themselves and to an audience.
Even sequels to big-budget extravaganzas change some elements to keep the movie-going experience fresh for the audience, though these projects have the added challenge of reproducing whatever it was that made the original work so sequel-worthy.
Harper Lee based her Pulitzer Prize–winning novel To Kill A Mockingbird (1960) on her life growing up in the South, exploring topics such as rape, racism, the legal system, and mob justice through the eyes of a ten-year-old protagonist. It was not an autobiographical work based on her life but rather her attempt to write what she knew so that her work would have the authenticity and detail of real life.
She expected her book to be rejected or cause a mild scandal, but its steely, accurate depiction of Southern racism broke through and caused a massive sensation. She created one of the great fictional representations of human decency and courage in the character of attorney Atticus Finch.
We recommend you develop projects based on your own life and passions because the details we recall from our most transformative experiences, how they enriched us, how they injured us, or how we struggled to recover from them deepen the quality of the story and the project. Details make stories. That said, if your passion is to write about the life of a World War I flying ace, you should follow your passion and let the details come from the quality of your research.
The writer and director of 8 Mile (2002) based that film’s fictional story on some aspects of the life of Eminem, who starred in the film. Some critics felt that the movie lacked a third act because after we see the main character Jimmy “B-Rabbit” Smith overcome his fears and freestyle brilliantly, we don’t then go on to see him become a huge success, selling out stadiums and making a lot of money, as his real-life counterpart did.
This was a creative choice on the part of the producers and director, who didn’t want to produce a feature-length “make it rain” hip-hop video, choosing instead to focus on the artist’s internal creative and personal struggles.
Josefina Lopez wrote a play based on growing up and facing the challenges of life in and away from the Boyle Heights neighborhood of Los Angeles. The play, Real Women Have Curves (which opened in 1993), was a success, and Lopez and a colleague produced a version for HBO based on the play in 2002, largely because of the honesty and integrity of the piece and the richness of the characters the writer drew based on her family and the loving portrayal of life on L.A.’s East Side.
Stepping Up to the Plate: The Pitch
Generally speaking, when pitch is used as a verb (outside of a baseball game), it means to attempt to sell something, as in an ad you might see on late-night television (“It slices! It dices! You need it! It will make your life complete! It’s only $9.99...for the next five minutes!”).
When used as a noun in the world of media and entertainment, a pitch is a summary of your project that communicates to anyone who hears it the essence of what makes it good...in 25 words or less.
A pitch is a tool that you keep in your utility belt that will help you to do the following:
![]() Sell your project to someone or some company looking for that kind of project (whether they knew it or didn’t)
Sell your project to someone or some company looking for that kind of project (whether they knew it or didn’t)
![]() Attract cast and crew members who are talented and looking for quality projects to work on
Attract cast and crew members who are talented and looking for quality projects to work on
![]() Refine or change your idea if you’re not getting the kind of response to it you would like
Refine or change your idea if you’re not getting the kind of response to it you would like
Traditionally a pitch is a sentence, for example, “A sheriff who is afraid of water must stop a shark who is killing beachgoers in a Long Island community.” Or, “A group of soldiers try to find one missing private who is the last survivor in his large family.” Or, “A boy strikes up a friendship with an alien from another planet.”
Yes, we happen to like Steven Spielberg movies, but one of his strengths is developing storylines and movies that are usually appealing and also easy to describe.
What to Leave In, What to Leave Out
The pitch will typically describe the main character of your story, the goal they are pursuing, and the main obstacles that get in their way. The main character, or protagonist, as you remember from Chapter 2, is the one who stands in for the audience to make us feel like we are going along through the story ourselves.
Whether or not you get all the information about your main character into the pitch (because it’s short and to the point), it’s your job as the writer to know what is most interesting about your main character and to weave it into your story.
You must determine what is most original about your pitch and focus on that. We recommend pitching your project a few times for practice to determine whether you have fully communicated what you need to in order to get an audience interested (see FIGURE 3.3).

You’ll know how successful your pitch is when it achieves what you wanted it to or when it ultimately fails to do so and you must choose either to refine it further or to abandon it in favor of something else.
Sometimes writers come up with a pitch before they write the script for their project. Occasionally, if the idea of the story itself is interesting enough, writers are even able to sell well-crafted pitches to production companies that may then pay them (or someone else) to write the screenplay.
Selling a project with a single sentence can be the writer’s version of winning the lottery. Disney Pictures paid $3.5 million for a pitch called Lightspeed before a script was written. Disney management did so because they loved the pitch; had a relationship with the writer, Terry Rossio, who had written the Pirates of the Carribean movies for them; and knew that the business potential for this project was extremely high (the Pirates movies have made almost $4 billion worldwide). Even though $3.5 million is a lot of money, the choice to pay it for a pitch before the writer sold it to another studio was considered a sound business decision for the company.
However, before anybody sets out to write that one great sentence and retire, we should point out that the great majority of greenlighted projects not only sell and are produced based on completed screenplays but that those screenplays have often been rewritten over the course of several drafts.
In fact, most of the big-budget projects you watch in the theater (or on your personal playback device of choice) actually were developed across several different drafts written by different writers, with an organization called the Writers Guild of America (WGA)—which is like a union—brought in at the end to determine who wrote what and who gets the main credit for the finished script.
Successful Pitching Strategies
The main way writers use their pitches is to communicate the essence or best part of their project and to make sure that any changes they make along the way as they develop it are in keeping with whatever their project is really about.
Some other strategies for successful pitching include the following:
![]() Starting your pitch with a question related to the main challenge faced by your protagonist. For example, “What if everything you thought you knew about your life turned out to be a lie?” This engages the listener from the beginning.
Starting your pitch with a question related to the main challenge faced by your protagonist. For example, “What if everything you thought you knew about your life turned out to be a lie?” This engages the listener from the beginning.
![]() Bringing the listener to an interesting or mysterious part of your story and then switching to another portion, creating a cliffhanger in your pitch.
Bringing the listener to an interesting or mysterious part of your story and then switching to another portion, creating a cliffhanger in your pitch.
![]() Speaking openly about what drew you to this story if asked.
Speaking openly about what drew you to this story if asked.
![]() Taking feedback on the project openly, even if the comment does not, at first, seem like a good idea. Just listen to it and consider it later.
Taking feedback on the project openly, even if the comment does not, at first, seem like a good idea. Just listen to it and consider it later.
Processing Feedback
It’s important to listen to and process feedback you receive on your script to apply an objective point of view to your work. Was something confusing to your audience? Would some scenes be clearer if they happened in a different order? The pitch can help you clear things up and determine what you can fix during revisions.
However, be careful when receiving feedback on your project from a producer or a friend on a script about some aspect of the story that they liked or didn’t like. You don’t want to do a massive rewrite without fully considering whether the changes they are suggesting are appropriate for the story that you want to tell.
Remember that the person giving you feedback has their own interests, opinions, and agendas that don’t necessarily reflect your own. Also, sometimes people just feel a need to say something, and their feedback may or may not be something you can use.
On the other hand, if your pitch keeps getting the same response it has already gotten—for instance, “I’m not buying this, and neither will anybody else”—you may want to consider what specific aspects of your narrative are getting between you and a fantastic finished media project and a pile of cash. Writers typically refine pitches over time based on feedback that they receive, just not all at once.
Our recommendation is to jot down any ideas you get, sit on them a bit, and then consider whether they will make your story better or just different. Anyone can have a good idea, but it is your responsibility as the writer or creator of your project to determine whether the recommendation you just heard gets your project where it needs to go.
Once, a writer was creatively stalled on a script that was set to go into production and couldn’t figure out how to resolve one major issue and finish the screenplay. Then, out of the blue, the perfect solution came from one of his worst enemies, who forgot for a minute how much he disliked the writer and basically fixed his story. It was like Lex Luthor giving the cure for kryptonite poisoning to Superman.
Pitching from a Template
Finally, the pitch is a tool you use to determine whether anything new you want to introduce—a scene, a character, a motif—fits into your project. If you come up with an awesome new white-haired wizard character named Zandalf but your pitch is “A repressed mom and housewife regains joy in her life when she discovers kickboxing,” maybe save Zandalf for the next script.
Then again, it’s your project. Maybe Zandalf would make a great mentor/sidekick for kickboxing Mommy! Your call. In any case, it all comes back to your pitch. Keep it next to the Batarang and get it out when you need it.
The following is an example of a template for a pitch. Some who read it may find it cynical to think that all stories can be reduced to one paradigm. However, all projects have to take some aspects of the human experience and funnel them through a particular set of characters, experiences, and subcultures.
As a result, virtually every project from Titanic (1997) to Blue Velvet (1986) to Los Olvidados (1950) to Finding Nemo (2003) to Friday (1995) can be diagrammed using the following template. Try it yourself with a movie, TV show, book, or play you know well and see!
Get It on Paper
Like many beautiful events in life such as a wedding or the birth of a child, the making of a video project is attended by lots and lots of paperwork. Artistic paperwork. Business paperwork. Organizational paperwork. Understanding the various types of paper you’ll be filling out or asking others to fill out is key to successfully developing your media business or career.
The following is a list of some of the most common types of forms used in video production (at all levels). Here and in the appendix, you will find templates of each form discussed in this section.
We’ll cover storyboards last because they merit their own chapter, or even their own book!
The Project Triangle: Fast, Good, and Cheap
All the documents we are about to describe help you immensely to have a more organized, clear, articulate production with nothing left to chance. The saying from production—“Fast, good, and cheap...pick any two”—actually comes from the Project Constraint Model (see FIGURE 3.4). Here are a few examples of how it plays out in the world of filmmaking:
![]() If you want it fast and good, it won’t come cheap. The second and third installments of the Pirates of the Caribbean movie series were shot at the same time without a break, which cost a lot of money but allowed the producers to complete both sequels much faster than if the whole cast and crew had gone away and then come back together a year later to start it all up again.
If you want it fast and good, it won’t come cheap. The second and third installments of the Pirates of the Caribbean movie series were shot at the same time without a break, which cost a lot of money but allowed the producers to complete both sequels much faster than if the whole cast and crew had gone away and then come back together a year later to start it all up again.
![]() If you want it good and cheap, it won’t be fast. Filmmaker Robert Rodriguez jump-started his career by making the feature-length El Mariachi (1992) for the jaw-dropping sum of $5,000 by doing virtually every job in the movie he possibly could himself, including the special effects. He later wrote a book about the experience called Rebel Without a Crew, which is a must-read for young filmmakers.
If you want it good and cheap, it won’t be fast. Filmmaker Robert Rodriguez jump-started his career by making the feature-length El Mariachi (1992) for the jaw-dropping sum of $5,000 by doing virtually every job in the movie he possibly could himself, including the special effects. He later wrote a book about the experience called Rebel Without a Crew, which is a must-read for young filmmakers.
![]() If you want it fast and cheap, it won’t be good. Whether strolling through Blockbuster (Google it, kids) or scrolling around Netflix, it’s possible to come across many, many projects that starred people not known for acting but famous for other reasons—for example, Hulk Hogan and other wrestlers—or that have titles that leave you scratching your head, such as Killer Klowns from Outer Space (1988).
If you want it fast and cheap, it won’t be good. Whether strolling through Blockbuster (Google it, kids) or scrolling around Netflix, it’s possible to come across many, many projects that starred people not known for acting but famous for other reasons—for example, Hulk Hogan and other wrestlers—or that have titles that leave you scratching your head, such as Killer Klowns from Outer Space (1988).

You might watch these titles out of curiosity or for amusement, or even rent them accidentally, but don’t be shocked if they aren’t very good. Some movies get made because producers have access to professional wrestlers or an excess of clown makeup. Koff, Sharknado, koff.
Welcome to Hollywood, kids.
On to the paperwork.
Shot Lists: The Grocery Lists of Production
In a perfect, or even good, world of production, a director will be able to create a storyboard that is more than a series of stick figures with crosses for eyes. But at the least, the director should come to the set with a shot list, a list of camera setups they hope to use to record a scene.
A typical (and simple) shot list might include a wide shot (WS) of the scene being shot that shows the location as well as the actors in the scene; two medium shots (MSs) of the main actors shot from opposite, matching angles; and two close-ups (CUs) of the same action (see FIGURE 3.5).

We discussed the framings of various types of shots in Chapter 1. The shot list for a scene might be written up as follows:

The producer and first assistant director have to check this list against their schedule and make sure they have the time to shoot the various setups listed on the shot list. If they don’t have the time, they have to prioritize the most important shots and leave the rest for another day.
These Are the Breaks: Script Breakdowns
When a script is in preproduction, the unit production manager or line producer marks up the script using various colored highlighters to determine exactly what is going to be needed to record every scene and then, as the schedule is determined, when the individual cast, crew, and objects will be required to be on the set to shoot.
As the first assistant director creates a production board and a shooting schedule based on the number of script pages in a particular scene and a certain location, they determine what they need and by when. The line producer and unit production manager attend to the many technical details necessary to be ready to shoot (see FIGURE 3.6).

Charts of all the required elements for a particular shooting day, called a script breakdown, detail everything that is necessary and accountable for each day of shooting. This might include the 1966 Mustang convertible the writer wrote into his script hoping the producer would buy it for him when the film wrapped (completed) production, or it could be a photograph sitting on a nightstand that has to be filmed and framed before it can be filmed again (did we just blow your mind?) during the production of the actual scene.
A crew was shooting a short that all took place in one large executive’s office. The entire film consisted of one long scene. It was shot over three weekends, and there was a fish tank in the office that contained a fish that ate other fish, as a visual metaphor for how this main character of the executive “ate” other executives in meetings. The only thing was, it was expensive to rent a fish that ate other fish.
As a result, the crew developed their shooting schedule around the fish. For the first two weekends, they shot the angles around the executive’s desk at the other end of the office and didn’t shoot any angles that would show the fish tank even in the background. They left those camera angles the last weekend and got them all then.
Often, when it comes to costumes, props, and so forth, line producers will try to get multiples or doubles of whatever they need because things happen, and line producers need to be like Boy Scouts (times a million): Above all, they need to be prepared.
The script breakdown is a complete list of all the categories involved in the production of a particular scene:
![]() Locations
Locations
![]() Actors
Actors
![]() Background actors (extras)
Background actors (extras)
![]() Props
Props
![]() Costumes
Costumes
![]() Vehicles
Vehicles
![]() Stunt performers
Stunt performers
![]() Makeup and hair
Makeup and hair
In the finished script breakdown, each of these necessary elements has been color-coded and organized by category for each individual scene.
There are software applications such as Movie Magic Scheduling and Jungle Software that will allow you to create script breakdowns fairly easily. Not all crews go to the trouble to create script breakdowns. Most prefer simple lists of cast, crew, props, and so on. But there’s no denying that your production, however big or small, will run more smoothly if the producer releases, in advance, a complete list of what is required to shoot and when it is needed by.
As an example, a while back a crew was shooting a project called New Life in which a high-school freshman has chocolate milk sprayed on her by a bully in the school cafeteria.
Everything was fine on the day of the shoot, and everyone was prepared—except for one thing. The producer had arranged for only one costume shirt to be on the set for the main character, which meant that the producers were going to have to get the sprayed milk shot in a single take.
Fortunately, someone noticed this oversight before shooting of the scene began and the producers and the director made a command decision to change the costume for the main character to a simple white T-shirt, of which they had three or four on set that the wearers were willing to have chocola-fied for the sake of the movie.
This turned out to be an excellent last-minute reconsideration, as the girl playing the bully missed with the chocolate milk on the first take and hit only the shirt. They were able to shoot several times until the bully got her aim right and blasted the other actress with a face full of Bessie’s best.
Yes, but...Is It in the Budget?
The film budget for any media project lists how much every element of the production will cost, including the cast, crew, props, costumes, insurance, catering, and everything else.
The costs to produce a project can range from nothing to a few hundred dollars for a video résumé to $1,000 for a wedding video and from $5,000 for El Mariachi (1992) to $220 million or more for big-budget blockbusters like The Avengers (2012). Whatever amount of funding you need to complete your project, a detailed budget is an incredibly useful tool to help you determine where to spend what you’ve got to get the most bang for your buck (see FIGURE 3.7).

Low-budget filmmakers know that sets, props, costumes, locations, and humans may come cheap or free, but the three things that always cost are food, insurance, and gear, including whatever you do to get your cast a version of their work to show. Few microbudget projects are able to (or should even want or expect to) get around these basic costs of doing business.
Of course, the real trick in effective filmmaking is to get great things shot for free or cheap. All successful indie producers know this. And you might be surprised to learn what you can get for free or cheap once you set your mind to making your magnum opus, even if it’s only three minutes long.
Actor and director John Sayles (Return of the Secaucus 7, 1980) and horror auteur Orin Peli (Paranormal Activity, 2009) are just two examples of producers who saved a lot by writing a movie they could shoot in their own homes.
In top-notch media schools like USC or A.F.I., you might find students spending money to get a great Steadicam shot ($$$), outdoor gunfight ($$$$), or song by the Rolling Stones ($$$$$$), but at the high-school level, we rarely spend that kind of cash in production. We once authorized a student with a Goth sensibility to drop $25 on makeup in a Hollywood shop so her group could shoot their zombie epic, Juan of the Dead.
Where Are You Supposed to Be? The Master Schedule
The master schedule or shooting schedule lists each day of production, what scenes are going to be shot, how many pages are planned to be covered on that day, which cast members need to be available, and what the location is, along with other critical information (see FIGURE 3.8).

SCREENSHOT: JUNGLE SOFTWARE
FIGURE 3.8 A shooting schedule in stripboard form created with Gorilla production software
There is no Oscar or Emmy award for the assistant director (who typically serves as schedule-keeper), but the shooting schedule is as important as any other technical document in the making of a project. We require all producers to have an approved schedule with locked locations before shooting can begin.
Call Me: The Call Sheet
The call sheet is a form filled out daily for each day’s shooting, which contains all the key information for the cast and crew: where they’re shooting, who has to be on set that day, the contact information for all the key personnel, and, most importantly, what their call time is—in other words, what time they have to be on set.
Call sheets are documents crew members need to prove they worked on particular days, either to confirm their income or to satisfy union requirements (see FIGURE 3.9). All levels of crews are well-served in creating call sheets in order to avoid any producer said/production assistant said disagreements. With the call sheet, everyone knows what time they need to be there.

We recommend setting a call time an hour before you plan to start shooting, especially if you need to allow time for hair and makeup.
![]() Punctuality
Punctuality
Location, Location, Location: Obtaining Location Permits
A location permit is a signed document that allows you and your crew to shoot at a particular place at the times and under the conditions that have been agreed to previously by you and the owner or representative of that location (see FIGURE 3.10).

The location permit spells out the rights you have, such as to shoot in a particular place from a certain time to a certain time. It may also spell out the specific area in which you and your crew may record or not record—for example, in the living room but not the foyer or the bedroom.
In professional filmmaking, locations have to be rented for a fee agreed upon between the production company and the owner. We use location permits in student media even though students do not generally pay for the locations they use.
This helps students get used to crafting, agreeing to, and sticking to contracts. In addition to location permits, the crew may want to put up signs around the location indicating exactly what times the location will be used so that people know to be quiet around the location.
Actor Releases
An actor release (sometimes known as a talent or model release) is a consent form signed by a performer to allow their image to be used in conjunction with the presentation and promotion of a media project (see FIGURE 3.11).

The actor is agreeing legally to be recorded and to show up in the movie as the director and producers see fit.
There is a tremendous need for contracts such as location permits and actor releases even on student productions where there is no money involved because people sometimes change their minds after you’ve already filmed them. Without this documentation, a lot of work, time, and money could be wasted, and a cast and crew of many people could be demoralized into not finishing their project.
Contracts enable producers to cover their butts and make sure all of their work and dedication won’t be wasted on producing footage they can’t use.
There’s another reason to get used to obtaining this kind of legal protection. Let’s say you make a short that is so good, a producer or distributor wants to buy it and release it. Depending on the kind of actor release you have, you may or may not be able to exploit your project commercially by selling or licensing it.
Although you need actor releases for professional filmmaking, you are legally okay to film a public figure like a senator or a business leader for your documentary without a release.
Storyboards: Your Movie, Now in Convenient Comic-Book Form
Storyboards, which depict your audiovisual project in comic book style, are a curious hybrid of technical document and artistic accomplishment.
For Hollywood flicks, directors collaborate with storyboard artists to draw out the whole script shot by shot and scene by scene before production begins. The idea is to communicate every possible aspect of each shot—lens length, lighting, time, composition, filtration, and so on.
Creating storyboards helps the director immensely as a visualization exercise. It also lets key cast and crew members see what the project will look like even before they shoot it. Storyboard artists work in a variety of media, including pencil, charcoal, pen and ink, watercolors, and 2D and 3D animation software.
By providing this information to the cast and crew, storyboards allow key creative personnel to minimize the number of items they need to ask the director about (though they’re likely to be barraged by anxious cast and crew members anyway).
Virtually every big-budget Hollywood project since the beginning of the Walt Disney Studios in 1923 has used storyboards extensively to streamline its production workflow, save time, and cut costs.
In low-budget projects, directors sometimes choose not to use storyboards and just shoot on the fly. Or they may have an artistic friend draw either storyboards or overheads, which are pretty much what they sound like: an overhead view of the whole set showing where the camera, actors, and key props need to be placed.
![]() Going Beyond Stick Figures
Going Beyond Stick Figures
Some projects, such as documentaries, are less suited to storyboards because the shooter is never sure what they are going to record until right before they go out, making such visual pretreatments impractical.
However, other types of projects including commercials, PSAs, and corporate training videos use storyboards increasingly for the same reasons as their bigger-budget cousins: to save money and time.
Occasionally, storyboards give directors such immense power to express their vision that their crews and the available technology struggle to record the images the director described to the storyboard artist.
The storyboards for Citizen Kane (1941) stymied the camera crew by depicting deep-space shots that featured characters close to and far from the camera lens, both of whom needed to be in sharp focus. Achieving these shots was beyond the capabilities of the lenses available at that time. New lenses actually were invented to record the shots as drawn by the storyboard artist from the mind of Orson Welles!
Another bonus is that illustrating 12 panels of a storyboard for a script you have written gives you directing experience before you get behind a camera.
FIGURES 3.12, 3.13, and 3.14 show a few examples of storyboards.


SCREENSHOT: JUNGLE SOFTWARE
FIGURE 3.14 Computer-designed storyboards created with Chimpanzee production software
The world we live in is increasingly visually oriented, as we’ve discussed elsewhere in this book. For this reason, storyboards, photomatics (photographs instead of illustrations), animatics (images roughly sequenced together to suggest the effect of movement), and other types of previsualizations have grown in influence.
Just look at the number of features alone that originated as either comic books or graphic novels over the last couple years including The Walking Dead, Ghost World, From Hell, Watchmen, Sin City, The Avengers, and The Dark Knight, as well as many others. Did these movies have their own storyboards, or did they just use their rich source material?
Some software we’ve used with students for storyboarding can be referenced in the appendix.
And, of course, should all else fail, there’s also pen and paper. As long as your storyboards are fueled by the unparalleled, unlimited software known as the human mind, you should be fine.
Fundamentals of Cameras and Camerawork
“Perhaps it sounds ridiculous, but the best thing that young filmmakers should do is to get hold of a camera and some film and make a movie of any kind at all.”
—Stanley Kubrick
![]() Video
Video
To see a demonstration of the operation of basic camera settings, please refer to the video in the chapter files that accompany this book.
For the first two chapters and projects in this book, we have been taking advantage of the automatic functions of the camera so you could get a handle on the overall workflow and process of creating a video program. After that we showed you just why it is so important to consider the content of the video—the function, not just the form. In creating the last two projects, you might have tinkered with the camera controls a little to figure out how to get some desired effects as you got more comfortable using your camera.
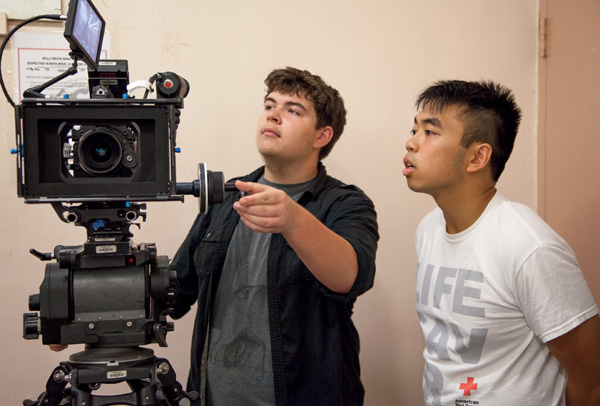
When you learn how to drive, you need to acclimate yourself to the controls so that you can focus on the road and not get overwhelmed with trying to remember what gear to shift into. Learning to operate a camera is no different—you’ll never get the shots you want if you wait until the action has begun to learn what all those buttons and dials and rings and settings are for (see FIGURE 3.15). So, let’s get a little dirty and do some looking under the hood to get the best performance from your machine.
The Lens
The lens is the optical component of a camera that allows images you see in front of you in physical space to be delivered to the component that actually captures those images. There are a few controls on the lens that you need to know how to operate, but first you need to know about some of the differences in the more common lenses used in video production.
If you’ve been using the camera on your mobile device and have had to zoom in, you may have noticed that the quality of the image decreases as you zoom. The image gets blurry and noisy. The reason for that is simple: The zoom function on your camera is digital, not optical. To put it more simply, it’s not really zooming in; it’s cropping the image or scaling up to show a smaller part of the image more closely. This is not necessarily a bad thing. If you do not want to lose any quality when using cameras with a fixed lens and need to have your subject appear larger on the screen, you just get closer to it.
Professional cinema cameras, DSLRs, and prosumer video camcorders have the ability to switch out lenses to meet the needs of the shot. A lens that has a single angle or perspective is called a prime lens (see FIGURE 3.16).

On camcorders, studio video cameras, and electronic news gathering (ENG)–style cameras, there tends to also be just one lens, but it is a zoom lens. The zoom lens allows the operator to change focal length without switching out the lens (see FIGURE 3.17).

Focal Length
Whether you’re using a zoom lens or a prime lens, your lens will be identified by a handy number that is used to determine how wide or narrow the angle of the lens is. That number is the focal length, which is usually expressed in millimeters (mm). The number refers to the length between the focal plane, the element of the lens where light comes into focus, and the electronic sensor of the camera, or image plane.
There are three types of lenses identified by focal length: the normal lens, the wide lens, and the long lens (see FIGURE 3.18).
![]() A normal lens has a focal length roughly equal to the diagonal size of the sensor. A normal lens is called that because shots using it appear similar to human sight, or “normal.”
A normal lens has a focal length roughly equal to the diagonal size of the sensor. A normal lens is called that because shots using it appear similar to human sight, or “normal.”
![]() A wide lens (or wide-angle lens) has a shorter focal length than a normal lens and a wider angle of view. An extremely wide lens has distortion at the edges of the frame, making what would otherwise be straight looked curved. The fisheye lens, used in many a skate video and peephole point-of-view (POV) shots, shows this distortion clearly.
A wide lens (or wide-angle lens) has a shorter focal length than a normal lens and a wider angle of view. An extremely wide lens has distortion at the edges of the frame, making what would otherwise be straight looked curved. The fisheye lens, used in many a skate video and peephole point-of-view (POV) shots, shows this distortion clearly.
![]() A long lens (or telephoto lens) has a longer focal length than a normal lens and a narrower angle of view. This lens allows the operator to frame the subject tighter or appear closer without having to physically get closer. The long lens also changes the perspective in a way that compresses or shows less of the background.
A long lens (or telephoto lens) has a longer focal length than a normal lens and a narrower angle of view. This lens allows the operator to frame the subject tighter or appear closer without having to physically get closer. The long lens also changes the perspective in a way that compresses or shows less of the background.

Prime Lens
A lens that has a single focal length is a prime lens. Prime lenses, especially normal or wide primes, are smaller and lighter than zoom lenses.
You might ask, “Why would we ever want to use a prime lens over a zoom lens?”
The answer is simple: quality. For a zoom lens to be able to have a range of focal lengths, it requires more optical or glass elements inside of it to work. With more parts come more chances for loss of quality and, most importantly, decreased speed. By speed, we do not mean to say it gets the job done faster. Glass that is “faster” (or with a more open iris or larger aperture) allows a lens to effectively bring in more light to a sensor so that you can shoot in low light for your horror masterpiece or with a higher shutter speed for your action extravaganza.
That being said, high-quality zoom lenses exist; they’re just more expensive. Lenses that are considered slower can be quite effective with the right light or by changing the sensitivity of the image sensor.
Zoom Lens
Having a zoom lens with a good range of focal lengths can be convenient. Switching out lenses takes time that you often don’t have in the middle of a shoot. It’s also important to keep in mind what a zoom lens was designed to do: change the focal length of a shot as the shot is happening, giving the appearance of getting closer or pulling away without having to physically move the camera (see FIGURE 3.19).

You’ll notice on zoom lenses that are controlled with a rocker switch (so named because it rocks back and forth) that there is a W and a T at either side. The W is for wide; the T is for telephoto. These lenses have a mechanism called a servo motor (or servo for short) that allows the operator to control both the direction of the change of focal length and the speed of the movement.
Novice camera operators, once they’ve discovered this control, tend to get a bit zoom-happy. The quick use of the zoom lens to move in and out of different shot sizes is appropriate to see in documentary and news footage because those are functional movements of the shot. Quick zooming is also common in music videos and action movies for stylistic reasons. When productions include overuse or unnecessary use of the zoom, it tends to give away to the audience that they’re watching the work of a beginner.
The Image Sensor
The part of the camera that takes the light and color delivered by the lens and captures it, converting it to an electronic signal, is called the image sensor (see FIGURE 3.20). Early video cameras used cathode ray tubes to capture images in an analog format.

Later, video cameras began using the charge-coupled device (CCD), which allowed for higher-quality image capturing and smaller cameras. Professional video cameras would capture the image using three CCDs, one for each of the three primary colors of the additive color model (red, green, and blue). The combination of the three primary colors can create a representation of other colors.
Most current video and digital cinema cameras use the complementary metal-oxide semiconductor (CMOS), which can capture images with more image detail, more of a range between light and dark, and with more color detail. This range is frequently referred to as dynamic range.
Focus
At this point, we’d like to think that you have experimented with some of the settings and controls of your camera and figured out how to turn on the manual focus or auto-lock feature. With automatic focus, the camera does its very best to set the focus so the image is as sharp as possible. This is a great feature, if neither the operator nor anything in your image is moving. Consumer and prosumer camcorders handle autofocus fairly well. Cameras in mobile devices tend to distractingly pulse in and out of focus with the movement.
From this point on, when something in your image is in focus, we will refer to that as being sharp. When something (or everything) is out of focus, we will refer to that as being soft.
As an operator, you determine what is in focus in your shot based on the distance the subject is from the image plane (where the sensor is). On professional productions, a camera assistant uses a tape measure to determine the distance the desired focal point is from the camera. If that subject or the camera moves closer or further apart, then it might be desirable to change the focus setting. This is called pulling focus (see FIGURE 3.21).

When shooting an event that you do not have complete control over, you can focus using the method that news shooters and videographers have always used.
1. Zoom in all the way on the subject. If the subject has eyes, go for that. When we have a conversation with someone, we tend to look at their eyes.
2. Use the focus ring on the lens to get those eyes as sharp as possible (see FIGURE 3.23).

3. Zoom back out and frame your shot.
Note
If the desired focal point is soft after you zoom out, you may need to adjust the back focus on the camera. Back focus is an adjustable control on certain lenses, such as ENG lenses, that keeps sharp focus consistent at different focal lengths. With cameras that have a fixed lens, this would have to be repaired by a trained technician.
Tip
If you’re shooting with a prime lens, use your camera’s focus-assist feature that either magnifies the image to see detail more easily or shows peaking, or colored lines at edges that are most sharp. With both audio and video signals, peaking refers to the highest point of the signal. With focus, it refers to the sharpest edges of the image.
Tip
If your camera can focus only using touchscreen, zooming in helps to avoid selecting any part of the image you did not want to focus on.
Exposure
Exposure can be described as a way to control how bright or dark an image is or control how much light the lens is delivering to the image sensor. Aside from adding or subtracting light, there are three factors involved in controlling the exposure of your image: iris, shutter speed, and ISO or gain.
Exposure is a key setting on a camera that is better left to manual control. By default, most cameras have automatic exposure on. Much like autofocus, auto-exposure can produce the undesirable effect of the image getting lighter and darker depending on what is in front of the camera.
Iris
The iris diaphragm of a camera lens functions the same way the colored part of the human eye does: It regulates the amount of light traveling through the lens. In the center of the iris is an opening called the aperture (see FIGURE 3.24). The measurement of the size of the opening of the aperture is labeled by stops, most commonly f-stops, using an f-number.

Here is where it gets tricky. The larger the f-number, the smaller the aperture is, letting through less light. The smaller the f-number, the more open the iris is, allowing more light in (see FIGURE 3.25).

Earlier in the section on prime lenses, we mentioned that some lenses can be described as fast. Each lens has a range of aperture sizes that determines whether the lens is fast or slow. A lens that is capable of an f-stop of f1.4 or f2.0 can bring in more light than a lens with a range that starts at f4.0 and consequently is considered a fast lens.
So, how do you know what f-stop to set your lens to? That’s all going to depend on what you want your image to look like, what is considered good exposure, and how you set the other two factors that determine the exposure of your image.
Shutter Speed
Regardless of how they may appear, the images you have been shooting do not move. We have referenced the history of “motion pictures,” movies, and camera movement. Not one of these terms is technically accurate. It’s all an illusion. Surprise! A motion picture is actually just a series of still images shown in such quick succession that it only appears to move. In fact, traditionally, there have been tiny gaps of darkness in between all those still images that last as long as the image itself.
For example, cinema cameras that shoot at 24 frames per second (fps) capture each still image or frame for a duration of 1/48 of a second. The mystery of why the gap of darkness for the other 1/48 of a second in between is answered by understanding the shutter. For half of the time you are sitting in a movie theater, you are sitting in darkness. That might be why watching movies is so relaxing!
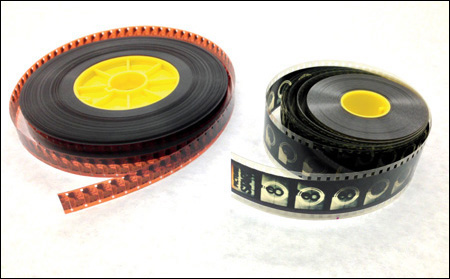
The shutter is the mechanical device on a camera that allows light to travel from the lens to the image sensor for a specified amount of time. Historically, on cinema cameras that captured images on film or celluloid, the physical strip of film needed a chance to move without light hitting it so that the captured images would not get blurred (see FIGURE 3.26).

PHOTO BY: FRANK GREENAWAY (C) DORLING KINDERSLEY
FIGURE 3.26 Motion blur on a subject in motion at three different shutter speeds
So, for 1/48 of a second, the film stood still and captured the image; then for the next 1/48 of a second, the film would move to place itself for the next frame to capture. This would repeat for the duration of the shot or until the film rolled out. The human brain has to deal with a lot of sensory stimuli that could be very distracting. The reason we see the images and the illusion of movement—instead of those moments of darkness in between frames—is because our brains don’t let us. The term that folks in this industry have settled on for this phenomenon is persistence of vision.
The shutter speed on digital cameras does not necessarily need to be set at half the speed of the frame rate but can be set at the same speed of the frame rate to allow more time for light to hit the image sensor. Doing so gives the footage a different appearance. The longer the shutter is open, the more motion blur is visible on the image, especially if the subject or camera is moving quickly. With a faster shutter speed, images appear sharper but require more light to expose well.
ISO/Gain
On digital cameras, the measurement of an image sensor’s sensitivity to light is labeled by a system called ISO (from the International Organization for Standardization). A baseline ISO on most digital cameras is ISO 100. A doubling of ISO speed (for example, from 100 to 200 or from 400 to 800) is equivalent to one full f-stop on a lens.
On video cameras, typically with CCD sensors, the setting is called gain. Gain is the electronic amplification of the video signal and is measured in decibels, just like audio. The baseline gain is 0dB. Each +6dB of gain is equal to one f-stop.
Tip
Just like with focus and iris, if your camera has an automatic gain control (AGC), just do us all a favor and turn it off.
When shooting with great amounts of light—for instance, outdoors on a sunny day—you might want to set your iris at a high f-stop. Your shutter speed might be at twice the speed of your frame rate, maybe higher, especially if you are shooting a sporting event. You might even place a neutral density (ND) filter on the lens, which acts like sunglasses for your camera. With these shooting circumstances, there would be no practical reason to have your ISO or gain at a high level.
With a whole different set of shooting circumstances, you might find yourself shooting in a location that is not very well lit or discover that you lost track of time and have started losing sunlight quickly. There is no filter on the lens, your shutter speed is acceptably slow, and you have your fastest prime lens open to f1.6, but the image is still dark. It’s time to bring up the ISO or gain (see FIGURE 3.27).

Bringing up the ISO or gain allows you to capture a brighter image in low light, but there’s a catch. With more image sensor sensitivity comes more grain or image noise. Perhaps that works for your project stylistically, or maybe it’s just not acceptable, which means you are just going to have to add more light.
By bringing up your ISO or gain, you also risk capturing images with less color saturation. Speaking of color...
Depth of Field
To begin to understand what filmmakers and photographers mean when they refer to “depth of field,” follow these steps:
1. Close one eye.
2. Hold your thumb in front of your face and focus on it.
3. Without moving, try to focus on what’s behind your thumb, the background.
4. Now focus back on your thumb.
This is called rack focus (see FIGURE 3.28).

A rack focus can be accomplished only if you are working with a narrow depth of field. So far you have been controlling what the audience sees by using the size of the shot and framing only what you want to show. This is two-dimensional control. When you want the audience to focus (yes, in both senses of the word) on a specific subject or plane of vision, you must have an understanding of depth of field. The amount of the field of view that is in focus is the depth of field. Another way to define it is the amount of distance in the z-axis that has acceptable sharpness. The simplest way to define it is as how much of the shot isn’t blurry.
There are three main factors that determine the depth of field of your image or how much is in focus: focal length, aperture size, and sensor size.
![]() Wide lenses, or lenses with a short focal length, tend to have a wider depth of field compared to long lenses that have more narrow depth of field.
Wide lenses, or lenses with a short focal length, tend to have a wider depth of field compared to long lenses that have more narrow depth of field.
![]() An open aperture or a low f-stop number can have a more narrow depth of field, where a more closed aperture with a higher f-stop number has a wider depth of field.
An open aperture or a low f-stop number can have a more narrow depth of field, where a more closed aperture with a higher f-stop number has a wider depth of field.
![]() Larger image sensors, like the full-frame sensor on certain DSLRs or the ever-growing monstrous sensors from camera companies such as RED Digital Cinema, have a more narrow depth of field. Smaller sensors that are found in video camcorders make it easier to have a wider depth of field.
Larger image sensors, like the full-frame sensor on certain DSLRs or the ever-growing monstrous sensors from camera companies such as RED Digital Cinema, have a more narrow depth of field. Smaller sensors that are found in video camcorders make it easier to have a wider depth of field.
Think of this: What do you do when you want to read a sign that is far away? You squint. It’s kinda like that.
White Balance
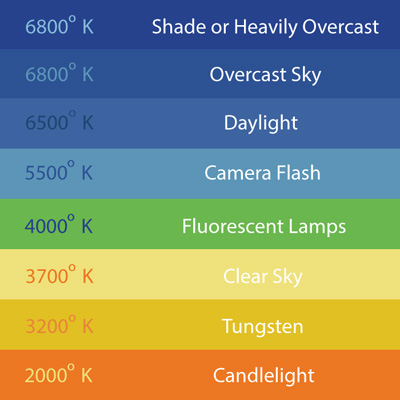
In the additive color system, adding equal amounts of the three primary colors—red, green, and blue (RGB)—will create white (unlike adding equal amounts of the primary colors you learned in art class, which just creates a weird brown mess). White balance refers to the balance of RGB to represent white.
As with persistence of vision and motion perception, the human brain likes to give the illusion of consistency. Different kinds of light have different colors. If you don’t pay too much attention to it, you might not notice. The color of light from indoor practical house lamps is warmer, or more orange, than the light from the sun, which we call daylight. Daylight is colder, or more blue. Fluorescent light that you’ll find in most classrooms and offices is somewhere in between (see FIGURE 3.29).
There are automatic white balance settings on most cameras, but just as with focus and exposure settings, using these settings puts your image at risk of shifting in an undesirable way. If someone in the shot is wearing a very warm-colored top, the entire image can turn colder, showing color that is inaccurate.
When setting the white balance of your camera, you have three options. For shooting with indoor or tungsten light, the preset may have a symbol that looks like a lightbulb, ![]() . For outdoor shooting in day, the daylight preset looks like the sun,
. For outdoor shooting in day, the daylight preset looks like the sun, ![]() . For shooting in that in-between color of fluorescent light or just for the assurance of accuracy, use the custom setting,
. For shooting in that in-between color of fluorescent light or just for the assurance of accuracy, use the custom setting, ![]() , which sort of looks like a boat or a box that split in two to reveal another box (see FIGURE 3.30).
, which sort of looks like a boat or a box that split in two to reveal another box (see FIGURE 3.30).

To set the white balance using the custom setting, follow these steps:
1. Zoom in your camera (or fill the image) with a white card or a flat surface that is mostly white. Make sure that the white card is in the same light that your main subject is in or the light that you want the camera to represent as white.
2. Set your iris so that the image is not too bright. An overexposed white card will not show the true color that the image sensor is interpreting the light as. Aim for about 70 percent of total brightness.
Note
Not every camera can have its custom white balance set like this. Check the instruction manual to make sure you are doing it correctly.
3. Press the “set” (or OK or execute) button. Usually something blinks for a brief moment.
4. Reframe your shot, get your exposure back to the appropriate level and ask the camera assistant who is holding the white card to come back behind the camera.
5. Now get back to work—we’re burning daylight here!
Is This Thing On? Recording a Voiceover
An important element in many video productions is the voice of the narrator; you’ll see one example of how effective narration can drive or complement a video in the project at the end of this chapter. In many projects, there may be no better method of delivering your message and letting your voice be heard than to speak directly to your audience. In the writing stage, you spend a substantial amount of time and care crafting the words that will be heard by your audience and creating the images that accompany them. It is only fair that an equal amount of effort is applied to the recording of the audio.
Mic Check: One Two, One Two
The cost of professional studio microphones used in voiceover recording can range from a few hundred dollars up to a few thousand dollars. With this wide range, there are only two considerations that will determine what you should use to record your voiceover: your budget and your ears (see FIGURE 3.31).

Over the past few decades, as desktop audio recording has become more popular, affordable microphones that plug directly into computers without additional special interfaces have entered the market. Having to go to a music store or electronics shop is no longer the only way to get recording equipment that can produce professional results (see FIGURE 3.32).

Once you have narrowed down the options within your budget, you could compare specifications or read online reviews. Perhaps you find a microphone that has great specs and loads of great reviews, but you should hear it to believe it. Try the gear before you spend your hard-earned cash. Most importantly, though, trust your ears.
“Can You Hear Me Now?”
A good pair of headphones, or cans, is also a crucial piece of equipment to make sure you have when you record. We could probably fill another book on what defines a good pair of headphones and the influence of popular culture on the subject. The enormity of options available can be overwhelming. Perhaps you spent a small fortune on a fashionable set of headphones that really enhance the bass of the music you listen to. That does not necessarily mean they will be a good choice for monitoring when you are recording...or that they were a wise purchase.
Tip
When purchasing a pair of headphones for recording, ignore what they look like—your ears don’t care what they look like. Take a look at the appendix for a list of our favorite mics and cans, if you’re too busy to try any yourself.
When choosing a pair of headphones, just like when choosing a microphone, first consider your budget. You want a pair that has an almost flat frequency response, meaning one in which there is no discernible enhancement of the high or low frequencies or pitch. Choose over-ear headphones instead of earbuds. Larger audio drivers (the little speakers) will provide more accurate monitoring. Compare different pairs using the same source of audio, like your favorite song, and trust your ears. A good pair of headphones will sound good at low volumes. A really good pair of headphones will reveal layers of your favorite song that you didn’t know were even there (see FIGURE 3.33).

“Did You Hear That?”
Before you record anything, find a location where the answers to the following questions are all “yes.”
![]() Is the location quiet?
Is the location quiet?
![]() Is it still quiet?
Is it still quiet?
![]() Will it stay quiet?
Will it stay quiet?
What do we mean by quiet? Listen carefully for at least 30 seconds. Is there any ticking or buzzing? If so, can the cause of this sound be turned off? Are there any other sources of noise outside of the space you are recording in? Can they be controlled? It’s not the end of the world if unwanted sounds occur in between words or during pauses in the recording. They can be edited out.
The irreparable problems are the noises or unwanted sounds that are audible at the same time your voiceover artist is speaking. It’s always easier to record another take rather than trying to filter the noise in post.
“Dead or Alive, You’re Coming with Me”
When speaking at a normal volume, does the room sound alive, like the walls are talking back to you? Not literally, of course; that would be frightening. Rather, do you hear any echoing? This happens when a room has large flat surfaces that bounce the sound around the room (see FIGURE 3.34).

It’s best to be in a space that sounds dead, one in which sounds are absorbed by the objects around the room, keeping echoes from occurring. If you don’t have access to a professional sound booth, you could record in a wardrobe closet. Can’t fit in the closet? Build a small pillow fort around the microphone. The smaller the space you’re in, the less chance there will be for unwanted noise to creep into your recording (see FIGURE 3.35).

“Never Rock the Mic with the Pantyhose”
The closer the voiceover artist is to the microphone, the more profound and deep the voice sounds. Think about the classic movie trailer voice that says, “In a world where nothing is what it seems....” That naturally deep voice is enhanced by the speaker being about an inch away from the microphone. If that’s not the tone you want in your narration, back off the mic a bit.
Even at a safer distance from the microphone, there can be some distracting pops from the speaking of hard letters, like the letter p. Those pops are called plosives and are caused by air traveling rapidly from the performer’s mouth. They can be minimized by using a pop filter, also called a popper-stopper. If you’re on serious budget lockdown, create a circular frame with a wire coat hanger and double-wrap it with some pantyhose that won’t be missed. Now you have yourself a micro-budget popper-stopper. Just don’t tell Mom.
Don’t Hold Your Breath
Breathing is normal and natural; keep doing it. But when you’re recording a voiceover, have the performer turn their head when taking breaths because they can be distracting to the listener. Breaths can also be edited out in post.
Lip-smacking is much more noticeable when the microphone is close to the performer’s mouth. Voiceover artists have a variety of remedies for unwanted mouth sounds.
![]() Video
Video
To see a demonstration of the recording of a voiceover, please refer to the video in the chapter files that accompany this book.
Some popular choices include the following:
![]() Something wet, like a gulp of water
Something wet, like a gulp of water
![]() Something dry, like a bite of bread
Something dry, like a bite of bread
![]() Something in between, like a bite from an apple
Something in between, like a bite from an apple
Tip
Holding the palm of your hand right in front of your face can give you an indication of what your voice sounds like when close to a microphone. Try it and notice plosives (pop pop!), lip smacks (like a bad taste in your mouth), and breathiness (time to brush your teeth, isn’t it?).
Sample Project: Visual Poem
The Visual Poem project is designed to allow you to stretch your imagination and exercise your style and creativity...all in a way that will please your English teacher, too. The concept is simple: Make a video that visualizes the ideas, images, and language of a poem written by a notable poet or author.
Workflow
Following these steps, use your newly developed skills of production organization and planning, full camera control, and voiceover recording, on top of everything you’ve learned on the previous projects to make a video that shows you have a firm grip on the language of visual storytelling:
1. Choose a poem from a notable poet or author or write your own. We’ve provided a handy list of suggestions in the next section.
2. Analyze the poem. Write a few sentences describing what the poem means to you and what you think the poet intended it to mean. This might require some research.
3. Read the poem out loud into a microphone. Record a voiceover narration by delivering a performance of the poem that uses appropriate tone, emphasis, volume, and pacing.
4. Script it out. For each line of the poem, describe what actions and/or images would be ideal to express the ideas, meaning, theme, and subtext beyond what just the words mean. Using the two-column script format would work best.
5. Storyboard it! Using the description for each shot written in your script, draw out what those images should actually look like on the screen.
6. Plan your shoot. Create every single document that a professional production would require. That means a schedule, a budget, shot lists, and call sheets.
7. Shoot beautiful images. Having scheduled enough time, experiment with the controls of the camera. Be curious and try things that you think you might not even use in the finished video. If it doesn’t work, don’t use it!
8. Start your edit by laying down the voiceover. Edit the appropriate image over each line of the poem. If you have more than one shot per line, try cutting them in. If it works well with the pace and rhythm of the poem and how you performed it, then be happy you shot more than you thought you needed.
9. Add sound effects and music that you created and recorded or are royalty-free.
10. Get that video online and let the world know what you’ve been up to so they can see for themselves what you’ve learned so far.
Suggested Poems
Here is a list of poems you can choose from to create your video. Any one of these should make your English teacher proud.
![]() Sonnet 73 by William Shakespeare
Sonnet 73 by William Shakespeare
![]() Song by John Dunne
Song by John Dunne
![]() Ozymandias by Percy Bysshe Shelley
Ozymandias by Percy Bysshe Shelley
![]() We Grow Accustomed to the Dark by Emily Dickinson
We Grow Accustomed to the Dark by Emily Dickinson
![]() Loveliest of Trees by A. E. Houseman
Loveliest of Trees by A. E. Houseman
![]() Life Every Voice and Sing by James Weldon Johnson
Life Every Voice and Sing by James Weldon Johnson
![]() Yet Do I Marvel by Countee Cullen
Yet Do I Marvel by Countee Cullen
![]() Musée des Beaux Arts by W.H. Auden
Musée des Beaux Arts by W.H. Auden
![]() Women by Alice Walker
Women by Alice Walker
![]() I Am Offering This Poem to You by Jimmy Santiago Baca
I Am Offering This Poem to You by Jimmy Santiago Baca
![]() My Father Is a Simple Man by Luis Salinas
My Father Is a Simple Man by Luis Salinas
![]() The Gift by Li-young Lee
The Gift by Li-young Lee
![]() Mother to Son by Langston Hughes
Mother to Son by Langston Hughes
![]() Forgive My Guilt by Robert Tristram Coffin
Forgive My Guilt by Robert Tristram Coffin
![]() Internment by Richard Rodriguez
Internment by Richard Rodriguez