Chapter 5. Authenticity and Professionalism
“There was a moment when I changed from an amateur to a professional. I assumed the burden of a profession, which is to write even when you don’t want to, don’t much like what you’re writing, and aren’t writing particularly well.”
—Agatha Christie
One of the key quests in life is finding out what kind of work you like to do—some combination of an activity you enjoy, something you do well, and work that pays the bills. Those who enjoy video production, filmmaking, or media creation find satisfaction with the kind of work that leaves a record of its time, whatever the scope.
Whether they work in the camera department or in postproduction and whether they focus on fictional features, television, documentaries, infomercials, or wedding videos, filmmakers are a tribe of people who enjoy even the most difficult parts of their job: rising before dawn, putting in long hours, and constantly solving problems they would have never anticipated in order to produce work that is interesting, thought-provoking, and commercially viable.

So, what if you discover that you want to join this band of outsiders? There are more normal jobs in the world. But what if this type of work speaks to you in the way that other work does not? There’s a feeling a creator gets when their work is completed and when it is screened for others. The completion of a circuit with the audience can create an electrical impulse in some of us.
What if this describes you?
In this chapter, you’ll look at some of the key strategies employed by media creators taking their first steps to employment and making a living in content creation, distribution, and exhibition (see FIGURE 5.1). We’ll talk you through some of the first steps, guide you past some of the pitfalls in starting a career in media, and describe the expectations of the professional world.

PHOTO BY ANTB, VIA SHUTTERSTOCK
FIGURE 5.1 Floor manager and presenter planning a television broadcast
The Professional World
Several key aspects of content creation have three parts. Screenplays and treatments consist of three acts, and the production cycle consists of three parts—preproduction, production, and postproduction. Likewise, the world of content creation consists of three stages, which traditionally have been broken down as follows:
![]() Production: Everything involved in the creation of media, from the germination of the idea to filming to the final audio mix. Examples of production companies include Pixar (Toy Story, 1995), Lightstorm Entertainment (Avatar, 2009), and Gracie Films (The Simpsons, 1989).
Production: Everything involved in the creation of media, from the germination of the idea to filming to the final audio mix. Examples of production companies include Pixar (Toy Story, 1995), Lightstorm Entertainment (Avatar, 2009), and Gracie Films (The Simpsons, 1989).
![]() Distribution: The method of getting the media to the audience. Distributors are the companies that can handle the incredible logistical challenges of creating thousands of copies of film prints, flying them all over the world so a film can open in many countries on the same day or broadcasting their content on television sets all over the world at the same time. They have been the big guns of the media game and have reaped the lion’s share of the profits. Examples of distributors include Paramount Pictures, 20th Century Fox, and NBC Universal.
Distribution: The method of getting the media to the audience. Distributors are the companies that can handle the incredible logistical challenges of creating thousands of copies of film prints, flying them all over the world so a film can open in many countries on the same day or broadcasting their content on television sets all over the world at the same time. They have been the big guns of the media game and have reaped the lion’s share of the profits. Examples of distributors include Paramount Pictures, 20th Century Fox, and NBC Universal.
![]() Exhibition: The companies that own and operate the palaces that show or exhibit media. Throughout history, they went from being part of a monopoly, to being owned by the major studios, to being broken off into independent theaters (see FIGURE 5.2) occasionally managed in chains. Exhibitors keep some of the profits from the viewing of media but all of the profits from concession sales. Examples of exhibitors include Regal Entertainment Group, AMC Theatres, and Cinemark.
Exhibition: The companies that own and operate the palaces that show or exhibit media. Throughout history, they went from being part of a monopoly, to being owned by the major studios, to being broken off into independent theaters (see FIGURE 5.2) occasionally managed in chains. Exhibitors keep some of the profits from the viewing of media but all of the profits from concession sales. Examples of exhibitors include Regal Entertainment Group, AMC Theatres, and Cinemark.

The Digital Revolution
Every job in media relates to one of these stages, but the technical methods by which all three occur have changed radically over the past 15 years as most theaters have moved from exhibiting film prints to exhibiting digitally (see FIGURE 5.3). Movies are hardly ever carried into theaters in film cans anymore (see FIGURE 5.4); rather, they are transported on hard drives (see FIGURE 5.5), beamed in over satellites, or transferred via broadband cables.

PHOTO BARCO DP2K-23B DLP PROJECTOR, DIGITAL LIGHT PROCESSING (DLP): BY VIVAIQUIQUE.COM VIA FLICKR CC BY 2.0
FIGURE 5.3 Movie theater projection booth with digital projector


Television broadcast and other media have been produced and distributed digitally for quite a while, but as theaters have made the switch, it seems inevitable that within a short time frame, motion picture film itself—which debuted in 1888—may be going the way of the compact disc and the VHS cassette.
This is a source of great sadness for film enthusiasts who believe that digital cinema cameras, while getting better at approximating the texture, look, and feel of film, will never completely re-create the magical chaos of film and its ability to transport the viewer into the world of our dreams and nightmares, as masters of the filmmaking craft have done for more than a century (see FIGURE 5.6).

A small band of influential film rebels is working to extend the timeframe wherein motion-picture film will continue to be developed, printed, and screened, but without a doubt, the digital tide is upon us.
This revolution has changed the way entertainment is distributed and exhibited from the ground up, and it has also changed the jobs. The process of digital distribution is much cheaper for studios and requires far fewer workers to execute.
It’s difficult to predict how much this process will continue to evolve or how the job market will change as a result. At the end of the day, film may have the last laugh. Ironically, movies printed on film may last longer than those archived digitally.
Where Are the Jobs?
When deciding on what kind of job to get in the media and entertainment field, the first thing we recommend for you is to get familiar with the names of key jobs in video production. Even with all of the innovations in the way media is distributed and exhibited, certain aspects of the main production jobs will not fundamentally change.
Some of these jobs may be done best by forming a company of your own or with others, for instance above-the-line jobs like producer. For below-the-line jobs, such as a camera operator or sound recordist, it’s more common to be a freelancer hired by the owner of a company or the producer of a project.
We also recommend getting as much experience as you can in as great a variety of professional environments as you are able to, in any area you find interesting, or that you can perform reasonably well.
Keeping one’s “nose to the grindstone” sounds painful, but work in media creation goes project to project, which means that as you build up credits (listings in produced works you have contributed to), it’s up to you to treat job hunting as a job unto itself until you have distinguished yourself so much that producers or clients come looking for you and you can pick and choose from a variety of projects to pursue.
So, where do you begin? Here are a couple ways to get started.
Make Your Own Project
Get your smartphone, DSLR, or HD camcorder; make a plan with a couple friends; and start showing the world what you’ve got. Every once in a while, a Vine or YouTube video by someone who has creative flair or has tapped into the zeitgeist or spirit of the day will catapult its creator into the media stratosphere.
The main advantage here is to just start filming, make your mistakes, get better, and find the best path forward for you. Get it on, get it up, and get it out there. If you don’t get the response you want, get better.
Even if you decide to keep going at it alone, we recommend you see as many films as possible (see FIGURE 5.7) and read and investigate as much about media as you can. The more you know, the better you get.

PHOTO VI S-REARRANGE-3 BY GRANT BALD WIN VIA FLICKR CC BY -ND 2.0
FIGURE 5.7 The video store, practically a bygone relic
Approach everything as a student, even when you get to be the boss.
A Touch of Class
Although picture quality and good sound recording are important elements in higher-level media projects, never let lack of technology stop you from making films. Back in the day, films like The Evil Dead (dir. Sam Raimi, 1981), Bad Taste (dir. Peter Jackson, 1987), and Following (dir. Christopher Nolan, 1998) were shot on 16mm, a thinner film stock considered student/amateur level that didn’t always look as brilliant or sound as clear as its professional big brother, 35mm. These filmmakers didn’t let this limitation slow them one bit.
Top media schools such as the University of Southern California’s School of Cinematic Arts (see FIGURE 5.8); the University of California, Los Angeles, School of Theater, Film and Television; the American Film Institute Conservatory; New York University’s Tisch School of the Arts; and Columbia University’s School of the Arts are only a few of the options available to those aspiring to a career in film and video production. There are many media programs at private universities and community colleges that can help you take the next step to a career.

PHOTO BY ANGRY JULIE MONDAY VIA FLICKR CC BY 2.0
FIGURE 5.8 University of Southern California’s School of Cinematic Arts
There, you can get great training and experience and meet like-minded students to collaborate with. Director Albert Hughes graduated from Los Angeles City College. Tim Burton and John Lasseter went to California Institute of the Arts. Some people benefit profoundly from the kind of structure and mentorship media programs provide.
Don’t Take Classes, Do Projects
Media creation is not a one-size-fits-all type of career, and as they say, there are many ways to skin a cat. Why you’d want to skin a cat, we’re not sure, but that’s a subject for a different book.
In any case, there are some media creators (Martin Scorsese, Ron Howard, and Matt Weiner) who went to film school, and others (Quentin Tarantino, Terry Gilliam, and James Cameron) who didn’t. They watched films, discussed them, read about them, and jumped into working, letting their experience be their school.
When you add up the price of education, the time invested in school, and the learning style that suits you best, there’s no one perfect way, and it’s up to you to determine what is right for you.
In Chapter 6, we cover strategies on writing effective résumés and creating effective reels to show off your skills. It will be necessary for you to have these basic calling cards at the ready to apply for entry-level positions. They will often not pay much or at all at first, but you will learn enough to make yourself valuable to do a job that will pay later.
Tip
The value of listening during any job interview, even a casual one over the phone, cannot be overestimated. Job posters will often tell you what they’re looking for and what their priorities are. Don’t get so caught up in delivering your résumé the way you want them to hear it that you don’t listen to what they’re telling you. Thinking on your feet and adjusting your pitch as you go can greatly improve your chances of making a solid connection with the interviewer and getting the job.
Look at Your Options and Crunch the Numbers
One of the best exercises for those interested in a career in media is to stick around for the credits after a film, television show, or video game. Here’s where you will learn a crucial truth—media projects, particularly the big ones, have one (occasionally two) director, one (but occasionally 12) writer, and a gaggle of producers.
However, if you look at the nuts-and-bolts departments that audience members don’t always know about as much—visual effects designers, sound department, grip and electrical, and other below-the-line jobs—you’ll learn that there are an enormous number of jobs that are statistically much more attainable than the boss-type positions but that are very rewarding and pay extremely well.
Inside Outside Upside Down: Internships and Externships
If you hear of a company that is doing good work and looking for an intern, apply. Just get in. It doesn’t matter whether you’re getting coffee or filing papers; you are doing two of the most important things you can do to improve your career—learning and meeting people.
For years, one of the most sought-after entry-level jobs in Hollywood was the Agent Trainee program at the William Morris Agency, known as the mailroom, because as the story goes, even new hires were able to look through the mail they were sorting and learn the ins and outs of deal making.
Just get in, wherever you want to be—a production office, a studio lot, a television network. Get in and take it from there.
Or...Be Your Own Boss!
Do your friends call you a lone wolf? Do you like to go it alone? Perhaps the better option for you is to bypass all of that coffee-getting and just form a company and handle things like a boss.
Many types of productions are created on a small budget by a small crew. This work can actually pay very well, especially once you’re established and if you can keep the costs of your overhead down. Here are some types of work that you might go after on your own or with a small company.
Wedding and Event Video
There’s definitely a growing market for event videography, such as at weddings, red carpets, company parties, bachelorette parties (these days, what happens in Vegas stays in the cloud). If the company or entity involved is big enough, either they have an in-house content creator (a job you may want to look out for) or they may advertise for video jockeys (see FIGURE 5.9).

This type of production can usually be done by a one- or two-person crew and is often high paying, but the work has to be good—really good—or you may find yourself running afoul of a bridezilla or a groomzilla.
“Really good” means you need to find out what the bride and groom (or whoever is running the show) want beforehand, and then you give it to them in the least obtrusive method possible. For these types of once-in-a-lifetime events, shooting with multiple cameras is a must. Using small cameras like DSLRs allows you to move around quickly to capture the coverage you need but still get a professional cinematic look.
Here are some strategies you should employ to avoid getting chin-checked by a wild-eyed lady in white:
![]() Check the location before the shoot.
Check the location before the shoot.
![]() Look at your angles and obstructions.
Look at your angles and obstructions.
![]() Try to determine the weather and change of lighting over the course of the day.
Try to determine the weather and change of lighting over the course of the day.
![]() Have backups for batteries, mics, cameras, and other key equipment.
Have backups for batteries, mics, cameras, and other key equipment.
Corporate Training Video
Every industry has a growing need for media to showcase what they do and what their business plan is for the future. This is not to say that you can bring in a two-person crew and film their commercials or high-end publicity right off the bat. But as with any position in film, it’s all about getting in with them, getting along, and trying to do business.
Corporate videos typically follow the model of the expositional documentary, which is planned out, scripted, and visualized, usually by some collaboration of the in-house marketing department and the content producer.
As with wedding video, in corporate video it is incumbent on the media creator to be clear about the goals and priorities of your client, the company hiring you to make the video. Be sure to ask your client what they want or don’t want and what their goals for the video are. Your responsibility is to satisfy your client, which you can do only through clear planning, reliability, and quality work. For your protection, you need to be clear about exactly what you are providing and what your payment schedule will be.
Music Videos
You may not be able to walk in off the street and shoot the next Taylor Swift video (or maybe you can—that sort of thing hinges on salesmanship), but a media creator can do well to collaborate with music producers or an artist by applying for a gig and being hired by those musicians. Alternatively, you can go out of their way to collaborate with an artist you admire, who are themselves looking for a break, and offer to produce a video for them.
The production of music videos has a lot in common with narrative films or documentaries. You need either a clear script or at least a treatment exploring the theme of the song or piece. It will usually parallel the story of the song, but many music videos focus on style instead of story.
A couple of the most inventive and successful music videos ever are Michael Jackson’s tribute to horror movies, Thriller (dir. John Landis, 1983) and the Beastie Boys paean to cop thrillers, Sabotage (dir. Spike Jonze, 1994). Both of these examples used familiar genres (horror, cop action) with established visual parameters as their jumping-off point to engage the audience.
One difference in the production of a music video is that the visual elements need to be edited to the rhythm of the musical piece and build to a visual, and usually a narrative, climax, as they would in the montage of a feature-length film.
Starting Your Own Company
It’s understood that everyone who wants to work in media may not start their own business to do so. However, if you want to work for yourself and make money legally, these are the steps you should take.
Build Your Brand
When you’re your own boss, you sometimes have to get tough with yourself, never more so than when it comes time to promote your new company by doing the following:
![]() Creating a design or logo (see FIGURE 5.10)
Creating a design or logo (see FIGURE 5.10)

![]() Designing stationery and business cards with your logo
Designing stationery and business cards with your logo
![]() Starting a website and building a social network presence
Starting a website and building a social network presence
![]() Lying to the public and presenting your fictional film as a true documentary
Lying to the public and presenting your fictional film as a true documentary
Okay, that last one may not have sounded very ethical, but it worked for Eduardo Sanchez and Daniel Myrick, the producers of The Blair Witch Project (1999). Their great fake-out film, in which footage of three college filmmakers “found” after a year purported to show them being terrorized and killed by the eponymous witch, fooled and frightened a worldwide audience at a cost of around $35,000 and a gross of $254,000,000.
Boo, indeed.
These are just a few ways to get your name, your reputation, and the type of work you do in front of your audience, which is the sum total of people who might want to hire you.
Advertise your business in local newspapers, gazettes, Craigslist, or wherever else you can find. In Chapter 3, we suggested some resources to use to find actors and crew; use the same to advertise yourself to do work for others.
Check Your Competition
You need to research companies similar to yours. Find out “best practices” by learning what the market is for productions like the ones you are capable of making, what those projects typically cost, and what the pitfalls are for those types of productions. Develop sample budgets and pricing sheets for any services you might provide.
Get an Address
Once you get big enough, you will need to receive mail. Will it be your home address, or will you rent a space or use someone else’s existing office space as yours?
Alternately, you might want to rent a P.O. box from your local post office and pick up your company mail there. Once your company has fans, you may not want them knowing where you live.
Startup Costs
Many companies get underway with little more than a phone and a computer. That said, you may find that once you have some of your promotional materials (business cards, letterhead paper, invoices, and so on) in place, moving forward with your venture gets a little easier.
It’s in your interest to keep your startup costs as low as possible to make your company sustainable over the long haul. Some new companies make a lot of splashy purchases and bad investments right off the bat and have a hard time paying their bills after as little as six months.
Now Hiring!
You may find as your company grows or based on your own skill set that you need to hire someone to cover the areas where you are weak or when you can’t be two places at once. One of the side benefits of developing good habits as a worker is that you know what you are looking for as a boss.
Reflexively, the qualities you know that you would look for in your own employees (“Be on time! Be polite! Work hard! Think ahead!”) are the same qualities you should strive to represent as an employee or when looking for work.
Set up interviews in person or over the phone, check references, and find the help you need.
Get Up on It
Make sure to keep your résumé, reel, and any other materials you’re using to promote yourself up-to-date.
Now, get hired and get cracking—projects don’t make themselves!
![]() Where Does the Money Come From?
Where Does the Money Come From?
![]() Borrowing money from their families
Borrowing money from their families
![]() Using windfalls from insurance
Using windfalls from insurance
![]() Maxing out their credit cards
Maxing out their credit cards
![]() Surveying friends and colleagues to see what gear/props/costumes they might have access to
Surveying friends and colleagues to see what gear/props/costumes they might have access to
![]() Taking out a second mortgage
Taking out a second mortgage
![]() Approaching venture capitalists with a plan that showed why their project was a good investment
Approaching venture capitalists with a plan that showed why their project was a good investment
![]() Creating a Kickstarter campaign online that allowed anyone who liked their project to donate to it
Creating a Kickstarter campaign online that allowed anyone who liked their project to donate to it
Networking
Once you’ve created a business plan and you own or have access to the gear and starting funding that you need, where do you find the jobs?
For any new company, the first gigs are the hardest to land, and identifying them may take some time. More than half of small companies fold within the first year, ironically, after making the kind of mistakes they probably needed to make and learn from in order to be successful.
You may need to drop your rates or even work for free in the beginning of your career to show what you can do, which you can then promote in order to get more work.
One of your best strategies for getting the word out about your company and the quality of your work will be networking, getting yourself out there to meet with professionals like yourself and possibly clients as well at conventions or social meetups. You can find these opportunities via searches on Facebook or other social media.
Some major entertainment industry conventions where media pros get together and technical and organizational breakthroughs are reported and celebrated include the following:
![]() Consumer Electronics Show (CES): Showcases new developments in professional and consumer entertainment technology and a great place to see the newest electronic gadgets
Consumer Electronics Show (CES): Showcases new developments in professional and consumer entertainment technology and a great place to see the newest electronic gadgets
![]() National Association of Broadcasters (NAB) conventions: Features the latest in professional media production gear and an exhaustive array of workshops and presentations on video production technology and techniques
National Association of Broadcasters (NAB) conventions: Features the latest in professional media production gear and an exhaustive array of workshops and presentations on video production technology and techniques
![]() National Association of Television Programming Executives (NATPE): Focused on program development, acquisitions, and networking for media executives
National Association of Television Programming Executives (NATPE): Focused on program development, acquisitions, and networking for media executives
![]() Comic-Con: For fans and creators of the ever-growing and intersecting worlds of fantasy, comic books, graphic novels, films, gaming, and other media (see FIGURE 5.11).
Comic-Con: For fans and creators of the ever-growing and intersecting worlds of fantasy, comic books, graphic novels, films, gaming, and other media (see FIGURE 5.11).

PHOTO COMIC-CON 2013 BY PAT LOIKA VIA FLICKR CC BY 2.0
FIGURE 5.11 A cosplay extravaganza at Comic-Con 2013
This is just the tip of the tip of the iceberg. Wherever you live, your town probably has meetups for professionals, amateurs, and enthusiasts engaged in media creation.
Meetup.com is a good place to start looking for like-minded folks and learn where the gigs are. When exploring a new website for the latest information, do your best to validate the legitimacy of the website and any events listed therein before depending on any information you get from it.
Lots of jobs feature constancy and reliability. Once you have the job, you keep it until you decide to change it or are fired or laid off. Media work is different. When you are a media professional, your work is your life and your life is your work, and you’re only as good as your last gig. The good news is you may not have a boss (unless you have investors). The bad news is you have to hustle once the last gig is over or the cupboard goes bare.
Over time, you’ll build up a database of clients who will ideally rehire you or recommend you for future work, and you will develop a client base.
Writing a Business Proposal for a Promotional Project
When you write a proposal and pitch yourself or your company to produce a project for your client, you need to think about several things that will make your proposal more competitive.
Fulfill a Need
You might feel there’s a need for a food bank to feed the underprivileged in your community. You could contact a local outreach and help them create media to promote this mission.
Or maybe you’re a skateboarder with an idea for an innovation to the board or the GoPro camera. Ronald Bennett of Bennett Trucks invented a skateboard truck that granted boarders more control turning. Could your innovation become the next campaign for a company you follow and admire? Why not? Familiarity is a sort of expertise. Use what you know.
Be Bold
You need to have a point of view about the work you are planning to do. Playing it safe and saying as little as possible will probably land your proposal in the circular file, also known as the garbage can. Remember that when you write a proposal, both sides are looking for something. You’re looking for a job, and your potential client is looking for The Answer.
A great example of this comes from an episode of the show Mad Men (2007). Ad man Don Draper is meeting with executives from Kodak Camera who are looking for the best way to market a new device they call “The Wheel,” which rotates photographic slides on a circular tray so they can be projected against a wall.
Draper’s proposal does not promote “The Wheel”; rather, he explains to the execs that the device they have created is a time machine families will use to revisit themselves at their best. He tells them that their device is not called “The Wheel”; it’s called “The Carousel.”
Once again, he doesn’t ask his client, he tells them.
Needless to say, they accept his proposal based on the strength and clarity of his conviction. This may represent more confidence and will than you are comfortable demonstrating, but it speaks to a key dynamic in the relationship between the pitcher and the client.
The key to writing or delivering a successful proposal is salesmanship, and that comes from having a good project or a good idea and selling it well. This can require boldness and tenacity; in a competitive market, the strong thrive, and the timid change jobs.
Be Clear
You will need to develop a business plan for a promotional film as well as a production plan. Your business plan must clarify your understanding for key aspects of your deliverables including deadlines and financial compensation, as well as covering all the legal responsibilities involved.
To do this, you will have to research the elements that should be included in your proposal. Simultaneously, you need to develop some script ideas for the project to give your potential client some choices.
If you win an interview with your potential client, you should review your proposal and practice pitching your script ideas until they are ready, making notes on needed revisions and discussing any points of contention.
You will then make any needed adjustments based on a clarification of goals of the project, methodology, costs, scheduling, and so on, and return for client approval.
Consider the Competition
Considering the competition has two meanings in regard to your project. First, you need to understand the market you are making a proposal regarding. You need to ask the following questions:
![]() Is your client the market leader?
Is your client the market leader?
![]() If not, who is, and why?
If not, who is, and why?
![]() What aspect of your client’s product should your proposal focus on? Have they recently made a change they want your campaign to focus on?
What aspect of your client’s product should your proposal focus on? Have they recently made a change they want your campaign to focus on?
![]() If your client has made a recent development to their product, why did they change it, and what sort of advance in the market would they like to see their development create? Are their expectations reasonable? How can you find out?
If your client has made a recent development to their product, why did they change it, and what sort of advance in the market would they like to see their development create? Are their expectations reasonable? How can you find out?
![]() What intelligence or reports are available to clarify the history of your client, the product in question, and the market? Does a quantitative (data-based) analysis of this information yield an understanding of how the client came to be where they are—market leader or also-ran—and how likely the current development might be to improve their market performance as much as they hope?
What intelligence or reports are available to clarify the history of your client, the product in question, and the market? Does a quantitative (data-based) analysis of this information yield an understanding of how the client came to be where they are—market leader or also-ran—and how likely the current development might be to improve their market performance as much as they hope?
Tip
Be certain that the promotional campaign you’re coming up with for the client or producing based on the campaign of someone else is likely to achieve the desired effect for the client. Ask yourself, are you throwing darts in the dark? How sure can you be?
The second meaning asks you to consider your worldwide competition as a media creator. For your promotion to succeed, you need to keep your audience’s attention. This is an increasingly difficult challenge in a world where millions of other images and sounds are vying for them.
Ask yourself what in your proposal is designed to do that. You should have a central idea, preferably visual, that you introduce, explore, and come back to throughout your video project.
Most importantly, your proposal should grab the audience and not let go. It should make them interested in what comes next.
Here’s the Pitch
You will need to prepare a pitch based on your potential client’s perceived needs, as well as produce visual and written material to support the pitch. You should practice your presentation before others who will act as the client.
Quality Is Key
High-end commercials cost more to produce per minute than feature films. Even though you may not be shooting at that top bracket, it will benefit you to make every image you record as visually stunning, well composed, and professional as it can be. It should look like it was shot for a million bucks even though you actually spent only five.
Cool locations, exciting costumes, funny script, and great videography add up to powerful promotions. Companies often hire stars for commercials (if they can afford them) because they have a proven track record of holding the audience’s attention and their persona might improve the chances of convincing the audience to try the product.
Where Are You Screening?
Success in promotions often depends on exposure—not the brightness of the image but the degree to which it reaches the largest possible audience and makes a good impression, engendering positive word-of-mouth. These days, YouTube, Facebook, and Instagram get the word out much more cheaply and sometimes more effectively than traditional broadcast and print media outlets.
The Interview
Conducting an interview is key to success in several arenas related to media creation. Since they share a number of the same goals, we have chosen to group practices related to conducting successful interviews here.
Interviewing Documentary Participants
If you’ve watched any number of documentaries, you’ve probably noticed that interviews, also called talking heads, are one of the cornerstones of that format, often dominating the content and driving the production of B-roll to support the topics introduced during the interview (see FIGURE 5.12).
Typically, the respondent replies to a series of questions posed by the interviewer, and the questioner is relegated to a disembodied voice or in many cases not heard from at all, having been removed via editing, to allow the viewer to focus on the response of the interviewee.
Interviews are juxtaposed with B-roll, reenactments, freeze frames, graphics, and voiceover to create most of the content of documentaries.
In the greatest interviews of all time, including that of President Richard Nixon by journalist David Frost, of actor Marlon Brando by author Truman Capote, and of political leader Malcolm X by writer Alex Haley, the subject was very comfortable engaging in an open exchange of ideas with the interviewer.
Remember to keep your goals for the interview in mind when conducting the interview. Sometimes the interviewer puts themselves or their agenda before the goal of getting the subject to reveal themselves on camera, creating a true “gotcha” moment instead of developing a true dialogue with their subject.
Tip
Occasionally a demagogue (someone who tries to motivate the public emotionally rather than with facts) will refer to any desire to engage in dialogue as a “gotcha” moment. They may try to take advantage of the audience’s cynicism. As an interviewer, be aware that any unwillingness to discuss legitimate issues should signal an alarm to interviewers and the general public alike.
Before the Interview
The key to a successful interview is research. Knowing the truth, or at least as much of it as is available to you, may guide you to areas of significant investigation or epiphany.
Keep in mind, if you present as ignorant on the topic you are interviewing your subject about, you will immediately lose credibility with your subject as well as your audience. Practice adhering to the following guidelines:
![]() Unbiased news must be as faithful as possible to the facts of the account; however, facts need to be massaged out of interviewees by asking appropriate questions to the main respondent, supported by secondary interviews of ancillary respondents.
Unbiased news must be as faithful as possible to the facts of the account; however, facts need to be massaged out of interviewees by asking appropriate questions to the main respondent, supported by secondary interviews of ancillary respondents.
In other words, if you’re conducting an interview about climate change, activist and former Vice President Al Gore might be considered a main respondent, someone in a key position to make an educated statement on the topic at hand. Next might be inhabitants of areas immediately affected by climate change, such as the Maldives, Seychelles, and the Solomon Islands, or those who are fighting climate change in those affected areas.
![]() Consider the bigger picture or “big idea” underlying the topic of your interview. What will happen if the problem you are considering is left unchecked? What is the ultimate upside if the innovation you are discussing is supported and allowed to develop?
Consider the bigger picture or “big idea” underlying the topic of your interview. What will happen if the problem you are considering is left unchecked? What is the ultimate upside if the innovation you are discussing is supported and allowed to develop?
![]() Practice your interview with a friend or associate. Make sure you are comfortable with the topic, questions, and wording.
Practice your interview with a friend or associate. Make sure you are comfortable with the topic, questions, and wording.
![]() Choose the location to make the subject most comfortable, whether their home office or a location key to the topic at hand.
Choose the location to make the subject most comfortable, whether their home office or a location key to the topic at hand.
During the Interview
Having researched and prepared for the interview (see FIGURE 5.13), here are some tips and technical requirements to make sure your interview is successful at gathering footage and a method for further research:
![]() While your crew sets up camera and lights and “mics up” the subject, have a pre-interview with the interview subject.
While your crew sets up camera and lights and “mics up” the subject, have a pre-interview with the interview subject.
Be honest about the kinds of information you are hoping to collect on camera and share a few of the questions with the person you’re going to interview. Remember, it’s not an interrogation. If you do this right, the interview will flow more like a conversation, rather than an oral exam.
Also, ask the subject to include the question you ask into their answer so that in case you ask a yes or no question, you have a better chance of capturing a useful sound bite.
![]() Sit or stand as close to the lens as possible. The line of sight (eyeline) of your subject should be near the lens to allow the viewer to share in the participation of the conversation.
Sit or stand as close to the lens as possible. The line of sight (eyeline) of your subject should be near the lens to allow the viewer to share in the participation of the conversation.
PHOTO COURTESY GIGNIKS.ORG
FIGURE 5.13 A sit-down interview with Bill Pope, cinematographer of the Matrix trilogy
Filmmaker Errol Morris, in a quest for the most intimate interviews, uses two teleprompters, in a configuration he calls the interrotron, to get the interview subject to look directly into the lens, while seeing the interviewer’s face on the two-way mirror of a teleprompter.
![]() Start the interview by asking the subject to state their name and spell it on-camera. Spelling an interview subject’s name incorrectly onscreen is not acceptable.
Start the interview by asking the subject to state their name and spell it on-camera. Spelling an interview subject’s name incorrectly onscreen is not acceptable.
![]() Don’t just wait to ask the next question; listen to what your subject is saying.
Don’t just wait to ask the next question; listen to what your subject is saying.
To assure that you do just that, repeat and paraphrase a point the subject made, and ask a question that relates to what was said. For example, if they told you what they had for breakfast this morning, you can jump off of that by saying, “You mentioned you had cereal for breakfast; what is your favorite breakfast food?”
![]() Before ending the interview and thanking the interview subject, ask them whether there is any additional information they’d like to share. Sometimes there’s great information available that you did not know how to ask for.
Before ending the interview and thanking the interview subject, ask them whether there is any additional information they’d like to share. Sometimes there’s great information available that you did not know how to ask for.
Interviewing Prospective Clients
The other type of interview you’re likely to conduct in your career involves you interviewing for a job after submitting your proposal. Once you get a callback, after they’ve looked over your reel, you may have to meet with the client to describe your vision.
Often, the interview is the last step before the hire. In Chapter 3 we discussed in depth the importance of vision and the value of research. These are the key strategies you can use to convince the client that you and only you can deliver the exact effect they are looking for (or better).
The key to a good interview is having the information you need to convince your potential client you are the one for the job. This may be in the form of a written proposal, or it may simply come from you in the course of your meeting.
You should go into the meeting with a plan and specific goals or outcomes you want to achieve, but remain flexible and listen to what the client is telling you. Some interviewees hear every criticism as a rejection, but the most successful play the long game with potential clients and stay positive and focused on winning the work, either now or the next time.
A wise old salesman used to pitch 30 to 40 potential clients every day. After he made his pitch, he would wrap up by saying, “I hope I won your business today. If I didn’t, please let me know what I could do to win it, and I assure you, I will do everything in my power to make you happy you chose my company.”
![]() Good grooming: Dress well, be clean, smell good.
Good grooming: Dress well, be clean, smell good.
![]() Breath mints: Enough said.
Breath mints: Enough said.
![]() A firm handshake: Not too hard, not too soft. And not wet. Keep a dry handkerchief or paper towel nearby.
A firm handshake: Not too hard, not too soft. And not wet. Keep a dry handkerchief or paper towel nearby.
![]() Eye contact: Make it, not creepy and intense but direct. Some interviewees go on autopilot when answering a question. Keep in touch with the interviewer during questioning. Confirm that your potential client is “getting” what you have to say.
Eye contact: Make it, not creepy and intense but direct. Some interviewees go on autopilot when answering a question. Keep in touch with the interviewer during questioning. Confirm that your potential client is “getting” what you have to say.
He didn’t win over all his potential clients on his first round of stops. But he kept up with them, reminded them of past meetings, asked after their families, and did his best to resolve their issues. Over time, his attitude and consistency won most of his clients from his competitors.
Questions? We’ve Got Answers
You should definitely go into any interview situation with an attitude that’s active as opposed to passive, and that means having questions for your potential client.
If they ask whether you have any questions for them and you say “I’m good,” take a minute later and think about how your competitors answered that question—you know, the ones who got the job.
Or, just add to this list of starter questions:
![]() “First and foremost, I want you to be beyond thrilled with the media I create for you. What do you want this project to achieve for you, short-term and long-term?” (Alternately, you can tell the client what the project can achieve for them Don Draper–style, just as long as that’s your style, too. Many clients with experience can sense insincerity, so you will do well to scrutinize your delivery and choose the approach that works best for you and comes across as the most sincere.)
“First and foremost, I want you to be beyond thrilled with the media I create for you. What do you want this project to achieve for you, short-term and long-term?” (Alternately, you can tell the client what the project can achieve for them Don Draper–style, just as long as that’s your style, too. Many clients with experience can sense insincerity, so you will do well to scrutinize your delivery and choose the approach that works best for you and comes across as the most sincere.)
![]() “What aspects of your product are you keen to focus on, and what aspects do you want to deemphasize?” You may want to express to the client that the project can do even more for them than they are hoping. Most clients will be happy to learn that you are as ambitious or more ambitious about the goals of the project than they are. More generally, most people respond to or are turned on by vision, so long as yours does not directly contradict theirs and does not make them see you a direct competitor.)
“What aspects of your product are you keen to focus on, and what aspects do you want to deemphasize?” You may want to express to the client that the project can do even more for them than they are hoping. Most clients will be happy to learn that you are as ambitious or more ambitious about the goals of the project than they are. More generally, most people respond to or are turned on by vision, so long as yours does not directly contradict theirs and does not make them see you a direct competitor.)
![]() “What aspects of your company’s mission and vision should be evident in this media campaign?”
“What aspects of your company’s mission and vision should be evident in this media campaign?”
![]() “What are your must-haves for this project? How much leeway can you give me as to how I include them?”
“What are your must-haves for this project? How much leeway can you give me as to how I include them?”
![]() “What are your concerns about my ability to produce this project to your maximum level of satisfaction?”
“What are your concerns about my ability to produce this project to your maximum level of satisfaction?”
Shooting with Multiple Cameras
There are many reasons a video production might require the use of multiple cameras. The most common is to be able to capture multiple angles of an event that is either difficult or impossible to re-create. Live events such as sports, concerts, and theatrical performances demand it.
In the early days of television, multiple cameras were required because the majority of programs were broadcast live because of the cost and time involved with producing work on film and the nonexistence of any other recording medium. The use of videotape as an affordable method to record and store video content did not become standard until the mid-1960s.
The three-camera multicamera sitcom that is credited with establishing the format is the 1950s classic I Love Lucy. The show is still remembered and celebrated today, not just because of the quality of the writing and the timeless talent of Lucille Ball and Desi Arnaz but also because of the choice to shoot on film, instead of broadcasting video directly to the viewing audience. It survives today, unlike many programs that were not recorded on a permanent medium (or at all in some cases), because of how well the show’s film elements could be (and were) preserved.
One holdover from the early days of television that still uses a multiple-camera, theatrically staged format is the situation comedy, or sitcom. Television comedy borrowed other forms from cinema with the single-camera format and a documentary approach known as the mockumentary.
Shows such as The Office, Parks and Recreation, and Modern Family are shot in a single-camera documentary style yet still use multiple cameras in production. This is because of contemporary documentaries’ use of multiple cameras to capture once-in-a-lifetime moments in cinema verité style, as well as talking head interviews.
When editing single-camera talking head footage, the use of B-roll becomes a necessity not only to show what the subject is talking about but also to cover up jump cuts that occur when a portion of the interview is removed, such as a long pause, a flub, or redundant and unnecessary speech.
The advantage to shooting interviews with two cameras (see FIGURE 5.14) is the opportunity for B-roll to cover up those awkward cuts that are exposed when a transition from one shot at a certain size and angle to another with a different size and/or angle allows you to stay in the moment with the interview subject.
Besides using the two shots to cover up edits in the interview, the choice of angle can be used creatively for emphasis. Start on a medium shot for the first part of a sound bite and then, just when an important moment occurs during the interview—bam!—punch in to the close-up.
Something to Sync About
Professional studio cameras that are designed for multicamera shoots have the ability to use identical timecode, coming from an external source to make synchronizing—or syncing—footage quick and easy.
Note
Timecode is an 8-digit addressing system based on the 24-hour clock that allows each frame to have its own address number. It is formatted as HH:MM:SS:FF (which stands for hours:minutes:seconds:frames).
There are a few considerations to make when shooting with multiple cameras if you don’t have the kind of budget to get cameras and gear that are specifically designed for multicamera shooting. The syncing of multiple clips in editing can be difficult if these technical considerations are not made.
![]() Shoot with identical cameras if at all possible.
Shoot with identical cameras if at all possible.
![]() Set the cameras to record in the same frame rate and format.
Set the cameras to record in the same frame rate and format.
![]() Match the white balance, shutter speed, and gain settings on each camera.
Match the white balance, shutter speed, and gain settings on each camera.
![]() Set up each camera at an angle and focal length different enough that cutting between them does not look awkward like a jump cut.
Set up each camera at an angle and focal length different enough that cutting between them does not look awkward like a jump cut.
![]() Record audio on each camera as a reference to aid in syncing.
Record audio on each camera as a reference to aid in syncing.
![]() Assign one person (usually the assistant director) to be responsible for calling “Roll” and “Cut.”
Assign one person (usually the assistant director) to be responsible for calling “Roll” and “Cut.”
Tip
As an alternative to a slate, you can use a camera flash or a person clapping their hands.
![]() With all cameras rolling, clap a slate (clapboard) to mark a slate to sync to.
With all cameras rolling, clap a slate (clapboard) to mark a slate to sync to.
![]() Once the cameras start rolling, they must stay rolling until “Cut” is called. Stops and starts can make syncing the angles difficult.
Once the cameras start rolling, they must stay rolling until “Cut” is called. Stops and starts can make syncing the angles difficult.
![]() Optionally, you can clap or slate at the end of the roll before cutting to have a backup sync point.
Optionally, you can clap or slate at the end of the roll before cutting to have a backup sync point.
![]() Upon ingesting the footage, name each clip with an angle number or letter.
Upon ingesting the footage, name each clip with an angle number or letter.
Most editing software requires you to place a mark—either an In point, an Out point, or a marker—on a clip to determine the point at which the clips of each angle are to be synchronized.
Note
You can also use the multicamera syncing feature of your editing software to edit the various angles of projects that were not shot simultaneously, such as music videos.
Synchronizing angles can be done automatically when using a third-party plug-in, such as Red Giant Plural Eyes, or when the editing software has an automatic clip syncing feature, such as Apple Final Cut Pro X.
Both of these options require reference audio on each clip that is analyzed to find matching indicators in the sound to sync the angles. This feature makes syncing clips much easier, even if most of the considerations mentioned were not made.
Lighting an Interview
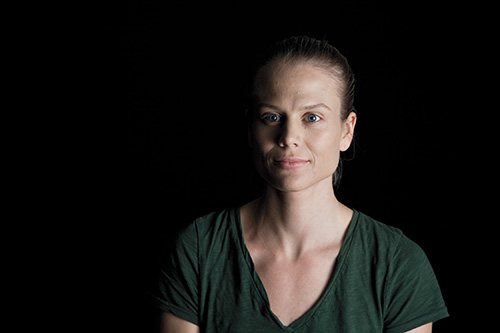
In Chapter 4, we presented the fundamentals of lighting for narrative. The approach for which a sit-down, talking-head interview for nonfiction is lit takes its cues from portrait lighting in straightforward and classic approach. This style of lighting is called three-point lighting. The three points of light are the key light, the fill light, and the back light (see FIGURE 5.15).

Tip
Placing the key light slightly higher than eye level can help avoid the subject discomfort and squinting from the directness of the light angle. This also creates a triangle of light on the subject’s cheek and is called the Rembrandt style of portrait lighting.
The key light, as mentioned in Chapter 4, is the main source of light in a shot. It is the brightest source and can also be used to light a larger area around the interview subject. It is placed at around a 45-degree angle from the camera to give a sense of depth and present detail of the subject.
A decision needs to be made as to whether the key light should be placed on the same side as the interview subject’s line of sight (eyeline) or the opposite side (see FIGURE 5.16). Placing the key light on the same side as the subject’s eyeline will allow more coverage of light on the subject’s face (both eyes are lit). Placing the key light on the opposite side creates more shadow on the face (one eye is lit).

The transition from light to shadow is called fall-off. When using a direct source with no diffusion for the key light, a harder shadow appears on the face, which can also be described as a fast fall-off.
Note
You can use more sources—or points—of light if necessary when lighting an interview, especially to illuminate the background.
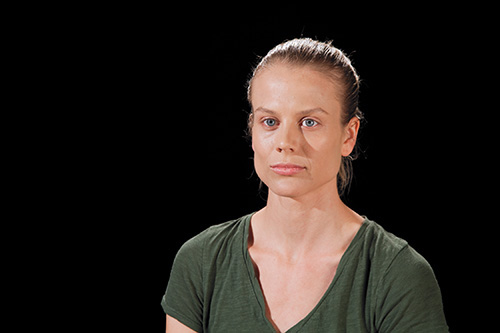
The fill light (see FIGURE 5.17) is used to fill in the shadow that is created by the key light. The fill should be a lower-intensity light and a much softer, or diffused, source of light. A fill does not have to be a direct source; it can be a light bounced off of a bounce board or foamcore card.

Tip
The fill light doesn’t necessarily need to be a dedicated source. If bouncing light for the fill, you could bounce off the key or the back light to achieve a similar result without having to set up a third light fixture.
Because of the lower intensity of the light due to the diffusion or bounce, you may need to use a higher-intensity light or bring the light closer to the subject. Too close or too intense, and the effect of the shadow from the key will be lost, causing what is called flat lighting, like the look of flash photography.
Tip
When placing the back light, take special care to not let the light hit the lens of the camera because this would cause a light flare and/or milky shadows.
The softer light used for fill (see FIGURE 5.18) has a longer transition from light to shadow, or a slow fall-off.
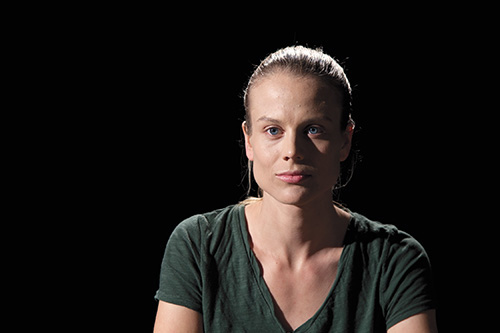
The third point of light, the back light (see FIGURE 5.19), is designed to separate the subject from the background by giving an outline around the head and shoulders or a halo effect. This type of back light is often called a rim light (see FIGURE 5.20) and is placed above the subject’s head.

If the back light is not coming from directly behind the subject but from the side so that the light hits a bit of the side of the subject’s face, it is called a kicker. The back light should be of a lower intensity than the key or the fill light.
If you’re interested in creating a darker mood for the look of your interview, consider using only two points of light, but don’t sacrifice the back light. Use the key light and a back light for a dramatic transition from light to dark (see FIGURE 5.21).
For a softer yet still moody look, go with a back light and what you would normally use as a fill, which would now be considered your key light (see FIGURE 5.22).

The same approach can be made even outside of the studio environment. When out on location, indoors or outdoors, identify what the main source of light is—your key light—and place your subject, framing your shot with the direction of that light in mind. Use additional light sources or bounce boards and reflectors as your other points of light.
Tip
Be aware that having a strong source of light such as the sun as your back light can make it a challenge to get an acceptable exposure on your subject if you are not adding enough light to balance it out. This is a common problem in amateur production.
Postproduction: “We’re Not Done Yet?”
In Chapter 4, the process of trimming and revising your project in postproduction brought you much closer to completion. There still remain a few more stages of the post workflow.
To achieve a truly professional look and to provide information to your audience in an alternative manner to dialogue and images, you may want to consider using text onscreen.
Words onscreen, called titles, are most necessary to identify people and places that you present onscreen. Graphics, such as photos, logos, and illustrations, are used to present and clarify information visually and can help brand your productions. Both titles and graphics should be used creatively yet thoughtfully to support the themes and styles of your video.
How to Be Safe While Textually Active
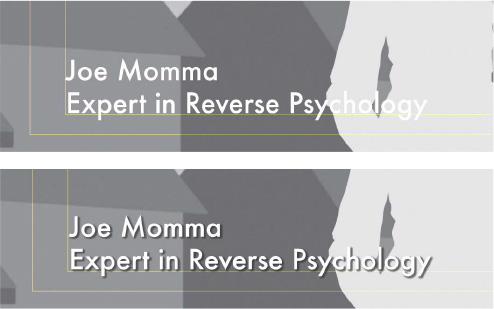
Before throwing a bunch of words onto the screen, we have to establish some boundaries so that everything is done safely. Those boundaries are called action-safe and title-safe zones (see FIGURE 5.23).

Since not every video display and television is made the same, the safety zones were established to be a reference of the safe distances from the edge of the video frame that could be cropped by the overscan of most video displays. The standard overscan of 16:9 video is 5 percent. That means that 5 percent of each edge of the captured frame is cut off by most displays.
Note
Video displayed on computer screens usually show the entire uncropped frame.
Before high-definition digital displays, analog televisions were less precise about how much or how evenly the overscan was cropped. Therefore, it was possible for important text information at the edge of the action safe zone to be cropped off on certain television sets.
For this reason, an even tighter zone is considered safe for text onscreen. The title-safe zone on a 16:9 image is 10 percent from each edge of the frame. Keeping all of your text within this zone assures that no text or graphic placed in the area will be cropped off by a video display or television.
Words, Words, Words
Text onscreen comes in many forms. All forms of onscreen text are referred to as titles, even if the actual title of the show is shown only once. The most basic title is text that stays static onscreen and is called a title card.
Before electronic and digital technology could generate text on a screen, the text, such as the title of a program, would have to be painted or printed on a physical card; thus, the term title card remains.
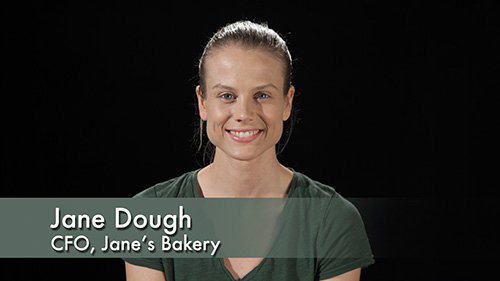
Text that identifies a person when they appear onscreen, such as in a talking head shot, is called a lower-third (see FIGURE 5.24). Inventively named because the text is positioned on the lower horizontal third of the screen, lower-thirds typically contain two lines of text—the top line for the name and the bottom line for the title—aligned to the left and frequently with a background bar.
Titles that scroll up from the bottom of the screen, most associated with the end credits of a feature film, are called a title roll. Lists of text in title rolls are formatted in two columns. The left column contains character roll or job title (roll and title: no pun intended) and is aligned right. The column on the right contains the full name of the credited cast or crew member and is aligned left, leaving a slight gap between the columns.
Title generators are built into most video-editing applications. Many have professionally designed templates to work from, which can be helpful. Some of the templates even have motion integrated into the title, making them quite impressive, but remember that the choices you make should serve your project. Sometimes a title card that flies into frame and then explodes away is not the best choice, if it is inconsistent with all the other design decisions you’ve made throughout your video.
Here are some suggestions when designing your titles to maintain a professional look and avoid looking like a rookie:
![]() Choose a typeface, or font within a typeface family, that is easily legible and appropriate for the tone and purpose of your program. Script fonts might be okay for a main title, depending on the tone of your project, but might not be a good choice for the rest of your credits.
Choose a typeface, or font within a typeface family, that is easily legible and appropriate for the tone and purpose of your program. Script fonts might be okay for a main title, depending on the tone of your project, but might not be a good choice for the rest of your credits.
![]() The Chyron Legacy
The Chyron Legacy
![]() Certain fonts are avoided in professional design.
Certain fonts are avoided in professional design. ![]() and
and ![]() come to mind. It’s also a good idea to avoid the default font on the title generator. You’re better than that.
come to mind. It’s also a good idea to avoid the default font on the title generator. You’re better than that.
Tip
When creating a title or graphic with Photoshop that has a transparent background, make sure the video-editing software you use can accept PSD files. If not, save your titles in PNG format to keep the transparency data.
![]() Choose a style for your text, including choices such as color, size, and letter case (title case or uppercase), and stay consistent with your style choice throughout your project.
Choose a style for your text, including choices such as color, size, and letter case (title case or uppercase), and stay consistent with your style choice throughout your project.
![]() It should go without saying, but carefully check for spelling and grammatical errors on every title. Nothing makes you lose credibility faster than a mispelled misspelled word.
It should go without saying, but carefully check for spelling and grammatical errors on every title. Nothing makes you lose credibility faster than a mispelled misspelled word.
![]() Even worse than a misspelled word is a misspelled name. For many microbudget and student productions, the only payment a crew or cast member receives for their time is a credit. If their name not spelled correctly, it’s an insult.
Even worse than a misspelled word is a misspelled name. For many microbudget and student productions, the only payment a crew or cast member receives for their time is a credit. If their name not spelled correctly, it’s an insult.
![]() Add a drop shadow (see FIGURE 5.25) to add some depth and separation from the background.
Add a drop shadow (see FIGURE 5.25) to add some depth and separation from the background.
Unfortunately, there is no single standard tool that every media creator can learn to master the art of title creation. The closest thing we can recommend is Adobe Photoshop.
Within Photoshop, there is a Film & Video preset (see FIGURE 5.26) when creating a new file that allows you to choose the format of the video you are working in. Files created with this preset conveniently have guides set up for action- and title-safe zones.

Show Me!
Beyond text, there are many reasons to include graphics in your project. If you have designed a logo for your production company, the logo could be edited in at the top of the show, or you could place it as a bug on the bottom-right corner of the screen like most TV channels do. In many cases, there are photographs, graphs, and illustrations that can be used as B-roll to support an idea or provide visual evidence.
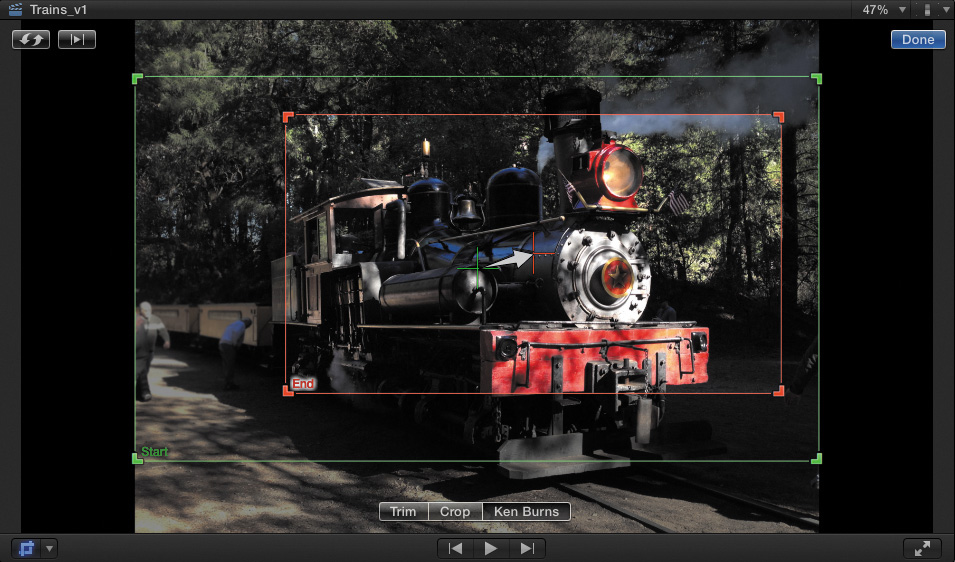
Photographs may make up the majority of your visual content in projects such as historical documentaries. Filmmaker Ken Burns is credited with having popularized the effect of panning and zooming into photographs with an animation camera in his documentaries. Although he is the first one to tell you that the technique had been used by other filmmakers before him, most refer to it as the Ken Burns effect.
Adding movement to graphics not only helps keep the attention of the viewer but allows you to help tell your story by calling attention to a detail on a photo. By using keyframes for scale and position, similarly to how they were used in automating audio levels in Chapter 3, you can achieve the same effect that required filmmakers to use special equipment in the past.
Some third-party plug-ins, such as Noise Industries’ free Pan and Zoom, and built-in features in video-editing applications can make it even easier to add movement to your still images.
In Final Cut Pro, Apple actually named the photo-animating feature the Ken Burns effect (see FIGURE 5.27). It works quite easily. By placing a frame on a still (or video) for the start and end of the movement, you create the effect. The speed of the effect is based on the duration of the segment in your sequence.
Sample Project: Nonprofit Promotional Video
New media has evolved to the point where video content in a website is as necessary as photos and text. Big corporations and companies hire in-house production teams to create videos to promote products, support their customers, train their employees, and document company events.
The ease of creating acceptable, if not professional, video using mobile devices has made it possible for smaller companies to expect their employees to be able to create video, even without special training or equipment.
Entrepreneurs must create video pitch presentations to raise money on crowdfunding sites, such as Kickstarter and Indiegogo. Nonprofit organizations have a need to create promotional video for their websites to show supporters the work they do.
Nonprofit organizations function solely on the funds that are raised through donations and grants. To attract and maintain supporters, they create (or commission) promotional materials that present the goals and accomplishments of the organization.
Workflow
You, as a trained video creator, now have the skills to authentically create video for a company or organization in your community.
Development
The first step is to identify the organizations in your area that are doing work that is charitable and beneficial to you and the people who live around you.
1. Establish a brand identity for you as a production company that includes an original name and a logo design.
2. Create a website and business cards. Having a social network presence is optional but effective in demonstrating your commitment to doing professional work.
3. Research the organizations you are targeting to understand the details of their goals. Be aware of existing promotional material they have made public.
4. Create a written proposal for the type of video you intend on making for the organizations you will pitch to. You might need to send this by e-mail, deliver it on paper in person, or both.
Be clear in your proposal that you want the video to be used to help and support the organization in its goals.
5. Make some phone calls. Reaching out through e-mail can work, but it’s much more effective to connect with others to make your pitch by telephone or in person.
6. Once you’ve made a contact with a member of the organization, work together with them to develop your video idea. Make a list of what should be included in the promotional video, such as a message from organization leadership, past activities and accomplishments, or current and future goals.
7. Rejoice a little bit—you have a client.
8. Stop rejoicing and get back to work. Write an outline and a script for the video and then get it approved by your contact. Remember that the video is for their purposes, so do your best to take their feedback positively and make changes according to their wishes.
9. Create a written agreement with your client on what each of you is providing to complete the project, including time commitment.
Preproduction
The production phase on a promotional video has the same challenges as any other project, except now you have a client and building a good reputation is at stake, so plan your production meticulously.
1. Gather any previously created material from your client, such as video clips, slideshows, photos, and graphics.
2. Schedule your production to prioritize material that tells the story and fills the bulk of your project’s duration, for example, interviews or voiceover narration.
3. Have a production meeting with your crew to inform them of all the major details of the video’s purpose and what is expected of you and them during production.
1. Before you begin to shoot, take extra care to ensure that all of your equipment is in working order. Production problems are bound to happen; just make sure they aren’t the ones you could have prevented.
2. With a professional demeanor and a smile on your face, start shooting and check off each item on your shot list as you acquire them.
3. Leave the locations looking better than you found them.
Postproduction
Your client is going to be eager to see what you put together, so waste no time if you intend to build a good reputation.
1. Ingest and organize your footage. There is a chance that your client will visit you or that you will bring the laptop you edit with you to them. The organization of your project assets (bins, events, clip names) is a reflection on you and your professionalism. Use standard conventions of asset organization, or at the least, keep things neat.
2. After cutting your rough-cut assembly, you will be tempted to send it to the client for feedback. Don’t.
You understand that the post process has only begun and there is much to do in terms of adding B-roll, cutting in music, layering titles and graphics, and sweetening audio, but your client does not.
They may say they do, but if you don’t show them a nearly finished project with at least some temp music and most of the additional B-roll and images in place, you will be fielding questions like, “Why does it look like that?” and “Is that supposed to jump like that?” and “Didn’t you say there was going to be music?” Prepare for this.
3. For feedback, provide your client with a compressed export that cannot be mistaken for completed product. Add a low-opacity title card across the middle of the screen with your name or the words “NOT FOR DISTRIBUTION” on it. This watermark should protect you from the unfinished work being used, especially if it’s a paying gig.
4. Rinse and repeat. Make as many changes as you can within the agreed-upon time commitment.
5. In the end, deliver the best product you can because, after all, your name is on it.
![]() eyelinefall-off/fast fall-off/slow fall-off
eyelinefall-off/fast fall-off/slow fall-off