Chapter 6. Delivering the Message
“Never be afraid to raise your voice for honesty and truth and compassion against injustice and lying and greed. If people all over the world would do this, it would change the earth.”
—William Faulkner
How can you effect change in your society if you don’t know the facts? How can you know the facts if media companies with means to report the facts do not cover the stories that are most relevant to your life?
Documentaries (or docs), more than any other type of media projects, are the inspirations or drivers for social change. It’s amazing to think that the work of one person or a handful of people can instigate change in the policies of a major corporation and even cause new laws to be introduced on the floor of Congress. But that is exactly what happens.

![]() The Thin Blue Line (1988): This doc by Errol Morris investigated the life imprisonment of a man convicted of killing a police officer in Dallas, Texas. The man, Randall Adams, was freed because of the film, which also went deeper in its critique of the American legal system than simply targeting the officials who mishandled Adams’ case.
The Thin Blue Line (1988): This doc by Errol Morris investigated the life imprisonment of a man convicted of killing a police officer in Dallas, Texas. The man, Randall Adams, was freed because of the film, which also went deeper in its critique of the American legal system than simply targeting the officials who mishandled Adams’ case.
![]() Supersize Me (2004): Because of this film, in which Morgan Spurlock showed how quickly eating McDonald’s food can affect the health of an individual, the mega–restaurant chain discontinued its “supersize” option.
Supersize Me (2004): Because of this film, in which Morgan Spurlock showed how quickly eating McDonald’s food can affect the health of an individual, the mega–restaurant chain discontinued its “supersize” option.
![]() Bowling for Columbine (2002): After this Michael Moore doc explored the relationship between the bloody killing spree at a school in Colorado and America’s willingness to accept the world’s highest degree of gun deaths in exchange for the freedom to own guns, K-Mart stopped selling bullets. That’s right. K-Mart used to sell bullets.
Bowling for Columbine (2002): After this Michael Moore doc explored the relationship between the bloody killing spree at a school in Colorado and America’s willingness to accept the world’s highest degree of gun deaths in exchange for the freedom to own guns, K-Mart stopped selling bullets. That’s right. K-Mart used to sell bullets.
![]() The Invisible War (2012): After Kirby Dirk’s blistering account of a subculture of sexual abuse within military ranks that was dismissed by the commanders in charge of defending the victims and investigating the crimes, Secretary of Defense Leon Panetta made immediate changes in the policies of the Armed Forces, requiring these cases to be handled outside the units in which they were allegedly committed. The House Armed Services Committee pledged to redirect military training to address underlying problems in the culture that led to such a high degree of assault, and federal legislation was introduced to allow victims of rape and assault to pursue justice outside the chain of command.
The Invisible War (2012): After Kirby Dirk’s blistering account of a subculture of sexual abuse within military ranks that was dismissed by the commanders in charge of defending the victims and investigating the crimes, Secretary of Defense Leon Panetta made immediate changes in the policies of the Armed Forces, requiring these cases to be handled outside the units in which they were allegedly committed. The House Armed Services Committee pledged to redirect military training to address underlying problems in the culture that led to such a high degree of assault, and federal legislation was introduced to allow victims of rape and assault to pursue justice outside the chain of command.
There are many such stories.
In this chapter, we are going to provide some guidelines on how to approach making a documentary project, from the consideration of what topic would be the best candidate worthy of your time and effort to the steps you will need to take to execute your project so that it is entertaining, is informative, and has integrity.
The World of Nonfiction Filmmaking
Documentaries tell stories that aren’t being told and, oftentimes, the stories that most need to be told (see FIGURE 6.1). There was a time when the majority of Americans turned to the evening news to stay informed and had confidence that the news was presented free of bias without an agenda beyond informing the general populace. As the relationship between corporations, politicians, and the American public changed, competitiveness, the need to improve viewership, and the fear of losing viewers have diminished that early mission.

PHOTO BY HAIDER Y. ABDULLA. SHUTTERSTOCK
FIGURE 6.1 An interview subject telling a story, with a camera capturing
So then, what is a documentary? Is it “the news” with a longer production schedule? Is it a story-based film with more talking heads? Webster’s Dictionary defines a documentary as follows:
“of, relating to, or employing documentation in literature or art; broadly: factual, objective”
Factual? Objective? Even the casual audience member may realize that this right here is a very tall order. To re-create even one scene from reality, one would have to cast actors who seem like facsimiles of the original subjects; re-create their actions; get inside their minds to glean their intentions; use the original locations or re-create them; and choose or re-create the original clothing, props, and dialogue of the original scene.
That’s not just tough; it’s impossible. The best we can do is try to be true to the essence of the original events and challenge ourselves to portray them as close to reality as we can. Even that much is difficult because when we hear a story, we interpret it through the lens of our own experience, and we try to make sense of the facts based on our understanding of reality.
Film festivals, Netflix, and the Academy Awards would have us believe that “narrative” films and “documentary” films are two completely different animals, but documentary filmmakers or those who have worked in nonfiction media will tell you that these two denominations of project have much more in common than many people think. Like fictional films, documentary films do the following:
![]() Shoot on an agreed-upon schedule
Shoot on an agreed-upon schedule
![]() Coordinate the efforts of a film crew that may be small or large, depending on the size of the production
Coordinate the efforts of a film crew that may be small or large, depending on the size of the production
![]() Have story arcs that feature rising action, falling action, twists and reversals, and a climax (or anticlimax)
Have story arcs that feature rising action, falling action, twists and reversals, and a climax (or anticlimax)
News, Entertainment, Propaganda...or All Three?
Who do you believe? Manipulation of the media to achieve certain results is a process that has exploded over the last century because of the worldwide distribution of mass media.
The question for today’s media creators is, what is your main goal in creating your piece, and what questions does that goal suggest about the style or limits of your methodology?
News
With news, our goal is to report, to make complicated stories involving multiple points of view easier for the general audience to understand, and to educate our viewers about the facts of their world. The question is, who gives you the facts to report, and which facts do you choose to report and which do you not? We’ll discuss this in more detail in a moment.
Entertainment
Your goal is to amuse your target audience and perhaps the widest possible audience with the goal of having a successful project that makes a lot of money and provides more opportunities to you because of its success. The question is, are you presenting the events in your piece as factual or “inspired by true events,” and are you sacrificing either the details of the truth or the underlying truth to have a more entertaining and popular project?
Propaganda
Your goal is to convince your audience of something. However, are you limiting yourself to the truth to make your argument, or are you structuring a false argument based on mistruths or half-truths because the success of your campaign is more important to you than promoting the truth?
Any description of propaganda should begin with a mention of the Nazi-produced Triumph of the Will (1935), directed by Leni Riefenstahl. To this day probably the most effective media manipulation of all time, this observational doc celebrated the practices of the Third Reich with cinematic shots of cheering crowds and marching armies, which motivated the impoverished and disenfranchised German people to support the Reich.
In American politics, President Lyndon Johnson was a particularly colorful media manipulator. He is supposed to have once suggested that his opponent had intimate relations with a pig. His campaign manager purportedly said, “Sir, you know he doesn’t do that!”
Johnson replied, “I know that, but I want him to deny it.”
During his 1964 Presidential campaign, Johnson’s campaign created a television commercial called “Daisy” (see FIGURE 6.2) where an adorable little girl picks flowers in a field. She hears a countdown, and then the camera zooms in on her eye as a nuclear blast destroys, presumably, everything around her. Johnson’s reassuring voice plays over the blast, warning people to vote for him so that this terrible event does not happen. Though the ad ran only once, it was considered a key component of his landslide victory against the pro-nuclear Barry Goldwater.

COURTESY DEMOCRATIC NATIONAL COMMITTEE AND THE LYNDON BAINES JOHNS ON PRESIDENTIAL LIBRARY
FIGURE 6.2 Three stills from Johnson’s “Daisy” campaign ad
So, when considering creating propaganda, keep in mind that there is The Truth, and there is What We Want to Convince People Of.
A Quick History of News
“What’s new?” (or as the question was posed in antiquity, “What news?”) has intrigued humankind for as long as there have been civilizations. Whether the news of the day was communicated in the agora, the square, the local lunchroom, or the pub, the public has always had a boundless desire to know what was going on in their world, forcing the development of news tellers and news organizations to address this fundamental human need using methods of increasing technical complexity. Here are a few highlights from this history:
![]() Couriers (2400 BCE to 1700s) were sent around by pharaohs, Caesar, prime ministers et al. Their goal was to disseminate the news as publicity for the government. The message most often was, “All is well. Pay taxes promptly.”
Couriers (2400 BCE to 1700s) were sent around by pharaohs, Caesar, prime ministers et al. Their goal was to disseminate the news as publicity for the government. The message most often was, “All is well. Pay taxes promptly.”
![]() Newspapers were introduced in Germany at the beginning of the 17th century, inspired by the pamphlets of Protestant Reformation thinker Martin Luther—specifically, the 95 Theses in 1517. Luther was the social media superstar of his day, using the relatively recent technology of the printing press to distribute pamphlets to the masses and distributing his ideas much more widely than previously possible.
Newspapers were introduced in Germany at the beginning of the 17th century, inspired by the pamphlets of Protestant Reformation thinker Martin Luther—specifically, the 95 Theses in 1517. Luther was the social media superstar of his day, using the relatively recent technology of the printing press to distribute pamphlets to the masses and distributing his ideas much more widely than previously possible.
![]() From the issuing of the first commercial radio licenses in the United States in 1921 up to the introduction of the television in the early 1950s, radio and newsreels that played before feature films in theaters delivered news in America and throughout Europe.
From the issuing of the first commercial radio licenses in the United States in 1921 up to the introduction of the television in the early 1950s, radio and newsreels that played before feature films in theaters delivered news in America and throughout Europe.
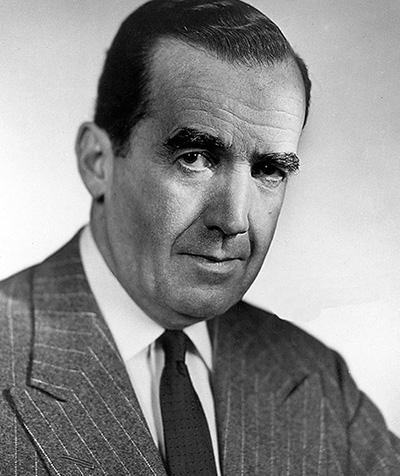
![]() Popularized in 1948, network television news took off with the presentation of the program See It Now in 1954 by journalist Edward R. Murrow (see FIGURE 6.3), who is best known for challenging the Communist-baiting tactics of Senator Joseph McCarthy. McCarthy retired in part because of the challenges posed by Murrow, the first major case of the influence of television journalism to challenge the status quo and criticize the Powers That Be.
Popularized in 1948, network television news took off with the presentation of the program See It Now in 1954 by journalist Edward R. Murrow (see FIGURE 6.3), who is best known for challenging the Communist-baiting tactics of Senator Joseph McCarthy. McCarthy retired in part because of the challenges posed by Murrow, the first major case of the influence of television journalism to challenge the status quo and criticize the Powers That Be.
Later, when Murrow saw the audience for his show diminished by the success of games shows like The $64,000 Question, he wondered how long television would be able to protect or promote the mission of honestly reporting the issues of the day in the face of competition from entertainment, which produced higher ratings and more advertising revenue to their networks.
Murrow prophetically realized that promoting the public interest was costly and challenging because networks needed to allow equal time to organizations that were criticized by their news department. Here is an excerpt from his famous “Wires & Lights” speech, delivered in 1958, about the responsibility of those working in such a powerful and influential medium as television:
“This instrument can teach, it can illuminate; yes, and it can even inspire. But it can do so only to the extent that humans are determined to use it to those ends. Otherwise it’s nothing but wires and lights in a box. There is a great and perhaps decisive battle to be fought against ignorance, intolerance and indifference. This weapon of television could be useful.”
Even facing the challenges of entertainment television, television news expanded in its influence, and anchormen such as ABC’s Harry Reasoner and NBC’s Chet Huntley and David Brinkley became media stars as well as news reporters.
From 1962 through the early 1980s, CBS News remained the gold standard for presenting news that the nightly audience felt that they could believe in and that was relevant to their lives. CBS anchorman Walter Cronkite (see FIGURE 6.4) was “the most trusted man in America.” Cronkite was followed by Dan Rather (1981–2005), who maintained the network’s high level of integrity.

The 1980s saw the growth of cable television and the 24-hour news channel. The Cable News Network (CNN) was created in Atlanta in 1980 by Ted Turner. Events such as the Challenger disaster in 1986 and the Gulf War in 1991 spurred America’s addiction to watching news as it unfolded.
During this time, criticism of television news (and newspapers including the New York Times) by conservatives increased. Australian mogul Rupert Murdoch began broadcasting the Fox News Channel in 1996 in response to what some Republicans felt was the liberal bias in the major media outlets of the day.
Though Fox News has been criticized as a mouthpiece for Republican movers and shakers such as the Koch Brothers, the network has remained the most-watched cable network in the United States for more than a decade. Even though the network is often cited as intentionally disseminating mistruths in its reportage, Fox News maintains a stronghold on cable news over all other stations including CNN, ESPN, and MSNBC.
Rise of the Documentary
The documentary film was invented pretty much at the same moment motion pictures were because the goal of most early films produced between 1890 and 1905 (called actualities) was to document something in reality and to show it to the audience as it was.
Interpretation, commentary, and, for that matter, editing would come later. These earliest films were travelogues, biographies, and popular filmed events such as boxing matches. The newsreel developed during the 1910s as the main method of showing audiences the most exciting developments of the day, such as Sir Ernest Shackleton’s Trans-Antarctic Expedition.
The different genres of documentary mostly derive from the philosophy used to gather the material. There is not absolute agreement even among documentary filmmakers as to the limits of these definitions, but there are several useful guidelines.
The cinema vérité style of documentary uses the camera to reveal unaltered truths, letting the camera be a fly on the wall, unobtrusive to the events it records. It was based on the earlier Russian concept of Kino-Pravda by Dziga Vertov, which, like cinema vérité, means cinema truth.
Vertov believed the truest goal and greatest power of filmmaking was to combine the actualities by editing strips of film together to get at a deeper truth than we perceive with our eyes.
Toward this end, vérité filmmakers would use techniques including the hidden camera to maximize the truthfulness of the recording and minimize the invasiveness of the camera as a participant in what is being recorded.
The goal of vérité cinema, to depict events as accurately as possible, is also the occasional goal of narrative feature films that are “inspired by true events.” Paul Greengrass produced and directed United 93 (2006) with a goal of faithfully and solemnly re-creating the experience of the passengers on that fateful flight on September 11, 2001, who overwhelmed terrorists and forced their flight to a crash landing before it reached its intended target, either the White House or the Capitol Building.
To achieve that goal, the film used real airline employees to portray their counterparts in the film, and the project utilized 110 minutes of screen time to depict 110 minutes of real time to maximize the loyalty to truthfulness of the storytelling.
Description, Styles, and Purposes of Documentaries
The structure and timetable of the production for your documentary will be based on what type of project you are doing. Documentary filmmakers will tell you that the main difference in documentaries comes from the main purpose of the project.
Is your project attempting to document and explain the truth of something that is or will be readily available, such as the construction of a building or a high-school football game?
Tip
Capture audio B-roll of background sounds (traffic, horns, helicopters) at your locations as well. This may help smooth out your transitions and fill empty areas of your soundtrack.
For a project such as this, the director, producer, and crew can agree upon what elements will be included in the shoot (interview, time-lapse videography, B-roll), schedule the shoot, and edit it together, a relatively straightforward procedure. B-roll or cutaways are shots used to show something referenced by your interviewees while they are speaking. The term refers to older methods of editing motion pictures, where a shot of an interviewee (nicknamed talking head) would be on the A-roll of film and shots to overlay or cut away from would run parallel on the B-roll.
The following are two examples of this type of documentary:
![]() Gimme Shelter (1970): This is a visual account of the Rolling Stones 1969 tour and the tragic concert at Altamont Speedway in California in which a concertgoer was killed. The Maysles Brothers, wanting to create a true record of the events, made a point of minimizing the participation of the camera and not reframing reality through the editing process. Interestingly, Martin Scorsese and George Lucas both served as camera operators covering the concert for the Maysles.
Gimme Shelter (1970): This is a visual account of the Rolling Stones 1969 tour and the tragic concert at Altamont Speedway in California in which a concertgoer was killed. The Maysles Brothers, wanting to create a true record of the events, made a point of minimizing the participation of the camera and not reframing reality through the editing process. Interestingly, Martin Scorsese and George Lucas both served as camera operators covering the concert for the Maysles.
![]() The Civil War (1990): Ken Burns breathed new life into the historical documentary with his juxtapositioning of period music, talking-head commentary, narration of period documents including personal letters, and reliance on period photos that he panned over and slowly zoomed into in a manner that has since been referred to as the Ken Burns effect.
The Civil War (1990): Ken Burns breathed new life into the historical documentary with his juxtapositioning of period music, talking-head commentary, narration of period documents including personal letters, and reliance on period photos that he panned over and slowly zoomed into in a manner that has since been referred to as the Ken Burns effect.
An alternative style of documentary is the investigative style, in which a topic is chosen but the entire narrative of the piece, the individuals to be investigated and interviewed, and even the schedule of filming depend entirely on the day-to-day results of the filming.
This type of filmmaking, in which the camera and the crew may be much more active and involved (and can even change the direction of the story), can take a lot longer (and may therefore be more expensive) and is more likely to fizzle out if the story doesn’t go anywhere especially interesting to the filmmaker (or the audience).
Many documentary filmmakers have tales of films they developed and worked hard on, only to walk away from the project when the investigation dried up or took an unpredicted turn.
The following are a couple of popular investigative documentaries from the last few years:
![]() Super Size Me (2004): Morgan Spurlock wondered whether eating fast food, particularly McDonald’s, was really unhealthy, so he documented himself eating something from the McDonald’s menu three meals a day for 30 days. As a participant rather than an observer, when his investigation/experimentation compromised his health, Spurlock had to visit his doctor, the result of which changed the course of his documentary.
Super Size Me (2004): Morgan Spurlock wondered whether eating fast food, particularly McDonald’s, was really unhealthy, so he documented himself eating something from the McDonald’s menu three meals a day for 30 days. As a participant rather than an observer, when his investigation/experimentation compromised his health, Spurlock had to visit his doctor, the result of which changed the course of his documentary.
![]() Fahrenheit 9/11 (2004): This strong critique of the Bush administration’s response to the terrorist attacks of September 11, 2001, produced and directed by Michael Moore, is the most commercially successful documentary of all time. Its release also highlights the challenge posed to filmmakers who speak truth to power. When the Walt Disney Company, the parent company of the production company that made the film, tried to block its release, the producers bought back the rights and released it independently. This film’s road to release is representative of the trend that media critical of federal and state administrations has to be produced and distributed independently of either large corporations or corporate-owned news agencies.
Fahrenheit 9/11 (2004): This strong critique of the Bush administration’s response to the terrorist attacks of September 11, 2001, produced and directed by Michael Moore, is the most commercially successful documentary of all time. Its release also highlights the challenge posed to filmmakers who speak truth to power. When the Walt Disney Company, the parent company of the production company that made the film, tried to block its release, the producers bought back the rights and released it independently. This film’s road to release is representative of the trend that media critical of federal and state administrations has to be produced and distributed independently of either large corporations or corporate-owned news agencies.
![]() Hoop Dreams (1994): This doc directed by Steve James followed two high-school basketball players over several years, documenting their lives while investigating the many influences that direct young people toward success or failure and going with the two young men wherever life took them.
Hoop Dreams (1994): This doc directed by Steve James followed two high-school basketball players over several years, documenting their lives while investigating the many influences that direct young people toward success or failure and going with the two young men wherever life took them.
It is not uncommon for the producers of documentaries, especially the low-budget variety, to work on them for several years, particularly if the project is investigative in nature and the project takes any number of turns while filming.
Objectivity and Subjectivity: Stranger Than Fiction
In truth, many so-called documentary films and television shows play as fast and loose with the truth as their fictional cousins, either by rewriting the “script” during the postproduction process or (if the participants in reality television shows are to be believed) by the producers often “writing” their docs during production by suggesting things for them to do to achieve a desired effect when the footage is edited together.
In an early behind-the-scenes account of the MTV show The Real World (1992–present) before the rules of modern reality television (including how many glasses of wine must be flung in someone’s face per hour) were etched in stone, the producers were dismayed to find that the seven charismatic, multicultural young people they’d shacked up together weren’t doing much of anything while the cameras were rolling—not fighting, not falling into bed together, not even chores.
They were just seven nice-looking diverse people from different parts of the country sitting around watching TV, like a Benetton ad after a turkey dinner. The producers threatened that if they didn’t get up and do something, the crew would expose the cast in all their slothlike glory until they could replace them. In moments such as these, the modern “reality” show was born. The “real world,” indeed.
The grandpappy of The Real World and one of the most successful early examples of combining documentary and fiction storytelling was Robert Flaherty’s Nanook of the North (1922), a filmed “actuality” in which the lives of Inuit natives were staged by the filmmaker to re-create aspects of their indigenous ancestors’ lives from centuries before, though the staging was not revealed to the audience (see FIGURE 6.5).
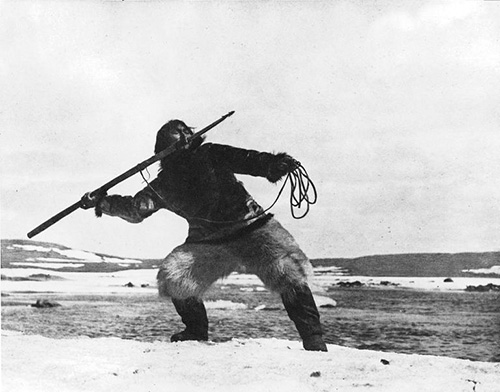
PHOTO BY ROBERT J. FLAHERTY, PUBLIC DOMAIN
FIGURE 6.5 Nanook, the Harpooner, subject of Nanook of the North (1922)
By making one of the seminal documentaries of the silent era of film, Flaherty also laid the groundwork for a new genre: the docudrama.
The other towering figure in the development of the documentary from this time is the Russian filmmaker Dziga Vertov, whose groundbreaking 1929 film Man with a Movie Camera (see FIGURE 6.6) showed as much groundbreaking innovation in the development of documentary as Méliès and Porter had done years before with narrative—superimpositions, montages, freeze frames, and jump cuts. Much of what Vertov concocted for this and other films was considered avant-garde or ahead of its time. His goal and the goal of his filmmaking collective, the Kinoists, was to find new ways for film to show reality by getting rid of the elements—actors, sets, a script, even intertitles—that created the artificial world that distances the audience from most films.

Over the next 30 years, the documentary developed all over the world along the paradigms discussed earlier in this chapter—news, observational, propaganda. The main aspects of documentaries that distinguished them from television and movies was their relatively low production costs.
As a result, their producers were not as beholden to corporate interests as their TV and feature-film counterparts, and they could be more sophisticated and intellectual in the range of ideas they presented since they didn’t need, as TV and movies typically did, to reach the whole available audience.
The next major development in documentary production came in the late 1950s as the result of a number of technical innovations. First was the introduction of new lightweight, handheld film cameras produced by the ARRI Group. These more compact cameras and the portable Nagra reel-to-reel audio tape, along with the crystal sync process that allowed the filmmakers to record sync sound without needing a cable between camera and recorder, made portable shooting much more doable.
This marked an exciting and empowering revolution in filmmaking that some would argue is comparable to the latest digital revolution.
The goals of the Direct Cinema movement, which started in Quebec around this time and expanded to the United States, were to use this new equipment to show real life, as opposed to what they saw as the artificiality of Hollywood product and the increasing reluctance of television journalism to take on government and big business.
Filmmakers including Drew Associates—a collective including Richard Drew, D.A. Pennebaker, and the Maysles Brothers—took the techniques they developed as journalists, engineers, and photographers and developed them into films including Yanqui, No! (1960), Primary (1961), and Salesman (1969). These Drew Associates docs were sometimes critical of the U.S. government and culture and showed the audience the lives of those profiled in the film—salesmen, politicians, South American citizens with negative impressions of the United States—without commentary or editorial judgment.
For many, this approach represented a new independent vision and voice, an American version of cinema vérité. This was confirmed when Drew Associates as a journalistic enterprise was dropped by its corporate sponsors, Time-Life.
The opportunities for filmmakers with a passion for their topic and limited funding have exploded over the past 25 years. Throughout this chapter you will find lists of incredible films that celebrate what is good (Spellbound, 2002; Wordplay, 2006), criticize what is wrong (Enron: The Smartest Guys in the Room (2005); Inside Job, 2010), and make us wonder about life and the world we live in (Koyanisqatsi, 1982; Crumb, 1994).
With the advent of smaller camcorders, phones, and mobile devices with built-in HD cameras, as well as social media, everyone reading this book is a potential documentarian. The following events are only a few that were documented first (or best) by individuals who were in the right place at the right time and recorded footage that changed the world:
![]() The Los Angeles riots of 1992/the Rodney King beating (videotaped by George Holliday)
The Los Angeles riots of 1992/the Rodney King beating (videotaped by George Holliday)
![]() The Arab Spring (2011), democratic revolutions in Egypt and elsewhere documented variously on Facebook, circumventing state media
The Arab Spring (2011), democratic revolutions in Egypt and elsewhere documented variously on Facebook, circumventing state media
![]() The death of Osama bin Laden (2011), posted on Twitter before it was carried by major news outlets
The death of Osama bin Laden (2011), posted on Twitter before it was carried by major news outlets
The power to distribute news is no longer in the hands of the few, and the challenge of controlling what the audience gets to see has grown impossible for major news corporations. They are in a race to keep up with the news of the world like never before.
However, as Spider-Man learned the hard way, with great power (the ability to learn more, read more, and see more from many different and independent sources) comes great responsibility (taking the time, now more than ever, to consider the validity of what we see, read, and think about the world we live it).
We don’t have only a broadcast center on our computers via Facebook, Twitter, and Instagram; with Final Cut Pro, Adobe Photoshop, and Adobe After Effects, we have a Hollywood studio as well.
Our slogan these days needs to not only be caveat emptor (“let the buyer beware”) but observator emptor (“let the watcher beware”).
Docudrama: The Two-Headed Monster
It’s not only the line between news and propaganda but the one between documentary and fiction that has become blurry, mainly because of the development of the docudrama, which dramatizes events and may juxtapose them with interviews and news reports to heighten the sense of reality and engagement with the audience.
We may refer to a spectrum of media projects along which adherence to the truth is key to the production and goals of the project, including projects described as “inspired by true events” and “based on true events.”
Let’s take a look at one example from the “fictional” world of docudrama. Boys Don’t Cry (1999) documented the real-life story of Brandon Teena, a transgendered individual who was born biologically female but who chose to live as a man and was killed by acquaintances in Nebraska.
The film was inspired by an article in the Village Voice about Teena, who was born Teena Brandon. Filmmaker Kimberly Pierce read the story and connected deeply to Teena’s life and plight. Her passion for the story inspired producers to develop and buy a script and produce a film.
Creating a media project means making choices. Pierce chose to structure her film around the love story between Teena and a young woman named Lana Tisdel. When actress Hillary Swank was cast as Teena, the actress chose to live as a man for one month to experience as closely as possible what Teena had gone through.
The film was released to great acclaim for the filmmakers as well as Swank and Chloë Sevigny, who played the main roles. However, the real-life Lana Tisdel objected to her portrayal in the film and argued in a lawsuit that events dramatized in the film were depicted inaccurately.
So, did Pierce and her team, in an effort to maximize empathy for the character of Brandon Teena and perhaps encourage tolerance for the transgendered community, stray from the facts of the real life Teena and Tisdale? Were the facts correct in ways that Tisdale did not want to acknowledge? Or was the truth somewhere in between?
Since there were no cameras on the original events and because the real-life Tisdale settled her lawsuit against the filmmakers, we’ll never know how significant the difference is between reality and what was filmed.
But the truth is, we never would know, even if there were cameras rolling. The truth is a mystery, left to the interpretation of those with the will to create a book, film, or television show “inspired by real events.”
Everyone has biases, and everyone has their own set of priorities when they create a media piece. They decide just how much liberty they are willing to take with the objective details of the story itself in order to get at what they feel is an underlying, more important, or universal truth.
Transforming the Form
Over the past 100-plus years, some of the most interesting media projects have defied expectations of what a film is or what a documentary should be.
These works sometimes transcend the requirements of nonrealistic story styles such as surrealism and expressionism and can be described as metafiction, works that comment on, play with, or subvert the form or rules of narrative storytelling itself.
Don Quixote, the 1605 Spanish novel by Miguel de Cervantes, is most associated with the development of metafiction. In this book, a middle-aged gentlemen deludes himself that he is a knight and goes on a series of quests whose purpose is to revive chivalry.
Different readings of translations of the text over the centuries interpreted Don Quixote (see FIGURE 6.7) as social commentary, farce, philosophical novel, or self-reflexive treatise on the relationship between life and fiction. It is considered the first modern novel and so can be considered the father or great-grandfather of the modern metafictional documentary or fiction film hybrid.

PUBLIC DOMAIN
FIGURE 6.7 Bronze statues of Don Quixote and Sancho Panza at the Plaza de España in Madrid, Spain
Besides the projects already discussed in this chapter and throughout this book, some of these historical paradigm busters are the following:
![]() Cannibal Holocaust (1980): This cheerfully titled fake horror doc (remember, the title should grab you!) gave birth to the whole found footage craze in which finished fictional works are purported to be real, mysteriously discovered documentaries in order to engage the audience on a deeper level, paving the way for The Blair Witch Project (1999), Paranormal Activity (2007), and Chronicle (2012).
Cannibal Holocaust (1980): This cheerfully titled fake horror doc (remember, the title should grab you!) gave birth to the whole found footage craze in which finished fictional works are purported to be real, mysteriously discovered documentaries in order to engage the audience on a deeper level, paving the way for The Blair Witch Project (1999), Paranormal Activity (2007), and Chronicle (2012).
![]() Funny Games (1997): Devised by Austrian filmmaker Michael Haneke, this film begins as a straightforward thriller about a family terrorized by two preppie psychopaths. By allowing the sadistic antagonists to speak to the viewer of the film via direct address and even pause and rewind the movie when things don’t go their way, Haneke makes the audience complicit in all the violence performed by the young men. A documentary-style project with similar issues on its mind is Man Bites Dog (1992), written, directed, and produced by a trio of Belgians.
Funny Games (1997): Devised by Austrian filmmaker Michael Haneke, this film begins as a straightforward thriller about a family terrorized by two preppie psychopaths. By allowing the sadistic antagonists to speak to the viewer of the film via direct address and even pause and rewind the movie when things don’t go their way, Haneke makes the audience complicit in all the violence performed by the young men. A documentary-style project with similar issues on its mind is Man Bites Dog (1992), written, directed, and produced by a trio of Belgians.
![]() Tarnation (2003): This is a postmodern hybrid of documentary and home movie, created by Jonathan Caouette and edited from hundreds of hours of his family’s home movie footage along with bruising current interviews with his mother and other family members.
Tarnation (2003): This is a postmodern hybrid of documentary and home movie, created by Jonathan Caouette and edited from hundreds of hours of his family’s home movie footage along with bruising current interviews with his mother and other family members.
![]() The Act of Killing (2012): Directed by Josh Oppenhemier, this doc features reenactments of murders committed during the Indonesian purges of 1965–1966, performed by the leaders of the death squads that carried out the original murders. Some killings are staged in the style of a musical or other film genre to enhance the presentational approach of the filmmakers. In one scene, a real-life murderer plays his own victim and then breaks down talking about the experience.
The Act of Killing (2012): Directed by Josh Oppenhemier, this doc features reenactments of murders committed during the Indonesian purges of 1965–1966, performed by the leaders of the death squads that carried out the original murders. Some killings are staged in the style of a musical or other film genre to enhance the presentational approach of the filmmakers. In one scene, a real-life murderer plays his own victim and then breaks down talking about the experience.
Developing a Theme, Part 2: Nonfiction
The long-lasting sketch comedy staple Saturday Night Live has a recurring character called The Girl You Wish You Hadn’t Started a Conversation With, who chides her friends for not being more socially aware of some issue she just learned about, finally declaring, “It’s a tragesty.”
When developing your documentary, there are three main steps to not being that girl.
1. As the inscription on the statue in Animal House (1978) tells us, “Knowledge Is Good.” Thoroughly research media—books, films, TV, and so on—relevant to your topic that might overlap with your project or have covered your material in a way that might make yours seem like a cliché, or at the very least creatively undernourished.
If you make a project where you eat only Burger King for a month to see what happens to you, don’t be surprised if folks say, “Oh, so it’s like Supersize Me...but with Burger King instead of McDonald’s.” There may be a bit of disconnect between your drive to make that project and the world’s enthusiasm to receive it.
2. Narrow your topic. Less is more. Or rather, more specific is more. Think about the length and other limits on your project and try to make sure the scope of your project matches this. For instance, The History of Drug Abuse in America is probably too ambitious for a 10-minute piece.
But you could, with the proper access, profile someone struggling with drug addiction in that amount of time and, with a decent amount of research and visualization using your subject’s pictures and home video, create a vivid and memorable portrayal of one person’s struggle.
3. Present all sides of the argument in your doc. Minimize editorializing when you let the other side present their case. It will make your argument stronger.
In the Beginning
Many documentaries start with someone asking a question.
![]() “What will happen to the earth if we don’t check the trend in climate change? (An Inconvenient Truth, 2006)
“What will happen to the earth if we don’t check the trend in climate change? (An Inconvenient Truth, 2006)
![]() What part did the finance industry play in the creating the economic bubble and crisis in 2008? (Inside Job, 2010)
What part did the finance industry play in the creating the economic bubble and crisis in 2008? (Inside Job, 2010)
![]() Is the military able to responsibly charge and prosecute crimes of rape and sexual assault, or is it more just to leave that to outside authorities? (The Invisible War, 2012)
Is the military able to responsibly charge and prosecute crimes of rape and sexual assault, or is it more just to leave that to outside authorities? (The Invisible War, 2012)
A good way to start developing your documentary is by choosing something you’d like to know more about and then investigating it or by seeing something you think is wrong and trying to figure out why it is the way it is. Here are some other questions to ask:
![]() Is there a topic you feel strongly about that you think has not been adequately covered in the news or where you feel the media’s take on the subject doesn’t get at the real story?
Is there a topic you feel strongly about that you think has not been adequately covered in the news or where you feel the media’s take on the subject doesn’t get at the real story?
There are so many more ways to get your piece in front of an audience now than there were even ten years ago. Social media, including Twitter, YouTube, and Facebook, has risen up to provide powerful tools for circumventing the traditional channels of news delivery.
![]() Is there a story you’ve heard from a friend or family member that has stayed with you, that you wanted to learn more about, or that you thought others would be interested in hearing?
Is there a story you’ve heard from a friend or family member that has stayed with you, that you wanted to learn more about, or that you thought others would be interested in hearing?
![]() Is there something happening in the world that touched your heart in such a way that you wanted to help and contribute to forming a solution to that problem?
Is there something happening in the world that touched your heart in such a way that you wanted to help and contribute to forming a solution to that problem?
This happened for a lot of young people, most prominently in 2012 when a video called Kony 2012, produced by a group called Invisible Children Inc., premiered on YouTube. It detailed the atrocities committed by African militia leader Joseph Kony, who commands a group that forces children into brutal service.
Demonstrating the massive potential of social media, within days Kony 2012 was watched by approximately half of the young people in the United States and was declared the number-one viral video of all time. It generated national support for the “Stop Kony” cause and motivated the U.S. government to send troops to Africa in response.
![]() Is there an interesting family story you would like to document and get multiple perspectives on? These are typically the stories that we have the most access to that are also very personal to us.
Is there an interesting family story you would like to document and get multiple perspectives on? These are typically the stories that we have the most access to that are also very personal to us.
Planned Spontaneity: Structuring an Unscripted Project
Just as with a fiction film, the preproduction process for documentaries involves successfully completing several steps.
1. Select key crew members such as producer, director, camera operator, and sound recordist. Frequently, depending on the timeframe of shooting your project and your budget, the key production personnel (usually the director and producer) may need to draft available crew members as needed since the project may not be full-time for your crew members (and often not for the key participants themselves).
Additionally, even more so than in fiction films, it is normal for the key participants in documentary productions to “wear many hats” (producer as director, director as producer, and so on).
2. Get on the same page regarding the vision and goals of the project. Communication is key. Don’t be afraid to rock the boat by getting your vision out there in front of your colleagues. The more people talk, the more you will see where any differences in opinion lie. This can save a lot of arguments later (friendships and professional relationships, too).
3. Script or outline as much as possible. Where will you film? What will you research? Who will you interview on camera? Depending on what type of doc you are making, you will be more or less able to prepare the majority of your filming beforehand.
However, your organizational and proactive planning abilities will still be paramount to your success and minimize communication misfires (“I was sure he agreed to shoot with us today!”).
As we mentioned earlier, a doc tells a story that needs to be interesting just as a fictional story needs to, but with a doc, you have to find, unearth, and craft the story instead of inventing it.
4. Create as much of a budget and schedule as possible. This will allow you to maximize your results and manage expectations for your shooting.
5. Research thoroughly and choose archived images and audio thoughtfully. In the place of fiction films’ production design and costume design, your project may require substantial research until you find just the right historical information, images, and audio to support the subject of your project (unless your doc project involves reenactments, and then you get that fun, too).
The process of making sets and costumes is typically replaced by applying for the correct license to use whatever elements you want to the copyright holder.
6. Discuss the stylistic guidelines of your project. If you’re conducting interviews, will your subjects be seen on camera? Will subjects look into the camera to respond or look off-camera? Will audio from your interview continue as you cut away to B-roll shots that complement (or contrast) what your interviewee is saying? It’s helpful for the crew to know what goes and what doesn’t with your film.
Remember in the “Know Your Rights: Copyright” section of Chapter 2 when we discussed the use of copyrighted music? Well, that topic has come back with a vengeance now because if you plan any sort of commercial release for your doc, you will have to clear (obtain a license for the use of) any music playing in the background of your shots.
So if you’re interviewing the head coach of the football team at your school and the band in the background is playing “Baby Got Back,” be prepared to find out who Sir Mix-A-Lot’s publishing company and lawyer is. He likes big butts...and getting paid.
You may want to choose to shoot in places where music is not playing or turn off music that is playing if that is an option. You’ll also need to clear any other media—photos or video clips you use in your film—that you do not create yourself.
![]() Lightweight camera with stabilizer
Lightweight camera with stabilizer
![]() Reflector boards
Reflector boards
![]() Radio microphone
Radio microphone
![]() Boom microphone
Boom microphone
![]() Tripod
Tripod
![]() Lightweight camera with stabilizer
Lightweight camera with stabilizer
![]() Basic three-point lighting kit
Basic three-point lighting kit
![]() Halogen lights
Halogen lights
![]() China ball
China ball
![]() Gels
Gels
![]() Reflectors
Reflectors
![]() Extensions
Extensions
![]() Clothes pins
Clothes pins
Also, just as in a fiction project, you will need location releases for any places you film and consent forms that state that anyone featured in your project agreed to be filmed, which are the equivalent of your actor releases. If you interview a subject younger than 18, make sure you have consent forms signed by their legal guardian.
Crew Positions, Part 2: Nonfiction
How many crew members do you need to make your documentary? This depends on what it is and what you need to shoot to “get it in the can” (or at least on the memory card).
Although many crew positions have similar responsibilities to a fiction film, it’s not uncommon to see documentaries conceived, produced, directed, and edited by one or two creators who wear various hats throughout the production process.
Sherman’s March (Ross McElwee, 1985), Grizzly Man (Werner Herzog, 2008), and Tarnation (Jonathan Caouette, 2003) are all examples of one-man-band shooting (or assembling).
Especially at the low-to-medium end of the budget spectrum (which includes 97 percent of all released documentaries), the do-it-yourself (DIY) mentality and maverick style can be a good fit for those who don’t play well with others, or at least a lot of others.
The most common crew list for documentary films includes the following positions/responsibilities:
![]() Director/interviewer: The creative boss of the project also typically asks the questions of subjects interviewed in the project.
Director/interviewer: The creative boss of the project also typically asks the questions of subjects interviewed in the project.
![]() Producer: This role can be combined with the director; however, many project creators agree that two project leaders are often a boon to a production to “put out fires” when challenges present themselves during filming.
Producer: This role can be combined with the director; however, many project creators agree that two project leaders are often a boon to a production to “put out fires” when challenges present themselves during filming.
![]() Camera operator/director of videography: This role may be performed by a number of different crew members over the course of the shoot. The credits for a doc are typically long in the camera department (additional camera) because any number of filming days and locations might necessitate adding on more crew members.
Camera operator/director of videography: This role may be performed by a number of different crew members over the course of the shoot. The credits for a doc are typically long in the camera department (additional camera) because any number of filming days and locations might necessitate adding on more crew members.
However, unless your documentary involves producing reenactments or other dramatizations (approximating the requirements of a fiction film shoot), the doc’s camera “crew” will frequently be one or two crew members at a time.
![]() Sound mixer/recordist: This role can be combined with the camera operator depending on crew availability and shooting logistics. (For instance, how challenging will it be to record “clean” audio where you are filming? Will it require one crew member’s undivided attention?)
Sound mixer/recordist: This role can be combined with the camera operator depending on crew availability and shooting logistics. (For instance, how challenging will it be to record “clean” audio where you are filming? Will it require one crew member’s undivided attention?)
![]() Editor: As with a fiction film but perhaps more so, the editor helps the director find the story in the footage, while adhering to whatever standard of journalistic integrity adheres to the goals of the project (inform/educate/entertain/convince).
Editor: As with a fiction film but perhaps more so, the editor helps the director find the story in the footage, while adhering to whatever standard of journalistic integrity adheres to the goals of the project (inform/educate/entertain/convince).
![]() Assistant director (AD)/production crew: If scenes are dramatized for the doc production, then an AD plus production assistants and a larger camera crew, grip, and electric crew and hair and makeup team may be required.
Assistant director (AD)/production crew: If scenes are dramatized for the doc production, then an AD plus production assistants and a larger camera crew, grip, and electric crew and hair and makeup team may be required.
![]() Production assistant (PA): The smaller the crew, the more responsibility each member will have. The PA on a doc might need to have even more hustle than his fiction-film counterpart.
Production assistant (PA): The smaller the crew, the more responsibility each member will have. The PA on a doc might need to have even more hustle than his fiction-film counterpart.
Postproduction: “A Project Is Never Finished, Only Abandoned”
Planning ahead and scheduling time to fit in every item in a postproduction workflow is crucial to creating a high-quality, professional-grade product. Frequently, novice video students procrastinate through the postproduction process and find themselves in a situation where, up against a deadline, they have to turn in an unfinished project. When that happens, you just have to take a deep breath and say, “Better done than good.”
But why not both?
Having completed a few projects at this point, you should better understand the importance of careful time management and follow-through. It’s not until you experience the huge amount of power in the process of sound sweetening (Chapter 2) and the endless amount of potential the visuals in your project have through graphics (Chapter 5) and color correction that you will understand the saying, “A project is never finished, only abandoned.”
This part of the process is called finishing, not because you are near completion but more like the way a carpenter finishes a fine piece of woodwork. Think of color correction and color grading as your stain and shellac.
Color Correction and Grading
As you begin the process of color correction and grading—adjusting the look of your shots to match other shots in a scene and reflect your visual design and style—you will find that the images you shoot have a whole lot more information than you were able to see at first.
Two possible outcomes can occur. One, you could become overwhelmed with the number of controls that can be used to manipulate your images and you have to learn. Or two, you get carried away and make way too many changes to your images to the point where your shots are unrecognizable or look obviously over-manipulated.
With either occurrence, you can let time be on your side, rather than against you. Just like with preproduction, creating a clear plan of attack for the color correction of your project will keep you on track. A good way to plot your plan is a prioritized to-do list. It is easier to make such a list by knowing the types of corrections you can to make to your images.
Correction for Form and Standards
A video image needs to adhere to certain standards, especially if it is intended for broadcast. If you’ve been using your camera controls correctly and lighting aesthetically and effectively, you may think your shots don’t need any correction. These shots are not high-priority items. The shots we do need to worry about are the ones that you play back and say, “Whooooah, was the operator even looking at the viewfinder?”
Depending on shooting circumstances or the skill level of your camera operator, you might find some common errors in your image, such as the following:
![]() White-balance shift (cold or warm images)
White-balance shift (cold or warm images)
![]() Overexposure or underexposure
Overexposure or underexposure
![]() Excessive head space
Excessive head space
![]() Excessive nose room or lead space
Excessive nose room or lead space
![]() Slanted horizon line (due to unbalanced tripod)
Slanted horizon line (due to unbalanced tripod)
![]() Shakiness (camera operator is a huge fan of Cloverfield, 2008)
Shakiness (camera operator is a huge fan of Cloverfield, 2008)
All of these problems can be improved upon at this point in the process, but there are limits to every correction tool, so don’t start to make “We’ll fix it in post” your production mantra. It is still ideal to catch these mistakes before they occur.
Grading for Style and Tone
Beyond correcting a video image to meet basic image standards and balancing color, the same tools can allow you to enhance your image to meet a desired style or tone. If your project fits within a certain genre, you likely designed a look for the imagery during production through production design, lighting, and camera techniques.
To complete the look and make sure it’s balanced throughout the program, color grading is necessary. The terms color correction and color grading are somewhat interchangeable. Correction implies there is a problem, whereas grading (also known as color timing, when referring to film) intends a deliberate artistic enhancement of the image.
Good, bad, or indifferent, a trend has emerged where certain genres have acquired a specific look or color palette. Here are some examples:
![]() Movies that take place in the past have an aged, warm, or sepia tone (a faded brown look)
Movies that take place in the past have an aged, warm, or sepia tone (a faded brown look)
![]() Horror movies have a cool (as in cold, not rad) blue look
Horror movies have a cool (as in cold, not rad) blue look
![]() Movies that take place after an apocalypse are washed out, desaturated, or lack color
Movies that take place after an apocalypse are washed out, desaturated, or lack color
![]() Sci-fi movies tend to have a specific futuristic color palette, sometimes layered over every shot, like the color green in The Matrix (1999)
Sci-fi movies tend to have a specific futuristic color palette, sometimes layered over every shot, like the color green in The Matrix (1999)
![]() Blockbuster action movies have adopted the use of complementary colors orange and blue, which are opposite to one another on the color wheel and cancel each other out when combined
Blockbuster action movies have adopted the use of complementary colors orange and blue, which are opposite to one another on the color wheel and cancel each other out when combined
Luminance, Hue, and Chrominance
Note
Hue control can also be done through a Color Board as in the Color Adjustment mode in Apple Final Cut Pro X. The rectangular shape allows you to add or remove a chosen hue vertically.
Three properties that make up the image of a video signal are luminance, hue, and chrominance (see FIGURE 6.8). Understanding these three properties is essential to being able to correct or create the look of the images in your projects.

Luminance is the measurable intensity of light or brightness in an image. In video, luminance is measured by IRE (named for the Institute of Radio Engineers) units on a waveform monitor or scope; 0 IRE represents true black where 100 IRE represents pure white. Any parts of an image that are at or beyond either end of the spectrum lose all perceptible detail.
Hue is the specific value or color within the color wheel (see FIGURE 6.9). A hue is a pure color, not defined by brightness or vibrance of the color. The color wheel is the chart that shows the relationship between primary colors, secondary colors, and all colors in between.

If you’ve taken an art class, you learned that the primary colors are red, yellow, and blue. In painting, the subtractive color model is used, whereas video uses the additive color system in which the primary colors are red, green, and blue (see FIGURE 6.10).

Additive color works by combining two or more colors to create other colors. When an equal amount of red, green, and blue are added, you get white. Combining two of either primary colors creates secondary colors. Green and blue make cyan; blue and red make magenta; red and green make yellow.
Chrominance, or saturation, is the value of vibrancy of a color or hue. It can be described as how much color is in an image, or how colorful it is. An image with no chrominance would be considered black and white or grayscale.
Hue value and chrominance are measured on a vectorscope monitor (see FIGURE 6.11). The vectorscope uses the same shape and positions as the color wheel. The distance between traces and the center of the scope determines the image’s chrominance or saturation.

Primary Correction
Whether you’re correcting an image for form or for style, the first step is primary color correction, which can be achieved in color correction software using your keyboard and mouse or using an external control surface (see FIGURE 6.12). In most video color correction tools, control is split between three parts of the image, shadows, midtone, and highlights. Shadows are the darker parts of the image that fall within the lower 30 percent of the waveform monitor. Highlights are the brighter parts of the image that fall within the upper 30 percent of the waveform monitor. Midtones, or mids, is what is in between.

The controls of each of the three parts blend into the other, so there’s no definite value in which shadows end and midtone begins. Within those three parts, you can control the luminance (also called contrast control) and hue. Saturation or chrominance controls commonly apply to the entire image.
To get started, turn on your scopes, particularly your waveform monitor and vectorscope. The first step in primary color correction is to fix the luminance using the contrast controls. If your image has a serious color shift that is really obvious, ignore the urge to adjust the color before you’ve adjusted the contrast.
1. Adjust the contrast control for the mids. Think of this as adjusting the exposure of your shot. Get the image in a range that you determine fits the desired tone for the shot.
2. Adjust the contrast control for the highlights to bring detail back to parts of the image that have gone beyond 100 IRE (brightness). Try to bring all the traces to stay no further than 90–100 IRE.
3. Adjust the contrast control for the shadows. Be careful; this control has more extreme results with the tiniest of adjustment.
Next, move on to adjusting color controls. If it’s clear that there was an error in color correction, for instance if the image is too cold, first adjust only the color wheel on the highlights. You will be directing the image toward the desired hue, so if it is cool, move the color control away from cyan and blue and toward yellow and red. On the vectorscope, you should see the traces settle closer to the middle (see FIGURE 6.13).

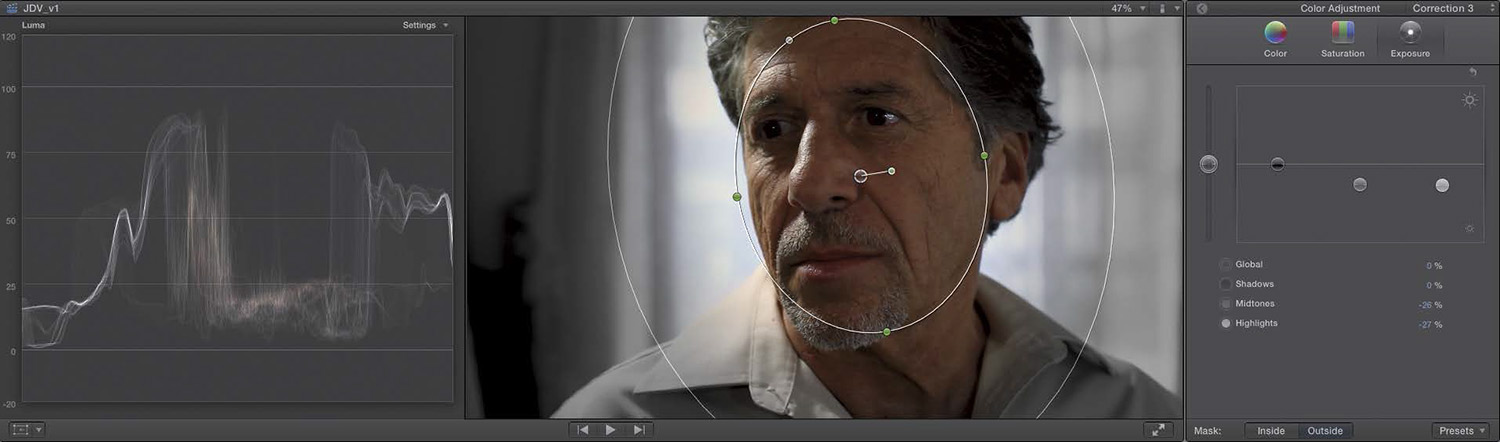
If your image still has a slight shift in white balance, after adjusting the highlights color control, adjust the color control for the mids but only slightly. If there is a human face in the shot, especially a close-up, you might see the traces pointing toward the flesh-line (see FIGURE 6.14). Since human flesh tone falls mostly within the midtones of an image, the mids controls is where you want to adjust an image to get an accurate representation of color. Try to adjust control to get the traces to line up closely with the flesh-tone line.

After contrast and hue adjustments, you might want to adjust the saturation. If your image was overexposed and you had to bring the contrast controls down to reduce brightness, your image may seem too saturated now. The opposite is true as well: An image that needed to have a boost in brightness because it was shot too dark will seem washed out and could use a slight lift in saturation.
Secondary Correction
Once you have the overall image corrected through primary color correction, you might want to add another layer of correction to fix a specific part of image. For example, if you wanted the sky to be more vibrant, adding saturation or adjusting the color in primary color correction can affect the rest of the image undesirably.
With secondary color correction, you can mask an area of your shot or key a specific value to change only what you need corrected (see FIGURE 6.15). With this method, you can change the color of an object or a piece of clothing. Try not to get too carried away because doing this can be time-consuming, so focus on making only changes that are essential to the story.
Other types of secondary correction can include adding a filter such as fog or grain. You might also want to add a vignette, the darkening of the corners, to bring the audience’s attention toward the center of the frame.
Delivery and Exhibition
Just when you think it’s over, there’s another phase in the postproduction process to pull you back in. You’ve gone through the marathon of completing a video project. If the project is personal, it’s easy to share an export and upload it to a video-hosting service like YouTube or Vimeo, but if the project is for broadcast or has to be delivered to a client, a contest, or a festival, there are some other considerations to make.
Yes, Master
There is a growing number of exhibition platforms and opportunities for video projects. Because of this, you will need to deliver your project in a variety of formats. If it has a long life and if interest in your project continues deep into the future, you may need to deliver your project in formats that don’t exist today, for uses you didn’t originally intend.
To prepare for the delivery and archiving of your project, you must first create a master file. Your master file is your completed project in a high-quality format. Expect your master file to be hefty in size because high quality means low compression, and low compression means a large file size. All other copies you need to make, either for the Web, consumer disc formats, or specific exhibition requirements, will come from this master file.
The codec or compression format that was chosen for editing is a safe choice of format for the creation of your master file. Codecs designed for editing, such as the Apple Pro Res and Avid DNxHD families, have a comfortable amount of compression. Although not lossless, mastering to the format the video was edited in does not cause any loss of quality, as would mastering to a format designed for web distribution such as H.264.
If you can afford to store a large file, either because you are rolling around in data storage space or because your project has a short running time, creating an uncompressed master file is an excellent choice to preserve the quality of your work.
Spec Sheets and Deliverables
Student video projects don’t always have specific technical requirements for how to turn in the completed product, but it’s a good idea to practice the professional process of following a spec sheet for your master file and deliverables.
A spec sheet is a list of technical specifications and standards that your project has to fit for delivering to its final destination. Festivals and video contests have specific technical requirements for submission (see FIGURE 6.16).

COURTESY LOS ANGELES LATINO IN TERNATIONAL FILM FESTIVAL (LALIFF)
FIGURE 6.16 Submission form for a student film showcase
The following items are what you might find in a spec sheet:
Tip
Some networks have published their standards and spec sheets on their websites. The BBC has especially well-formatted, informative, and detailed standards documents.
![]() Total running time (TRT) limit or range
Total running time (TRT) limit or range
![]() Tape format, if tape is required instead of a file
Tape format, if tape is required instead of a file
![]() Raster size or resolution (for example, 1920 x 1080)
Raster size or resolution (for example, 1920 x 1080)
![]() Aspect ratio
Aspect ratio
![]() Frame rate (for example, 23.98, 29.97, 59.94)
Frame rate (for example, 23.98, 29.97, 59.94)
![]() Codec or compression type (for example, Apple Pro Res 422 HQ, Avid DNxHD, H.264)
Codec or compression type (for example, Apple Pro Res 422 HQ, Avid DNxHD, H.264)
![]() Video color space (for example, YUV [YCbCr], RGB)
Video color space (for example, YUV [YCbCr], RGB)
![]() File bit rate, if compression is required
File bit rate, if compression is required
![]() Audio format (for example, two-channel stereo, 5.1 surround)
Audio format (for example, two-channel stereo, 5.1 surround)
![]() Timecode
Timecode
Deliverables are items that you’re required to deliver along with the video, including materials for print, publicity, or legal documentation. You might be asked to deliver a compressed video file for web viewing or previewing along with the high-quality video file. Projects that will have an international audience might require separate audio files containing the production audio (dialogue), music, and sound effects separated. These are called audio stems.
Note
U.S. law requires that all broadcast programs must contain closed captioning. Online video-hosting services also support closed captioning and contain tools to help you easily transcribe your videos, including automatic transcribing. Although not yet required by law, consider adding captions to all your online videos as to not limit your audience and exclude those who are hearing disabled.
Other deliverables might also include the following:
![]() Video files in different formats
Video files in different formats
![]() A transcript of all dialogue and audio for closed captioning
A transcript of all dialogue and audio for closed captioning
![]() Promotional photos or screengrabs
Promotional photos or screengrabs
![]() A short synopsis of the project
A short synopsis of the project
![]() A credit list
A credit list
![]() Copies of talent and crew release forms
Copies of talent and crew release forms
![]() Copies of licensing agreements
Copies of licensing agreements
Tip
See the appendix for a list of resources to create captions.
Archiving Your Project
“There are only two kinds of computer users: those who have lost data in a crash and those who will lose data in a crash.”
—Bob “Dr. Mac” LeVitus
Preserving your master file is serious business. Despite our best efforts, whether we store on hard drives, optical media, tape media, or solid-state drives, all physical media wear out over time. Sometimes our storage systems break down. Standards change, and the software and hardware we use now to read and play back our files might not work, be available, or exist in the future. Even professionals with access to costly, state-of-the-art technology have to follow the same guidelines to archive and preserve media as everyone else.
The first line of defense against the march of time is having duplicate copies with geographic separation. The reason for duplicate copies is to ensure that the data still exists if either drive fails. The reason for geographic separation is to ensure the data still exists if there is theft or damage at the location of either copy.
Cloud storage is a wonderful and convenient way to store and protect your data. It is also useful to be able to access your data from any location in the world with Internet access. Be careful as to which networks you choose to upload your valued data. Some cloud storage services have clauses in their terms and conditions that allow the service to claim ownership of the data you upload to their servers.
Your master is in two places, geographically separated, only on cloud services that allow you to retain ownership of your data. Does this mean you can sigh a breath of relief? Yes. But not for long. Data rots. Believe it or not, data sitting on a drive collecting dust can degrade over time. The reasons for data degradation (also known as data rot) depend on the kind of physical media used to store the data.
![]() “You Had One Job!”
“You Had One Job!”
To battle this, keep your files moving. Set a reminder for every six to eight months to move your important data from one location to a new one. This is called data migration. All this moving around could cause some confusion as to where you left your files and which copy is the latest, so keep records of where your data is stored and backed up so that you can easily find it when you need it. While following these measures may seem obsessive, you can rest easy knowing you don’t have to do this to all your data, only the data you want to keep.
Résumé and Portfolio Development
As mentioned in Chapter 5, developing professional habits is the best way to be treated as a professional. Now that you have a few projects under your belt, even if they are micro-budget or student projects, you should have ready what every prospective employer will ask of you when you are offered a gig or if you apply for a job. The two most requested items to have at the ready are a résumé and a showreel.
Building a Résumé
The writing of a résumé focusing on entertainment industry jobs (see FIGURE 6.17) is similar to the writing of a traditional résumé. Every résumé is expected to have the following sections:
![]() Your contact information
Your contact information
![]() Your education
Your education
![]() Your experience
Your experience
![]() Your awards, honors, and accomplishments
Your awards, honors, and accomplishments
![]() Your skills
Your skills

You can find numerous examples of different styles and formatting of résumés online. The good thing about writing a résumé for an industry job is that you can have fun and be creative with the design.
Note
When writing your résumé, do your best to fit it onto one side of a single page. If your résumé spills a little onto a second page, it’s best to cut it down a bit rather than stretch it to fit two pages.
Other than starting with your contact information, the order of the rest of the résumé is something you can play with until it looks good to you. Just make sure that in your contact info section, you put the title you refer to yourself as directly underneath your name. If you put student as your job title, don’t expect to be taken seriously for any position other than an internship.
The main difference writing an industry résumé is that the experience and skills sections might need to be organized differently.
It’s All About the Experience
Most résumés have experience listed in chronological order from latest job or gig to earliest. This works fine under two conditions: one, on all of the projects you’ve worked on, you performed the same job, or two, all of the projects you’ve worked on, you had multiple roles and responsibilities.
Tip
In the experience section of your résumé, feel free to mention any well-known names or clients who would make the work you did sound even slightly more impressive.
With each listing, you identify the project name if you worked freelance or company name if you worked on a staff. Follow that with the timeframe of the work and the job title or titles you had within the listing. If you think your résumé might be a little light, add a description of what your job responsibilities were on the show or company you listed. You can also list some details about what type of project it was and any awards or accolades the project received, even if you were not the recipient.
You should organize your experience section in subsections if there are large differences in the type of work you did or if you had what might be considered a career or focus shift.
For example, if half of your listed experience was as an assistant editor and the other half was as an editor, that might warrant splitting it into two subsections, even if you went back and forth between job titles for a while.
I Got Skills
For the skills section of your industry résumé, we advise separating your skills into subsections. Devote one section to your technical skills that relate directly to the work you’re trying to get. It can include specific tools and gear that you are experienced in using and industry-specific software. Do not list any technical skills you would not feel comfortable being asked to do without help from others or without having to frequently look up references on.
The other subsection of your skills section can focus on basic career skills such as office software proficiency and what are called soft skills. Soft skills are personal traits and abilities that can’t be proven by a certification, a credential, or a degree. Soft skills include the ability to communicate, manage time, be reliable, solve problems, work collaboratively, be confident and accountable for oneself, and bring a strong work ethic to a project. Sure, you can just list these skills, but just like with technical skills, don’t list any soft skills you can’t back up or give examples of how you applied them in your previous work.
Note
Even if you have worked only on student productions, don’t be embarrassed about listing them in your résumé. It’s better to have those projects listed than to have an empty résumé. As time goes on and you build a history of more professional-level experience, you will cut those earlier projects from your list.
That Looks Showreel
A showreel, also called a demo reel or just a reel, is a portfolio of samples of your best work. When putting your reel together, it’s best to avoid creating a fast-cut montage for the whole duration. A short, quick montage is fine for the introduction with your name and title, but the purpose of the reel is to give the viewer a strong sense of what your work is like, not that you can create a new flashy version of whatever to impress them.
When cutting your reel, start by gathering the masters of each of your projects. If you can’t obtain the masters, get the highest-quality versions possible. Once ingested and organized in a project or event, mark selects for each of the samples you plan on assembling. The duration of each sample should be long enough to give the viewer a sense of the tone and pace of the original material but not long enough to bore them. Aim for your samples to be around 30 seconds each.
If you don’t have a clear idea about how to structure your reel, you can either assemble the samples in chronological order—beginning with your latest work and ending with your earliest—or start and end with your two strongest pieces that represent you best.
The complete duration of your reel should be somewhere between three and five minutes long. If it’s not quite three minutes, there’s nothing wrong with adding a second sample from a project you already pulled a sample from. If it’s longer than five minutes, lift out samples that are low in quality (cringe worthy, embarrassing) and/or out of place with any theme that the collected assembly has formed.
Once you have the duration settled, it’s time to move some clips around. If you find that there is a clip that is somewhere in the middle of your assembly that is clearly the most impressive sample of your work, splice that bad boy up to the top of your sequence. Transitions from one sample to the next are important. Look for thematic connections if at all possible to create a flow for the viewer.
Laying out your samples from best to worst order is not necessarily the best approach. If it’s clear to the viewer that as they watch the reel is worsening, there’s no reason for them to keep watching. Keep a solid, fun, and/or powerful sample for the end of the reel to leave a good impression.
Having formed the body of your reel, you can then have some fun and cut together a fast-paced, ten-second music montage to put at the top of your reel, acting as a grabber, and finish with your name and career title before going into your first sample of work. Use snippets of your work that were not in any part of the main assembly. Be creative and have fun with it because you’re selling yourself and designing your brand. Slap on the same title after the last clip to bookend your reel.
Mix your audio so that the volume levels are consistent from one clip to the next. Cross-fade between samples to blend abrupt transitions. There’s also no crime in color-correcting shots on your earlier projects that you made when your skill level wasn’t as high as it is today. George Lucas still corrects work from more than 30 years ago—he color corrects, Greedo corrects, and one day he may even Jar Jar correct.
Now post that video online, embed it in your personal website, and even burn it on a business card–shaped optical disc to get your reel in people’s hands and in front of their eyes. You have messages to deliver and a professional career to build.
Sample Project: Documentary
The documentary form is unique in its sets of contradictions that define the genre. The documentary is nonfiction, but it is not unbiased like broadcast news and journalism should be. There’s a great amount of freedom in creating a documentary, but without boundaries and limitations, it can be difficult to define and shape a story.
The audience is lenient in its expectations of production quality, with good reason because there are no opportunities for multiple takes if anything goes wrong while acquiring footage. The documentary is designed to educate and motivate its audience to act but is ultimately a form of entertainment. For these reasons, the creation of a documentary can be both an excruciating and exhilarating experience.
Workflow
This project is designed to culminate all the skills learned and practiced from each chapter of this book. As with the sample project in Chapter 5, the workflow cannot be rigidly defined because subject and topic choice, shooting circumstances, and the complexity of the form itself will require you to put into full gear your practice of critical thinking and problem-solving skills.
Development
Unlike a scripted narrative film, a documentary has most of its writing and structure created during postproduction. That doesn’t mean you should just shoot whatever strikes you and see what you can slap together while editing. The development of a documentary begins with choosing a topic and involves extensive research. After choosing your topic, use research to answer the following questions:
1. Who is your audience?
Be specific. Just answering “Everybody” creates a problem. We all know that there are programs designed for children, even toddlers and infants, but did you know there is now a cable network designed to show programs for dogs? Yes, seriously, dogs. Programming created for a distinct audience requires specific considerations. For the success of your documentary, narrow your audience by demographic information such as age, gender, geographic location, languages known, education level, ethnicities, abilities, and now even species.
2. What do you want your audience to do after watching your documentary?
Just like with a call to action in a public service announcement (PSA), having an expected outcome for the message you deliver will guide you in creating your story.
Continue to research your topic and keep up-to-date with any current events that are relevant to your story. Watch other documentaries on your topic. Rewatch your favorite documentaries to get inspiration for stylistic choices.
Write an outline of what you would like your story to look like. As you continue your research and gather footage (which is still a form of research), there will be changes to your outline.
Preproduction
The workflow of a documentary has much more flexibility than a scripted project, but planning, scheduling, and budgeting are still not only useful but requirements.
1. Create a list of the interview subjects you would like to have in your documentary.
Go through the list and contact each one to make a pitch and schedule an interview.
2. Create a master schedule of all your shoots.
Any original material you need to acquire for B-roll and montages needs to be scheduled like with any other shoot.
When scheduling your interviews, allow time for the pre-interview to discuss your topic with your subjects before throwing them under lights and in front of the lens.
3. Create a budget. Shooting a documentary can mean more shoot days and a lot more travel to get from interview to interview. With a documentary where one subject is followed, or all events take place in a single location, meals for crew and talent, gas, equipment rental, and expendables must all be taken into consideration.
Production
Follow your schedule as closely as you can, but expect frequent changes to it as your interview subjects request to reschedule because, you know, life happens. When shooting your documentary, keep an open mind about what you will learn from the people you interview and what you capture. It is inevitable that what you thought your documentary was going to look like and be about will be different when it’s all put together.
Postproduction
We may sound like a broken record corrupted audio file here, but as with all the previous steps, stay flexible in anticipation of revelations about your story as you piece it together in editing.
If your shoot takes place over a long period of time, the post process should overlap with production. Documentaries will have more footage to manage than scripted narrative projects. Follow these steps to take control of the process:
1. Transcribe your interviews.
Being able to see, as text, what was said during the interviews will make it much easier to narrow down the footage for the assembly. The process of transcribing will help you become more familiar with your footage.
2. Create a paper cut, but don’t hurt yourself.
Like choosing quotes when writing an essay, a paper cut is a script with the actual words from your footage that will allow you to get a better handle on the overall structure of your story before putting together your assembly.
3. Create bins or keyword tags for multiple subjects to keep your selected footage organized.
4. Mark your footage, based on your paper cut, and place them in the proper bins or mark them with the appropriate keywords.
5. Splice together only your interviews into the assembly based on the paper cut.
Before adding B-roll or cutting together montages, feel free to reorder any interview segments if you discover that a different order works better than what you expected when you put it together on paper.
6. Add appropriate B-roll over your talking heads and cut together your planned montages.
Allow at least four to five seconds somewhere within the first instance of a talking head shot uncovered by B-roll to establish who is speaking, and allow time enough to read any lower-third title cards.
7. Add important title cards that are important to the story, such as lower-thirds or expository text.
8. Before spending any time on color correction or serious audio sweetening, show your assembly to your crew and trusted advisors to convey notes on improving the cut or make sure the story makes sense and the message is clear to others.
9. Duplicate your sequence to keep a record of the first cut and then make all suggested trims and changes.
10. Repeat steps 8 and 9 until you are sure that your message is ready for delivery.
11. Color correct, add graphics, and sweeten and mix your audio.
12. Deliver your message.
![]() additive color/subtractive color
additive color/subtractive color