
]>

After selecting the tool, click-drag to draw a marquee on the image surface.

Hold down the Shift key whilst drawing to restrict the shape to either a square or a circle. Hold down the Alt (Windows) or Option (Mac) key to draw the shape from its center. Hold down the Spacebar to reposition the marquee.

After selecting the tool, click-drag to draw the selection area by freehand. Release the mouse button to join the beginning and end points and close the outline.

After selecting the tool, click and release the mouse button to mark the fi rst fastening point. To draw a straight line, move the mouse and click again to mark the second point.
To draw a freehand line, hold down the Alt (Windows) or Option (Mac) key and clickdrag the mouse.
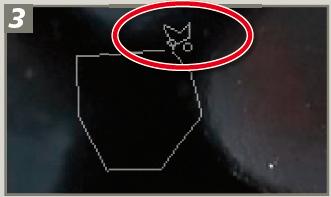
To close the outline, either move the cursor over the fi rst point and click or doubleclick.
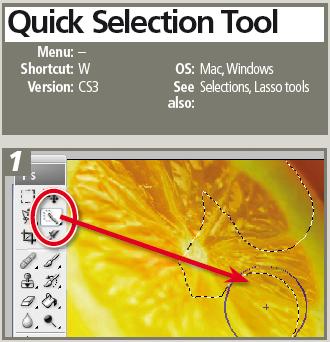
After selecting the tool, adjust the settings in the options bar to vary the brush size, shape and hardness (edge softness). To make a selection paint over the area to be included. The selection outline will grow as you continue to paint. When you release the mouse button the tool will automatically refi ne the selection further.
To take away from an existing selection hold down the Alt/Opt key so that the brush tip now has a small minus sign in the middle and paint over the area to be removed. To add to an existing selection hold down the Shift key so that the brush tip has a plus sign in the middle and paint over the new areas.
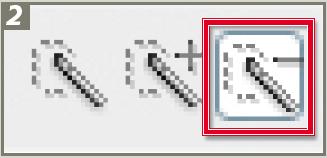
The mode buttons on the options bar can be used as an alternative method for changing from adding to or subtracting from selections.


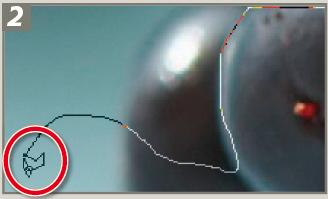
After selecting the Magnetic Lasso tool, click and release the mouse button to mark the fi rst fastening point. Trace the outline of the object with the mouse pointer. Extra fastening points will be added to the edge of the object automatically.

If the tool doesn’t snap to the edge automatically, click the mouse button to add a fastening point manually. Adjust settings in the options bar to vary the tool’s Magnetic function. To close the outline, either double-click or drag the pointer over the fi rst fastening point.


With the Magic Wand tool active, click onto the part of the image that you want to select. Modify the Tolerance of the selection by altering this setting in the options bar then deselect. Then click the tool again to reselect with the new Tolerance settings.

Constrain the selection to adjacent pixels only by checking the Contiguous option.
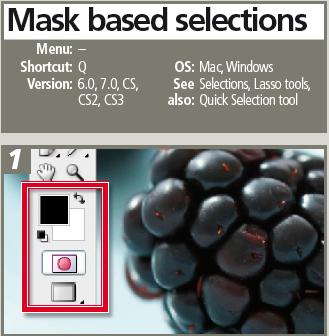
Ensure that the foreground and background colors are in the default colors then select the Quick Mask mode button at the bottom of the toolbox.
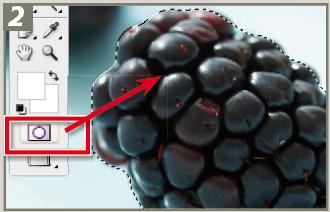
With black as the foreground color paint over the areas not to be selected. The painted sections will be colored red by default. If you accidently paint in the wrong place simply switch to white as the foreground color and paint over the mistake. Once you have fi nished painting click the Quick Mask button again to switch back to Selection mode.