]>
In order to make the most of this book, take a couple of minutes to read the following. This will let me introduce a few of the special features that I have included to help you fi nd the information that you need fast. Apart from the basic A–Z structure that lists the topics, features and tools alphabetically, I have also used the following design devices to make ‘search and locate’ missions speedier and more productive.
Each feature and tool entry is headed with a summary table that details the menu where the feature can be found, any keyboard shortcuts associated with the tool, the version of Photoshop that contains the feature and any other features that are linked to the feature.
The colored edge tabs change for each letter section. They can be used in conjunction with the contents page to quickly thumb through the book to locate a particular group of entries.
The before and after examples illustrate how features, tools and techniques can be used to change the way that your pictures look.
Important ideas and techniques are highlighted with the Remember icon and the tips and tricks used by working professionals are noted with the ‘Pro’s Tip’ ticked box.
The entries detailing new or substantially changed or revamped features in Photoshop CS3 are highlighted in red.
Don’t forget about the book’s website – www.photoshop-a-z.com. Here you will fi nd video tutorials on how to use the top new features in Photoshop CS3, the example pictures used in the step-by-step guides, links to all the featured plug-in vendors and much more.
There is a completely new step-by-step section at the front of the book designed to demonstrate how to use major tools and features. These mini-tutorials can be used to extend your understanding as well as build your editing and enhancement skills.
Select the From Camera or Card Reader option from the File menu, or select the Bridge option from the pop-up dialog that is displayed when the card reader is connected to the computer. Choose the Standard dialog.
After finding and selecting the source of the pictures adjust the Import Settings. Browse for the folder where you want the photographs to be stored and if you want to use a subfolder select the way that this folder will be named from the Create Subfolder drop-down menu.
Finally, choose what other actions Bridge will take after downloading the fi les. Here you can select to open Bridge after the transfer is complete, automatically convert the images to DNG format and even make a backup of the originals to another drive. Clicking the Get Photos button will transfer your pictures to your hard drive.
To switch the Photo Downloader to the Advanced version of the feature click on the Advanced Dialog option at the bottom of the window.
As well as performing the basic setup actions indicated in the Standard step-bystep to the left, you can add in metadata details to be attached to each downloaded fi le. Here, the Basic Metadata option is used to add simple author and copyright information. Use the drop-down menu to select any presaved metadata templates.
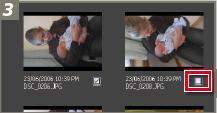
The small checkboxes at the bottom right of the preview thumbnails can be used to choose which images to transfer. All photos are selected by default but can be deselected by clicking the UnCheck all option at the bottom of the preview window. Click the Get Photos button to start the import process.


