In this section:
A Quick Look at Word 2010 Illustrations
Inserting a Picture
Changing the Size of a Picture
Adding Clip Art and Shapes
Editing and Formatting a Picture
Getting Artistic with Pictures
Removing Picture Backgrounds
Wrapping Text Around a Graphic
Arranging Multiple Graphics
Positioning Graphics on the Page
Creating Artistic Text
Inserting a Relational Diagram
Creating a Char
The images you add to your documents—whether you’re creating a business report, a newsletter for your garden club, invitations for your son’s graduation party, or a flyer for a new product—invite people in for a closer look. Images bring color, energy, and life to the words on the page. Whether you’re showing pictures of happy people, capturing a beautiful landscape, spotlighting a product, or creating a piece of abstract art, the images in your document can inspire and uplift people, while encouraging them to stick around and read what you’ve written.
Microsoft Word 2010 includes a number of picture tools that help you fine-tune your pictures and add professional, artistic touches that can really make your work stand out. New features in Word 2010 enable you to add artistic effects—including all kinds of special filters—to the images you add. And the enhanced cropping tool makes it simple for you to display just the aspect of your image that is sure to get the most attention.
Years ago, adding a photo or a diagram to a document was a pretty big deal. Today it’s very easy to do and what’s more, you can apply all sorts of professional effects to make the images look great on the page. In the Illustrations group of the Insert tab, Word 2010 gives you the tools to add several different types of illustrations to your document so that you can inspire your readers with photographs, drawings, charts, diagrams, screenshots, and more.

Chances are that you’ll use the Picture tool quite a bit. Using this tool, you can add photos or other artwork you’ve already saved in folders on your computer. Once you put the picture in place, you can use Word’s picture editing tools to fine-tune its appearance.

Word 2010 offers a large collection of clip art—with more being posted all the time—and connects directly to Office.com so you can always access the great number of downloadable art available for free online. And clip art isn’t just cartoons—you’ll also find photos and sound and video clips available through the Clip Art tool.
If you want to create your own illustrations in your document, Word 2010 offers a large collection of ready-made shapes you can add directly to your page. You can create a drawing canvas and add the custom illustration there or simply click the shape you want and draw right on the page.

SmartArt graphics give you a simple way to create professional-looking diagrams, helping you illustrate key ideas in the documents you create. SmartArt offers a number of different diagram styles, and you can customize all the diagrams you create within each style type.

You can create and insert a variety of chart types directly into your Word documents using the Chart tool in the Illustrations group. A datasheet enables you to add and modify chart values; you can customize the chart to add titles, labels, values, formatting, and more.


Adding pictures to your document livens things up and gives your readers something colorful to capture their interest. If you’re creating a dry report, you can include a photo of key staff members to personalize the document. If you’re writing Web copy, you can add images of your building, the surrounding landscape, your products, or happy customers to paint a positive image of what you do. Inserting a picture is a simple task in Word, and Word accepts images in a number of different file formats, as you can see in the following table. This means you can use pictures from a wide variety of sources—nothing goes to waste!
Picture Format Name | File Format |
|---|---|
Windows Enhanced Metafile | .emf |
Windows Metafile | .wmf |
JPEG File Interchange Format | .jpg, .jpeg, .jfif, .jpe |
Portable Network Graphics | .png |
Windows Bitmap | .bmp, .dib, .rle |
Graphics Interchange Format | .gif, .gfa |
Compressed Windows Enhanced Metafile | .emz |
Compressed Windows Metafile | .wmz |
Compressed Macintosh PICT | .pcz |
Tag Image File Format | .tif, .tiff |
WordPerfect Graphics | .wpg |
Computer Graphics Metafile | .cgm |
Encapsulated PostScript | .eps |
Macintosh PICT | .pct, .pict |
See Also
Adding Clip Art for information about inserting pictures that you’ve cataloged using the Clip Organizer.
Try This!
Most of us today have lots of digital pictures, and Office 2010 comes with a valuable tool that can help you manage your media effectively. The Microsoft Office Picture Manager is available in Microsoft Office Tools. Simply click Start, click All Programs, click Microsoft Office, and choose Microsoft Office Tools. Click Microsoft Office Picture Manager to open the software and begin working with your photos.
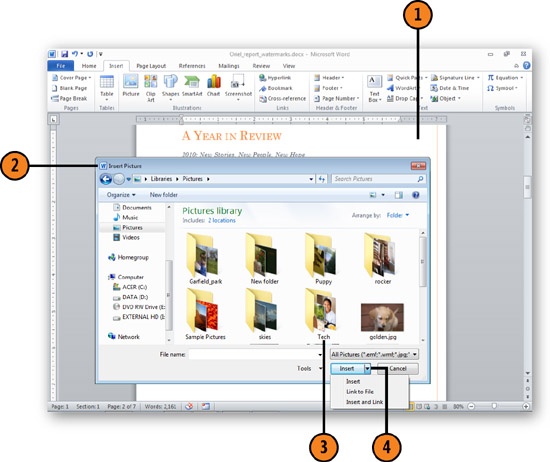
Click in your document where you want to insert the picture.
On the Insert tab, click the Picture button in the Illustrations group to display the Insert Picture window.
Navigate to the folder that contains the picture you want and click the picture file.
Click the down arrow next to the Insert button and click one of the following:
Insert to copy the picture and store it in the Word document.
Link To File to connect to the picture file without increasing the file size of your Word document. (The source picture file must be available for the picture to be displayed.)
Insert And Link to copy the picture, store it in the Word document, and update the picture automatically whenever the source picture file changes.
See Also
Editing and Formatting a Picture for information about modifying a picture or its placement.
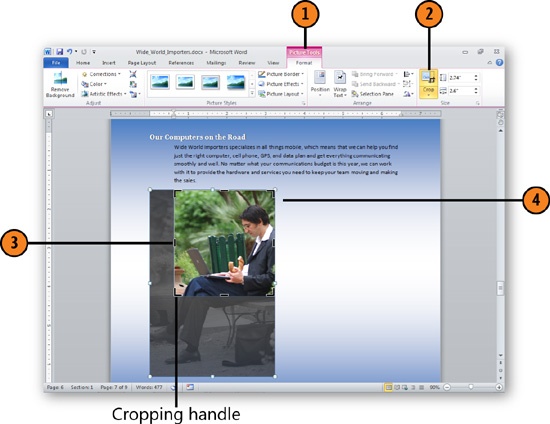
Pictures come in all shapes and sizes, and depending on how you have your digital camera options set (or where you found your images), your pictures might be extremely large. When you insert them on your page, they may overwhelm your text. There are two different ways you can get your pictures down to a manageable size—you can resize the entire image or you can crop the image to just the part you want. Or, of course, both.

Try This!
Now in Word 2010 you can crop a photo to a shape to add special touches to your files. Add a photo to your page by clicking Insert, Picture, and choosing the photo you want to add. Click Insert to paste the photo at the cursor position. Now click the photo and click the Picture Tools Format tab. In the Size group, click the Crop arrow, and point to Crop To Shape. Click the shape you want to apply to the photo and watch what happens on your page! The photo is cropped to the shape you selected. You won’t want to use this often in your publications and worksheets, but once in a while it’s a fun feature.
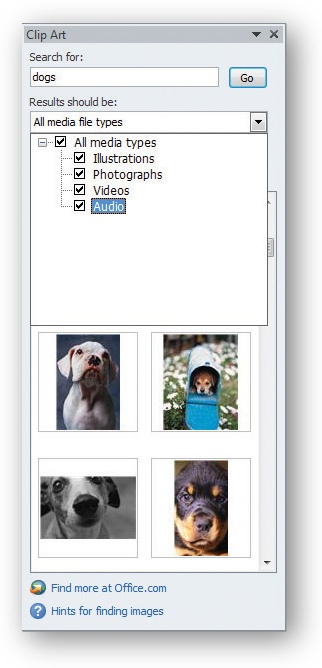
Word 2010 gives you access to clip art, photographs, video, and audio clips that are included with the program as well as a whole world full of clips available online at Office.com. When you search for a specific illustration you’d like to use for your document, you can enter a simple word or phrase—computer, for example—and the Clip Art tool will provide you with dozens of results to review. When you add a picture to a document, the picture becomes part of the document, and you can edit and change it as you’d like.
Click in your document where you want to place the clip art.
On the Insert tab, click Clip Art in the Illustrations group.
In the Clip Art pane, type a keyword or keywords to describe the type of picture you want.
Specify the type of clip you want.
Click to include clips from Office.com in the search.
Click Go to view the items that match your criteria.
Click to insert the picture into your document. Add any other clip art you want, and close the Clip Art pane when you’ve finished.

See Also
Changing the Size of a Picture for information about cropping and resizing the clip art.
See Also
Editing and Formatting a Picture for information about modifying the clip art.
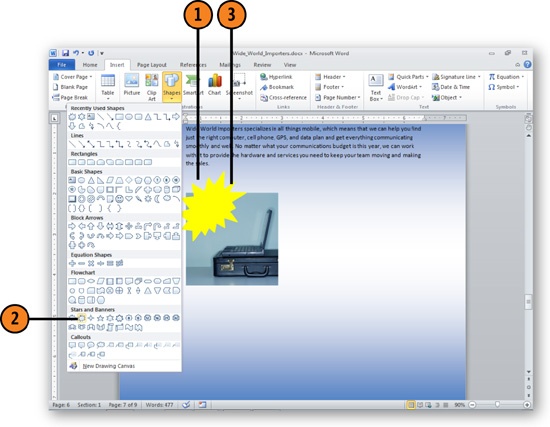
For some documents you may want to draw things yourself. Word 2010 includes a palette of shapes you can use to create all sorts of images—buttons, boxes, and much more—on your page. You can use shapes as containers for text and create pull quotes, sidebars, coupons—almost anything you can envision you can create. Once you’ve drawn the shape, you can add 3-D effects, shadows, or special formatting touches to make the shape stand out.
Click in your document where you want to insert the shape.
On the Insert tab, click Shapes in the Illustrations group, and choose the shape you want from the gallery that appears.
Hold down the left mouse button, and drag out the shape.
Adjust the shape by dragging the
Sizing handles to change the size of the drawing.
Adjustment handle to reshape the drawing.
Rotation handle to rotate the drawing.
Change the shape fill and outline color.
Use Shape Effects to apply special effects—including shadow, glow, and more—to the shape.

See Also
Adding Shapes for information about modifying the appearance of a shape.
See Also
Arranging Multiple Graphics for information about combining multiple shapes for special effects.
See Also
Creating Artistic Text and Adding Text Boxes for information about customizing the text and text layout in a text box.
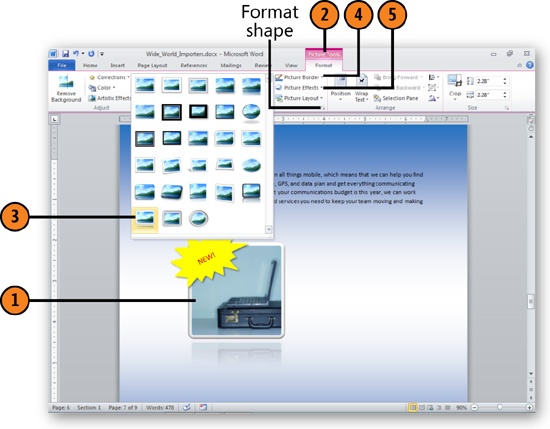
Word 2010 includes some great picture editing tools that enable you to fine-tune your images, adjusting brightness, contrast, and color. In addition to picture editing tools, you can apply special artistic effects to give your pictures a professional appearance, displaying them, for example, as watercolor prints, ink drawings, or even images through glass. Using these types of special picture enhancements help you create a document your readers will remember.

Click the Picture Tools Format tab.
Click the More button in the lower-right corner of the Picture Styles gallery to display all your choices, and click the style you want to apply.
Click Picture Border to choose a new color for the border or change border style.
Click Picture Effects to add or change the 3-D rotation, shadow, reflection, glow, or soft edges.
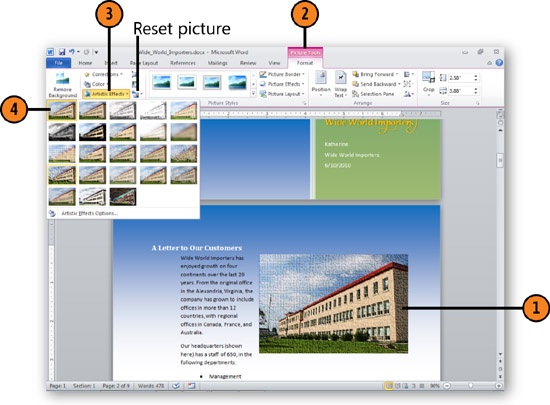
You’ve probably noticed that documents get better looking all the time. Changes in technology have made it possible for us to take lots of pictures and include those pictures in the work we produce. Word 2010 includes a great new feature called Artistic Effects that makes it simple for you to create unique and professional effects for your pictures. You can apply all sorts of different filters to create different looks and give new life—and lots of visual appeal—to the pictures you include on your pages. You can also recolor the pictures you use to create special picture effects that correspond to other colors used in your document.
Click the picture in your document.
Click the Picture Tools Format tab.
Click Artistic Effects and hover the mouse over the different effects.
Click the effect you want to apply.
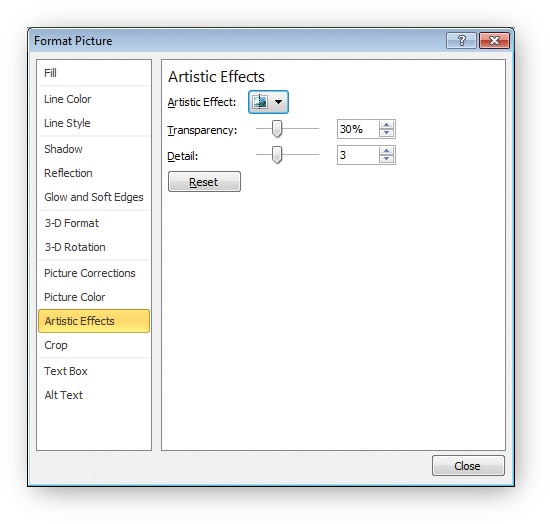
Tip
If you want to set options for the Artistic Effects, click Artistic Effects Options at the bottom of the Artistic Effects gallery. You can then choose the effect you want to change and adjust the settings to get the result you want.

Many of the pictures we create include elements we’d like to leave out. A great picture of your dog, for example, might include the foot of a friend, the mess in the corner, or a product you’d rather not showcase in your document. Word 2010 includes a great new feature than enables you to remove the background of the picture so your readers’ attention is drawn just to the part you want them to see.
Click the picture you want to change.
Click the Picture Tools Format tab.
In the Adjust group, click Remove Background.
Click Mark Areas To Keep, Mark Areas To Remove, or Delete Mark as needed to adjust the purple masking (this is the background area that will be removed).
When the picture is marked the way you want it, click Keep Changes.
To reset the picture and return the background, click Discard All Changes.


When you place images, shapes, pictures, and diagrams in your document, you need to be able to adjust the text to make room for those items. Wrapping text around an item adds another level of polish to your document. However, using one of the standard text-wrapping configurations doesn’t always produce the desired effect. As you might expect, you can customize the way Word wraps the text.
Click the picture.
Click the Picture Tools Format tab and click the Wrap Text in the Arrange group. Click the text-wrapping option you want.
Drag the picture to set its position in the paragraph. The text wraps around it.
If the text wrapping still doesn’t look the way you want, click the Text Wrapping button again, choose More Layout Options from the menu, and make your custom layout settings in the Advanced Layout dialog box. Click OK when you’ve finished.


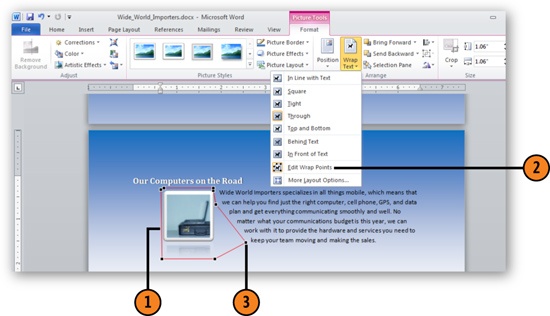
Click to select the item to be wrapped if it isn’t already selected.
Click the Text Wrapping button, and choose either Tight or Through text wrapping. Click the Text Wrapping button again, and choose Edit Wrap Points from the menu.
Drag a wrapping point to change the wrapping outline. Continue moving wrapping points, or drag the line to create a new wrapping point.
Click outside the item to deselect it.
Click at the point where you want to stop the wrap.
On the Page Layout tab, click the Breaks button, and click the Text Wrapping option.

Try This!
Set an item with Behind Text wrapping, move the item so that the text runs over it, and try to select the item. No luck? Click the Select button on the Home tab, choose Select Objects from the menu, and drag a selection rectangle around the item. Now you can move the item or change its wrap. Click the Select button again and click Select Objects to turn it off.
When you have more than one graphic (or type of graphic) in your document—for example, pictures, clip art, and/or shapes that are meant to appear together—you can arrange them in whatever configuration you want. You may want to overlap the graphics so that one appears in front of another or group several items into one group so that you can move, resize, and copy and paste them together.
Click a graphic and click the Picture Tools Format tab.
Click Bring Forward or Send Backward in the Arrange group to arrange the image.
Repeat for other graphics on the page.
Select multiple shapes by pressing Ctrl and clicking each item.
Click Group in the Arrange group to combine the shapes into a single object.


Your readers expect to see some kind of logical order on your page, so no matter how great your images look, you can’t just put them haphazardly on the page. You can use Word 2010’s alignment tools to make sure your images appear just where you want them to in the document.
Select the image. Click the Picture Tools Format tab or the Drawing Tools Format tab.
Click Align in the Arrange group and choose View Gridlines.
Click the Align button again, and specify whether you want the graphic to align relative to the edge of the paper or to the margin.
Click the Align button again, and click where you want to place the graphic on the page.
To fine-tune its position, drag the graphic to where you want it, using the grid to align the graphic to other items.


Word 2010 includes features that help you stylize your text in new ways. WordArt is a tool that has been around for a while, but it is more closely integrated into the workings of Word now. You can add all kinds of effects, curving your text words and phrases, creating interesting angles, shadows, and more.
On the Insert tab, click WordArt in the Text group to display the WordArt gallery.
Click the WordArt style you want.
A text box appears on your page with the format you selected. Click in the box.
Type your text.
Click outside the text box.

Try This!
Create some WordArt, select it, and then use the tools on the WordArt Tools Format tab to change the shape, character spacing and height, and text alignment. Use the WordArt Styles gallery to apply a three-dimensional effect. Use the 3-D Effects tools to change the color, depth, direction, lighting, surface type, and 3-D angle. Amazing, isn’t it? And so much fun!
Tip
You may notice that the styles available in the Text Effects gallery (in the Font group of the Home tab) and the styles available in WordArt look similar. You’re right—they do. But WordArt creates a text box with the phrase “Your text here,” and in order to edit and format the object you use the Drawing Tools Format contextual tab. Text effects add and format the text on your document page, so the result is that the actual text is given the format you choose from Text Effects.
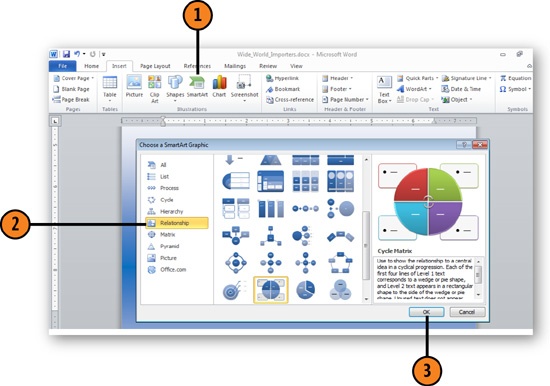
SmartArt is the diagramming tool in Word 2010 that makes it easy for you to show relationships—including comparisons, processes, and more—in your documents. SmartArt offers a number of different categories with different styles of diagrams you can adapt to fit what you want to show. You can also use pictures as part of the diagram (this is a new feature in Word 2010) and continue to add to the diagram as your needs change.
Click the Insert tab and click SmartArt in the Illustrations group.
Select the type of diagram you want.
Click a diagram design, review the information about that diagram, and click OK to create the diagram.
Click Change Colors in the Smart Styles group of the SmartArt Tools Design tab and select the color palette you want to use.
Click the first item in the Text pane and type the text for that item. If the Text pane isn’t displayed, click Text Pane on the SmartArt Tools Design tab.
Continue entering text, doing any of the following:
Press the Tab key to make the entry a subentry of the previous item (or click Demote), or Press Shift+Tab to elevate the entry one level (or click Promote).
Press Enter to finish the current item and insert a new line for text.
Press the Down arrow key to move to the next item.
Press Delete to remove entries you don’t want.

On the SmartArt Tools Design tab, point to different layouts and click the one that works best for your content.
Point to different SmartArt Styles and click the one you want.
Use the SmartArt Tools Format tab to set text and shape formats.
Click the frame of the diagram and use a Sizing handle to change the diagram’s size.

One of the beautiful things about the various programs in Office 2010 is that it is so easy to use the programs together. When you’re working with data that you’d like to present in a chart, you can easily add a chart within Word that draws from the powerful features of Excel. The process is simple, and the chart will look great with just a few clicks of the mouse.
Click the Insert tab and click Chart in the Illustrations group.
Select a chart type.
Click the chart design you want and click OK.
In the Excel worksheet that appears, edit the sample data so that only your data is shown.
The result of your data entry appears in the chart.
Close the worksheet when you’ve finished.


Click in the chart to select it if it isn’t already selected.
If you need to modify which data is shown and how it’s organized, on the Chart Tools Design tab, click the Edit Data button, and make your modifications in the worksheet that appears.
Use the tools on the Chart Tools Design tab to change the chart type, the data, the layout, and the overall appearance of the chart.
Use the tools on the Chart Tools Layout tab to add annotations, labels, and other elements.
Use the tools on the Chart Tools Format tab to format individual items in the chart.
Save the document to save the data and the design of the chart.
