
Visual Basic for Applications (VBA) combined with Microsoft Excel is probably the most powerful tool available to you. This tool is sitting on the desktops of 500 million users of Microsoft Office, and most have never figured out how to harness the power of VBA in Excel. Using VBA, you can speed the production of any task in Excel. If you regularly use Excel to produce a series of monthly charts, you can have VBA do the same task for you in a matter of seconds.
There are two barriers to learning successful VBA programming. First, Excel’s macro recorder is flawed and does not produce workable code for you to use as a model. Second, for many who learned a programming language such as BASIC, the syntax of VBA is horribly frustrating.
Microsoft began to dominate the spreadsheet market in the mid-1990s. Although it was wildly successful in building a powerful spreadsheet program toward which any Lotus 1-2-3 user could easily transition, the macro language was just too different. Anyone proficient in recording Lotus 1-2-3 macros who tried recording a few macros in Excel most likely failed. Although the Microsoft VBA programming language is far more powerful than the Lotus 1-2-3 macro language, the one fundamental flaw is that the macro recorder does not work.
With Lotus 1-2-3, you could record a macro today, play it back tomorrow, and it would faithfully work. When you attempt the same feat in Microsoft Excel, the macro might work today but not tomorrow. I was horribly frustrated in 1995 when I tried to record my first Excel macro.
The code generated by the macro was unlike anything that I had ever seen. It said this was “Visual Basic.” I had the pleasure of learning half a dozen programming languages at various times; this bizarre-looking language was horribly unintuitive and did not at all resemble the BASIC language that I had learned in high school.
To make matters worse, even in 1995, I was the spreadsheet wizard in my office. My company had just forced everyone to convert from Lotus 1-2-3 to Excel. I was now faced with a macro recorder that didn’t work and a language that I couldn’t understand. This was not a good combination of events.
My assumption in writing this book is that you are pretty talented with a spreadsheet. You probably know more than 90 percent of the people in your office. I will assume that you are not a programmer, but that you might have taken a class in BASIC in high school. This isn’t a requirement—it actually is a barrier to entry into the ranks of being a successful VBA programmer. There is a pretty good chance that you’ve recorded a macro in Excel and a similar chance that you were not happy with the results.
Even if you’ve been frustrated with the macro recorder before, it is really just a small speed bump on your road to writing powerful programs in Excel. This book will teach you why the macro recorder fails, but also will show how to easily change the recorded code into something useful. For all the former BASIC programmers in the audience, I will decode this bizarre-looking language so that you can easily pick through recorded macro code and understand what is going on.
Although you’ve probably been frustrated with Microsoft over your inability to record macros in Excel, the great news is that Excel VBA is powerful. Absolutely anything that you can do in the Excel interface can be duplicated with stunning speed in Excel VBA. If you find yourself routinely creating the same reports manually day after day or week after week, Excel VBA will greatly streamline those tasks.
The authors work for MrExcel Consulting. In this role, we get to help automate reports for hundreds of clients. The stories are often similar: The MIS department has a several-month backlog of requests. Someone in accounting or engineering discovers that he or she can import some data into Excel and get the reports necessary to run the business. This is a liberating event—you no longer need to wait months for the IT department to write a program. However, the problem is that after you import the data into Excel and win accolades from your manager for producing the report, you then find yourself producing the same report every month or every week. This becomes very tedious.
Again, the great news is that with a few hours of VBA programming, you can automate the reporting process and turn it into a few button clicks. The reward is great. Hang with me as we cover a few of the basics.
This chapter is going to expose why the macro recorder does not work. I will walk through a simple example of recorded code and demonstrate why it will work today but fail tomorrow. You will be seeing code here, and I realize that this code might not be familiar to you yet. That’s okay. The point of this chapter is to demonstrate the fundamental problem with the macro recorder. We also cover the fundamentals of the Visual Basic environment.
We’ll start with a basic overview of the tools needed to get around with VBA. By default, Microsoft hides the VBA tools. You have to change a setting in Excel options to access the Developer ribbon.
From the Office icon, select Excel Options. The third setting in the Popular category is Show Developer Tab in the Ribbon. Choose this option and click OK. Excel displays the Developer ribbon shown in Figure 1.1.

The Code group of the Developer ribbon contains icons used for recording and playing back VBA macros.
Visual Basic icon—. Opens the Visual Basic Editor.
Macros icon—. Displays the Macro dialog, where you can choose to run or edit a macro from the list of macros.
Record Macro icon—. Begins the process of recording a macro.
Use Relative Reference icon—. Toggles between using relative or absolute recording. With relative recording, Excel will record that you move down three cells. With absolute recording, Excel will record that you selected cell A4.
Macro Security icon—. Accesses the Trust Center, where you can choose to allow or disallow macros to run on this computer.
The Controls group of the Developer ribbon contains an Insert menu where you can access a variety of programming controls that you can place on the worksheet. See “Assigning a Macro to a Form Control, a Text Box, or a Shape” later in this chapter. Other icons in this group allow you to work with the on-sheet controls. The Run Dialog button enables you to display a custom dialog box or userform that you have designed in VBA. For more on userforms, see Chapter 10, “Userforms—An Introduction.”
Note
The XML group of the Developer ribbon contains tools for importing and exporting XML documents. See Chapter 17, “XML in Excel 2007.”
After VBA macros were used as the delivery method for some high-profile viruses, Microsoft changed the default security settings to prevent macros from running. Therefore, before we can begin discussing the recording of a macro, we need to show you how to adjust the default settings.
In Excel 2007, you can either globally adjust the security settings or control macro settings for certain workbooks by saving the workbooks in a trusted location. Any workbooks stored in a folder that is marked as a trusted location will automatically have its macros enabled.
You can find the macro security settings under the Macro Security icon on the Developer ribbon. When you click this icon, you see the Macro Settings category of the Trust Center. You can use the left navigation bar in the dialog to access the Trusted Locations list.
You can choose to store your macro workbooks in a folder that is marked as a trusted location. Any workbook stored in a trusted folder will have its macros enabled. Microsoft suggests that a trusted location should be on your hard drive. The default setting is that you cannot trust a location on a network drive.
To specify a trusted location, follow these steps:
Click Macro Security in the Developer ribbon.
Click Trusted Locations in the left navigation pane of the Trust Center.
If you want to trust a location on a network drive, choose Allow Trusted Locations on My Network.
Click the Add New Location button. Excel displays the Microsoft Office Trusted Locations dialog (see Figure 1.2).
Click the Browse button. Excel displays the Browse dialog.
Browse to the parent folder of the folder you want to be a trusted location. Click the trusted folder. Although the folder name does not appear in the Folder Name box, you can click OK. The correct folder name will appear in the Browse dialog.
If you want to trust subfolders of the selected folder, choose Subfolders of This Location Will Be Trusted.
Click OK to add the folder to the Trusted Locations list.

Caution
Use care when selecting a trusted location. When you double-click an Excel attachment in an email, Outlook will temporarily store the file in a temp folder on your C: drive. You would not want to globally add C: and all subfolders to the Trusted Locations list.
Although trusted locations are not new in Excel 2007, Microsoft has made the process of adding trusted locations more discoverable in Excel 2007.
For all macros not stored in a trusted location, Excel relies on the macro settings. The Low, Medium, High, and Very High settings that have been used for the past eight years have been renamed.
To access the macro settings, click Macro Security in the Developer ribbon. Excel displays the Macro Settings category of the Trust Center dialog. Choose the second option, Disable All Macros with Notification. A description of each option follows:
Disable All Macros without Notification—. This setting prevents all macros from running. This setting is for people who never intend to run macros. Because you are currently holding a book that teaches you how to use macros, I will assume that this is not you. This setting is roughly equivalent to the old Very High Security setting in Excel 2003. With this setting, only macros in the trusted locations folders can run.
Disable All Macros with Notification—. This setting is similar to Medium security in Excel 2003 and is the setting that I recommend. In Excel 2003, a Medium setting would cause a box to be displayed when you opened a file containing macros. This box would force the person to choose either Enable or Disable. I think a lot of novice Excel users would randomly choose from this box. In Excel 2007, the message is displayed in the Message Area that macros have been disabled. You can choose to enable the content by clicking that option, as shown in Figure 1.3.
Disable All Macros Except Digitally Signed Macros—. This setting would require you to obtain a digital signing tool from VeriSign or another provider. This might be appropriate if you are going to be selling add-ins to others, but a bit of a hassle if you just want to write your own macros for your own use.
Enable All Macros (Not Recommended: Potentially Dangerous Code Can Run)—. This setting is similar to Low macro security in Excel 2003. Although it requires the least amount of hassle, it also opens your computer up to attacks from malicious Melissa-like viruses. Microsoft suggests that you do not use this setting.

My recommendation is that you set your macro settings to Disable All Content with Notification. If you use this setting and open a workbook that contains macros, you will see a Security Warning in the area just above the formula bar. Follow these steps to enable the macros:
If you do not want to enable macros for the current workbook, dismiss the Security Warning by clicking the X at the far right of the message bar.
If you forget to enable the macros and you attempt to run a macro, Excel indicates that you cannot run the macro because all macros have been disabled. If you need to reopen the message bar, you can use the Message Bar check box in the Show/Hide group of the View ribbon.
Recording a macro is very useful when you do not have enough experience in writing lines of code in a macro. As you gain more knowledge and experience, you will begin to record lines of code less and less frequently.
To begin recording a macro, select Record Macro from the Developer ribbon. Before recording begins, Excel displays the Record Macro dialog box, as shown in Figure 1.4.

In the Macro Name field, type a name for the macro. Be sure to type continuous characters; for example, type Macro1 and not Macro 1 (with a space). Assuming you will soon be creating many macros, use a meaningful name for the macro. A name such as FormatReport is more useful than Macro1.
The second field in the Record Macro dialog box is a shortcut key. If you type J in this field, and then press Ctrl+J, this macro runs.
In the Record Macro dialog box, you can choose where you want to save a macro when you record it: Personal Macro Workbook, New Workbook, This Workbook. I recommend storing macros related to a particular workbook in This Workbook.
The Personal Macro Workbook (Personal.xlsm) is not an open workbook; it is created if you choose to save the recording in the Personal Macro Workbook. This workbook is used to save a macro in a workbook that will open automatically when you start Excel, thereby enabling you to use the macro. After Excel is started, the workbook is hidden. If you want to display it, select Unhide from the Window menu.
It is not recommended you use the personal workbook for every macro you save. Save only those macros that will assist you in general tasks—not in tasks that are performed in a specific sheet or workbook.
The fourth box in the Record Macro dialog is for a description. This description will be added as a comment to the beginning of your macro. Note that previous versions of Excel automatically noted the date and user name of the person recording the macro. Excel 2007 no longer automatically inserts this information in the Description field.
After you select the location where you want to store the macro, click OK. Record your macro. When you are finished recording the macro, click the Stop Recording icon in the Developer ribbon.
Tip
You can also access a Stop Recording icon in the lower-left corner of the Excel window. Look for a small blue square to the right of the word Ready in the status bar. Using this Stop button might be more convenient than returning to the Developer ribbon. When you are not recording a macro, this icon changes to a small red dot on an Excel worksheet. That icon is a shortcut to begin recording a new macro.
If you assigned a shortcut key to your macro, you can play it by pressing the key combination. Macros can also be assigned to toolbar buttons, forms controls, drawing objects, or you can run them from the Visual Basic toolbar.
You can add an icon to the Quick Access toolbar to run your macro. If your macro is stored in the Personal Macro Workbook, you can have the button permanently displayed in the Quick Access toolbar. If the macro is stored in the current workbook, you can specify that the icon should only appear when the workbook is open. Follow these steps to add a macro button to the Quick Access toolbar:
Click the Office button and choose Excel Options to open the Excel Options dialog.
In the Excel Options dialog, choose the Customize category from the left-side navigation. (Note that a shortcut to replace steps 1 and 2 is to right-click the Quick Access toolbar and choose Customize Quick Access Toolbar.)
If your macro should be available only when the current workbook is open, open the upper-right drop-down and change For All Documents (Default) to For <FileName.xlsm>. Any icons associated with the current workbook are displayed at the end of the Quick Access toolbar.
Open the upper-left drop-down and choose Macros from the list. The Macros category is fourth in the list. Excel displays a list of available macros in the left list box.
Choose a macro from the left list box. Click the Add button in the center of the dialog. Excel moves the macro to the right list box. Excel uses a generic VBA icon for all macros. You can change the icon by following steps 6 through 8.
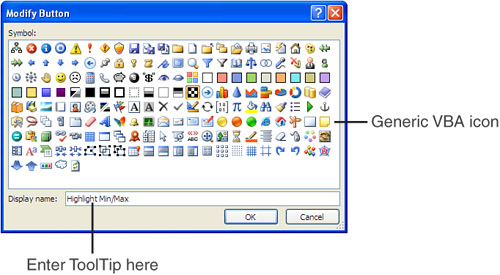
Click the macro in the right list box. Click the Modify button at the bottom of the right list box. Excel displays a list of 181 possible icons (see Figure 1.5). Considering that Excel 2003 offered 4,096 possible icons, plus an icon editor, the list of 181 is a major disappointment.
Choose an icon from the list. In the Display Name box, replace the macro name with a short name that will appear in the ToolTip for the icon.
Click OK to close the Modify Button dialog.
Click OK to close Excel options. The new button appears on the Quick Access toolbar.
If you want to create a macro specific to a workbook, store the macro to the workbook and attach it to a form control or any object on the sheet.
Follow these steps to attach a macro to a form control on the sheet:
On the Developer ribbon, click the Insert button to open its drop-down list. Excel offers 12 form controls and 12 ActiveX controls. Many icons look similar in this drop-down. Click the Button Form Control icon at the upper-left icon in the drop-down.
Move your cursor over the worksheet; the cursor changes to a plus sign.
Draw a button on the sheet by clicking and holding the left mouse button while drawing a box shape. Release the button when you have finished.
Select a macro from the Assign Macro dialog box and click OK. The button is created with generic text such as Button 1. To customize the text or the button appearance, follow steps 5 through 7.
Ctrl+click the button to select it. Drag the cursor over the text on the button to select the text. Type a new label for the button. Note that while you are typing, the selection border around the button changes from dots to diagonal lines to indicate that you are in Text Edit mode. You cannot change the button color while in Text Edit mode. To exit Text Edit mode, either click the diagonal lines to change them to dots or Ctrl+click the button again.
Right-click the dots surrounding the button and choose Format Control. Excel displays the Format Control dialog with seven tabs across the top. If your Format Control dialog has only a Font tab, you failed to exit Text Edit mode. Close the dialog, Ctrl+click the button, and repeat this step.
Use the settings in the Format Control dialog to change the font size, font color, margins, and similar settings for the control. Click OK to close the Format Control dialog when you have finished.
Click the button to run the macro.
Macros can be assigned to any worksheet object such as clip art, a shape, SmartArt graphics, or a text box. In Figure 1.6, the top button is a traditional button form control. The other images are clip art, a shape with WordArt and a SmartArt graphic. To assign a macro to any object, right-click the object, and choose Assign Macro.

Excel 2007 offers support for four file types. Macros are not allowed to be stored in the default file type. You either have to use the Save As setting for all of your macro workbooks, or you can change the default file type used by Excel 2007.
The available files types are as follows:
Excel Workbook (.xlsx)—. Files are stored as a series of XML objects and then zipped into a single file. This new file-saving paradigm in Excel 2007 allows for significantly smaller file sizes. It also allows other applications (even Notepad!) to edit or create Excel workbooks. Unfortunately, macros cannot be stored in files with an .xlsx extension.
Excel Macro-Enabled Workbook (.xlsm)—. This is similar to the default .xlsx format, except macros are allowed. The basic concept is that if someone has an .xlsx file, they don’t need to worry about malicious macros, but if they see an .xlsm file, they need to be concerned that there might be macros attached.
Excel Binary Workbook (.xlsb)—. This is a binary format designed to handle the larger 1.1-million-row grid size in Excel 2007. All previous versions of Excel stored their files in a proprietary binary format. Although binary formats might load quicker, they are more prone to corruption; a few lost bits can destroy the whole file. Macros are allowed in this format.
Excel 97-2003 Workbook (.xls)—. This format produces files that can be read by anyone using legacy versions of Excel. It is a binary format, and macros are allowed. However, when you save in this format, you lose access to any cells outside of A1:IV65536. You lose access to all new features in Excel.
To avoid having to choose a macro-enabled workbook in the Save As dialog, you can customize your copy of Excel to always save new files in the .xlsm format. Follow these steps:
Click the Office button and choose Excel Options.
In the Excel Options dialog, choose the Save category from the left navigation pane.
The first drop-down is Save Files in This Format. Open the drop-down and choose Excel Macro-Enabled Workbook (*.xlsm). Click OK.
Note
Although you and I are not afraid of using macros, I’ve run into some people who seem to completely freak out when they see the .xlsm file type. They actually seem angry that I sent them an .xlsm file that didn’t have any macros. Their reaction seemed reminiscent of King Arthur’s “You got me all worked up!” line in Monty Python and the Holy Grail.
If you encounter someone who seems to have an irrational fear of the .xlsm file type, remind them of these points:
Every workbook created in the past 20 years could have had macros, and most did not.
If someone is trying to avoid macros, they should use the security settings to prevent macros from running anyway (turn back to page Figure 1.3). They can still open the .xlsm file to get the data in the spreadsheet.
With these arguments, you can hopefully overcome any irrational fears of the .xlsm file type and make it be your default file type.
Figure 1.7 shows an example of the typical VB Editor screen. You can see three windows: Project Explorer, the Properties window, and the Programming window. Don’t worry if your window doesn’t look exactly like this; as we review the editor, I show you how to display the windows you’ll need.

Several settings in the VB Editor enable you to customize it as you want. I’m going to go over only the ones that will help you with your programming.
Under Tools, Options, Editor, you’ll find several useful settings. All settings except for one are set correctly by default. The remaining setting requires some consideration on your part. This setting is Require Variable Declaration. By default, Excel doesn’t require you to declare variables. I prefer this setting. It can save you time in creating a program.
My co-author, Tracy, prefers changing this setting to require variable declaration. This forces the compiler to stop if it finds a variable that it does not recognize. This cuts down on misspelled variable names. It is a matter of your personal preference if you turn this on or keep it off.
If you’re like me, you write a lot of personal macros. After a while, it gets tiresome having to approve the enabling of macros you wrote. That’s where digital signatures come in. You can buy a digital signature from one of a number of third-party vendors. Microsoft provides a list of approved vendors at http://msdn2.microsoft.com/en-us/library/ms995347.aspx. Once you have purchased a digital signature, use Tools, Digital Signature to attach the signature to your VBA project.
The Project Explorer lists any open workbooks and add-ins that are loaded. If you click the + icon next to the VBA Project, you will see that there is a folder with Microsoft Excel objects. There can also be folders for forms, class modules, and (standard) modules. Each folder includes one or more individual components.
Right-clicking a component and selecting View Code, or just double-clicking the components, brings up any code in the Programming window (except for userforms, where double-clicking displays the userform in Design view).
To display this window, select View, Project Explorer from the menu, press Ctrl+R, or click the Project Explorer icon on the toolbar.
Figure 1.8 shows the Project Explorer pane. This pane can show Microsoft Excel objects, userforms, modules, and class modules.

To insert a module, right-click your project, select Insert, and then select the type of module you want. The available modules are as follows:
Microsoft Excel objects—. By default, a project consists of sheet modules for each sheet in the workbook and a single ThisWorkbook module. Code specific to a sheet, such as controls or sheet events, is placed on the corresponding sheet. Workbook events are placed in the ThisWorkbook module. You’ll learn more about events in Chapter 9, “Event Programming.”
Forms—. Excel allows you to design your own forms to interact with the user. You’ll learn more about these forms in Chapter 10, “Userforms—An Introduction.”
Modules—. When you record a macro, Excel automatically creates a module to place the code. It is in these types of modules that most of your code will reside.
Class modules—. Class modules are Excel’s way of letting you create your own objects. Also, class modules allow pieces of code to be shared among programmers without the programmer needing to understand how it works. You’ll learn more about class modules in Chapter 22, “Creating Classes, Records, and Collections.”
The Properties window enables you to edit the properties of various components—sheets, workbooks, modules, and form controls. Its Property list varies according to what component is selected.
To display this window, select View, Properties Window from the menu, press F4, or click the Project Properties icon on the toolbar.
Suppose you work in an accounting department. Each day you receive a text file from the company system showing all the invoices produced the prior day. This text file has commas separating each field. The columns in the file are InvoiceDate, InvoiceNumber, SalesRepNumber, CustomerNumber, ProductRevenue, ServiceRevenue, and ProductCost (see Figure 1.9).

As you arrive at work each morning, you manually import this file into Excel. You add a total row to the data, bold the headings, and then print the report for distribution to a few managers.
This seems like a fairly simple process that would be ideally suited to using the macro recorder. However, due to some problems with the macro recorder, your first few attempts might not be successful.
Preparing to Record the Macro
This is a task that is perfect for a macro. Before you record any macro, think about the steps that you will use before you begin. In our case, these steps are as follows:
Click the Office button and select Open.
Navigate to the folder where invoice.txt is stored.
Choose All Files(*.*) from the Files of Type drop-down list.
Select Invoice.txt.
Click Open.
In the Text Import Wizard—Step 1 of 3, select Delimited from the Original Data Type section.
Click Next.
In the Text Import Wizard—Step 2 of 3, uncheck the Tab key and check Comma in the Delimiters section.
Click Next.
In the Text Import Wizard—Step 3 of 3, select General in the Column Data Format section and change it to
Date: MDY.Click Finish to import the file.
Press the End key followed by the down arrow to move to the last row of data.
Press the down arrow one more time to move to the total row.
Type the word
Total.Press the right-arrow key four times to move to Column E of the total row.
Click the Autosum button and press Ctrl+Enter to add a total to the Product Revenue column while remaining in that cell.
Grab the AutoFill handle and drag it from Column E over to Column G to copy the total formula over to Columns F and G.
Highlight Row 1 and click the Bold icon on the Home ribbon to set the headings in bold.
Highlight the Total row and click the Bold icon on the Home ribbon to set the totals in bold.
Press Ctrl+A to select all cells.
From the Home ribbon, select Format, AutoFit Column Width.
After you’ve rehearsed these steps in your head, you are ready to record your first macro. Open a blank workbook and save it with a name like MacroToImportInvoices.xlsm. Click the Record Macro button on the Developer ribbon.
In the Record Macro dialog, the default macro name is Macro1. Change this to something descriptive like ImportInvoice. Make sure that the macros will be stored in This Workbook. You might want an easy way to run this macro later, so enter the letter i in the Shortcut Key field. In the Description field, add a little descriptive text to tell what the macro is doing (see Figure 1.10). When you are ready, click OK.

Don’t be nervous, but the Macro Recorder is now recording your every move. You want to try to perform your steps in exact order without extraneous actions. If you accidentally move to Column F and then back to E to enter the first total, the recorded macro blindly makes that same mistake day after day after day. Recorded macros move fast, but this is nothing like having to watch your same mistakes played out by the macro recorder again and again.
Carefully, execute all the actions necessary to produce the report. After you have performed the final step, click the Stop button in the lower-left corner of the Excel window or click Stop Recording in the Developer ribbon.
It is time to take a look at your code. Switch to the VB Editor by choosing Visual Basic from the Developer ribbon or pressing Alt+F11.
</division>Let’s take a look at the code you just recorded from the case study; don’t worry if it doesn’t make sense yet.
To open the VB Editor, press Alt+F11. In your VBA Project (MacroToImportInvoices.xls), find the component Module1, right-click it, and select View Code. Notice that some lines start with an apostrophe—these are comments and are ignored by the program. The macro recorder starts your macros with a few comments, using the description that you entered in the Record Macro dialog. The comment for the Keyboard Shortcut is there to remind you of the shortcut.
Note
The comment does not assign the shortcut. If you change the comment to be Ctrl+J, it does not change the shortcut. You must change the setting in the Macro dialog box in Excel or run this line of code:
Application.MacroOptions Macro:="ImportInvoice", _
    Description:="", ShortcutKey:="j"
    ActiveCell.FormulaR1C1 = "Hello World!"
    Range("A3").Select
Recorded macro code is usually pretty neat (see Figure 1.11). Each noncomment line of code is indented four characters. If a line is longer than 100 characters, the recorder breaks it into multiple lines and indents the lines an additional 4 characters. To continue a line of code, you type a space and an underscore at the end of the line. Note that the physical limitations of this book do not allow 100 characters on a single line. I will break the lines at 80 characters so that they fit on this page. Your recorded macro might look slightly different from the ones that appear here.

Consider that the following seven lines of recorded code is actually only one line of code that has been broken down into seven lines for readability:
Workbooks.OpenText Filename:= _
    "C:invoice.txt", Origin:=437, StartRow:=1, DataType:=xlDelimited, _
    TextQualifier:=xlDoubleQuote, ConsecutiveDelimiter:=False, _
    Tab:=True, Semicolon:=False, Comma:=True, Space:=False, _
    Other:=False, FieldInfo:=Array(Array(1, 3), Array(2, 1), Array(3, 1), _
    Array(4, 1), Array(5, 1), Array(6, 1), Array(7, 1)), _
   TrailingMinusNumbers:=True
Counting the above as one line, the macro recorder was able to record our 21-step process in 14 lines of code, which is pretty impressive.
Note
Each action that you perform in the Excel user interface might equate to one or more lines of recorded code. Some actions might generate a dozen lines of code.
It is always a good idea to test out your macro. Return to the regular Excel interface by pressing Alt+F11. Close Invoice.txt without saving any changes. You still have MacroToImportInvoices.xls open.
Press Ctrl+I to run the recorded macro. It works beautifully! The data is imported, totals are added, bold formatting is applied, and the columns are made wider. This seems like a perfect solution (see Figure 1.12).

So, you would have saved your macro file. The next day, you come to work and you have a new invoice.txt file from the system. You open the macro, press Ctrl+I to run it, and disaster strikes. The data for June 7 happened to have 12 invoices. The data for the June 8 had 16 invoices. However, the recorded macro blindly added the totals in Row 14 because this was where we put the totals when the macro was recorded (see Figure 1.13).

This first problem arises because the macro recorder is recording all your actions in absolute mode by default. Instead of using the default state of the macro recorder, the next section discusses relative recording and how this might get you closer to the final solution.
By default, the macro recorder records all actions as absolute actions. If you navigate to Row 14 when you record the macro on Monday, the macro will always go to Row 14 when the macro is run. When dealing with variable numbers of rows of data, this is rarely appropriate.
There is an option to use relative references when recording.
Macros recorded with absolute references note that actual address of the cell pointer (for example, A14). Macros recorded with relative references note that the cell pointer should move a certain number of rows and columns from its current position. For example, if the cell pointer starts in cell A1, the code ActiveCell.Offset(16, 1).Select would move the cell pointer to B17 (the cell 16 rows down and one column to the right).
Let’s try the same case study again, this time using relative references. The solution will be much closer to working.
Let’s try to record the macro again, using relative references. Close Invoice.txt without saving changes. In the workbook MacroToImportInvoices.xls, record a new macro by choosing Record Macro from the Developer ribbon. Give the new macro a name of ImportInvoicesRelative and assign it a different shortcut key, such as Ctrl+J (see Figure 1.14).

As you start to record the macro, go through the process of opening the invoice.txt file. Before navigating to the last row of data (press the End key + down-arrow key), click the Use Relative Reference button on the Developer ribbon (refer to Figure 1.2).
Continue through the actions in the script from the case study:
Press the End key followed by the down-arrow key to move to the last row of data.
Press the down arrow one more time to move to the total row.
Type the word
Total.Press the right-arrow key four times to move to Column E of the Total row.
Press the Autosum button, and then press Ctrl+Enter to add a total to the Product Revenue column while remaining in that cell.
Grab the AutoFill handle and drag from Column E over to Column G to copy the total formula over to Columns F and G.
Press Shift+spacebar to select the entire row and apply bold formatting to it.
At this point, you need to move to Cell A1 to apply bold to the headings. You do not want the macro recorder to record the movement from Row 18 to Row 1—it would record this as moving 17 rows up, which might not be correct tomorrow. Before moving to A1, toggle the Use Relative Recording button off, and then continue recording the rest of the macro.
Highlight Row 1 and click the Bold icon to set the headings in bold.
Press Ctrl+A to select all cells.
From the Home ribbon, select Format, AutoFit Column Width.
Stop recording.
Press Alt+F11 to go to the VB Editor to review your code. The new macro appears in Module1 below the previous macro.
Caution
If you close Excel between recording the first and second macro, Excel inserts a new module, called Module2, for the newly recorded macro.
I’ve edited the following code with two comments to show where I remember turning the relative recording on and then off.
Sub ImportInvoicesRelative
'
' This was recorded with Relative
' References on during the first part of the macro
'
' Turned on relative recording here
    Selection.End(xlDown).Select
    ActiveCell.Offset(1, 0).Range("A1").Select
    ActiveCell.FormulaR1C1 = "'Total"
    ActiveCell.Offset(0, 4).Range("A1").Select
    Selection.FormulaR1C1 = "=SUM(R[-16]C:R[-1]C)"
    Selection.AutoFill Destination:=ActiveCell.Range("A1:C1"), Type:= _
        xlFillDefault
' Turned off relative recording here
    ActiveCell.Range("A1:C1").Select
    ActiveCell.Rows("1:1").EntireRow.Select
    ActiveCell.Activate
    Selection.Font.Bold = True
    Rows("1:1").Select
    Selection.Font.Bold = True
    Cells.Select
    Selection.Columns.AutoFit
End Sub
To test the macro, close Invoice.txt without saving, and then run the macro with Ctrl+J. Everything looks good—I get the same results.
The next test is to see whether the program works on the next day when you might have more rows. Figure 1.15 shows the data for June 9.

I open MacroToImportInvoices.xls and run the new macro with Ctrl+J. This time, everything looks pretty good. The totals are where they are supposed to be. Look at Figure 1.16—see anything out of the ordinary?

If you aren’t careful, you might just print these off for your manager. You would be in trouble. Look in Cell E23. Luckily, Excel has a green triangle there telling you to look at the cell. If you would have happened to try this back in Excel 95 or Excel 97 before we had smart tags, there would have been no indicator that anything was wrong.
Move the cell pointer to E23. An alert indicator pops up near the cell. The indicator tells you that the formula fails to include adjacent cells. If you look in the formula bar, you can see that the macro totaled only from Row 7 to Row 22. Neither the relative recording nor the nonrelative recording is smart enough to replicate the logic of the AutoSum button.
At this point, any sane person would give up. But imagine that you might have had fewer invoice records on this particular day. Excel would have rewarded you with the illogical formula of =SUM(E10:E1048571) and a circular reference, as shown in Figure 1.17.

My guess is that if you have tried using the macro recorder that you have run into similar problems as the ones produced in the last two case studies. While this is frustrating, you should be happy to know that the macro recorder actually gets you 95% of the way to a useful macro.
Your job is to recognize where the macro recorder is likely to fail and then to be able to dive into the VBA code to fix the one or two lines that require adjusting in order to have a perfect macro.
You need to dive in and figure out Visual Basic. With some added human intelligence, you can produce awesome macros to speed up your daily work.
In Chapter 2, “This Sounds Like BASIC, So Why Doesn’t It Look Familiar?” we take a look at these two macros we recorded in an effort to make some sense out of them. After you know how to decode the VBA code, it will feel natural to either correct the recorded code or simply write code from scratch. Hang on through one more chapter and you will be writing useful code that works consistently.