
Lesson 13: Working with Code-editing Features
Dreamweaver provides exceptional code-editing support to complement its powerful visual layout tools and application development features. You can adapt the coding environment so that it fits the way you work. Learn how to change the way you view code, reformat your markup, or use your favorite tag library.

What you’ll learn in this lesson:
- • Using the Code and Design views
- • Working with the Coding toolbar
- • Validating your code
- • Formatting and reformatting your code
Starting up
Before starting, make sure that your tools and panels are consistent by resetting your workspace. See “Resetting the Dreamweaver workspace” in the Starting up section of this book.
You will work with several files from the dw13lessons folder in this lesson. Make sure that you have loaded the dwlessons folder onto your hard drive from www.digitalclassroombooks.com/epub/dreamweavercc. See “Loading lesson files” in the Starting up section of this book.
Before you begin, you need to create site settings that point to the dw13lessons folder. Go to Site > New Site, or, for details on creating a site, refer to Lesson 2, “Setting Up a New Site.”
Working with code
Although Dreamweaver’s traditional audience has been for those who prefer to work in the Design view and not with code, there are many good reasons to dive into the code editing view. In this lesson, you will look at some of the unique functions available in the Code view by taking a look at an older web page.
Accessing code with the Quick Tag editor
In this exercise, you will use a feature called the Quick Tag editor. This feature is generally for users who are more familiar with their code. The Quick Tag editor offers an easy way to add CSS class or ID names as well as attributes to your code without having to leave the Design view. The Quick Tag editor works in conjunction with the tag selector. In this exercise, you’ll apply a CSS class to an image to float it to the right.
1 In the Files panel, navigate to the dw13lessons folder and double-click the oldcode.html file to open it. Click the image of the beets. In the bottom-left of the document window is the tag selector which now has the <img> tag selected.
2 Right-click (Windows) or Ctrl+click (Mac OS) the <img> tag in the tag selector. A context menu appears with all the code for the selected image. Choose Quick Tag Editor from the menu. The Quick Tag Editor appears, displaying the code for this tag.

Viewing the attributes and properties of a tag in the Quick Tag Editor.
Instead of switching to the Code view to make changes to this code, you can make changes within the editor.
3 Click once after the align="left" code and press the spacebar. A code-hinting menu is triggered, allowing you to choose from a list of possible choices. Double-click the class option; the code will be written for you. Notice that the only option, floatright, is listed; press the Return (or Enter) key to apply this class. Your image now has the class applied and is floating to the right.
You can also use the Quick Tag Editor to remove unnecessary code. For example, this page uses the older <font> tag to style text.
4 Click anywhere inside the main paragraph of your document. In the tag selector, click the <font> tag and then right+click (Windows) or Ctrl-click (Mac OS) and from the context menu choose the Remove Tag option.

Quickly remove a tag by choosing Remove Tag.
This removes both the opening and closing font tags and the text now reverts to its default unstyled appearance.
Using HTML5 code-hinting
The internal library of code that is available to Dreamweaver CC evolves as the language of the Web evolves. If you are working with the next generation of web pages, Dreamweaver has access to the latest HTML5 elements.
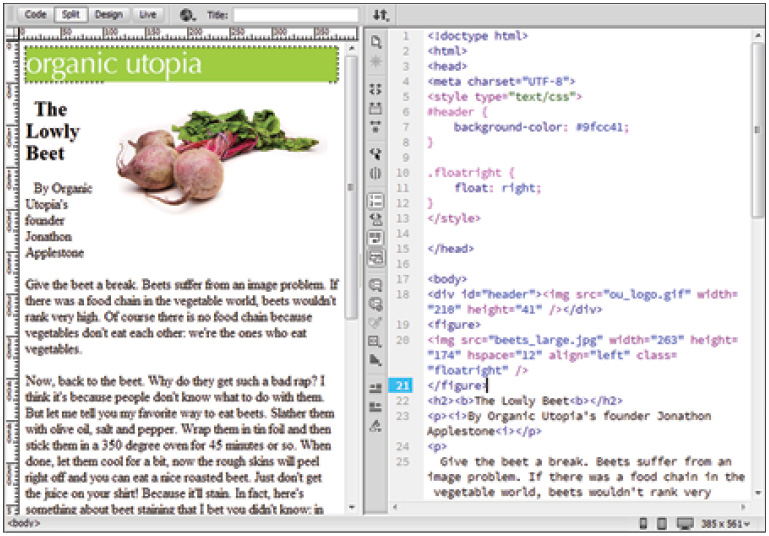
1 In the Code view, locate the <img> element on or around line 19. Place your cursor immediately before the opening <img> tag and press Return (Mac OS) or Enter (PC) to move this code to the next line.
Click once in the empty line you just created above the <img> element. You will now be adding a new HTML5 element.
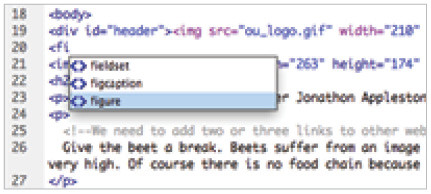
2 Type a left bracket (<); Dreamweaver’s code-hinting panel appears. This is a complete list of every element that is a part of Dreamweaver’s library of HTML tags.
Type the letters fi; notice that as you type, the list automatically narrows down to the available choices. Using the arrow keys on your keyboard, select the <figure> tag and press Return (Mac OS) or Enter (PC).
Use code-hinting to select the HTML5 figure tag.
3 Type the closing bracket (>). Dreamweaver will not automatically do it for you.
The HTML5 <figure> element is designed to help structure your web pages by giving you a more specific way to define images on your pages. For example, you could add a common style for all figures on your page.
4 You need to add the closing tag for the figure element, so click once at the end of the line of the <img> code and press Enter (Windows) or Return (Mac OS).
5 On this new line, type a left bracket and a forward slash: </. Dreamweaver will automatically complete (auto-complete) the rest of the tag.

Dreamweaver will auto-complete your closing tags.
 You can choose to turn off the code-hinting and auto-complete options within your preferences. Choose Edit > Preferences (Windows) or Dreamweaver > Preferences (Mac OS). Select the Code Hints category. To turn off code-hinting, click to clear the Enable Code Hints check box. To prevent Dreamweaver from auto-completing your tags, select Never from the Close tags section.
6 Choose File > Save to save your work.
Working in the Code view
As you’ve seen, the Code view is a hand-coding environment for writing and editing HTML and CSS. More experienced users who work in scripting languages such as JavaScript and PHP can modify their workspace to suit the way they prefer to work with code.
Modifying the Code view workspace
You can view the source code for Dreamweaver documents in several ways. You can display it in the document window by switching to the Code view, you can split the document window to display both the visual page and its related code in Split view, or you can work in the Code Inspector, a separate coding window. The Code Inspector works like a detachable version of the Code view for the current page.
1 Choose View > Code and Design, to view the code and visually edit the page in the document window at the same time. By default the Code view is split with the Code on the left and Design view on the right.
2 From the View menu choose Design View on Left to swap the views.
Choose Design View on Left to switch the location of the Code and Design views.
3 Place your cursor over the splitter bar between the Design view and the Code view. Click and drag the bar to the right and the Design view will expand as the Code view contracts.
4 Choose Window > Code Inspector. Working in the Code Inspector is just like working in the Code view, except that it is in a separate window. This might be useful, depending on how you choose to manage your workspace (for example, users who have two monitors could put this window in a separate window).
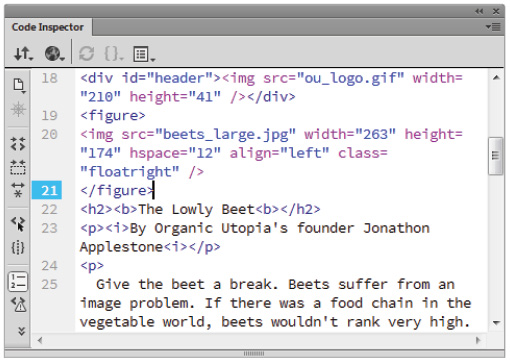
You can also view your HTML code in the Code Inspector window.
Click the Close button to close the Code Inspector for now. From the View menu, choose Design View on Left to return the split screen to its original orientation.
5 Choose View > Code. You will now look at some of the coding features available in the coding toolbar in Dreamweaver.
The Coding toolbar
The Coding toolbar contains buttons that let you perform many standard coding operations, such as collapsing and expanding code selections, highlighting invalid code, applying and removing comments, indenting code, and inserting recently used code snippets. The Coding toolbar is visible only in the Code view and appears vertically on the left side of the document window. To see what each button does, position the cursor over it until a tooltip appears.
|
Icon |
Tool Name |
Use |
|
Icon |
Tool Name |
Use |
|
|
Open Documents |
Lists the documents that are open. When you select a document, it is displayed in the document window. |
|
|
Show Code Navigator |
Displays a list of code sources related to a particular selection on your page. Use it to navigate to related code sources, such as internal and external CSS rules, server-side includes, external JavaScript files, parent template files, library files, and iframe source files. You can access the Code Navigator from Design, Code, and Split views, as well as from the Code Inspector. |
|
|
Collapse Full Tag |
Collapses the content between a set of opening and closing tags (for example, the content between <body> and </body>). You must place the insertion point in the opening or closing tag and then click to collapse it. |
|
|
Collapse Selection |
Collapses the selected code. |
|
|
Expand All |
Restores all collapsed code. |
|
|
Select Parent Tag |
Selects the content and surrounding opening and closing tags of the line in which you’ve placed the insertion point. If you repeatedly click this button, and your tags are balanced, Dreamweaver will eventually select the outermost <html> and </html> tags. |
|
|
Balance Braces |
Selects the content and surrounding parentheses, braces, or square brackets of the line in which you’ve placed the insertion point. If you repeatedly click this button, and your surrounding symbols are balanced, Dreamweaver will eventually select the outermost braces, parentheses, or brackets in the document. |
|
|
Line Numbers |
Hides or shows numbers at the beginning of each line of code. |
|
|
Highlight Invalid Code |
Highlights invalid code in yellow. |
|
|
Word Wrap |
Changes the Word Wrap from Soft Wrap to Hard Wrap (or vice-versa) |
|
|
Syntax Error Alerts in Info Bar |
Enables or disables an information bar at the top of the page that alerts you to syntax errors. When Dreamweaver detects a syntax error, the Syntax Error Information bar specifies the line in the code where the error occurs. Additionally, Dreamweaver highlights the error’s line number on the left side of the document in Code view. The info bar is enabled by default, but only appears when Dreamweaver detects syntax errors in the page. |
|
|
Apply Comment |
Wraps comment tags around selected code, or opens new comment tags. |
|
|
Remove Comment |
Removes comment tags from the selected code. If a selection includes nested comments, only the outer comment tags are removed. |
|
|
Wrap Tag |
Wraps selected code with the selected tag from the Quick Tag Editor. |
|
|
Recent Snippets |
Inserts a recently used code snippet from the Snippets panel. |
|
|
Move or Convert CSS |
Lets you move CSS to another location, or convert inline CSS to CSS rules. |
|
|
Indent Code |
Shifts the selection to the right. |
|
|
Outdent Code |
Shifts the selection to the left. |
|
|
Format Source Code |
Applies previously specified code formats to selected code or to the entire page if no code is selected. You can also quickly set code formatting preferences by selecting Code Formatting Settings from the Format Source Code button, or edit tag libraries by selecting Edit Tag Libraries. |
The number of buttons available in the Coding toolbar varies depending on the size of the Code view in the document window. To see all the available buttons, resize the Code view window or click the Show More arrow at the bottom of the Coding toolbar.
Collapsing and expanding tags and code blocks
Dreamweaver lets you collapse and expand code fragments so that you can hide and show various sections of your code. This can help reduce the amount of screen space that is taken up and also prevent mistakes since code that is collapsed cannot be edited. When you select code, Dreamweaver adds a set of collapse buttons next to the selection (minus symbols in Windows; vertical triangles in Mac OS). You can collapse code only in the Code view.
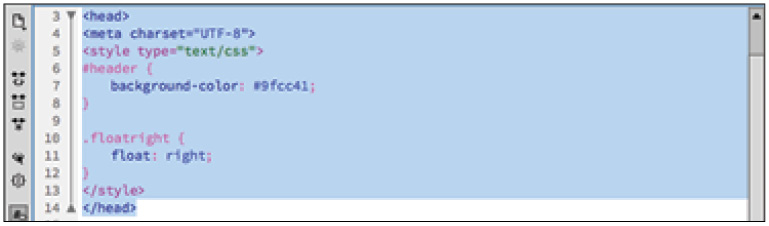
1 Make sure you are in the Code view by clicking the Code view button on the Document toolbar. Scroll to the top of the screen if necessary and click anywhere between lines 6 and 14, which is the <style>, tag that contains all your CSS.
2 Click the Collapse Full Tag button in the coding toolbar. You can also choose Edit > Code Collapse > Collapse Full Tag. The <style> tag is now collapsed. This feature is useful for reducing the amount of screen space that your code occupies on the screen.
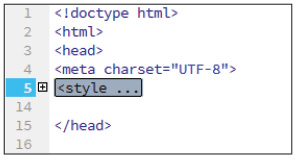
The Collapse Full Tag button collapses the relevant tag.
Click the plus sign (Windows) or arrow (Mac OS) on the left to expand the code again.
3 In the Coding toolbar click the Select Parent Tag button. This will select the code that is nesting your existing selection. In this case, the parent is the <head> tag, which is now selected.
 The Select Parent Tag button is a great alternative to selecting code by hand. Selecting by hand can often introduce mistakes; the Select Parent Tag will always be more reliable and faster.
4 In the Coding toolbar click the Collapse Selection button to collapse the <head> tag and all its content. You could have also chosen Edit > Code Collapse > Collapse Selection.
5 Click anywhere within your document and note that you could begin to work in your HTML and the <head> tag will always remain collapsed until you need to access it.
6 Double-click the head tag to expand it again.
Double-clicking collapsed code will expand it.
 To expand all code at once, you can also choose Edit > Code Collapse > Expand All. All your code fragments are now restored to their original view.
Validating your code
In addition to the many options available for formatting your code, you can also use Dreamweaver to find out if your code has tag or syntax errors. Dreamweaver can validate documents in many languages, including HTML, XHTML, PHP, ColdFusion Markup Language (CFML), Java Server Pages (JSP), Wireless Markup Language (WML), and XML. You can validate the current document or a selected tag.
Highlighting and correcting invalid code
You can set Dreamweaver to highlight invalid code (in yellow) in the Code view. When you select a highlighted section, the Property Inspector offers information on how to correct the error. Invalid code is not highlighted by default in Code view. In order to view the invalid code, you must enable this option in the View menu.
1 Select View > Code View Options and turn on the Highlight Invalid Code option by selecting it from the menu.
2 Two tags become highlighted in yellow the <b> and the <i> tags.
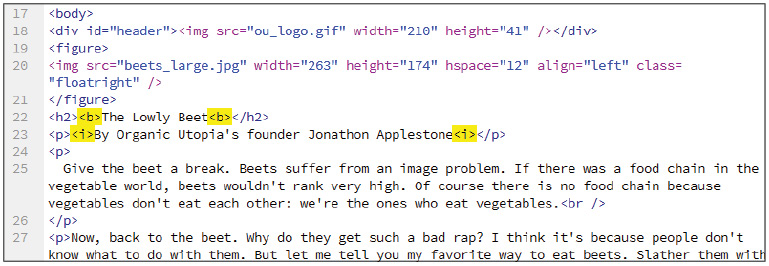
Invalid code is highlighted in yellow in the Code view.
3 Click once on the first highlighted (invalid) code for the <b> tag. In the Property Inspector, this has been identified as invalid markup because there is an unclosed or overlapping tag. (In this case, the author used two opening tags and no closing tags.)
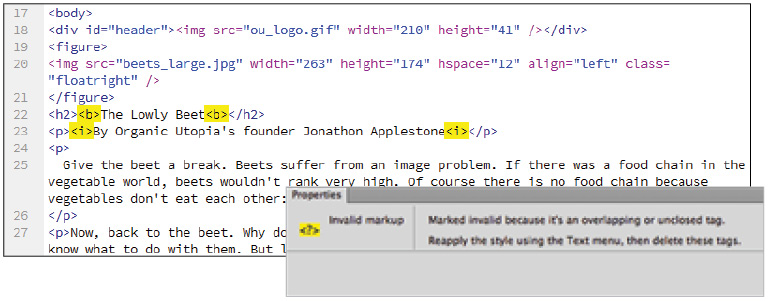
The Property Inspector identifies the invalid code and suggests how to correct it.
4 Correct the error by removing the incorrect markup. Individually select each of the four highlighted tags and then delete them. You can now style them correctly either in the Design view or the Code view; for now, you will leave them as is.
Running a report
Site reports allow you to scan your code using a set of criteria. Code which doesn’t fit the criteria is identified, allowing you to fix it. In this exercise, you’ll run all the reports for HTML.
1 Choose File > Save. Then choose Site > Reports and in the site Report window that appears, check all five boxes for HTML reports. Be sure that the Report on menu is set to Current Document. You can also run reports sitewide, for certain files only or an entire folder.
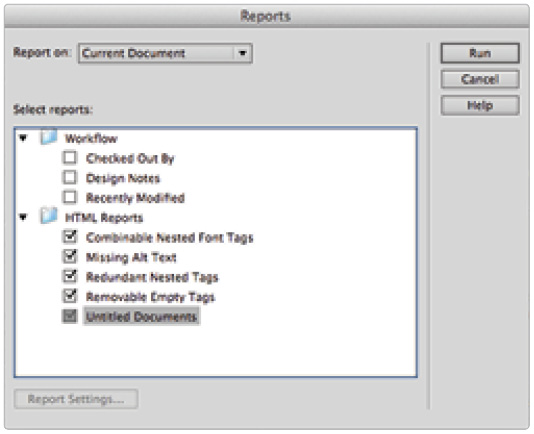
Check the HTML Reports you would like to run.
2 Click Run; the results of the Report appear in a new Site Reports panel below the Properties panel. In this case, there are three warnings; two warnings that the alt attribute is missing from your images and a third warning the file has no title tag. The alt attribute improves accessibility for images on your page for assistive devices, such as screenreaders. This is not technically required, but you should add them. The title tag is required for properly-formed HTML files and provides important information to the user in the title bar of their browser.
3 In the Site Reports panel, double-click the first warning. You will be sent directly to the code and the image will be selected. In the Properties panel, locate the Alt text field and type Logo and then click anywhere in the code window to commit the change.

Clicking a warning in the Site Reports panel sends you to this code.
4 Repeat this step and double-click the second warning. This will select your other image along with the opening Figure tag. Click the <img> element on line 20 in the Code view to select this image. Type Beets in the Alt text field, then click anywhere in the code window to commit the change.
5 Double-click the third warning. Place your cursor in the Title field at the top of the Dreamweaver workspace. Type The Lowly Beet and press Enter/Return to add the new title.
6 Choose File > Save to save your file. You should also close the entire group of the report tabs. You can do this by clicking the context menu at the top-right of the panel and choosing Close Tab Group.
Formatting code
Once you’ve validated your code, you can further change its look by specifying formatting preferences, such as indentation, line length, and the case of tag and attribute names. Many developers who code by hand have certain conventions or preferences for the way their code appears on the page or for the formatting used. Dreamweaver helps automate certain code formatting tasks that would otherwise be time-consuming and tedious.
1 Select Edit > Preferences (Windows) or Dreamweaver > Preferences (Mac OS).
2 When the Preferences dialog box appears, select Code Format from the Category list on the left. The Code Format preferences appear on the right.

Choose from the Code Format preferences to further change the look of your code.
The Code Format preferences allow you to change the way code is written in Dreamweaver. For example, when you press the Tab key, your cursor indents four spaces. Using this preference window, you could increase or decrease the amount of the indent.
3 In the Advanced Formatting section, click the CSS button; the CSS Source Format Options window appears. This window allows you to specify the way your CSS code is written.

The CSS Source Format Options window allows you to change the way CSS syntax is written.
Click the Cancel button to close this window, and then click the Close button to close the Preferences window.
Indenting
Dreamweaver also offers indentation options for you as you write and edit code in the Code view or the Code Inspector. You can change the indentation level of a selected block or line of code, shifting it to the right or left by one tab.
1 In the Code view, click in front of the div element for the header on line 19, and press the Tab key twice. Alternatively, you could select Edit > Indent Code or use the indent button on the Coding Toolbar.
2 To outdent the selected block of code, press Shift+Tab, or you can select Edit > Outdent Code.
 You can also select multiple elements and Indent and Outdent them.
3 Choose File > Save to save your work, then close the file by choosing File > Close.
Self study
Choose File > Save As and make a copy of the oldcode.html page. In the design view, experiment with the Quick Tag Editor and try some of the following: Convert the H2 tag of The Lowly Beet heading to an H3 tag. Use the Quick Tag editor to open the <img> tag for the beets and remove the align attribute as it is no longer needed.
In Code view make sure you understand the tools covered in the lesson by clicking elements and collapsing them. Try clicking within a paragraph and then clicking the Select Parent Tag button. Click it again to see what happens. Before you click a third time can you predict what will be selected?
Try formatting the readibility of your code by indenting the nested elements in the file. Selecting multiple elements at once and then clicking the indent (or outdent) buttons will allow you to shift entire blocks of code to the left or right.
Review
Questions
1 What is the purpose of working in the Code view in Dreamweaver?
2 When are the code formatting options that you specify in Code Format preferences applied?
3 What advantages are there in using the tag selector to select, edit, and remove HTML code?
4 How do you know where invalid code exists in your document and how to fix it?
Answers
1 The Code view is a hand-coding environment for writing and editing HTML, JavaScript, server-language code such as PHP, and any other kind of code.
2 The code formatting options that you specify in Code Format preferences are automatically applied only to new documents that you subsequently create with Dreamweaver. However, you can apply new formatting preferences to existing documents using the Apply Source Formatting command.
3 You can use the tag selector to select, edit, and remove tags without exiting the Design view. The tag selector, situated in the status bar at the bottom of the document window, displays a series of tags that correspond to elements on your page.
4 With the Highlight Invalid Code option selected, Dreamweaver highlights invalid code in yellow in both the Design and Code views. When you select a highlighted section, the Property Inspector offers information on how to correct the error.