
First, we need to create an app for a mobile device that can capture both images and gyroscope signals simultaneously. Interestingly, these aren't readily available (at least on Android).
Once we have a video and gyro stream, we'll look at how to use that data.
Create a standard Android application (I use Android Studio). We'll start by creating a blank application. The goal is to create a simple app that starts recording video and gyro signals on touching the screen. On touching again, the recording stops and a video file and a text file are saved on the phone. These two files can then be used by OpenCV to compute the best stabilization.
Note
Code in this section is available in the GitHub repository for this book: https://github.com/OpenCVBlueprints/OpenCVBlueprints/tree/master/chapter_7
We'll start by implementing a simple video recording utility. Create a new blank project in Android Studio (I named it GyroRecorder and named the activity Recorder). First, we start by adding permissions to our app. Open AndroidManifest.xml in your project and add these permissions:
<manifest ...>
<uses-permission android:name="android.permission.CAMERA" />
<uses-permission android:name="android.permission.WRITE_EXTERNAL_STORAGE" />
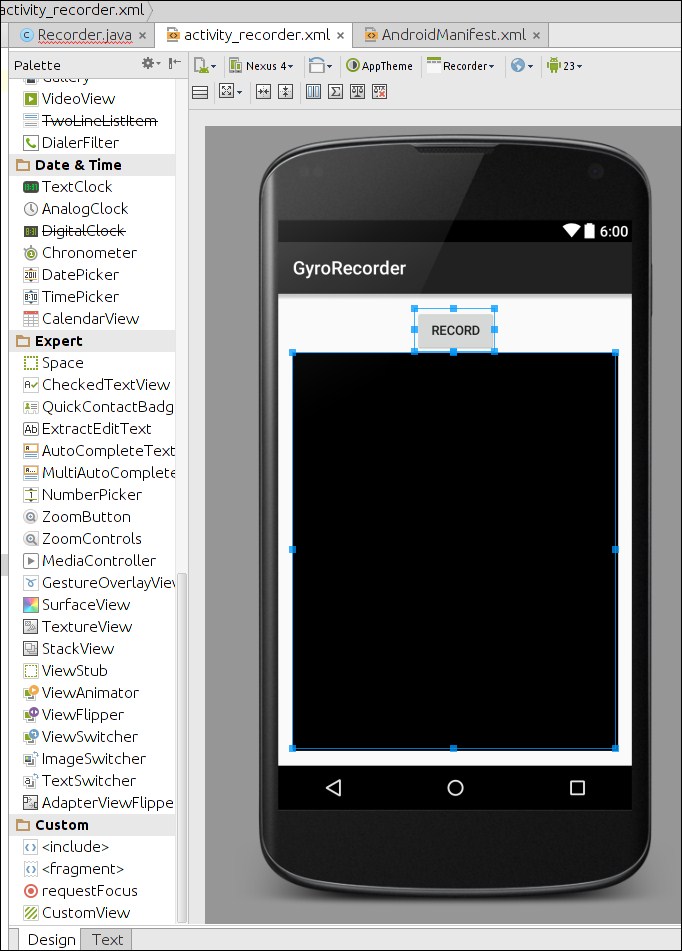
<application ...>This simply lets our app access the camera and write to storage (the gyro file and the video). Next, open the main activity visual editor and add a TextureView and a Button element inside a vertical LinearLayout.
Change the names of these elements to texturePreview and btnRecord respectively.
Now we start with some code. In the main activity class, add these lines:
public class Recorder extends AppCompatActivity {
    private TextureView mPreview;  // For displaying the live camera preview
    private Camera mCamera;        // Object to contact the camera hardware
    private MediaRecorder mMediaRecorder;    // Store the camera's image stream as a video

    private boolean isRecording = false; // Is video being recoded?
    private Button btnRecord;            // Button that triggers recording
These objects will be used to communicate with Android to indicate when to start recording.
Next, we need to initialize these objects. We do that in the onCreate event.
    protected void onCreate(Bundle savedInstanceState) {
        super.onCreate(savedInstanceState);
        setContentView(R.layout.activity_recorder);

        mPreview = (TextureView)findViewById(R.id.texturePreview);
        btnRecord = (Button)findViewById(R.id.btnRecord);

        btnRecord.setOnClickListener(new View.OnClickListener() {
            @Override
            public void onClick(View view) {
                onCaptureClick(view);
            }
        });
The onCreate method already contains some methods (super.onCreate, setContentView, and so on; we will add a few lines after that). Now, we need to define what onCaptureClick does.
    public void onCaptureClick(View view) {
        if (isRecording) {
            // Already recording? Release camera lock for others
            mMediaRecorder.stop();
            releaseMediaRecorder();
            mCamera.lock();

            isRecording = false;
            releaseCamera();
            mGyroFile.close();
            mGyroFile = null;
            btnRecord.setText("Start");
            mStartTime = -1;
        } else {
            // Not recording – launch new "thread" to initiate!
            new MediaPrepareTask().execute(null, null, null);
        }
    }
Note
If you want to explore strings.xml, refer to Chapter 2, Working with Camera Frames, of the PacktPub book Android Application Programming with OpenCV.
Here, we use the internal isRecording variable to notify the media recorder and camera to start saving the stream. We need to create a new thread because initializing the media recorder and camera usually takes a few milliseconds. This lag would be noticeable on the UI if we did it in the main thread.
Once we're done recording (the user taps the Stop button and we need to release the media recorder. This happens in the releaseMediaRecorder method:
    private void releaseMediaRecorder() {
        if(mMediaRecorder != null) {
            mMediaRecorder.reset();
            mMediaRecorder.release();
            mMediaRecorder = null;
            mCamera.lock();
        }
    }
Now, we look at creating a new thread. Create this class in your main activity class.
    class MediaPrepareTask extends AsyncTask<Void, Void, Boolean>{
        @Override
        protected Boolean doInBackground(Void... voids) {
            if(prepareVideoRecorder()) {
                mMediaRecorder.start();
                isRecording = true;
            } else {
                releaseMediaRecorder();
                return false;
            }
            return true;
        }

        @Override
        protected void onPostExecute(Boolean result) {
            if(!result) {
                Recorder.this.finish();
            }

            btnRecord.setText("Stop");
        }
    }
This creates an object of the type AsyncTask. Creating a new object of this class automatically creates a new thread and runs doInBackground in that thread. We want to prepare the media recorder in this thread. Preparing the media recorder involves identifying supported image sizes from the camera, finding the suitable height, setting the bitrate of the video and specifying the destination video file.
In your main activity class, create a new method called prepareVideoRecorder:
    @TargetApi(Build.VERSION_CODES.HONEYCOMB)
    private boolean prepareVideoRecorder() {
        mCamera = Camera.open();

        Camera.Parameters parameters = mCamera.getParameters();
        List<Camera.Size> mSupportedPreviewSizes = parameters.getSupportedPreviewSizes();
Now that we have supported video sizes, we need to find the optimal image size for the camera. This is done here:
        Camera.Size optimalSize = getOptimalPreviewSize(mSupportedPreviewSizes,mPreview.getWidth(),mPreview.getHeight());
        parameters.setPreviewSize(optimalSize.width,optimalSize.height);
With the optimal size in hand, we can now set up the camera recorder settings:
        CamcorderProfile profile = CamcorderProfile.get(CamcorderProfile.QUALITY_HIGH);
        profile.videoFrameWidth = optimalSize.width;
        profile.videoFrameHeight = optimalSize.height;
Now, we try to contact the camera hardware and set up these parameters:
        mCamera.setParameters(parameters);
        try {
               mCamera.setPreviewTexture(mPreview.getSurfaceTexture());
        } catch(IOException e) {
            Log.e(TAG,"Surface texture is unavailable or unsuitable" + e.getMessage());
            return false;
        }
Here, along with setting the camera parameters, we also specify a preview surface. The preview surface is used to display what the camera sees live.
With the camera setup done, we can now set up the media recorder:
    mMediaRecorder = new MediaRecorder();
        mCamera.unlock();
        mMediaRecorder.setCamera(mCamera);

        mMediaRecorder.setVideoSource(MediaRecorder.VideoSource.CAMERA);

        mMediaRecorder.setOutputFormat(profile.fileFormat);
        mMediaRecorder.setVideoFrameRate(profile.videoFrameRate);
        mMediaRecorder.setVideoSize(profile.videoFrameWidth,profile.videoFrameHeight);
        mMediaRecorder.setVideoEncodingBitRate(
                                    profile.videoBitRate);

        mMediaRecorder.setVideoEncoder(profile.videoCodec);
        mMediaRecorder.setOutputFile(getOutputMediaFile().toString());
This just sets whatever we already know about the video stream—we're simply passing information from what we've gathered into the media recorder.
With everything in place, we try to start the media recorder:
        try {
            mMediaRecorder.prepare();
        } catch (IllegalStateException e) {
            Log.d(TAG, "IllegalStateException preparing MediaRecorder: " + e.getMessage());
            releaseMediaRecorder();
            return false;
        } catch (IOException e) {
            Log.d(TAG, "IOException preparing MediaRecorder: " + e.getMessage());
            releaseMediaRecorder();
            return false;
        }
        return true;
    }
And that's the end of the prepareVideoRecorder method. We've referenced a bunch of variables and functions that do not exist yet, so we'll define some of them now.
The first is getOptimalPreviewSize. Define this method in your activity's class:
    private Camera.Size getOptimalPreviewSize(List<Camera.Size> sizes, int w, int h) {
        final double ASPECT_TOLERANCE = 0.1;
        double targetRatio = (double)w / h;

        if(sizes == null) {
            return null;
        }

        Camera.Size optimalSize = null;

        double minDiff = Double.MAX_VALUE;

        int targetHeight = h;

        for (Camera.Size size : sizes) {
            double ratio = (double)size.width / size.height;
            double diff = Math.abs(ratio - targetRatio);

            if(Math.abs(ratio - targetRatio) > ASPECT_TOLERANCE)
                continue;

            if(Math.abs(size.height - targetHeight) < minDiff) {
                optimalSize = size;
                minDiff = Math.abs(size.height - targetHeight);
            }
        }

        if(optimalSize == null) {
            minDiff = Double.MAX_VALUE;
            for(Camera.Size size : sizes) {
                if(Math.abs(size.height-targetHeight) < minDiff) {
                    optimalSize = size;
                    minDiff = Math.abs(size.height-targetHeight);
                }
            }
        }

        return optimalSize;
    }
This function simply tries to match all possible image sizes against an expected aspect ratio. If it cannot find a close match, it returns the closest match (based on the expected height).
The second is getOutputMediaFile. This function uses the Android API to find an acceptable location to store our videos. Define this method in the main activity class as well:
    private File getOutputMediaFile() {
        if(!Environment.getExternalStorageState().equalsIgnoreCase(Environment.MEDIA_MOUNTED)) {
            return null;
        }

        File mediaStorageDir = new File(Environment.getExternalStoragePublicDirectory(Environment.DIRECTORY_PICTURES), "Recorder");

        if(!mediaStorageDir.exists()) {
            if(!mediaStorageDir.mkdirs()) {
                Log.d("Recorder", "Failed to create directory");
                return null;
            }
        }

        String timeStamp = new SimpleDateFormat("yyyyMMdd_HHmmss").format(new Date());
        File mediaFile;
        mediaFile = new File(mediaStorageDir.getPath() + File.separator + "VID_" + timeStamp + ".mp4");

        return mediaFile;
    }
It finds the media storage location for pictures and appends a timestamp to the filename.
Now we have almost everything to start recording videos. Two more method definitions and we'll have a working video recorder.
    private void releaseCamera() {
        if(mCamera != null) {
            mCamera.release();
            mCamera = null;
        }
    }
    @Override
    protected void onPause() {
        super.onPause();

        releaseMediaRecorder();
        releaseCamera();
    }
The onPause method is called whenever the user switches to another app. It's being a good citizen to release hardware dependencies when you're not using them.
In the previous section, we only looked at recording video. For this project, we also need to record gyroscope signals. With Android, this is accomplished by using a sensor event listener. We'll modify the main activity class for this. Add this implements clause:
public class Recorder extends Activity implements SensorEventListener {
    private TextureView mPreview;
    private Camera mCamera;
    ...
Now, we need to add a few new objects to our class:
    ...
    private Button btnRecord;

    private SensorManager mSensorManager;
    private Sensor mGyro;
    private PrintStream mGyroFile;
    private long mStartTime = -1;

    private static String TAG = "GyroRecorder";

    @Override
    protected void onCreate(Bundle savedInstanceState) {
    ....
The SensorManager object manages all sensors on the hardware. We're only interested in the gyroscope, so we have a Sensor object for it. PrintStream writes a text file with the gyroscope signals. We now need to initialize these objects. We do that in the onCreate method. Modify the method so that it looks like this:
                onCaptureClick(view);
            }
        });

        mSensorManager = (SensorManager)getSystemService(Context.SENSOR_SERVICE);
        mGyro = mSensorManager.getDefaultSensor(Sensor.TYPE_GYROSCOPE);
        mSensorManager.registerListener(this, mGyro, SensorManager.SENSOR_DELAY_FASTEST);
    }
Here, we're fetching the gyroscope sensor and registering that this class should receive events (registerListener). We're also mentioning the frequency we want data to flow in.
Next, we initialize the PrintStream in the prepareVideoRecorder method:
    private boolean prepareVideoRecorder() {
        mCamera = Camera.open();
        ...
        mMediaRecorder.setOutputFile(getOutputMediaFile().toString());

        try {
            mGyroFile = new PrintStream(getOutputGyroFile());
            mGyroFile.append("gyro
");
        } catch(IOException e) {
            Log.d(TAG, "Unable to create acquisition file");
            return false;
        }

        try {
            mMediaRecorder.prepare();
        ...
This tries to open a new stream to a text file. We fetch the text file name using:
    private File getOutputGyroFile() {
        if(!Environment.getExternalStorageState().equalsIgnoreCase(Environment.MEDIA_MOUNTED)) {
            return null;
        }

        File gyroStorageDir = new File(Environment.getExternalStoragePublicDirectory(Environment.DIRECTORY_PICTURES), "Recorder");

        if(!gyroStorageDir.exists()) {
            if(!gyroStorageDir.mkdirs()) {
                Log.d("Recorder", "Failed to create directory");
                return null;
            }
        }

        String timeStamp = new SimpleDateFormat("yyyyMMdd_HHmmss").format(new Date());
        File gyroFile;
        gyroFile = new File(gyroStorageDir.getPath() + File.separator + "VID_" + timeStamp + "gyro.csv");

        return gyroFile;
    }
This is almost the same code as getOutputMediaFile, except that it returns a .csv file (instead of an .mp4) in the same directory.
One last thing and we'll be recording gyroscope signals as well. Add this method to the main activity class:
    @Override
    public void onAccuracyChanged(Sensor sensor, int accuracy) {
        // Empty on purpose
        // Required because we implement SensorEventListener
    }

    @Override
    public void onSensorChanged(SensorEvent sensorEvent) {
        if(isRecording) {
            if(mStartTime == -1) {
                mStartTime = sensorEvent.timestamp;
            }
            mGyroFile.append(sensorEvent.values[0] + "," +
                             sensorEvent.values[1] + "," +
                             sensorEvent.values[2] + "," +
                             (sensorEvent.timestamp-mStartTime) + "
");
        }
    }
The idea is to store values returned by the sensor into the file as soon as possible.