1
Introduction to Neo4j and Cypher
Neo4j is the world’s leading graph database. Its architecture is optimized to store, retrieve, and traverse graphs as nodes and relationships. It takes a property graph approach, which is beneficial for fast traversals and operations.
Neo4j uses Cypher as its query language, which makes it easy to represent traversals. Cypher is a declarative language for describing visual patterns in graphs using ASCII-art-like syntax. This makes it easy to read and comprehend how the data is connected as nodes and relationships in graphs.
In this chapter, we will cover the following topics:
- Introducing Neo4j and graph database concepts
- Installing the Neo4j Desktop
- A visual tour of Neo4j Desktop
- Using Neo4j Desktop
- Working with local DBMSs
If you are already familiar with these basic concepts and are comfortable using Neo4j Desktop and Browser, you can skip this chapter and move on to the next ones.
Technical requirements
You need a Windows, Mac, or Linux machine to be able to download and install Neo4j Desktop. Neo4j Desktop comes pre-packaged with all the required software dependencies.
Introducing Neo4j and graph database concepts
In this section, we will take a look at how data is stored as a graph in Neo4j. We will first introduce what a graph is, what a graph consists of, and how we can query graphs.
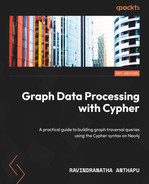
Neo4j uses a property graph data model to store the data. The following diagram shows a sample graph created in Neo4j:
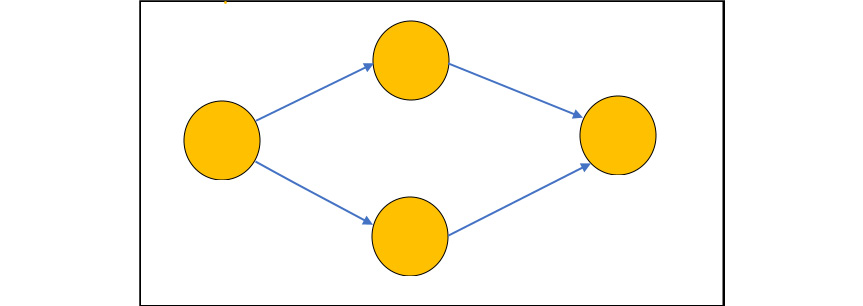
Figure 1.1 – Sample graph
Neo4j property graphs can consist of the following features:
- Nodes, which describe the entities of a domain.
- Nodes can have zero or more labels, but a node with no labels is not a normal occurrence. A node with multiple labels represents multiple facets that the node is part of. For example, a node that has labels such as Employee and Manager means this node is an employee who is also a manager.
- A relationship is a connection between two nodes.
- Relationships always have a direction, which is represented using an arrow symbol. The node at the starting point of the arrow is called the start node and the node at the end is called the target node.
- Relationships should have a type, which describes the relationship between the two nodes.
- Both nodes and relationships can have properties, which are key-value pairs.
Let’s take a look at what nodes represent in a graph.
Understanding nodes in graphs
A node is used to represent an entity in the data domain. A sample node in an HR data domain might be as shown in the following figure:

Figure 1.2 – A node in a graph
This node represents a person in an HR data domain. It has two labels. A label can be thought of as something that describes what this node data represents. Here, the labels are Employee and Manager. This can be interpreted as the node representing an employee who is also a manager, with the firstName, lastName, and joinDate properties.
Let’s take a look at what relationships represent in a graph.
Understanding relationships in graphs
A relationship describes how a source node and a target node are related. It is possible for a node to have a relationship with itself.
A relationship has the following aspects:
- It joins a source node and a target node, symbolizing the relationship between these nodes.
- It has a direction, which can be either incoming or outgoing. It represents the relationship direction of the nodes it is connecting.
- It has a type, which represents the nature of the connection between the nodes.
- It can have properties (key-value pairs), which further describe the relationship.
The following diagram represents relationships between employee nodes in HR data:

Figure 1.3 – Relationships between employee nodes
Figure 1.3 represents an employee named John Doe who reports to a manager named Tom Riddle. The REPORTS_TO string is the type of relationship between the two nodes. The direction of the relationship shows the direction of reporting structure. A relationship can also have properties that can further quantify the type of relationship between the two nodes.
Cypher
Nodes typically represent entities, such as concepts, events, places, and so on. Relationships connect the nodes that represent the context of how those two nodes are related. They can be considered as building blocks of the graph. The real strength of a property graph lies in its simplicity when it comes to representing and traversing patterns in graphs in an efficient manner.
Cypher is a query language based on graph traversal descriptions. These patterns are used to match the desired graph paths. When the matching pattern has been found, it can be used for further processing.
A simple pattern in Cypher is shown as follows:
(p:Person {name: "Tom"})–[:LIVES_IN]->
       (city:City {name: "Edison"})–[:PART_OF]->
       (country:Country {name: "United States"} )
The pattern here is self-explanatory and human-readable. A person named Tom lives in a city named Edison, which is a part of the country named the United States. You can see here that nouns represent the nodes and verbs represent the relationships.
We will take a deeper look at Cypher syntax in the coming chapters.
Installing Neo4j Desktop
Neo4j Desktop is a client application that makes it easy for developers to quickly start working with Neo4j databases. This makes it easier to set up and play with Neo4j databases, along with becoming familiar with other tools for developers. Neo4j Desktop allows the user to create multiple servers as needed and work with them in a seamless manner. This makes it easier to update the configuration of DataBase Management Systems (DBMSs), manage plugins, view the logs, backup and restore data, and upgrade the existing DBMS instances.
Downloading Neo4j Desktop
Neo4j Desktop can be downloaded from the Neo4j website, https://neo4j.com/download/.
The system requirements to install the Neo4j desktop are shown in the following table:
|
Software requirements: | |
|
macOS |
10.10 (Yosemite) |
|
Ubuntu |
12.04+ |
|
Fedora |
21 |
|
Debian |
8 |
|
Windows |
8.1+, with PowerShell 5.1+ |
Figure 1.4 – System requirements for Neo4j Desktop
Neo4j comes bundled with Java 17, Java 11, and Java 8, along with Neo4j Browser and the Bloom visualization plugin.
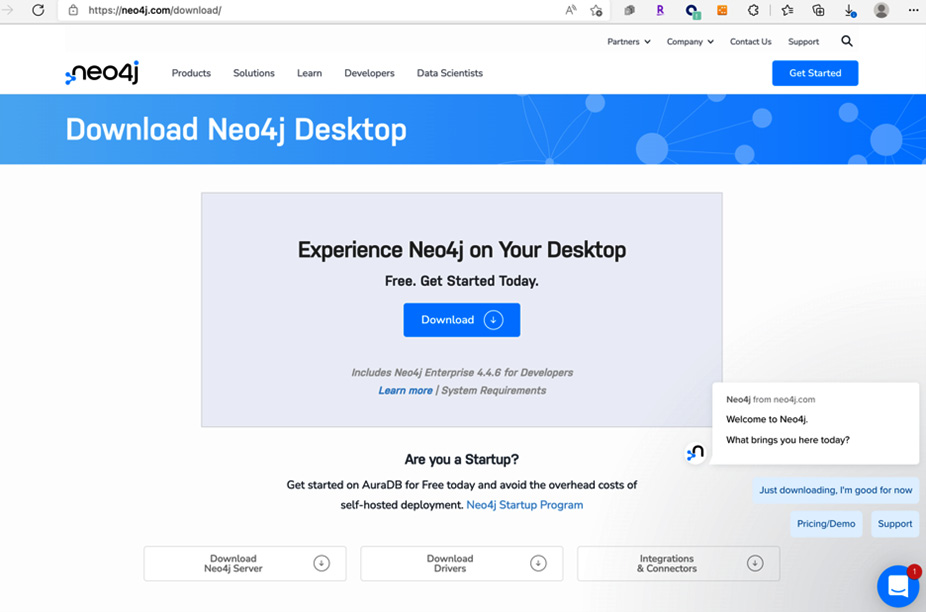
Figure 1.5 – Neo4j Desktop download
Next, follow the steps to download Neo4j Desktop:
- Click on the Download Desktop button to register and download Neo4j Desktop. This will take you to the registration screen.
Figure 1.6 – User registration screen
- Fill out the form with your details. You will need to register with an email to download. You will receive an activation key once registration is complete, as shown in the following figure. This activation key will also be emailed to the email address you have provided.

Figure 1.7 – Neo4j Desktop Activation Key
Now that we have downloaded the Neo4j Desktop binary and acquired the activation key, let us continue with installation.
The installation steps are as follows:
- Double-click on the downloaded file to start the installation.
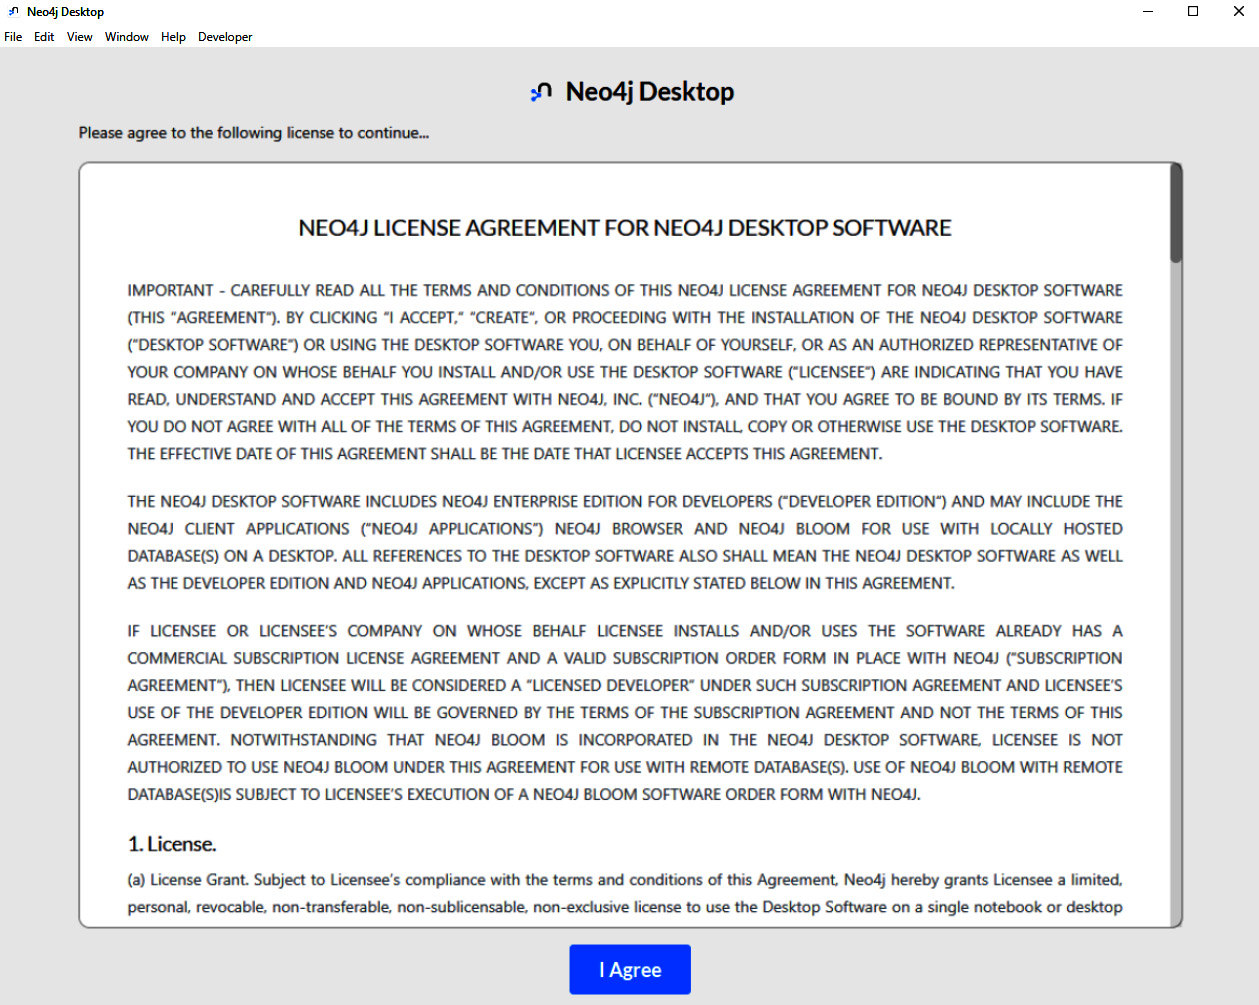
Figure 1.8 – End user license agreement
- Accept the terms and conditions by clicking on the I Agree button. You are only asked to do this the first time Neo4j Desktop is installed.
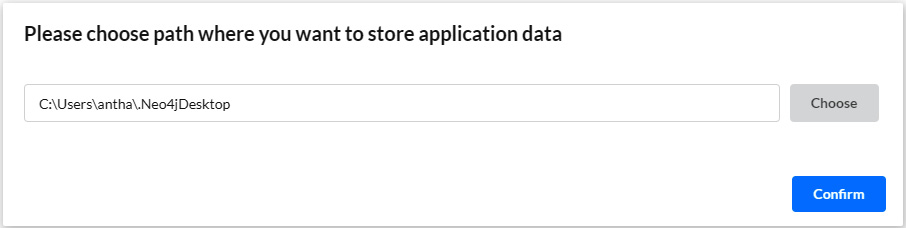
Figure 1.9 – Selecting an installation location
- Select the installation location and click Confirm.
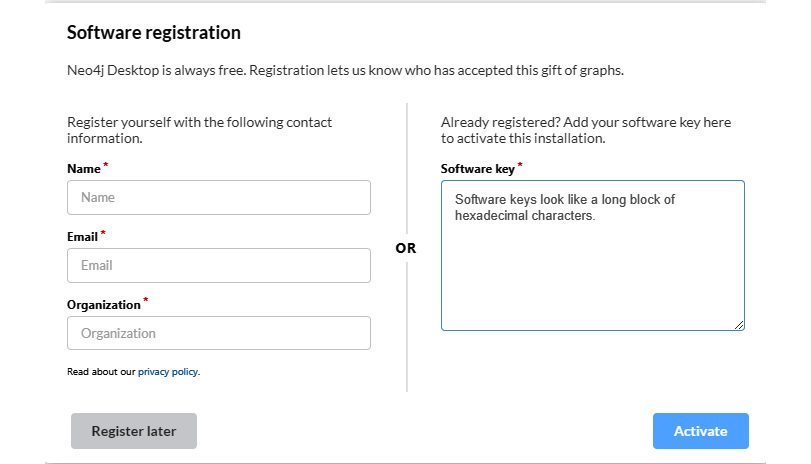
Figure 1.10 – Activating Desktop with a software key
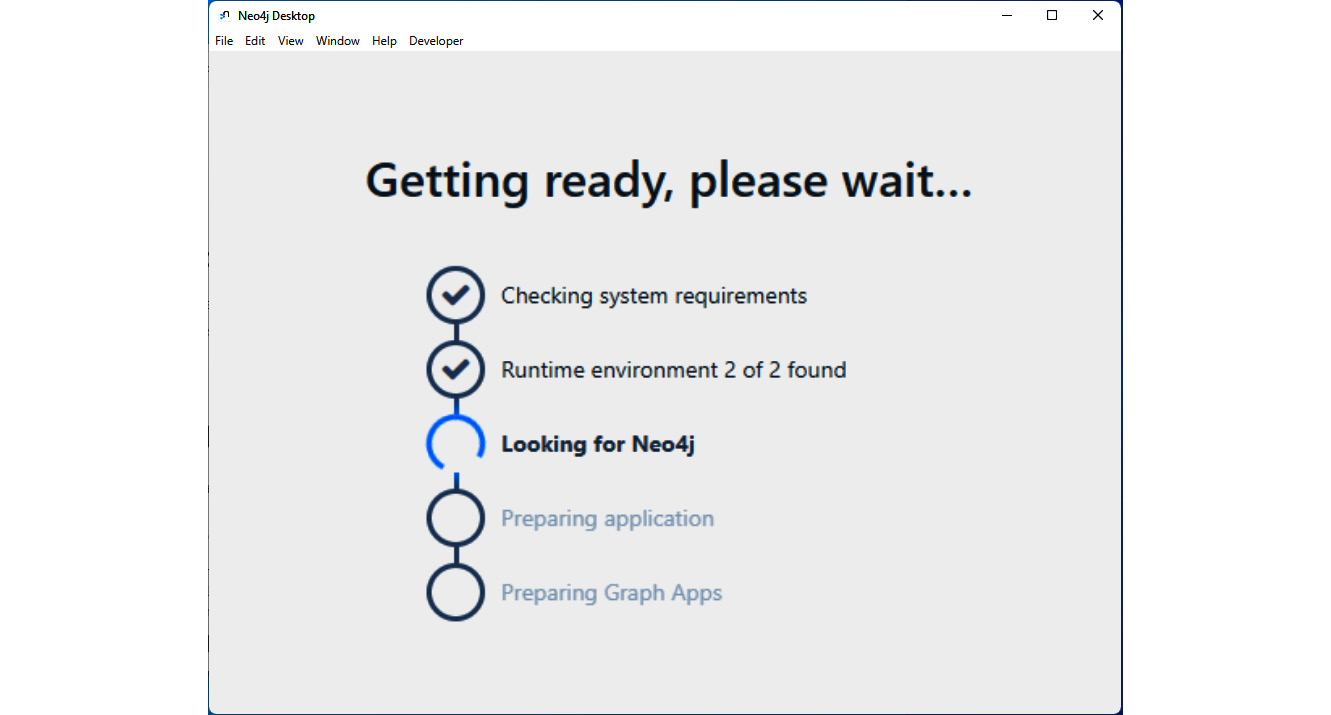
Figure 1.11 – Installation progress
Neo4j Desktop will continue setting up a first-time environment and creates a starter database when installation is complete. Neo4j Desktop is now ready for use.
A visual tour of Neo4j Desktop
Let’s have a visual tour of the Neo4j Desktop. The following screenshot shows the screen after Neo4j Desktop has launched successfully. The arrows and text point to various sections of the Desktop UI. We will explore each of those sections shortly.

Figure 1.12 – Neo4j Desktop start screen
Let’s move on to the Projects menu next.
Projects menu
A project in Neo4j Desktop is a representation of a development folder. You can create local database instances, known as DBMSs, or connect to remote DBMSs, and add files within your project. This allows you to manage multiple projects, and it is easy to move databases and files between different projects using the drag and drop method. At any given point in time, you can have only one active local DBMS or remote connection.
DBMSs menu
A DBMS is a Neo4j server instance that contains a minimum of the system database and a default database. When a DBMS is created, a default database named Neo4j is made. This can be renamed, or a new database can be created.
This screenshot shows all the versions of Neo4j servers that are available to create instances using Neo4j Desktop, along with how many instances of each version exist.
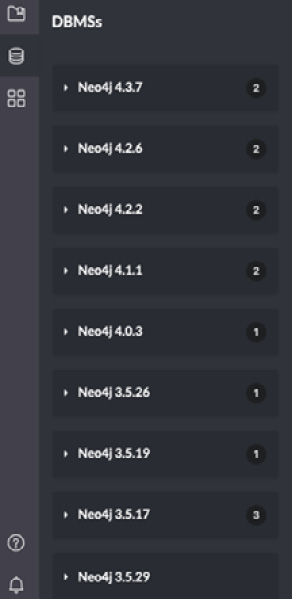
Figure 1.13 – DBMSs menu
Neo4j Desktop includes a free Neo4j Enterprise license for developers to explore all the enterprise capabilities, such as multiple databases, role-based access controls, and so on.
Graph applications
When you click on the graph applications icon in Neo4j Desktop, it will show a list of the graph applications installed.
The following figure shows the graph applications that are available in Neo4j Desktop:

Figure 1.14 – Graph applications
Neo4j Desktop comes with the Neo4j Browser and Bloom applications pre-packaged to help you interact with graphs.
When you click on Graph Apps Gallery, it will take you to the site to explore and install other graph apps.
Help menu
When the help menu is clicked, Neo4j Desktop shows all the forms of help available, as shown in the following screenshot:

Figure 1.15 – Help menu
This section contains the links for Neo4j documentation and resources for developers.
Settings menu
When you click on the settings menu icon, Neo4j Desktop shows the menu that controls Neo4j Desktop operations. The following figure shows which aspects of Neo4j Desktop users can control and change.
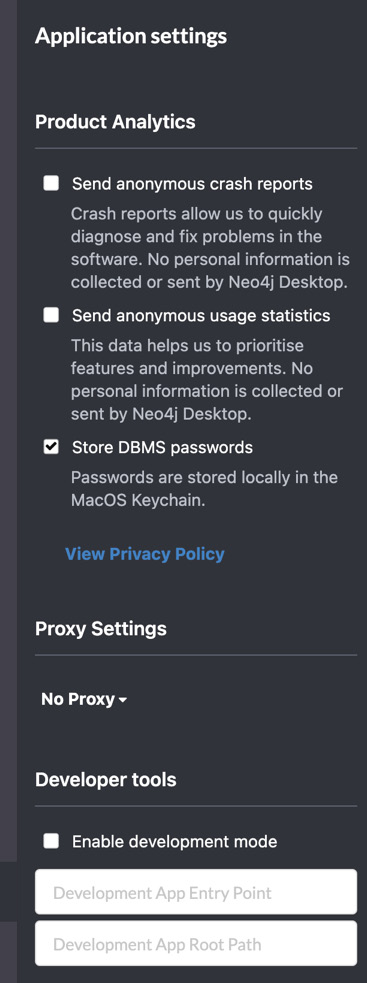
Figure 1.16 – Application settings menu
Users can control whether to send crash reports and usage statistics to Neo4j. If Store DBMS passwords is checked, then the user ID and passwords are stored securely, so that you don’t need to enter them every time the Neo4j server is restarted.
In some enterprise environments, you might have to configure a proxy for Neo4j Desktop to be able to go to the internet to download updates and install graph apps and the latest Neo4j server software.
Now that we have talked about the UI control elements of Neo4j Desktop, the next section will discuss using these elements to create a Neo4j instance and manage it.
Using Neo4j Desktop
In this section, we will take a look at how we can use Neo4j Desktop to create a Neo4j instance and manage it.
Creating a local DBMS
Let’s go through the steps to create a local DBMS:
- To create a local DBMS, a project should be created and selected.

Figure 1.17 – Creating a local DBMS
- Click on the Add button and select Local DBMS to create a local DBMS instance.

Figure 1.18 – Select the Neo4j version
- You can change the name from Graph DBMS to anything that makes sense. You will need to provide a password. This would be the password for the Neo4j admin user.
- In the Version dropdown, Neo4j Desktop shows the latest downloaded version as the selected one and, if there are newer versions, they are also shown in the dropdown with a download icon next to them. This means this version is not available locally and needs to be downloaded. If you would like to use any of those versions, then click on the download icon. This will download that version of the Neo4j software before creating the local DBMS instance.
- Once the required version is selected, click the Create button to create the local instance.
Next, we will take a look at how we can manage the instance we have created.
Managing a local DBMS instance
Once we have created the local database instance, we can then manage that instance. We can start/stop the instance, change the configuration, and add plugins. Here, we will take a look at how to manage the local Neo4j instance we created.
Reviewing DBMS details
Once the instance is created, an entry is shown in the selected project. The following screenshot shows the instance details:

Figure 1.19 – Local instance details
When you click on the name of the instance, it shows the details on the right-hand side. The description box can be used to add details about this DBMS instance. If you need to change the password, it can be done under the Reset DBMS password option.
Managing DBMS plugins
For this instance, we can add or remove plugins. To do this, click on the Plugins tab. It displays all the installed plugins and the available plugins to install. The following screenshot captures this aspect:
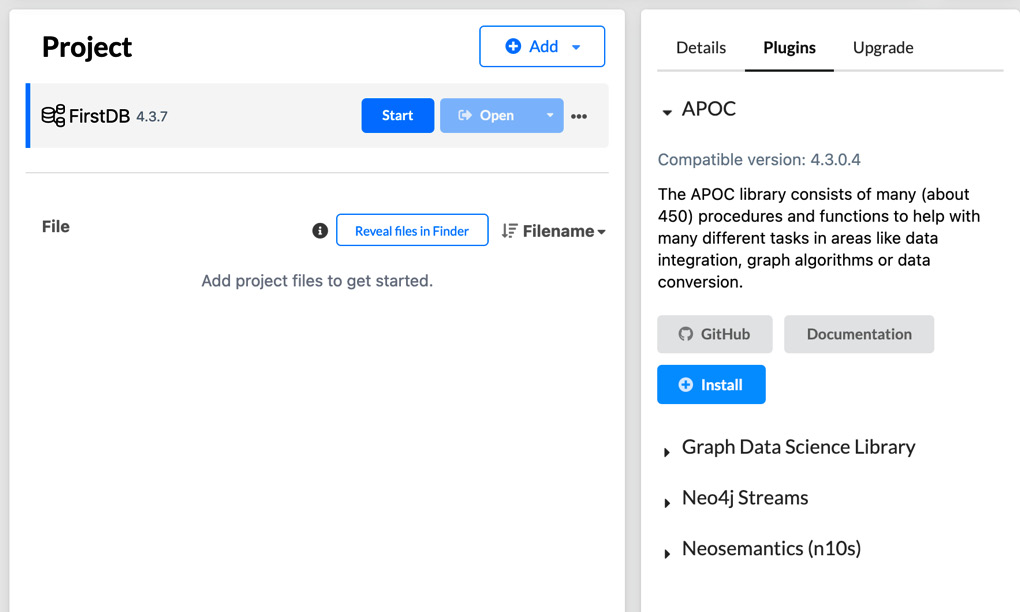
Figure 1.20 – Plugins installation
The list of the plugins available is dependent on the version of the Neo4j instance. When you click on the name of the plugin, it shows the details of that plugin and any related links. You can click on the Install button to install a plugin. Neo4j Desktop will install the plugin and make the required changes to the server configuration.
Upgrading the server
It is possible to upgrade the version of the instance we have created. When you click on the Upgrade tab, it shows the options available. The following screenshot captures this aspect:
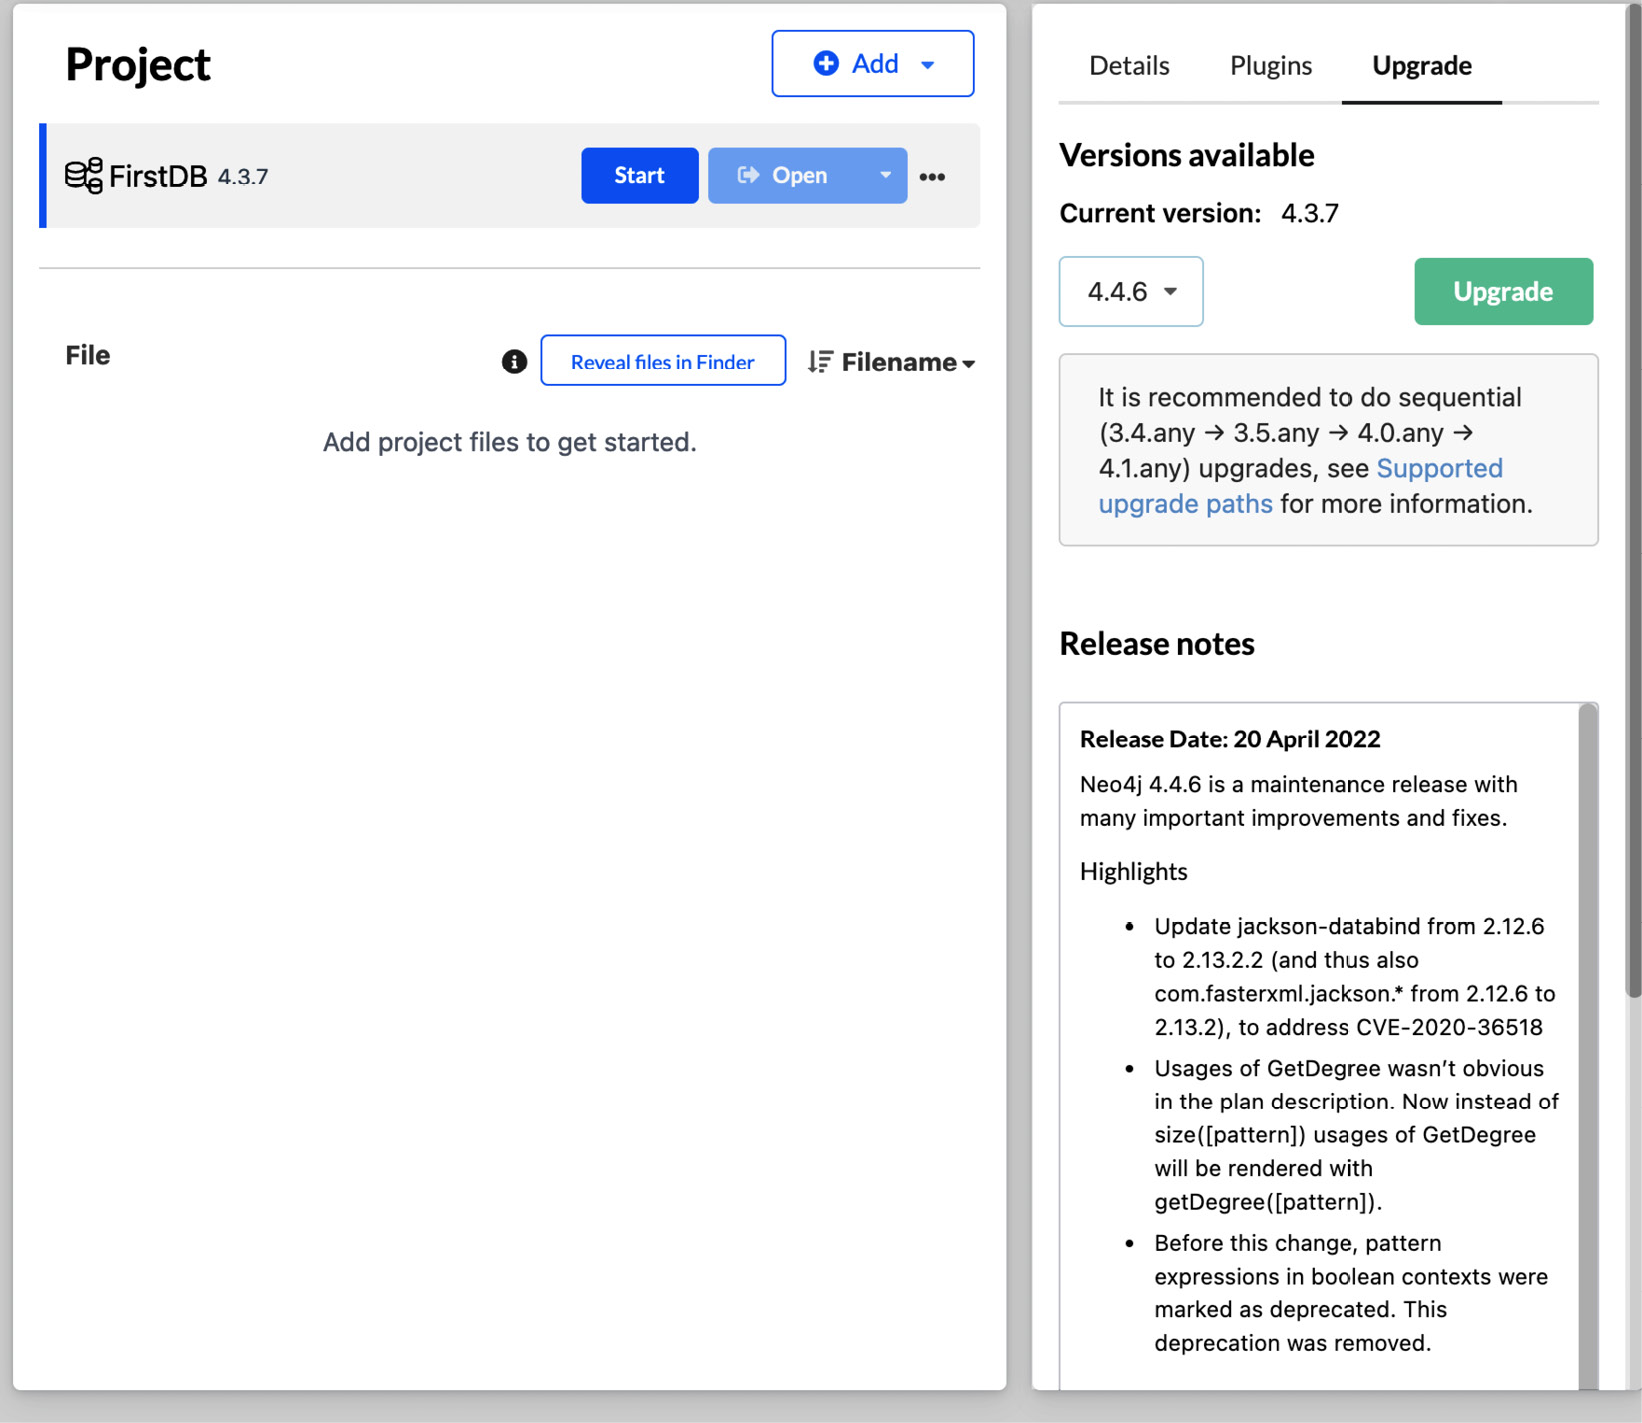
Figure 1.21 – Upgrade options
Here, you will find a dropdown of all possible versions of this instance that can be upgraded. When a version is selected, the release notes for that version are shown. By clicking the Upgrade button, you can upgrade the selected DBMS instance.
Working with a local DBMS
This section discusses how you can work with a local Database Management System (DBMS) instance. We can perform multiple operations on an instance. We can start a stopped instance and once an instance is started, we can launch the browser and work with the database instance.
Starting the instance
When an instance is selected in a project, it will show the buttons to start the instance. The following screenshot showcases this:
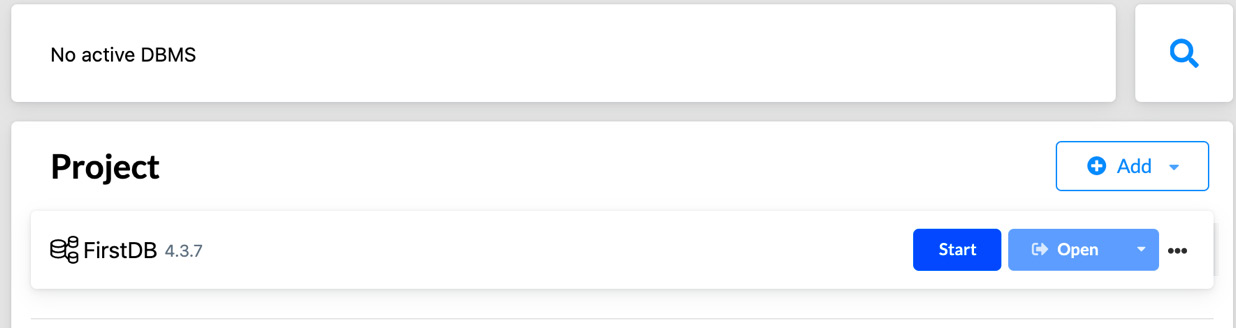
Figure 1.22 – Starting the instance
Click on the Start button to start the instance.
Opening the browser
When the instance is available to query, the Open button will be activated. The following screenshot demonstrates this:
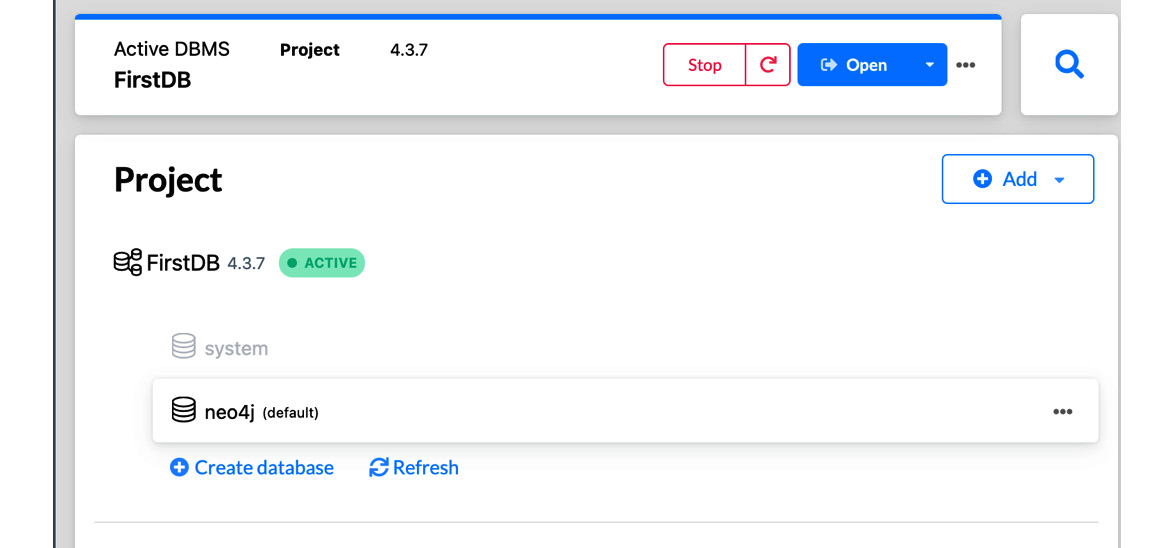
Figure 1.23 – Opening the browser
Click on the Open button to open the browser. If you need to create another database, you can use the Create Database button to create a new database on this instance. By default, a database named neo4j will be created.
Working with the browser’s UI
The browser looks as shown in the following screenshot. It can be used to query the database.
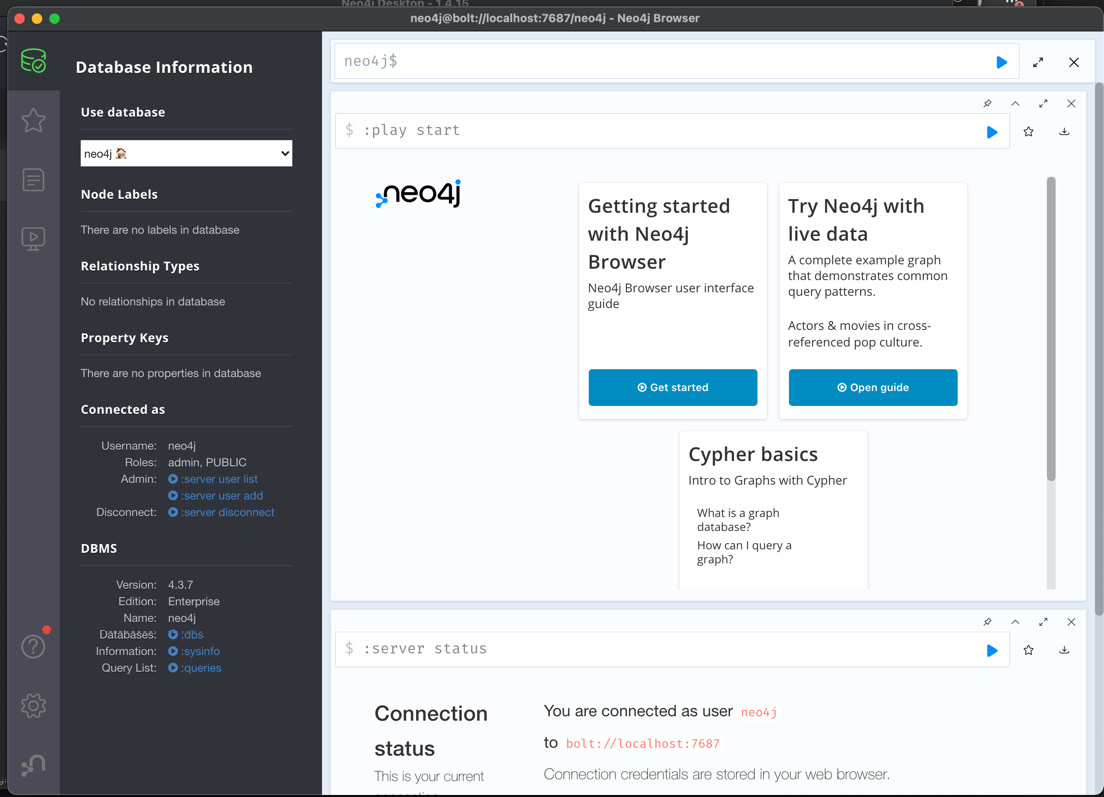
Figure 1.24 – Neo4j Browser
The Neo4j Browser interface is used to execute Cypher queries against a database:
- On the left side of the Neo4j Browser interface, you can see the database details. The dropdown shows the active database that is selected. It can be changed by clicking on the dropdown and selecting the required database.
- Below the dropdown, you can see the number of nodes, node labels, relationships, relationship types, and property types. You can click on the name of the node labels or relationship types to sample data.
- Below the database stats section, there are the current user details and user management shortcuts to create, update, or delete local users. It also gives a shortcut to disconnect from DBMS.
- The DBMS section shows the current DBMS version and shortcut links to get the DBMS details, such as a list of databases available, current queries being executed, and system information.
The query area is where Cypher queries are written. Click on the blue arrow to execute the query. The results will be shown below the query area.
Using Browser help
To get help with browser usage, you can enter :help in the query area. Neo4j Browser will show all the commands available with descriptions, as shown by the following figure:

Figure 1.25 – Browser help
If you scroll down, you will see links for various guides for sample graphs to play with. When you click on the link, you get a guided tour of content that the user can follow by clicking along the way. Here are some sample graph concepts and Cypher guides to illustrate how it works:

Figure 1.26 – Graph concepts
The graph concepts guide provides basic concepts for the user to review before working with Cypher. For new graph database users, this would be a very valuable guide to follow to review the basic concepts.
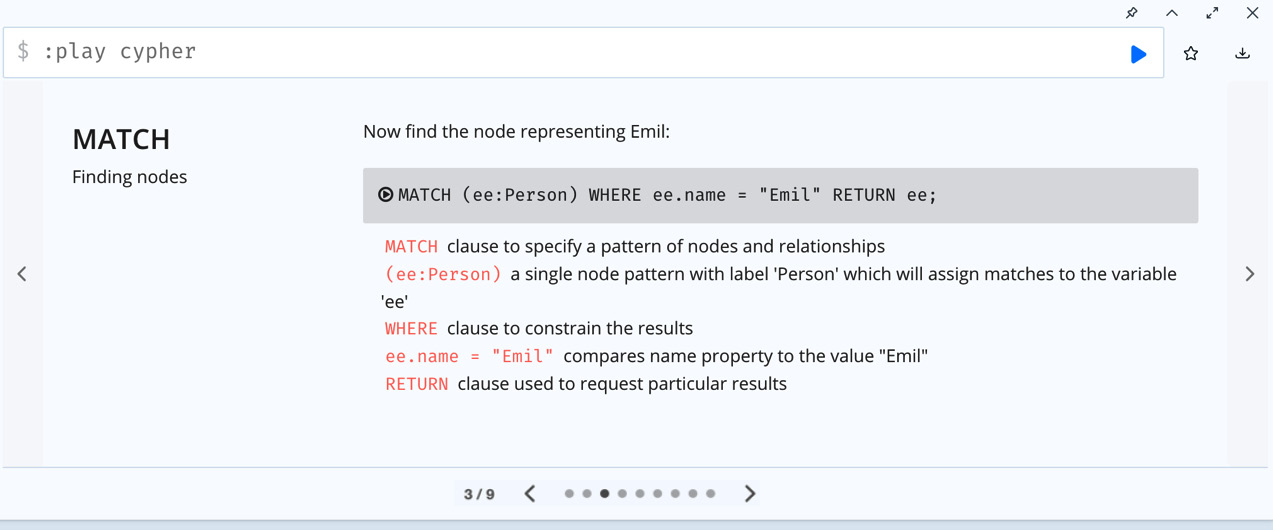
Figure 1.27 – Cypher help
The Cypher help guide introduces keywords and the basic usage of building queries using these keywords. For new users, this provides a good introduction to Cypher in a quick and clean fashion.
Next, we will take a look at the administrative aspect of the local instance.
Working with additional options to manage local DBMS
We will take a look at administrative and filesystem aspects in this section. When you click on the … icon, it shows a drop-down menu displaying the additional options available, as shown in the following screenshot:
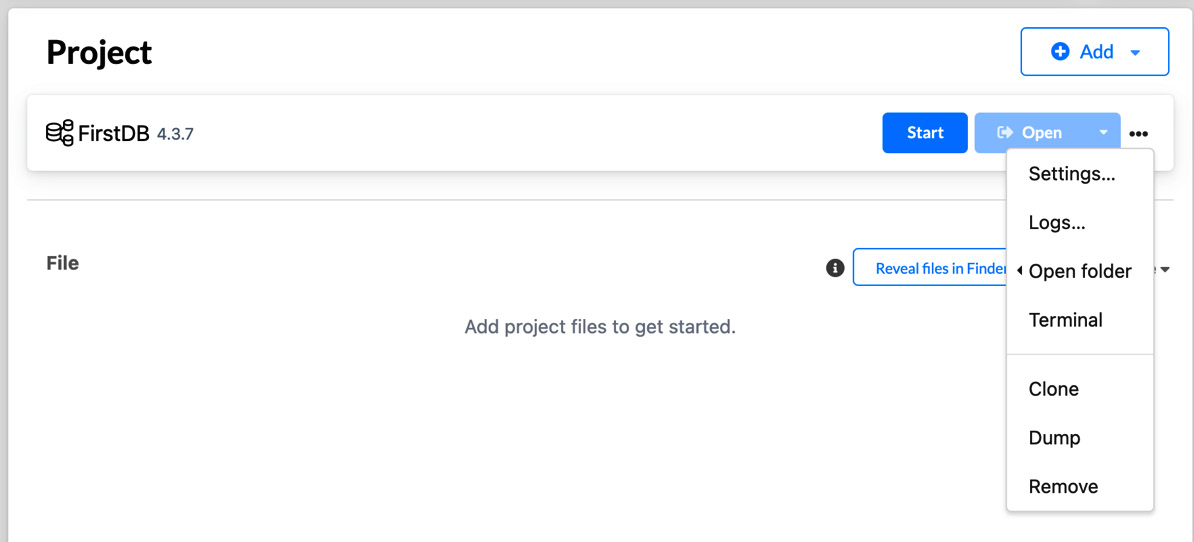
Figure 1.28 – Additional options to manage an instance
As you can see, it provides options to manage the settings, see the logs, look at the folder system where the instance is available, see the terminal, and so on.
Managing settings
When you click on Settings, it brings up the settings UI to view and modify the settings for this instance.
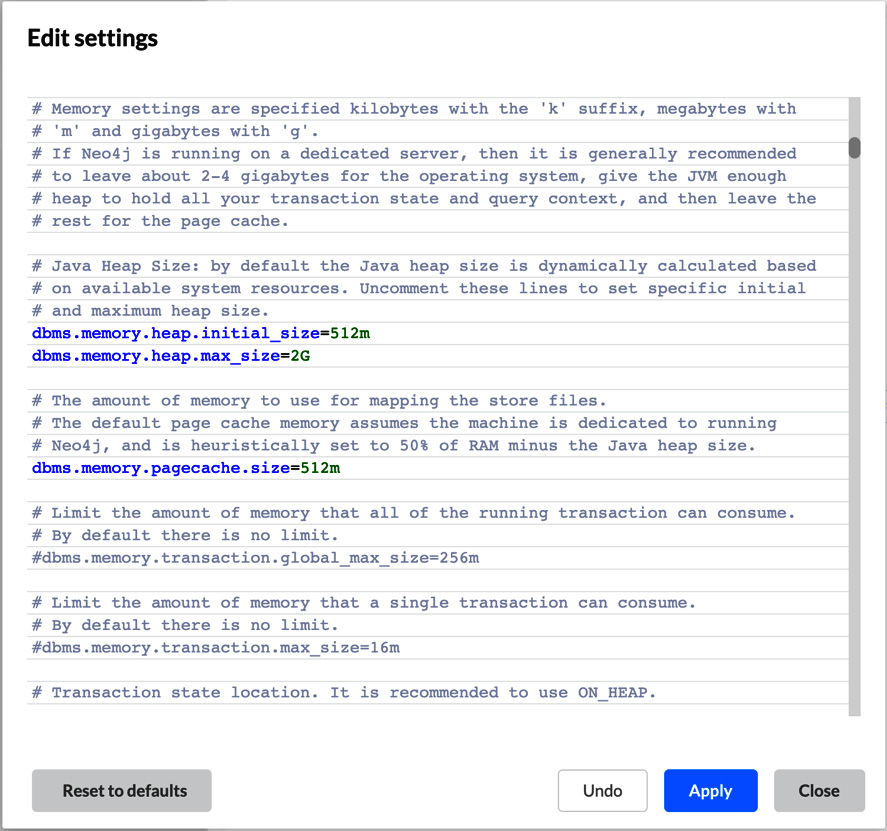
Figure 1.29 – Neo4j instance settings
When you modify the settings, the Apply button at the bottom will become activated and an Undo button will appear. When you click the Apply button, it will update the server configuration and restart the instance so that these configurations are applied. The Undo button will undo only the latest changes made. When you click on Reset to defaults, it will reset all the configuration values to the original defaults and restart the server.
Viewing logs
When you click on Logs, you will be faced with the system log window, as shown in the following screenshot:
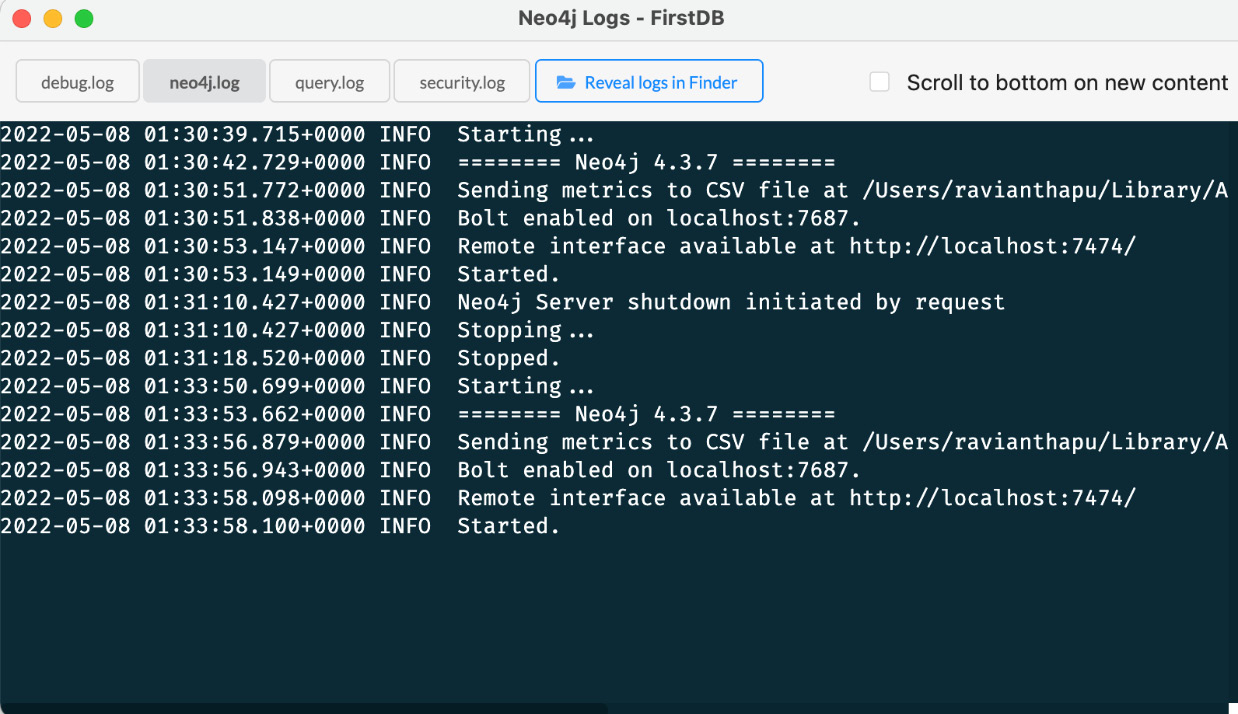
Figure 1.30 – Instance log
There are four different logs are provided by Neo4j, and they are as follows:
- By default, you get neo4j.log. This is the basic system log. You can click on the filenames at the top to see debug.log, query.log, or security.log.
- debug.log contains detailed information to help you troubleshoot the server.
- query.log contains the queries issued against the server.
- security.log contains the authentication-related logging details.
- When you click on Reveal logs in Finder, it opens up the finder window or file explorer window, so that you can use other text or log reader utilities to read the files.
Opening the Neo4j Desktop terminal
When you click Terminal menu item, you get a terminal or command-line window with the directory changed to the location of the DBMS instance.

Figure 1.31 – Local DBMS instance terminal window
You can do almost all the things that we’ve been using the UI to do in the terminal. You can edit a configuration, see logs, and start/stop an instance.
Opening the folder
When you click on Open Folder menu item, you’ll see a submenu:

Figure 1.32 – Local DBMS instance file explorer
Depending on which submenu is selected, you will get a finder or file explorer navigated to the root of the installation directory or any of the other sub-directories that are selected. The following screenshot shows the root directory file window:
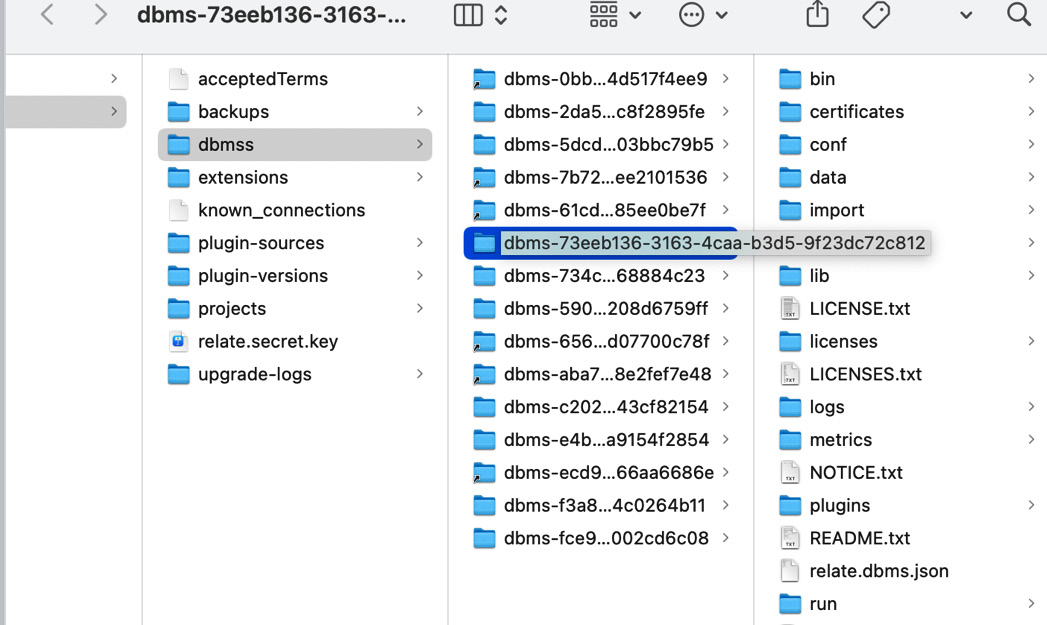
Figure 1.33 – Local DBMS instance root directory
When you select any of the sub-menu items, such as import, plugins ,logs, or configuration, it will navigate directly to the import, logs, plugins, or conf directory.
Summary
In this chapter, we have covered the process of downloading and installing Neo4j Desktop. We have explored how to activate it by registering with Neo4j, explored the UI in detail, and learned how to create projects and local databases, as well as how to manage a database by changing the configuration or adding/removing plugins. We also explored how to use Neo4j Browser self-help guides to review graph database concepts or to learn Cypher. Finally, we looked at database configuration and log exploration using the command line or file explorer.
We connected to a local instance using Neo4j Browser to start writing queries. With this setup, we should be able to start building Cypher queries to talk to a Neo4j database.
If you would like to learn more about Neo4j Desktop, Neo4j Browser, or available plugins, you can go to http://neo4j.com/docs to find more details.
In the next chapter, we will take a detailed look at Cypher fundamentals and keywords to understand how we can use Cypher to work with the instances we create.