
C H A P T E R 7
User Interaction and the HTML5 APIs
Included in the HTML5 specification is documentation on how HTML elements, as well as the wider web browser environment, can be accessed from a programmed script. This is a component of the specification that is interwoven throughout the specification. Each component that can be scripted is broken into application programming interfaces (APIs) that define how the script can interface with specific elements on the page and specific aspects of the web browser. Some of these APIs are included as part of HTML5, such as the History API for manipulating the browser's forward and back buttons programmatically, while others are part of associated technologies and are covered in separate (but interlinked) specifications to HTML5, such as the geolocation API—which provides web pages with geographic location–aware capabilities. What these APIs are built around is the idea that the page and its environment are represented by a series of objects, such as the geolocation object, which contains location data for the page. In the context of just the page's content, these objects form the means by which a web page's Document Object Model (DOM) may be traversed, as discussed in Chapter 1.
The goal of this chapter is to get you versed in how to explore and use the scripting capabilities defined in the HTML specification so you have the necessary tools to explore on your own beyond what can be shown in this chapter. As examples, we will look at using scripting to interact with the browser's history, as well as the video and canvas elements. Lastly, we'll also look at how to add drag-and-drop support to any element.
Using JavaScript in this chapter
JavaScript has been sprinkled throughout the chapters in this book, but in this chapter we will be working with it more formally, so you'll want to set up a testing environment for JavaScript code. As discussed in Chapter 2, JavaScript can be embedded using the script element, or it can be loaded from an external file, which is the preferable method. Moving it to its own file creates a clearer separation between the markup and scripting on your website.
We're going to create a bare-bones web page to use as a template for the examples in this chapter. Create a directory named jstemplate (on your desktop or wherever is convenient for you to access). You'll use this directory as a starting template for the examples in this chapter. Launch your favorite text editor, and create the following web page:
<!DOCTYPE html>

<html>

          <head>

                    <meta charset="utf-8" />

                    <title>HTML5 Apprentice</title>

                    <link rel="stylesheet" type="text/css" href="css/styles.css" />

                    <script type="text/javascript" src="js/script.js" defer></script>
          </head>

          <body>

                    <p>Content goes here!</p>

          </body>

</html>
Save this code as a file named index.html in the jstemplate directory you created. Create a second page for the JavaScript named script.js and place it in a directory called js inside the jstemplate directory.
Write the following JavaScript in script.js:
// init function runs when page has fully loaded

function init() {

           // code to run

}

window.onload = init;
This script will run the function init when the page has fully loaded.
Lastly, create an empty CSS style sheet (just an empty text file at this stage) named styles.css and place it in a directory called css inside the jstemplate directory.
Accessing DOM properties and methods
Chapter 1 provided an overview of the DOM, which describes the elements on a page as a connected tree-like structure (technically an acyclic connected graph), which can be used to gain programmatic access to the page's elements, attributes, and text. What was also mentioned is that the DOM is accessible through a document object, which is contained inside another object—the window object. What wasn't mentioned is that more abstract entities (besides the web page document) can be accessed through the window object. For example, there is programmatic access available to the browsing history, website URL location, screen dimensions, and so forth. Each of these entities is accessible through the window as an object in its own right.
So, what exactly are objects? Objects are merely a collection of properties and methods. What does that mean? Properties are a series of keys and values, like attributes on HTML elements. They are what an object has. For instance, the width of the screen is a property that holds a specific value (the screen width in pixels). Some properties are read-only, while others can have their values overwritten. Properties are also known as variables, depending on the context.
Methods describe what a particular object can do. For instance, using JavaScript to pop up an alert window is done through a method. Methods are also known as functions. They are self-contained blocks of code that will run only when called, like the function you saw in the template JavaScript code in the previous section.
For instance, the window object has a property called name that can be used to add an identifier to a particular web browser window.1 This property is not read-only, so it can be read and written to.
As far as methods go, the window object has a method (among many) called alert(), which you've likely seen in use. It pops up a dialog box with a message and an OK button. Using dot notation (described in Chapter 1), these could both be used like so:
__________
1This may be used in the target attribute of hyperlinks in order to open a linked resource in a specific windows
function init() {

         // sets the name of the window

         window.name = "MAIN";

         // shows the name of the window

         window.alert("The name of this window is set to: " + window.name);

}

window.onload = init;
The specific usage of this property and method are beside the point at this stage; what is important is the conceptual difference between properties and methods and the knowledge that JavaScript can access settings and behavior in the web browser beyond just the HTML elements on the page.
Logging to the console
Chapter 1 also mentioned the web developer tools available to major web browsers and the code console.log("message"). Let's look at these two topics closer. Among the web developer tools in each browser, there will be a means to access a JavaScript console where messages from JavaScript can be logged. In the major web browsers, these are found as shown here:
- Chrome: Select View
 Developer JavaScript Console.
 - Firefox: I recommend using the Console tab in Firebug.
- Internet Explorer (8 and above): There is Script tab in the Internet Explorer Developer Tools, accessible by selecting Tools Developer Tools.
- Opera: Select View Developer Tools Error Console. Opera also has a toggle in Opera Dragonfly for showing and hiding a console.
- Safari: Select Develop Show Error Console.
If you modify your template script to log a message, you should see it appear in the JavaScript console when loading the page. Figure 7-1 shows an example in Safari of running the following code:
function init() {

         console.log("message");    // log a message to the JavaScript console

}

window.onload = init;

Figure 7-1. Safari's error console showing logged JavaScript output.
![]() Note Another option for logging JavaScript output is Firebug Lite, a version of Firebug that can be used with Internet Explorer, Firefox, Opera, Safari, and Chrome. Download it here:
Note Another option for logging JavaScript output is Firebug Lite, a version of Firebug that can be used with Internet Explorer, Firefox, Opera, Safari, and Chrome. Download it here: http://getfirebug.com/firebuglite.
Although it is all well and good to log messages to the console, the real power of the console comes from logging parts of the DOM and inspecting the value and existence of objects, properties, and methods. For example, try changing the console message in the prior code snippet to the following, and reload the page:
…

console.log(window);    // log the window object to the JavaScript console.

…
This will produce (depending on the JavaScript console) a representation of the window object as a collapsible list of properties and methods, as shown in Figure 7-2.
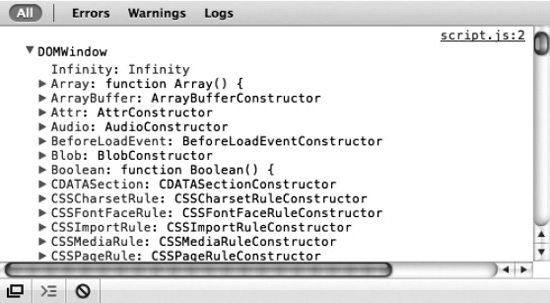
Figure 7-2. The window object as it appears logged in Safari's error console
Scrolling through this list, you will find interesting information about what you can manipulate from JavaScript. For example, you'll see the type of data you can work with from JavaScript, such as Arrays, Booleans, and so on. You'll also see a list of the HTML elements in the form of HTMLAnchorElement, HTMLImageElement, HTMLParagraphElement, and so forth. JavaScript is a prototype-oriented language, meaning it does not have classes (unlike Java or Adobe Flash's ActionScript) but instead utilizes "prototype" objects that provide a basis for other objects. These prototype objects can build on each other, creating a "prototype chain" that allows prototype objects to inherit properties and methods from other prototype objects. This process is analogous to the inheritance capabilities of classes in other object-oriented languages. The HTML element-like entries in the console output shown in Figure 7-2 are the prototype objects that define the properties and methods different HTML elements have when represented in the DOM. For instance, the stop() and play() methods defined for the video element that stop and play a video loaded in that element can be found through exploring the HTMLVideoElement object represented in the DOM (exploring this element, you'll discover it actually inherits these methods from HTMLMediaElement).
![]() Note When logging HTML elements that appear on the page (by referencing them by their ID, for instance), the error console will normally show the actual HTML code for the element, which will look like a snippet of HTML source code. This behavior doesn't help you discover the properties that a referenced HTML element has, so in cases like this, use the console method
Note When logging HTML elements that appear on the page (by referencing them by their ID, for instance), the error console will normally show the actual HTML code for the element, which will look like a snippet of HTML source code. This behavior doesn't help you discover the properties that a referenced HTML element has, so in cases like this, use the console method console.dir() instead of console.log(). This method will show you the properties of a particular object sent to it.
Other objects of note in the window object include the following:
- The
navigatorobject contains information about the web browser being used such as the plug-ins installed and vendor and version information. Also contained in this object is geolocation information. - The
screenobject contains information about the dimensions, color depth, and related information about the display being used to view the current web page. - The
historyobject contains methods for accessing the browser's forward and back buttons and related functionality programmatically. - The
locationobject contains information about the web page URL address. The website can be redirected by setting thehrefproperty in this object, such aslocation.href = "http://www.apress.com";. - The
documentobject contains the DOM representation of all the HTML elements on the web page currently being viewed.
Some information will be buried; for instance, you may not immediately find the alert() method that was used earlier. For this we need to look at the prototype used to create the window object, which is accessible through the following:
…

console.log(window.constructor.prototype);    // log the window object's prototype.

…
This will reveal the methods defined directly on the window object, as shown in Figure 7-3.
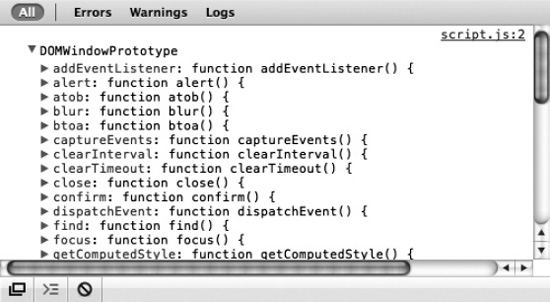
Figure 7-3. The window object's prototype object showing the methods defined for the window object
![]() Note Accessing the object's prototype does not directly reveal the methods inherited by that prototype. For browsers that support it (it's nonstandard), such as Safari, Chrome, and Firefox, you will find a
Note Accessing the object's prototype does not directly reveal the methods inherited by that prototype. For browsers that support it (it's nonstandard), such as Safari, Chrome, and Firefox, you will find a __proto__ property that will give you access to the parent prototype that a particular prototype is built upon. This can be used to inspect the methods inherited from the parent prototype.
Events
Events are the notifications that happen in JavaScript as a result of such things as user input (mouse clicks, keyboard key presses, and so on) or conditions of the page (page has loaded, and so on) that can be "listened to" in order to make something happen when the event occurs. Elsewhere inside the window object you will see a long series of properties that begin with "on," such as onclick, onscroll, onload, and so on. These are the events that the window object can respond to (clicking, scrolling, and loading the page, respectively). These will have values of null for the most part, except for onload, which will be set to function init(), since this was set in the code created earlier at this line:
…

window.onload = init;
This sets the onload property to our custom event handling init() function, meaning the init() function will run when the window has fully loaded and sent a notification of the onload event.
Each possible event can be associated with a function in this way. For example, the following would associate a function that pops up an alert box when the page is clicked:
function windowClickHandler() {

     alert( "Window was clicked" );   // pops up an alert box

}

window.onclick = windowClickHandler;
If the function associated with an event is given a parameter, then that parameter holds an object with information about the event that occurred. For instance, the following uses a parameter (named e) that contains a pageX and pageY property, which specifies the location of the mouse cursor on the page:
// logs the event object function windowMouseDownHandler(e) {

console.log(e);

// log the mouse location

console.log("Mouse is at: " + e.pageX + ", " + e.pageY);          }

window.onmousedown = windowMouseDownHandler;
When this code is run and the page is clicked, the event object (a MouseEvent object in this case) and the mouse location will be logged to the console.
The History API
Let's put all this JavaScript knowledge to use! I mentioned that the window object contains a history object for controlling the browser's forward and back buttons. This is actually not all that can be done with the history object, and HTML5 has built on the History API2 to allow the actual history record to be updated programmatically. This means pages can be added to the history of the browser, and if the user actually clicks the back button, they will go to the pages that have been added to the history instead of pages they previously visited. The usefulness of this is evident in pages that use Ajax to load content dynamically. Asynchronous JavaScript and XML (Ajax) is a means of loading and injecting content into a page without having to reload the entire page. For instance, websites such as Twitter and Facebook use Ajax to add new posts to their pages.
__________
Really simple Ajax
Ajax uses an object called XMLHttpRequest (XHR) to load content from a URL using JavaScript. This content then can be added to the page by using, for instance, the innerHTML property of HTML elements.
At its very simplest, using Ajax might look like the following:
var xmlhttp = new XMLHttpRequest();

xmlhttp.onreadystatechange = responseReady;

xmlhttp.open("GET","content.txt",true);

xmlhttp.send();
The var keyword creates a new variable, which is just like a property—it's a container that holds some value that can be read or written to. The new variable in this case holds a new XMLHttpRequest object instance (the new keyword creates this object). A function is then set to handle the onreadystatechange event, which will be fired when the XHR object has retrieved some content. The open() method then specifies the kind of method used to retrieve the file, the filename, and whether the request is asynchronous (the script continues while the external file loads) or synchronous (the script waits for the external file to load before continuing). Setting this to true makes it asynchronous and false sets it to synchronous. The event handling function might look like this:
…

function responseReady() {

          document.body.innerHTML = xmlhttp.responseText;

}
This script will set the content on the page to the content that was inside the loaded text file.
As a complete example, we'll create a simple page with a next button and a previous button and a message that loads between the two. Duplicate the jstemplate directory from earlier and rename it ajax, and then edit index.html to look like the following HTML:
<!DOCTYPE html>

<html>

         <head>

                   <meta charset="utf-8" />

                   <title>HTML5 Apprentice</title>

                   <link rel="stylesheet" type="text/css" href="css/styles.css" />

                   <script type="text/javascript" src="js/script.js"></script>

         </head>

         <body>

                   <button id="prevButton">Previous</button>

                   <p id="message"></p>

                   <button id="nextButton">Next</button>

         </body>

</html>
This page contains two buttons and an empty paragraph between the two that we'll fill with content using Ajax. Open script.js from the ajax/js directory. Add the following script:
// create global variables

var xmlhttp;

var prevbutton;

var nextbutton;

var message;

var messageID = 1;
// initialize variables and add event listening functions

function init() {

           prevbutton = document.getElementById("prevButton");

           nextbutton = document.getElementById("nextButton");

           message = document.getElementById("message");


           prevbutton.onmousedown = prevButtonDown;

           nextbutton.onmousedown = nextButtonDown;


           checkButtons();

          loadFile();

}

// disable previous or next button depending on whether first or last message is displaying

function checkButtons() {

          if ( messageID == 1 ) prevbutton.disabled = true;

          else prevbutton.disabled = false;

          if ( messageID == 3 ) nextbutton.disabled = true;

          else nextbutton.disabled = false;

}

// decrement message ID when previous button is pressed

function prevButtonDown() {

          messageID--;

          if (messageID < 1) messageID = 1;


          checkButtons();

          loadFile();

}

// increment message ID when next button is pressed

function nextButtonDown() {

          messageID++;

          if (messageID > 3) messageID = 3;


          checkButtons();

          loadFile();

}

// load message files using Ajax

function loadFile() {

          var file = "message"+messageID+".txt";


          xmlhttp = new XMLHttpRequest();

          xmlhttp.onreadystatechange = responseReady;

          xmlhttp.open("GET",file,true);

          xmlhttp.send();

}

// add Ajax loaded content to paragraph on the page

function responseReady() {

          message.innerHTML=xmlhttp.responseText;

}

window.onload = init;
This script uses a variable (messageID) to track which of three messages needs to load when the previous or next button is clicked. You'll need to create three text files to load named message1.txt, message2.txt, and message3.txt and save them in the ajax directory. Add some text to each of these files; just make sure the text is different for each. This text will be injected into the empty paragraph element on the page.
Open index.html in a web browser to test the file. You should be able to click the buttons back and forth and display a different message on each click (Figure 7-4).

Figure 7-4. The output of a simple Ajax application after two clicks of the next button. The button is disabled when the last of the three messages is displayed.
History-enabled Ajax
If you look at the URL for the page's address in the previous example, you will see it is not updating as the different content is loaded. This isn't ideal because the pages showing the different messages can't be bookmarked, and clicking the browser's back button will not go back to the previously displayed message but instead will go to the previous page viewed. However, the History API can be used to overcome these issues. HTML5 introduces two methods, pushState() and replaceState(), for adding to and editing the browsing history. The first, pushState(), allows a new entry to be added to the page's browsing history, while replaceState() will replace the current browsing location in the history with a new entry.
Let's edit the script in the previous example and include pushState() to add a new entry to the browsing history when the next and previous buttons are clicked. Go back to the previous script and edit the prevButtonDown() and nextButtonDown() methods:
…

function prevButtonDown() {

          messageID--;

          if (messageID < 1) messageID = 1;


          var obj = { page: messageID };

          var title = "page"+messageID;

          var url = "#message"+messageID;

          window.history.pushState( obj , title , url );


          checkButtons();

          loadFile();

}

function nextButtonDown() {

          messageID++;

          if (messageID > 3) messageID = 3;


          var obj = { page: messageID };
          var title = "page"+messageID;

          var url = "#message"+messageID;

          window.history.pushState( obj , title , url );


          checkButtons();

          loadFile();

}

…
The pushState() method takes three arguments. The first is a JavaScript object (the curly brackets are shorthand notation for creating an object) that can contain information about the page being added to the history. In this case, it's an object with a single custom property, page, and a value that holds the page ID. Next is the title of the page added to the history (for example, "page1"). Lastly—and most importantly—is the URL of the page to add to the history. The page we'll add is the same page we're on, but we'll add a hashtag to the URL so it becomes ajax.html#message1, ajax.html#message2, and ajax.html#message3 for each click of the next button. We can just add the hashtag without specifying the current page, because the browser will add the current page if no page is specified.
OK, edit the loadFile() function so that it retrieves the message ID from the hashtag in the URL:
…

function loadFile() {

           // retrieve the hashtag from the URL using the location object

           var messageHash = window.location.hash;

           if (messageHash == "") messageHash = "#message1";

           var file = messageHash.substr(1)+".txt";     // strip out the "#" from the hashtag

           xmlhttp = new XMLHttpRequest();

           xmlhttp.onreadystatechange = responseReady;

           xmlhttp.open("GET",file,false);

           xmlhttp.send();

}

…
Now test the page and use the next and previous buttons. You should see the web page address URL update with the hashtag. This means the individual Ajax-enabled pages of content can be bookmarked, which is great! However, if you click the browser's forward or back button, you will notice the message on the page does not update, even though the URL in the address bar does. The reason for this is that the onload event does not fire again when the user clicks the forward and back buttons. This is because the page has been cached by the browser so that it will load faster as the user navigates through the history. What we need to add is an event that fires when the history has changed, and thankfully there is such an event called onpopstate. At the very end of the script, add the following:
…

window.onpopstate = init;
This will run the init() function every time the history is navigated. This isn't the most efficient code, because there will be redundant calls to the init() function (for example, twice when first loading the page), but use this simple example to develop from.
Building a custom video controller
Let's look at interacting with the JavaScript methods associated with an HTML element. Earlier I mentioned that the video element has a play() method and a stop() method. We can use these to control video playback from JavaScript, which means we can create a control bar with a custom play and pause button. Say goodbye to a control bar that looks different in every browser! For the graphics we'll use CSS, but more specifically we'll use a concept called CSS sprites, which is a technique for using one image file to display two or more images at different points on the page. The idea behind this technique is that a single image file can contain a whole bunch of images, which then can be cropped and positioned in different ways to show the different images. This is kind of like looking through a paper towel tube at cookies spread out on a cookie sheet. You'll be able to see only one cookie at a time, but you can move the sheet around to show different cookies. This technique gives the illusion of multiple images having been downloaded, but in fact only one has, meaning all the images will appear on the page at once and only one request has gone to the server to fetch the image.
On to our example…duplicate the jstemplate directory from earlier and rename it video_player. Create an image for the sprite that contains a play and pause graphic for our video controls (Figure 7-5). Set the size to 80 pixels wide by 30 pixels tall.
Figure 7-5. An image sprite with two images for the controls on a simple video player
Update the HTML in index.html to look like the following:
<!DOCTYPE html>

<html>

          <head>

                    <meta charset="utf-8" />

                    <title>HTML5 Apprentice</title>

                    <link rel="stylesheet" href="css/styles.css" type="text/css" />

                    <script type="text/javascript" src="js/script.js" defer></script>

          </head>

          <body>

          <section>

                    <video width="320" height="240" poster="poster.jpg" id="my_video">

                         <source src="trailer.webm" type='video/webm; codecs="vp8, vorbis"' />

                <source src="trailer.mp4" type='video/mp4; codecs="avc1.4D401E, mp4a.40.2"' />

                        <source src="trailer.ogv" type='video/ogg; codecs="theora, vorbis"' />

                              <p>Video playback not supported.</p>

                    </video>

                    <div class="video_controls">

                              <a href="nojs-player.html" title="Play" id="control_button">

                                        <span id="control_graphic" class="play"></span>

                                        <label id="control_label">Play</label>

                              </a>

                              </div>

          </section>

          </body>

</html>
As you can see, this code contains the video element with fallback content3 followed by a div area for the custom video control. To get this example to work, you will have to include three video files sized to 320 by 240 pixels, which are named trailer.webm, trailer.mp4, and trailer.ogv in the same directory as index.html (it wouldn't be a bad idea to create a video directory or similar for the videos, if you do this be sure to update the HTML).
Next we'll create the JavaScript that will be used to enable this custom control. Open script.js from the video_player/js directory. For the code, first we will create variables to hold a reference to the video, anchor (<a>), span, and label on the page. Next the init() function is updated so that it sets the value of each JavaScript variable to a reference to an HTML element, which can be retrieved through their id attribute using the getElementById() method. Update script.js to look like this:
// JavaScript variables used to hold references to HTML elements

var video;

var control_button;

var control_label;

var control_graphic;


// initialization function runs when the page has loaded

function init() {

          video = document.getElementById("my_video");


          control_button = document.getElementById("control_button");

          control_label = document.getElementById("control_label");

          control_graphic = document.getElementById("control_graphic");

          control_button.onclick = playVideo;

}


window.onload = init; // runs the init function when the page has finished loading
![]() Note Classes instead of IDs could be used for all the elements, and the
Note Classes instead of IDs could be used for all the elements, and the document.getElementByClassName() function could have been used to automatically enable functionality for multiple video controls on one page, but this would make the code a bit more complex, so for brevity's sake IDs have been used.
The last line in the init() function calls another function when the button control is clicked. This function is named playVideo(). Go ahead and add it to script.js:
…

function playVideo() {

          control_graphic.className = "pause";

          control_button.onclick = pauseVideo;

          control_button.title = "Pause";
          control_label.textContent = "Pause";

          video.play();

          return false;

}
__________
3 For brevity, the fallback content has been shortened; refer to Chapter 5 for comprehensive fallback content information for the video element.
This function sets the class attribute on the control graphic to a CSS class named pause, which positions the CSS sprite over the pause button image. Next, it sets the text content (which is used as fallback content if the CSS style sheet was disabled), and it then plays the video. The return false bit ensures the link (with the ID of control_button) does not go to its linked page when it's clicked; however, if JavaScript is disabled, it'll go to a page called nojs-player.html that would presumably contain a video player that will work without JavaScript (you'll have to build this one on your own). This function also sets a new function for when the button control is clicked again. This new function is called pauseVideo(), and it pauses the video and reverses the changes set in the playVideo() function. Go ahead and add this to your script.js file:
…

function pauseVideo() {

          control_graphic.className = "play";

          control_button.onclick = playVideo;

          control_button.title = "Play";

          control_label.textContent = "Play";

          video.pause();

          return false;

}
That's all the JavaScript we need; now on to the CSS. First the link anchor element is set to display as a block-level element and has its width and height set. The property overflow is set to hidden so that content that flows outside of the dimensions of the controls does not show up. This is needed to hide the fallback text, because it will be pushed out of the bounds of the control. Open styles.css from the video_player/css directory. Add the following CSS rule:
.video_controls a {

    display: block;

    width: 40px;

    height: 40px;

    overflow: hidden;

}
Next we add a rule for the span so that it is styled to be a block-level element as well (pushing the other textual content out of the way). This is where the background image sprite (named "controls.png") is attached:
…

.video_controls span {

    display: block;

    background-image: url(controls.png);

    background-repeat: no-repeat;

    width: 40px;

    height: 40px;

    background-color: #ccc;
}
Lastly two CSS classes are created that set the position of the background image, moving it to show the play symbol or pause symbol:
…

.pause {

    background-position: -45px 5px;

}

.play {

    background-position: 5px 5px;

}
That's it! The play and pause buttons are derived from the same image, as shown in Figure 7-6.

Figure 7-6. The play (L) and pause (R) states of the custom video control using a CSS sprite
Scripted 2D Canvas API
Now let's look at something even more interactive. As you saw in Chapter 5, the canvas element does not have much that can be done to it purely with HTML, because it has only two attributes, which simply specify the width and height of the canvas area. The real power of canvas comes from manipulating the element from JavaScript. Remember, the canvas is a bitmap canvas, meaning it is essentially a blank image that we can manipulate the pixels of through a set of drawing commands.
To work with the canvas, a particular "context" needs to be retrieved from the element, which then can be used as the target of drawing operations. The context specifies what kind of image we are dealing with. There are two choices available: a two-dimensional or three-dimensional image.
Let's begin by hunting down the method for retrieving the context we will draw with.4 First duplicate the jstemplate directory from the beginning of the chapter and rename it canvas. Modify the HTML in index.html to add a canvas element (and some fallback content) in place of the paragraph of text:
__________
4 For the impatient, the method for retrieving a context is called getContext().
…

<body>

          <canvas id="canvas" width="300" height="300">

                    <p>The canvas element is not supported!</p>

          </canvas>

</body>

…
Now modify script.js in the canvas/js directory to gain access to the canvas element from JavaScript. We'll begin by adding a variable that will hold a reference to the canvas element, which we'll set using the getElementById() method:
var canvas;     // variable to hold a reference to the canvas element on the page


function init() {

canvas = document.getElementById( "canvas" );         // look up the canvas element by its ID

}

window.onload = init;
![]() Note You may have noticed earlier that
Note You may have noticed earlier that document is a property of the window object, so why isn't the syntax window.document… in the previous code block? The reason is that the browser will automatically look into the window object when looking up a property or method, so it isn't necessary to prefix all the properties or methods of the window object with window. For example, console is also a property of window, but for brevity window is usually left out (although it could be included with no harm caused).
This gets us access to the canvas element from our script. Let's look at what methods are defined for the canvas element by looking at its prototype, like we did with the window object, by accessing constructor.prototype. Edit the script like so:
…

function init() {

// look up the canvas element by its ID

canvas = document.getElementById( "canvas" );

// log the canvas element's prototype

console.log( canvas.constructor.prototype );            }

…
This reveals getContext(), which is the method we need to retrieve the context! The other method, toDataURL(), is for converting the canvas image data to a URL that could, for instance, be supplied as the source image data for an image element (img).
As mentioned earlier, the context will tell what type of image we are dealing with, which can be a two-dimensional or three-dimensional image. To retrieve a certain context, a text keyword is given as an argument to the getContext() method.5 To retrieve a two-dimensional context, the text keyword "2d" is used. To retrieve a three-dimensional context, the text keyword "webgl" is used instead. As you can see, the 3D context uses WebGL for interacting with the image.
![]() Note WebGL is a 3D rendering specification for web browsers that is overseen by the Khronos group.6 WebGL is an experimental feature in web browsers, and as such, the
Note WebGL is a 3D rendering specification for web browsers that is overseen by the Khronos group.6 WebGL is an experimental feature in web browsers, and as such, the webgl keyword may not work for the immediate future. If you experiment with this context and find it does not work, try "experimental"-webgl instead, which is the temporary context keyword being used in supporting browsers until WebGL is further along in its development.
Let's retrieve the 2D context and inspect its properties and methods using the JavaScript console; edit the script to look like the following:
var canvas;

var context;           // variable to hold a reference to the canvas context


function init() {

         canvas = document.getElementById("canvas");

         // retrieve the 2D canvas context

context = canvas.getContext("2d");


         // inspect the canvas context

console.log(context);

        // inspect the canvas context prototype

console.log(context.constructor.prototype);

}

window.onload = init;
This will log two objects to the console, CanvasRenderingContext2D and CanvasRenderingContext2DPrototype (the actual names may vary by browser). The first will show the properties available on the context, which includes the color of lines and fills added to the canvas. The CanvasRenderingContext2DPrototype shows the available methods, which includes a range of methods for drawing on and transforming the canvas. The graphical capabilities of the canvas encompass the following:
- Basic drawing: There are methods for drawing rectangles, lines, curves, and arcs.
- Fills and strokes: There are methods for creating solid fills and outlines.
- Effects: There are methods for creating shadows, gradients, transparency, and for compositing images on top of each other.
__________
5 The WHATWG runs a wiki at http://wiki.whatwg.org/wiki/CanvasContexts that provides an overview of the canvas context keywords available.
6 The WebGL specification is available here: www.khronos.org/registry/webgl/specs/latest/.
- Transformations: There are methods for scaling, rotating, and translating (moving) the image.
- Text: There are methods for adding solid or outlined text.
- Images: There are methods for drawing an image (or even a video or another canvas element) onto the canvas, which can then be transformed or otherwise manipulated.
We will explore the first two areas, but be sure to use the console to explore the methods and properties available that are not covered in this chapter. The purpose of many of them is quite self-evident!
Drawing on Canvas
Let's begin by drawing a rectangle on the canvas that covers the available area. The methods related to drawing a rectangle are as follows:
fillRect(x,y,w,h): Draws a solid rectanglestrokeRect(x,y,w,h): Outlines a rectangle
Using either of these methods, we can create a rectangle of a given width and height starting at a specified location on the canvas. Before using these methods, you may want to style the rectangle to specify the appearance of the fill and stroke (the outline color). There are a few properties that can be set for this purpose:
fillStyle: The fill colorstrokeStyle: The color of the outlinelineWidth: The width of the outline
To set the style properties, set the value equal to a quoted CSS-style color code, such as #00000 for black. The lineWidth property takes a number that specifies the width in pixels. To fill the entire canvas with a solid rectangle, you'd specify a starting point of 0, 0 (the upper-left point) and a width and height the same as the canvas width and height. Adding an outlined rectangle on top of that would give us the following:
…

canvas = document.getElementById( "canvas" );

context = canvas.getContext( "2d" );

// the color of the fill

context.fillStyle = "#cccccc";

// the color of the outline

context.strokeStyle = "#999999";

// the width of the outline

context.lineWidth = 5;

// fill the canvas area with a rectangle

context.fillRect( 0, 0, canvas.width, canvas.height );

// outline a rectangle inside the canvas borders

context.strokeRect( 30, 30, 200, 100 );

…
Add this code to the content of the init() function in script.js in the canvas/js directory to see it in action! The canvas uses a Cartesian coordinate system with an inverted y-coordinate. This means every pixel on the canvas can be specified by an x and y value, where x is the number of pixels from the left side of the canvas area and y is the number of pixels from the top side of the canvas area. For instance, an x, y coordinate of 30, 30, would specify a location 30 pixels from the left side and 30 pixels from the top side of the canvas area (Figure 7-7).

Figure 7-7. The rectangle drawn by strokeRect(30,30,200,100) in a 300 by 300 pixel canvas
Drawing more complex shapes than a rectangle is more complicated. A line needs to be created—also known as a path—which can be used to build the shape segment by segment. The following are the relevant methods for drawing a simple shape with straight edges:
beginPath(): Starts a new lineclosePath(): Finishes a new linemoveTo(x,y): Moves to a coordinate on the canvaslineTo(x,y): Draws a line segment to a coordinate on the canvasstroke(): Colors the linefill(): Fills in the shape created by the line segments
The beginPath() method is first used to tell the canvas that a new shape is being drawn, which consists of line segments. The moveTo() and lineTo() methods are then used to move around the canvas and draw line segments. Lastly, the closePath() method is used to complete a line and connect the beginning and ending points if the line is filled. For example, to create a triangle a path is begun, the drawing point is moved, two lines are drawn, and the path is closed, filled, and outlined:
…

context.beginPath();           // start a new line

context.moveTo(50,50);         // move to 50 pixels from the left and top edge of the canvas

context.lineTo(150,50);        // draw a line to 150 and 50 pixels from the left and top edge

context.lineTo(100,150);       // draw a line to 100 and 150 pixels from the left and top edge

context.closePath();           // close the line

context.fill();                // fill the shape formed by the line with the fill style color

context.stroke();              // outline the line with the stroke style color

…
Used in place of the rectangle drawing code earlier, this results in the triangle shown in Figure 7-8.

Figure 7-8. A triangle drawn using the canvas path drawing methods
![]() Note If the
Note If the beginPath() and closePath() methods are omitted, the lines won't be automatically closed to form a shape, which may be desired in cases where you just want to have lines without a fill.
In place of the lineTo() method, the arcTo(), bezierCurveTo(), or quadraticCurveTo() methods could be used to create shapes with curved edges.
Additionally, the lineCap and lineJoin properties can be set to affect how the end of line segments and the join points of each segment appear. The lineCap property can be set to butt, round, or square to change the end of a line. The lineJoin can be set to miter, round, or bevel to affect the shape of the join point of two line segments (Figure 7-9). When set to miter, another property, miterLimit, can be used to specify the angle over which a point will be formed.

Figure 7-9. The values of the lineCap and lineJoin properties
TRIGONOMETRY
An area of mathematics that is worth getting your head around when dealing with algorithmically created drawings is trigonometry. Trigonometry is concerned with the study of the angles and sides of triangles, which is critical for drawing specific points around a circle. Since the canvas uses a Cartesian coordinate space made up of rows and columns (the x and y coordinates), finding the x, y coordinates of a point a certain distance away from another point, when the line of sight between them is slanted, is not as straightforward as it would be if they were in a horizontal or vertical line from each other, but finding the point really isn't that much more difficult. All you need is the angle formed inside a triangle drawn between the two. Once you have that, the formulas in Figure 7-10 are all you need.

Figure 7-10. Determining the point on a circle using trigonometric functions
In Figure 7-10, the angle, theta, needs to be in radians, which equals the angle in degrees times pi divided by 180. Translated into code, the formula in Figure 7-10 might look like this:
x = 50 + Math.cos( 45 * Math.PI / 180 ) * 20;

y = 50 + Math.sin( 45 * Math.PI / 180 ) * 20;
This would find the x and y coordinates of a point that was at a 45-degree angle and was 20 pixels out from another point at the x, y coordinate of 50, 50 on the canvas.
Let's look at a full example. This example draws a spiral on the canvas, the result of which is shown in Figure 7-11. It runs a loop a number of times that increases the distance from the center ("c" in Figure 7-10) and increases the angle in degrees:
// declare the global variables

var canvas;

var context;

var centerX;

var centerY;

var degrees = 0;

var radius = 1;


function init() {

          canvas = document.getElementById( "canvas" );

          context = canvas.getContext("2d");

          centerX = canvas.width/2;

          centerY = canvas.height/2;

          // move to the center of the canvas

          context.moveTo( centerX , centerY );

          // loop two thousand times, drawing a line out further and further from the center

          for (var i=0; i<2000;i++) {

                    degrees += 1;

                    radius += 0.02;

                    context.lineTo(

                                centerX+Math.cos(degrees*Math.PI/180)*radius ,

                                centerY+Math.sin(degrees*Math.PI/180)*radius

                                );

          }

          context.stroke();

}

window.onload = init;

Figure 7-11. Spiral drawn on canvas using trigonometric functions
Canvas state
Setting the fill and stroke style will affect all subsequent graphics created on the current canvas context. To deal with temporarily changing the fill and stroke style, the canvas context has two methods, save() and restore(), which are used to save the styles set and then restore them to the saved state later. When multiple shapes are drawn on the canvas, these two methods are often used to isolate the stylistic changes applied by each shape. For instance, in the following code block, three squares are drawn that are outlined by the colors red, green, and blue, respectively. A border is then drawn around all the boxes. Because save() and restore() are used, the final border does not need a style set because it will be using the original styles:
…

context.save();

context.strokeStyle = "#ff0000";

context.strokeRect(0,0,100,100);

context.restore();


context.save();

context.strokeStyle = "#00ff00";

context.strokeRect(50,50,100,100);

context.restore();


context.save();

context.strokeStyle = "#0000ff";

context.strokeRect(100,100,100,100);

context.restore();


// Rectangular outline will be default black, because original style settings were restored context.strokeRect(0,0,200,200);

…
![]() Note Is canvas a Flash killer? You may have heard this question posed, particularly after Steve Jobs of Apple Inc. famously railed against Adobe Flash in an open letter in 2010, in which he stated that Flash is an antiquated technology that will soon be replaced by HTML5 technologies. This was in part spurred on by the creation of the
Note Is canvas a Flash killer? You may have heard this question posed, particularly after Steve Jobs of Apple Inc. famously railed against Adobe Flash in an open letter in 2010, in which he stated that Flash is an antiquated technology that will soon be replaced by HTML5 technologies. This was in part spurred on by the creation of the video element—as video is an area on the Web where Flash dominates—but the canvas element encroaches a bit onto Flash's territory as well, although the overlap is limited. Canvas is a scriptable bitmap image optimized for drawing with pixel data, and it does not include any built-in methods for animation. Canvas uses immediate mode rendering, meaning it does not store the graphics it displays as separate entities. It's like actually painting on a real canvas, where paint can be layered on top of the image, but once on the canvas, it is effectively part of any prior paint that has been applied. Flash content, on the other hand, is traditionally stored as vector imagery (although it handles bitmap data as well), and it includes the concept of a display list for its graphics, which is very much like the DOM for HTML. This means that graphics in Flash are separated into nodes that can be easily accessed from code for interactive and animation purposes. In many respects, SVG, another graphics technology for the Web, is more akin to the traditional space of Flash. Therefore, canvas alone does not replace Flash, but together with other technologies associated with HTML5, it is making the authoring of content traditionally restricted to Flash possible.
Canvas interactivity
Interacting with canvas graphics is a matter of setting an event handler function on one of the mouse-related events of the canvas, such as onmousedown, onmouseover, or onmousemove (use console.log() on the window object to explore the events available) and then doing some drawing on the canvas at the mouse location. For example, the following script records the x, y coordinate of the mouse cursor position and draws a line from the saved to the current position every time the user moves the mouse, creating a simple drawing application (Figure 7-12):
// declare global variables

var canvas;                      // reference to canvas element on page

var context;                     // reference to canvas context

var cwidth;                      // reference to canvas width

var cheight;                     // reference to canvas height

var lastX = 0;                   // variable to hold an x coordinate value

var lastY = 0;                   // variable to hold an x coordinate value


// initialize the variables and add event handler

function init() {

           canvas = document.getElementById( "canvas" );

           context = canvas.getContext("2d");

           cwidth = canvas.width;

           cheight = canvas.height;

           context.strokeStyle = "#000000";

           context.strokeRect(0,0,cwidth,cheight);


// call the draw function when the cursor moves over the canvas

           canvas.onmousemove = draw;

}

// draw on the canvas

function draw(e) {

           // update the saved x, y coordinates to the position of the cursor

           // if it is first entering the canvas

           if (lastX == 0) lastX = e.pageX - canvas.offsetLeft;

           if (lastY == 0) lastY = e.pageY - canvas.offsetTop;

           // begin a new line and move to the last saved x, y coordinates

           context.beginPath();

           context.moveTo(lastX, lastY);

           // set the saved x, y coordinates to the position of the mouse cursor

           lastX = e.pageX - canvas.offsetLeft;

           lastY = e.pageY - canvas.offsetTop;


           // draw a line

           context.lineTo(lastX, lastY);

           context.closePath();

           context.stroke();
}

window.onload = init;

Figure 7-12. Doodle made with a simple canvas drawing application
Canvas animation
Animation is just a series of still images, so the basic steps involved in animating are as follows:
- Clear any existing graphics on the canvas.
- Draw new graphics on the canvas.
- Repeat steps 1 and 2
Drawing on canvas uses the drawing methods covered earlier, but clearing the canvas introduces a new method: clearRect(x,y,w,h). This method clears all graphics from the canvas within a rectangular area. For animations, this would usually mean clearing the entire canvas area, unless you could reliably know only one portion of the canvas would be changing throughout the animation.
The global window object contains two methods for repeating a piece of code over time, as is needed in an animation: setInterval(f,t) and setTimeout(f,t). Both of these methods call a custom function (f) after a specified interval (t). The interval is set in milliseconds, so 1000 would be one second in length. The difference between the two is setInterval(f,t) runs continuously, while setTimeout(f,t) executes only once after the set amount of time. We'll use setInterval(f,t) to create a basic animation engine.
![]() Note Firefox, Chrome, Opera, and Internet Explorer have an experimental method called
Note Firefox, Chrome, Opera, and Internet Explorer have an experimental method called requestAnimationFrame(), which is used to tell the web browser to repaint the window in order to redraw the frames of an animation. This has advantages over using the setInterval() method because the animation runs only when the browser is available, meaning that, for instance, an animation running in a tab that is hidden will stop because the page is not being shown, saving the computer's processor from consuming resources unnecessarily. You can find more information on this method at https://developer.mozilla.org/en/DOM/window.requestAnimationFrame.
To create a basic animation engine, the following functions are created:
init()to set up initial variables and start the animationinvalidate()to specify that the animation frame needs to be redrawnclear()to clear the animation framedraw()to draw the animation frameupdate()to update variables used when drawing the animation frame
Put together, the code for a basic animation engine looks like the following, which will animate two lines across the canvas (Figure 7-13):
// declare global variables

var canvas;

var context;

var cwidth;

var cheight;

var lastX = 0;

var lastY = 0;


// initialize animation

function init() {

           // set variable values

           canvas = document.getElementById( "canvas" );

           context = canvas.getContext("2d");

           cwidth = canvas.width;

           cheight = canvas.height;


           // start animation sequence by calling the update function every 30 milliseconds

           setInterval(update, 30);

}

// clear and redraw the canvas

function invalidate() {

           clear();

           draw();

}

// clear the canvas

function clear() {

           context.clearRect( 0 , 0 , cwidth , cheight );

}

// draw the graphics on the canvas using the saved x, y coordinate values

function draw() {

           context.fillRect(0,lastY,cwidth,5);

           context.fillRect(lastX,0,5,cheight);

}

// update the saved x, y coordinate values. Reset them to zero if they reach the canvas edge

function update() {

           lastY += 1;

           if (lastY > cheight) lastY = 0;


           lastX += 1;

           if (lastX > cwidth) lastX = 0;
           invalidate(); // call invalidate to redraw the canvas

}

window.onload = init;

Figure 7-13. Three frames from a basic animation engine that sweeps two lines across a canvas
To see this working, edit script.js in the canvas/js directory. Obviously, this is just a simple example to show a bare-bones animation engine, but this structure could easily be developed further to create more complex animation sequences.
Drag-and-drop operations
Drag-and-drop functionality as it appears in the HTML5 specification is actually an old Microsoft addition,72 which was added to Internet Explorer originally more than a decade ago. Since then, the other browsers have caught up and implemented the same functionality—except for Opera, which does not currently support this feature natively. In the supporting browsers, drag-and-drop capability is available to all the elements through the global draggable attribute, which has the possible values of true or false. Most elements will be set to false by default, but there are a few exceptions. The image element (img) has its draggable attribute set to true by default, as does the anchor element (a), but only if it has its href attribute set. Also, although it doesn't have attributes, plain text that has been selected by the user can be dragged by default.
Dragging operations will always have a start and an end, which usually corresponds to something being picked up, moved, and dropped somewhere else. Quite a few events are involved, depending on the complexity of the desired behavior in between the start and end of a drag-and-drop sequence. Table 7-1 describes the relevant events and when they are triggered.


Let's create a file that logs each of these events to the console. Duplicate the jstemplate directory from earlier and rename it dnd. Begin by editing index.html to look like the following:
<!DOCTYPE html>

<html>

          <head>

                    <meta charset="utf-8" />

                    <title>HTML5 Apprentice</title>

                    <link rel="stylesheet" type="text/css" href="css/styles.css" />

                    <script type="text/javascript" src="js/script.js" defer></script>

          </head>

          <body>

                <section>

                    <h1 draggable="true" id="draggable">Draggable</h1>

                </section>

                <section>

                    <h1 draggable="false" id="droptarget">Drop Target</h1>

                </section>

          </body>

</html>
This HTML page creates two sections, one that has its draggable attribute set to true and one to false (this could be left off, but I included it to explicitly differentiate the two). Each has an ID that will be referenced in the JavaScript for the page.
Now edit the linked CSS file, styles.css (in the dnd/css directory). We will take the sections and create two black-bordered boxes that are arranged side by side:
section {

          width:200px;

          padding:10px;

          background-color:#cccccc;

          border:1px solid #000000;

          float:left;

          margin-right:4px;

          text-align:center;

}
Lastly, edit script.js (in the dnd/js directory) and write the following script:
// global variable to hold reference to the two sections on the page

var draggable;
var droptarget;


// initialize variable values and set event handling functions

function init() {

          draggable = document.getElementById( "draggable" );

          droptarget = document.getElementById( "droptarget" );


          draggable.ondragstart = dragStartHandler;

          draggable.ondrag = dragHandler;

          draggable.ondragend = dragEndHandler;


          droptarget.ondragenter = dragEnterHandler;

          droptarget.ondragover = dragOverHandler;

          droptarget.ondragleave = dragLeaveHandler;

          droptarget.ondrop = dropHandler;

}

// event handling functions for each of the drag and drop operations

function dragStartHandler(e) { console.log("dragstart"); }

function dragHandler(e) { console.log("drag"); }

function dragEndHandler(e) { console.log("dragend"); }

function dragEnterHandler(e) { console.log("dragenter"); }

function dragOverHandler(e) { console.log("dragover"); }

function dragLeaveHandler(e) { console.log("dragleave"); }

function dropHandler(e) { console.log("drop"); }


window.onload = init;
This script will add event handler functions for each of the drag-and-drop events and log a message to the console when the event occurred. If you open this in a web browser and drag the text "Draggable" to "Drop Target," you should see some event messages appear in your JavaScript console.
Depending on the browser you used, you may not see very much. For instance, Google Chrome shows only"dragstart" and "dragend" and appears to ignore all the other events! What's going on here? Well, Chrome expects something called a dataTransfer object to be set, which is essentially a data payload that gets (potentially) delivered to the drop target in a drag-and-drop operation. At its simplest, a drag-and-drop operation involves the following:
- Setting the
draggableattribute totrue(if it isn't already) - Setting an event listener function to handle the
dragstartevent - Setting the payload of the
dataTransferobject in thedragstartevent handler function
OK, so we need to add a line of code to the dragStartHandler() function to make this script compatible with browsers such as Google Chrome. Amend the code for the dragStartHandler() function in script.js to look like this:
…

function dragStartHandler(e) {

          console.log("dragstart");

          e.dataTransfer.setData("text/plain" , "Payload Landed" );

}

…
As you can see, the dataTransfer object has a method named setData() that sets the type and value for the data that is sent along with the dragged item. Now (if you weren't seeing it before), you should see the following events logged to JavaScript console:
dragstart

drag

dragenter

dragover

drag

…

dragleave

dragend
In the middle, you will see “dragover” and “drag” repeated many times as you drag the item around.
You may notice one event is missing, the all-important drop! The reason for this is the dragover event has the odd behavior of resetting the drag-and-drop operation when you are over the drop target, which has the consequence that the drop event never fires. The dragenter and dragover events could be used to handle the drag-and-drop operation, but in most circumstances you will want to trigger the drop event. What you need to do then is cancel the default behavior of the dragover event. This is a matter of calling the method preventDefault() on the event object that is passed as a parameter into the dragOverHandler() function. Additionally, we will check whether the default behavior has already been prevented, and we'll also return false from the function, which is another way of telling the browser to ignore the default behavior of the event. Both methods can be added in order to ensure the broadest browser support for this instruction. Edit your code and add the following:
…

function dragOverHandler(e) {

          console.log("dragover");

          if (e.preventDefault) e.preventDefault();

          return false;

}

…
Now when you test the drag-and-drop operation, you should see an entry for "drop" in the JavaScript console. For the last edit, we'll assign the text of the "drop target" to the text in the payload in the dataTransfer object. We'll use the innerHTML property to set the content inside the drop target. Edit the script to make this change:
…

function dropHandler(e) {

          console.log("drop");

          droptarget.innerHTML = e.dataTransfer.getData("text/plain");

}

…
The getData() method is used to retrieve the contents of the payload set in the dragStartHandler() function, which then assigns that value to the contents of the drop target. Test the page again, and you should see that when you drop the “Draggable” text onto the “Drop Target” text it changes to “Payload Landed.”
OK, let's make this a little bit more user friendly. We're going to add a CSS class that creates a dashed black border that we'll make appear and disappear when over the drop target. We'll also add a default border to the h1s that blends into the background so the elements don't shift when the dashed border is added. Edit styles.css, adding the following two rules:
Now we'll add the over class when the drag is over the drop target by setting the className property on the drop target. Edit the dragOverHandler() function in script.js to add the class name:
…

function dragOverHandler(e) {

          console.log("dragover");

          droptarget.className = "over";

          if (e.preventDefault) e.preventDefault();

          return false;

}

…
We need to remove this class in the dragEndHandler() and dragLeaveHandler() functions, so we'll set the className property on those to null, which will remove the CSS class:
…

function dragEndHandler(e) {

          console.log("dragend");

          droptarget.className = null;

}

…

function dragLeaveHandler(e) {

          console.log("dragleave");

          droptarget.className = null;

}

…
Finally, we need to prevent the default behavior of the dropHandler() function. Some browsers will try to open content that has been dropped. For instance, a link that is dragged and dropped into a browser window may cause the browser to navigate to the link's URL. To prevent this, make the following edit to script.js:
…

function dropHandler(e) {

          console.log("drop");

          droptarget.innerHTML = e.dataTransfer.getData("text/plain");

          if (e.preventDefault) e.preventDefault();

          return false;

}

…
Now if you test this drag-and-drop operation, you should see the text payload added when the drag-and-drop operation is complete, and the border should appear and disappear during the operation (Figure 7-14).

Figure 7-14. A drag-and-drop operation in progress (top) and completed (bottom)
In addition to the draggable attribute, there is the global dropzone attribute. This attribute can in theory be used to specify what kind of data a particular drop target expects to receive as well as what kind of drag-and-drop operation is going on (the specification lists move, link, and copy as its possible values), which in theory could be used to replace any logic introduced in the dragenter and dragleave events. However, at the time of writing, you'll have to wait for this feature to be implemented across the major web browsers.
ADDEVENTLISTENER
Sorting a list using a drag-and-drop operation
Let's look at another example of a drag-and-drop operation, in the form of a user sortable list. For this example, you'll create an ordered list where the user can—through a drag-and-drop operation—rearrange the order of the list items.
To begin, duplicate the jstemplate directory from earlier and rename it dnd_list. Edit the index.html file to look like this:
<!DOCTYPE html>

<html>

          <head>

                    <meta charset="utf-8" />

                    <title>HTML5 Apprentice</title>

                    <link rel="stylesheet" type="text/css" href="css/styles.css" />

                    <script type="text/javascript" src="js/script.js" defer></script>

          </head>

          <body>

                    <ol>

                        <li>One</li>

                        <li>Two</li>

                        <li>Three</li>

                        <li>Four</li>

                        <li>Five</li>

                    </ol>

          </body>

</html>
Edit the JavaScript file named script.js in the dnd_list/js directory. This script will use four functions, init(), dragStartHandler(), dragOverHandler(), and dragEndHandler(). First create the global variables and edit the init() function:
// define global variables

var dragging;           // the list item being dragged

var dir;                // the direction (up or down) the drag is going in


function init() {

          var li = document.getElementsByTagName("li");

          // loop through list and make items draggable and set the event handler functions

          for ( var i = 0; i < li.length; i++ )

          {

                    li[i].draggable = true;

                    li[i].ondragover = dragOverHandler;

                    li[i].ondragstart = dragStartHandler;

                    li[i].ondragend = dragEndHandler;

          }

}
This example differs from the previous one in that the draggable attribute value is being added from the script. The script retrieves a reference to all list item elements on the page and adds the ability for them to be swapped around.
Continue with the script:
…function dragStartHandler(e) {
dragging = e.target;
e.dataTransfer.setData('text/plain' , null);
dragging.style.opacity = "0.5";
}
The dataTransfer object is set here but to a value of null because we're not using a payload. It just needs to be set to allow the dragover event to fire in Chrome. We're setting the CSS opacity property here too, although it would be advisable to add and remove a CSS class like in the earlier example so that you could easily add more styles in the future. For brevity we'll leave it as is in this example.
The dragOverHandler() function does the real work in this example:
…

function dragOverHandler(e) {

          // make sure the item being dragged isn't the same as the one we're dragging over

          // and make sure it hasn't been removed from the page

          if (dragging != e.target && dragging.parentNode != null)

          {

                    // determine whether the drag in going up or down

                    if ( e.target.previousElementSibling == dragging ) dir = "down";

                    else dir = "up";


                    // remove the item being dragged from the page

                    dragging.parentNode.removeChild(dragging);


                    // add item being dragged above or below the item being dragged over

                    if (dir == "down"){

                          dragging = e.target.parentNode.appendChild(dragging , e.target);

                    }

                    else if (dir == "up")

                          dragging = e.target.parentNode.insertBefore(dragging , e.target);

           }

           // prevent the default behavior

           if (e.preventDefault) e.preventDefault();

           return false;

}
This function contains the logic for removing the dragged item and adding it back in at a different spot.
Add the final function that resets the styles and, lastly, ensure the script is set to run when the page fully loads:
…

function dragEndHandler(e) {

          dragging.style.opacity = "1.0";

}


window.onload = init;
That's it! You should have an ordered list that you can drag and drop the items in to change the order (Figure 7-15).

Figure 7-15. A drag-and-drop ordered list allowing for user reordering of the list items
Summary
My hope it that this chapter has shown you how you can peer into the JavaScript APIs that are sprinkled throughout the HTML5 specification. With scripting, the possibilities are as big as your imagination. The page can be changed in so many ways, dynamically and interactively. For example, an initially uninspiring thing like a blank canvas can be built to include all sorts of interesting effects for generating real-time changes to images. Or drag-and-drop functionality can be used for building all sorts of unique interfaces that might be found on such applications as web forms, games, or administrative interfaces. Using JavaScript, HTML, and CSS together, you could create beautiful skins (controls) for a custom HTML5 video player, which would look the same across all major web browser platforms. You could take the same approach with the audio element as well. The best way to learn how the JavaScript APIs work is to use them; and remember, if something doesn't work, take a step back and use the output in console.log() to help familiarize yourself with what is going on and what is available for you to use.