
15
Template Frameworks
In the previous chapter, we explored child templates, one of the newest features included in Joomla.
We’ll now complete the discovery of template-related features presenting some of the major template frameworks available for Joomla.
Template frameworks are special frontend templates that include a layout builder and offer a wide series of customization options, including color palettes, fonts, module styles, and much more. They allow you to build rich and complex layouts without advanced coding skills.
After reading this chapter, you will be able to do the following:
- Understand what a template framework is
- Understand how to build a custom layout in Joomla
- Know the most used template frameworks
What is a template framework?
As mentioned in the introduction of this chapter, template frameworks allow you to build rich layouts for your website, offering many options and controls, and making the customization completely visual. With a template framework, almost no CSS/JS/PHP coding skills are required.
From a technical perspective, template frameworks are distributed as normal templates that can be installed through the extension installer feature of the Joomla backend. Sometimes, they are distributed in bundles with additional plugins or as a package that includes the template installation files, together with the plugin or module installation files.
Template frameworks generally offer a layout builder that implements the 12-column Bootstrap grid, so that you can create new module positions and reallocate all the other module positions everywhere in the layout grid, visually, simply by moving and resizing positions.
Template frameworks provide multiple default configuration sets that allow you to change the website color palette or font type. They also provide options to customize font type and size, colors, menu type, site logo, and much more.
Many template frameworks also offer the possibility to inject custom JavaScript and CSS code, through specific fields in their configuration panel. They also provide options to integrate third-party services such as comments, social networks, and analytics services.
Furthermore, template frameworks often include options to optimize the website, compress CSS and JS files, minify assets, optimize images, and much more.
In the next section, we’ll analyze the advantages of using a template framework.
Why use a template framework
Using a template framework brings many benefits, allowing normal users to create stunning layouts and frontend experiences. Let’s explore the major advantages of using one:
- Build a completely custom frontend layout with ease
- Add and resize module positions everywhere
- Customize colors, fonts, backgrounds, logos, and favicons
- Enable/disable advanced features with a few clicks
- Customize the whole template starting from a solid and fully responsive base
- No need to write complex PHP/JavaScript/CSS code
- Compatible with all major browsers out of the box
- Build a custom multi-level mega menu in a visual way (where supported)
Some template frameworks implemented their version of child templates, far before Joomla’s core implementation, which we explored in Chapter 14, Child Templates.
Other template frameworks also implement some additional features, such as blocks that allow you to insert specific features, for example, slideshows, accordions, media galleries, maps, social media icons, and so on.
At the same time, using a template framework may bring some side effects in terms of performance and additional dependencies, and may not support all the Joomla extensions.
Consider potential vendor lock-in
Even though predefined blocks can be useful to build a wonderful template with ease, pay attention that vehiculating most of your website structure or content through these template-specific blocks may require additional efforts in case you want to change the template at some point. The use of modules and module positions in the template layout allows you to change the template more easily, as you can reuse modules and positions in other templates.
Let’s now get to know which are the most used template frameworks for Joomla.
Most used template frameworks
Template frameworks are often embedded into commercial templates. It’s very common to find commercial templates that are based on and include one of the most used template frameworks.
This is also because major template studios have developed their own template frameworks, on which they based their template production.
Furthermore, template frameworks providers also developed page builder extensions, which allow you to build pages in Joomla without even using articles and other components, customizing the whole page visually.
Template frameworks versus page builders
Template frameworks are special types of templates that allow you to completely customize your website layout and appearance with ease. Once configured, the template shows the contents of your website: articles, categories, component output, and much more.
A page builder, instead, allows you to build and design a single page. With a page builder, you can define the layout of a page, placing modules, contents, and pieces that are predesigned and available in the extension, such as media galleries, accordions and tabs controls, embedded maps, and so on. Some template frameworks include a page builder, as well as some others that support one or more page builders. A page builder can also be used when using a regular template not based on any specific framework.
There are many template frameworks available for Joomla 4 and they offer a wide set of features and options. Among others, the most known and used are as follows:
- Helix Ultimate by JoomShaper
- T4 Framework by JoomlArt
- Gantry by RocketTheme
In the next sections, we’ll see some of these template frameworks in action, starting with JoomShaper’s Helix Ultimate.
Example – Helix Ultimate
Helix Ultimate is the second generation of template frameworks developed by JoomShaper, a leading extension and template provider.
Helix Ultimate is a fully responsive, mobile-first template, based on Bootstrap 5. It allows you to design your website in a visual way, presenting a real-time preview of the website while configuring it, so that you can easily check the impact of your actions.
Helix Ultimate offers a drag and drop layout builder so that you can create your custom layout, defining rows and column sizes and properties, granting you granular control over all the aspects of your website structure. It allows you to set the font size and colors, upload and adjust logo and website headers with a few clicks, and test your website preview at the different view sizes by simulating different device screen sizes.
It provides you with several predefined style options that you can activate or change as you wish, offering unlimited design combinations.
Helix Ultimate integrates a mega-menu builder, with which you can create a multi-level and composite navigation system for your website. Furthermore, you can enrich your mega menu by adding modules (e.g., the Login module or custom modules) to make your website’s menu unique.
It also implements an off-canvas menu, which is used on mobile screens and is completely customizable so that you can provide a rich navigation experience to your mobile users.
Helix Ultimate offers a wide number of options to choose your desired font face, size, and color. It implements advanced blog styling tools, such as image resizing features and comment management functionalities. It also supports the import/export of the configuration of the template, making it easy to replicate the design on another website.
Helix Ultimate is available free of charge from the JoomShaper website and integrates complete support for SP Page Builder, which is the page builder extension developed by the same company.
In the next section, we’ll see how to install Helix Ultimate.
Installing Helix Ultimate
Helix Ultimate is made up of two installation packages:
- A template
- A system plugin
To install it, download the latest version from the developer website, then install the template through System Dashboard | Install – Extensions | Upload Package File, simply by dragging and dropping the installation file. Repeat the procedure for the Helix system plugin. The system plugin is active by default after the installation. Let’s now explore the Helix Ultimate template.
Customizing with Helix Ultimate
To start customizing your website using Helix Ultimate, open the Site Template Style page from System Dashboard, then click on the shaper_helixultimate – Default template style. The main page, as shown in Figure 15.1, shows a big green button (Template Options), which opens the framework configuration page, and the Menu Assignment tab, from which you can assign the template style to the menu items:
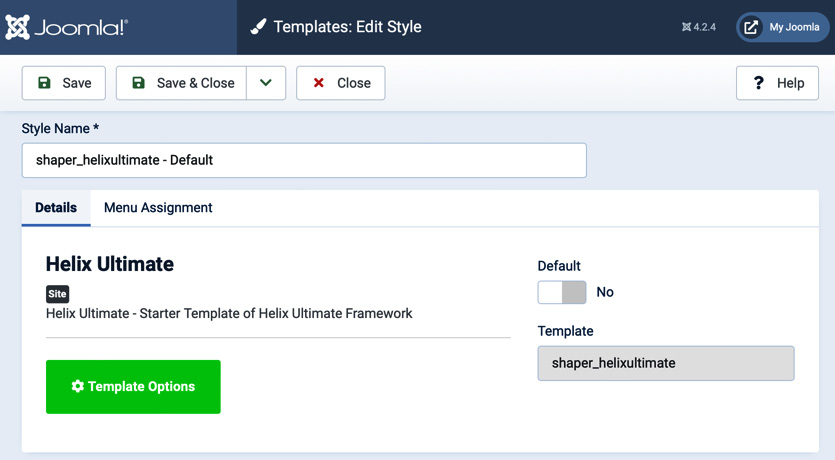
Figure 15.1 – Helix Ultimate | Templates: Edit Style
Let’s click on the Template Options button to see all the customization controls offered by Helix Ultimate. The website preview is opened with a floating menu from which you can access all the commands.
The Basic menu item – shown in Figure 15.2 – allows you to do the following:
- Specify your website logo
- Choose a structure layout for your website header
- Decide whether to use a fluid or boxed layout
- Implement social media icons
- Display copyright and a link to the top in the footer
- Customize the error page
- Enable the Coming Soon mode

Figure 15.2 – Helix Ultimate | Basic
At the top of the page, there is a toolbar that shows the logo of Helix Ultimate and the version in use, the controls to emulate different screen sizes (desktop, tablet, and mobile), and the buttons to save and close the screen.
The main part of the screen is occupied by the preview of the website with the Helix Ultimate template style applied.
The Presets menu item opens the color palette options. From the page, you can pick one of the default predefined sets of colors or enable the Custom Style option, which allows you to pick your desired color for each of the styled elements, as shown in Figure 15.3:

Figure 15.3 – Helix Ultimate | Presets
The Layout screen allows you to build your custom layout for your website, as shown in Figure 15.4. Here, you can create and change the rows and columns where to place module positions, as per your needs. The layout builder is based on the 12-column Bootstrap grid and allows you to specify custom CSS IDs and classes for each part:
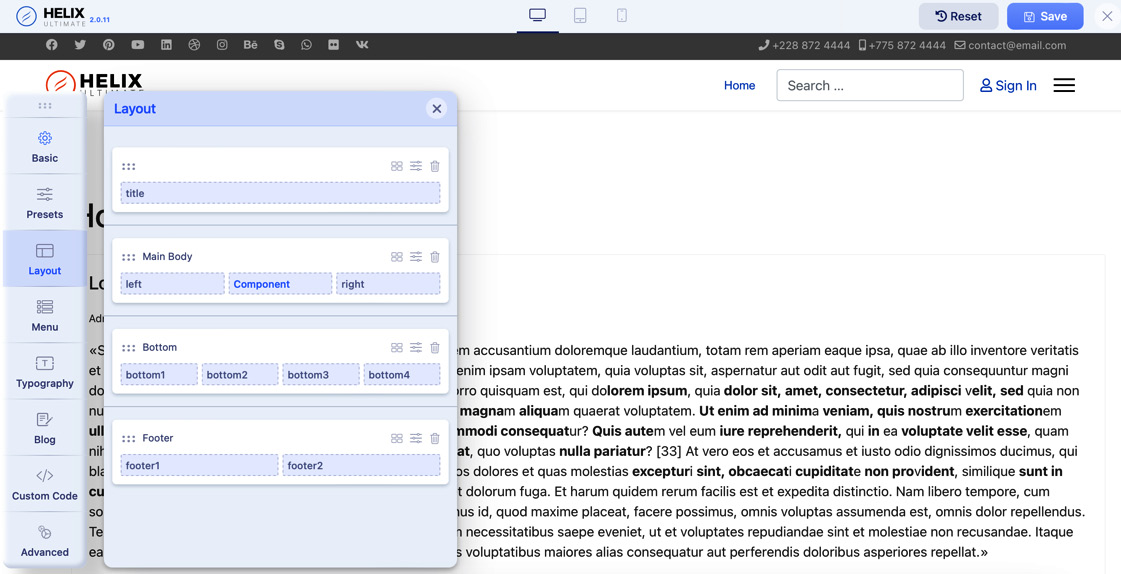
Figure 15.4 – Helix Ultimate | Layout
The Menu screen is where you can build your website menu, customizing the style of each menu item. You can select the desired type of menu, set the size of the drop-down menu (for submenus), and the animation, as shown in Figure 15.5:

Figure 15.5 – Helix Ultimate | Menu
From the same screen, you can also set the options for the Off-canvas menu that is shown on mobile screens. Furthermore, Helix Ultimate allows you to build a rich mobile menu, integrating login features, social icons, contact details, and much more.
From the Typography page, as shown in Figure 15.6, you can customize the Font family, including the size and weight of the text of your website, having the chance to set options independently for each type of text – headers, menu items, and contents:
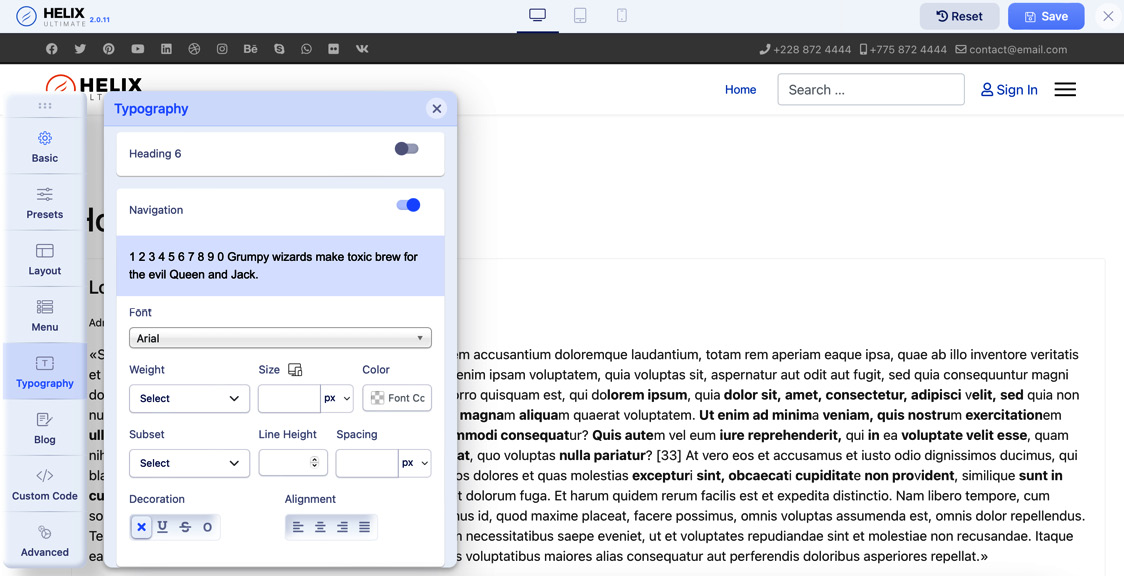
Figure 15.6 – Helix Ultimate | Typography
The Blog screen, among others, offers options to enrich your articles defining different image sizes and the ability to crop them to a specific size, as shown in Figure 15.7:

Figure 15.7 – Helix Ultimate | Blog
The List and Details tabs on the same page allow you to set the size of the image to be shown in the different article layouts. Helix Ultimate also integrates with some external comment services, such as Disqus, IntenseDebate, and Facebook.
The Custom Code page allows you to insert custom code in your template in a different place of the page code markup, as shown in Figure 15.8:

Figure 15.8 – Helix Ultimate | Custom Code
The last screen of Helix Ultimate is the Advanced page, as shown in Figure 15.9, which includes options that allow you to do the following:
- Compress CSS and JS files
- Compile CSS as SCSS
- Enable/disable FontAwesome and Google Fonts
- Enable/disable image lazy loading
- Import/export the configuration
- Specify your Google Analytics 4 tracking code
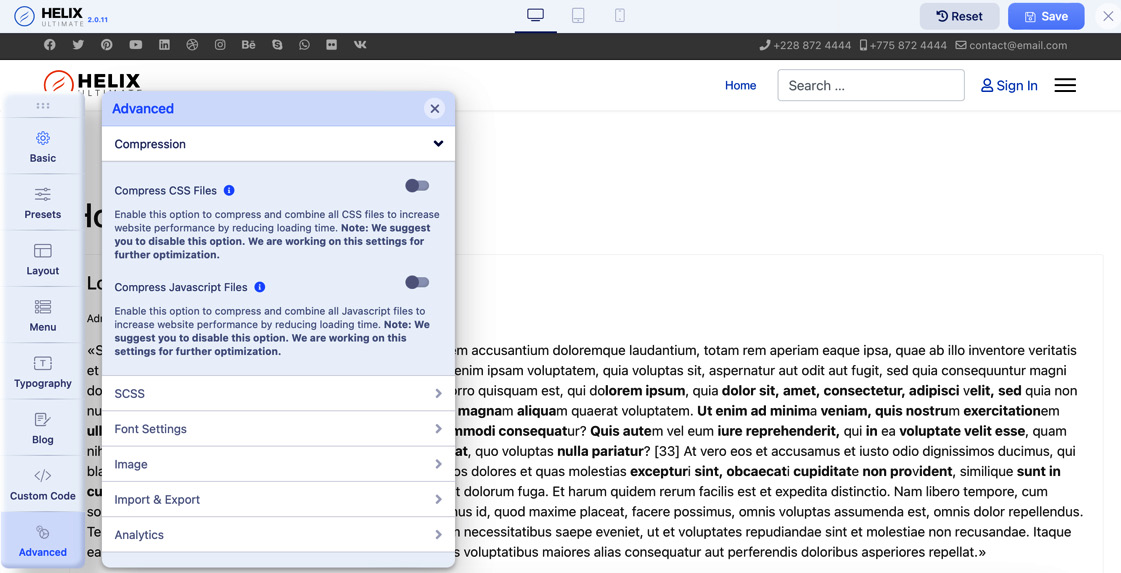
Figure 15.9 – Helix Ultimate | Advanced
Once you have completed all the desired changes to the template, you need to save them by clicking on Save in the toolbar, then close it by clicking on the X symbol. To check your website with the Helix Ultimate framework, mark it as the default template style for your website and open your website frontend.
With all these options and the real-time preview, Helix Ultimate is one of the most used template frameworks and it’s also used as the base for many commercial templates.
In the next section, we’ll explore the T4 Framework by JoomlArt.
Example – T4 Framework
T4 Framework is a template framework developed by JoomlArt, one of the largest Joomla template and extension development companies. T4 Framework is a complete template framework that includes a layout builder, a mega-menu designer, and a wide range of controls to customize your website appearance.
It’s available in two releases, a Bootstrap 4 version and a Bootstrap 5 one. It integrates FontAwesome and Google Fonts and allows you to work on any page item, from text style to colors, from module positions, names, and sizes to their background options.
T4 Framework offers tools to optimize your template speed, combining and minifying JavaScript and CSS files, as well as editors to work on CSS and SCSS.
In the next section, we’ll explore how to install and use T4 Framework.
Installing T4 Framework
T4 Framework is distributed through two packages:
- The template
- The system plugin installation files
Install the template through System Dashboard | Install – Extensions | Upload Package File, simply by dragging and dropping the installation file. Repeat the procedure for the T4 system plugin. The system plugin is active by default after the installation. Let’s now work on our template.
Customizing with T4 Framework
To start customizing your website using T4 Framework, open the Site Template Style page from System Dashboard, then click on t4_bs5_blank – Default (which is the name of the T4 blank template based on Bootstrap 5).
The T4 Framework management screen will look like Figure 15.10:
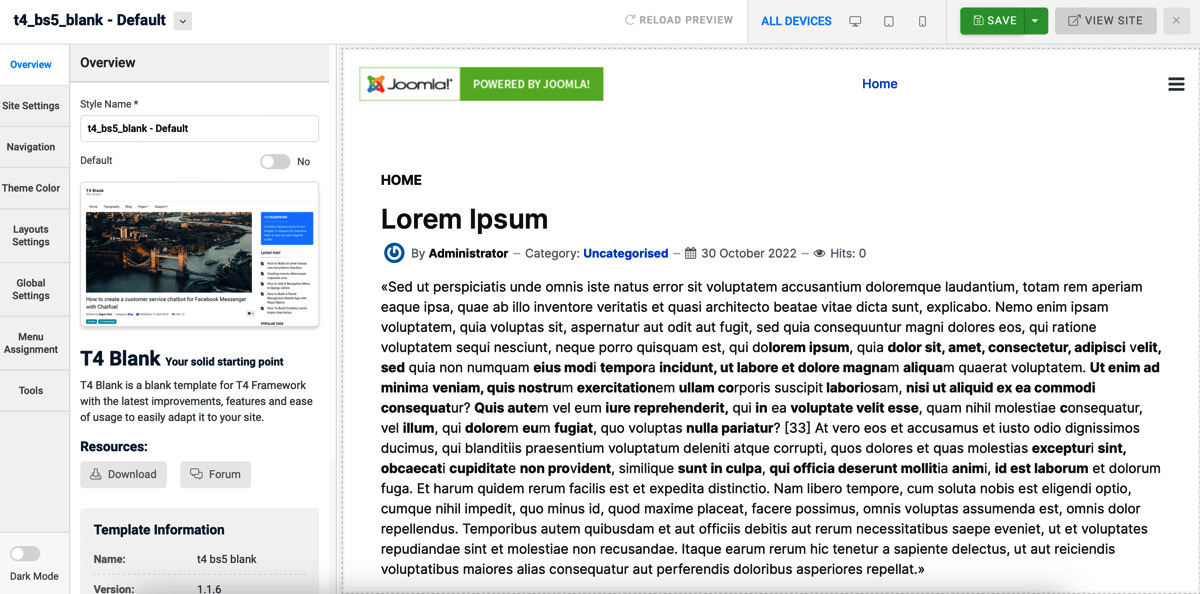
Figure 15.10 – T4 Framework | Overview
As displayed in the previous figure, the Framework page differs from the regular Joomla backend for its setup and offers specific options and configuration panels. The Overview page shows the style name and some information about the template and shows a preview of the website with the template applied on the right side of the page.
On the top bar, there are buttons to preview the website at different sizes (desktop, tablet, and mobile), save the changes, open the public website, and close the page.
On the left side, we can find the menu to go through all the options offered by the framework: Site Settings, Navigation, Theme Color, Layout Settings, Global Settings, Menu Assignment, and Tools. T4 Framework is also available with a Dark Mode to save energy and reduce eye fatigue.
On the Site Settings page, as shown in Figure 15.11, you can find controls to do the following:
- Set the site name
- Set the site slogan (or subtitle)
- Upload the site logo for desktop and mobile
- Customize the website’s typography: font style, color, and size
- Customize page appearance, through background color or images
- Set up author configuration for articles, set whether to show a link to the Author page or not, and avatar settings
- Implement a website favicon

Figure 15.11 – T4 Framework | Site Settings
The Navigation page shows a series of options to configure your website’s main menu, offering a flexible mega menu, as shown in Figure 15.12.
There are also controls to set up the Offcanvas menu for mobile devices and act on menu breakpoints, making your design respond to your needs:

Figure 15.12 – T4 Framework | Navigation
The Theme Color page collects all the color-related controls, allowing you to choose the desired color for the background, text, links, menu items, and much more, as shown in Figure 15.13:

Figure 15.13 – T4 Framework | Theme Color
On the Layout Settings page, as shown in Figure 15.14, you can build your page layout by customizing rows and columns, creating and modifying module positions, adding new sections, and much more:

Figure 15.14 – T4 Framework | Layout Settings
On the Global Settings page, as shown in Figure 15.15, you can find controls to do the following:
- Choose the frontend template editor style
- Enable/disable the CSS and JS optimization features with any eventual exclusion
- Inject custom PHP/CSS/JS code in your template in different positions
- Enable/disable template add-ons, such as FontAwesome and IcoMoon
- Enable/disable OpenGraph

Figure 15.15 – T4 Framework | Global Settings
The Menu Assignment page, as with all the other Joomla templates, allows you to choose which menu the template style should be assigned to. The Tools page includes a built-in editor to operate on CSS and SCSS template files, directly from your website backend.
Once you have completed all the desired changes to the template, you need to save them by clicking on Save and Close in the toolbar. To check your website with the T4 Framework, mark it as the default template style for your website and open your website frontend. Building a custom template for your website using T4 Framework is very easy thanks to all the visual controls and options.
In the next section, we’ll explore the Gantry template framework.
Example – Gantry
The last template framework we’ll get to know in this chapter is Gantry, developed by one of the most known Joomla template studios: RocketTheme.
Gantry is an open source, fast, and lightweight template framework that integrates an easy-to-use layout manager, mega-menu support with a visual editor, and a powerful particle system. Particles are simple blocks that can be imported and placed anywhere in your template.
Gantry implements a built-in way to handle overrides and allows you to have template styles derived from a base template. It’s a similar implementation to child templates, which we explored in Chapter 14, Child Templates, but it’s template specific.
Let’s see how to install the Gantry template framework.
Installing the Gantry framework
Gantry is distributed through three packages:
- The Gantry component
- Two template installation files: Helium theme and Hydrogen theme
Install the component first through System Dashboard | Install – Extensions | Upload Package File, simply by dragging and dropping the installation file. Then, repeat the procedure for the two template installation files.
Customizing with Gantry
To start customizing your website using the Gantry framework, click on Gantry 5 Themes from the Components menu, then on Available Themes. There, you can find the two themes installed: Helium and Hydrogen, as shown in Figure 15.16:

Figure 15.16 – Gantry | Available Themes
In this example, we will explore the Helium theme. Let’s click on Configure to see the template configuration screen.
The setup screen shows the Base Outline style of the Helium theme. This represents the master style for the template, serving as the parent template, which is inherited by the child styles. The Layout tab shows the page, as shown in Figure 15.17, allowing you to build your template layout acting on module positions, rows, and columns of the page:
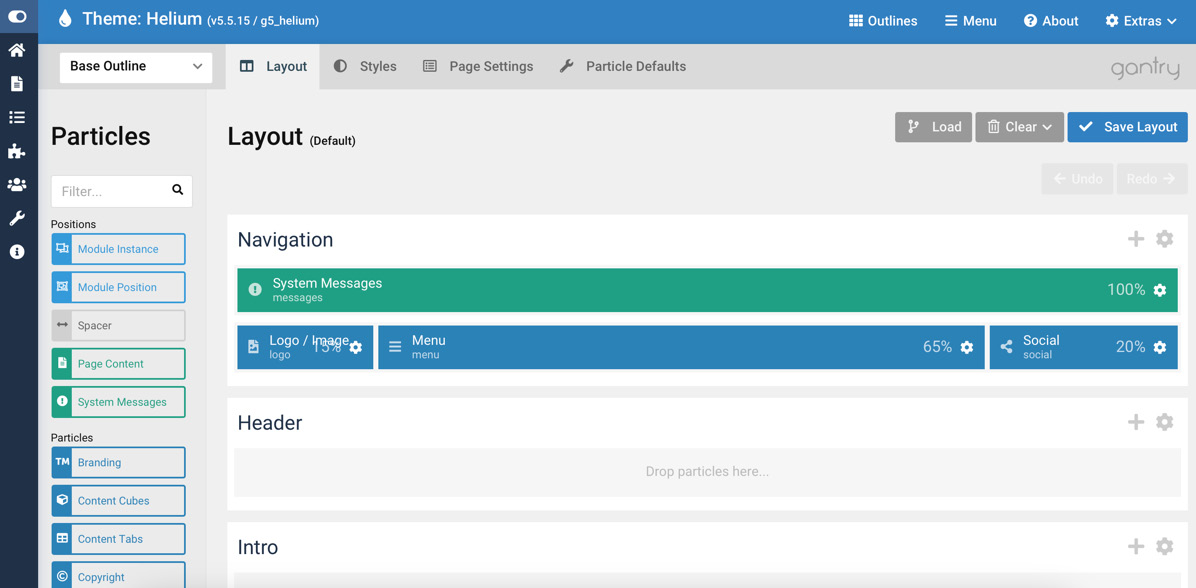
Figure 15.17 – Gantry | Helium theme | Layout
For each position, you can define the name, options, and styles. In the left sidebar, you can find the available particles (the predefined blocks that can be placed in every position). There are particles to handle content, system messages, module instances, copyright text, logos, social icons, and much more.
The Styles tab allows you to choose between color presets and to customize the color of each template item: body, titles, links, background, and so on, as shown in Figure 15.18:

Figure 15.18 – Gantry | Helium theme | Styles
The Page Settings tab, shown in Figure 15.19, allows you to enable some services like Font Awesome, and customize the favicon, page meta tags, and page attributes, among other options:
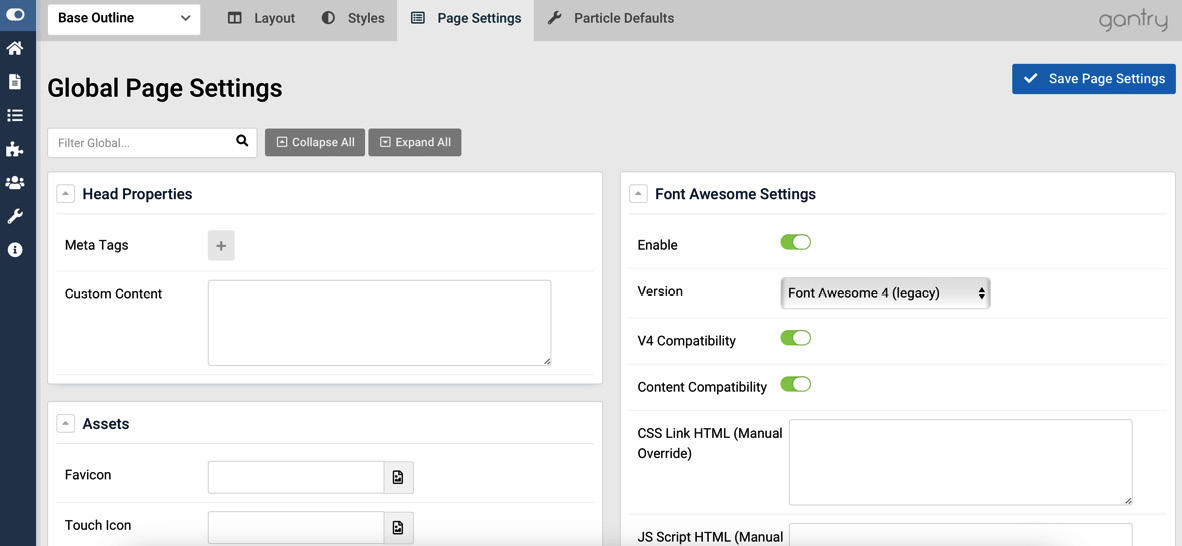
Figure 15.19 – Gantry | Helium theme | Page Settings
From the Particle Defaults page, you can set the default values for some particles, such as the copyright text, the logo, and some options that are applied globally throughout the template, as shown in Figure 15.20:
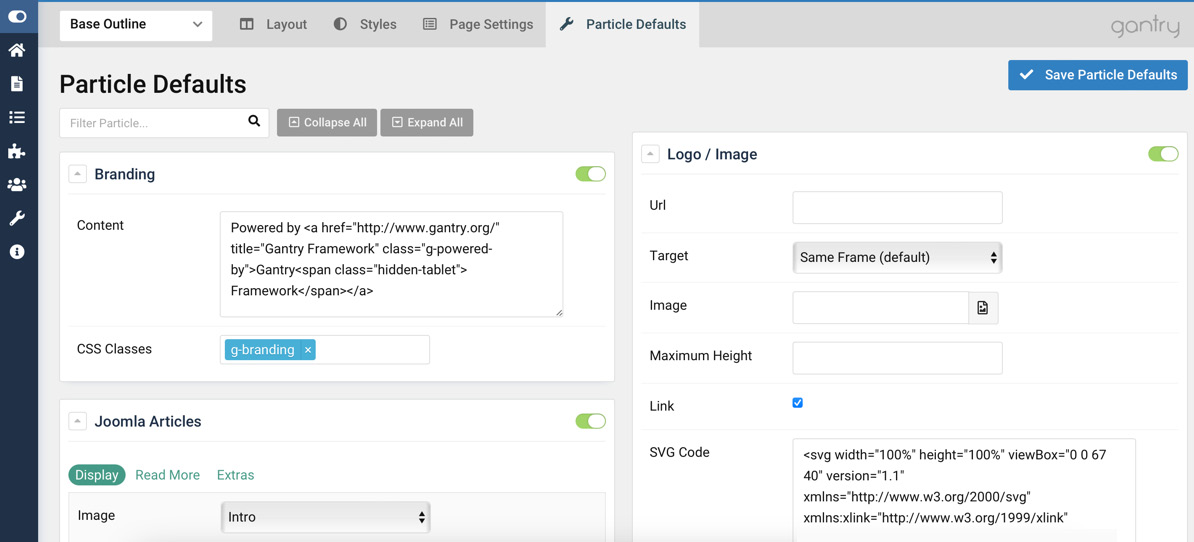
Figure 15.20 – Gantry | Helium theme | Particle Defaults
Once you have completed the setup of Base Outline, you can work on the specific styles, which Gantry calls theme outlines. Theme outlines are like child templates: they inherit everything from the base outline and allow you to customize any aspect, including layout, styles, page settings, and particle values. Theme outlines can be assigned to menu items, as we normally do with template styles.
Gantry also includes a menu editor, which is available by clicking on the Menu button in the toolbar, as highlighted in Figure 15.21:

Figure 15.21 – Gantry | Helium theme | Menu
The Gantry menu editor allows you to easily build your custom mega menu for your website by simply dragging and dropping menu items as well as particles, as shown in Figure 15.22:

Figure 15.22 – Gantry | Helium theme | Menu Editor
When you insert a particle in the menu, you can choose which particle you want to add from a pop-up window, as shown in Figure 15.23:
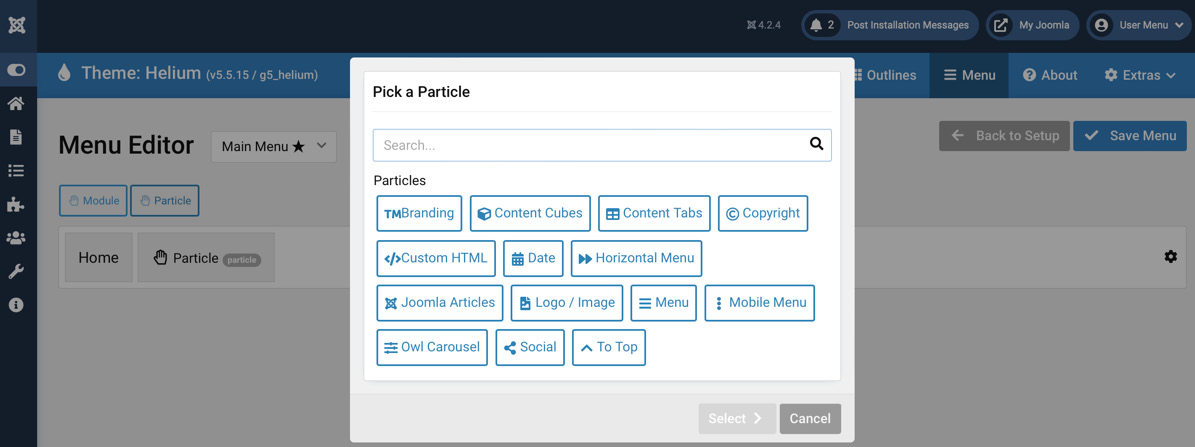
Figure 15.23 – Gantry | Helium theme | Menu Editor | Particle selection
Once completed, save the menu and the work on the template. It’s time to assign a theme outline to one or more menu items – or as site default – and check your website frontend. Gantry is very powerful with its rich configuration features and built-in particles.
With Gantry, we have completed the exploration of three of the most used Joomla template frameworks. Test your knowledge with the exercises contained in the next section.
Exercises
It’s time to apply the knowledge you acquired in this chapter about template frameworks.
Exercise 1 – Use a template framework
In this exercise, you are required to install the Helix Ultimate template framework and build a simple layout with it:
- Download and install the latest version of Helix Ultimate (template and plugin) from this page: https://www.joomshaper.com/downloads/template/helixultimate.
- Install the template first, then the plugin from your website’s backend.
- From System Dashboard | Site Template Styles, open the shaper_helixultimate – Default style.
- Click on Template Options.
- Upload your logo and favicon from the Basic page.
- Enable Boxed Layout from Basic | Body.
- On the Typography page, enable the Body option and choose Georgia as the font, set the weight to Normal, and the font size to 12px.
- Save the changes and close the page.
- On the Site Template Styles page, select shaper_helixultimate – Default and mark it as the default template style for your website by clicking on the Default button in the toolbar.
- Now, open the website frontend and check the template you created.
Summary
In this chapter, we understood what a template framework is in Joomla and how it can help build a custom design for a website, without having coding and development skills. We’ve explored three of the most used template frameworks – Helix Ultimate, T4 Framework, and Gantry – getting to know their setup and configuration options.
In the next chapter, we’ll explore some advanced security features, including multifactor authentication, and other functionalities to increase your website security.
Resources
- Helix Ultimate framework: https://www.joomshaper.com/helix
- T4 Framework: https://www.joomlart.com/t4-framework
- Gantry template framework: https://gantry.org