

• A circuit also needs a component that runs on electricity. This
can be a light, a motor, a speaker, or other components that
need electricity to work. It is known as the circuit’s load.
• A power source like a battery has a negative terminal (end)
and a positive terminal. Components have negative and
positive terminals too. For some components, it doesn’t matter
which end is which. But an LED will only light if the positive end
is facing the positive end of the battery. This is called polarity.
• To prevent a short circuit, cover the circuit with insulation,
material that isn’t friendly to electricity. Insulation keeps the
electricity flowing through the load. Without a load, a circuit
can overheat and even catch fire. That’s why short circuits are
dangerous!
Chapter 2: Robots That Get Around 31
Make_Simple_Robots_interior_FIN.indd 31Make_Simple_Robots_interior_FIN.indd 31 4/26/22 1:54 PM4/26/22 1:54 PM
Project:
Make a Light-Up Origami Jumping Frog
ADD AN ELECTRIC CIRCUIT TO A PAPER MODEL TO MAKE IT
POP AS IT HOPS!
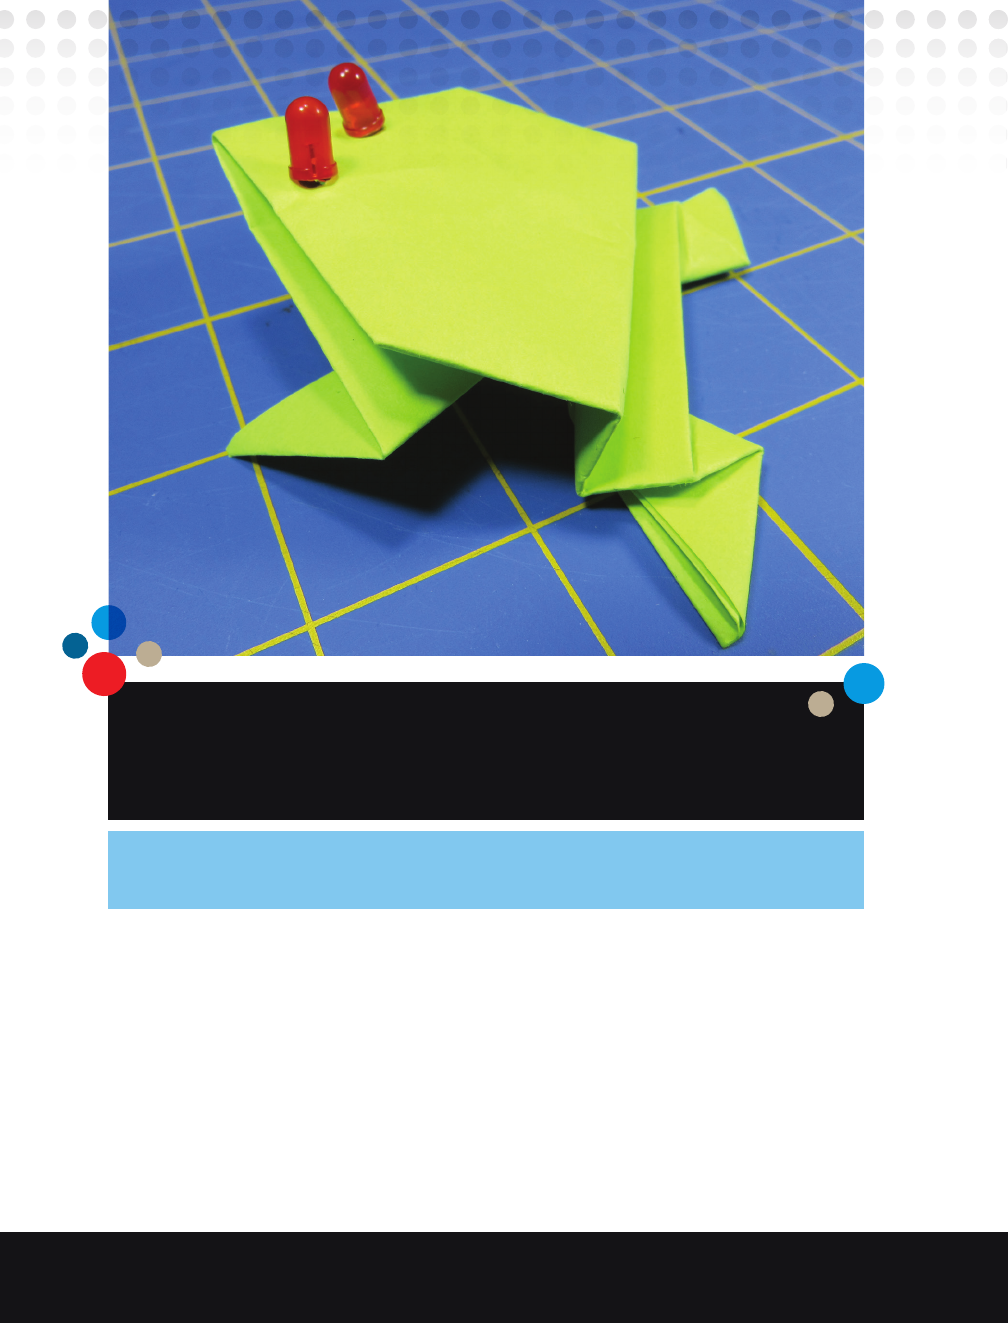
This light-up robot frog was invented by then-11-year-old Mina Olsson
and her mom Emi, a business executive and computer engineer. To create
it, they combined a traditional origami jumping frog with a light-up paper
circuit project, inspired by my book Paper Inventions. It works kind of like
a robot’s pressure sensor. When you press on the frog’s body, it closes an
electrical circuit that turns on the frog’s LED eyes. When you remove your
finger, the circuit opens and the lights turn off. (See the box “How Does an
Electrical Circuit Work?” on page 30.)
32
Making Simple Robots, 2nd Edition
Make_Simple_Robots_interior_FIN.indd 32Make_Simple_Robots_interior_FIN.indd 32 4/26/22 1:54 PM4/26/22 1:54 PM

At the same time, you’re creating potential energy that can make the frog
move on its own. It’s the same thing that happens when you push down on a
spring — let go, and it pops back up.When you take your finger off the frog,
the paper model leaps across the table. If you’re lucky, it may even do a
little flip!
You don’t need any origami experience to make this design, but it helps
to have patience. There are some tricky parts that may take a few tries to
get right. Once your frog is hopping, you’ll need to (temporarily) dissect it
so you can insert the LEDs. Building the circuit is a snap — all you need to
connect the lights to the battery is a little bit of metallic foil tape. Then fold
everything back up, and your frog will be jumping and glowing in no time!
WHAT TO EXPECT
• Time Needed: Less 1 hour
• Cost: Around $2
• Difficulty: Easy
• Safety Issues: Be careful with the coin battery. It may be
a swallowing hazard for young children and pets, and can heat up
if it is short-circuited.
SKILLS USED
Folding and creasing paper into standard origami shapes
SUPPLIES
• Copy paper, cut to 4 1/4 inches by 8 1/2 inches (or half a sheet of
8-inch square origami paper)
• 2 LEDs with medium to long wire leads (they should be the same color)
• 3V coin battery (CR2032 or similar)
• 2 small strips (1/4 inch wide) of copper foil tape with conductive glue.
You can also use aluminum foil tape from the hardware store heating
aisle, but you will need to fold it over so the foil side conducts electricity
to all parts of the circuit.
• Clear tape (or any kind of non-conductive tape)
Chapter 2: Robots That Get Around 33
Make_Simple_Robots_interior_FIN.indd 33Make_Simple_Robots_interior_FIN.indd 33 4/26/22 1:54 PM4/26/22 1:54 PM
INSTRUCTIONS
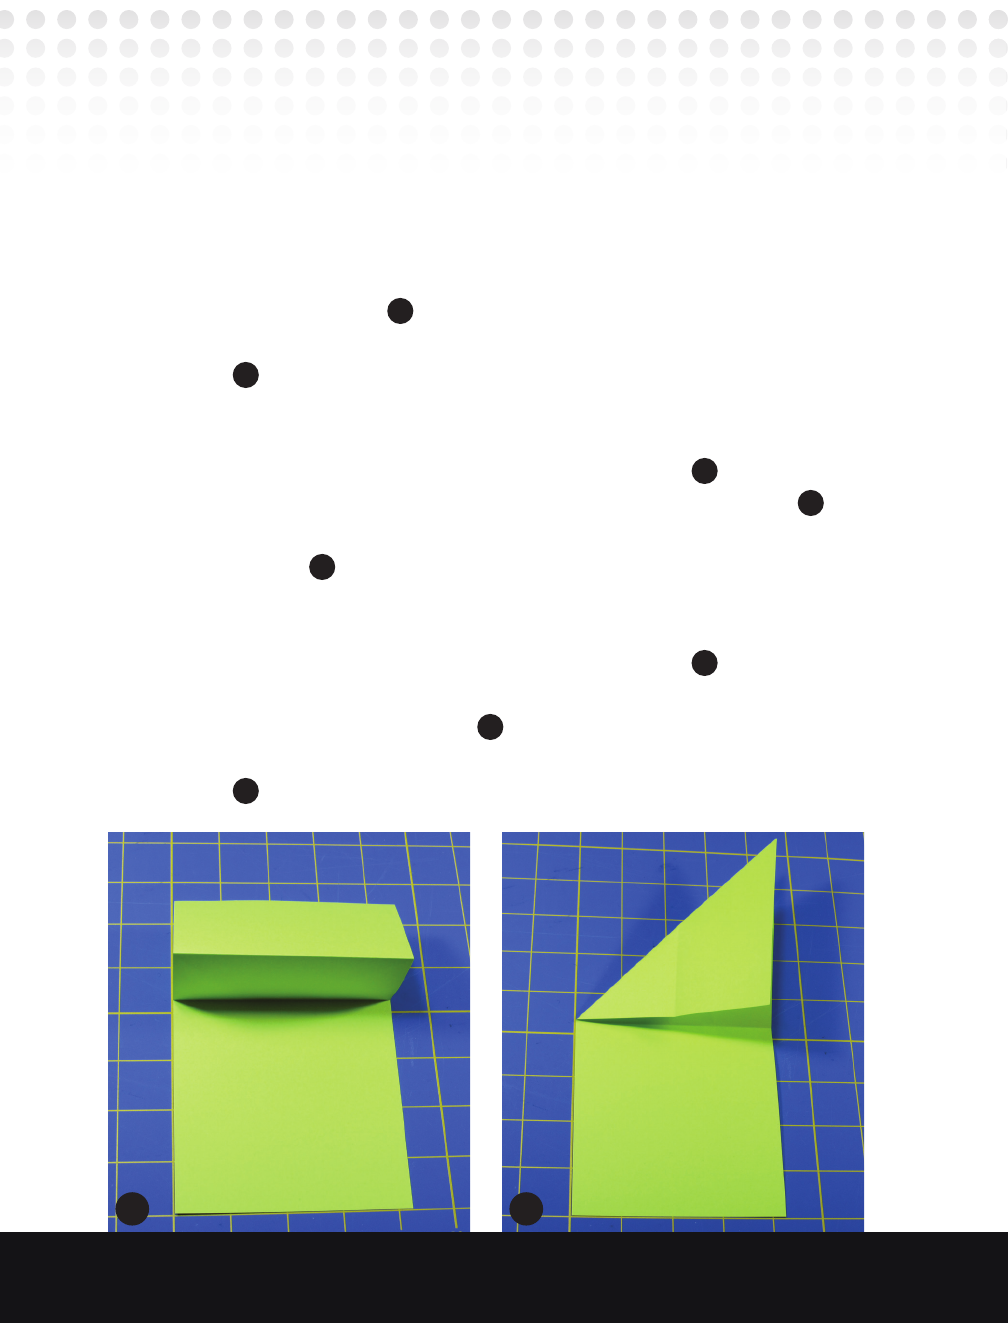
1. Start by making some creases in the paper that will help you figure out
later folds:
• Bring the shorter edge at the top down to the bottom edge. Make the
crease sharp.
• Bring the same edge up to the middle fold and crease again. Open the
paper up again
(Figure
A
)
.
• Bring one top corner down to the opposite end of the middle crease
(Figure
B
)
. Open and repeat with the other corner to form an “X”.
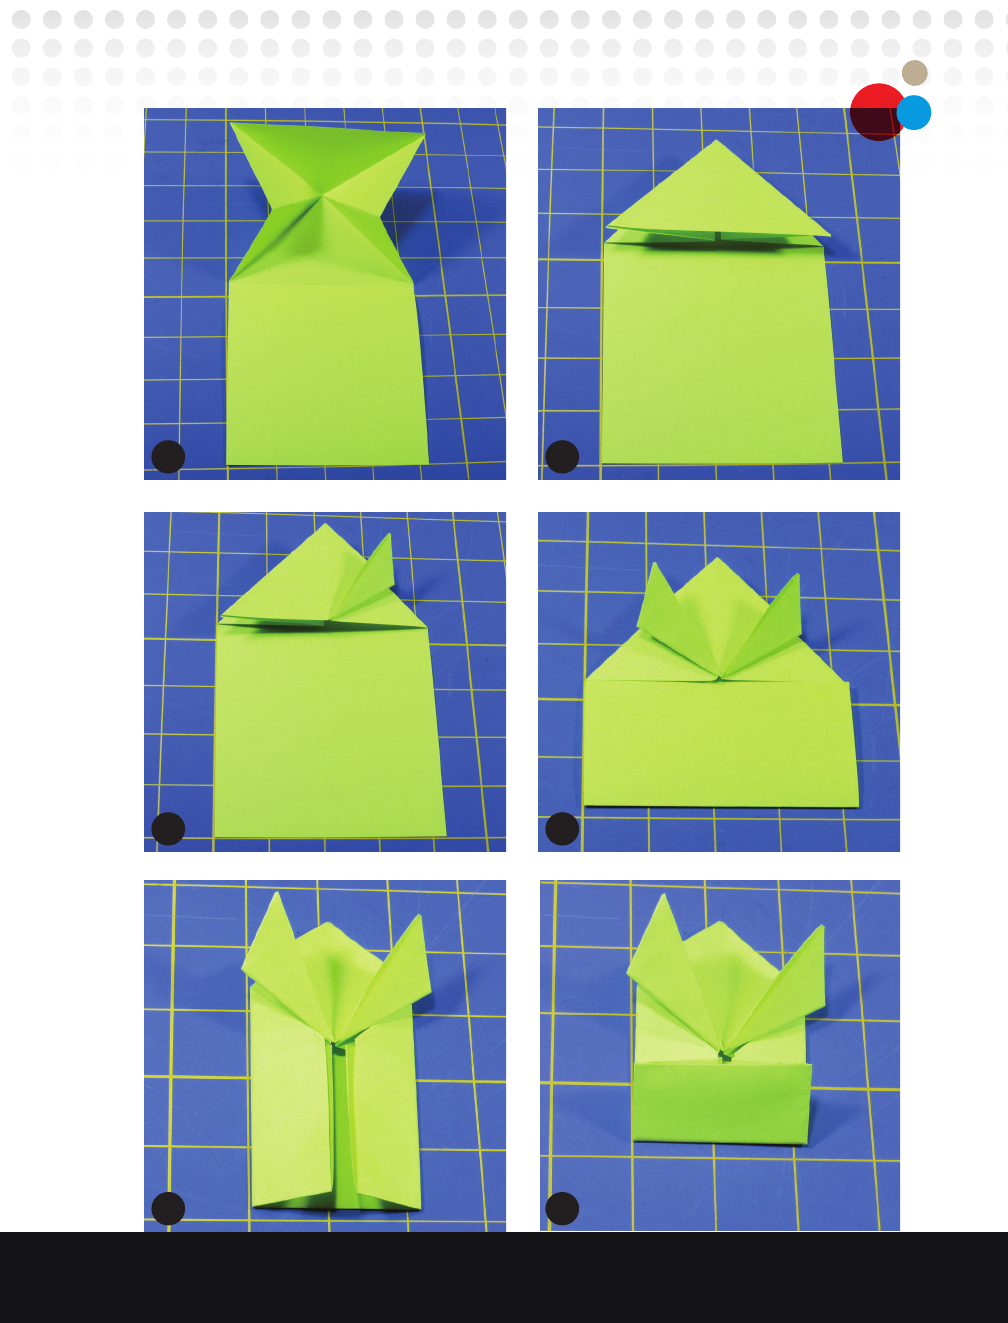
2. To make the frog’s head and front legs:
• Take the X-crease on the top half of the paper
(Figure
C
)
and push in
the sides to form a triangular “tent.” Flatten the triangle
(Figure
D
)
.
• Fold the bottom corners of the triangle up as shown to form the legs.
Flatten
(Figure
E
)
.
3. To make the frog’s body:
• Fold up the bottom edge to the middle crease
(Figure
F
)
.
• Fold in the sides so they meet in the middle. You may need to lift the
front legs out of the way
(Figure
G
)
.
• Fold the bottom up again so it meets the bottom corner of the head.
(Figure
H
)
A B
34
Making Simple Robots, 2nd Edition
Make_Simple_Robots_interior_FIN.indd 34Make_Simple_Robots_interior_FIN.indd 34 4/26/22 1:54 PM4/26/22 1:54 PM
C
E
G
D
F
H
Chapter 2: Robots That Get Around 35
Make_Simple_Robots_interior_FIN.indd 35Make_Simple_Robots_interior_FIN.indd 35 4/26/22 1:54 PM4/26/22 1:54 PM
..................Content has been hidden....................
You can't read the all page of ebook, please click here login for view all page.