
Project: Design a Wheel-Leg Hybrid
USE COMPUTER DESIGN SOFTWARE TO INVENT YOUR OWN
VERSION OF FEET THAT ROLL!
The idea of a wheel made up of legs goes back to the ancient triskelion, a
symbol with three human legs joined together in a circle. Robot whegs may
have rounded feet, or even mini-wheels on the ends of their legs. Other
designs just roll along on the tips of their spiky legs. In this project, you’ll
create your own whegs with a free design program called Tinkercad.
Computer-Aided Design, or CAD software is used by architects, engineers,
car designers, video game designers, and more. It can be used to create
Chapter 2: Robots That Get Around 51
Make_Simple_Robots_interior_FIN.indd 51Make_Simple_Robots_interior_FIN.indd 51 4/26/22 1:55 PM4/26/22 1:55 PM

2D (two-dimensional, or flat) and 3D (three-dimensional, or boxy) drawings
and animations. If you’ve ever created an object in Minecraft, you’ve used a
type of CAD software.
The instructions here will help you get started with Tinkercad. You can
take a pre-existing shape, such as a gear, and transform it into a wheg. Or
follow the directions to make the sample three-legged version shown. This
sample wheg is small, only about 2 1/2 inches across. It’s flat so you can cut
it out of cardboard, or 3D print it relatively quickly. The hole in the center is
sized to fit on a bamboo skewer. Check out the sample design on Tinkercad
at tinkercad.com/things/1RlzfX5ZoYV.
WHAT TO EXPECT
• Time Needed: 1 hour
• Cost: Free (to create an online Tinkercad design)
• Difficulty: Easy to moderate
SKILLS USED
Drag and drop graphics
SUPPLIES
• Pen and paper
• Computer with internet access
• Tinkercad account
52
Making Simple Robots, 2nd Edition
Make_Simple_Robots_interior_FIN.indd 52Make_Simple_Robots_interior_FIN.indd 52 4/26/22 1:55 PM4/26/22 1:55 PM
Get Started with Tinkercad
Tinkercad is free online software that’s easy to learn.
Here’s what to do:
1. Go to Tinkercad.com. If you don’t have an account, click “Join
Now” and create one using an email address. If you have an
account, just sign in. Any designs you create, and any shapes you
“favorite,” will be saved in your account.
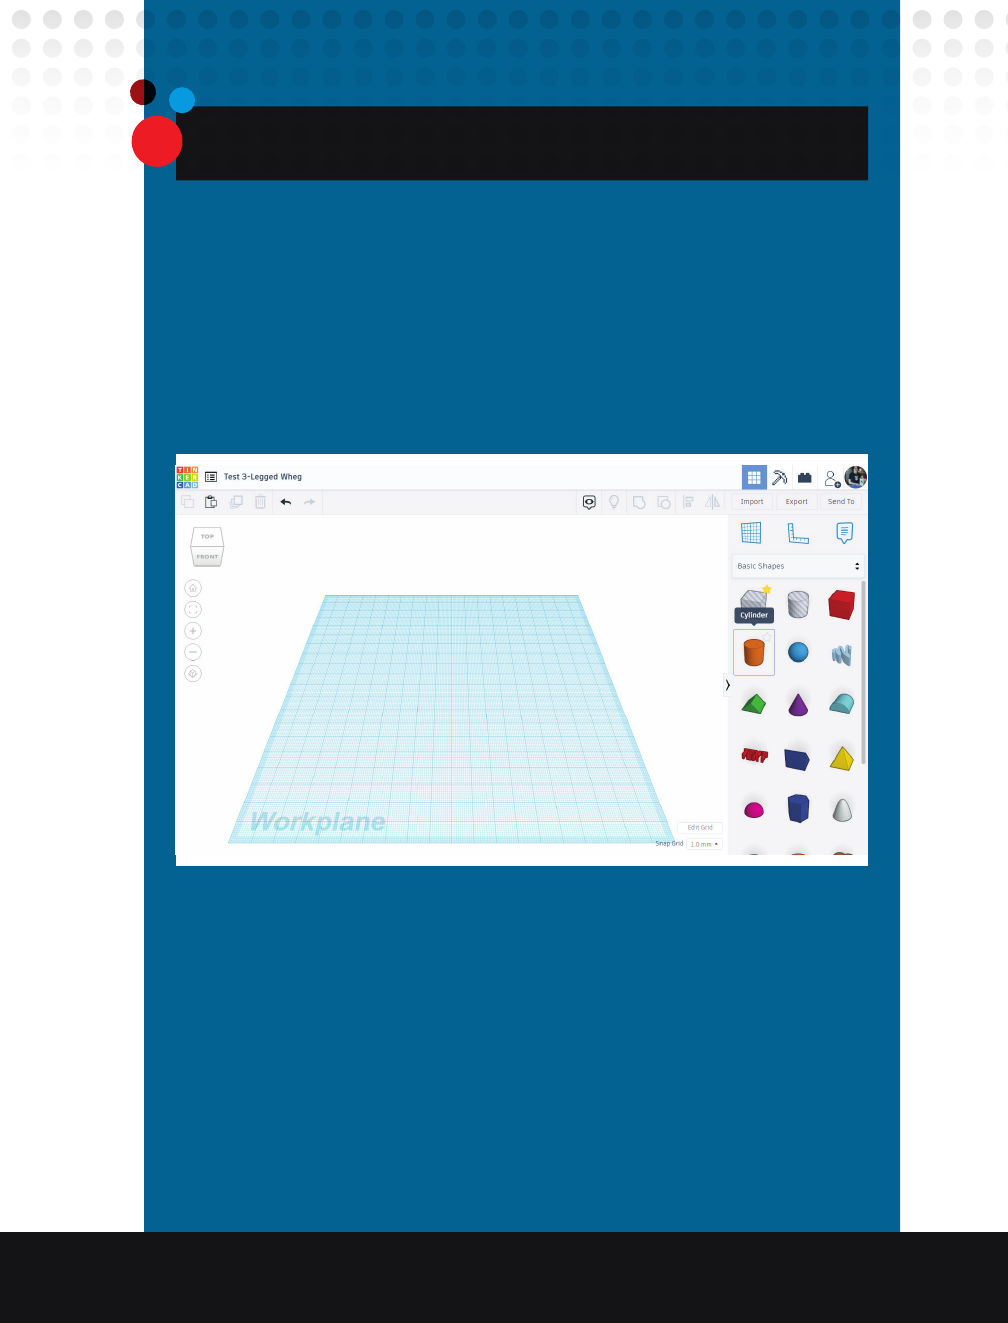
2. On your dashboard page, click on “Create New Design.” When
you start a new design or lesson, here’s what you’ll see:
• The Workplane is the surface you build your object on. To see
it from different angles, right click and drag your mouse, or
move the little navigation box around to see the top, front, left,
right, back, and bottom views. Small buttons underneath help
you zoom in and out, or focus on an object you select.
• Check out the menu of shapes along the side. If you see any
you like, click on the star to add them to your Favorites list.
Chapter 2: Robots That Get Around 53
Make_Simple_Robots_interior_FIN.indd 53Make_Simple_Robots_interior_FIN.indd 53 4/26/22 1:55 PM4/26/22 1:55 PM

3. Click on any block you like and drag it onto the Workplane.
Then start to build an object:
• Click on the shape to select it and work on it:
• To change the shape, stretch or squash it by
dragging the little white boxes around it.
• Flatten the edges or round them off by
adjusting the settings in the pop-up box.
• To lift a shape off the Workplane, drag
the little black cone at the top.
• To set it back on the Workplane, select
it and type D, for Down.
• To get rid of a shape, click on it and hit the
Delete or Backspace key on your computer.
• You can also create your own shape using the extrusion
tool from the Shape Generator menu. “Mold” it by dragging
around the handles in the pop-up box.
• Add more shapes and connect them. Attach a new workplane
to one side of the object.
• When you like what you’ve got, select all the shapes by
dragging your mouse over them. Then click on the “Group”
symbol at the top to group them together. That way, they
become one piece that you can move around or combine with
other shapes or other groups.
• If you want to cut an opening, use a hole (or turn a regular
shape into a hole). Overlap a regular shape with a hole and
group them. The hole will get cut out of the regular shape.
• If you need to fix anything, just Undo the last step with the
arrow at the top. You can also Ungroup any groups you
created.
4. When you’re done, name your project so you can find it again
in your Tinkercad account. You can share the link to your project
with others, or print out an image of it. You may be able to use
the image as a pattern to make a cardboard prototype!
54
Making Simple Robots, 2nd Edition
Make_Simple_Robots_interior_FIN.indd 54Make_Simple_Robots_interior_FIN.indd 54 4/26/22 1:55 PM4/26/22 1:55 PM

Design Your Own Whegs in Tinkercad
To design your own wheg, first sketch out some rough ideas with
paper and pencil. Look at photos of existing wheg designs for
inspiration, and think about questions like these:
• What kind of surface will your whegs travel over? Do they
need to be sturdy to cross hard, rocky ground? Or wide like a
snowshoe for soft, sandy, or swampy terrain?
• What do you want your whegs to look like?
• How many legs per wheel?
• Legs bent or straight?
• Feet flat or curved?
• How will they be attached to the robot body? If you’re adding
them to a toy vehicle or homemade body, make sure they fit on
the axles (the rods that hold the wheels and let them spin).
• Will you try to build your whegs? If you’re cutting them out from
cardboard by hand, stick to simple shapes. If you’re 3D printing
them, make them small so they’ll print quickly.
Some ideas to start with:
• Choose a Shape Generator gear as a base, and use the controls
to turn it into a simple wheg. Add or subtract legs, make them
short or long, fat or skinny, pointy or rounded.
• Follow the lesson
“Make a Gear in
Tinkercad” on the
Tinkercad site to
custom-design a
gear-type wheg.
• Use the shape
extrusion tool to
make the legs wiggly,
bend them at the knees, or add feet.
Chapter 2: Robots That Get Around 55
Make_Simple_Robots_interior_FIN.indd 55Make_Simple_Robots_interior_FIN.indd 55 4/26/22 1:55 PM4/26/22 1:55 PM
..................Content has been hidden....................
You can't read the all page of ebook, please click here login for view all page.