
This chapter will be somewhat free-flowing and will jump from one subject to another to convey additional information, concepts, methods, and terminology that I haven't covered in the previous projects of this book. These extras are important for any game artist to know. Many of these topics are techniques that you might use only every so often on certain projects, or perhaps never. But they are good tips that all good environment artists should be aware of.
Autodesk's Mudbox and Pixologic's ZBrush are two programs that have become extremely popular in the video game industry. They allow extremely high-resolution models to be made and can help create an exceptional amount of detail that just isn't possible in Maya alone. Although using these programs was not covered in this book (since this book is about Maya), I highly recommend trying one or both of them. You may also want to pick up ZBrush Character Creation: Advanced Digital Sculpting by Scott Spencer (Sybex, 2008) or Introducing Mudbox by Ara Kermanikian (Sybex, 2010). Both books do an excellent job covering their respective applications and can be great companion books for this one.
Many games will require you to create Level of Detail (or LOD) models for your environment props and assets, especially if the game features large vistas where the player is able to see for long distances. Creating LODs for your models enables the game to switch higher resolution models for lower resolution models as the player's vantage point gets farther away. This way, high detail meshes can be seen by players who are close to them and low detail meshes are seen from far away. If there were no differences in Level of Detail, you wouldn't be able to climb to the top of a tower in games such as Assassin's Creed and still be able to view the entire city below in all of its richness and splendor without the hardware or the game engine gasping and wheezing in protest.
You may think that such low-geometry models would detract from the look of the game, but they actually help. Take a game like Crysis, for example. It has a very elaborate LOD system to allow for large jungles with thousands of pieces of foliage. In that game, you can literally see a point from hundreds of yards away and run to that point without any load times slowing you down along the way. As the player gets closer to that distant point, the geometry that once was so far away gets closer as well. As it does, the game switches the low-resolution meshes with higher-resolution meshes. Meanwhile, the position that the player used to be in has been replaced with much lower-resolution geometry.
Note
The farther away a prop is, the more LOD transitions may be needed. If a prop has only two LOD "steps," then the player could see the transition between the two LODs pop into view. If there are three or more LOD steps, the prop can transition between LODs as the player approaches, which allows for a smoother transition between low-resolution and highresolution meshes.
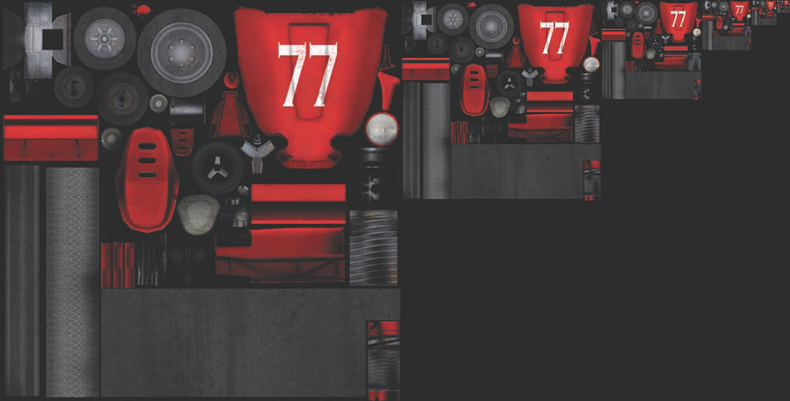
Because the player was so far away, the low-resolution meshes looked just fine. If you were able to see the same geometry up close, it would have looked like a blocky, blurry mess! In the example (Figure 9.1), the building on the left is the high-resolution building. It is made with about 35,000 polygons. The building on the right is the low-resolution LOD mesh, which is meant to be viewed from a far distance. It is 16 polygons—much smaller in polycount and much less taxing on a game.

Mipmapping is a form of LODs using textures. When a prop is close to the player, its texture will be the highest resolution available to be displayed, giving the prop crisp details with no blurriness. As the prop gets farther away from the player, the game engine will actually switch its texture to a lower resolution. This is due to a game engine's tendency to make normally crisp details look scratchy and dithered from a distance. By lowering the resolution to match the distance the prop is being viewed from, the scratchy dithering is diminished.
Most game engines are able to automatically create the different mips used in a mipmap, but in case you ever need to make your own, here's how:
In Photoshop, open your texture. In my case, I'll use a texture from Chapter 3's vehicle. My particular texture is 1024×1024 resolution. The next mip of this texture will be 512×512, as that is one power of two less than 1024×1024. The mip after that will be 256×256. The next will be 128×128, and so on.
Go to Image → Canvas Size and take a look at the options in the window that opens.
Change the Width and Height unit measurement from inches to pixels. Change the Width value to 2016. Change the Anchor point to the left-middle box (Figure 9.2).
Note
The value of 2,016 is derived by adding up the pixel width of each mip in the texture: 1,024 + 512 + 256 + 128 + 64 + 32 = 2,016. If your highest resolution was 512×512, then subtract 1,024 from 2,016 and you'd use 992.
Click OK to apply the changes. Your image's total area should expand to the right.
Duplicate the texture (by dragging its layer onto the New Layer button or by selecting its layer and pressing Ctrl+J). Use the Edit Transform command (Ctrl+T) to change the duplicate layer's size. Scale it down to 50 percent (use the percentage input boxes at the top of the screen if you need to). Position it directly to the right of the original texture, flush with the top of the image.
Do the same with the duplicate layer: Duplicate it again, scale this duplicate by 50 percent, and position it directly to the right. Eventually you get something like Figure 9.3.

Keep in mind that the exact specifications of a mipmap can vary per project. This one used six layers of mips. Some games may need only three or four. Your art director will be able to tell you more specifically what your project needs.
Some game engines, such as the popular Unreal Engine, make use of multiple UV channels (or sets) on meshes. Throughout the projects in this book, you created only a single UV channel—the one with the texture information that you can easily see. However, in the case of the Unreal Engine, a second UV channel can be used for lighting purposes. Other uses of a secondary UV channel may be for applying a decal image to a model or for the UV coordinates of a special detail texture. Secondary UV sets can have their own UV layout, meaning the textures that are applied with them do not have to match the layout of the textures from the primary UV set.
Follow these steps to create a new UV channel for a mesh in Maya:
Note
Open any of your own projects or any of the projects on the book's companion DVD.
Select a low-resolution model and open the UV Texture Editor (found under the Window menu).
From the Create UVs menu, you have several options for creating new UV channels, depending on what you'd like to do:
Create Empty UV Set will, as you'd expect, create a new UV channel for the model that has no pre-applied UVs. This means that while the new UV channel is active, you will need to remap all of the model's UVs.
Copy UVs to UV Set will copy the currently active UVs to another UV channel or into a completely new UV channel. This is what I usually do so that I don't have to start from scratch in the new UV channel.
Farther down the Create UVs menu, you can find the Delete Current UV Set command to remove the active UV channels from the model.
Note
You can change which UV set is currently active in the UV Texture Editor, under the UV Sets menu. The active UV set will be checked in the menu list that opens.
It depends on the game engine being used, but many require the artist to create collision meshes for each prop she creates. These are generally very simple polygonal shapes—mostly cubes and cylinders. For example, the sci-fi prop that you created in Chapter 8 could very easily use a cube collision mesh, such as the one in Figure 9.4.
A collision mesh is an invisible object that does exactly what it sounds like: it creates a collision volume. If a prop is placed within a scene without a collision volume, the player (or other moving assets in the game) would be able to walk right through the prop. Using simple, geometric shapes for collision makes the mathematics involved in collision detection much simpler and faster to compute. There is nothing different about creating collision geometry from normal, visible geometry. It's simply a polygonal cube (or whatever shape the object may need).

The method used to get a game engine to recognize the collision geometry as collision geometry and not regular, visible geometry, however, can vary depending on the game engine. On one game I worked on, naming the collision mesh with the prefix "coll_" made the game engine automatically recognize and use the geometry as a collision mesh. In another game, the geometry needed to have a specific material applied to it. The specific requirements for this type of mesh can vary greatly between projects, so ask your art director if your game engine requires anything particular for such meshes and their use.
Although collision is the most widely used way of using invisible geometry to affect the game, other possible meshes include shadow meshes and, rarely, portal meshes. Shadow meshes are simple geometric shapes representing a more complex object. The game uses the invisible shadow mesh to compute shadow information, rather than the more complex, fully detailed version of the asset. This helps the game perform such effects faster and with less computational time. A portal mesh is similar to a window. When the player comes within view of a portal mesh, the level's contents that exist behind the portal mesh get loaded so the player can see through the portal mesh to the area on the other side. Having a level load in sections, rather than all at once, allows the levels to be more detailed and complex without slowing down the game.
Obviously, game programmers can invent any number of mesh objects to affect a game's creation. Make sure that you are aware of any such requirements for any project you work on.
The idea of being professional is a very broad topic and one that perhaps could be a book all unto itself. But in truth (and this applies to nearly every profession), being professional is the best thing any artist can do for his or her career. I thought I'd try to impress on you just a few ideas and concepts on this subject.
Learn to communicate well. Communication is vital in every field, but in a visual medium such as games, it is doubly so. Hours, days, weeks, and even months (dare I say, years?) of work can be wasted simply because of poor communication. If you have any question at all regarding an assignment that has been given to you, ask!—especially when you are first starting in your career. When sharing information or asking a question, attempt to convey your thoughts as clearly as possible. Try sketching it or even producing a small mockup to help make what you are saying as clear as possible.
Take direction and criticism. Beauty is in the eye of the beholder, but let's be clear—as an artist in the video game field, you are not creating art. You are creating commercial art. Yes, it can be beautiful, compelling, and have wonderful meaning, just as all good art does. But it is being produced for a client for their purpose and for their product. You could produce a piece of art that is a beauty to behold and the art director could ask for a change. You must be able to take direction and criticism. You must even seek it out from your peers! And take what they say seriously and with an open mind. And when your boss says, "Make it more purple," then more purple it will be!
Be creative on and off the clock. This is something that can be very difficult to do. Even I find it hard to make the time to create my own artwork after a hard week at the office. This was especially true while I was writing this book! But it's important that you do everything you can to further your own creativity and learning. Long after school, you can still be learning. I just started learning Pixologic's ZBrush this last year and am finding it to be a great tool that will further my skills as an artist in this industry, and that's after having done this job for seven years. I'm sure I'll have more to learn in the future. Do your best to make time to learn and to keep your creativity fresh. If you don't use it, after all, you'll lose it.
Do your best, regardless of the job. As a commercial artist, you will be tasked with an assignment that you don't like—maybe even something you hate. I know I have had such assignments. I worked on the game SAW, an adaptation of the horror films of the same name. I am not fan of the SAW films. Yet even though I was not the most enthusiastic about some of the work I was assigned, I still needed to do it and do it well. You have to be able to find your own fun sometimes. That can be easier said than done when you've just been given "rock duty" but, by golly, make each and every one of those rocks look good and you can be assured that your effort and good attitude will not go unnoticed by your superiors.
I hope you have enjoyed this book and have found it useful. In these chapters, you've gone through the process of creating game environments and props several times. These processes are the essentials of nearly every asset you will ever make while in the game industry, so get used to them! And of course, always strive to learn more and more.
Have fun! After all, you are making games. It's a far cry from digging ditches or flipping burgers. (I can be the worst one at taking my own advice sometimes, and this one can be the hardest one of all.) It's so easy to become jaded in this industry. Do your best to keep a good attitude about what you're doing.
When I tell people what I do, I always hear the remark, "Wow! That must be fun." And you know what?
It is.
Title: Abandoned Colony
Artist: Bram Eulaers
Website: www.brameulaers.com
Info: Total scene polycount is approximately 100,000 polygons
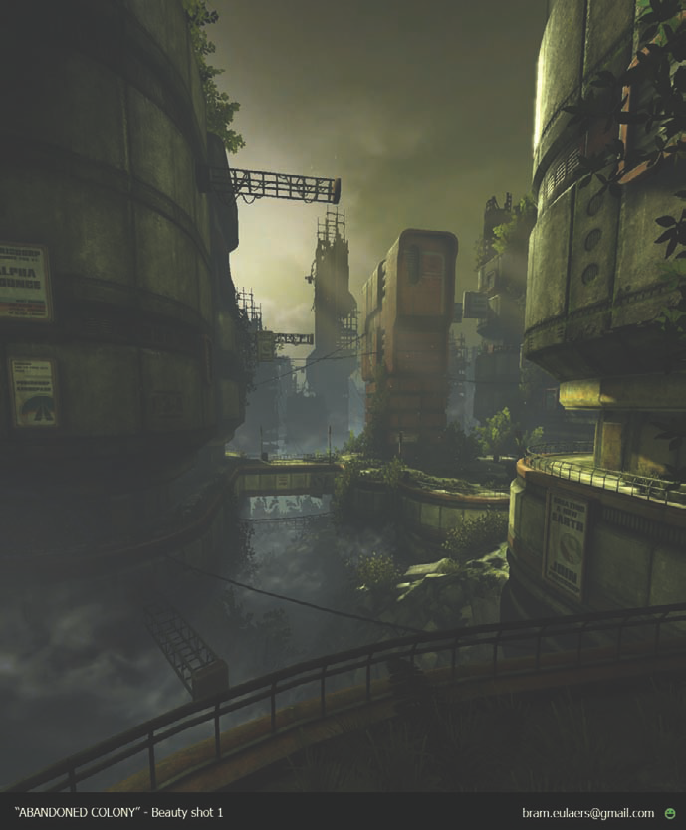
From the Artist: "Unearthly Challenge is an environment art competition organized by www.gameartisans.org and www.polycount.net. I won first prize in the 3D category and also won an extra honorary award. The scene is built in the Unreal Engine 3 with modular assets. I created all models, textures, effects, and lighting, and painted initial concepts before constructing the scene."