In this section:
Formatting Documents with Themes, Styles, and Fonts
Choosing and Changing Themes
Applying and Saving Styles
Formatting Text
Creating and Customizing Bulleted or Numbered Lists
Creating and Customizing Multilevel Lists
Changing Character Font and Size
Adjusting Paragraph Spacing
Indenting Paragraphs
Formatting with Tabs
Adding Sidebars and Pull Quotes
Adding and Customizing Text Boxes
Adding Page and Paragraph Borders
Your words may be engaging and brilliant, but if you cram a bunch of them on the page in no particular format, readers are going to look for something more inviting to read. The format of your documents goes a long way toward inviting the reader and holding his or her interest. Headlines let readers know what’s most important on a page; readable body text is easy on the eye; bullet lists and numbered lists present information in bite-sized chunks. Pull quotes, captions, callouts, and more—as well as columns, borders, and spacing—all contribute to the reading experience your reader will have.
Microsoft Word 2010 includes a number of features that make formatting your documents a breeze. You can apply themes and styles to contr ol the overall font and color selections; adjust the spacing to give your text a little breathing room; and add borders, columns, and more to help lead the reader down the page. Whether you’re creating letters, reports, memos, flyers, or a training manual, the formatting features in Word 2010 simplify the look of your document and help you make your point clearly and easily.
Most of us know what we like when we’re looking at a document. We seem to instinctively know whether something will be easy (or worth it) to read. We like certain colors used together—we are drawn to some publications more than others. Designers seem to have a sixth sense about this kind of thing, understanding what fonts and colors promote the most pleasing reading experience for those of us reading their documents. Luckily, Word 2010 includes the wisdom and talent of designers in key formatting features that you can apply to your own documents. With Word 2010 formatting tools you can create consistent, easy-to-read pages that look professional and put-together for your readers. The following sections describe the various formatting features you’re likely to use as you apply formats to your pages.
Themes are the controllers of your design. A theme coordinates the font, color scheme, and special effects for objects in your document, including the shading and shadow of shapes. When you change a theme, all the coordinated styles change, resulting in a whole new look for your document.

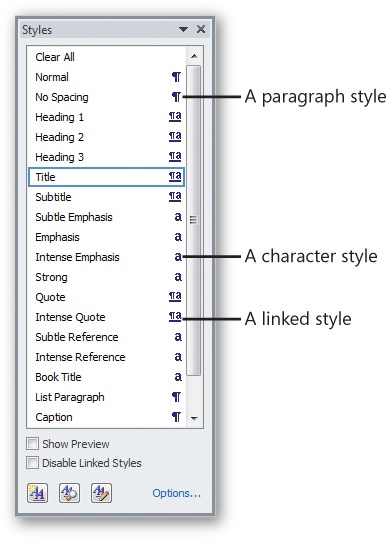
Word 2010 offers a variety of styles that enable you to format different elements in your document:
Paragraph styles define the layout of your paragraphs—line spacing, indents, tab spacing, borders, and so on.
Character styles define the look of individual text characters—for example, boldfaced, italicized, or underlined emphasis; strikethrough, superscript, color, and shadow effects; and spacing between characters. If you specify the font as something other than the theme’s default font, the character style can also define the font and font size. Otherwise, the font is determined by the chosen theme.
Linked styles define both paragraph and character formatting. For example, in a single style you can define the paragraph layout, including the alignment and line spacing, as well as the appearance of the characters for the entire paragraph, including font, font size, emphasis, and effects.
Table styles control the appearance of your tables—for example, the shading of rows or columns and the thickness of the gridlines.
List styles determine the appearance of your bulleted and numbered lists—for example, the kind of bullet used and how far the paragraph is indented.
You can also use direct formatting to create customized words, paragraphs, or blocks of text. For example, you can apply bold formatting to a couple of words to make them stand out, or select a quotation and add italics to it. It’s a good idea to use styles as much as possible so that you can maintain a consistent look, but you may want to directly format text in special instances. If you use direct formatting and later want to use the same formatting again, you can either use that formatting to create a new style or copy the formatting and apply it elsewhere with the Format Painter tool.

Themes are the big formatting story in Word 2010. A theme is a coordinated set of fonts, colors, and special effects that are applied throughout your document automatically. When you choose a specific headline style, for example, the theme controls the font, size, color, and effect of the text. If you decide to choose a different theme later, the elements that are connected to that theme—headings, body text, object effects, and more—change to reflect the new theme automatically. In this way, Word 2010 makes creating and formatting documents more flexible and easier than ever.
Open the document you want to use.
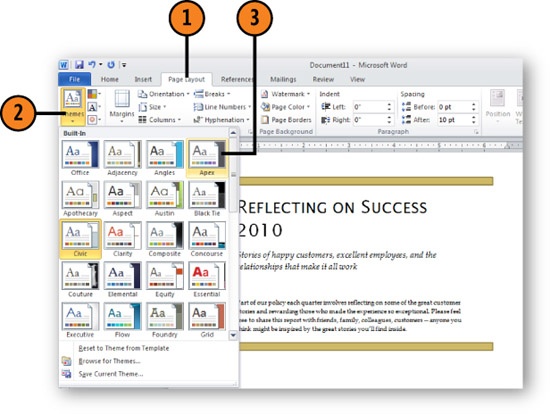
Click the Page Layout tab.
Click the Themes arrow and choose any of the following:
Point to a theme to see how your document will look if you use that theme.
Click Reset To Theme From Template to revert to the original theme for the document.
Click Browse For Themes to display the Choose Theme Or Themed Document dialog box. Select a theme or a document that contains the theme you want and click Open.
Click the theme you want to apply.

Caution
You can change the format—including the color and font—of items on your page, but be aware that doing so changes them from the default styles applied by the theme. This means that if you choose a new theme at a later time, the elements you formatted directly will not automatically change to reflect the new theme.
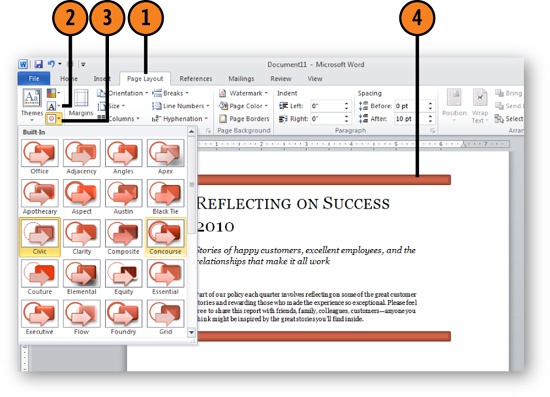
Click the Page Layout tab, click Theme Colors in the Themes group to display the gallery of color groupings, and click the color grouping you want.
Click Theme Fonts, and select the font pairing from the gallery that appears.
Click Theme Effects, and select the shadow and shading effects you want to use for shapes, SmartArt diagrams, and graphs.
Use the theme fonts, colors, and effects in your document.
If you like your customized theme, on the Page Layout tab, click the Themes tool and choose Save Current Theme. In the Save Current Theme dialog box, type a name for the theme, and click Save.

See Also
Changing Style Sets for information about using different Quick Style sets for a theme.
Styles make it easy for you to coordinate the format of repeating elements in your document. This helps you keep things consistent by coordinating your text font, size, color, and so on. Word 2010 includes many predesigned styles as part of the program, and you can also create and modify styles to suit your own needs.

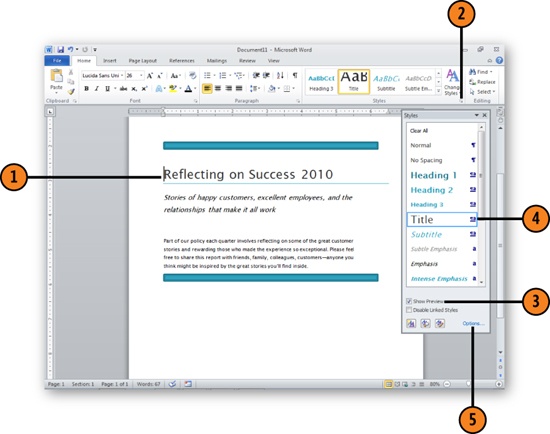
On the Home tab, click the dialog launcher in the Styles group.
Select the Show Preview check box if it isn’t already selected.
Click the style you want to apply.
If the style you want isn’t listed, click Options. In the Styles Pane Options dialog box, under Select Styles To Show, click All Styles, click OK, and then click the style you want.
A style set is a collection of style choices that reflect a particular mood or personality in your document. Is the tone of your document happy, somber, businesslike, or playful? You can choose a style set—or create one of your own—to give your text just the kind of look you’re hoping for.
On the Home tab, click the Change Styles tool in the Styles group.
Point to Style Set and then point to the Quick Style set you want to see.
Click a set to apply it or preview other styles until you find the one you want.

See Also
Applying and Saving Styles for information on choosing a specific style you want to add to your text.
Tip
If you want this to be the style set you’ll use in other documents based on this template, click Change Styles again and then choose Set As Default from the menu that appears.
Caution
If you are creating documents for business use, don’t change the style set unless it’s okay to change the font, style, and color scheme used for your business. Most businesses try to produce a coordinated look with their business communications, so make sure you have the necessary green light before you begin changing styles on the fly.
In some cases you’ll want simply to format a text phrase or selection that doesn’t require choosing a theme or applying a style. This type of direct text formatting is simple in Word. You can quickly apply the format you want before you type the text, while you’re typing, or after you’ve typed the words you want to format.
Name | Shortcut Key | Description | |
|---|---|---|---|
Font | Ctrl+Shift+F | Changes the font applied to the selected text | |
Font Size | Ctrl+Shift+P | Chooses a different font size for the text | |
Grow Font | Ctrl+> | Increases font size one point | |
Shrink Font | Ctrl+< | Decreases font size one point | |
Change Case | Changes lowercase to uppercase and vice versa | ||
Clear Formatting | Removes all formatting of selected text | ||
Bold | Ctrl+B | Applies a bold style to text | |
Italic | Ctrl+I | Italicizes selected text | |
Underline | Ctrl+U | Underlines selected text | |
Strikethrough | Adds the strikethrough style to text | ||
Subscript | Ctrl+= | Formats the text as subscript | |
Superscript | Ctrl+Shift++ | Formats the text as superscript | |
Text Effects | Displays a gallery of text effects you can apply to your document | ||
Text Highlight Color | Displays a palette from which you can choose a color to highlight text | ||
Font Color | Displays a palette from which you can choose a color for selected text |
Although it is possible to go overboard with lists in a document, readers on the whole tend to appreciate them. Lists can provide small bits of information in an easy-to-understand format. Word 2010 makes formatting lists simple for you. Not only does Word add numbers or bullets to your list, with consistent spacing between the number or bullet and the text, it also keeps track of your list so that if you move an item within a numbered list, Word will renumber the list to keep the items in the correct order. You can also have the numbering skip paragraphs and can even split lists by restarting a series at 1.
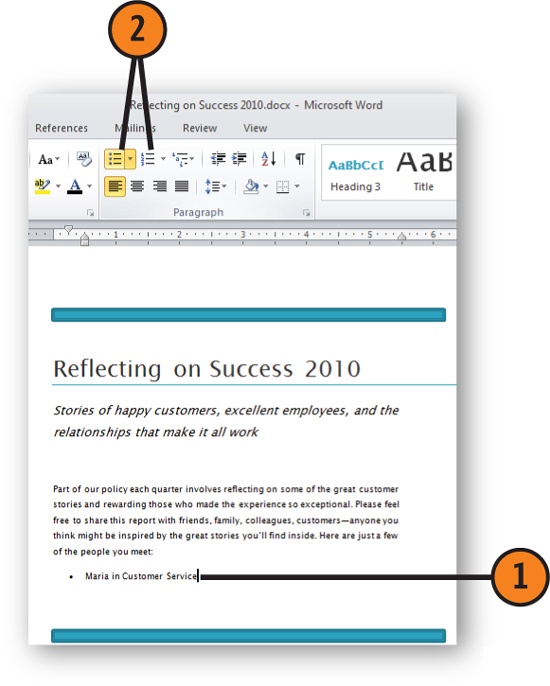
Type the first line for your list. Make sure you’re using the paragraph style you want for the list.
On the Home tab, click the Numbering tool in the Paragraph group for a numbered list or the Bullets tool for a bulleted list.
After completing the first line, press Enter to start the second list item.
When you’ve completed the list, press Enter twice to create an empty paragraph and to turn off the list formatting.

See Also
Creating a Multilevel List for information about placing a list inside another list.
See Also
Customizing a Bulleted or Numbered List for information about changing the look of a list.

Although standard bullets or numbers may be fine for most lists, you might want to add some pizzazz to a special document with decorative bullets, or you might need to change your numbering format to conform to certain document specifications. Whatever the reason, you can customize the bullets and the numbering scheme for your lists.
Select the entire list if it’s completed, or click in your document where you want to start a list.
On the Home tab, click the Bullets arrow in the Paragraph group to display the Bullets gallery.
Click the bullet character you want to use.
If none of the displayed bullets is exactly what you want, click Define New Bullet at the bottom of the gallery to display the Define New Bullet dialog box.
To use a text symbol, or dingbat, as a bullet, click Symbol. In the Symbol dialog box, select the font and the symbol you want, and click OK.
To modify the size, color, or any other aspect of the symbol, click the Font tool, make your changes in the Font dialog box, and click OK.
To use a clip-art picture bullet, click Picture, choose the bullet you want in the Picture Bullet dialog box, and click OK.
Select the alignment of the bullet in relation to the table text, and click OK.

Tip
By default, the Include Content From Office Online check box is selected, which means that picture bullets from Office.com are included in the displayed gallery. If you don’t see one to click, click in the Search box, type a word or phrase that describes what you’re looking for, click Go, and then select the bullet you want from the displayed results.
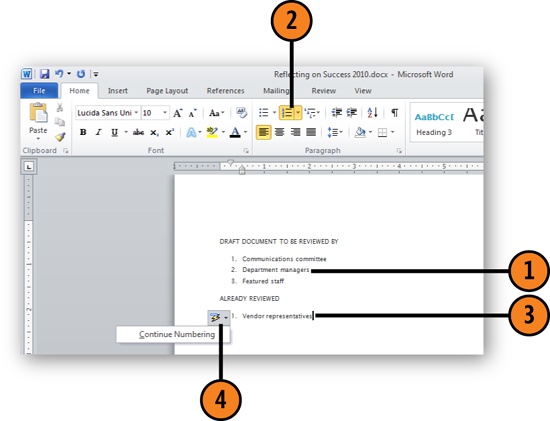
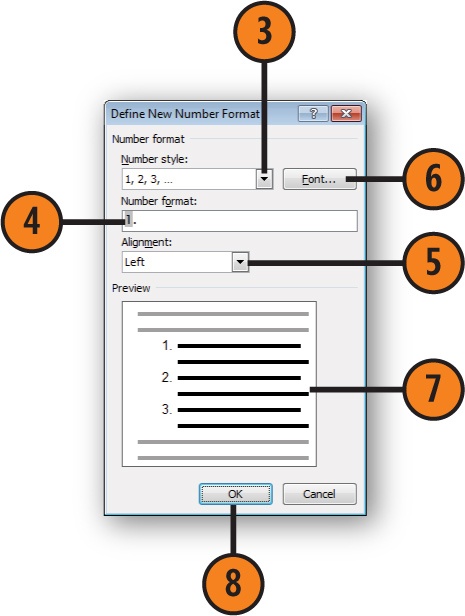
On the Home tab, click the Numbering arrow in the Paragraph group to display the Numbering gallery. If none of the available numbering formats is what you want, click Define New Number Format near the bottom of the gallery to display the Define New Number Format dialog box.
Select the numbering style you want.
Add any text that you want to be included in the numbering.
Select the alignment of the numbering in relation to the table text.
If you want to modify the font, size, color, or any other aspect of the numbering and any added text, click the Font tool, make your changes in the Font dialog box, and click OK.
Use the preview to see the effect of the alignment and any changes you’ve made to the font settings.
Click OK.

Sometimes a regular list just won’t do the job. If you need to create a list within a list (called a nested list), what you need is a way to create a multilevel list. Luckily, Word 2010 has just the tool to help you do that.
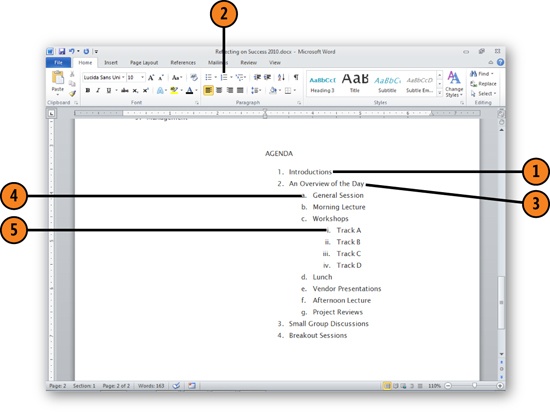
Type the first line of your list.
Click either the Numbering or the Bullets tool in the Paragraph group to choose the type of list you want.
Continue creating the list of items that are all at the same level.
At the beginning of the line where you want the second level to begin, press the Tab key. Type the item and press Enter. Continue entering the items that belong in this level of the list.
At the beginning of the paragraph with which you want to start the third level of the list, press the Tab key again.
To return to the second level of the list, press Shift+Tab. Press Shift+Tab a second time to move from the second level to the first level of the list.

A multilevel list is a powerful tool for presenting your information in an organized, hierarchical way. The multilevel lists that are available in the List Library provide some structure, but you might need to develop your own structure to present the information in exactly the way you want.
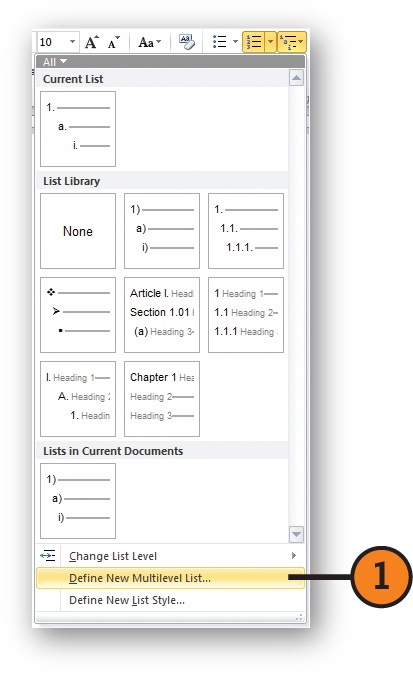
Click the Multilevel List arrow, and click Define New Multilevel List near the bottom of the gallery to display the Define New Multilevel List dialog box. Click the More button, if it’s displayed, to see all the settings. (The Less button is displayed when the More button has been clicked.)
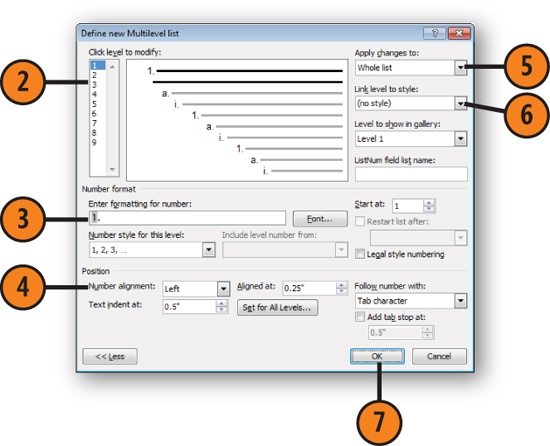
Click a list level that you want to modify.
Define your numbering format. Add or edit any text that you want to use with the number; then specify the numbering style and the number with which that list level starts.
Set the position of the numbering in relation to the text.
Specify whether these changes apply to the entire list or only part of it.
Specify which style you want to use with this level and what level you want assigned to this style when it’s included in a list.
Click OK.
The font and font size you choose for your document conveys a particular tone and feeling. Large elaborate fonts gush; small neat fonts speak more softly. The combinations you choose have a definite effect on how readers perceive your document. You can easily set both of these elements for all or part of your content with just a few clicks on the ribbon.
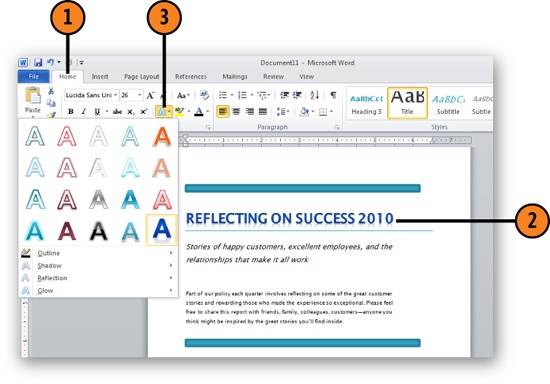
Select the text you want to change.
On the Home tab, click the Font arrow in the Font group.
Click the font from the displayed list.

Tip
Use Quick Styles or custom styles to apply consistent font formatting for similar content throughout your document. Use direct formatting for special formatting or to design and create new styles.
Tip
You can also change the font and font size using the Mini toolbar that appears when you select some text and keep the mouse pointer pointing to the selected text.
Try This!
Create and select some text in your document. On the Home tab, click the Font list down arrow, point to a font, and drag your mouse slowly down the list. Note that the font of the selected text changes to the font you’re pointing to. When you see the font you like, click it to use that font.

Select the text to which you want to restore the default settings for that style.
On the Home tab, click the Clear Formatting tool.
If you don’t like the results, click the Undo tool on the Quick Access Toolbar and use the formatting tools to modify the formatting of the selected text.
See Also
Modify a Theme for information about setting the default heading and body text fonts for your theme.
Caution
The Clear Formatting tool changes not only the font and font size but also any emphasis—bold, italic, or underline—that you have applied.
See Also
Applying and Saving Styles for information about using existing formatting to create or modify a style.
When you’re so busy filling your page with text and formatting it, you may at first overlook the importance of the space in which the text sits. The amount of space surrounding your text is an important part of the overall design, and it has a lot to do with how readable your text is—or isn’t. Too little space makes the lines of text looked squashed together and difficult to read; too much space also makes the text difficult to read because the reader’s eye has to search for the beginning of the next line.
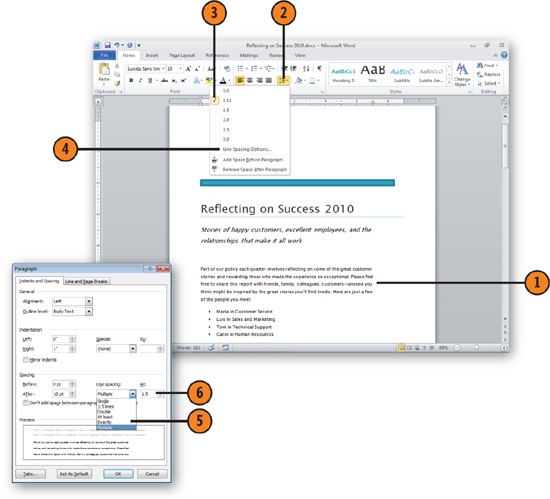
Click in a paragraph or select the paragraphs with the line spacing you want to set.
On the Home tab, click the Line Spacing tool in the Paragraph group.
Click the line spacing you want.
If you don’t see the spacing you want, click Line Spacing Options.
In the Paragraph dialog box that appears, select the type of line spacing you want:
Exactly to create a specific space between lines regardless of the font size used
At Least to create a minimum space between lines, which can increase if large font sizes are used
Multiple to specify how many lines of space you want between the lines of text
Use the arrows or type a value. For the Exactly and At Least settings, this is a distance measurement, usually in points; for Multiple, this is the number of lines of space.Click OK.
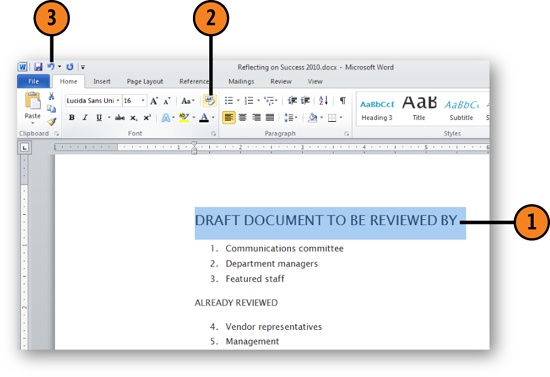
Click in a paragraph or select the paragraphs you want to change, and then click the Line Spacing tool in the Home tab.
Click the command for adding space before or after the paragraph or paragraphs.
If you want to customize the spacing, click Line Spacing Options to display the Paragraph dialog box.
In the Before and After boxes, use the arrows or type a value for the space before (above) the first line of the paragraph and for the space after (below) the last line of the paragraph.
Select this check box if you don’t want space between paragraphs of the same style.
Click OK.
If you want to remove the space before or after the selected paragraph or paragraphs, click the Line Spacing tool again, and choose Remove Space Before Paragraph or Remove Space After Paragraph from the menu.


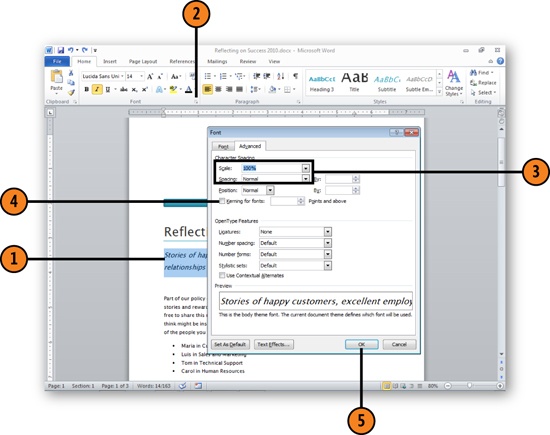
Sometimes you’ll need to squeeze a little more text onto a line; at other times you’ll want to spread the text out to fill up a line. Perhaps you want to create a special look in a heading by condensing or expanding the text. You can achieve all these effects by adjusting the widths of characters and the spaces between characters and between words.
Select the text whose spacing you want to adjust.
On the Home tab, click the Font tool to display the Font dialog box and click the Advanced tab.
Change the settings to adjust the spacing:
In the Scale box, click a percentage in the list, or type the percentage by which you want to expand or condense the width of each character.
In the Spacing box, click Expanded or Condensed in the list; in the By text box, enter a value to expand or condense the spacing between characters.
To kern—that is, to decrease the spacing between—certain pairs of letters, select this check box and specify a minimum font size to be kerned. (Word uses its own list to determine which letter pairs, in which fonts, can be kerned.)
Click OK.
Caution
As a side effect of increasing or decreasing the character spacing, Word also adjusts the spacing between words.
See Also
Add WordArt Elements for information about adjusting the character spacing in WordArt.
Tip
Also in the Advanced tab you’ll find the OpenType settings, which enable you to use Word 2010’s high-end typography features that are available with some OpenType fonts. Now for the fonts that support it (such as Gabriola, which comes with Word 2010), you can set ligatures, stylistic sets, and number styles, which give you additional ways to format and display the text.

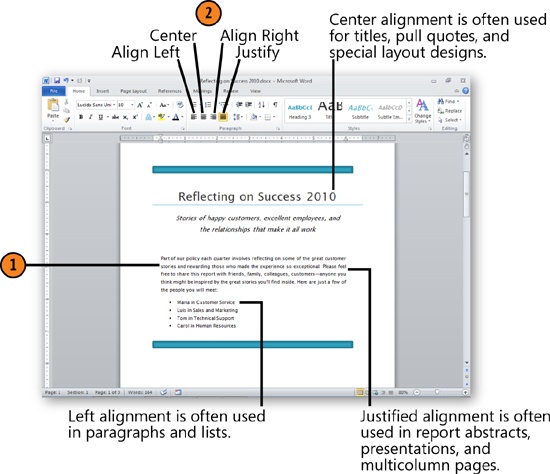
Choosing the alignment of the paragraphs in your document plays an important part in drawing the reader’s eye down the page. You can experiment with different alignments to get just the right look, but in most cases you won’t want to stray too far from the traditional left alignment. For some special elements, such as quotes, headings, or captions, you may want to liven things up with centered or right alignment.
Click in a paragraph or select the paragraphs you want to change.
In the Paragraph group of the Home tab, click one of the following:
Align Left to align the paragraph with the left margin or left indent. Align Left creates a ragged right margin.
Center to center the text between the margins or between the indents, if those settings are used.
Align Right to align the paragraph with the right margin or right indent. Align Right creates a ragged left margin.
Justify to align the paragraph with both margins or with both indents (if used). Justify adds space between words to align both the left and right margins or indents.
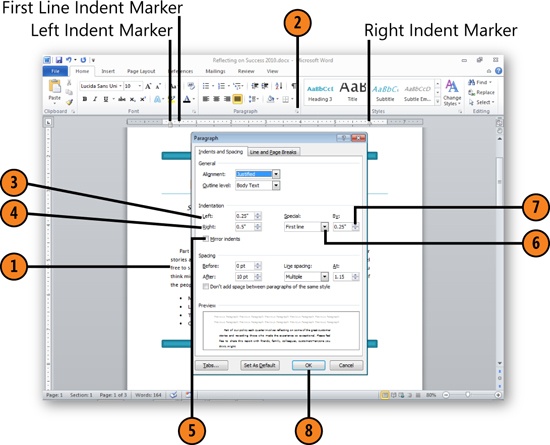
When you want to set a paragraph off from other paragraphs and change the amount of space between the margin and the text, consider using an indent. The indent can be as simple as slightly indenting the first line to indicate the start of a new paragraph, or as complex as indenting both the left and right edges of the paragraph to create a separate block of text.
Click in a paragraph or select the paragraphs you want to change.
Click the dialog launcher in the Paragraph group on the Home tab.
Click in the Left box and use the arrows, or type a value for the distance you want the indent from the left margin.
Click in the Right box and set the distance for the indent from the right margin.
Select this check box if you want the left and right indents to switch depending on whether they’re on odd or even pages.
Click in the Special box, and select one of the following:
First Line to indent the first line
Hanging to indent all the lines in the paragraph except the first line
Click in the By box and use the arrows, or type a value for the size you want the indent to be.
Click OK.
Tip
The Mirror Indents option is designed for two-sided documents, so you’ll notice that the Left label changes to Inside and the Right label changes to Outside.
Tip
Using the ruler, you can easily set the indents by dragging the Left Indent, First Line Indent, and Right Indent markers. You can also create a left indent in a paragraph by clicking the Home tab and then clicking the Increase Indent tool. When you set indents using the Paragraph dialog box, however, you can specify precise values for all the indents.
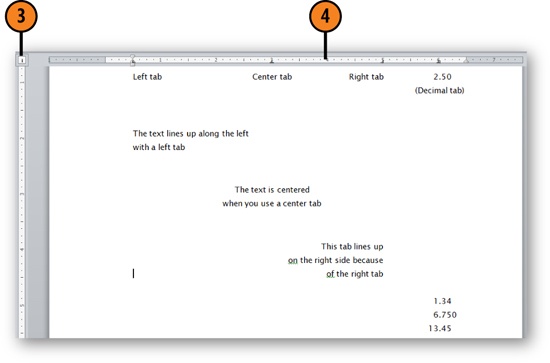
Tabs give some people fits, but they are actually easy to work with in Word 2010. There are already tabs set by default every half-inch across the width of your document. You can use these tabs to position text horizontally on a line simply by pressing the Tab key. You can also set your own tabs and customize their effects by choosing different types of leaders—dotted, dashed, or plain lines—that appear before the tab stop.
Click the View tab and click the Ruler check box to display the ruler.
Click the paragraph or select all paragraphs where you want to set the tabs.
Click to select the type of tab you want. Each click selects a different type of tab or other ruler marker.
Click in the ruler where you want the tabs. If necessary, drag a tab stop to a new location to adjust it.
Repeat steps 3 and 4 to set additional tab stops.
Drag a tab stop off the ruler to delete that tab stop.
Tip
Consider using a table instead of tab stops when you want to align several lines of text into columns.
See Also
Creating a Table from Scratch for information about setting tabs in table cells.
Double-click any tab stop on the ruler to display the Tabs dialog box.
Select the tab stop you want to modify.
Select an alignment for the tab stop.
Select a leader for the tab stop.
Click Set.
Do any of the following:
Set a new value for the default tab stops.
Specify a position for a new tab stop, set its alignment and leader, and click Set.
Select an existing tab stop, and click Clear to delete it.
Clear all tab stops.
Click OK.

For special effects in the formatting of your page, you may want to add elements such as sidebars and pull quotes. Sidebars are often used to provide information that is related to—but not directly part of—the main text. Pull quotes can call attention to important thoughts used within the body text. Both can add a professional look to your page and help readers remember what’s most important about the information you’re presenting. Word provides a variety of predesigned text boxes you can use for sidebars and pull quotes, and you can also create and save your own text boxes for use in your documents.
Switch to Print Layout view if necessary.
In the Text group of the Insert tab, click the Text Box tool. In the gallery that appears, click the text box design you like.
Select any sample text in the text box, and paste or type your replacement text.
Click the outer boundary of the text box and drag it to the location you want.
Choose tools on the Drawing Tools Format tab to modify the text box itself or use the formatting tools on the Home tab to modify the text.
Click outside the text box to resume working on the main content of your document.


Tip
If you’d rather draw your own text box instead of using one from the Text Box gallery, click Text Box and choose Draw Text Box. You can now add your own text and format the box as you’d like, using the tools on the Drawing Tools Format tab.
Create, format, and position the text boxes as you want them.
Click the first text box to select it, and type or paste the text you want.
On the Text Box Tools Format tab, click the Create Link tool.
Click inside the text box into which you want to flow the text.
Add line breaks or blank paragraphs to control the way the text flows from one text box to another.
Adjust the size and position of each text box if necessary.
If you want to link additional text boxes, select the last linked box and repeat steps 3 and 4.

See Also
Adding Shapes for information about using a text box with a shape to create special effects with your text.
If you want to create a special effect at the opening of a chapter or section in your document, you can add a drop cap to your text. A drop cap, which is a short way to say “dropped capital,” simply changes the format of the opening character so that it adds a graphic element to the introduction of your text.
Click to the right of the first letter of your paragraph.
Click the Insert tab and click Drop Cap in the Text group.
Preview the different styles and click the one you want to apply.
If you don’t see a style you like or want to customize the settings, click Drop Cap Options.
Do any of the following to customize the drop cap:
Specify a different font.
Specify a different number of lines over which you want the drop cap to extend.
Specify an increased or decreased horizontal distance between the drop cap and the text.
Click OK.

If you want to apply formatting to multiple items in your document, you can use the Format Painter tool to select the formatting, copy it, and apply it to other items. This feature is great for those times when you create a special format that isn’t a part of a style but that you want to apply to headings or quote text throughout a document.
Click the Home tab and then click the Show/Hide ¶ tool in the Paragraph group to display paragraph marks.
Select the text with the formatting you want to copy. If you want to copy paragraph formatting, make sure your selection includes the paragraph mark at the end of the paragraph.
On the Home tab, click the Format Painter tool in the Clipboard group.
Drag the Format Painter over the selected text to apply the formatting and then release the button.

Tip
To copy formatting to several locations, double-click the Format Painter tool after you’ve selected your text. You can now copy the formatting to as many places as you want. When you’ve finished, press the Esc key or click the Format Painter again.
Depending on the overall design of your document, you may want to add a border around the page. Word 2010 includes a number of line styles you can use to add and customize the borders you add.
Click the View tab and click the One Page tool in the Zoom group to display one entire page of your document.
Click the Page Layout tab, click Page Borders, and, in the Borders And Shading dialog box that appears, click the Page Border tab.
Click the type of border you want.
Specify a line style, color, and width.
To remove an existing border from one side of the page, click the border that represents the side of the page whose border you want to remove. To add a border, click a border that represents a side of the page that doesn’t have a border.
Specify the part of the document that you want to have this border.
Click Options to change the distance of the border from the edge of the page or the text, and to specify whether you want the running heads to be surrounded by this border.
Click OK.

Try This!
Insert a page border. Click a button to remove the border from one side. Specify a different line style, width, or color; and click the same border button. Repeat to modify the other sides to create a custom border.
See Also
Adding a Border or Shading to a Paragraph for information about placing a border around a paragraph.
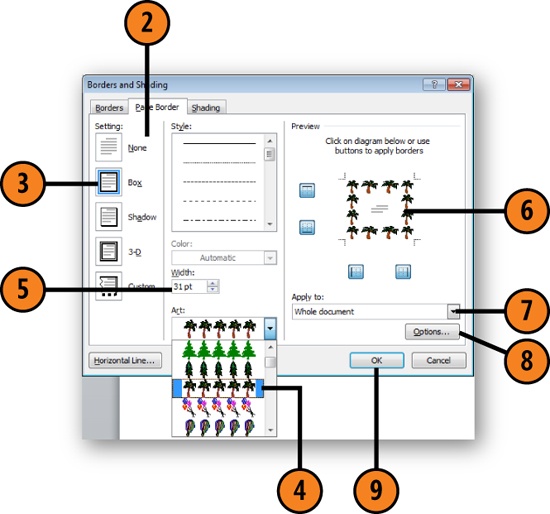
If you want to be a little more dramatic with your page border, you can add one with artistic embellishments. Word 2010 includes a number of special art borders that enable you to border your pages with ice cream cones, flowers, ladybugs, and more. This offers a fun design touch for party invitations, brochures, flyers, and more.
Click the View tab and click One Page in the Zoom group.
Click the Page Layout tab, click Page Borders in the Page Background group, and click the Page Border tab of the Borders And Shading dialog box.
Click the Box setting.
Choose the art style you want to use for your border.
Specify the width you want for the border art; if the Color list is available, choose the color you want.
Click a border to remove it. To replace the border, click the border’s button.
Specify the part of the document that you want to have the selected border.
Click Options if you want to change the distance of the border from the page edge or from the text.
Click OK.
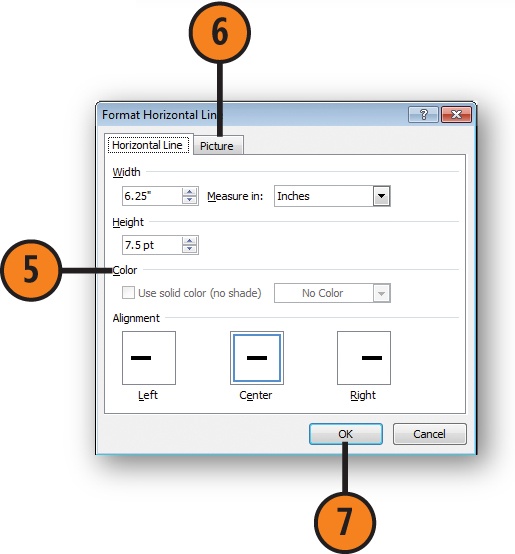
A horizontal line can be more than just a line. In Word it can be a curvy, colorful line or picture, or it can be as simple as a series of dots and dashes. Whichever style of horizontal line you choose, you can customize it in a way that fits your document’s design.
Click at the point in your document where you want the horizontal line to appear.
Click the Page Layout tab, click the Page Borders tool of the Page Background group, and click the Horizontal Line button in the Borders And Shading dialog box.
Click the horizontal line style you want to use.
Click OK.
Double-click the line to display the Format Horizontal Line dialog box. Make any modifications you want to the line.
On the Picture tab, make any further adjustments.
Click OK.


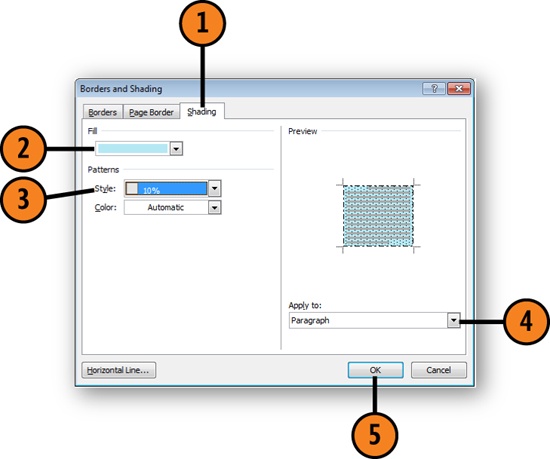
You can set off special paragraphs, text sections, sidebars, and more by adding a border or shading to a paragraph. This enables you to call attention to specific information on the page.
Click in the paragraph you want to border.
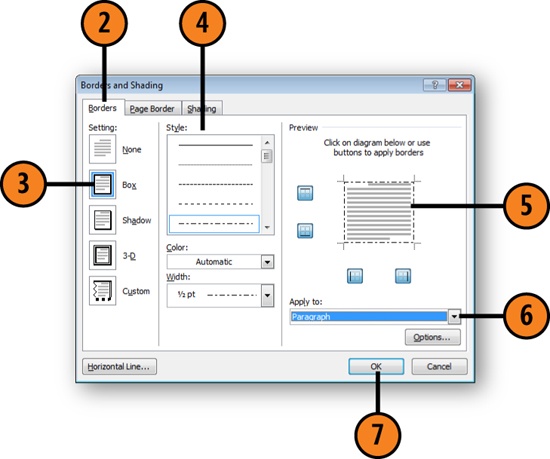
Click the Page Layout tab, click Page Borders, and click the Borders tab of the Borders And Shading dialog box.
Click the type of border you want.
Specify a line style, color, and width.
Click a border if you want to remove the border from one or more sides of the paragraph. To replace the border, click the button again.
Specify Paragraph.
Click Options if you want to change the distance of the border from the text. Click OK.