
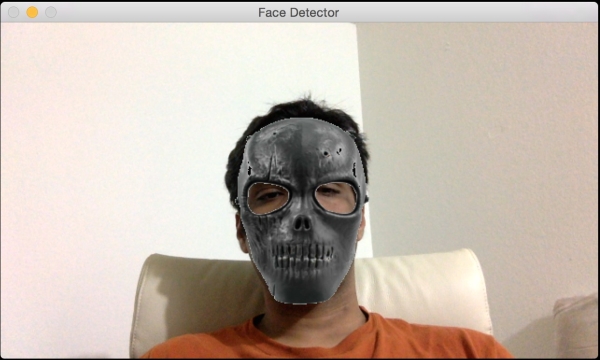
Now that we know how to detect and track faces, let's have some fun with it. When we capture a video stream from the webcam, we can overlay funny masks on top of our faces. It will look something like this next image:
If you are a fan of Hannibal, you can try this next one:

Let's look at the code to see how to overlay the skull mask on top of the face in the input video stream:
import cv2
import numpy as np

face_cascade = cv2.CascadeClassifier('./cascade_files/haarcascade_frontalface_alt.xml')

face_mask = cv2.imread('mask_hannibal.png')
h_mask, w_mask = face_mask.shape[:2]

if face_cascade.empty():
    raise IOError('Unable to load the face cascade classifier xml file')

cap = cv2.VideoCapture(0)
scaling_factor = 0.5

while True:
    ret, frame = cap.read()
    frame = cv2.resize(frame, None, fx=scaling_factor, fy=scaling_factor, interpolation=cv2.INTER_AREA)
    gray = cv2.cvtColor(frame, cv2.COLOR_BGR2GRAY)

    face_rects = face_cascade.detectMultiScale(gray, 1.3, 5)
    for (x,y,w,h) in face_rects:
        if h > 0 and w > 0:
            # Adjust the height and weight parameters depending on the sizes and the locations. You need to play around with these to make sure you get it right.
            h, w = int(1.4*h), int(1.0*w)
            y -= 0.1*h

            # Extract the region of interest from the image
            frame_roi = frame[y:y+h, x:x+w]
            face_mask_small = cv2.resize(face_mask, (w, h), interpolation=cv2.INTER_AREA)

            # Convert color image to grayscale and threshold it
            gray_mask = cv2.cvtColor(face_mask_small, cv2.COLOR_BGR2GRAY)
            ret, mask = cv2.threshold(gray_mask, 180, 255, cv2.THRESH_BINARY_INV)

            # Create an inverse mask
            mask_inv = cv2.bitwise_not(mask)

            # Use the mask to extract the face mask region of interest
            masked_face = cv2.bitwise_and(face_mask_small, face_mask_small, mask=mask)

            # Use the inverse mask to get the remaining part of the image
            masked_frame = cv2.bitwise_and(frame_roi, frame_roi, mask=mask_inv)

            # add the two images to get the final output
            frame[y:y+h, x:x+w] = cv2.add(masked_face, masked_frame)

    cv2.imshow('Face Detector', frame)

    c = cv2.waitKey(1)
    if c == 27:
        break

cap.release()
cv2.destroyAllWindows()Just like before, we first load the face cascade classifier xml file. The face detection steps work as usual. We start the infinite loop and keep detecting the face in every frame. Once we know where the face is, we need to modify the coordinates a bit to make sure the mask fits properly. This manipulation process is subjective and depends on the mask in question. Different masks require different levels of adjustments to make it look more natural. We extract the region-of-interest from the input frame in the following line:
frame_roi = frame[y:y+h, x:x+w]
Now that we have the required region-of-interest, we need to overlay the mask on top of this. So we resize the input mask to make sure it fits in this region-of-interest. The input mask has a white background. So if we just overlay this on top of the region-of-interest, it will look unnatural because of the white background. We need to overlay only the skull-mask pixels and the remaining area should be transparent.
So in the next step, we create a mask by thresholding the skull image. Since the background is white, we threshold the image so that any pixel with an intensity value greater than 180 becomes 0, and everything else becomes 255. As far as the frame region-of-interest is concerned, we need to black out everything in this mask region. We can do that by simply using the inverse of the mask we just created. Once we have the masked versions of the skull image and the input region-of-interest, we just add them up to get the final image.