
Blurring refers to averaging the pixel values within a neighborhood. This is also called a low pass filter. A low pass filter is a filter that allows low frequencies and blocks higher frequencies. Now, the next question that comes to our mind is—What does "frequency" mean in an image? Well, in this context, frequency refers to the rate of change of pixel values. So we can say that the sharp edges would be high frequency content because the pixel values change rapidly in that region. Going by that logic, plain areas would be low frequency content. Going by this definition, a low pass filter would try to smoothen the edges.
A simple way to build a low pass filter is by uniformly averaging the values in the neighborhood of a pixel. We can choose the size of the kernel depending on how much we want to smoothen the image, and it will correspondingly have different effects. If you choose a bigger size, then you will be averaging over a larger area. This tends to increase the smoothening effect. Let's see what a 3x3 low pass filter kernel looks like:
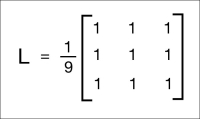
We are dividing the matrix by 9 because we want the values to sum up to 1. This is called normalization, and it's important because we don't want to artificially increase the intensity value at that pixel's location. So you should normalize the kernel before applying it to an image. Normalization is a really important concept, and it is used in a variety of scenarios, so you should read a couple of tutorials online to get a good grasp on it.
Here is the code to apply this low pass filter to an image:
import cv2
import numpy as np

img = cv2.imread('input.jpg')
rows, cols = img.shape[:2]

kernel_identity = np.array([[0,0,0], [0,1,0], [0,0,0]])
kernel_3x3 = np.ones((3,3), np.float32) / 9.0
kernel_5x5 = np.ones((5,5), np.float32) / 25.0

cv2.imshow('Original', img)

output = cv2.filter2D(img, -1, kernel_identity)
cv2.imshow('Identity filter', output)

output = cv2.filter2D(img, -1, kernel_3x3)
cv2.imshow('3x3 filter', output)

output = cv2.filter2D(img, -1, kernel_5x5)
cv2.imshow('5x5 filter', output)

cv2.waitKey(0)
If you run the preceding code, you will see something like this:

In the preceding code, we are generating different kernels in the code which are kernel_identity, kernel_3x3, and kernel_5x5. We use the function, filter2D, to apply these kernels to the input image. If you look at the images carefully, you can see that they keep getting blurrier as we increase the kernel size. The reason for this is because when we increase the kernel size, we are averaging over a larger area. This tends to have a larger blurring effect.
An alternative way of doing this would be by using the OpenCV function, blur. If you don't want to generate the kernels yourself, you can just use this function directly. We can call it using the following line of code:
output = cv2.blur(img, (3,3))
This will apply the 3x3 kernel to the input and give you the output directly.