
Technique #2. Displacement Mapping to a Layer Mask
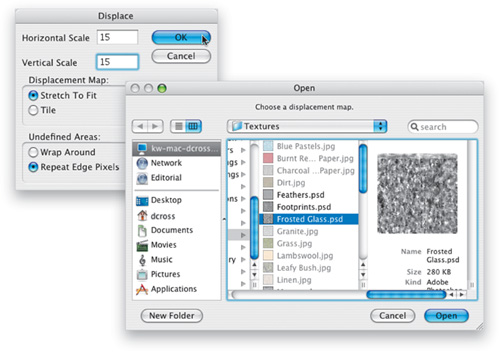
Here’s a variation on applying one of the typical filters, courtesy of photographer and Photoshop educator Eddie Tapp. Eddie shared his technique with me at Photoshop World, and with his permission I’ve included my slightly adapted version here. The key is using the Displace filter and some of the textures that are built into Photoshop.
key concepts:
layer masks
![]()
filters
![]()


..................Content has been hidden....................
You can't read the all page of ebook, please click here login for view all page.