
The goal of the SimpleCV framework is to make common computer vision tasks easy. This chapter introduces some of the basics, including how to access a variety of different camera devices, how to use those cameras to capture and perform basic image tasks, and how to display the resulting images on the screen. Other major topics include:
Installing the SimpleCV framework
Working with the shell
Accessing standard webcams
Controlling the display window
Creating basic applications
The SimpleCV framework has compiled installers for Windows, Mac, and Ubuntu Linux, but it can also be used on any system on which Python and OpenCV can be built. The installation procedure varies for each operating system. Because SimpleCV is an open source framework, it can also be installed from source. For the most up-to-date details on installation, go to http://www.simplecv.org/docs/installation.html. This section provides a brief overview of each installation method.
Regardless of the target operating system, the starting point for all installations is http://www.simplecv.org/download/. This page will point you to the latest stable release, and also point you in the right direction for how you can get started with the SimpleCV framework.
Note
Clicking the download button on http://www.simplecv.org takes you to a page that automatically downloads the installer for the current computer’s operating system. To download the installer for a different operating system, go to http://sourceforge.net/projects/simplecv/files/ and select the download for the desired operating system. The Windows filename extension is .exe, and the Mac’s is .pkg. With Ubuntu Linux, the extension is .deb.
By far the easiest way to install the SimpleCV framework on Windows is by using the Windows Superpack. Clicking the latest stable release link from http://www.simplecv.org/download/ will download the Superpack from http://sourceforge.net. Simply download the Superpack and follow the instructions. In addition to the basic installation, it will also check for and download any missing dependencies. The following are the required dependencies:
Python 2.7
Python Setup Tools
NumPy
SciPy
Easy_install
OpenCV
The installation creates a SimpleCV program group under the Start menu.
This includes a link to start the SimpleCV interactive Python shell and
a link to access the program documentation. The majority of the examples
in this book can be run using the SimpleCV shell. More details regarding
the shell are covered in the SimpleCV shell section of this
chapter.
Caution
There have been substantial changes made to the available software and development tools between different versions of Mac OS X. As a result, the installation instructions for Macs are likely to change in response to the ever-evolving underlying configuration of the operating system. Please see the README file included in the software download for the latest installation instructions. You can also view the README file online in the SimpleCV GitHub repository at https://github.com/ingenuitas/SimpleCV/blob/master/README.markdown.
Note
Before beginning a Mac installation, it is strongly recommended that Xcode be installed from Apple. On some versions of Mac OS X, this will resolve dependency and installation errors. To download, see https://developer.apple.com/xcode. The SimpleCV framework also requires the Command Line Tools available from within Xcode (Xcode→Preferences→Downloads→Components).
The Mac installation follows a template similar to the Windows approach. From the SimpleCV download page, click the latest stable release link. It will go to SourceForge.net and begin downloading the installation Superpack. This package will handle the installation of the SimpleCV framework and its major dependencies. The list of dependencies is the same as it is for Windows:
Python 2.7
Python Setup Tools
NumPy
SciPy
Easy_install
OpenCV
Because the SimpleCV framework integrates with Python, the Superpack installs files in places other than the Applications directory. It will also install binary dependencies in /usr/local, and Python libraries in /Library/Python2.7.
The easiest way to work with the examples below is from the Python
shell. Once the SimpleCV framework is installed, either click on the
SimpleCV.command icon in the
Applications folder or start iPython from a terminal window. To start a
terminal window, go to the Applications folder, find the Utilities
folder, and then click on Terminal to launch it. This will bring up a
command prompt. At the command prompt, type python -m SimpleCV.__init__ to bring up the
SimpleCV interactive Python shell. Most of the examples in this book can
be run from the SimpleCV shell.
While the following instructions are for Ubuntu Linux, they should also work for other
Debian-based Linux distributions. Installing SimpleCV for Ubuntu is done through a .deb package. From the SimpleCV download page, click the latest
stable release link. This will download the package and handle the installation of all the
required dependencies.
Note, however, that even recent distributions of Ubuntu may have an outdated version of OpenCV, one of the major dependencies for SimpleCV. If the installation throws errors with OpenCV, in a Terminal window enter:
$ sudo add-apt-repository ppa:gijzelaar/opencv2.3
$ sudo apt-get update
Once SimpleCV is installed, start the SimpleCV interactive Python
shell by opening a command prompt and entering python -m SimpleCV.__init__. A majority of the
examples in this book can be completed from the SimpleCV shell.
Some users may want to have the bleeding edge version of SimpleCV
installed. SimpleCV is an open source framework, so the latest versions
of the source code are freely available. The SimpleCV source code is
available on GitHub. The repository can be cloned from [email protected]:ingenuitas/SimpleCV.git.
For a more complete description of using git and the open source site GitHub, see http://www.github.com/.
Once the source code is installed, go to the directory where it was downloaded. Then run the following command at the command prompt:
$ python setup.py install
Tip
Installation from source does not automatically install the required dependencies. As a shortcut for installing dependencies, it may be easier to first install SimpleCV using the appropriate package described above. This does not guarantee that the newest dependencies will be resolved, but it will streamline the process.
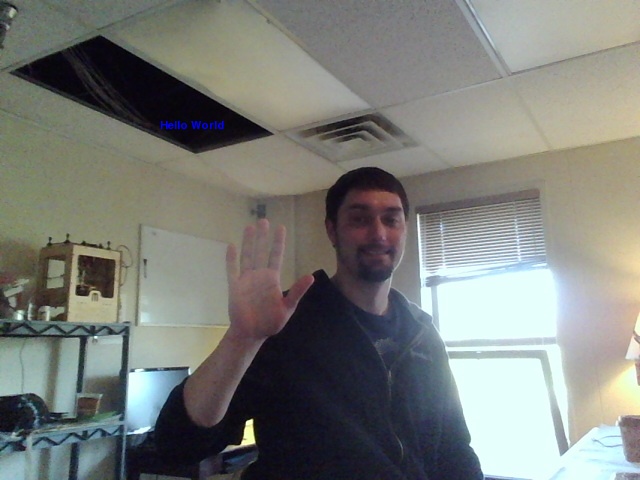
As is mandated by the muses of technical writing, the first example is a basic Hello World app. This application assumes that the computer has a built-in webcam, a camera attached via USB, or a similar video device attached to it. It will then use that camera to take a picture and display it on the screen.
Tip
The SimpleCV framework uses Python. For those who want a little more background on Python, check out Learning Python (O'Reilly, 2007) by Mark Lutz for a good introduction to the language.
from SimpleCV import Camera, Display, Image# Initialize the camera cam = Camera() # Initialize the display display = Display()
# Snap a picture using the camera img = cam.getImage()
# Show the picture on the screen img.save(display)
Either copy the code above into the SimpleCV shell or save the above
code as helloWorld.py using a plain
text editor and run the program. For those who have not worked with Python
before, these are the basic steps:
Open a Terminal window or the command prompt.
Go to the directory where
helloWorld.pyis saved.Type
python helloWorld.pyand press the Enter key.
After the program has started, look at the webcam, smile, wave, and say, “Hello World.” The program will take a picture and display it on the screen.
This example program uses three of the most common libraries
provided by the SimpleCV framework:
Camera, Display, and Image. These will be covered in greater detail
later in this book; however, a brief introduction to the program
follows:
-
The first line of code imports the libraries used in this program. Technically,
Imagedoes not need to be specifically listed because Python already knows thatCamerawill returnImageobjects. It is simply included here for clarity.-
The next two lines are constructors. The first line initializes a
Cameraobject to be able to capture the images, and the second line creates aDisplayobject for displaying a window on the screen.-
This line uses the
getImage()function from theCameraclass, which snaps a picture using the camera.
The final line then “saves” the image to the display, which makes the image appear on the screen.
Hello World purists may object that this program does not actually
display the text, “Hello World.” Instead, the example relies on the user
to say the words while the picture is taken. This situation is easily
resolved. Image objects have a drawText() function that can be used to display
text on the image. The following example demonstrates how to create a more
traditional Hello World program.
from SimpleCV import Camera, Display, Image
import time

# Initialize the camera
cam = Camera()

# Initialize the display
display = Display()

# Snap a picture using the camera
img = cam.getImage()

# Show some text
img.drawText("Hello World!")

# Show the picture on the screen
img.save(display)

# Wait five seconds so the window doesn't close right away
time.sleep(5)
This program appears almost identical to the original Hello World
example, except it now draws the text “Hello World” in the middle of the
screen. It also has a few new lines: import
time at the top of the program, and time.sleep(5) at the bottom. The import time line imports the time module from
Python’s standard library. The sleep()
function from the time module is then used at the end of the program to
delay closing the window for five seconds.
Before going into more depth regarding the features of the SimpleCV framework, this is a good point to pause and discuss one of the best tools to use when working with this book. Most of this book is based on using small snippets of code to do cool things. Yet the traditional way to code is to create a new file, enter the new code, save the file, and then run the file to see if there are errors. If there are errors (and there are always errors), open the file, fix the errors, re-save the file, and re-run the file—and keep doing this loop until all of the errors are fixed. This is an extremely cumbersome process when working with little code snippets. A much faster way to work through the examples is with the SimpleCV shell. The shell is built using IPython, an interactive shell for Python development. This section introduces the basics of working with the shell. Additional tutorials and more advanced tricks are available on IPython’s website, http://ipython.org.
Most of the example code in this book is written so that it could be
executed as a standalone script. However, this code can be still be run in
the SimpleCV shell. There are a few examples that should only be run from
the shell because they will not run properly as standard scripts. These
examples are mainly included to illustrate how the shell works. In these
cases, the example code will include the characters >>> at the beginning of each line to
indicate that it is expected to be run in the shell. Do not include these
initial >>> characters—they are just the
shell prompt. For instance, in the shell, the interactive tutorial is
started with the tutorial command,
demonstrated below:
>>> tutorial
When typing this into the shell, only enter the word tutorial and hit the Enter key. Do not type
the >>> string. The >>> merely indicates that it is a
command to be entered in the shell.
Some readers may have had prior experience working with a shell on a Linux system, MS-DOS, or software like Matlab, SPSS, R, or Quake 3 Arena. Conceptually, the SimpleCV shell has many similarities. Whereas the operating system shells take text-based commands and pass them to the OS for execution, the SimpleCV shell takes Python commands and passes them to the Python interpreter for execution. The SimpleCVshell is based on iPython and automatically loads all of the SimpleCV framework libraries. As a result, it is a great tool for tinkering with the SimpleCV framework, exploring the API, looking up documentation, and generally testing snippets of code before deployment in a full application.
All of the functions available while programming are also available when working with the shell. However, writing code in the shell still has a slightly different “feel” compared with traditional approaches. The shell will interpret commands after they are typed. This is usually on a line-by-line basis, though certain blocks, such as loops, will only be executed after the full block is entered. This places certain practical limitations on the complexity of the code, but in turn, makes an ideal environment for testing code snippets.
Starting the SimpleCV shell varies depending on the operating
system. In Windows, there is a SimpleCV link that is installed on the
Desktop, or accessible from the SimpleCV folder under the Start menu.
From a Mac or Linux machine, open a command prompt and enter simplecv to start the shell. After starting the shell, the window should look like Figure 2-1.

If the shell does not start with the SimpleCV command, it is also
possible to start it manually. Either enter python -m SimpleCV.__init__, or python at the command prompt. Then enter the
following:
>>> from SimpleCV import Shell >>> Shell.main()
To quit the shell, simply type exit() and press Return or Enter.
Tip
Press the keyboard’s up arrow to scroll back through the history of previously entered commands.
Similar to the popular shells found on Linux and Mac systems, the
SimpleCV shell supports tab completion. When typing the name of an
object or function, press Tab and the shell will attempt to complete the
name of the function. For example, if attempting to reference the getImage() function of a Camera object, first type getI and press Tab. The shell will complete
the rest of the name of the function. In cases where multiple function
names begin with the same letters, the shell will not be able to fully
complete the function name. With a Camera object, get could be referring to getImage() or to getDepth(). In such cases, it is necessary to
enter additional letters to eliminate the name ambiguity.
Note
If tab completion does not work, make sure that pyreadline is installed.
One of the most convenient features of the shell is the built-in
help system. The help system can display the latest documentation for
many objects. The documentation is organized by objects, but each
object’s functions are also documented. For example, the documentation
for Camera includes general
information about the Camera class
and its methods and inherited methods. To get help using the shell,
simply type help object. For example, to get help on
the Image object, enter:
>>> help Image
Caution
Python is case-sensitive: typing help
image is not the same as help
Image. This follows a standard convention in programming
called CamelCase which is used throughout the SimpleCV framework, and
is usually used in Python in general. In many cases, Python modules
and class names start with an uppercase first letter, while variables
and methods do not.
A slight variation on the above example is using the ? to get help on an object. In the code below,
adding a question mark to the end of img will show help information about the image
object. Since the SimpleCV shell imports all of the SimpleCV libraries,
it is technically possible to skip the line: from SimpleCV import Image.
>>> img = Image('logo')
# The next two lines do the same thing
>>> img?
>>> ?imgThe shell is also a convenient tool for frequently changing and testing blocks of code. In the shell, commands entered are immediately executed. Compare this to the traditional development cycle of writing and saving a block of code, compiling that code—or in the case of Python, waiting for the interpreter to start up—and then actually running the code to examine the results. This traditional process substantially slows any interactive designing and testing. For example, computer vision programming often involves tweaking various filters and thresholds to correctly identify the regions or objects of interest. Rather than going through many write-compile-execute cycles, it is substantially easier to simply test different configurations using the shell.
Consider the challenge of finding blobs. Blobs will be covered in greater depth later, but for the purposes of this example, assume that a blob is simply a region of lighter colored pixels surrounded by darker colored pixels. Letters written in white on a dark background are good examples of blobs. “Lighter” versus “darker” pixels are distinguished based on a threshold value. To ensure that the blobs are correctly identified, this threshold must be tweaked, usually through a process of trial and error.
Image objects have a function
named findBlobs() that will search
for the blobs. This function has a threshold option that represents its
sensitivity. For instance, to find some blobs in the SimpleCV logo, try
the following:
>>> img = Image('logo')
>>> blobs = img.findBlobs(255)
>>> print blobsThe shell will print None
because no blobs will be found with the threshold argument set that
high. To easily change this, simply tap the up arrow on the keyboard,
cycling back through the command history to the line of code that says
blobs = img.findBlobs(255). Now
replace the 255 with 100, and press the enter key. Then hit the up
arrow again until it shows the print
blobs line. Hit enter again.
>>> blobs = img.findBlobs(100) >>> print blobs
This time, the shell will output something like the following:
[SimpleCV.Features.Blob.Blob object at (35, 32) with area 385, SimpleCV.Features.Blob.Blob object at (32, 32) with area 1865]
This shows that with the lower threshold, the blobs were detected. Later chapters will cover fun blob tricks such as coloring them in and displaying them in a user-friendly fashion. For now, the point is to demonstrate how easy it is to rapidly tinker with the code using the SimpleCV Shell.
One feature of the SimpleCV Shell is that it also includes capabilities of the operating system’s shell. As a result, it is possible to navigate around the system without having everything located in the program directory. For example, you can download the images from this book from the SimpleCV website at http://www.simplecv.org/learn/. If the images used in this book are then stored in a folder named SimpleCV located in the home directory, then the paths to the example images used in this chapter would be: SimpleCVC:Usersyour_usernameSimpleCVChapter 2 on Windows SimpleCV/home/your_username/SimpleCV/Chapter 2 on Linux SimpleCV /Users/your_username/SimpleCV/Chapter 2 on Mac. There are also other advantages, such as being able to see what types of files are in a directory.
Note
In the following examples, the Mac/Linux directory and file
commands are used. When working in Windows, the forward slash notation
is also used, even though the Windows command prompt typically works
with backslashes. However, some common Linux commands such as ls and pwd will still work in the shell on
Windows.
The next example shows how to find the image named ch1-test.png using the shell, and then load
that image. First, locate the correct directory with the following
commands:
>>> cd >>> pwd
The two commands above should print out the location of the home
directory, which is probably /home/your_username if working on a Linux
system, /Users/your_username on a Mac system, and
C:\Users\your_username on Windows. The
example consists of two steps. First, by entering cd with nothing after it, the current
directory is changed to the home directory. The cd command stands for “change directory”; when
given a directory path, it moves you to that location. When no path is
entered, it moves you to the home directory. The second command,
pwd, stands for “print working
directory.” It prints out the current location, which should be the home
directory.
Assuming that the SimpleCV folder is located in the home directory, the camera-example.png image is loaded with the following command:
>>> img = Image('SimpleCV/Chapter 2/camera-example.png')However, when working with a lot of images, it may be more convenient to be in the image directory instead. To go to the directory with the Chapter 2 images, and then output a list of all of the images, type:
>>> cd SimpleCV/Chapter 2 >>> ls
The result will be a directory listing of all the sample image
files. Notice that this works just like using the cd and ls
commands in a traditional Linux shell. Not surprisingly, common command
options also work, such as ls -la to
show the file details as well as all of the hidden files. This is a good
way to look up a correct file name and prevent annoying “file not found”
error messages. Once the directory and file names are correct, loading
and displaying an image is done with the following commands:
>>> img = Image('camera-example.png')
>>> img.show()Having addressed the preliminaries, it is time to dive into the fundamentals of vision system development. For most applications, the first task is to get access to the camera. The SimpleCV framework can handle a variety of video sources and can stream video from multiple devices at the same time. This section will introduce some of the most common ways to access the camera. For greater detail, including how to work with networked cameras and the Kinect, see Chapter 3. Additionally, Appendix B will review several factors to consider when selecting a camera.
The simplest setup is a computer with a built-in webcam or an external video camera. These usually fall into a category called a USB Video Class (UVC) device. This is exactly the case described in the Hello World example in the previous section. In the Hello World example, the following line of code initializes the camera:
from SimpleCV import Camera # Initialize the camera cam = Camera()
This approach will work when dealing with just one camera, using the default camera resolution, without needing any special calibration. Although the Hello World example in the previous section outlined the standard steps for working with cameras, displays, and images, there is a convenient shortcut when the goal is simply to initialize the camera and make sure that it is working, as demonstrated in the following example:
from SimpleCV import Camera # Initialize the camera cam = Camera() # Capture and image and display it cam.getImage().show()
This code will behave similarly to the Hello World example, though
it is a bit less verbose. An example image is shown in Figure 2-2, but, obviously. actual results will vary. The
show() function simply pops up the
image from the camera on the screen. It is often necessary to store the
image in a variable for additional manipulation instead of simply calling
show() after getImage(), but this is a good block of code for
a quick test to make sure that the camera is properly initialized and
capturing video.

For many projects, this is all that is needed to access and manage
the camera. However, the SimpleCV framework can control the camera in many
different ways, such as accessing multiple cameras. After all, if one
camera is good, then it follows that two cameras are better. To access
more than one camera, pass the camera_id as an argument to the Camera() constructor.
Note
On Linux, the camera ID corresponds to the /dev/video(number)
device number. On Windows, passing
any number to the constructor will cause Windows to pop up a window to
select which device to map to that ID number. On Macs, finding the ID
number is much more complicated, so it can be easier to simply guess
which camera is 0, which is 1, and adjust by trial and error.
from SimpleCV import Camera # First attached camera cam0 = Camera(0) # Second attached camera cam1 = Camera(1) # Show a picture from the first camera cam0.getImage().show() # Show a picture from the second camera cam1.getImage().show()
The above sample code works just like the single-camera version,
except now it controls two cameras. The obvious question is: what is the
camera ID? The example conveniently uses 0 and 1. In
many cases, this will work because 0 and 1 frequently are the camera IDs.
If necessary, it is possible to look up these numbers, which are assigned
by the operating system. On Linux, all peripheral devices have a file
created for them in the /dev directory. For cameras, the file names start
with video and end with the camera ID, such as /dev/video0 and /dev/video1. The number at the end equals the
camera ID. In Windows, the camera ID number corresponds to the order of
the DirectShow devices, which is a bit more complicated to find. So with
Windows, passing in any number as the camera ID results in a pop- up
window for selecting the appropriate camera device. The ID on a Mac is
even harder to find. It is most easily found with trial and error. The ID
numbers should start at 0.
Of course, finding the list of camera IDs still does not identify which camera corresponds to which ID number. For a programmatic solution, capture a couple images and label them. For example:
from SimpleCV import Camera
# First attached camera
cam0 = Camera(0)
# Second attached camera
cam1 = Camera(1)
# Show a picture from the first camera
img0 = cam0.getImage()
img0.drawText("I am Camera ID 0")
img0.show()
# Show a picture from the first camera
img1 = cam1.getImage()
img1.drawText("I am Camera ID 1")
img1.show()In addition to the basic initialization, the SimpleCV framework can control many other camera properties. An easy example is forcing the resolution. Almost every webcam supports the standard resolutions of 320×240, and 640×480 (often called “VGA” resolution). Many newer webcams can handle higher resolutions such as 800×600, 1024×768, 1200×1024, or 1600×1200. Many webcams list higher resolutions that are “digitally scaled” or “with software enhancement,” but these do not contain any more information than the camera’s native resolution.
Rather than relying on the default resolution of the camera,
sometimes it is helpful to force a resolution to a set of known
dimensions. For example, the previous drawText() function assumes that the text should
be drawn at the center of the screen. The text can be moved to different
(x, y) coordinates, but an obvious
prerequisite for that is knowing the actual image size. One solution is to
force the resolution to a known size.
Here is an example of how to move text to the upper left quadrant of
an image, starting at the coordinates (160,
120) on a 640×480
image:
from SimpleCV import Camera
cam = Camera(0, { "width": 640, "height": 480 })
img = cam.getImage()
img.drawText("Hello World", 160, 120)
img.show()The resulting output will appear like Figure 2-3. Notice the text "Hello World" in the upper-left corner.
The above example is similar to the Hello World program, except that
the text is moved. Notice that the camera’s constructor passed a new
argument in the form of {"key": value}.
The Camera() function has a properties
argument for basic camera calibration. Multiple properties are passed in
as a comma delimited list, with the entire list enclosed in brackets. Note
that the camera ID number is NOT passed inside the brackets, since it is a
separate argument. The configuration options are:
widthandheightbrightnesscontrastsaturationhuegainexposure
Warning
The available options are part of the computer’s UVC system. In addition, the configuration options are dependent on the camera and the drivers. Not all cameras support all of the options listed above.
The show() function is used to
display the image to the screen. It keeps the image on the screen until
the program terminates—or until the shell closes. Clicking the Close
button on the window does not close the window. To get more control of the
window, use the Display object, which
is covered later in this chapter.
A good first step when setting up a vision system is to view what
the camera is capturing. To get live video feed from the camera, use the
live() function. This is as simple
as:
from SimpleCV import Camera cam = Camera() cam.live()
In addition to displaying live video feed, the live() function has two other very useful
properties. The live feed makes it easy to find both the coordinates and
the color of a pixel on the screen. This information will be useful in
later chapters when cropping images by their coordinates or segmenting
images based on color. Being able to click on the live feed to find the
coordinates for cropping the image is a lot easier than a trial and
error method of guessing what the coordinates or colors are and then
tweaking the code based on the results.
To get the coordinates or color for a pixel, use the live() function as outlined in the example
above. After the window showing the video feed appears, click the left
mouse button on the image for the pixel of interest. The coordinates and
color for the pixel at that location will then be displayed on the
screen and also output to the shell. The coordinates will be in the
(x, y) format, and the color will be
displayed as an RGB triplet (R,G,B).
An example is shown in Figure 2-4. The small text on
the left of the image is displaying the coordinates and the RGB color
values for where the left mouse button was clicked.

As much fun as loading and saving images may be, at some point it is also nice to see the images. The SimpleCV framework has two basic approaches to showing images:
Displaying them directly in a window
Opening a web browser to display the image
The first approach, showing the image in a window, has
been previously demonstrated with the show() command. Displaying the image in a web
browser is similar:
from SimpleCV import Image
img = Image("logo")
# This will show the logo image in a web browser
img.show(type="browser")Notice that it uses the same show() function, but requires the argument:
type="browser". The major difference
between the browser and the window is that the window can capture events,
such as a signal to close the window. So far, the examples in this chapter
have assumed that the window should remain open until the program
completes. For larger and more complex programs, however, this might not
be the case.
The next example shows how to take more control over when the window is displayed. First, consider the following condensed example, which is similar to the code used earlier in the chapter:
from SimpleCV import Display, Image
display = Display()
# Write to the display
Image("logo").save(display)In this case, the user will not be able to close the window by
clicking the close button in the corner of the window. The image will
continue to be displayed until the program terminates, regardless of how
the user interacts with the window. When the program terminates, it will
naturally clean up its windows. To control the closing of a window based
on the user interaction with the window, use the Display object’s isDone() function.
from SimpleCV import Display, Image
import
    time
display = Display()
Image("logo").save(display)
print "I launched a window"
# This while loop will keep looping until the window is closed
while not display.isDone():
time.sleep(0.1)
print "You closed the window"Tip
Notice how the line “time.sleep(0.1)” is
indented after the while statement? That indentation
matters. Python groups statements together into a block of code based on
the indentation. So it’s that indentation that tells Python to execute
the “time.sleep(0.1)” statement as the body of the
while loop.
The print statement in the
example above outputs to the command prompt, and not the image. The
drawText function is used for writing
text on the image. The print command,
on the other hand, is used for outputting text to the command
prompt.
Event handling does more than simply close windows. For example, it
is relatively easy to write a program that draws a circle wherever the
user clicks on the image. This is done by using the mouse position and
button state information that is provided by the Display object.
While the window is open, the following information about the mouse is available:
mouseXandmouseYThe coordinates of the mouse
mouseLeft,mouseRight, andmouseMiddleEvents triggered when the left, right, or middle buttons on the mouse are clicked
mouseWheelUpandmouseWheelDownEvents triggered then the scroll wheel on the mouse is moved
The following example shows how to draw on a screen using the information and events listed above.
Note
To use indented code in the shell, it helps to use the %cpaste macro. From the shell, enter %cpaste, copy and paste the desired code into
the shell, and then on a new line enter -- (two minus signs). It will then execute the
pasted block of code. This resolves any indentation errors thrown by the
shell.
from SimpleCV import Display, Image, Color winsize = (640,480) display = Display(winsize)
This example uses several new techniques:
-
This first step is a little different than the previous examples for initializing the window. In this case, the display is given the tuple
(640, 480)to specifically set the display size of the window. This creates an empty window with those dimensions.-
The same 640×480 tuple is used to create a blank image.
-
This code checks to see if the application has received a message that the left mouse button has been clicked.
-
If the button is clicked, draw the circle. The image has a drawing layer, which is accessed with the
dl()function. The drawing layer then provides access to thecircle()function. The following are the arguments passed to thecircle()function, in order of appearance: the tuple representing the coordinates for the center of the circle (in this case, the coordinates of the mouse), the desired radius for the circle in pixels (4), the color to draw the circle in (white), and a boolean value for thefilledargument which determines whether or not to fill in the circle or leave the center empty.
The little circles from the drawing act like a paint brush, coloring in a small region of the screen wherever the mouse is clicked. In this way, example code acts like a basic painting application that can be used to draw exciting pictures like the one in Figure 2-5.

This example provides a basic overview of working with the display and introduces the drawing layer. For more complex features regarding drawing layers, please see Chapter 7.
This section provides several straightforward examples of how to capture images, save them to disk, and render them on the display. As we progress, more advanced applications are covered in later chapters. Comments are included in the code to provide guidance about what is happening at each step along the way.
The examples below also use the time module from Python’s standard library, which we first introduced in the updated Hello World program. Experienced Python programmers may already be familiar with this module. In these examples, it is used to create timers that cause a program to wait for a specified interval of time. For instance, one example below captures an image every second. The timer is used to control the interval between snapping new photos.
The following examples include the following:
How to capture images at a fixed interval for time-lapse photography
How to create a photo booth application that lets users interact with the screen to capture images
Note
Although most of the code snippets presented in this chapter are designed for convenient use in the shell, these examples are best run as independent Python scripts.
This example operates like a camera with a timer: it takes a picture once per minute. It is a simple application that does nothing but save the images to disk. A more advanced version, though, could try to detect if there is any movement or look for changes in the objects. If left running indefinitely, it could quickly consume a great deal of disk space so a limit is included to only snap ten photos.
Tip
Sometimes the shell has problems when code that requires
formatting, such as loops, are copied and pasted into the shell. To
solve this problem, from the shell enter cpaste, press Enter, then paste the desired
code. Finally, type two dashes (--)
on a line by itself to exit the paste mode.
from SimpleCV import Camera, Image
import time

cam = Camera()

# Set the number of frames to capture
numFrames = 10

# Loop until we reach the limit set in numFrames
for x in range(0, numFrames):
    img = cam.getImage()

    filepath = "image-" + str(x) + ".jpg"
    img.save(filepath)
    print "Saved image to: " + filepath

time.sleep(60)-
Snap a picture just like in any other application.
-
Set up a unique filename so that the image is not overwritten every time. To create unique names, the name is prefixed with
image-followed by its sequence through the loop.-
Finally, save the image to the disk, based on the unique file name.
The next example is a simple photo booth application. After all,
nothing says, “I’m an aspiring vision system developer” better than
getting close with a friend or loved one and taking silly pictures. This
application takes a continuous feed of images. When clicking the left
mouse button on an image, it saves it to disk as photobooth0.jpg, photobooth1.jpg, and so on.
from SimpleCV import Camera, Display, Color import time # Initialize the camera cam = Camera() # Initialize the display display = Display() # Take an initial picture img = cam.getImage()img.drawText("Photo saved.", color=Color().getRandom())
img.save(display) time.sleep(5) counter = counter + 1
-
When the application is started, an initial picture is taken.
-
Instructions are written on the image using the
drawText()function. Because no coordinates are passed todrawText(), the message will be written in the center of the screen. TheColor().getRandom()function is used to pass a random color to thecolorargument. This will result in the text being in a different color each time the message is displayed. Then the image is “saved” to the screen. Thetime.sleep()is used to freeze the image and keep the message on the screen for a few seconds-
Wait for a few seconds to allow the user view their image.
-
Inside the
whileloop, the image is repeatedly updated. This loop continues until the window is closed.-
If the display receives a click from the left mouse button, as indicated by
display.mouseLeft, then save the image asphotobooth(.number).jpg-
After the image is saved to disk, a message is written to the screen indicating that the image was saved. It is important to write the text after saving the file. Otherwise, the message would be included on the saved image.