
Chapter 6
Using Twitter in Your SharePoint Solutions
What's in This Chapter?
- Understanding what Twitter is and how you can use it programmatically
- Understanding OAuth applications using Twitter
- Leveraging Twitter to build an application that integrates with SharePoint
Many companies are looking at ways to integrate Web 2.0 sites and technologies into SharePoint. The popularity of Twitter makes it a prime candidate to begin to integrate this Web 2.0 experience into the collaborative experience of SharePoint. In this chapter, you'll learn about Twitter and the difference between authenticated and unauthenticated integration. More importantly, you'll get a taste of how you can get started using the Twitter application programming interfaces (APIs) to build your own Twitter-based application for SharePoint.
Before we take a look at how you integrate Twitter and SharePoint, let's first explore the basics of Twitter.
You have very likely heard of Twitter before reading this chapter, as it is one of the most prominent and pervasively used social networking technologies of our recent times. If you have not heard of Twitter, it's essentially a website that offers a form of social networking — more precisely, micro-blogging services — that provides members who sign up for the service the capability to send and read messages from other members. These text-based messages are restricted to a 140-character limit and are displayed on the Twitter website, as well as routed to those who are “following” you. (To follow someone means you have signed up to be informed every time they submit a tweet, or message, to Twitter.) Figure 6.1 shows the landing page of Twitter for a user called redmondhockey, along with a series of CBSNews tweets.

While it may seem pedestrian to have another social messaging framework that fits within the Web 2.0 world, there are a couple of things that set Twitter apart. The first is that it is widely used, not only as a way to transmit messages but also as a way to gauge the social conscience. For example, many marketing teams and companies are using Twitter as a way to both disseminate messages and analyze the reaction to those messages to understand what people are saying, thus thinking, about certain issues and topics. The second is that Twitter is an interesting social phenomenon because it's at the tipping point of being a central tool in news alerts and collection — both for the public and the primary news agencies. For example, when Osama Bin Laden's compound was raided in May of 2011, a software engineer was unknowingly broadcasting a series of tweets that recorded intermittent happenings around the event. This led to news tip-offs and the public having a Twitter-mediated window into what happened in Abbottabad, courtesy of this (at least initially) unsuspecting chap. Social networking and news aside, Twitter is also evolving into a platform that enables developers to build many different types of applications against it; many companies are building their own Twitter integrations that are either native to their applications or are complementary to platforms such as SharePoint.
With all this in mind, this chapter explores Twitter from a developer's perspective at a high level. You'll get a chance to walk through building a service-based application that queries Twitter for trend data — in our case, these trends will be broken out by geographical region. Specifically, you'll build a Silverlight-based web part that leverages the Trends REST API in Twitter to build an integrated application that can filter and display trends specific to certain geographical regions. To get started, let's discuss some of the fundamentals around developing applications for Twitter, paying close attention to how you factor authorization into your Twitter applications.
Developing Applications Using Twitter
Twitter has its own set of developer documentation and SDK, which you can find by visiting http://apiwiki.twitter.com/w/page/22554679/Twitter-API-Documentation. The SDKs are fairly meaty and for the most part up to date. You may find that certain areas are not documented and are left to your own devices; this is part of a quickly evolving platform. Also, the developer community around Twitter is significant and growing. There are an increasing number of blogs, third-party libraries, and other resources that will help you get started developing using Twitter.
Twitter provides a rich set of REST-based APIs that you can use to build applications. For those of you who are new to REST, it stands for Representational State Transfer and in essence uses web-based protocols such as HTTP and SOAP to enable lightweight interaction with services and data.
The REST APIs are comprehensive, offering functionality for numerous services and resources, including streaming (providing near real-time public status over a persistent connection), search, timelines, users, lists, list members and subscribers, direct messages, favorites, notifications, OAuth (Open Authorization), and much more. Each of these areas offers numerous opportunities for application development for different audiences — the data moving across Twitter is as deep as it is wide.
![]() See the section “Additional References” at the end of the chapter for more helpful links on how to get started with Twitter development.
See the section “Additional References” at the end of the chapter for more helpful links on how to get started with Twitter development.
If you have experience developing REST-based applications, you'll adapt very quickly to the Twitter framework. However, there is one area that is worth spending some time discussing: authorization. When you build applications that use Twitter, you can either authorize the application or user, or simply leverage the open APIs that don't require authorization. Although you'll build an application that does not require application authorization, it's worth introducing how you might manage authorization with a Twitter application using OAuth.
Using OAuth in Your Twitter Applications
OAuth is an open-security protocol that supports API and application authorization for desktop and browser applications in a simple and standard way. The ultimate goal for OAuth is to provide a way to manage security tokens to enable applications to offload the authorization process to existing infrastructures, as opposed to building that infrastructure themselves. This is done through a REST-based, lightweight approach and the passing of SAML tokens (a type of XML-based security token).
Using Twitter OAuth means that you'd be redirecting your web application (either through the browser UI or programmatically through Windows Identity Foundation, which is beyond the scope of this chapter) to authenticate using Twitter's existing login and authorization infrastructure. For example, with a simple web application, this would mean when you load the landing page, the web application redirects to a Twitter login page; you sign in and are passed back to your original web application. Thus, with regard to authorization and authentication, Twitter does the heavy lifting for you; you don't have to maintain any identity management code in your application. This process and implementation is done within the OAuth framework. You can find detailed information on OAuth at http://oauth.net/.
While you can build many types of applications, this chapter discusses two types of Twitter applications: those that require some level of authentication, and those that do not. For authentication, this chapter serves more as background. As mentioned earlier, you will actively leverage REST APIs that don't require authentication to build your solution in this chapter.
Building Applications That Require Authorization
At one time, you could authorize applications using Twitter with basic authorization — a form of authentication that simply involved passing the username and password of an application to Twitter for authorization. However, those days are now gone (i.e., Twitter no longer supports basic authorization), and now in place of basic authentication is OAuth. As described earlier, this means that your application must “redirect” to Twitter to handle the log-in process, as opposed to usernames and passwords being sent across the wire.
In this regard, the premise behind OAuth is that you can have Twitter (or another application or site) act on behalf of the person or application trying to gain access to your site or application. Furthermore, when accessing a site or application, you actually don't need the password or username of an authoritative account. Instead of using an explicit username and password, OAuth uses the SAML tokens, which provide limited access to a site or application. An analogy would be a card key to enter a building. Your all-access card key represents the username and password, and an OAuth token can grant you access either to specific parts of the building, say the first floor, or to all floors. The point is that you have more control over the level of authorization, and you don't expose key credential information in the process.
When you implement OAuth in your applications, you can use standard libraries across languages and platforms. Many of these libraries are open source, but all of them accomplish at least two main things. First, they obtain a token to access otherwise protected resources by asking the user to grant access (request token); second, they use that token to access protected resources (access token). At a high level, you can think of each OAuth authorization process following a similar path (assuming in this case that Twitter is our point of authorization):
1. The user loads a fictional website called ContosoRadBikes.com, but because it requires OAuth-based authorization from Twitter, it redirects to a special Twitter authorization page.
2. When the user is redirected to Twitter, ContosoRadBikes.com asks for a request token.
3. The user then types in his or her Twitter credentials. Because the user is a member of Twitter, and we're using Twitter as the source of OAuth authorization, once the user enters his or her credentials, they are trusted and can access the website.
4. After the user is successfully authorized on the login page, Twitter sends the request token to ContosoRadBikes.com.
5. After ContosoRadBikes.com receives the request token, it requests an access token from Twitter.
6. Twitter receives the request and then issues an access token. The user now has access to ContosoRadBikes.com.
This seems like a lot of back and forth, but the net result is a trusted relationship between you and ContosoRadBikes.com using Twitter as the point of authorization. And as you can see, the only place you entered any username and password information was through a Twitter-mediated login page, as opposed to it being embedded in the actual application and passed across HTTP requests.
Let's look at a more practical example with some code behind it. Suppose that you want to add an OAuth layer to a local ASP.NET site, thereby requiring any user of your site to have a token before he or she can access it. In addition, you want to use Twitter as the third party to verify the credentials of anyone who wants that access. How do you manage this relationship using OAuth — and more specifically, OAuth with Twitter?
First, you need to register an application with Twitter. You can do this by navigating to https://dev.twitter.com/apps and clicking “Register a new app” (see Figure 6.2).

On the Register an Application page that appears (see Figure 6.3), you can enter information about your application, including application name, description, website, organization, application type, callback URL, default access type, and application icon. (Ensure that your default access type is read/write.) After you complete the registration, click Save Application.

When the registration of the application is saved, a number of settings are automatically generated for you. You can click Application Details to see the key elements used for OAuth: the consumer key and the consumer secret, as shown in Figure 6.4. The token URLs are standard ways to request the OAuth token. When you implement an application to use this consumer key and secret, Twitter will redirect users to a page that enables them to authenticate — this in essence represents the connection point between the application requesting authorization and Twitter (the token-granting authority). After the user authenticates, Twitter then issues the token to access the ASP.NET site.

With the new application registered and the consumer key and secret in hand, you are now ready to implement OAuth in code. Rather than walk through an elaborate example, this chapter uses an existing solution that Shannon Whitley (a technologist who writes on many different subjects, including OAuth) created. It's a simple ASP.NET application that you can make a couple of tweaks to and very quickly test out OAuth authorization with Twitter. You can directly download the code from this location: http://voiceoftech.com/downloads/oauthtwitterexamplenet.zip.
After downloading Whitley's OAuth sample application, unzip it and open it in Visual Studio 2010. (Note that Visual Studio 2010 will walk you through the conversion wizard to update the solution files.) To make the required changes to the code to implement OAuth against your Twitter application, first open the web.config file and add your consumer key and secret to the appSettings element, as per the following bolded code:
<?xml version="1.0"?>
<configuration>
  <appSettings>
    <add key="consumerKey" value="kqr*************qqQ"/>
    <add key="consumerSecret" value="iOrmvL**************************yFLU"/>
  </appSettings>
  <connectionStrings/>
  …
</configuration>
Note that by adding your consumer key and secret, you've created a connection between this application and the Twitter application you just registered. After adding the key, you may also want to change the default port 80 to another port number, as shown in Figure 6.5 (because you are likely running your local SharePoint instance on port 80). If you don't, the application may not run.

Lastly, you'll want to make sure that the CallBackUrl property is set to your local ASP.NET site. By default, it reads http://localhost, so you may not have to change it. The bolded line of code in the following code snippet (in default.aspx.cs) shows where you need to make this update:
…

namespace oAuthExample
{
    public partial class _Default : System.Web.UI.Page
    {
        protected void Page_Load(object sender, EventArgs e)
        {
            string url = "";
            string xml = "";
            oAuthTwitter oAuth = new oAuthTwitter();

            if (Request["oauth_token"] == null)
            {
                oAuth.CallBackUrl = "http://localhost";
                Response.Redirect(oAuth.AuthorizationLinkGet());
            }
            else
            {
…
                }
            }
        }
    }
}
After you make these changes, press F5. The application should launch and then redirect to Twitter and, using the application you registered, prompt you to sign into your site using your Twitter credentials. Figure 6.6 shows the login page that Twitter provides as a redirect from the application (and the application to which the consumer key and secret apply). After you enter your username and password, Twitter issues you an OAuth token, which enables you to access the local SharePoint site.

Note that when you're redirected to a local ASP.NET site (http://localhost in Figure 6.7), an OAuth token is now appended to the local site URL. This is the token issued by Twitter.

You can apply this standard method of authentication across many different applications, and the general process that was discussed using ContosoRadBikes.com would also apply to other sites or applications that use Twitter as the point of OAuth authorization.
Although authorization is an important aspect of Twitter application development, many other options are available to you that don't require authorization. The rest of the chapter discusses the types of applications you can build without requiring authorization, and walks you through the steps to build one using the Trends REST API.
Building Applications That Do Not Require Authorization
You can build many applications — too many, in fact — that don't require any level of authorization from Twitter. You do have to be careful, though, because your application may need to manage large amounts of data. For example, you can use the Twitter APIs to return all the tweets for a specific date or person, and with a large return data-set you'll need to manage scrolling, paging, caching, and so on, to ensure there is an optimal user experience with your application. This is less concerning for authorization and more of a concern for general application execution.
As mentioned earlier, Twitter makes heavy use of REST APIs (although you will find some .NET wrappers, such as Twitterizer, out there as well), which means that you use a URI within your application that returns some level of data that you can then parse and use in your application. In many of the Twitter REST APIs, you can opt to have your data returned in XML or JSON (JavaScript Object Notation). For those of you who have programmed .NET before, you're probably accustomed to using XML and, for example, LINQ to XML, to manage returned data. For those of you who are web developers and are, for example, using jQuery, JavaScript, or AJAX in your applications, you may prefer to use JSON. jQuery, for example, has a native set of APIs that work well with JSON.
Assuming you've signed up for a Twitter account, you can type the following REST URI into your browser and it will return information about you:
http://twitter.com/users/show/username_here.xml
The returned data for this query will be formatted similar to the following (which is truncated to optimize page space), and includes the last tweet of the username you're querying:
<?xml version="1.0" encoding="UTF-8"?>
<user>
<id>35768732</id>
<name>Steve Fox</name>
<screen_name>redmondhockey</screen_name>
<location/>
<description/>
<profile_image_url>http://a3.twimg.com/profile_images/311539668/steve-
  fox_normal.jpg</profile_image_url> <url/>
…
<created_at>Tue Mar 08 18:23:18 +0000 2011</created_at>
<id>45187852669173760</id> <text>SharePoint Conference 2011 now open for reg:
http://www.mssharepointconference.com/Pages/default.aspx</text>
<source>web</source>
<truncated>false</truncated>
<favorited>false</favorited>
<in_reply_to_status_id/> <in_reply_to_user_id/> <in_reply_to_screen_name/>
<retweet_count>0</retweet_count>
<retweeted>false</retweeted>
<geo/>
<coordinates/>
<place/>
<contributors/>
</status>
</user>
Likewise, you can change the format of the REST-based query to Twitter to return the same data in JSON format:
http://twitter.com/users/show/<username_here>.json
The returned data for this query will be formatted similar to the following (which, again, is truncated to save space):
{
"profile_use_background_image":true,
"protected":false,
"profile_background_color":"C0DEED",
"name":"Steve Fox","verified":false,
"profile_background_image_url":"http://a3.twimg.com/images/themes/theme1/bg.png",
…
"favorited":false,"truncated":false},
"profile_background_tile":false,
"favorites_count":0,
"screen_name":"redmondhockey",
"default_profile_image":false,
"show_all_inline_media":false,
"geo_enabled":false,
"url":null,"id":35768732,
"contributors_enabled":false,
"profile_link_color":"0084B4",
"is_translator":false,
"created_at":"Mon Apr 27 15:25:55 +0000 2009",
"profile_sidebar_border_color":"C0DEED",
"followers_count":118,
"default_profile":true,"follow_request_sent":null,
"statuses_count":15,
"following":null,"time_zone":null,
"friends_count":37
}
Because you have the option to manage REST responses in XML or JSON, you need to decide which is appropriate for your application. In this chapter, you'll use XML. The reason we chose XML was that for .NET there is currently more support for managing XML return data than JSON, and we felt that it mapped better to Silverlight. However, you could use JSON parsers within Silverlight, if you choose.
![]() If you want more background on JSON (and how it differs from XML), read the article “An Introduction to JavaScript Object Notation (JSON) in JavaScript and .NET,” at http://msdn.microsoft.com/en-us/library/bb299886.aspx.
If you want more background on JSON (and how it differs from XML), read the article “An Introduction to JavaScript Object Notation (JSON) in JavaScript and .NET,” at http://msdn.microsoft.com/en-us/library/bb299886.aspx.
Using the Twitter Trends Data
The application you'll build is going to use the Twitter trends data, which provides trends across different pivots, such as daily and weekly trends, and trends for geographical regions. Table 6.1 provides some additional details about the currently available and common Twitter trends REST APIs. In the table, note that the URI is truncated; it does not include a prefix of http://api.twitter.com. For example, for the first trend (Available), the REST URI would be http://api.twitter.com/1/trends/available.xml (for XML format) or http://api.twitter.com/1/trends.available.json (for JSON format). Note that in the URI column in Table 6.1, the tilde (∼) replaces http://api.twitter.com.
Table 6.1 Trend API
| Trend | Description | URI |
| Available | Provides all available locations for trending | ∼/1/trends/available.format |
| Location | Location-specific trends | ∼/1/trends/woeid.format |
| Current | Top 10 current trending topics | ∼/1/trends/current.format |
| Daily | Top 20 trending topics per hour in a day | ∼/1/trends/daily.format |
| Weekly | Top 30 trending topics per day in a week | ∼/1/trends/weekly.format |
Since you'll be using the XML return format and focusing on the trends available by region, let's take a look at what is returned when you enter the Available trends REST URI (http://api.twitter.com/1/trends/available.xml). The result should look similar to the following (also truncated to optimize page space):
<?xml version="1.0" encoding="UTF-8"?>
<locations type="array">
  <location>
    <woeid>23424969</woeid>
    <name>Turkey</name>
    <placeTypeName code="12">Country</placeTypeName>
    <country type="Country" code="TR">Turkey</country>
    <url>http://where.yahooapis.com/v1/place/23424969</url>
    <parentid>1</parentid>
  </location>
  <location>
    <woeid>2364559</woeid>
    <name>Birmingham</name>
    <placeTypeName code="7">Town</placeTypeName>
    <country type="Country" code="US">United States</country>
    <url>http://where.yahooapis.com/v1/place/2364559</url>
    <parentid>23424977</parentid>
  …
  </location>
  <location>
    <woeid>2418046</woeid>
    <name>Harrisburg</name>
    <placeTypeName code="7">Town</placeTypeName>
    <country type="Country" code="US">United States</country>
    <url>http://where.yahooapis.com/v1/place/2418046</url>
    <parentid>23424977</parentid>
  </location>
  <location>
    <woeid>2359991</woeid>
    <name>Baton Rouge</name>
    <placeTypeName code="7">Town</placeTypeName>
    <country type="Country" code="US">United States</country>
    <url>http://where.yahooapis.com/v1/place/2359991</url>
    <parentid>23424977</parentid>
  </location>
  <location>
    <woeid>76456</woeid>
    <name>Santo Domingo</name>
    <placeTypeName code="7">Town</placeTypeName>
    <country type="Country" code="DO">Dominican Republic</country>
    <url>http://where.yahooapis.com/v1/place/76456</url>
    <parentid>23424800</parentid>
  </location>
  <location>
    <woeid>455825</woeid>
    <name>Rio de Janeiro</name>
    <placeTypeName code="7">Town</placeTypeName>
    <country type="Country" code="BR">Brazil</country>
    <url>http://where.yahooapis.com/v1/place/455825</url>
    <parentid>23424768</parentid>
  </location>
</locations>
This feed indicates all the currently available locations for geo-specific trending. In the return data from this REST URI, you can see that the WOEID (that is, Yahoo's Where On Earth ID) is included. The WOEID is Twitter's way of representing place programmatically. Rather than reinvent the geographical wheel, so to speak, they borrowed an in-place ID and repurposed Yahoo's 32-bit identifiers, which are unique and nonrepetitive — once a WOEID is assigned it never changes. This enables you to easily query a locale-specific set of tweets in the more simple case, to mashing up other data alongside the trends in a more complex scenario.
Building a geo-specific query requires that you include the WOEID within the REST URI. For example, if you take the WOEID for Turkey (which is 23424969) and then query for the top trends in this region (http://api.twitter.com/1/trends/23424969.xml), you'll get something similar to the following as a return data package:
<?xml version="1.0" encoding="UTF-8"?>
<matching_trends type="array">
  <trends as_of="2011-05-30T02:33:10Z" created_at="2011-05-30T02:29:48Z">
    <locations>
      <location>
        <woeid>23424969</woeid>
        <name>Turkey</name>
      </location>
    </locations>
    <trend query="%23orduspor"
url="http://search.twitter.com/search?q=%23orduspor">#orduspor</trend>
    <trend query="%23sikeyapiyoruz"
url="http://search.twitter.com/search?q=%23sikeyapiyoruz">#sikeyapiyoruz</trend>
    <trend query="%23burgerkingeboykot"
url="http://search.twitter.com/search?q=%23burgerkingeboykot">
        #burgerkingeboykot</trend>
    <trend query="%22Fatma+Murat%22"
url="http://search.twitter.com/search?q=%22Fatma+Murat%22">Fatma Murat</trend>
    <trend query="%22B%C3%BClent+Orta%C3%A7gil%22"
url="http://search.twitter.com/search?q=%22B%C3%BClent+Orta%C3%A7gil%22">
       Bülent Ortaçgil</trend>
    <trend query="%22Ahmet+G%C3%B6k%C3%A7ek%22"
url="http://search.twitter.com/search?q=%22Ahmet+G%C3%B6k%C3%A7ek%22">
       Ahmet Gökçek</trend>
    <trend query="%22Metin+Diyadin%22"
url="http://search.twitter.com/search?q=%22Metin+Diyadin%22">Metin Diyadin</trend>
    <trend query="%22%C3%96zge+Ulusoy%22"
url="http://search.twitter.com/search?q=%22%C3%96zge+Ulusoy%22">Özge Ulusoy</trend>
    <trend query="K%C4%B1l%C4%B1%C3%A7daro%C4%9Flu"
url="http://search.twitter.com/search?q=K%C4%B1l%C4%B1%C3%A7daro%C4%9Flu">
       Kiliçdaroglu</trend>
    <trend query="%22Glee+%26+Gleeks%22"
url="http://search.twitter.com/search?q=%22Glee+%26+Gleeks%22">Glee & Gleeks</trend>
  </trends>
</matching_trends>
In the application that you'll build in this chapter, you'll use only a handful of the WOEIDs; however, as you explore Twitter trends further, you can flesh out your application to include other available locations. Table 6.2 provides the seven locations and accompanying WOEIDs you'll use.
Table 6.2 Chapter Example WOEIDs
| Locale | WOEID |
| Worldwide | 1 |
| United States | 23424977 |
| Canada | 23424775 |
| Ireland | 23424803 |
| United Kingdom | 23424975 |
| Mexico | 23424900 |
| Brazil | 23424768 |
Now that you have some background on the type of data returned from Twitter's REST APIs, the trending-specific APIs, and the core locations you'll be targeting in your application, let's go ahead and create the solution.
Integrating Twitter with SharePoint
To keep things straightforward and illustrative, this solution will mainly provide you with location-specific insights (i.e., trending) from Twitter feeds. You'll make the feed available to SharePoint via a Silverlight-enabled web part.
The Solution Architecture
The architecture of this application will implement the REST URI within a WCF service, making it broadly available to a variety of applications. One of the key reasons for this is portability; we wanted to ensure the application worked the same in SharePoint Server (SPS) 2010 as it would in SharePoint Online. Making the application portable across the two requires the use of Silverlight (or jQuery/JavaScript), because you're making an external service call from the web part (which is not allowed by SharePoint's sandboxed solution architecture). Therefore, the WCF service will do the heavy lifting for you, and then you'll implement the service in the Silverlight application, which is deployed to SharePoint. With this in mind, the architecture should look something similar to Figure 6.8.

Note that the web part (Silverlight-based) lives in SharePoint Server 2010 (or SharePoint Online). The Silverlight application calls the GetTwitterTrends method, which can be deployed to your local IIS or can be deployed to Windows Azure and subsequently interact with Twitter. While deploying to Windows Azure is optional, we are deploying it locally in this chapter; deploying it to Windows Azure supports the portability across SPS and SharePoint Online. (Note that Chapter 2 walked you through how to build and deploy a WCF service to Windows Azure. You can apply the same method in this chapter if you want to deploy the service to Windows Azure.)
Creating the Twitter and SharePoint Solution
To build the application, you'll work through three primary tasks:
1. Create the service that enables you to interact with the Twitter trends reporting feed. As a part of this process, you'll need to deploy the service for implementation in the Silverlight client.
2. Create a Silverlight client application that consumes the WCF service to surface trend data.
3. Deploy the Silverlight application to SharePoint.
This basic application is fairly straightforward; however, you'll be able to use the solution as a bridge to build broader mashups and applications that leverage trend (or other) data feeds from Twitter.
Creating the Twitter Service
You have a variety of options when building applications using the Twitter REST APIs. For example, you might encapsulate the calls within an HttpWebRequest object and then parse the return data directly from within a client or web application. You might also abstract the call to Twitter with a WCF service; doing this enables you to re-purpose the service across multiple applications (especially if you deploy the service to Windows Azure). We chose the WCF service proxy as the path, so in this section of the chapter you'll walk through how to create the service proxy, which you'll consume later on in the Silverlight client application.
1. Open Visual Studio 2010 and click File ⇒ New Project.
2. Under Installed Templates, select Other Project Types ⇒ Visual Studio Solutions ⇒ Blank Solution.
3. Provide a name for your project (such as MyTwitterTrendSolution) and click OK (see Figure 6.9).
4. After Visual Studio creates the solution, right-click the new project and select Add ⇒ New Project.
5. Select Cloud under Installed Templates and then select Windows Azure Project.
6. Provide a name for the project (e.g., MyTwitterTrendCloudService), and click OK (see Figure 6.10).
7. When you're prompted with the New Windows Azure Project wizard, select the WCF Service Web Role and then click the right-arrow button (>) to add the role to the project (see Figure 6.11).
8. Click the small pencil icon to edit the name of the service and amend the service name to something more intuitive (e.g., TwitterTrends). Click OK when you are done.
At this point, you have a shell cloud project created with some default code in it. The project is a WCF service, and, even though you're using the cloud WCF service role, you do have the option to deploy the service to Windows Azure or to simply deploy and use in your local Internet Information Services (IIS). You have this option because the core service contract and code files are similar to those you would have if you were to create a WCF service application; the major difference in this project is that the cloud project provides you with a set of configuration files and additional classes that allow your code to run in Windows Azure. For example, note in Figure 6.12 that the MyTwitterTrendCloudService project has the one role you created (which corresponds to your service role). It also has a service configuration file and a service definition file — these files enable your service to run in the cloud and configure some of the options of the service runtime (e.g., number of role instances).
The following code snippet shows the service configuration file, which includes the role name, the number of instances that you want to manage in Windows Azure, and a setting to use the local development storage. Also, note that the Instances count is set to 2. By default, this is set to 1, which means one role running your application. However, to ensure you have failover and reliability (e.g., when machines are being patched), you should always configure this to be a minimum of 2.
<?xml version="1.0" encoding="utf-8"?>
<ServiceConfiguration serviceName="MyTwitterTrendCloudService"
xmlns="http://schemas.microsoft.com/ServiceHosting/2008/10/ServiceConfiguration"
     osFamily="1"
osVersion="*">
  <Role name="TwitterTrends">
    <Instances count="2" />
    <ConfigurationSettings>
      <Setting name="Microsoft.WindowsAzure.Plugins.Diagnostics.ConnectionString"
        value="UseDevelopmentStorage=true" />
    </ConfigurationSettings>
  </Role>
</ServiceConfiguration>
The following service definition file provides additional configuration information about your application, such as endpoint settings, bindings, and local storage and logging information:
<?xml version="1.0" encoding="utf-8"?>
<ServiceDefinition name="MyTwitterTrendCloudService"
 xmlns="http://schemas.microsoft.com/ServiceHosting/2008/10/ServiceDefinition">
  <WebRole name="TwitterTrends">
    <Sites>
      <Site name="Web">
        <Bindings>
          <Binding name="Endpoint1" endpointName="Endpoint1" />
        </Bindings>
      </Site>
    </Sites>
    <Endpoints>
      <InputEndpoint name="Endpoint1" protocol="http" port="80" />
    </Endpoints>
    <Imports>
      <Import moduleName="Diagnostics" />
    </Imports>
    <LocalResources>
      <LocalStorage name="TwitterTrends.svclog" sizeInMB="1000"
        cleanOnRoleRecycle="false" />
    </LocalResources>
  </WebRole>
</ServiceDefinition>
In the solution, though, note that the core service (i.e., TwitterTrends) contains the WebRole class and AzureLocalStorageTraceListener class, which provide you with startup events that manage application tracing in the cloud.
Because you're going to be using Silverlight, you must include a cross-domain policy to enable cross-domain application communication. The cross-domain policy file is an XML file that grants web clients, such as Silverlight applications, permission to access and handle data across multiple domains. For example, when one domain makes a request for data in another domain, the cross-domain policy enables the request to be satisfied and the transaction (e.g., to get the data) to be completed. To do this, you'll add two XML files to your application: crossdomain.xml and clientaccesspolicy.xml.
9. Right-click the service project (e.g., TwitterTrends) and select Add ⇒ New Item. Under Data, select XML and type in crossdomain.xml as the new filename.
10. In the crossdomain.xml file, copy and paste the following XML code:
<?xml version="1.0"?>
<!DOCTYPE cross-domain-policy SYSTEM "http://www.macromedia.com/xml/dtds/cross-domain-
   policy.dtd">
<cross-domain-policy>
  <allow-http-request-headers-from domain="*" headers="*"/>
</cross-domain-policy>
11. Repeat the previous step, adding a new XML file called clientaccesspolicy.xml. In this new XML file, copy and paste the following XML code:
<?xml version="1.0" encoding="utf-8"?>
<access-policy>
  <cross-domain-access>
    <policy>
      <allow-from http-request-headers="SOAPAction">
        <domain uri="*"/>
      </allow-from>
      <grant-to>
        <resource path="/" include-subpaths="true"/>
      </grant-to>
    </policy>
  </cross-domain-access>
</access-policy>
12. Rename the service and interface classes to something more intuitive (e.g., GetTwitterTrends and IGetTwitterTrends). You can do this by right-clicking Service1 in the main class file and selecting Refactor ⇒ Rename (see Figure 6.13).
13. Double-click the new service interface class (e.g., IGetTwitterTrends) and replace the code in it with the following bolded code:

using System;
using System.Collections.Generic;
using System.Linq;
using System.Runtime.Serialization;
using System.ServiceModel;
using System.ServiceModel.Web;
using System.Text;

namespace MyTwitterService
{

    [ServiceContract]
    public interface IGetTwitterTrends
    {

              [OperationContract]
              [WebGet()]
              [XmlSerializerFormat()]
              List<Trend> GetTrends(string GeoCode);
    }
}
code snippet 076576 Ch06_Code.zip/MyTwitterService.csproj
This operation contract defines a method that takes a string as a parameter (which will be the location that is transformed into a WOEID on the server side) and returns a list collection of Trend objects, which is a simple class you'll create next.
14. Right-click the project and select Add ⇒ Class. Name the class Trend, and then select Add. When the class has been added, amend the class code as per the following bolded code. This is a very simple class because you'll be using only one element within the return data — the trend. However, if you want to use other parts of the return data, you can extend the properties of this class.
using System;
using System.Collections.Generic;
using System.Linq;
using System.Web;

namespace TwitterTrends
{
    public class Trend
    {
              public string Name { get; set; }
    }
}
15. Open the core service class and replace the default code with the following bolded code:
using System;
using System.Collections.Generic;
using System.Linq;
using System.Runtime.Serialization;
using System.ServiceModel;
using System.ServiceModel.Web;
using System.Text;
using System.Net;
using System.Xml.Linq;

namespace TwitterTrends
{
    public class GetTwitterTrends : IGetTwitterTrends
    {
        List<Trend> listOfTrends = new List<Trend>();
        int geoCodeForTrends = 0;

        public List<Trend> GetTrends(string GeoCode)
        {
            //Method to get the correct geo-code.
            SetGeoCode(GeoCode);

            //Creates the URI for Twitter trends.
            string trendURI = "http://api.twitter.com/1/trends/" +
geoCodeForTrends.ToString() + ".xml";
            //string trendURI = "http://api.twitter.com/1/trends/1.xml";
            //Calls the Twitter trend feed.
            WebClient clientXml = new WebClient();
            Uri urlXml = new Uri(string.Format(trendURI));
            string newsXml = clientXml.DownloadString(urlXml);

            //Transform the feed and select the child nodes of the trends element.
            XDocument xmlTweetTrends = XDocument.Parse(newsXml);
            XElement trendElement = xmlTweetTrends.Root.Element("trends");
            IEnumerable<XElement> trendList = trendElement.Elements();

            //Create the return object (list collection) from top queries.
            foreach (XElement x in trendList)
            {
                Trend temp = new Trend();
                temp.Name = x.Value.ToString();
                listOfTrends.Add(temp);
            }

            //Dispose of the WebClient object.
            clientXml.Dispose();

            //Return list collection to calling application.
            return listOfTrends;
        }

        private int SetGeoCode(string GeoCode)
        {
            //Set geo code based on string from calling application.
            if (GeoCode == "Worldwide")
            {
                geoCodeForTrends = 1;
            }
            else if(GeoCode == "Canada")
            {
                geoCodeForTrends = 23424775;
            }
            else if(GeoCode == "Ireland")
            {
                geoCodeForTrends = 23424803;
            }
            else if(GeoCode == "United Kingdom")
            {
                geoCodeForTrends = 23424975;
            }
            else if(GeoCode == "Mexico")
            {
                geoCodeForTrends = 23424900;
            }
            else if(GeoCode == "Brazil")
            {
                geoCodeForTrends = 23424768;
            }
            else if(GeoCode == "United States")
            {
                geoCodeForTrends = 23424977;
            }
            else if(GeoCode == null)
            {
                geoCodeForTrends = 1;
            }

            //Return the set geo code to construct trend URL.
            return geoCodeForTrends;
        }

    }
}
code snippet 076576 Ch06_Code.zip/MyTwitterService.csproj
This code primarily accomplishes three things. First, it constructs the correct REST URI based on information passed to it. That is, the GeoCode variable represents the location, which is then passed to the SetGeoCode method. The SetGeoCode method returns the proper WOEID, which is then used in the construction of the proper REST URI. Second, the method retrieves the location-specific trend data using the WebClient object. The WebClient class is a common way to send and retrieve data from web-based resources using URIs, so it's a straightforward way to retrieve Twitter trend data in this scenario. The data is retrieved using the DownloadString method, which downloads the string representation of the Twitter data. Notice that to deserialize the data, the code targets a specific set of elements (the trend elements) that are nested within the trends element.
![]() For those of you deserializing JSON, you'll find that Twitter trend data has dynamic properties that make the structure a little tricky to manage. For example, JSON has a dynamically generated date property that makes deserialization trickier. An interesting blog post addresses the difficulty in object mapping when deserializing JSON: http://stackoverflow.com/questions/2352536/json-twitter-list-in-c-net.
For those of you deserializing JSON, you'll find that Twitter trend data has dynamic properties that make the structure a little tricky to manage. For example, JSON has a dynamically generated date property that makes deserialization trickier. An interesting blog post addresses the difficulty in object mapping when deserializing JSON: http://stackoverflow.com/questions/2352536/json-twitter-list-in-c-net.


When you've completed the deserialization of the XML data, the code then passes the generated list collection (listOfTrends) back to the calling application. Again, you may opt to keep the custom class (especially if you're looking at expanding the use of the class to include other trend information), or you could deserialize into an ArrayList object.
Now that you've built the main service for the Twitter trend data retrieval, you can deploy the service. Because you created a cloud project, you can deploy it to Windows Azure or you can deploy the service to your local IIS. If you don't have a Windows Azure account set up, deploy it locally to test the service.
1. To deploy to your local IIS, right-click the service project and select Publish.
2. In the Publish Web dialog, shown in Figure 6.14, select File System as the publish method, provide a target location (e.g., local folder), and then click Publish.
3. After you've successfully published, open IIS and then right-click Sites and select Add Web Site.
4. In the Add Web Site dialog (see Figure 6.15), provide a site name, add the path to the folder you published your WCF service to, and provide a port number other than 80 (which is your default port).
If you also want to explicitly set the authentication to your credentials, click Connect as and enter your domain information.
5. Click OK.


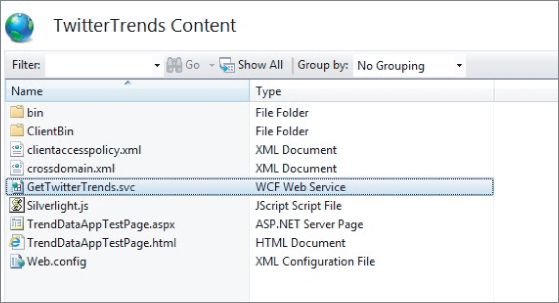
You should now be able to see the deployed service classes and files in your TwitterTrends site, as shown in Figure 6.16.
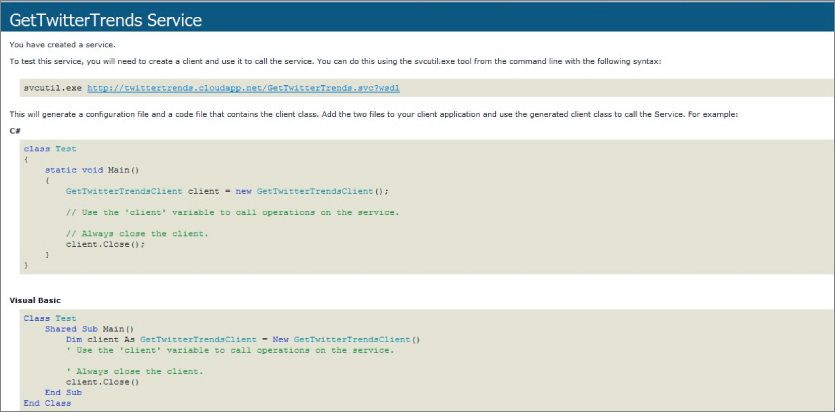
If you right-click the service and select Browse, you will see the service definition (and be able to copy and paste the service URL for implementation in other solutions).
If you do have a Windows Azure account, you can also deploy and run the WCF service from the cloud. When you publish to Windows Azure, you're essentially publishing the service to an IIS instance that is hosted on a Windows Server instance running in a data center. Therefore, to publish the service, you need to first create a hosted service in your Windows Azure Developer portal. Then you publish the service to the hosted instance of IIS instead of your local instance.
1. Navigate to https://windows.azure.com/default.aspx and sign in to your Windows Azure portal (see Figure 6.17).
2. Click Hosted Services ⇒ Storage Accounts ⇒ CDN. Select a subscription, a name for the service, and a region, and then you can either deploy code now to the new service (Deploy to Production) or wait until later to do it (Do Not Deploy). Select Do Not Deploy, and return to your Visual Studio solution.
3. In the Visual Studio project, right-click the Web role project and select Publish. This prompts you with the Deploy Windows Azure project dialog, as shown in Figure 6.18). Click Create Service Package Only, and click OK.
4. This prompts Visual Studio to package up the files into code and configuration files, after which Windows Explorer automatically opens to these two newly generated files. Copy the directory path to your clipboard, and return to your Windows Azure developer portal.
5. Select the service you just created, and then click New Production Deployment.
6. In the Create a new Deployment dialog, provide a deployment name and then click Browse Locally. Paste the directory path when prompted, and add the TwitterService.cspkg and ServiceConfiguration.cscfg files to your hosted service, and then click OK (see Figure 6.19).


Uploading and preparing the role for use may take a few minutes, so you can grab a quick coffee while you're waiting. After the service code has been uploaded, you will see a Ready status, as shown in Figure 6.20.

If you select the service (e.g., TweetTrends), you can click the DNS name of the service and append it to the WCF service name, and then you should see the service definition page appear, indicating your service is ready for use. As shown in Figure 6.21, the GetTwitterTrends service is now ready for use.
There were a number of steps to create and deploy the service, but the code to do so wasn't very complex, and you now have a service that you've deployed to either your local IIS, your Windows Azure instance, or both. If you deployed the service to Windows Azure, as described earlier, you can use this service for applications that live both on-premises (SPS) and in the cloud (SharePoint Online). Obviously, your local IIS can only be used for on-premises applications.
Creating the Silverlight Client Application
Now that you've built the service, it's time for the second part of the solution development: building the Silverlight client application that will consume the WCF service and the XML feed coming from Twitter trends.
1. Open the Visual Studio solution, right-click it, and select Add ⇒ New Project.
2. Select Silverlight under Installed Templates and then select Silverlight Application.
3. Provide a name for the project (e.g., TrendDataApp) and click OK. When prompted, uncheck Host the Silverlight application in a new or existing Web site in the solution, and then click OK.
4. Add the service reference to the WCF service you just deployed by right-clicking the project and selecting Add Service Reference.
5. Add the service URI (e.g., http://twittertrends.cloudapp.net/GetTwitterTrends.svc) to the Address field and click Go. (You can use either your locally deployed service or your Windows Azure deployed service here.)
6. Provide a namespace for the service (e.g., GetTrendsSvc) and click Add. You are now ready to use the WCF service you just created.
7. Right-click MainPage.xaml and select View in Designer. You can drag and drop the controls represented in the code snippet from the Toolbox to the Designer surface, or you can replace the XAML with the following bolded XAML code. (If you copy and paste, you may get a compile error; this is because you need to add the System.Windows.Controls.Data.Input library, which is added automatically when you drag and drop the controls onto the designer surface.)
<UserControl
xmlns:toolkit="http://schemas.microsoft.com/winfx/2006/xaml/presentation/toolkit"
xmlns:sdk=http://schemas.microsoft.com/winfx/2006/xaml/presentation/sdk
x:Class="TrendDataApp.MainPage"
    xmlns="http://schemas.microsoft.com/winfx/2006/xaml/presentation"
    xmlns:x="http://schemas.microsoft.com/winfx/2006/xaml"
    xmlns:d="http://schemas.microsoft.com/expression/blend/2008"
    xmlns:mc="http://schemas.openxmlformats.org/markup-compatibility/2006"
    mc:Ignorable="d"
    d:DesignHeight="438" d:DesignWidth="400">

       <Grid x:Name="LayoutRoot" Background="White" Height="434">
        <Button Content="Trends" Height="23" HorizontalAlignment="Right"
Margin="0,47,27,0" Name="btnTrends" VerticalAlignment="Top" Width="75"
Click="btnTrends_Click" />
        <ListBox Height="310" HorizontalAlignment="Left" Margin="30,95,0,0"
Name="lstbxTrends" VerticalAlignment="Top" Width="342">
            <ListBox.ItemTemplate>
                <DataTemplate>
                    <Border Margin="5" BorderThickness="1" BorderBrush="Black"
CornerRadius="4" HorizontalAlignment="Stretch">
                        <Grid Margin="3">
                            <Grid.RowDefinitions>
                                <RowDefinition></RowDefinition>
                                <RowDefinition></RowDefinition>
                            </Grid.RowDefinitions>
                            <TextBlock x:Name="txtblckLocation" Width="200"
FontFamily="Arial" FontSize="8" FontWeight="Bold" Text="{Binding
Location}"></TextBlock>
                            <TextBlock x:Name="txtblckSearchs" Grid.Row="1"
FontFamily="Arial" FontSize="12" Text="{Binding Name}"></TextBlock>
                       </Grid>
                    </Border>
                </DataTemplate>
            </ListBox.ItemTemplate>
        </ListBox>

        <sdk:Label Height="20" HorizontalAlignment="Left" FontSize="12"
FontWeight="Black" Margin="29,12,0,0" Name="lblTitle" Content="Global Twitter Search
Trends" VerticalAlignment="Top" Width="209" />
        <ComboBox Height="23" HorizontalAlignment="Left" FontSize="8"
Margin="94,47,0,0" Name="combobxGeos" VerticalAlignment="Top" Width="188">
            <ComboBoxItem>Worldwide</ComboBoxItem>
            <ComboBoxItem>Canada</ComboBoxItem>
            <ComboBoxItem>Ireland</ComboBoxItem>
            <ComboBoxItem>United Kingdom</ComboBoxItem>
            <ComboBoxItem>Mexico</ComboBoxItem>
            <ComboBoxItem>Brazil</ComboBoxItem>
            <ComboBoxItem>United States</ComboBoxItem>
        </ComboBox>
        <sdk:Label Height="16" HorizontalAlignment="Left" Margin="30,50,0,0"
Name="lblGeo" Content="Country:" VerticalAlignment="Top" Width="67" />
    </Grid>
</UserControl>
code snippet 076576 Ch06_Code.zip/TrendDataApp.cs
The UI is straightforward and includes a combo box for the seven locations selected for this application; data-bound text boxes for the location and trend within a list box; and a button to trigger the loading of the data into the list box.
After you've amended the XAML code, your UI should look similar to Figure 6.22.
8. Right-click the project and select Add ⇒ Class.
9. Call the new class Trend, and then amend the code as shown in bold:
using System;
using System.Net;
using System.Windows;
using System.Windows.Controls;
using System.Windows.Documents;
using System.Windows.Ink;
using System.Windows.Input;
using System.Windows.Media;
using System.Windows.Media.Animation;
using System.Windows.Shapes;

namespace TrendDataApp
{
    public class Trend
    {
        public string Location { get; set; }
        public string Name { get; set; }
    }
}
10. Right-click the MainPage.xaml file and select View Code.
11. In the code-behind (MainPage.xaml.cs), amend the code as shown in bold:
using System;
using System.Collections.Generic;
using System.Linq;
using System.Net;
using System.Windows;
using System.Windows.Controls;
using System.Windows.Documents;
using System.Windows.Input;
using System.Windows.Media;
using System.Windows.Media.Animation;
using System.Windows.Shapes;
using TrendDataApp.GetTrendsSvc;

namespace TrendDataApp
{
    public partial class MainPage : UserControl
    {
        List<Trend> listOfQueries = new List<Trend>();
        string geoFilter = "";

        public MainPage()
        {
            InitializeComponent();
        }

        private void btnTrends_Click(object sender, RoutedEventArgs e)
        {
            geoFilter = ((ComboBoxItem)combobxGeos.SelectedItem).Content.ToString();

            GetTwitterTrendsClient myprxy = new GetTwitterTrendsClient();
            myprxy.GetTrendsAsync(geoFilter);
            myprxy.GetTrendsCompleted += new
EventHandler<GetTrendsCompletedEventArgs>(myprxy_GetTrendsCompleted);

        }

        void myprxy_GetTrendsCompleted(object sender, GetTrendsCompletedEventArgs e)
        {
            var resultData = e.Result;

            int i = 0;

            foreach (var item in resultData)
            {
                Trend temp = new Trend();

                if (i == 0)
                {
                    temp.Location = geoFilter;
                }
                else
                {
                    temp.Name = item.Name;
                }

                listOfQueries.Add(temp);

                i++;
            }

            lstbxTrends.ItemsSource = listOfQueries;

            MessageBox.Show("Done");
        }
    }
code snippet 076576 Ch06_Code.zip/TrendDataApp.csproj

You can see from this code that the WCF service does most of the work; the client application implements the service using a service proxy (myprxy), asynchronously calls the GetTrends method (using GetTrendsAsync), passing in the selected location, and then handles completion of the call with the GetTrendsCompleted event handler. The GetTrendsCompleted event handler simply iterates through the return data (resultData) and on the first pass sets the Location property of the Trend object to the current filter; then it sets the Name property to the trend being returned from the Twitter feed. The list collection (listOfQueries) is then data-bound to the list box, which displays the returned Twitter data (see Figure 6.23).

Deploying the Silverlight Application
Now that you've built the Silverlight application, it's time to deploy it to SharePoint. To do this, you have a couple of options. The first is more manual, and the second is automated using a VSIX project template (i.e., a Visual Studio extension). We will use the manual method in this section, as it cross-applies well to both SPS and SharePoint Online.
1. Open your SharePoint site and create a new document library called XAPS. To do this, click Site Actions ⇒ View all site content ⇒ Create, select Library, provide the name (XAPS) for the library, and click Create.
2. When you've created the document library, navigate to it and click Add Document. Browse to the .xap file you just built in the last exercise and upload it to the document library.
3. When it is uploaded, right-click the link and select Copy Shortcut.
4. Navigate to any web page in your SharePoint site and click Site Actions ⇒ Edit Page. Click the Insert tab and then select Web Part.
5. Select the Media and Content category, and then select the Silverlight web part and click Add.
6. Paste the shortcut to the .xap file into the URL field and then click OK. Figure 6.24 shows the new application deployed to SharePoint.

You added the web part manually; however, it's worth noting how to deploy the Silverlight application to SharePoint using the Silverlight and SharePoint web part. You add a Silverlight web part to SharePoint using the Silverlight web part for SharePoint VSIX project template from the Visual Studio Gallery (http://visualstudiogallery.msdn.microsoft.com/e8360a85-58ca-42d1-8de0-e48a1ab071c7). When you install the VSIX (Visual Studio add-in), you have the option to add a custom Silverlight Custom Web Part project template to your project. When you add this to your current solution, it automatically detects the existing Silverlight application you've built and then builds the SharePoint web part infrastructure wrapper code. The web part can then be directly deployed to SharePoint and added to a SharePoint page like any other web part.
In this chapter, you learned about Twitter development at a high level. In particular, you learned that there are different types of Twitter development, some of which include authentication, and some of which that don't — and you can build very interesting applications with either of these. You also walked through the process of creating an application that uses Twitter trends and exposes location-specific trends in a Silverlight application, which was deployed to SharePoint. You learned how to use Windows Azure (for the WCF service that queries Twitter) and how you can use either the manual XAPS document library deployment or a more structured deployment using the Silverlight for SharePoint web part project template from the Visual Studio Gallery.
This simple example application illustrates how you can integrate trends from Twitter and then deploy the application into SharePoint. You can extend this application to include additional metadata from Twitter trends, or you can add additional queries from Twitter (such as lookups on the WOEID codes instead of hard-coding them) or mashup other cloud-based applications such as Bing maps to show location, incorporate customer or locale-specific news, and many other types of integrated solutions. You could also further integrate the application into SharePoint using the SharePoint client object model (e.g., add list items into a SharePoint list).
Following are some additional references that you might find useful:
- Twitter API documentation — http://apiwiki.twitter.com/w/page/22554679/Twitter-API-Documentation
- Overview of oDATA/REST — www.odata.org/home
- Overview of JSON — http://msdn.microsoft.com/en-us/library/bb299886.aspx
- Web part extensibility project — http://visualstudiogallery.msdn.microsoft.com/e8360a85-58ca-42d1-8de0-e48a1ab071c7
- Silverlight and SharePoint training kit — http://msdn.microsoft.com/trainingcourse.aspx