Finally, now that you have learnt about Spark, let's finally look at potentially limitless scaling! We will learn how to use cloud services to deploy Spark clusters. There are many big data and data analytic service providers, such as Google or IBM Bluemix, but we will concentrate on Amazon for this chapter. We will provide screenshots of the process because sometimes such platforms can get a little overwhelming. The following are the steps for the process:
- First, we need to create an Amazon Cloud account if you don't already have one. Go to https://aws.amazon.com and click on create a free account:

- Provide your credentials and click on Create account.
- Next, we have to create a Key Pair. Key Pairs are the basic authentication method on Amazon.
- First, we need to go the EC2 services dashboard:

- Then, click on Key Pairs in the side menu.

- Click on Create Key Pair and name it test-spark.

- Next, we need to give our user some special permissions, so on the Header Menu hover on your name, from the drop-down menu click on Security Credentials, and from the side menu click on Users.

- Next, click on your user, then click on Add permissions.

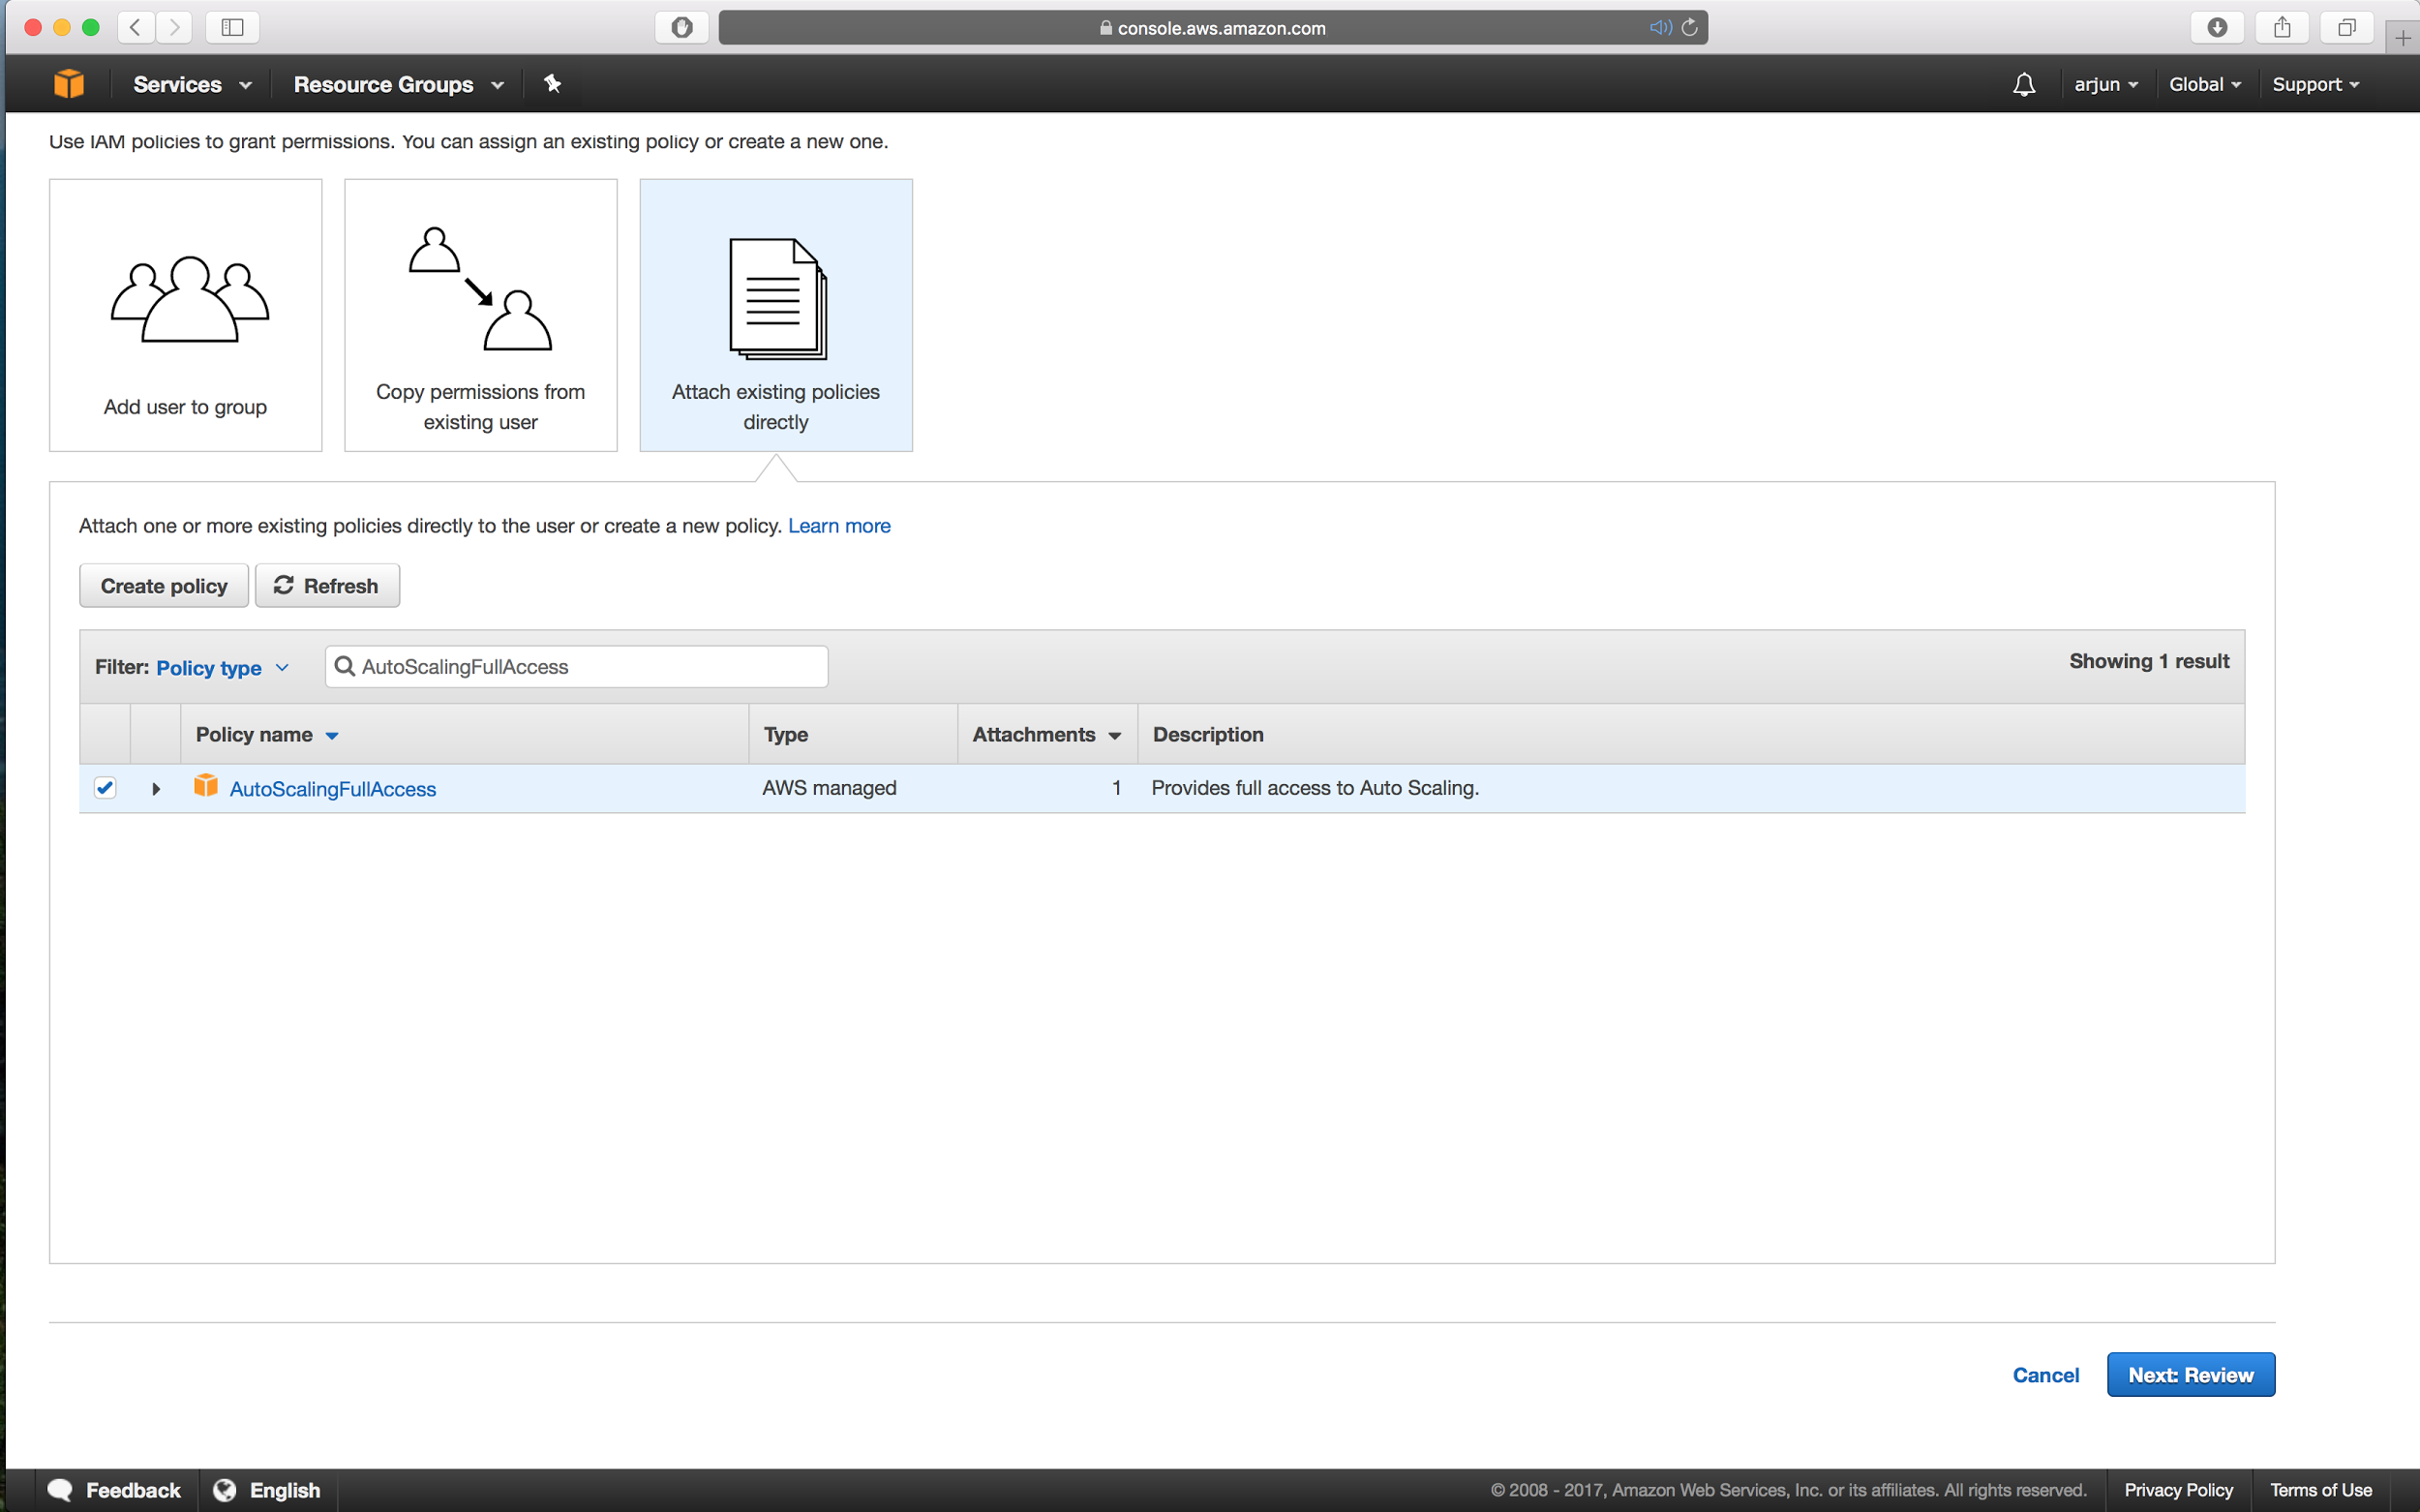
- Choose the option Attach existing policies directly and search for AutoScalingFullAccess. Finally, click on Next: Review and click on Add permissions.
Your user permissions should look like this:

AutoScalingFullAccess will give your user the right to use services like Amazon Elastic MapReduce to automatically commission servers to form clusters.
- Next, go back to the AWS Console home screen and we will choose the service EMR (Elastic MapReduce):

- Click on Create cluster, which should land you on the following screen:

- We will name the cluster Test Spark Cluster, and choose the number of nodes we desire in the cluster. For testing purposes, we will choose only two (one master and one slave). Finally, select the EC2 key pair that we created previously and click on Create cluster.
The cluster will take about 10 minutes to be ready, but once it is ready you should see the following on your screen:

- The cluster services are only accessible from the master node, so we will SSH into the master node to get access to the cluster. To do so, we need to add our IP address in the Inbound Rules.
- To do this, return to the AWS Console home screen and choose the service EC2. When open click on Security Groups from the side menu, and you should see the following:

- In the table under Group Name you will find ElasticMapReduce-master. Right-click on it and click on and select Edit inbound rules:

- Add a new rule and choose the choose SSH as the type of rule, and My IP for the address, and save the list of inbound rules:

- Next, return to the cluster in the EMR services dashboard and, next to the Master public DNS, click on SSH. This will open a pop-up window with instructions on how to connect to the Master Node:

- Copy and paste that in your terminal, indicating the right location for the test-spark.pem file.
The command should look like the following:
>> ssh -i test-spark.pem [email protected]
- Next, when logged in, simply open the PySpark shell
>> pyspark
- Just like that you are connected to your Spark Cluster. Next, do a simple test to make sure everything by running the following:
>> sc.parallelize(range(10)).map(lambda _: _ * _).collect()
That should return a list of integers as result.
Here we've created a cluster with just two nodes, but Amazon EMR allows to to scale up to as many nodes as you need. With a simple click, you could scale up to hundreds or even thousands of nodes.
