
Using the Format Dialog Box
You can use the Format dialog box to apply numerous object formatting changes all in one place. The Format dialog box duplicates some of the functions of the Drawing toolbar, but also has some special features of its own. Depending on the object you're formatting, the full name of the Format dialog box may vary (Format AutoShape, Format Text Box, and so forth).
To open the Format dialog box for a selected object, double-click that object or right-click and choose Format from the menu that displays. Figure 14.17 shows a sample Format dialog box—Format AutoShape.
Depending on the type of object you're formatting, only the tabs and fields that pertain are available.
Figure 14.17. The Format AutoShape dialog box enables you to make many changes in one place.
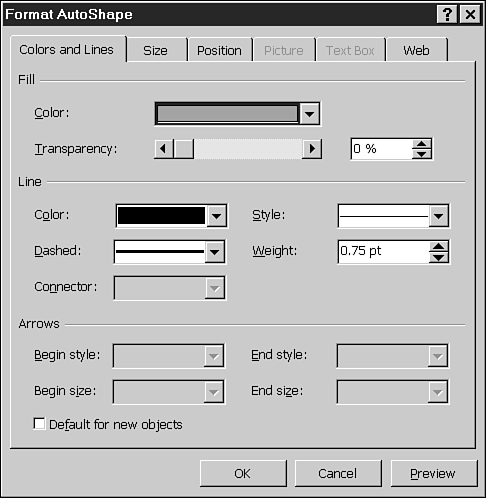
Formatting Colors and Lines
On the Colors and Lines tab, you can set colors and styles for fills, lines, and arrows. Most of these options duplicate what the Line Color, Line Style, Dash Style, and Arrow Style Drawing toolbar buttons also achieve. The drop-down lists provide palettes that are very similar to the ones you access from these buttons. The effect is the same whichever method you use to apply a specific color or line format. The only difference is the way you choose to apply the formatting.
→ To learn the best way to use these objects in your presentation, see “Adding Lines and Arrows” in this chapter.
→ To learn how to use the Line Color button, see “Specifying Line Color” in this chapter.
Click the Preview button to preview the changes in your presentation. Click the Default for New Objects check box to make these customizations your default for future objects you create in this presentation.
Formatting Size
On the Size tab (see Figure 14.18), you can manually set size, rotation, and scaling options.
You can specify the exact height and width of an object, rather than resizing it with the mouse, if you want. This is useful if you want to create several objects of the same size and need greater precision than you can achieve by resizing with the mouse. You can also specify an exact rotation percentage, rather than rotate using menu options.
Figure 14.18. Specify the exact size of the selected object on this tab.

Tip from
Another quick way to create multiple objects of the same size is to copy and paste from the same master object.
→ For details on rotation and flipping, see “Rotating and Flipping Objects” in this chapter.
To resize the selected object by scale, you can adjust the percentages in the Scale Height and Width fields. For example, you might want to reduce an object to 50% of its original size.
Is your rescaled object distorted? See the “Troubleshooting” section near the end of this chapter.
You can also set the object's size as Relative to Original Picture Size or as Best Scale for Slide Show to automatically set the proper proportions.
Formatting Position
On the Position tab, shown in Figure 14.19, you can specify the exact position of the object on the slide.
Enter the exact Horizontal and Vertical positions for the object. For example, to move an object currently 2.75 inches from the margin one inch to the left, you would enter 1.75 in the Horizontal field. You can also set the position at either Top Left Corner or Center.
Formatting a Picture
If the selected object is a picture, the Picture tab (see Figure 14.20) offers several formatting options.
Figure 14.19. With this dialog box, you can easily set an exact position.

Figure 14.20. Set options for a picture, such as a clip art image, on the Picture tab.
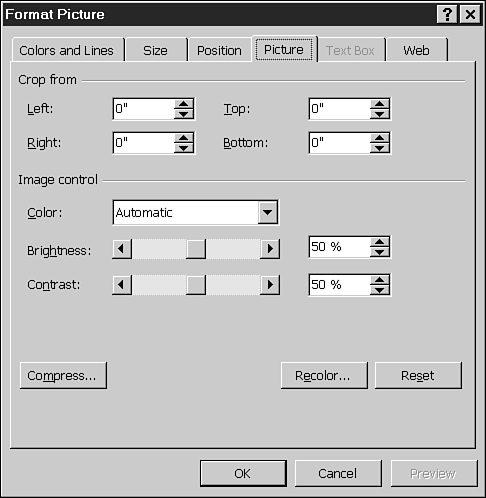
You can crop a picture if you don't want to include the entire image in your presentation. Select the inches to crop in the Left, Right, Top, and Bottom fields. The inches you select are removed from the picture.
Note
![]() You can also crop a picture using the Crop button on the Picture toolbar if you prefer cropping by using the mouse.
You can also crop a picture using the Crop button on the Picture toolbar if you prefer cropping by using the mouse.
Select a coloring format from the Color drop-down list. Options include Automatic, Grayscale, Black & White, and Washout. Figure 14.21 illustrates examples of each for the same picture.
Figure 14.21. The appropriate color format is an important factor in a successful presentation.

→ For interesting information about color theory, see “Using Color” in Chapter 24.
You can also specify brightness and contrast for this selected picture.
Click Recolor to open the Recolor Picture dialog box in which you can change the color of a PowerPoint object or a WMF clip art image.
Click Preview to see what the changes would look like in your presentation before you save them. Click Reset to restore everything to its original setting.
Tip from
Click the Compress button to open the Compress Picture dialog box where you can reduce the size of the pictures in your presentation, thereby reducing the size of the presentation itself.
→ To learn more about all these picture formatting options, see Chapter 13.
Formatting a Text Box
If the selected object is a text box or any other shape that contains text, you can specify additional formatting options in the Text Box tab. Figure 14.22 illustrates this tab.
Figure 14.22. You can make several text box customizations.

You can set a Text Anchor Point to align your text in the text box. Options include Top, Middle, Bottom, Top Centered, Middle Centered, and Bottom Centered.
The Internal Margin section enables you to determine how much open space—or internal margin—to display within the text box. You can select fractions of inches in the Left, Right, Top, and Bottom fields.
Other options include the following:
Word Wrap Text in AutoShape You should choose this option if you want to place text within an AutoShape object; otherwise, the text displays straight across the shape, rather than neatly inside it.
Resize AutoShape to Fit Text Resizes the AutoShape object to fit the text exactly. For example, if you have one word inside an AutoShape, it reduces the shape to a size that precisely surrounds that word.
Rotate Text Within AutoShape by 90° Rotates horizontal text to a vertical format.
Formatting Web Information
On the Web tab (see Figure 14.23), you can enter the text you want to display while this image is loading on the Web (through the HTML IMG tag's ALT attribute), which also displays as a ScreenTip when you pause the mouse over the image. This information is useful only if you're going to give a Web presentation.
Figure 14.23. In this dialog box, indicate what you want people to see while your Web graphic is loading.
