
Working with Hyperlinks
If you've ever surfed the World Wide Web, you're already familiar with hyperlinks. Simply put, by clicking your mouse on a linked object, you can jump to another location in your PowerPoint presentation, to another program, or even to a location on the Web.
Unlike a book or a typical slideshow where you must proceed sequentially through the material, a hyperlinked PowerPoint presentation enables you to go where you need to go and to present what you need to present when you want to present it. Suppose, for example, you are making a presentation to the board of directors of your entertainment company. You suspect some board members will want to know more about current promotions by a rival company. You can create a hyperlink in your slideshow that opens up your Web browser, connects to the Internet, and displays your competitor's Web site. Of course, if no one asks or if time is running short, you don't even need to use the link. But you know it's there, just in case.
Adding Internet Hyperlinks
The first step in creating an Internet hyperlink is to identify the object to link. You can link any object, including text, clip art, WordArt, charts, AutoShapes, and more. To create a link, follow these steps:
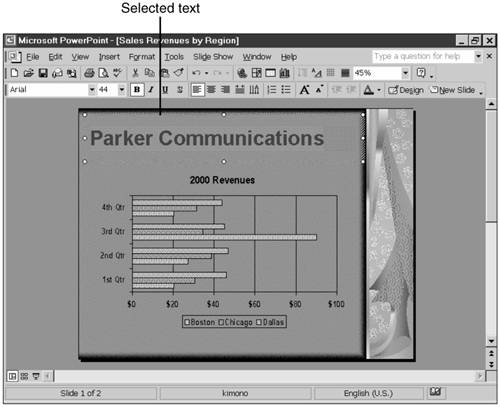
While in Normal view, select the text or object you want to link (see Figure 16.1).
Figure 16.1. Select text or any other object to which you want to add a hyperlink.
Click the Insert Hyperlink button. Alternatively, you can choose Insert, Hyperlink or press Ctrl+K. PowerPoint displays the Insert Hyperlink dialog box (see Figure 16.2).
Figure 16.2. Use the Insert Hyperlink dialog box to specify the location you want to link to the selected text or object.

Note
When you create a hyperlink for the first time, you use the Insert Hyperlink dialog box. If you change the hyperlink, the name of the dialog box changes to Edit Hyperlink. However, both are identical except for the Remove Link button found in the Edit Hyperlink dialog box.
Type the Internet URL in the Address field.
Caution
Be sure to type the URL carefully, including all special characters (such as the tilde ~). Generally, you should use lowercase characters. Some Web servers distinguish between uppercase and lowercase characters, and using an uppercase character in the URL might not work.
Click OK.
If you added a link to text, that text now appears underlined and in a different color (see Figure 16.3). The actual color you see depends on the PowerPoint design template you are using. If you added the link to any other object, you do not see any difference in the appearance of the object, but the object is linked, nonetheless.
When you access the Insert Hyperlink dialog box, PowerPoint displays the Link to Existing File or Web Page view by default. This view enables you to find the URL you want in several ways:
If you know the URL, simply type it in the Address field.
If the link is to a location that you have visited recently, you can select it from the list of displayed URLs.
Figure 16.3. Linked text appears underlined and in a highlighted color.

If you don't remember the location by its URL, you can click the Browsed Pages button and choose the location from a list of places you've recently visited on the Web.
You can click the Browse the Web button to go to your browser, enabling you to browse for the Internet location you want. When you find the location, you switch back to PowerPoint (use the Windows taskbar or press Alt+Tab), and the URL from your browser appears automatically in the dialog box.
Note
Don't forget that you must be connected to the Internet if you want to browse for a URL. Generally, those connected directly to a network need not be concerned; those using dial-up connections must first make sure they are connected.
If you want to jump to a specific location within a Web page after inserting the URL, click the Bookmark button. PowerPoint displays a list of all bookmarks found in the Web page (see Figure 16.4). Select a bookmark and choose OK. PowerPoint adds the pound sign (#) and the bookmark name to your URL.
Creating Invisible Hyperlinks for Text
Linked text appears markedly different from the nonlinked text around it (it's underlined). You might not like the look this creates, but you still want to be able to click that text and jump to the linked page or document. The solution is really quite simple: Draw an AutoShape—such as a rectangle—that covers the text you want to link, link the AutoShape, and then make it invisible.
Figure 16.4. If you need to link to a bookmark, PowerPoint can connect to the Web site and return a list of bookmarks in the target Web page.

→ For more information about creating AutoShapes, see “Adding AutoShapes” in Chapter 14, “Creating and Formatting Objects.”
To create an invisible hyperlinked object, follow these steps:
Use the Drawing toolbar to draw a rectangular box that covers the text you want to link (see Figure 16.5).
Type the Internet URL in the Address field.
Click OK. This creates the link to the AutoShape image.
Right-click the AutoShape, and choose Format AutoShape; or choose Format, AutoShape from the menu bar. PowerPoint displays the Format AutoShape dialog box (see Figure 16.6).
Figure 16.6. Use the Format AutoShape dialog box to remove fill color and line color, thus making the AutoShape invisible.

Click the Fill Color drop-down list and choose No Fill.
Click the Line Color drop-down list and choose No Line.
Click OK.

An invisible linked object now appears over the text you want linked (see Figure 16.7). When you play your slideshow, you simply move the mouse pointer to that text area and click when the mouse pointer changes to a hand. To the audience, it appears that you are clicking on text, although you are really clicking a linked invisible graphic shape.
An additional benefit to using an invisible link is that no one except you has to know the link is there. If you don't use it, no one will ever know. Text linked in the normal manner, on the other hand, begs to be clicked because the text around it is so obviously different.
Jumping to Other Slides
In addition to Web sites—and perhaps of more practical use—you can also create links that enable you to jump to other slides within your presentation, or even to a slide within another PowerPoint presentation.
Figure 16.7. An invisible AutoShape can be linked, making it appear that the text beneath it is linked.

Creating links to other slides helps you customize your slideshow so that you can go quickly to those slides you need. For example, after your opening title slide, you might want to include a table of contents slide, with hyperlinks from each topic to a specific location in the slideshow. On the last slide for each topic, you could include a link back to the table of contents slide. To create this type of internal link, follow these steps:
Select the object to be linked and access the Insert Hyperlink dialog box.
Click the Place in This Document button. PowerPoint displays a list of slides in the current slideshow (see Figure 16.8).
Figure 16.8. To link to a slide in your current presentation, click Place in This Document and select the slide you want.

Select the slide to which you want to jump.
Click OK.
To create a link to another presentation, do the following:
Select the object to be linked and access the Insert Hyperlink dialog box.
Choose the PowerPoint presentation to which you want to jump. Use the Browse for File button if necessary (the third small button to the right of the Look In drop-down list).
Click the Bookmark button. PowerPoint displays the Select Place in Document dialog box (refer to Figure 16.4).
Select the slide to which you want to jump.
Click OK twice to return to the PowerPoint editing screen.
Jumping to Another File
PowerPoint also enables you to create a hyperlink to another document, either on your own computer or on the network, if you are connected to one. When you jump from your PowerPoint presentation to another file, the application that displays that file starts automatically. Other PowerPoint files appear in PowerPoint, of course. Word documents appear in Word, HTML files are displayed in your browser, and so on.
To link to a file from the Insert Hyperlink dialog box, you can do the following:
Type the name of the file, including its full pathname (for example, c:my documentssales.xls).
Click the Recent Files button to display a list of recently accessed files.
Click the Browse for File button and browse your computer or your network files for the file you want.
Creating Other Types of Links
Finally, you can insert links to files you haven't even created, as well as links to send electronic mail. Creating a link to a new file (by clicking the Create New Document button) is a handy way to create a hyperlink and create a new PowerPoint presentation at the same time. And adding a link to an e-mail address can be useful if you publish to the Web and want your audience to be able to contact you after viewing your presentation (see Figure 16.9).
To create a link to an e-mail address, click the E-mail Address button in the Insert Hyperlink dialog box. Type the address in the E-mail Address field and enter a subject. You can even select the e-mail address from a list of recently used e-mail addresses (see Figure 16.10).
Figure 16.9. You can even link to a yet-to-be-created document.

Figure 16.10. Create a link to an e-mail address, enabling a viewer to send a message.

Tip from
As a shortcut, just enter your e-mail address directly in PowerPoint ([email protected]). PowerPoint recognizes common e-mail formats and creates a link for you automatically.
Note
Traditionally, PowerPoint presentations were designed to be presented to an audience by a speaker. PowerPoint is now designed so that viewers can also be allowed to run the presentation by themselves. PowerPoint presentations placed on a company network or on a Web site can be designed so that viewers can navigate and even interact with the presentation at their own pace.
Customizing the ScreenTip
When you point your mouse at a linked object during a presentation, a ScreenTip appears, detailing the location of the link. You can customize the ScreenTip to make it easier for you (or the audience) to know just where you will go if you click the linked object.
To change the ScreenTip, follow these steps:
Select the object to be linked and access the Edit Hyperlink dialog box.
Click the ScreenTip button. PowerPoint displays the Set Hyperlink ScreenTip dialog box (see Figure 16.11).
Figure 16.11. Customize the ScreenTip that appears when you move the mouse pointer to a linked object.

Type the text you want to appear in the ScreenTip in the ScreenTip Text field. The note about ScreenTips in Internet Explorer refers to slideshows viewed in the browser, not to slideshows presented normally.
Click OK twice to return to the PowerPoint editing screen.
Modifying Hyperlinks
The Edit Hyperlink dialog box is a powerful tool for quickly and efficiently modifying your hyperlinks. To change the URL for a hyperlink you created, follow these simple steps:
Click or select the linked object.
Right-click the object and choose Edit Hyperlink; or choose Insert, Hyperlink; or press Ctrl+K. PowerPoint displays the Edit Hyperlink dialog box (see Figure 16.12).
Figure 16.12. The Edit Hyperlink dialog box enables you to update or change an existing hyperlink.

Type the new URL or use one of the dialog box tools to select what you want to link to.
Choose OK to update the hyperlink.
Removing Hyperlinks
After inserting a hyperlink, you may decide you don't want that link or that you need to link it to another object on the screen. To remove a hyperlink, simply select the object, access the Edit Hyperlink dialog box, and click the Remove Link button.
Changing a Hyperlinked Object's Action Settings
The most important action for a linked object is to jump to a desired location. However, using PowerPoint's action settings feature, you can control how you activate the hyperlink and also add some pizzazz to the linked object.
→ To learn more about action settings, see “Using Action Settings” in Chapter 15, “Working with Animation.”
To access the Action Settings dialog box:
Select the linked object.
If you've created a hyperlink, Hyperlink To is already selected, and the location of the link is listed. Note that the action appears on the Mouse Click tab, which means that you have to click the linked object to activate the hyperlink. The Mouse Over tab offers the same options, but actions are activated merely by passing the mouse pointer over the linked object, without clicking.
Note
You might be able to save some time by selecting an object and using the Action Settings dialog box both to create the hyperlink and to set any actions you want.
Caution
You don't want surprises during your slide presentation. Unfortunately, the Mouse Over option for activating hyperlinks can take you places before you're really ready to go there. Generally, you should activate hyperlinks only by clicking the mouse.
You can add some pizzazz to your presentation by creating actions that produce sound effects or that highlight linked objects. For example, you can require a mouse click to activate a hyperlink, but you can highlight the object (graphic objects only) or add a sound effect when the mouse pointer is passed over the object.
To add Mouse Over sound and highlighting effects:
Select the object to which you want to add the effects.
Right-click and choose Action Settings, or choose Slide Show, Action Settings. PowerPoint displays the Action Settings dialog box.
Click the Mouse Over tab (see Figure 16.13).
Figure 16.13. Add action settings to a link that are activated when you pass the mouse pointer over the linked object.

Click the Highlight When Mouse Over check box (you cannot select this option if the object you have selected is text).
Click the Play Sound check box.
Note
You can associate any WAV-formatted sound file with the object. Simply choose Other Sound from the drop-down list and browse until you find the sound you want.
Note
If you add action settings to an object, the Action Settings dialog box opens when you click the Insert Hyperlink button (rather than the Insert Hyperlink or Edit Hyperlink dialog box). You can still edit the URL, but you have to remove any action settings if you want to access the Edit Hyperlink dialog box.
Testing Hyperlinks
More likely than not, you will test your hyperlinks as you go. Nevertheless, before you present to an audience, you'll want to test all your hyperlinks to verify that you set them up correctly.
Note
Don't forget that you must be connected to the Internet, either via a network or through a dial-up connection, if you want to test links to the Web.
To test a hyperlink, follow these steps:
Go to the slide you want to test.
Move the mouse pointer to the linked object.
Check that the ScreenTip appears properly.
Note whether action settings work properly (such as the sound effect on mouse over).
Click the linked object and verify that you are taken to the appropriate Web location, slide, or file.
Return to your slideshow by closing the linked location. Usually, this involves closing the application, although you can also just minimize the application if you want it to start more quickly the next time you use it.
When you complete your slideshow, you should test all the links in the entire presentation. This means starting the slideshow at the beginning and trying out each hyperlink. (We'll talk about how to do that in the next section.) Stop and fix any hyperlink that doesn't work the way you expect it to.
Tip from
If you're presenting at a remote location and want to use hyperlinks to the Internet, be sure to arrive early to test your Internet connection and hyperlinks again. Even if you tested your hyperlinks at home and they worked fine, you need to verify your network connectivity at an unfamiliar location and have enough time to resolve problems before you present.
Navigating a Hyperlinked Presentation
You would probably never get lost in a sequential slide presentation, but in a hyperlinked presentation, you can become disoriented—and even get lost—very easily.
You can minimize the likelihood of getting lost by rehearsing your presentation many times, trying out various links, and learning what will happen and how to get back on track.
Some typical techniques for returning to the right place in your presentation include the following:
If you go to a browser, you can use the browser's Back button to return to PowerPoint. Generally, this doesn't close the browser, but keeps it open in case you need to use it again during the presentation.
If you jump to another PowerPoint presentation, you can right-click the slide in the new presentation and choose Go, Previously Viewed to return to the original presentation. If your browser was open prior to opening a second slideshow, the browser might be closed.
If you link to another document that opens up another program, such as Word, you can switch back to PowerPoint without closing the application you jumped to by pressing Alt+Tab.
If you are linking primarily to other slides within your own presentation, you can also add navigational links, such as linked action buttons, that help you stay on course.
Linking to the Web During a Presentation
The more elements you add to your presentation, the more complex it becomes, thus increasing the chances that something will go wrong. This can be particularly true when you link to the Internet during a presentation. Try to determine what parts of your presentation are most critical, and have a backup plan in case things don't work the way you hope they will. Make allowances that minimize your risk, and consider the following:
Test links thoroughly. Remove broken links and update incorrect ones.
Test your links for speed relative to other sites. If the linked URL contains a lot of graphics, uses Java, or is served by a slower Web server, you might not want to wait during your presentation for the site to appear.
Always evaluate and reevaluate just how important the link is. If you don't need it, don't use it. What takes a few seconds to load in your office will seem like an eternity when you're standing in front of your audience.
Have a backup plan in case your hyperlinks don't work. One method is to copy the files from the URL to your local computer (or network) and display them from there. However, the complexity of some sites, as well as copyright considerations, might make this impractical.
Consider creating other slides that convey the same information as the Web site you wanted to connect to. They might not measure up to the actual Web site, but then again, you won't have to stand there waiting for the URL to come up, only to find that network congestion prevents it from doing so.
If you're using a slower dial-up connection to the Internet during your presentation, be sure to consider page download times. Even a short delay while a page loads can distract an audience.