
8
Logging Events in Spring Boot
In the previous chapter, we discussed the ideas, features, and implementation of Cross-Origin Resource Sharing (CORS) in securing our application. We also learned about JSON Web Tokens (JWTs) and how to generate one by creating authentication endpoints.
This chapter will focus on logging events in our Spring Boot application. We will discuss the popular packages for logging in to and configuring Spring Boot, where to save them, and what to do with logs as we develop our application.
In this chapter, we will cover the following topics:
- Getting started with SLF4J and Log4j2
- Setting up SLF4J and Log4j2
- Using logs
Technical requirements
The finished version of this chapter’s code may be seen at the following link: https://github.com/PacktPublishing/Spring-Boot-and-Angular/tree/main/Chapter-08/superheroes.
Getting started with SLF4J and Log4j2
Logging is considered one of the most important aspects of developing an application. Its importance tends to be underrated and, worse, we forget to apply it to our applications.
Event logging is used in most tech industries, especially those providing enterprise applications. It is applied with a given standard to prevent complex debugging and allow for an easier understanding of the code we are reading. A well-written and structured log can benefit developers, especially when maintaining or debugging code from another developer. Instead of searching exhaustively for an error, records will expedite the debugging process, providing information on where and why the error occurred, and what has happened in our application.
Logging has also evolved with improvements in languages and frameworks; in backend development, several logging frameworks have been developed to provide more flexible logging capabilities. Some of the example frameworks that we will discuss are SLF4J and Log4j2 for Java Spring Boot. Before proceeding, let’s discuss the features of a logging framework.
Features of a logging framework
A logging framework contains the following three features for us to display and capture events in our application:
- Logger: Gets the messages and the metadata
- Formatter: Formats messages retrieved from the logger
- Handler: Responsible for printing the messages in the debug console or inserting them in the database for the developer
A logging framework also displays messages with different severity levels, allowing the developer to quickly identify which event has occurred. The severity levels in a logging framework are as follows:
- FATAL: Level 1; considered a critical issue that can cause an application to pause or terminate
- ERROR: Runtime errors in the application
- WARNING: Logs that usually display deprecated APIs
- INFO: Logs that display events on the runtime of the application
- DEBUG: Logs that display information on the flow of the application
- TRACE: Logs that display more detailed information on the flow of the application
Logging using SLF4J
One of the popular logging frameworks being used with Java is Simple Logging Façade for Java, or SLF4J. It is one of the most widely used frameworks since it allows users to use any logging frameworks, such as Log4j, Logback, the java.util.logging package, or Java’s own logging engine, JUL, using only a single dependency. This means that we can switch from one logging framework to another depending on what is needed.
There are several advantages to using SLF4J:
- SLF4J enables us to switch from one framework to another at runtime or deployment.
- SLF4J has a migrator tool that allows us to migrate existing projects using the Java Class Library from Log4j to SLF4J.
- SLF4J supports parameterized logging messages to bind dynamic values for our logs.
- SLF4J decouples the application from the logging framework. We do not need to worry about which logging framework is being used when developing our application.
Methods and classes of SLF4J
SLF4J provides several classes and methods for displaying messages with severity levels, profiling the time of execution, or simply returning the instance of the logger. Let’s discuss the provided methods and classes.
Logger interface
The logger interface is mainly used to display the messages or logs provided with the severity level. This is also the entry point of the SLF4J API.
- void debug(String message): Logs the message at the DEBUG level
- void error(String message): Logs the message at the ERROR level
- void info(String message): Logs the message at the INFO level
- void trace(String message): Logs the message at the TRACE level
- void warn(String message): Logs the message at the WARN level
The LoggerFactory class
The LoggerFactory class is the SLF4J utility class, commonly used to create loggers using frameworks such as JUL and Log4j.
Logger getLogger(String name) generates the logger object with a specified name. The following example uses the getLogger() method:
private static final org.SLF4J.Logger log = org.SLF4J.LoggerFactory.getLogger(LogClass.class);
The Profiler class
The Profiler class is mainly used to identify the execution time of a specific task in our application, also known as the poor man’s profiler.
Various methods may be used:
- void start(string name) creates a new child stopwatch with a specific name and stops the previously created stopwatches.
- TimeInstrument stop() stops the recent child and global stopwatches and will return the current time execution.
- void log() logs the details of the current time instruments with the logger.
- void print() prints the details of the current time instrument.
Features of SLF4J
SLF4J has several features that make logs more helpful in debugging. It provides support for parameterized logging, which allows us to display dynamic values in our messages. Another feature is profiling, which is commonly used to measure different attributes such as the memory and execution time of specific tasks in an application.
Let’s discuss the concept and implementation of each feature.
Parameterized logging
To use parameterized logging in SLF4J, we will include placeholders {} in the message where we want to pass the value.
Let’s have a look at the following example:
public class LoggerExample {
   public static void main(String[] args) {
      //Creating the Logger object
      Logger logger =
        LoggerFactory.getLogger(LoggerExample.class);
      String name = "seiji";
      //Logger using info level
      logger.info("Hello {}, here is your log", name);
   }
In the preceding example, we have created a parameter in our message to display the value of the name variable. Once we execute the application, the output will be as follows:
INFO: Hello seiji, here is your log
Parameterized logging also supports multiple parameters in messages, as in the following example:
public class LoggerExample {
   public static void main(String[] args) {
      //Creating the Logger object
      Logger logger =
      LoggerFactory.getLogger(LoggerExample.class);
      Integer x = 3;
      Integer y = 5;
      //Logging the information
      logger.info("The two numbers are {} and {}", x, y);
      logger.info("The sum of the two number is" + (x +
                   y));
   }
In the preceding example, we can display the x and y variables in a single log. We can also execute operations directly in our messages. The output would be as follows:
INFO: The two numbers are 3 and 5
INFO: The sum of the two numbers is 8
Profiling
SLF4J also provides profiling, which is used to measure the memory, usage, and execution time of specific tasks in an application. The profiling feature can be used by a class named Profiler.
To implement a profiler in our code, we have to execute the following steps:
- Create a new Profiler class: We need to create a new instance of Profiler with a specific name. Once we have done so, remember that we have started a global stopwatch. The following example shows how to create a new Profiler:
Profiler profiler = new Profiler("ExampleProfiler"); - Start a child stopwatch: We use the child stopwatch if we want to measure specific methods in our app. To create one, we will call the start() method. Remember that starting a child stopwatch terminates other running stopwatches. This example shows how to start a stopwatch:
profiler.start("Example1");class.methodExample();
- Stop the stopwatches: We call the stop() method to stop the running stopwatch and global stopwatch. This will also return the Time instrument:
TimeInstrument tm = profiler.stop();
- Print the contents of the instrument: We execute the print() method to display the contents and information of the Time instrument.
Now we have learned the concepts, features, and advantages of SLF4J, we will discuss a framework called Log4j2.
Logging using Log4j2
Log4j2 is one of the most common logging frameworks used with Java. Since SLF4J is an abstraction of logging frameworks, Log4j2 can be used with SLF4J. Log4j2 is very flexible and offers different ways to store log information for debugging; it also supports asynchronous logging and displays logs with a severity level to quickly identify the importance of messages.
Let’s discuss the following features of Log4j2:
- The Log4j2 Logger
- Log4j2 Appenders
- Log4j2 Layouts
- Log4j2 Markers
- Log4j2 Filters
The Log4j2 Logger
The Logger is the main feature used by our application to create LogRecord instances. This means the logger is responsible for dispatching the messages. To create a Log4j2 Logger, we only need the following code:
Logger log = LogManager.getLogger(ExampleClass.class);
After creating a new Logger, we can now use it to call several methods, such as info(), to dispatch messages.
Log4j2 Appenders
Appenders are responsible for placing the logs dispatched by the Logger. In Log4j2, there are a wide range of Appenders that help us decide where to store our logs.
Here are some of the Appenders that are available from Log4j2:
- ConsoleAppender: Writes logs to the console (System.out or System.err). This is the default Appender.
- FileAppender: Writes logs to a file using FileManager.
- JDBCAppender: Writes logs to a database using a JDBC driver.
- HTTPAppender: Writes logs to a specific HTTP endpoint.
- KafkaAppender: Writes logs to Apache Kafka.
- AsyncAppender: Encapsulates another Appender and uses another thread to write logs, making it asynchronous logging.
- SyslogAppender: Writes logs to a syslog destination.
You can visit the Log4j2 documentation for other available Appenders at the following link: https://logging.apache.org/log4j/2.x/manual/appenders.html.
Log4j2 Layouts
Appenders use Layouts to format the output of a LogEvent. Log4j2 has different Layouts we can choose from to format our logs:
- Pattern: The default Layout used by Log4j2 uses a string pattern to display the logs. For example, the %d{HH:mm: ss} %msg%n; pattern would give the following result:
14:25:30 Example log message
- CSV: The Layout for generating logs using CSV format.
- HTML: The Layout for generating logs in HTML format.
- JSON: The Layout for generating logs in JSON format.
- XML: The Layout for generating logs in XML format.
- YAML: The Layout for generating logs in YML format.
- Syslog: The Layout for generating logs into a syslog-compatible format.
- Serialized: Serializes the logs into a byte array using Java serialization.
Log4j2 Markers
Markers are objects commonly used to mark a single log statement to identify whether we need to execute certain actions to specific logs. For example, we can mark a single log statement using the IMPORTANT Marker, which can indicate to the Appender that it needs to store the log in a different destination.
Let’s have a look at an example of how to create and use Markers:
public class Log4j2Marker {
    private static Logger LOGGER =
      LoggerFactory.getLogger(Log4j2Marker.class);
    private static final Marker IMPORTANT =
      MarkerFactory.getMarker("IMPORTANT");
    public static void main(String[] args) {
        LOGGER.info("Message without a marker");
        LOGGER.info(IMPORTANT,"Message with marker"
    }
}
In the preceding example, we can create a new Marker using the MarkerFactory.getLogger() method. To use the new Marker, we can apply it to a specific logger that indicates a particular action needed for significant events.
Log4j2 Filters
Log4j2 Filters are another valuable feature for use in displaying loggers. This gives us the capability to control log events that we want to say or publish based on the given criteria. In executing a Filter, we can set it with the ACCEPT, DENY, or NEUTRAL values. Here are some of the Filters we can use to display loggers:
- Threshold: Applies filtering to log events using the severity level
- Time: Applies filtering to log events with a given time range
- Regex: Filters the log events based on a given regex pattern
- Marker: Filters the log events based on the given Marker
- Composite: Provides a mechanism to combine multiple filters
- Dynamic Threshold: Applies filtering to log events using the severity level and includes additional attributes
In the following section, we will configure the logging frameworks in our project.
Setting up SLF4J and Log4j2
We will now implement several logging frameworks, including Logback and Log4j2, in our Spring Boot application. Remember that SLF4J is already included.
Configuring Logback
Logback is the default logger used by Spring Applications, so no dependencies need to be installed to use it. The spring-boot-starter-logging dependency is already included once we create our Spring Boot application. The first step we need to take is to make our Logback configuration file.
In our project, under the resources folder, we will add the logback-spring.xml file. This is where we will place our Logback configuration. The following is an example configuration:
<?xml version="1.0" encoding="UTF-8"?>
<configuration>
    <property name="LOGS" value="./logs" />
    <!—Please refer to the logback-spring.xml of
       the GitHub repo. Thank you. -->
    <!-- LOG everything at INFO level -->
    <root level="info">
        <appender-ref ref="RollingFile" />
        <appender-ref ref="Console" />
    </root>
    <logger name="com.example" level="trace"
     additivity="false">
        <appender-ref ref="RollingFile" />
        <appender-ref ref="Console" />
    </logger>
</configuration>
In the preceding XML, several configurations were defined to format our log events. We have created two Appenders – Console and RollingFile. Configuring the two appender tags will create logs in System.out and File Output.
We have also used a pattern that modifies the look and format of the log display. In this example, we have used the %black(%d{ISO8601}) %highlight(%-5level) [%blue(%t)] %yellow(%C{1.}): %msg%n%throwable pattern to display the logs in System.Out. It shows the date in black, the severity level in highlight, the thread name in blue, the class name in yellow, and the message assigned to the logs.
After successfully configuring Logback, we can run the application and see the logs in our console:

Figure 8.1 – Log events using Logback
We will now use the Log4j2 framework for our logs.
Configuring Log4j2
We can also use a different framework for logging events in our application. In this example, we will use Log4j2 to handle our logs:
- The first step is to add the Log4j2 dependency to our pom.xml file. To do this, we will add the following code:
<dependency>
<groupId>org.springframework.boot</groupId>
<artifactId>spring-boot-starter-Log4j2</artifactId>
</dependency>
- After successfully adding the dependency, we must exclude the spring-boot-starter-logging dependency in our Spring Boot application, allowing us to override Logback and use the Log4j2 framework in logging events.
To do so, we must add the following XML code to the dependencies under the org.springframework.boot group:
<exclusions>
   <exclusion>
      <groupId>org.springframework.boot</groupId>
      <artifactId>
        spring-boot-starter-logging</artifactId>
   </exclusion>
</exclusions>
- After including the Log4j2 dependency, we will add a file named log4j2-spring.xml to the resources folder and add the following XML configuration:
<?xml version="1.0" encoding="UTF-8"?>
<Configuration>
<!—Please refer to the log4j2-spring.xml of the
GitHub repo. -->
<Loggers>
<Root level="info">
<AppenderRef ref="Console" />
<AppenderRef ref="RollingFile" />
</Root>
<Logger name="com.example"
level="trace"></Logger>
</Loggers>
</Configuration>
The preceding configuration is almost the same as the one we have implemented using Logback. We have also created two Appenders – Console and RollingFile; the only significant difference is the pattern for the log events. We have now successfully configured Log4j2. When we run our application, we will see the following log output:
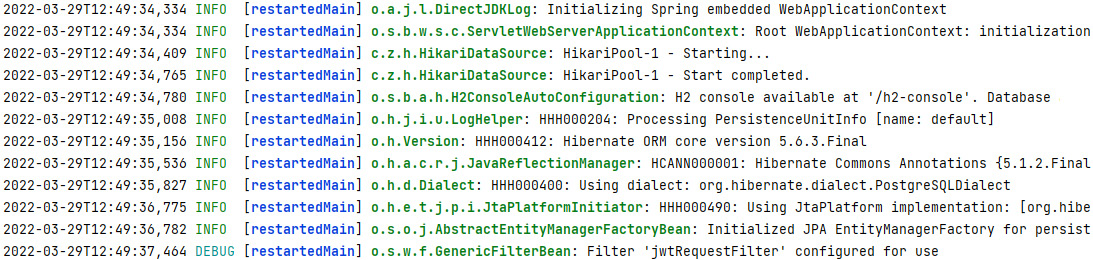
Figure 8.2 – Log events using Log4j2
Having configured and modified the configuration of our logs using the Log4j2 framework, we will now use it to add logs to our code.
Using logs
We can now use the log frameworks we have configured in our Spring Boot application to define logs on the different parts of our code. To do so, we must first create a new logger instance.
An example would be creating a log when a user attempts to get a list of all anti-heroes. In AntiHeroeController, we will add the following code to create a new logger instance:
private static final Logger LOGGER = LoggerFactory.getLogger(AntiHeroController.class);
We must also be aware that LoggerFactory and Logger should be under the SLF4J dependency. It is always recommended to use SLF4J as this is an abstraction of logging frameworks and makes it easier to switch between them.
In this case, our import should be as follows:
import org.slf4j.Logger;
import org.slf4j.LoggerFactory;
Once we have created a new logger instance, we can now use it in our methods, for example, if we want to display a log when the user attempts to get a list of anti-heroes.
To accomplish this, under the getAntiHeroes() method, we will add the following code:
public List<AntiHeroDto> getAntiHeroes(Pageable pageable) {
    int toSkip = pageable.getPageSize() *
                 pageable.getPageNumber();
    //SLF4J
    LOGGER.info("Using SLF4J: Getting anti hero
                list - getAntiHeroes()");
    // Mapstruct is another dto mapper, but it's not
    // straightforward
    var antiHeroList = StreamSupport
              .stream(
                service.findAllAntiHeroes().spliterator(),
                false)
            .skip(toSkip).limit(pageable.getPageSize())
            .collect(Collectors.toList());
    return antiHeroList
            .stream()
            .map(this::convertToDto)
            .collect(Collectors.toList());
}
In the preceding example, we have invoked info(String message). Every time the user calls the get anti-heroes endpoint, the log will be displayed. We can also invoke the following methods:
- trace(): Displays the log events on the TRACE level
- debug(): Displays the log events on the DEBUG level
- warn(): Displays the log events on the WARN level
- error(): Displays the log events on the ERROR level
- getName(): Retrieves the name of the logger
- isInfoEnabled(): Checks whether the logger is enabled on the INFO level
- isDebugEnabled(): Checks whether the logger is enabled on the DEBUG level
- isWarnEnabled(): Checks whether the logger is enabled on the WARN level
- isErrorEnabled(): Checks whether the logger is enabled on the ERROR level
Annotations in Lombok
Now let’s see how Lombok, a library in our Spring Boot application, can help us. Lombok can simplify our code by using annotations, but it also offers annotations for SLF4J and Log4j2 as follows:
- @log4j2: This annotation will generate a new Log4j2 instance in our class. The following example code will be generated:
public class LogExample {private static final org.SLF4J.Logger log =
org.SLF4J.LoggerFactory.getLogger(
LogExample.class);
}
- @slf4j: This annotation will generate a new SLF4J instance in our class. The following example code will be generated:
public class LogExample {private static final org.SLF4J.Logger log =
org.SLF4J.LoggerFactory.getLogger(
LogExample.class);
}
- The slf4j annotation is recommended as it allows the switching of logging frameworks.
Once we have used the annotations in our class, we don’t need to create a new instance and we can use the log directly in our methods:
//LOMBOK SLF4J
log.info("Using SLF4J Lombok: Getting anti-hero list - getAntiHeroes()");
Summary
This chapter has explained the concept and importance of loggers and how they can help developers in debugging and maintaining applications. It has introduced Log4j2, a third-party framework for Spring Boot that offers several features, such as Appenders, Filters, and Markers, which can assist in categorizing and formatting log events for developers. It has also introduced the concept of SLF4J, which is an abstraction of logging frameworks that allows us to switch between different frameworks at runtime or deployment.
In the following chapter, we will learn about the concepts and integration of unit testing in our Spring Boot application.