
12
Managing States with NgRx
In the previous chapter, we learned about the concepts and features of Reactive forms. We implemented FormGroup, FormBuilder, and formControlName to bind input values in the form elements in the application. We also discussed how to group form control to bind nested properties and create form arrays in our Reactive forms.
After that, we learned how to implement validations for form controls to handle and verify user input. This will be beneficial for the user experience and help us avoid unexpected errors.
In this chapter, we will add a new recipe to our application and learn how to implement state management, specifically NgRx, for handling data in our Angular application.
In this chapter, we will cover the following topics:
- Understanding complexities in managing the states of large applications
- State management and the global state
- Getting started and setting up NgRx
- Writing an action
- Writing an effect
- Writing a reducer
- Writing a selector and using a selector and dispatching it in a component
- Configuring the store
Technical requirements
The following link will take you to the finished version of code for this chapter: https://github.com/PacktPublishing/Spring-Boot-and-Angular/tree/main/Chapter-12/superheroes.
Understanding complexities in managing the states of large applications
Data management in frontend applications is very important, just like how essential data management is in backend applications and databases. As we add more features to our application, we know that the number of components, modules, and services working inside our Angular project is also growing.
This also means that the data flow in the application is growing and becoming complex. A complex data flow can lead to an unmaintainable application, inconsistent and scattered states in different components, and nested input and output bindings that result in complex code structures. Due to these possible issues when it comes to managing data in Angular, a solution called state management was introduced as a standard solution for maintaining data in frontend applications.
State management is an extension or library that is mainly used for managing and handling data in frontend applications. It introduces a pattern where all data being used is stored in one big object that acts as the state of the whole application. This concept is also known as a single source of truth. In this case, no matter how many components or how many services are added to our application, there is always a single object where we can retrieve the data we need. You can compare this state to an acting database for the frontend application.
Before proceeding with state management, let’s compare the flow of data without and with state management.
The flow of data without state management
Data flow in Angular starts on the services. We call endpoints in the services to retrieve and manage the data that we need for our application. As the number of features increases, the number of services added and called increases, resulting in a more complex data flow. Let’s look at a graphical illustration of the flow of data without state management:

Figure 12.1 – The flow of data without state management
In the preceding graphical illustration, we can see that we have four different services that are responsible for managing different kinds of data; each feature retrieves the data it needs from these services.
As we can see, the retrieval that occurs is scattered as the features are retrieving the data on different sources or services. This results in multiple data flows, and they can get larger as more services and features are required.
This can also lead to inconsistencies in data being held by each component as the source is coming from different services, leading to some unexpected bugs in the application. Now, let’s look at the flow of data with state management.
The flow of data with state management
In the previous data flow, we saw that the flow of data is not optimized, which can result in several problems in our application as the data flow’s direction is very complex. When implementing state management in our Angular application, we will have the following data flow:

Figure 12.2 – The flow of data with state management
In the preceding graphical illustration, we can see that all of the services of our application are handled by state management. We are still using services to retrieve data in our database. The significant difference here is that our features are now accessing all the retrieved data in the state instead of directly accessing it in the services.
This allows the data to flow in one direction and has a single origin for all the data being used in the application. With this approach, inconsistency in the states, possible bugs, and multiple API calls can be avoided.
With that, we have learned about the importance of state management in developing applications, especially enterprise-level apps.
Now, let’s discuss more state management concepts and global states.
State management and the global state
State management, as discussed in the previous section, is an extension or library that allows us to manage the flow of our data in the application in just one direction.
This is possible due to global states, which will contain all of the data. To understand how state management works, let’s discuss each of the building blocks of state management.
Global state/store
The global state, also known as the store, is the most crucial element in state management. The primary responsibility of a global state is to store all the data retrieved by the API or simply data being used in the application.
This means that all components in an Angular application will retrieve the data in the global state. Think of it as a database of the Angular application but in the form of a JSON object where we can get each property as slices.
Actions
Actions express unique events in your application. They are directly called in our components using the dispatch() function, which helps identify what events should be performed, such as modifying the state or calling APIs to retrieve data.
Actions are just simple interfaces; the type property identifies what action is dispatched. This simple string is just a definition of the action, and we can add properties to the actions for the data we require in the API or state.
Let’s have a look at an example of an action interface:
{
type: '[Blog] Add Blog',
title: string;
author: string;
content: string;
}
The preceding example action is dispatched when a new blog is created. This is called when the Submit button is clicked, and information such as title, author, and content is added as additional metadata to be passed on to the effect or reducer.
Reducers
Reducers are the decision-makers of state management. They are the ones that decide which actions to handle based on the action type. Reducers are also the ones that can change the value of the state.
Reducers are pure functions and handle state transitions synchronously; let’s have a look at an example of a reducer:
export const blogReducer = createReducer( initialState,
  on(BlogActions.addBlog, (state, {blog})=> ({ ...state,
    blogs: […state.blogs, blog]}))
);
In the preceding example, we have created a reducer for the addBlog() action. This allows us to add a new blog object in the blog’s state once we have dispatched the addBlog() action.
We will discuss reducers in more detail later in the Writing a reducer section of this chapter.
Selectors
Selectors are pure functions that allow us to retrieve slices of data in our store. It is a change detection mechanism where, when the value of the state changes, it compares the parts of the state and only sends the state if the changes are detected. This is a practice called memorization.
Selectors are used in components to get the data used in the UI. It is returned as an Observable that listens to the state changes.
Let’s look at an example of a selector:
// selector for list of blogs
// blog.selector.ts
export const selectBlogList = (state: AppState) => state.blogs;
// blog component
// blog.component.ts
blogs$ = this.store.select<Array<Blog>(selectBlogList);
   this.blogs$.subscribe(data => {
      console.log(data) // list of blogs from the state;
    });
In the preceding example, we have created a selector for the blog slice, as well as a function that returns the blogs metadata, called selectBlogList(). We used this function in our blog component as a parameter for the select function to retrieve the data by subscribing to the selector. The subscription will emit once the value of the blog’s slice changes. We will discuss selectors in more detail in the next section of this chapter.
Effects
Effects are specific elements that the NgRx library uses; this is an RxJs-powered side effect model that handles external interactions such as API calls, web socket messages, and time-based events. Using effects, we can isolate our components from interacting with external sources and reduce their responsibilities. Let’s look at a comparison between an application with and without side effects.
Application without side effects
The following is an application without side effects:
export class BlogPageComponent {
  movies: Blog[];
  constructor(private blogService: MoviService) {}
  ngOnInit() {
    this.blogService
        .getAll()
        .subscribe(blogs => this.blogs = blogs);
  }
}
In the preceding code example, we have a component that has several responsibilities, as follows:
- Managing the state of the blogs (the component has its blog state)
- Using the blog service to call an external API to get the list of blogs
- Modifying the state of the blog inside the component
This means that every component with a service dependency also has its state of data. Now, let’s look at an example of an application with side effects.
Application with side effects
The following is an application with side effects:
export class BlogsPageComponent {
  blogs$: Observable<Blog[]> = this.store.select(state =>
    state.blog);
  constructor(private store: Store<{ blogs: Blog[] }>) {}
  ngOnInit() {
    this.store.dispatch({ type: '[Blog Page] Load Blog'});
  }
}
In the preceding code example, we can see that the code for our blog page component has been reduced, and, at the same time, its responsibility is also less complex. Now, the component’s responsibility is to dispatch an action that will allow effects to identify what service needs to be called to retrieve the data.
Let’s look at an example effect for the blog state:
@Injectable()
export class BlogEffects {
  loadBlogs$ = createEffect(() => this.actions$.pipe(
ofType('[Blog Page] Load Blog'),
  mergeMap(() => this.blogService
     .getAll().pipe(
       map(blogs => ({ type: '[Blogs API] Blogs Loaded
                      Success', payload: blogs })),
       catchError(() => EMPTY)
     ))
   )
);
  constructor(private actions$: Actions,
              private blogService: BlogService) {}
}
In the preceding code example, we created a new effect named loadBlogs$. This effect is responsible for calling the getAll() method from the blog service to retrieve the list of blogs from the external endpoint. At the same time, it is also responsible for dispatching a new action that passes the retrieved blog list into the reducer to modify the store. We will discuss how to write effects in the next section of this chapter.
With that, we’ve seen all of the building blocks that make up state management. Let’s look at a detailed graphical illustration of how data flows in state management:

Figure 12.3 – How data flows when using NgRx state management
In the preceding graphical illustration, we can see that our UI components have only one responsibility, and this is to dispatch actions. If the action needs to call an API, an effect will be called to invoke an API using a service, and after getting the response data, the effect will also dispatch an action to call a reducer to modify the store.
On the other hand, if the action that’s sent from the component will alter the state, it will not need any side effects and call the reducer that matches the type of the action. All of the changes in the store will be detected by the selectors and emit the latest state to be used in the UI components.
With that, we have learned about the necessary concepts surrounding state management and how data flows together with the building blocks of state management. In the next section, we will learn how to set up and configure one of the most famous state management libraries in Angular: NgRx.
Getting started and setting up NgRx
To use NgRx state management, we must install the @ngrx/store library; this will contain all of the functions that will allow us to configure the store and create reducers and actions.
To install the @ngrx/store library, we must execute the following command:
ng add @ngrx/store
The preceding command will perform the following steps:
- Update package.json by adding @ngrx/store to the dependencies.
- Run npm install to install the dependencies.
- Update src/app/app.module.ts by adding StoreModule.forRoot(reducers, {}) to the imports array.
Before executing this command, make sure that the version of @ngrx/store is aligned with the version of your Angular; in our project, our Angular version is version 13.3.0, which means that we need to use version 13 of @ngrx/store.
Flags are also available that allow us to install @ngrx/store with customizations. The following is the list of flags we can use:
- --path: Specifies the path to the module where you want to import StoreModule.
- --project: The name of the project that is defined in angular.json.
- --module: The name of the file containing the module where you want to import StoreModule.
- --minimal: This provides the minimal setup for the root state management if set to true. It imports StoreModule.forRoot() in the module with an empty object.
- --statePath: This is the path where the state will be created.
- --stateInterface: The interface that defines the state.
Adding NgRx to our Angular project
Now, let’s add this to our Angular project. We only want to use the minimal setup as we will add the reducers and store step by step. After successfully executing the ng add @ngrx/store command, we will have the following changes in our project:
// app.module.ts
 imports: [
    … other modules
    StoreModule.forRoot({}, {}),
  ],
// package.json
"dependencies": {
     … other dependencies
    "@ngrx/store": "^13.2.0",
  },
In the preceding code example, we can see that StoreModule.forRoot() has been added without any objects; this means that we initially imported the store without reducers.
With that, we have successfully installed @ngrx/store in our Angular project. Now, we will install another extension to help us debug the state.
Installing NgRx DevTools
NgRx DevTools is a valuable extension that provides developer tools and instrumentation for the store. It allows us to check the values of the state, implement time travel debugging, and have a visual representation of the previous and current values of the data in our store.
We must execute the following command to install NgRx DevTools in our Angular project:
ng add @ngrx/store-devtools
After successfully executing this command, the following changes will be implemented in our project:
// app.module.ts
imports: [
… other modules
// Instrumentation must be imported after importing
// StoreModule (config is optional)
StoreDevtoolsModule.instrument({
  maxAge: 25, // Retains last 25 states
  logOnly: environment.production, // Restrict extension to
                                   // log-only mode
  autoPause: true, // Pauses recording actions and state
                   // changes when the extension window is
                   //not open
}),
],
In the preceding code example, we can see that a new module called StoreDevtoolsModule has been added; this will allow DevTools to be used once we run our application locally.
The next step to using DevTools is to add the Redux extension to our browser. To add this extension, go to one of the following links for your respective browser:
- Google Chrome: https://chrome.google.com/webstore/detail/redux-devtools/lmhkpmbekcpmknklioeibfkpmmfibljd
- Mozilla Firefox: https://addons.mozilla.org/en-US/firefox/addon/reduxdevtools/
After adding this extension to your preferred browser, running your Angular project with the imported StoreDevToolModule module will be automatically detected by this extension. It will provide an interface for viewing the state:
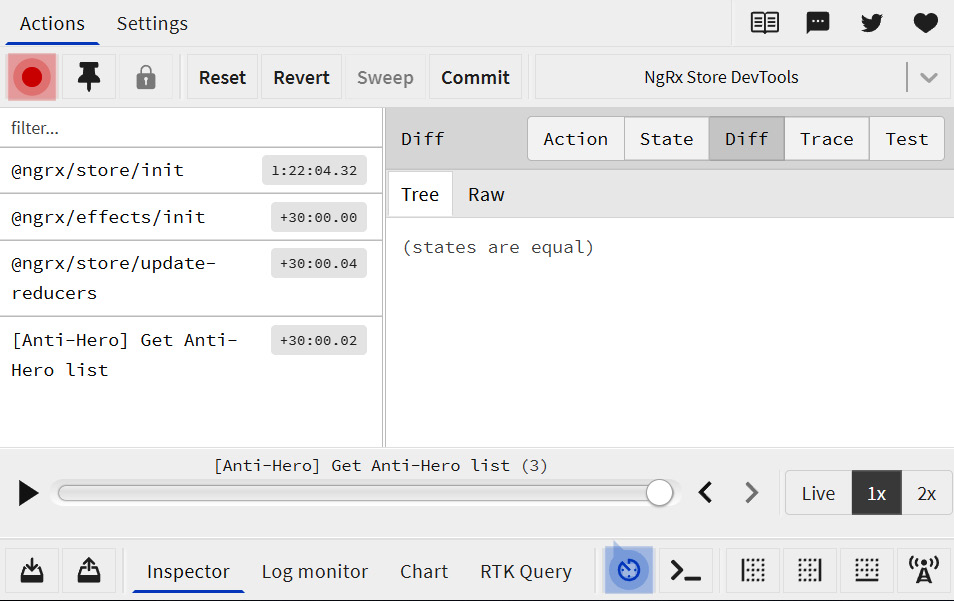
Figure 12.4 – Interface of the Redux DevTools extension
The preceding screenshot shows that our Redux DevTools extension has been activated; once we open our Angular project in our browser tab, we will see more Redux DevTools in action as we write our code.
Now that we have configured our store and installed NgRx DevTools in our application, we are ready to write the building blocks for our state management.
Writing an action
The first building block of state management is that we will write our actions. When writing actions, we have several rules we can follow so that we have good actions in our application:
- Upfront: Writing actions should always come first before developing the features. This gives us an overview of what should be implemented in the application.
- Divide: We should always categorize the actions based on the event source and the associated data.
- Many: Writing more number actions is not an issue. It is more beneficial as more actions create a better overview of the flow of your application.
- Event-Driven: Capture events as you separate the description of an event and how it’s handled.
- Descriptive: Always provide meaningful information using type metadata. This helps debug the state.
Let’s look at an example action that will set the list of blogs in our state:
import { createAction, props } from '@ngrx/store';
export const setBlogList = createAction(
 '[Blog] Set Blog List',
  props<{ blogs: ReadonlyArray<Blog> }>(),
);
In the preceding code example, we used the createAction() function to create our action. The createAction() function also returns a function that returns an object of the action interface; in this case, it will return "[Blog] Set blog list" as the action type and the array of blogs as the additional properties.
To dispatch the action, we will use the dispatch() function and use setBlogList as a parameter:
ngOnInit() {
     store.dispatch(setBlogList ({ blogs: this.blogs}));
}
Implementing actions in the project
Our primary goal for our project is to create the entire cycle to get the list of anti-heroes in our API and place it in our store. The first step is to take the actions we need; let’s look at the two actions that we should make for this feature:
- getAntiHeroList: This action will retrieve the list of blogs from the external API provided by our Spring project.
- setAntiHeroList: This action will place the retrieved list of blogs in our store.
Now that we have identified the list of actions we will create, in the anti-heroes folder, we will create a state/anti-hero.actions.ts file where we will place all of our actions.
Let’s place the following code in the anti-hero.actions.ts file:
import { createAction, props } from '@ngrx/store';
import { AntiHero } from '../models/anti-hero.interface';
export enum AntiHeroActions {
  GET_ANTI_HERO_LIST = '[Anti-Hero] Get Anti-Hero list',
  SET_ANTI_HERO_LIST = '[Anti-Hero] Set Anti-Hero list',
}
export const getAntiHeroList = createAction(
    AntiHeroActions.GET_ANTI_HERO_LIST,
);
export const setAntiHeroList = createAction(
  AntiHeroActions.SET_ANTI_HERO_LIST,
  props<{ antiHeroes: ReadonlyArray<AntiHero> }>(),
);
In the preceding code example, we have created two actions for getting and setting the anti-hero list. The first action, getAntiHeroList, has a single parameter, which is the type. This does not need any additional properties as this will only call the API to retrieve the list of anti-heroes through the use of effects.
On the other hand, the second action, setAntiHeroList, has two parameters: the type and an additional property called antiHero. This will set the value of the store with the retrieved list of anti-heroes through the use of reducers.
It is also excellent practice to make our action definitions enums in our code as this will help us avoid typographical errors when using the definition in other parts of the application.
With that, we have successfully created the required action for our anti-heroes list feature. Now, we will discuss how to write effects that will be used to call the API and retrieve the anti-hero list.
Writing an effect
We successfully created our actions in the previous section. Now, we will make the effects that will be responsible for calling our external API.
Effects are not included in the @ngrx/store library; we will install a separate library that will allow us to use the functions for effects.
To install effects in our application, we must execute the following command:
ng add @ngrx/effects
The preceding command will perform the following steps:
- Update the package.json file with the @ngrx/effects dependency.
- Run npm install to install the added dependency.
- Add EffectsModule.forRoot() to the imports array of your app.module.ts file.
Some flags are available that allow us to install @ngrx/effects with customizations; the following is the list of flags we can use:
- --path: Specifies the path to the module where you want to import EffectsModule.
- --project: The name of the project defined in angular.json.
- --skipTests: This creates a test file when it is set to false.
- --module: The name of the file containing the module where you want to import EffectsModule.
- --minimal: This provides the minimal setup for the root effects if set to true. It imports EffectsModule.forRoot() in the module with an empty object.
- --group: Group the effects files within the effects folder.
After successfully adding the dependency of the effect to our application, we can create our effects. Under the anti-heroes/state folder, we must create a new file named anti-hero.effects.ts. The first thing we need to do is create a class that has an @Injectable annotation:
@Injectable()
export class AntiHeroEffects {
  constructor(
    private actions$: Actions,
    private antiHeroService: AntiHeroService,
    private router: Router
  ) {}
}
In the preceding code example, we can see that effects are also service classes and can be injected by other services; we have injected the following services into AntiHeroEffects:
- Actions: A service from @ngrx/effects that returns an observable that we can assign a type to. This will act as the identifier when an action is dispatched.
- AntiHeroService: Our created service that contains the external APIs for our anti-heroes, found under anti-hero/services/anti-hero.service.ts.
- Router: Used for redirection once an API call is made.
After creating our AntiHeroEffect class and injecting our services, we can begin making our effects. The first thing we need to think of is what kind of effect we need to get the anti-heroes since we have the GET_ANTI_HERO LIST and SET_ANTI_HERO_LIST actions.
We should create an effect that has a type of GET_ANTI_HERO_LIST and can call the getAntiHeroes() function from AntiHeroService.
To create this API, we can write the following code:
import { Actions, createEffect, ofType } from '@ngrx/effects';
getAntiHeroes$ = createEffect(() => {
    return this.actions$.pipe(
        ofType(AntiHeroActions.GET_ANTI_HERO_LIST),
        mergeMap(() => this.antiHeroService.getAntiHeroes()
        )
    }, {dispatch: true}
  );
In the preceding code example, we used the createEffect() function to create our effects; this returns an action that has two parameters:
- ofType(AntiHeroActions.GET_ANTI_HERO_LIST): The first parameter uses the ofType operator, which defines the action type of the effect. This means that if the GET_ANTI_HERO_LIST action is dispatched, this effect will be called.
- mergeMap(() => this.antiHeroService.getAntiHeroes(): The second parameter uses the mergeMap operator, which will allow us to invoke the getAntiHeroes() function to call the endpoint.
With that, we have our effect for the GET_ANTI_HERO_LIST actions, but this is not complete yet. After getting the list of anti-heroes, we want to dispatch another action that sets the anti-heroes list in our state. To implement this, we can use the following code:
  mergeMap(() => this.antiHeroService.getAntiHeroes()
          .pipe(
            map(antiHeroes => ({ type: AntiHeroActions.SET_ANTI_HERO_LIST, antiHeroes })),
            catchError(() => EMPTY)
          ));
In the preceding code, we have added a pipe to our mergeMap operator; this calls a map operator that returns ({ type: AntiHeroActions.SET_ANTI_HERO_LIST, antiHeroes })). This will dispatch another action that has a type of SET_ANTI_HERO_LIST and has additional antiHeroes objects coming from the list of anti-heroes retrieved from the API.
Our effects for getting the list of anti-heroes feature is complete. The last step is to add AntiHeroEffects to our effects module. As we may recall, our anti-heroes module is lazy loaded, which means that we will not add AntiHeroEffects to EffectsModule.forRoot([]) located in the app.module.ts file; otherwise, we would need to add EffectsModule.forFeature([AntiHeroEffects]) in the imports of the anti-hero.module.ts file. This means that this effects class is only used under this module.
With that, we have successfully configured and created our effects for the anti-hero list feature. In the next section, we will write the reducers that will modify our state.
Writing a reducer
NgRx states are immutable objects; we cannot modify their values through direct assignment, and the only way we can change their states is through reducers.
Reducers have different parts that we should implement, as follows:
- The interface or type that defines the properties of the state
- The arguments, which consist of the initial state and the current action
- The list of functions that handle that state changes based on the dispatched actions
We will create these reducer parts under the anti-heroes/state/anti-hero.reducers.ts file.
The state interface
The state interface defines the shape of the state; this contains the properties or the slices of the state. In our application, we need a property that will hold the list of anti-heroes.
To implement the interface, we can use the following code:
export interface AntiHeroState {
    antiHeroes: ReadonlyArray<AntiHero>;
}
The initial state
The next part we need to implement is the initial state; this defines what the initial values of the state slices are. In our anti-hero state, we will set the antiHeroes slice to an empty array.
To implement this, we can use the following code:
export const initialState: AntiHeroState = {
    antiHeroes: []
}
The reducer function
After creating our initial state, we can implement our reducer function; this will hold the list of functions that will be called, depending on the type of action that is dispatched.
To implement the reducer function, we can use the following code:
export const antiHeroReducer = createReducer(
  initialState,
  on(setAntiHeroList, (state, { antiHeroes }) => { return {...state, antiHeroes}}),
  );
In the preceding code example, we can see that we have used a createReducer() function from the @ngrx/store library; this will contain all the functions that will modify our anti-hero state. The first parameter is our initial state, while the second parameter is a function that will be called when an action of SET_ANTI_HERO_LIST is dispatched.
This means that the effect we created earlier will call this once the API has retrieved the anti-hero list successfully; this function contains two parameters – one that holds the current state and another that holds the list of anti-heroes objects from the API. To modify the antiHeroes state with the retrieved list, we have returned {…state, antiHeroes}.
Now that we have finished writing the reducers for our state, the last step is to register our reducers in the store. We will apply the same rules that we applied for the effects; since our anti-heroes module is lazy loaded, we will register our anti-hero reducer in our anti-hero.module.ts file by adding StoreModule.forFeature('antiHeroState,' antiHeroReducer). The first parameter is the key for our anti-hero state, while the second is the function returned from the createReducer() function.
With that, we have successfully created and registered our reducer for the anti-hero list feature. Now, let’s discuss the NgRx selectors to get the state and how to dispatch actions in components.
Writing a selector and using a selector and dispatching it in a component
In the previous section, we successfully implemented reducers that can mutate the values of our state. This means that our state contains valuable data that we can get from the Angular components; we can use selectors to do this.
Selectors are pure functions that allow us to retrieve slices of state; we can use several helper functions, such as createSelector() and createFeatureSelector(), to create our selectors for the store.
Selecting root states
While selecting the root states, we will be using a pure function to create our selector. Let’s look at an example of a selector selecting the list of blogs under the root state (AppState):
// blogs.selectors.ts
export const selectBlogs = (state: AppState) => state.blogs
In the preceding code example, we have only created a function that returns the blogs slice; this is feasible when we select slices under the project’s root state. To use the created selector in our component, we can use the following code:
//blogs.page.ts
blogs$ = this.store.select(selectBlogs())
constructor(private store: Store<AppState>,){
   this.blogs$.subscribe((data) => {
      this.blogs = data;
    });
}
In the preceding code example, we injected Store from the @ngrx/store library. Store provides a select function that accepts selectors as a parameter and returns an observable that returns the slice of state that is defined by the selector.
In this case, we have subscribed to the blogs$ observable from the select(selectBlogs() function to retrieve the blogs slice that holds the list of blogs.
Selecting feature states
While selecting feature states, we will use the createSelector() and createFeatureSelector() functions to create the selector. Let’s look at an example of a selector selecting the list of blogs found under the feature state (BlogState):
// blogs.selectors.ts
import { createSelector, createFeatureSelector } from '@ngrx/store';
export const selectBlogsState = createFeatureSelector<BlogsState>('blogsState')
export const selectBlogs = () => createSelector
    selectBlogsState,
    (state: BlogsState) => state.blogs
)
In the preceding code example, the first step is to create the feature selector that will return the whole BlogState. Here, we have used createFeatureSelector() and the state’s key to identify the feature state we want to select.
The second step is to create the main selector of the blog slice; createSelector() has two parameters, where the first one is the BlogState feature selector, and the second one is a function where the returned BlogState from the feature selector is the parameter. The returned value is the blog slice.
Implementing selectors in our project
So far, we have learned how to create selectors using the createFeatureSelector() and createSelector() functions. Now, let’s implement them in our project. The first thing we need to identify is the states or slices. The first slice that needs a selector is a blog slice located under AnitHeroState. Remember that AntiHeroState is not our root state; this means that we will have a feature selector for the following state.
The second selector we need is the selector for the antiHeroes slice, which contains the array of anti-heroes retrieved in the API. Finally, the third selector we want will need to select specific antiHero data from the list based on the id parameter.
To create all of these selectors, place the following code in the anti-hero/state/anti-hero.selectors.ts file:
// select the AntiHeroState
export const selectAntiHeroState = createFeatureSelector<AntiHeroState>('antiHeroState')
// selecting all antiheroes
export const selectAntiHeroes = () => createSelector(
    selectAntiHeroState,
    (state: AntiHeroState) => state.antiHeroes
)
// selecting an antihero base on id
export const selectAntiHero = (id: string) => createSelector(
    selectAntiHeroState,
    (state: AntiHeroState) => state.antiHeroes.find(d =>
      d.id === id)
)
After successfully creating all of the selectors, we can use the on anti-hero/pages/list.component.ts file by adding the following code:
antiHeroes$ = this.store.select(selectAntiHeroes());
constructor(
    private router: Router,
    private store: Store<AppState>,
    ) { }
  ngOnInit(): void {
    this.assignAntiHeroes();
  }
  assignAntiHeroes() {
    this.antiHeroes$.subscribe((data) => {
      this.antiHeroes = data;
    });
  }
In the preceding code example, we used the selectAntiHeroes() selector to get the array of anti-heroes from the state. antiHeroes$ is an Observable that returns the current state of the antiHero slice once subscribed.
Finally, we must get the anti-heroes list feature. We can do this by dispatching the GET_ANTI_HERO_LIST action in the list component in the ngOnInit() hook. This will call the effect that we created earlier, which invokes the endpoint for getting the list of anti-heroes:
  ngOnInit(): void {
this. store.dispatch({type:   AntiHeroActions.GET_ANTI_HERO_LIST});
    this.assignAntiHeroes();
  }
With that, we have successfully created selectors for the components to retrieve data from the state. In the next section, we will discuss the available configurations we can implement for the store.
Configuring the store
In the previous sections, we created all of the building blocks of NgRx that complete a fully functional store for the application. In this section, we will learn how to configure the NgRx store using runtime checks.
Runtime checks
Runtime checks are used to configure the NgRx store to allow developers to follow the NgRx and Redux core concepts and best practices. This is very useful, especially for developers new to NgRx; they display errors regarding development based on the activated runtime checks.
@ngrx/store provides six built-in runtime checks:
- strictStateImmutability: Checks if the state isn’t mutated (default: On)
- strictActionImmutability: Checks if the actions aren’t mutated (default: On)
- strictStateSerializability: Checks if the state is serializable (default: On)
- strictActionSerializability: Checks if the actions are serializable (default: Off)
- strictActionWithinNgZone: Checks if actions are dispatched within NgZone (default: Off)
- strictActionTypeUniqueness: Checks if the registered action types are unique (default: Off)
To change the default configuration of the runtime checks, we will use the runtimeChecks property on the root store’s config object. The value of each runtime check can be assigned with true to activate the check or false to deactivate the check:
@NgModule({
imports: [
  StoreModule.forRoot(reducers, {
            runtimeChecks: {
                  strictStateImmutability: true,
                  strictActionImmutability: true,
                  strictStateSerializability: true,
                  strictActionSerializability: true,
                  strictActionWithinNgZone: true,
                  strictActionTypeUniqueness: true,
                         },
         }),
       ],
})
strictStateImmutability
This is the number one rule of NgRx. It is activated by default, and the runtime checks verify if the developer modifies the state object.
Example violation of this rule:
export const reducer = createReducer(initialState, on(addBlog, (state, { blog }) => ({
// Violation 1: we assign a new value to loading
state.loading = false,
 // Violation 2: `push` modifies the array
 // state.blogs.push(blog) })) );
Fix for this violation:
export const reducer = createReducer( initialState, on(addBlog, (state, { blog }) =>
// Fix: We are returning the state as a whole object with
// the new values
  ({ ...state,
   loading: false,
   blogs: [...state.blogs, blog],
})) );
strictActionImmutability
This runtime check is similar to strictStateImmutability but is for actions. This runtime check verifies if the developer modifies the action. This check is activated by default.
Example violation of this rule:
export const reducer = createReducer(initialState, on(addBlog, (state, { blog }) => ({
// Violation: it's not allowed to modify an action
blog.id = uniqueID();
return { ...state, blogs: [...state.blogs, blog]
} })) );
Fix for this violation:
//blog.actions.ts
export const addBlog = createAction( '[Blog List] Add Blog',
// Fix: we will return the object in the action with the
// new value
(description: string) =>
({ id: uniqueID(), description }) );
//blog.reducer.ts
export const reducer = createReducer(
initialState,
on(addBlog, (state, { blog }) => ({
...state,
blogs: [...state.blogs, blog],
})) );
strictStateSerializability
This runtime check verifies if the values placed in the state are serializable. This is essential for persisting the state so that it can be rehydrated in the future. This is deactivated by default.
Example violation of this rule:
export const reducer = createReducer(
initialState,
on(addBlog, (state, { blog }) => ({
...state,
blogs: [...state.blogs, blog],
// Violation: a Date type is not a serializable value.
createdOn: new Date()
})) );
Fix for this violation:
export const reducer = createReducer(
initialState,
on(addBlog, (state, { blog }) => ({
...state,
blogs: [...state.blogs, blog],
// Fix: We should convert the date into a JSON Object.
createdOn: new Date().toJSON()
})) );
strictActionSerializability
This runtime check is similar to strictStateSerializability, but for actions. It checks if the states are serializable. This is done by Redux DevTools to debug errors.
Example violation of this rule:
const createBlog = createAction(
'[Blog List] Add Blog,
blog => ({ blog,
// Violation, a function is not serializable
logBlog: () => { console.log(blog); }, }));
Fix for this violation:
const createBlog = createAction(
'[Blog List] Add Blog,
// Fix: we should use props to receive parameters
 props<{blog: Blog}>()
);
strictActionWithinNgZone
This runtime check verifies if the actions are dispatched by asynchronous tasks within NgZone. This check is deactivated by default.
Example violation of this rule:
// Callback outside NgZone
// Violation: the createBlog actions is invoked outside the
// ngZone
callbackOutsideNgZone() {
        this.store.dispatch(createBlog ());
}
Fix for this violation:
import { NgZone } from '@angular/core';
constructor(private ngZone: NgZone){}
 // use run() function to call the dispatch inside the
 // NgZone
function callbackOutsideNgZone(){
  this.ngZone.run(
    () => {  this.store.dispatch(createBlog());
  }
}
strictActionTypeUniqueness
This runtime check prevents developers from registering the same action type more than once. This check is deactivated by default.
Example violation of this rule:
//Violation: two actions have the same type
export const addBlog = createAction('[Blog] Add Blog'); export const modifyBlog = createAction('[Blog] Add Blog');
Fix for this violation:
//Violation: two actions have the same type
export const addBlog = createAction('[Blog] Add Blog'); export const modifyBlog = createAction('[Blog] Modify Blog');
Summary
With that, we have reached the end of this chapter. Let’s revisit the valuable things you have learned regarding the concepts and importance of having state management in applications.
A store serves as a single source of truth that provides a unidirectional flow of data to prevent inconsistency and mishandled subscriptions.
You also learned how to install and configure the NgRx store and NgRx DevTools library with parameters for custom configuration. Lastly, you learned about the concepts surrounding state management and how to write the different blocks of NgRx, such as actions, reducers, effects, and selectors.
In the next chapter, we will complete the CRUD functionality of our application by using the building blocks of NgRx. We will add, remove, and update items using actions, effects, and reducers.