
Chapter 6. Yahoo! Store Features and Advanced Techniques
In This Chapter
• What store features are available and why you should add them to your store
• How to create all your product pages by using the Database Upload feature
• How to upload multiple images simultaneously and have them automatically inserted on the appropriate page
With the basics of store layout under your belt, it’s time to move on to more advanced Yahoo! store features and techniques. Changing how a product is presented and enhancing your store by adding marketing tools can increase your bottom line. Creating a description that sells and having a great product is only part of the formula. You want to enhance your store not only to close a sale, but also to upsell the total order. In addition, you want to make the buying process more user-friendly, avoid confusion, and give the customer the necessary information to buy from you, not your competitors.
This chapter covers features that you might want to consider adding to your store. Although these features are not part of the standard Yahoo! store and will cost additional money in programming, they will help convert more visitors into buyers. These features require RTML programming and will need to be implemented by a third-party development company or programmer. Most of the Yahoo! store development companies, such as Solid Cactus (www.solidcactus.com), have developed most of these features for quick and easy implementation. This helps reduce cost and does not require programming from scratch.
Advanced Store-Layout Options and Ideas
Store-layout features help present your product information in a clear and concise format. These give customers all the necessary information to make a buying decision. You do not want the customer to have to wait for additional research or need to contact you to clarify something before making a purchase:
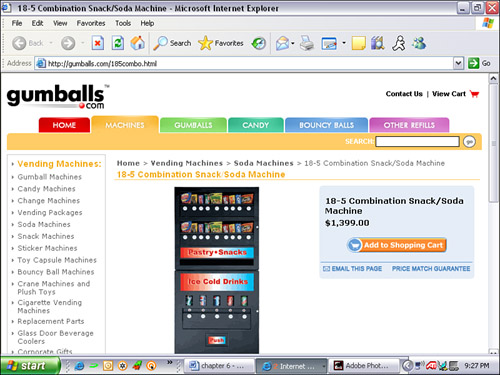
• Custom Add to Cart button— Add a custom Add to Cart button (see Figure 6.1) to match your look and feel or to make the button stand out. The default gray order button does not bring attention to the customer and is somewhat camouflaged on the page.
Figure 6.1. A custom Add to Cart button stands out and draws attention. This makes it easier for customers to add the product to the shopping cart.
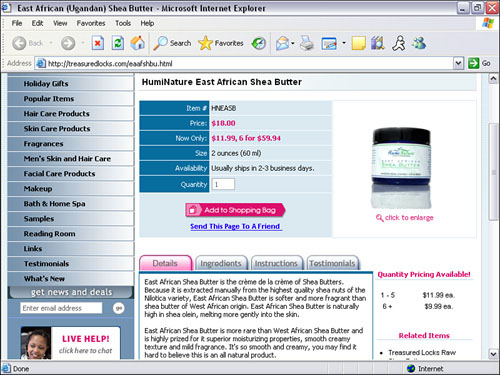
• Custom quantity pricing layout— Customers enter the number of products they would like to purchase before going through the checkout process. This is a great way to get customers to purchase more, especially if you offer volume discounts (see Figure 6.2).
Figure 6.2. The custom quantity pricing layout shows customers volume discount pricing right on the page. This entices customers to purchase more items for greater savings.
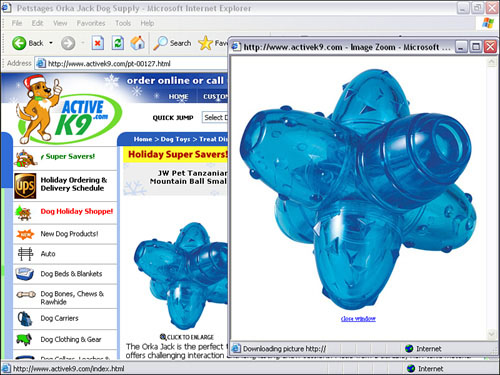
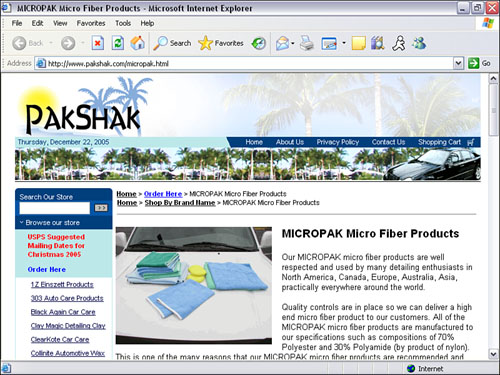
• Click to Enlarge Image— The default product image does not inform the visitor they can view an enlarged version of the image. The Click to Enlarge Image feature gives your customers a larger picture of your product and informs them that they can click the image to enlarge it. This is useful especially if the customer needs to see details of your product (see Figure 6.3).
Figure 6.3. The Click to Enlarge Image feature enables customers to click on the product thumbnail to view a larger version of the image.
• Product info table— A professional, easy-to-read table format (see Figure 6.4) of product information such as pricing, discounts, shipping costs, and options can help accelerate the purchasing decision. Customers do not have to look all over your product page for vital information.
Figure 6.4. A custom product info table can present your product information in an easy-to-read format. Most customers just skim your product information and do not like to read a long paragraph description.
• Multiple-product Add to Cart— Customers can add multiple items with just one click of the button (see Figure 6.5). Multiple products, along with quantity ordered boxes, can be displayed on the same page. This is very convenient if your products are sold in sets.
Figure 6.5. The multiple-product Add to Cart feature enables customers to purchase multiple products with just a click of the button.

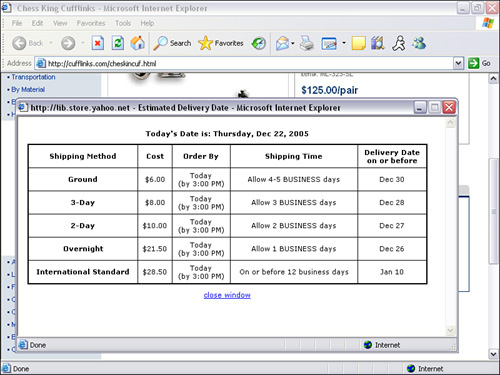
• Shipping policy pop-up chart— Customers want to know how much shipping will cost and when will they receive their products before adding them to the shopping cart (see Figure 6.6). One of the main reasons customers abandon a transaction during the checkout process is that they do not like the shipping cost or timeframe.
Figure 6.6. A shipping policy pop-up chart gives customers shipping options and rates without making them leave the product page or go through the checkout process.
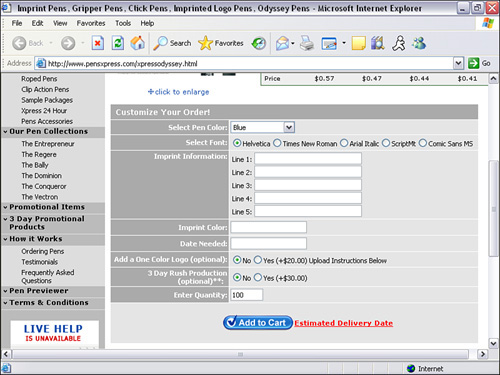
• Custom option display— A simple-to-read and well-positioned custom option display makes it easier for customers to add options or customize their order (see Figure 6.7). This is a must if you have customizable products, such as engraving.
Figure 6.7. A custom option display shows your product option in a more user-friendly and easy-to-read format.
• Custom contact form— Allow your customers to quickly and easily contact you with a custom contact form (see Figure 6.8). You can control the questions by adding your own specific custom fields. An online contact form enables your customers to contact you without needing an email client.
Figure 6.8. A custom contact form enables your customer to contact you or give you feedback without having to use an email client.

Advanced Store-Navigation Options and Ideas
Store-navigation features are designed to help your customers navigate your site quickly and efficiently. They help customers find the exact product they are looking for and create a user-friendly buying experience:
• Breadcrumbs— Breadcrumbs are a great way let your customers know where they are in your site (see Figure 6.9). They provide an easy way to backtrack to parent sections when viewing products. Breadcrumbs also help them remember which section they found that particular product in.
Figure 6.9. Breadcrumbs let customers know where they are in your store.
• Multiple breadcrumbs— Multiple breadcrumbs show multiple product paths (see Figure 6.10). These are useful especially if your product belongs in multiple categories.
Figure 6.10. Multiple breadcrumbs let customers know if products are located in other sections.
• Dynamic pagination— For faster loading time and to eliminate constant scrolling, you can dynamically break up the number of products displayed into multiple pages (see Figure 6.11). Customers can skip between pages or have an option to view all products in one page.
Figure 6.11. Dynamic pagination separates products into multiple pages to speed page-load time and reduce constant scrolling.
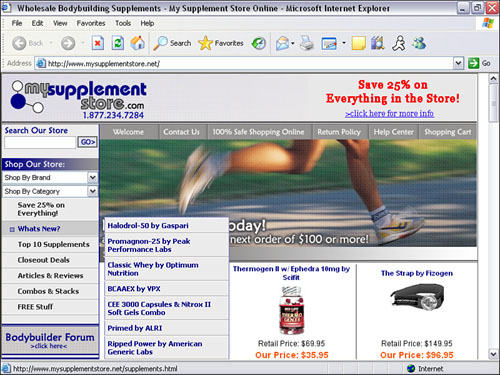
• Dynamic cascading menu— A dynamic sliding submenu appears if the customer hovers over the main navigation link or button (see Figure 6.12). Customers do not have to click on the parent category to go to a subcategory.
Figure 6.12. A dynamic cascading menu enables customers to drill down to subcategories without having to click on the parent category.
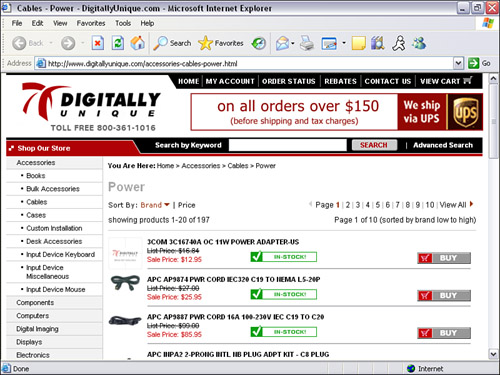
• Advanced search— An advanced search can help customers search for or narrow their product search (see Figure 6.13). You can allow customers to search by brand, date, price, or even color.
Figure 6.13. An advanced search helps narrow results.

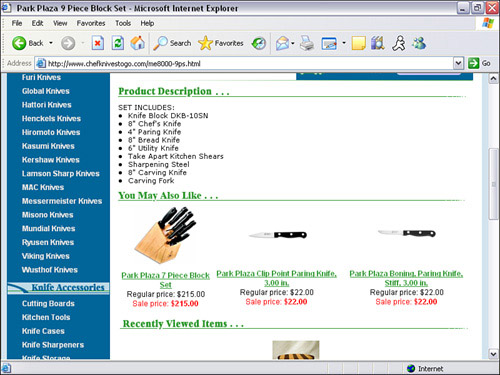
• Related items— Displaying related items helps customers consider other similar products they might be interested in (see Figure 6.14). It’s a great way to get customers to purchase other products.
Figure 6.14. Related items show other products similar or complimentary to a product customers are interested in.
Advanced Promotional Options and Ideas
Marketing features help you increase your bottom line by selling more products. A site that is professional and well laid out helps customers make important buying decisions:
• Send This Page to a Friend— This enables a customer to tell friends about your site or product by completing an online form (see Figure 6.15). An email is sent to the individual with a link to the page and a message from the sender.
Figure 6.15. Send This Page to a Friend provides a convenient way to let customers tell their friends and family about your site.
• Multiple product image views— Let your customers view multiple images of your product (see Figure 6.16). The default setting allows up to two product images. This is a great feature for products that come in multiple colors and for electronics; many buyers want to see the back of the product for input/output configurations.
Figure 6.16. Multiple product image views enable you to upload multiple images of your product. It’s perfect for products with multiple colors or if you need to show different angle views.

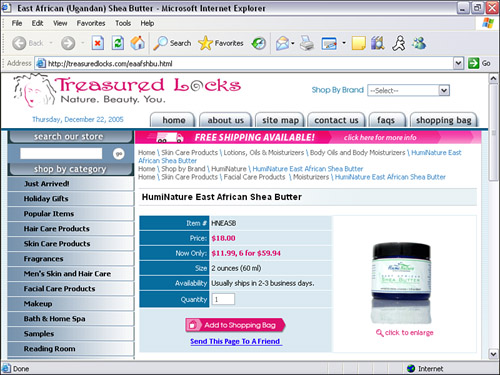
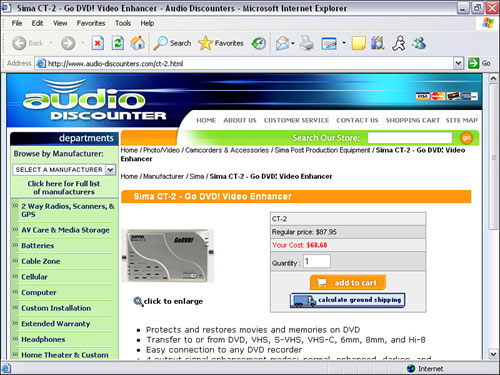
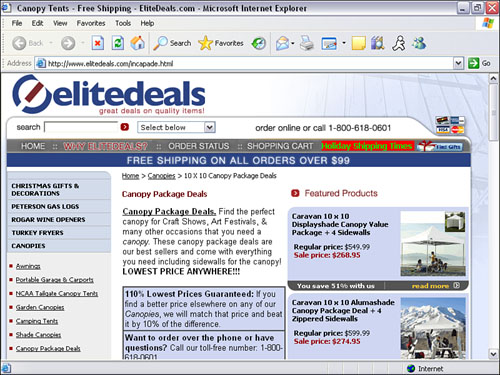
• You Save display— Show a message and percentage of how much the customer is saving (see Figure 6.17).
Figure 6.17. The You Save display shows the amount saved in either percentage or a dollar amount. This lets customers know exactly how much they are saving.
• Cross-selling— Similar to the Related Items feature, cross-selling enables you to display other products the customer might be interested in (see Figure 6.18).
Figure 6.18. Cross-selling enables you to display other products to up-sell the total order package.

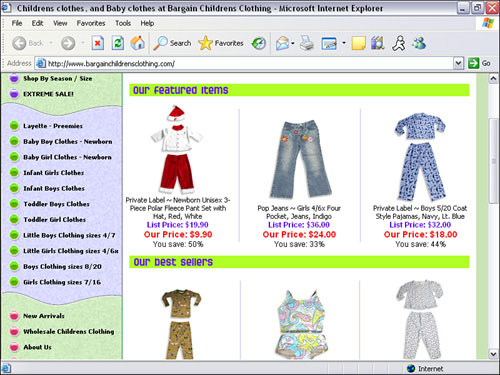
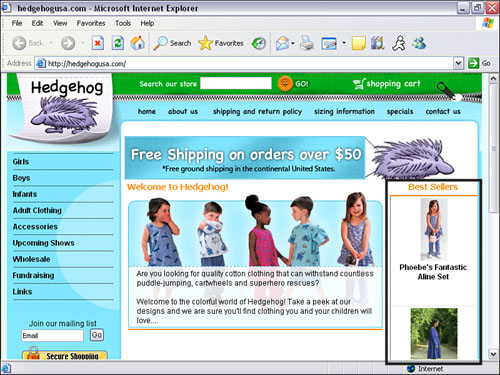
• Random best-selling item display— Randomly display best-selling or featured items. A different set of products appears every time someone comes to the site or refreshes the page (see Figure 6.19).
Figure 6.19. A random best-selling item display shows a list of the most popular items sold at your store. This gives customers ideas of which items are hot.
• Recently Viewed Items section— Customers can easily get back to items they were interested in or previously viewed. A list of recently viewed items is displayed at the bottom of the page (see Figure 6.20).
Figure 6.20. A recently viewed items section shows a list of products the customer previously viewed. This enables the customer to easily navigate back to previously viewed products.

• Secure Shopping graphic— Let your customers know that your site and their credit card transactions are safe and secure. A Secure Shopping graphic enforces that message (see Figure 6.21).
Figure 6.21. A Secure Shopping graphic lets customers know that your site and their credit card transactions are secure and safe.
• Shopping cart cookie tester— Test to see if customers have cookies turned off. If so, a message appears notifying them how to turn the cookies back on, or they will not be able to order from your store. This feature is standard with version 3 of Checkout Manager; no programming is required.
• Randomly displayed testimonial— Randomly display testimonials from your customers. A different testimonial appears every time the page is loaded. Customers feel secure when they hear that other customers were happy with you, your products, and your services.
• Email newsletter subscription— Customers can join your email newsletter by filling out an online form. Monthly email newsletters help you stay in front of your customer and new product releases and specials.
Advanced Search Engine Options and Ideas
Search engine features help search engine spiders find your product pages easily and help you increase search engine ranking. Search engine traffic, besides pay-per-click, is free, and these are qualified leads that are looking for your particular product or information:
• Related Items section— Similar to the cross-selling function, other related items appear next to the product. This helps create internal keyword-rich content for search engines.
• Breadcrumbs— Breadcrumbs not only help customers navigate through your site, but they also contain keyword-rich content and keyword-rich internal links (refer to Figure 6.9).
• Multiple breadcrumbs— Multiple breadcrumbs shows multiple product paths (refer to Figure 6.10) and add keyword-rich internal links.
• Text-based menus— Instead of image menu buttons, text-based menus help with search engine ranking, especially if you have keyword-rich text in your menu. Search engines cannot read images. Switching to a text-based menu also helps create your menus dynamically.
• Change page name to text— By default, Yahoo! creates an image for the page name. Although it looks like text, it’s actually an image. Changing the page name to text helps with search engine ranking. The page name usually contains keyword-rich text describing your product.
• Image alt tags— Some of your images do not have alt tags to describe your product. Adding a text description of your images helps with search engine ranking. Adding keywords in your alt tags helps with keyword density.
• Dynamically generated metatags— This feature scans your page to pull unique keywords and places them in your meta page description and keywords. This is a great solution if you don’t have the time yourself to customize your meta descriptions and keyword phrases.
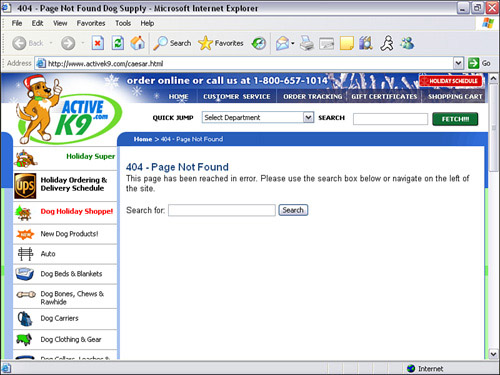
• Custom 404 “Page Not Found”— A custom “Page Not Found” message helps customers get to your site even if they clicked on a link that no longer exists on your site. Instead getting a blank “Page Not Found” message, they arrive at your custom page. This allows them to still navigate through your site.
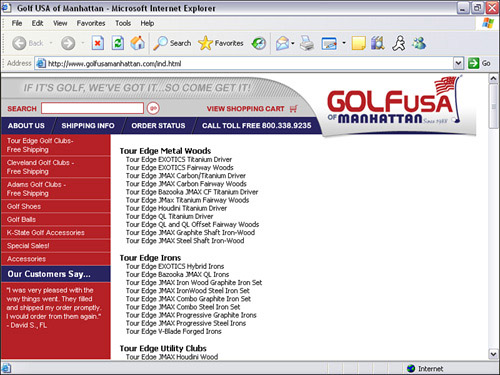
• Categorized site map— A site map has categorized links to all your products. Search engine spiders can get to your pages from a link off your home page. This increases your chances of getting more pages indexed by search engines (see Figure 6.22).
Figure 6.22. A categorized site map not only helps customers find your products, but it also helps search engine spiders scan all your pages and hopefully index more product pages.
Creating Product Pages Using Database Upload
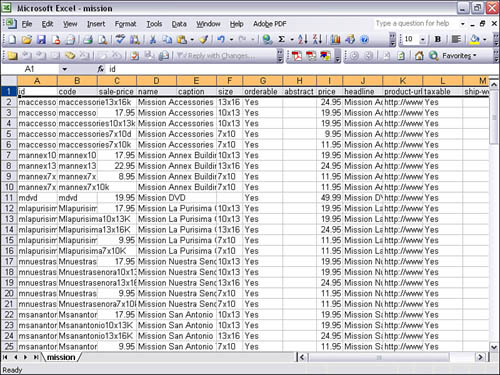
You can edit and add products in volume by using a spreadsheet program such as Microsoft Excel and uploading your product file into Catalog Manager. The Database Upload feature enables you to automatically create all your product pages and sections by simply uploading a .csv file. Using this feature saves you a tremendous amount of time and repetitive work. Although you can use a text editor such as Notepad to add and edit your products, it is recommended that you use Microsoft Excel so that you can more easily visually add, organize, and edit your product data (see Figure 6.23). Using a text editor can cause confusion when adding or editing products because there are no visually formatted columns. Database Upload is available for Store Editor—in fact, if you are building in Store Editor, you should use this feature because it enables merchants to include a path to create the hierarchy of a site, to avoid orphan product pages.
Figure 6.23. Microsoft Excel makes it easier for you to add and edit products because of the visual column and row structure.
Take a look at this sample data file using a text editor:
code, price, path, name
S123,59.95,Shoes: Sneakers, Nike Air Jordans
F345,39.95,Shoes: Boots, Marc Nason
Database Upload also works with advanced features such as breadcrumbs, a site map, cascading menus, and more, if programmed properly. These features automatically are updated with your new product data file. You will want to speak to your programmer or development company about synchronizing those features with your database upload.
If you are using the Database Upload feature for the first time, it is recommended that you download the spreadsheet file and use it as your starting point.
To download the .csv file, follow these steps:
1. In Store Manger, click the Catalog Manager link under the Edit column.
2. Click the Upload Items link.
3. Click the Download button on the far right of the page.
4. Click the Download button with the default table selected.
5. Select the location where you want to save your file.
These required and optional fields are available in the file:
• Name— The name of your product. The name also is used as the Title tag for the product Web page.
• Code— A unique code. You can use a product SKU (Stock Keeping Unit), if available.
• ID— Another unique code that can contain only letters and numbers, no spacing. The ID is important because it must exactly match the image filename when using the multiple-image upload feature.
• Price— The amount you want to sell the item for.
• Sale-price— The discounted price.
• Ship-weight— The weight of the product only if you are using weight to calculate shipping price.
• Options— Product options, such as size and color.
• Headline— Any text in the Headline field replaces the page name. A more descriptive name can be added here for display.
• Caption— The text for the description of the product. The text is displayed underneath the Headline.
• Abstract— Used when text is needed for a description on another page.
• Product-URL— The exact Web page location of the product page. Because you are using the Database Upload feature, the URL is generated for you. The product ID is used as your page filename (www.yourdomain.com/id.html).
Tip
You can also separate your products by creating more than one table or data file. Using multiple tables can help you manage your products better. This is also a great idea especially if you have products that are seasonal.
• Path— The section or category the product will be located in. By entering a name, the section button also automatically is created for you. You can create subsections by entering a colon—for example, Shoes: Sneakers.
Warning
Using the Database Upload feature can overwrite your entire site. When uploading a data file, you have the choice to add or rebuild the database. If you choose the rebuild option, all current products are deleted and only products in your new data file are available.
When you have all the product information in your data file, you need to upload the file.
To upload the .csv file, follow these steps:
1. In Store Manger, click the Catalog Manager link under the Edit column.
2. Click the Upload Items link.
3. Click the Upload button on the far left.
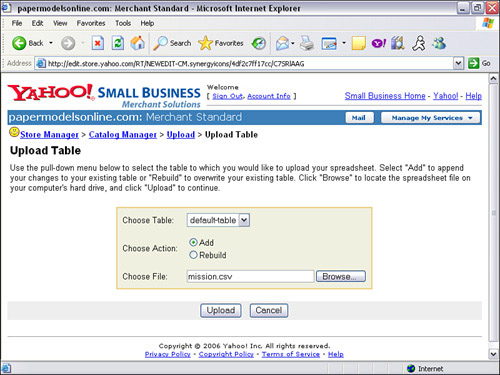
4. Here, you are given two options (see Figure 6.24). The first option asks which table you would like to upload the file. If you plan to create multiple tables, you must create them before you upload the file. The second option asks if you would like to rebuild or add to the table. Note: The rebuild option completely erases all your products in the current table and replaces them with your new product in your data file. When you have selected the two options, you need to click the Browse button to locate your new data file.
Figure 6.24. When uploading a .csv data file, you have an option to either rebuild or add to the database.
Tip: Reverting back to a previous .csv file
You can roll back to the last version of your data file if you made a mistake with the new data file. Simply click the Revert button on the upload page. Any new products in the new data file are erased because the previous data file did not include the new products.
5. When you locate your file, click the Upload button. This takes you to a page to report any errors. If there are errors, correct the errors in the .csv file and upload the file again.
6. If there are no errors, click the Commit button. This takes you to a screen to confirm that you want to rebuild the product table. Click the Rebuild button. Note: If you are adding to the product table, an Add button appears instead of a Rebuild button.
Uploading Multiple Images at Once
If you have a lot of products, using the option to upload multiple images will help you save time. How does the system know where to put the images? The name of file must exactly match the ID of the product page.
The Yahoo! store supports both .jpg and .gif image formats.
For example, if your product ID is zd100, your image filename must be zd100.jpg. If it’s a .gif, the image filename will be zd100.gif.
All images must be in a Zip file to be uploaded. This helps reduce the file size and speeds up the upload time. You can upload as many Zip files as you want, but only one Zip file can be uploaded at a time. If you don’t have a Zip program, you can download WinZip (winzip.com) StuffIt (stuffit.com), or another Zip utility program:
1. When you have added all the image files into the Zip file, click the Store Editor link in the Store Manager control panel.
2. When the Store Editor home page appears, click the red triangle on the toolbar to display the advanced settings.
3. In the advanced settings, click the Controls button.
4. Scroll down until you see the Multiple Image Upload link, and click the link.
5. After you click the link, a dialog box appears where you can browse and upload your Zip file.
The next chapter looks at tips and tricks to customize your store and add advanced features.