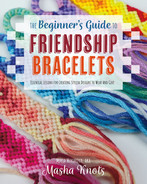
CHAPTER 9Bracelet Starts and Ends
There are many ways to start and end your friendship bracelets. Different starts and ends have different aesthetics and uses. In this chapter I will walk you through how to create some of the most popular methods to start and end both normal and alpha patterns as well as how to actually use these starts and ends to secure bracelets to a wrist.
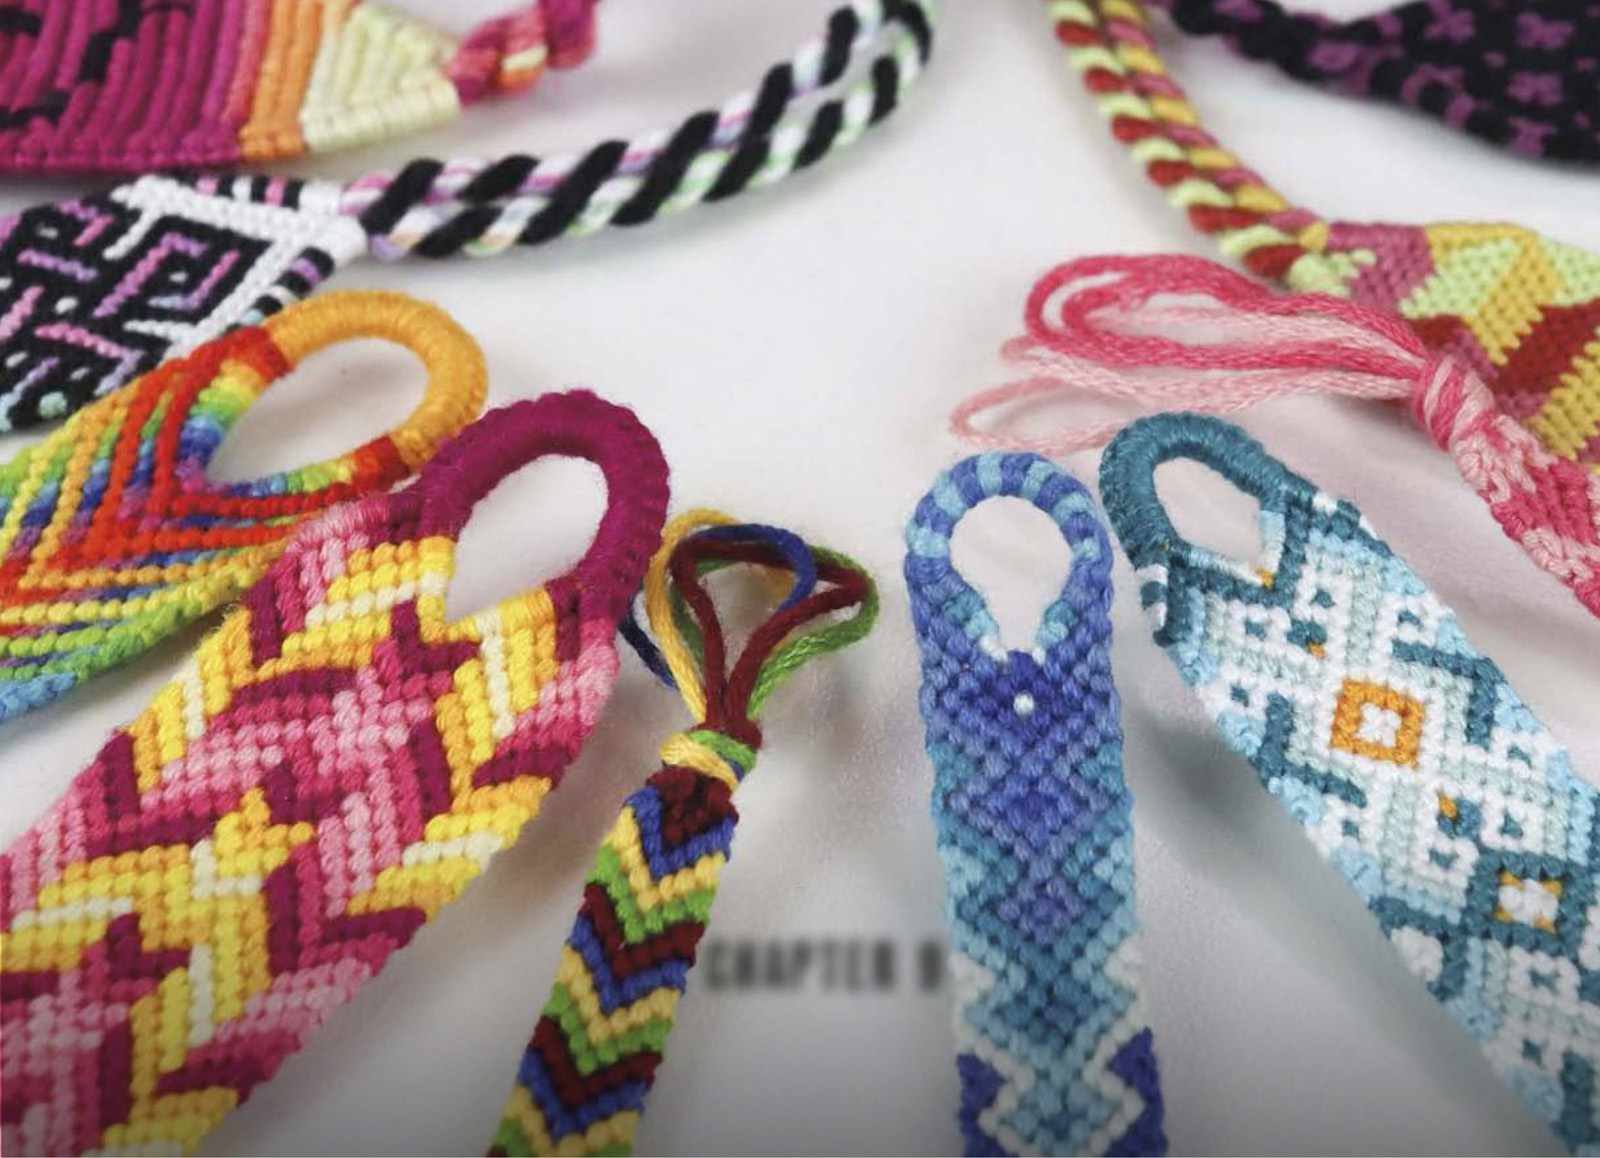
LOOPS
Loops are typically my start of choice. I like how a loop looks on a bracelet and I think it creates a beautiful, clean start. Additionally, loops use up less string than a bracelet with ties at either end since you only need ties on one end of the bracelet. There are many types of loops in bracelet making. In this section I will go over the most popular types.
One thing to remember about loops is that in order to make one, you need to fold your strings in half. This process creates two strings for knotting out of one, and it means you need to double the lengths of your strings to account for the fold, after which the strings will become their normal lengths.
This is also the reason some patterns are easier to create loops for than others. The easiest pattern to make a loop for is one that has an even number of strings for each color (since when you fold a string, you create two ends, which is an even number) and one in which the colors are balanced on either side of the bracelet, meaning there is the same number of strings per color on the left and right sides of the pattern relative to its center (since when you fold a string, the ends created are on different sides of the loop). There are ways to create loops for patterns with an odd number of strings per color, and I discuss some of them in the Other Loops section of this chapter. But first, let’s talk about the simpler beginner and basic loops.
Beginner Loop
- 1.Cut the strings required for your pattern. Make sure it is a pattern with an even number of strings per color so that when you fold the strings, you will create an even number of strings. Make sure to also double the length of your strings when cutting them, since folding your strings will also halve their length.
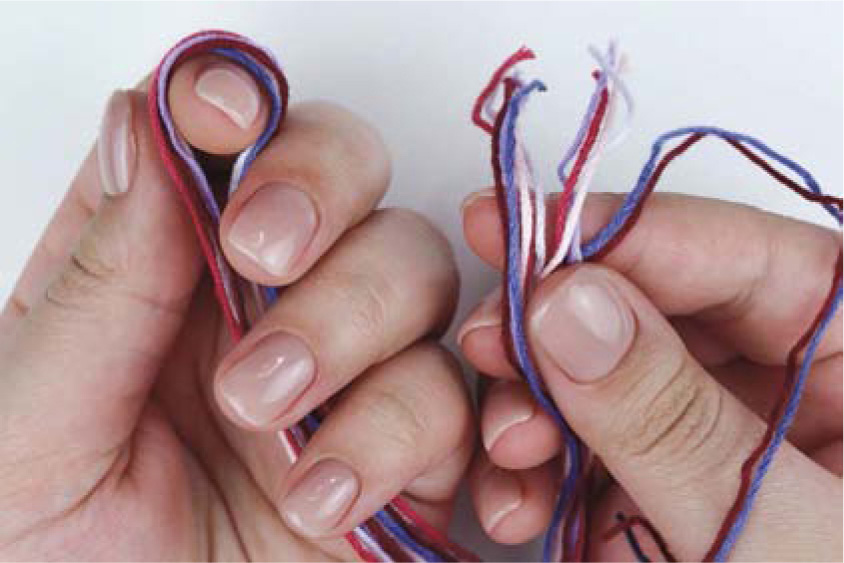
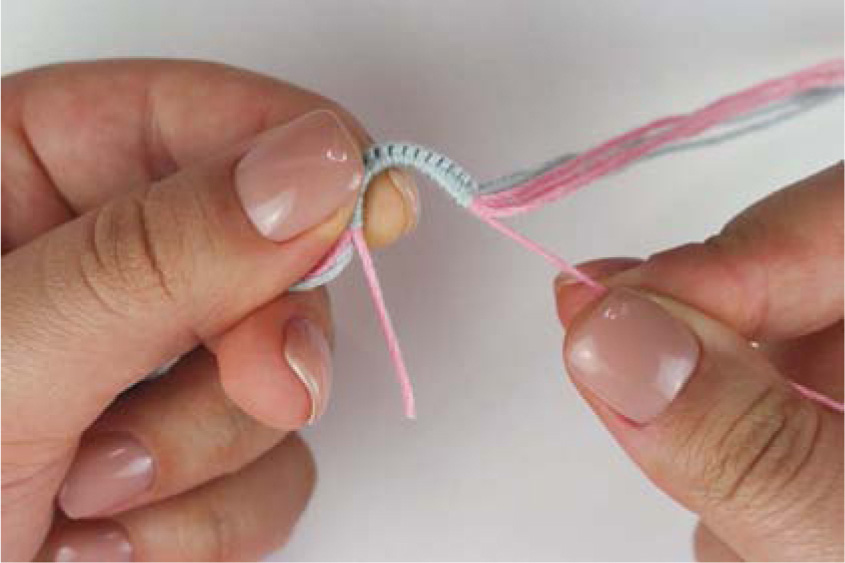
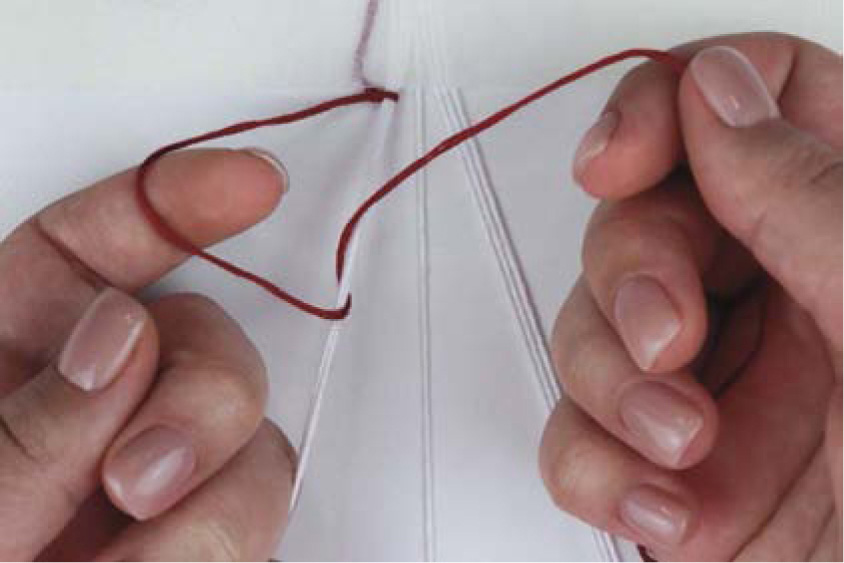
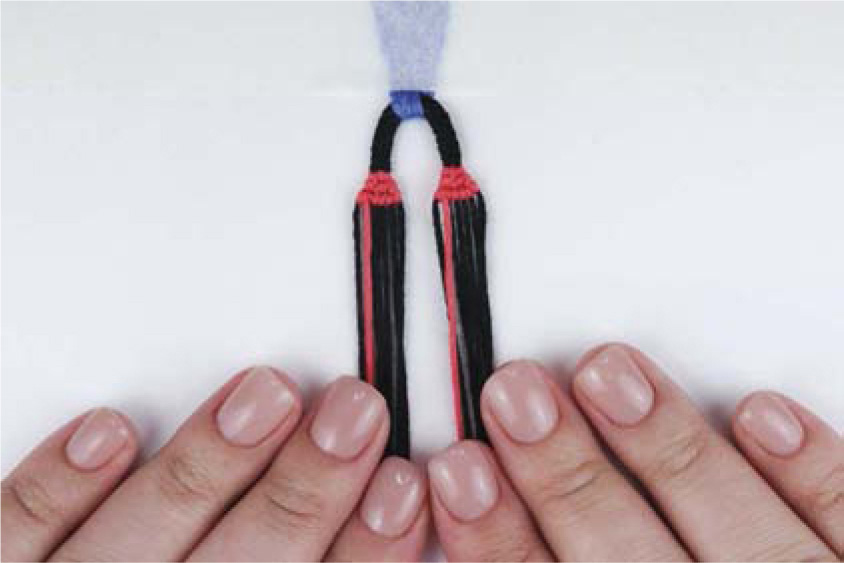
- 2.Once your strings are cut, grab both ends of your strings, put the ends together, and then run your hand along the strings to find the central point of the fold. This will be the tip of your loop.
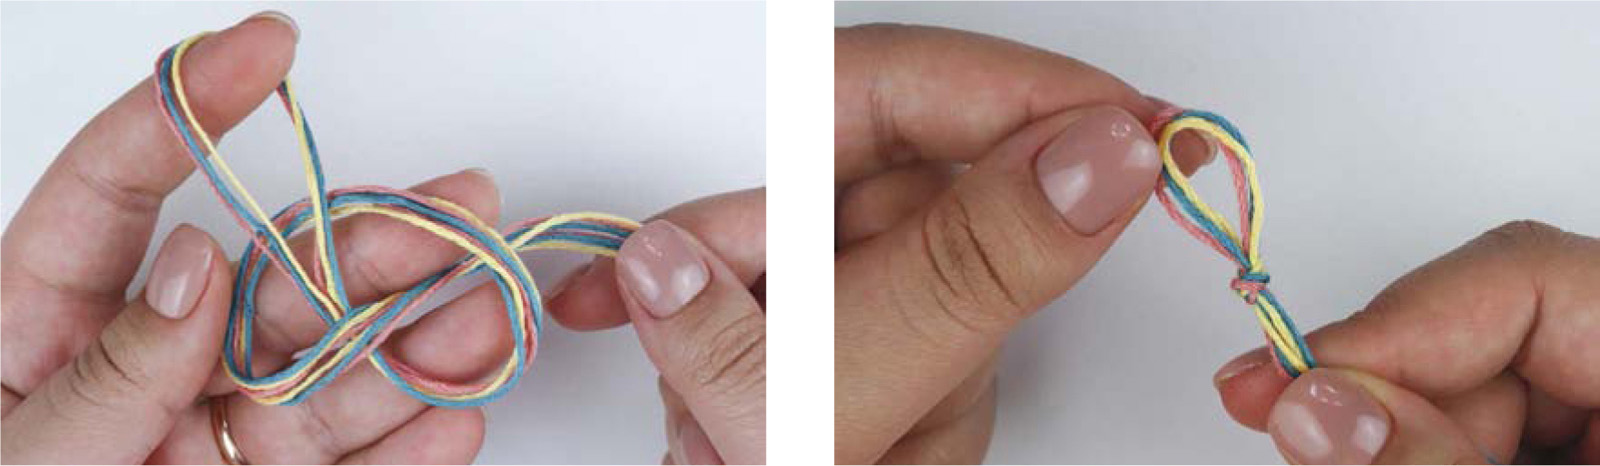
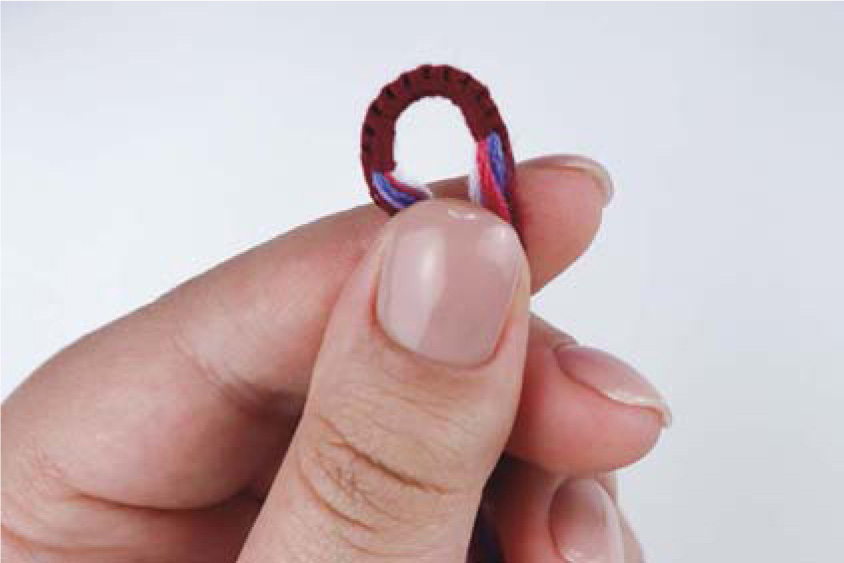
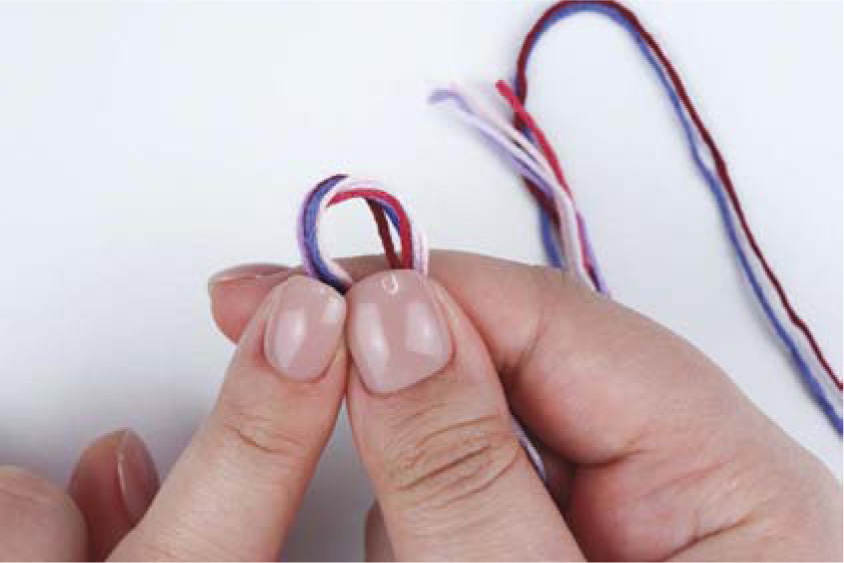
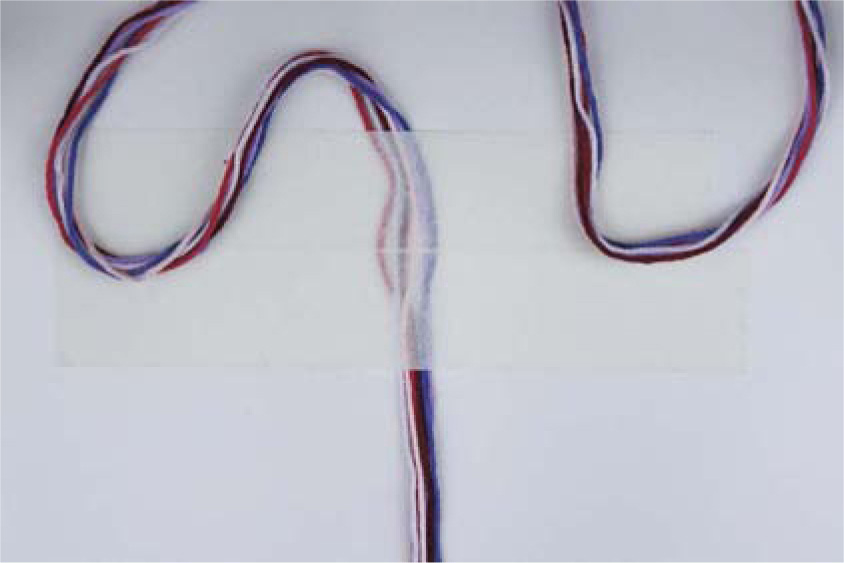
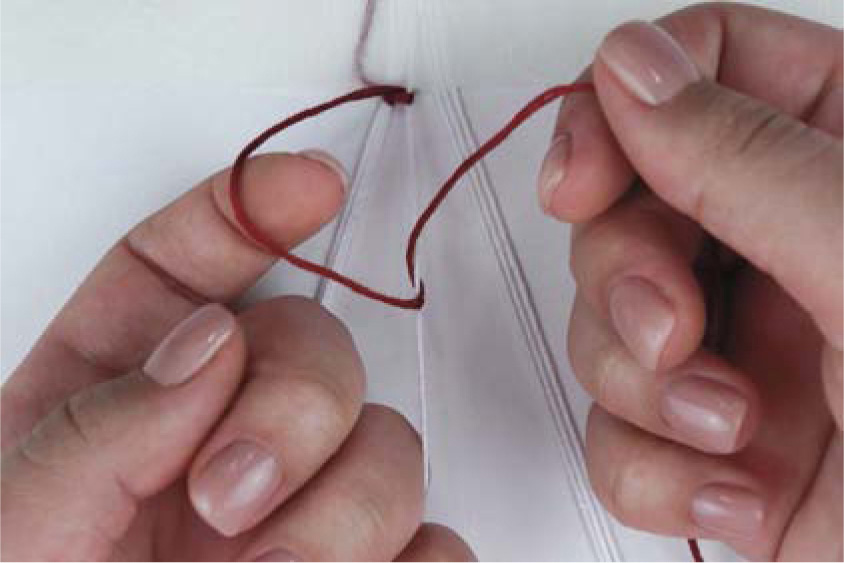
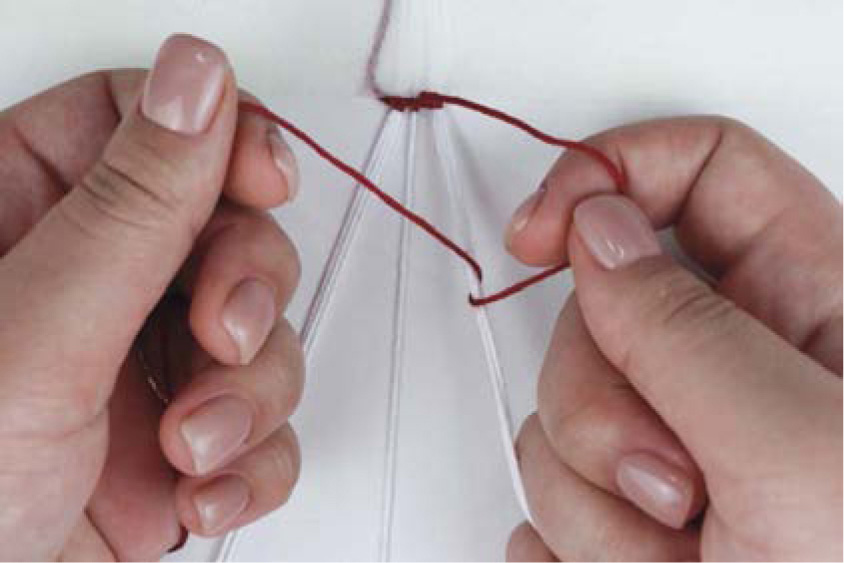
- 3.Whatever size you make the loop at this stage is the size it will end up being. Loop sizes are personal preference. I prefer a small loop as I think it looks neater, but it must be big enough for at least one tie of your bracelet to fit through. Decide how big your loop will be by choosing the point at which you want your bracelet to start. Hold your fingers at that point to keep track of it, make an overhand knot with your other hand, and then tighten that knot as close as you can to that point, as shown in these figures.
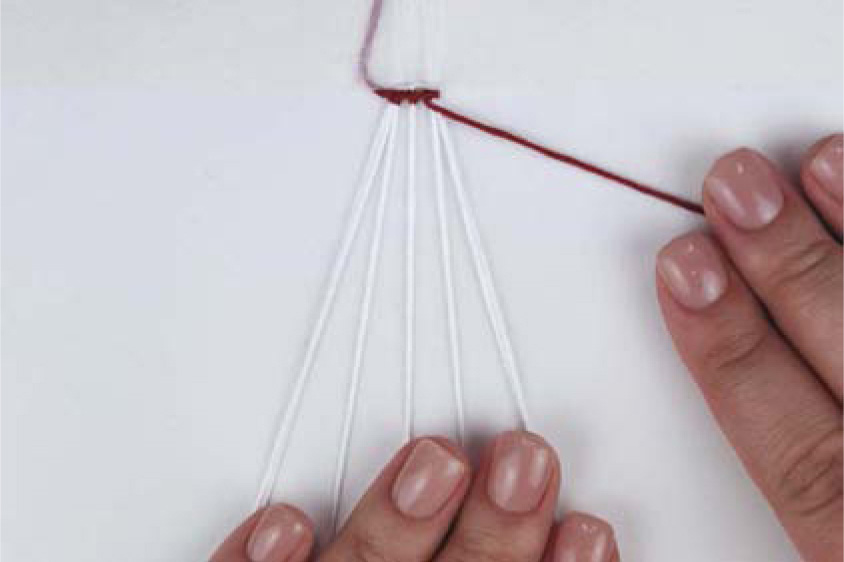
- The beginner loop is done! You are ready to secure your bracelet to your workspace and start knotting.
Basic Loops
SINGLE-COLORED BASIC LOOPS

- 1.To create a single-colored basic loop, you must first choose the color you would like your loop to be. I like to complement the bracelet itself with the colors of my loops, so I tend to go for the color that is most dominant in the pattern or the color of the outline within the design of the bracelet. The color to choose is up to you. Once you have selected your color, you will cut that string roughly 4 inches longer than the rest of your strings to accommodate for the creation of the loop.
- Once you have cut your strings, fold them in half, except for the string with the added 4 inches. This string won’t be folded in half; instead the extra 4 inches will be on one side.
- 2.Decide how big you want your loop to be and grab the place you want your bracelet to start at with your fingers, marking that spot. Make sure that spot is on the side that is opposite the side of the longer end of the string for the loop’s color.
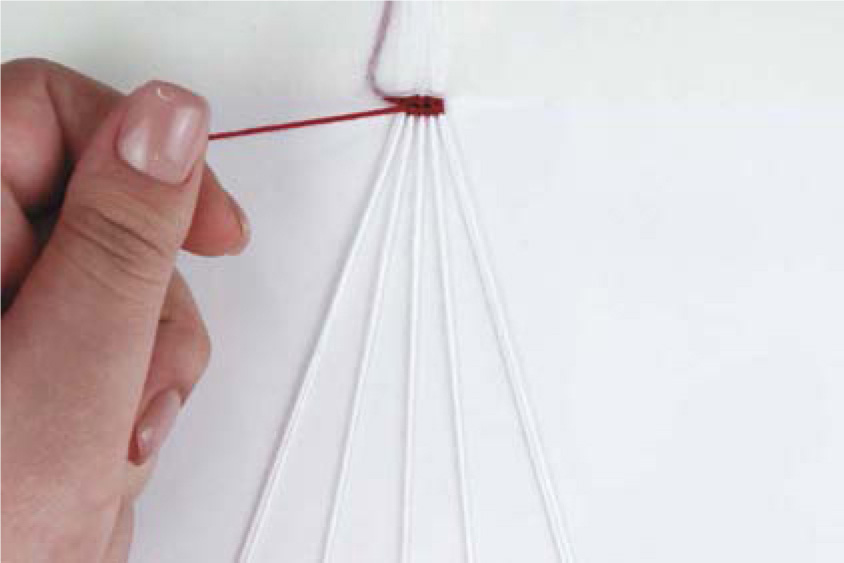
- 3.Unfold your strings and secure them to your workplace at the spot you marked in the previous step. If you are using tape, tape it down at that spot. Otherwise, make an overhand knot at that spot to help you secure your strings. You will later undo this overhand knot after the loop is complete.
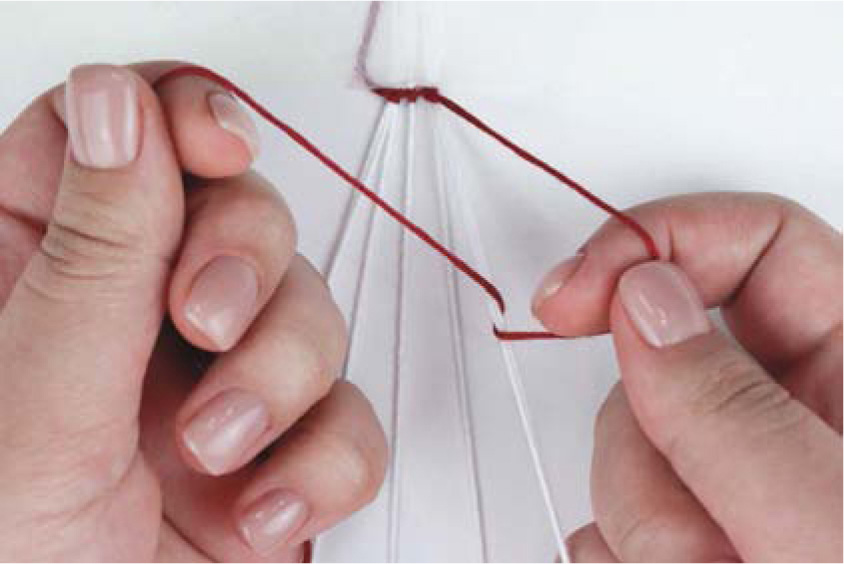
- 4.Grab the string you chose for the loop’s color that has the extra 4 inches and make a forward-backward knot onto the entire bundle of the rest of the strings.
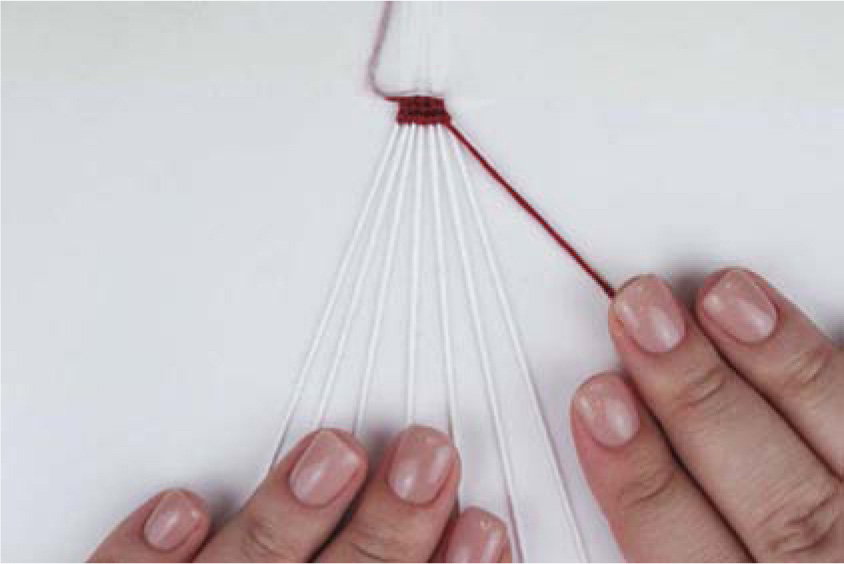
- 5.Continue making forward-backward knots onto the bundle of strings until your loop reaches the length you desire. I find it helpful to fold the newly formed loop every once in a while to check if it has reached the length I want. There is no set number of knots you need to do as the loop length will differ from pattern to pattern and is based on personal preference. Once you are done, you can undo your strings from your workplace, fold the loop, and start working on your bracelet.
MULTICOLORED BASIC LOOPS
Multicolored basic loops are created the same way as regular basic loops. The only difference is that you select multiple colors and, thus, multiple strings to create the loop itself. Multicolored basic loops can be created with any number of strings and colors, but for simplicity, I will use just two colors in this tutorial.
- 1.Start by selecting the colors you would like for your loop. As I mentioned, I like to use my loops to complement the bracelet itself, so if a bracelet uses alternating colors or a gradient, I might select my colors accordingly to highlight those colors in the loop. Once you have selected your colors, you will need to cut those strings roughly 3 inches longer than the rest to accommodate the creation of the loop. The more colors you choose for your loop, the less additional length you will need for each color.
- Once you have cut your strings, fold them in half, except for the strings with the extra length. These strings won’t be folded in half; instead, the extra ends will be on one side.
- 2.Decide how big you want your loop and grab the place where you want your bracelet to start with your fingers, marking that spot. Make sure that spot is on the side that is opposite the side of the longer ends of the strings for the loop’s color.
- 3.Unfold your strings and secure them to your workplace at the spot you marked in the previous step. If you are using tape, tape it down at that spot. Otherwise, make an overhand knot at that spot to help you secure your strings. You will undo this overhand knot after the loop is complete.

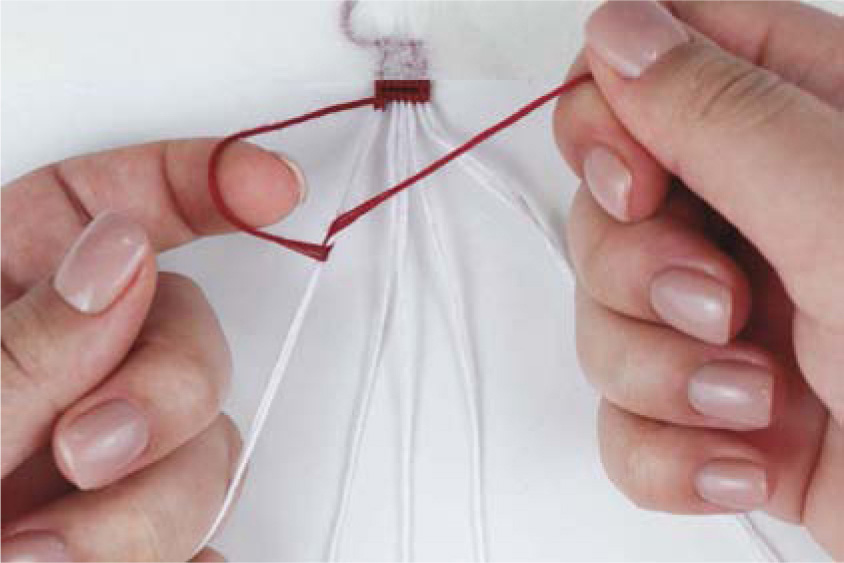
- 4.Grab the first string you chose for the loop’s color that has the extra length and make a forward-backward knot onto the entire bundle of the rest of the strings, just like in a single-color basic loop. Put that string to the side. Grab the second string you chose for the loop’s color that has the extra length and make a forward-backward knot on the entire bundle of strings, excluding the other string you are creating the loop with.
- 5.Next, grab the first string again and make a forward-backward knot onto the entire bundle, excluding the second string. Make sure the second string is underneath the first string as you are making the knot.
- 6.Continue making forward-backward knots onto the bundle of strings, alternating the strings you are making the knots with, until your loop reaches the length you desire. Once you are done, you can undo your strings from your workplace, fold the loop, and start working on your bracelet.
OTHER LOOPS
While creating a loop for a pattern that has an even and balanced number of strings is easiest, there are still ways to create loops for patterns that don’t fit those criteria. These ways are more tedious, however, and I use them only on the rare occasions when I really want to make a loop for a pattern. Let’s discuss these methods.
Linked Loop
The pairing loop works for patterns that have an even number of strings per color but those colors aren’t balanced, meaning that, for example, all the strings of one color are to one side relative to the center of the pattern. In combination with the removal loop, discussed later in this section, this technique could also be used for patterns that have an odd number of strings.
Before you start making the pairing loop, make sure the pattern you are considering making it for is actually an unbalanced pattern and not a balanced pattern in disguise. Some patterns that are balanced will have the first row look unbalanced, with more strings per color on one side than the other. However, if you look more closely at such patterns, you might notice a row in which the pattern becomes balanced, meaning that each string on the left has a matching string of the same color on the right. Since there is no rule that you have to start making a pattern on row one, you could make a basic loop and start making your pattern from the row at which it is balanced.
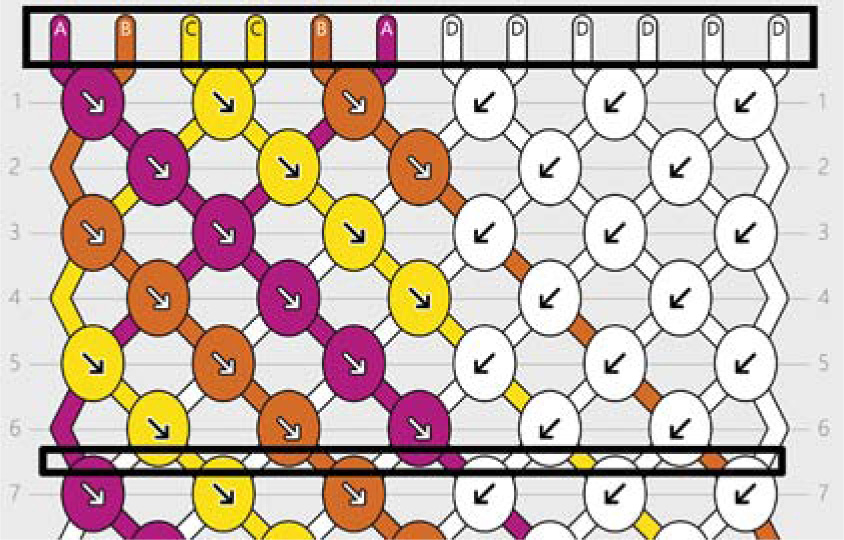
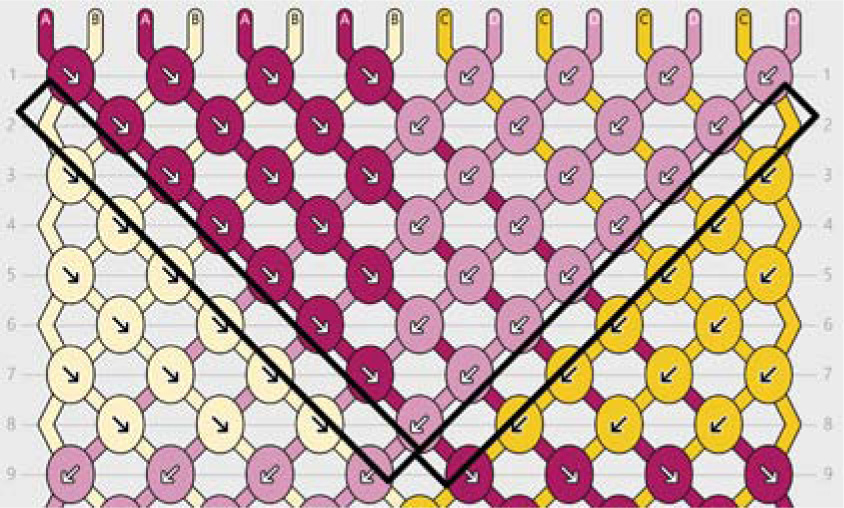
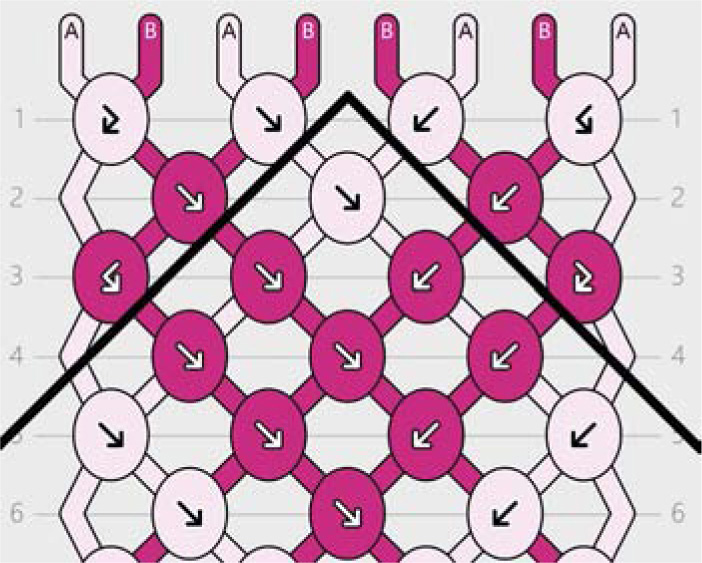
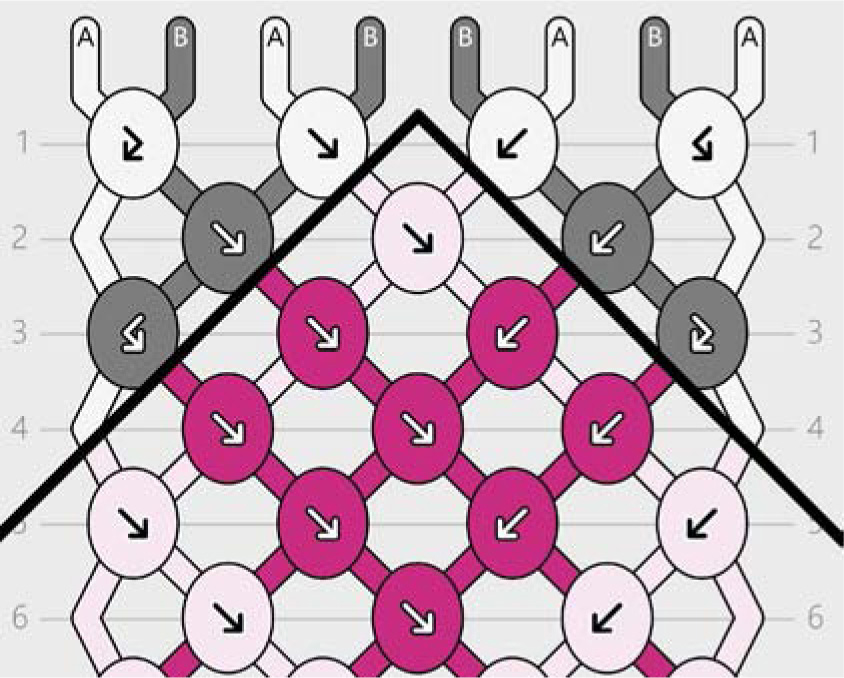
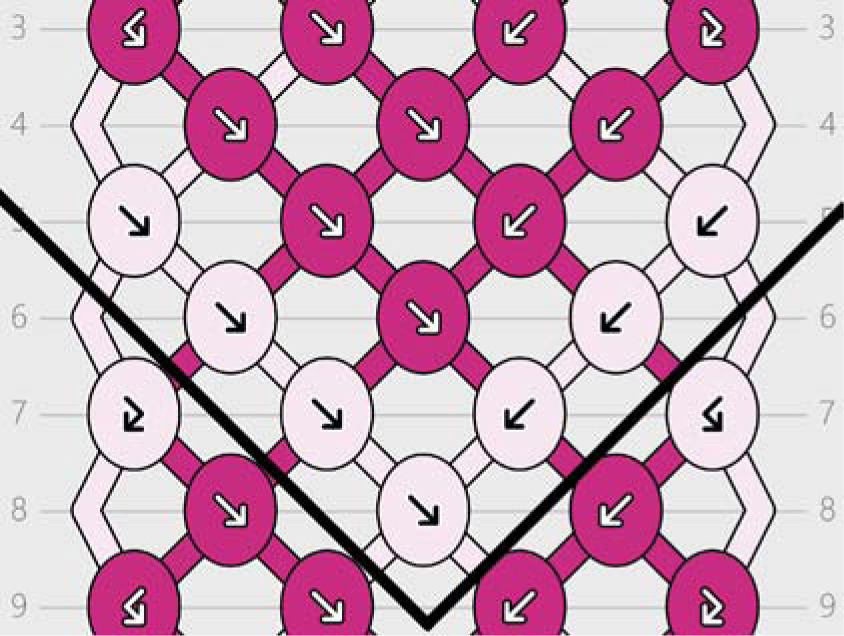
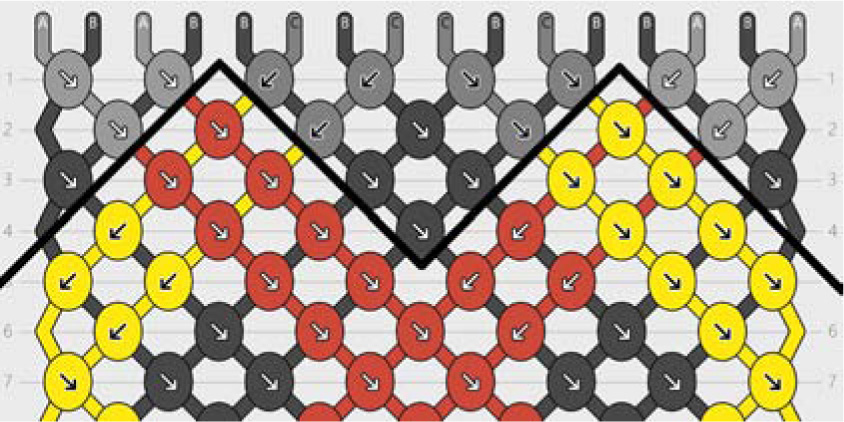
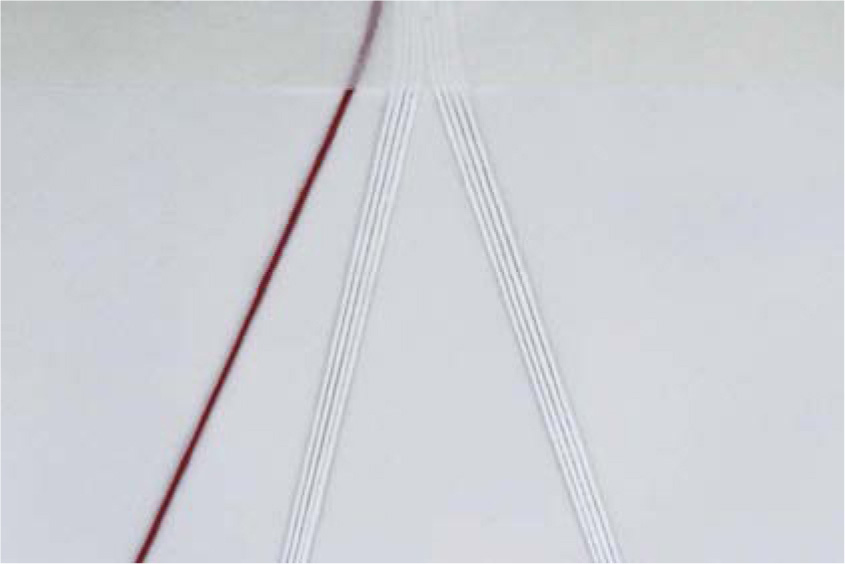
For example, in the pattern shown at the top of the next column, you can see that all the colored strings are on the left and all the white strings are on the right. However, on row six the pattern becomes balanced with three colored and three white strings on the left and the same on the right. For this pattern you could do a basic loop and start knotting it from row six.
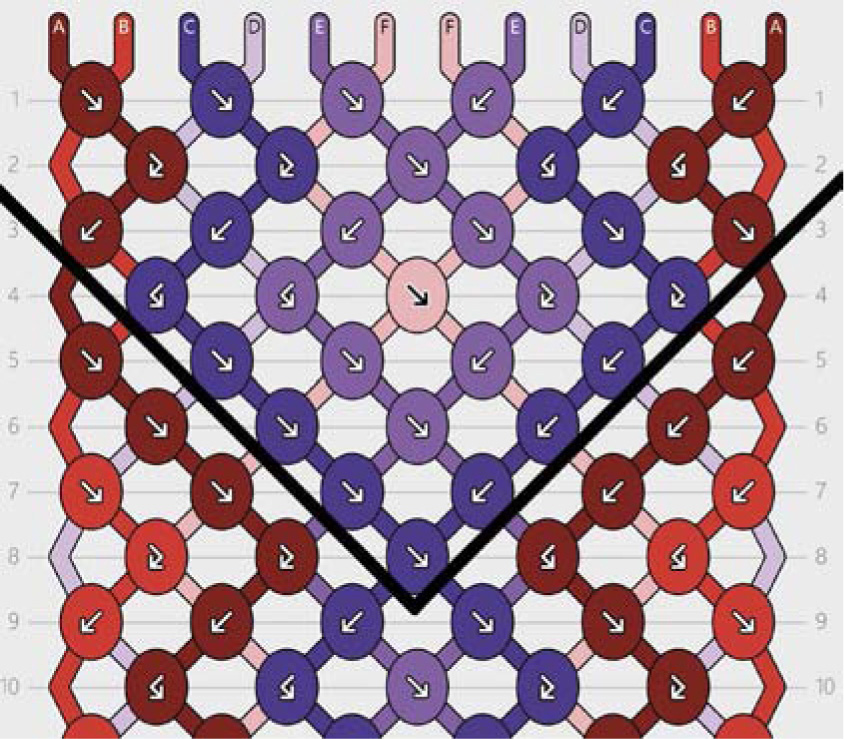
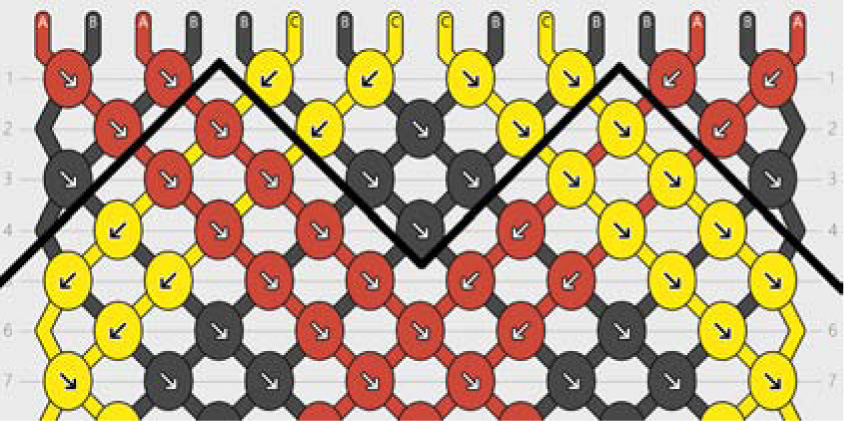
Once you have determined that the pattern you want to make a loop for is in fact unbalanced, or you don’t want to start your disguised balanced pattern at a different row, identify the strings that need to be balanced out. Some of the strings within the pattern will already have a string of the same color on the other side of the pattern as a pair to it. Since each of the colors has an even number of strings, choose a pair that needs balancing and match it with a pair from the other side. In this pattern, for example, you could pair the dark pink and light pink strings together and the light yellow and dark yellow strings together.
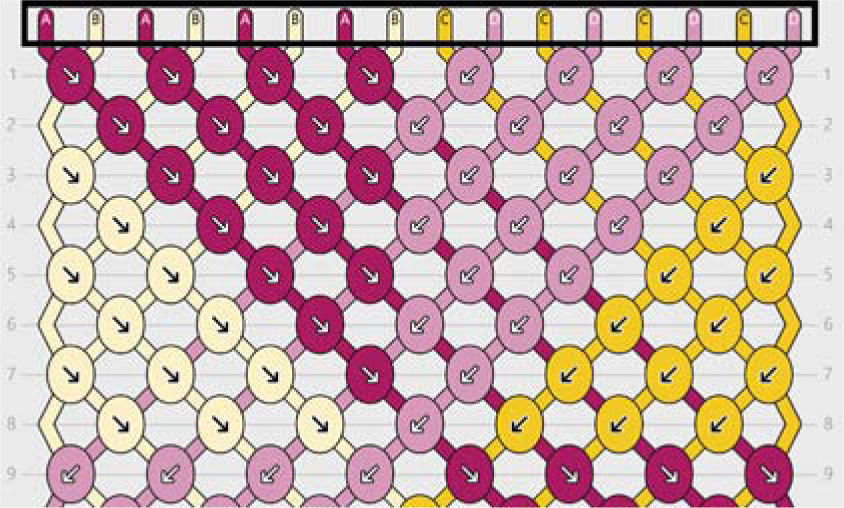
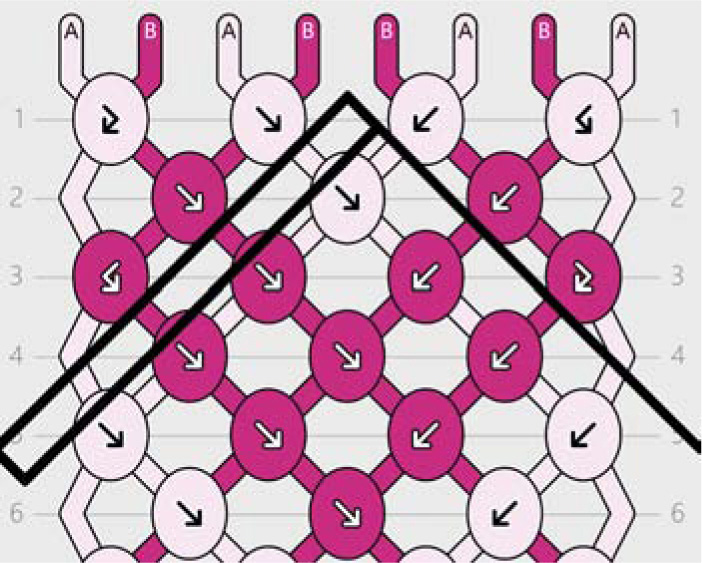
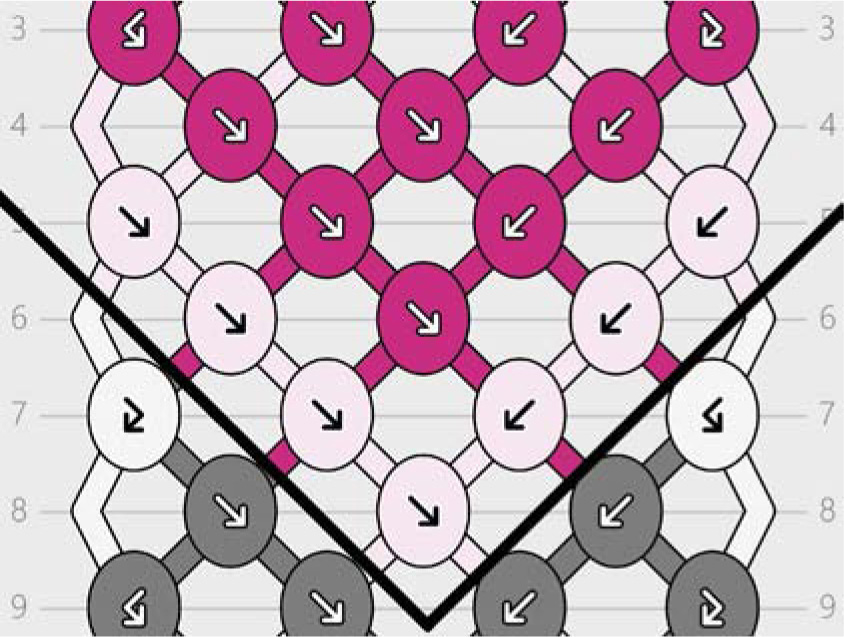
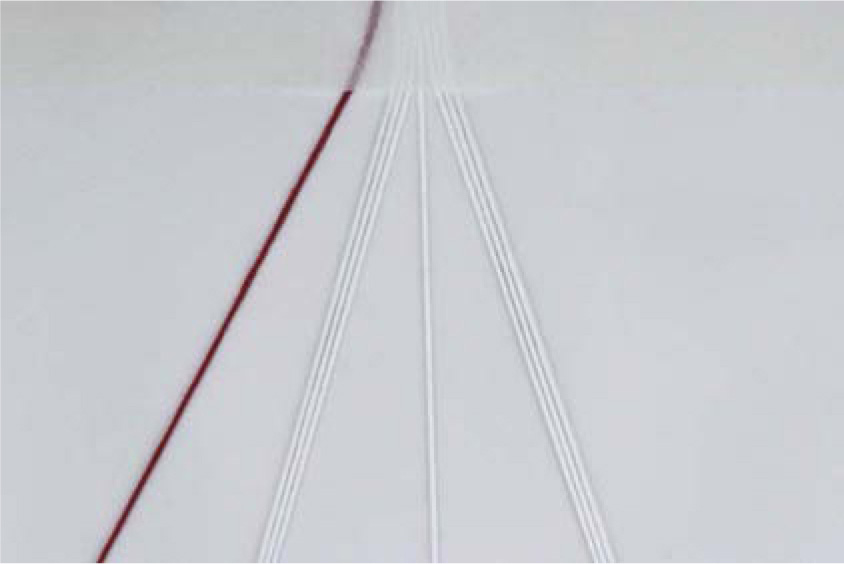
However, if you are doing a shaped start, like triangle ends after a loop or a teardrop loop, which are explained further in this chapter, you must be mindful of where you are starting your bracelet. I want to start this bracelet with a teardrop loop. Notice that I can still pair the light and dark strings of both pink and yellow strings together, as I could have, had I just done a straight start. However, the light and dark pink strings have switched sides. If I were to do the straight start, the dark strings would be on the left and the light strings would be on the right. With a teardrop loop, the dark strings are now on the right and the light strings are now on the left. While the technique for this type of loop is the same, regardless of where in your pattern you decide to start, it is important to keep track of which side you want your colors to appear on before you start making the loop.
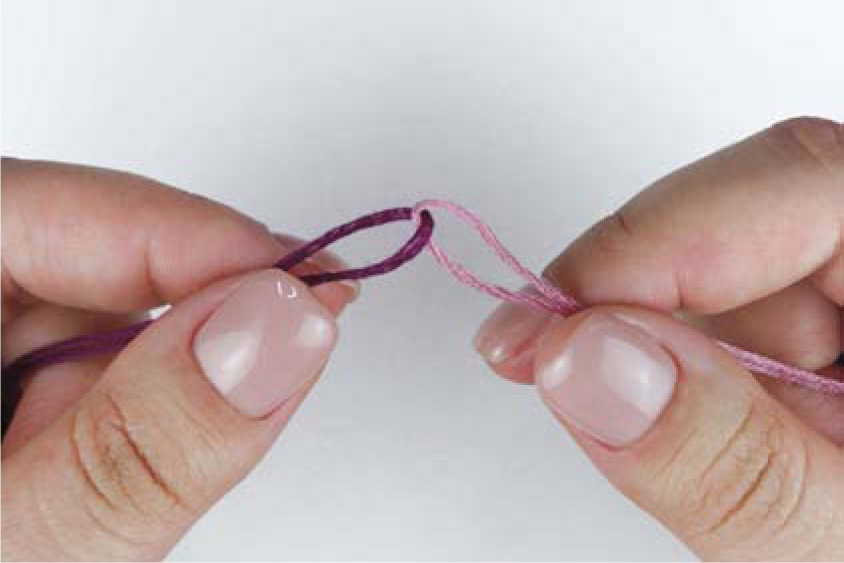
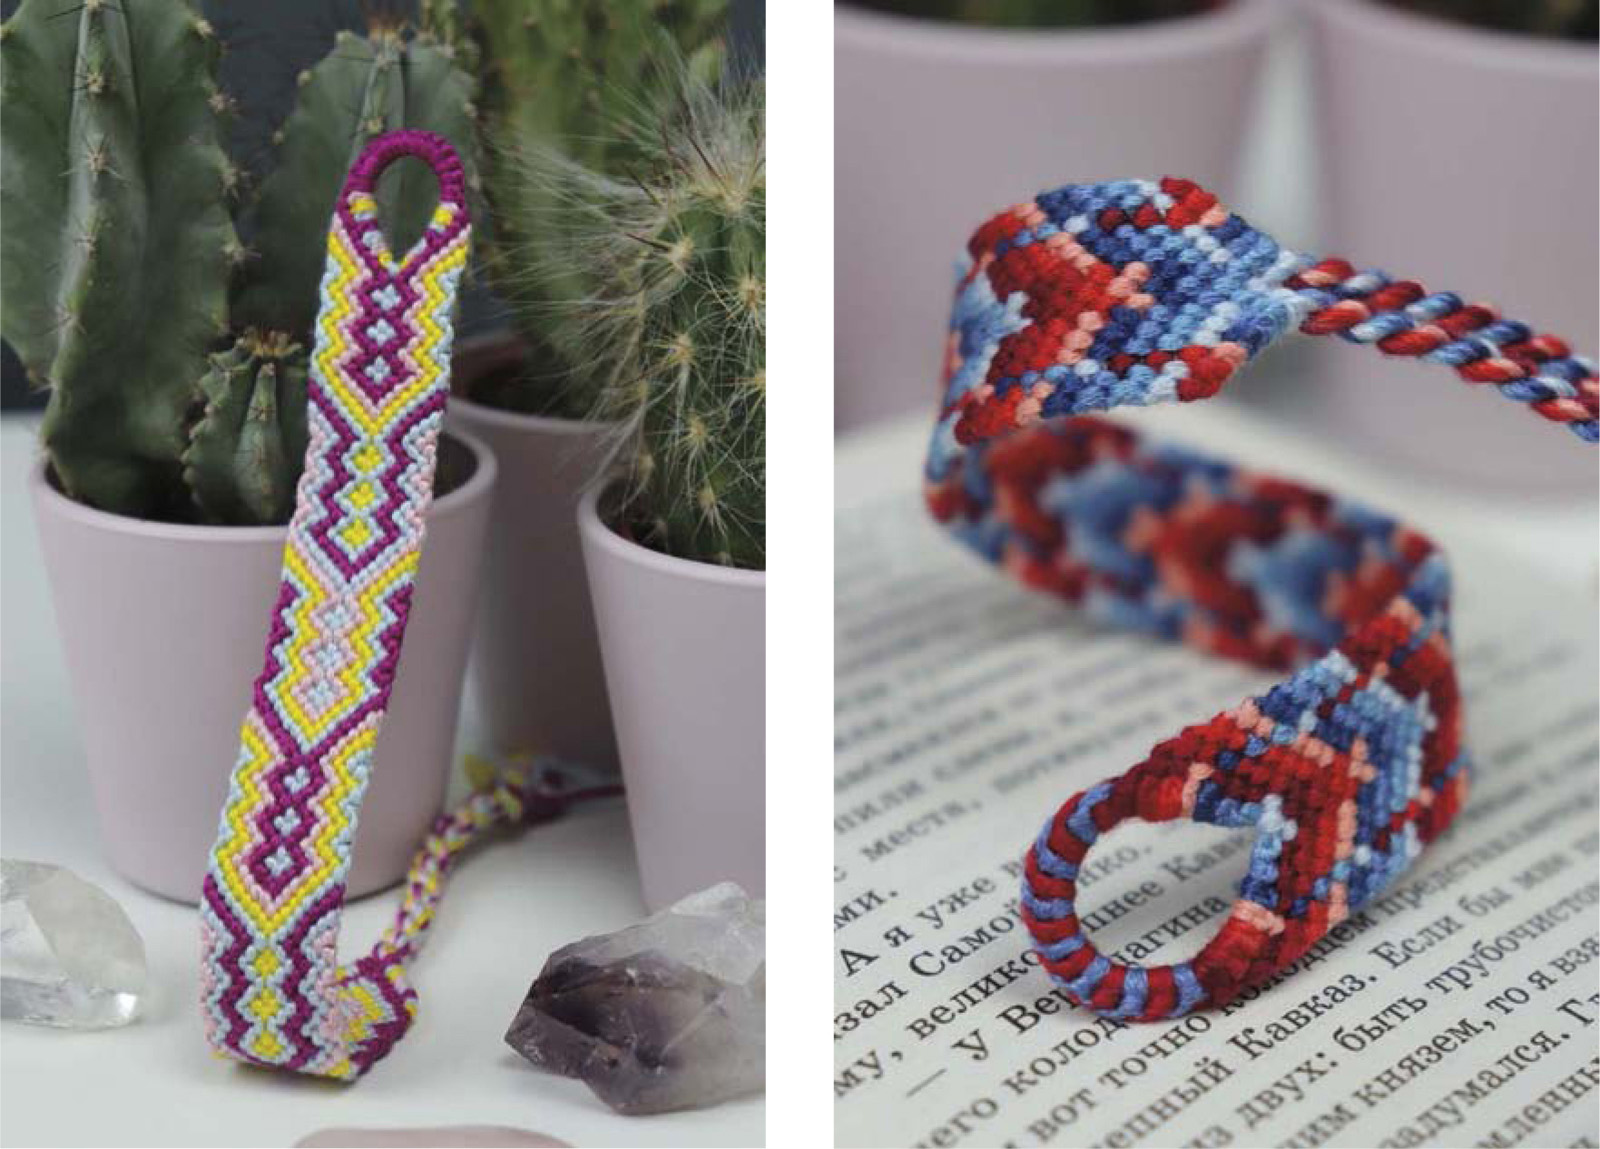
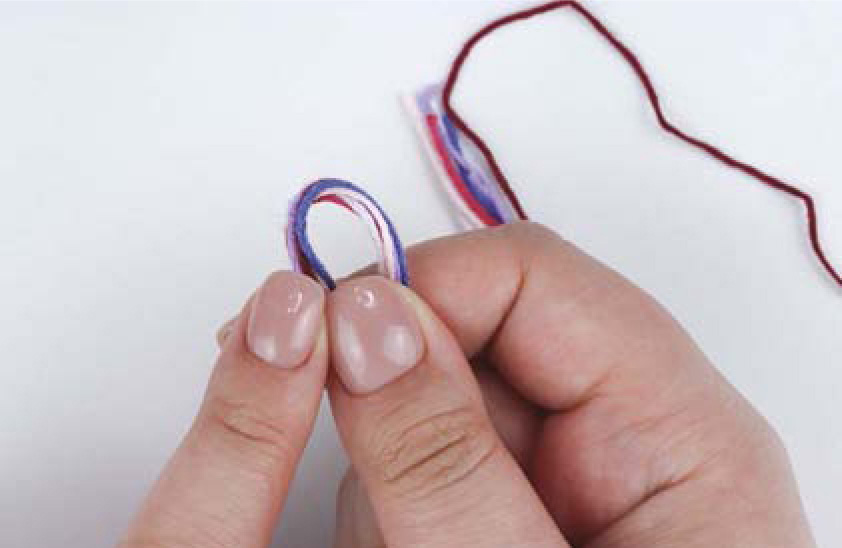
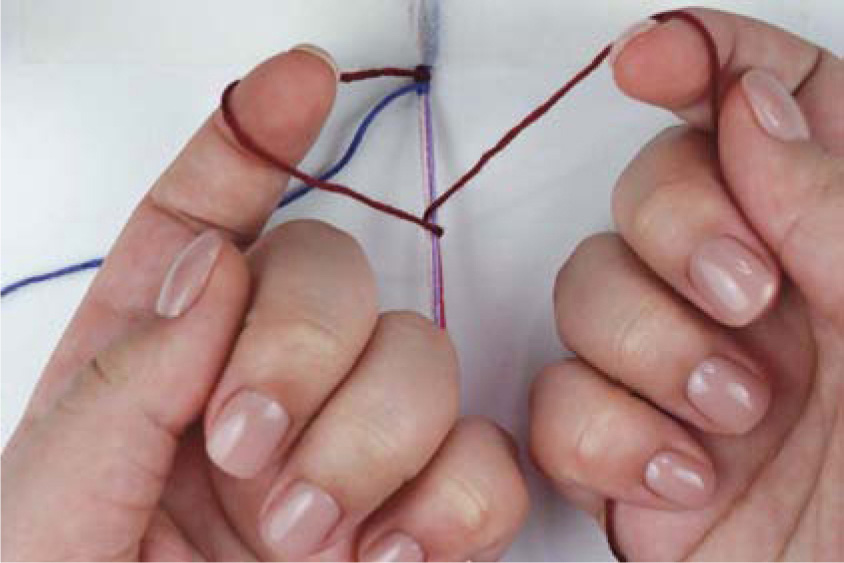
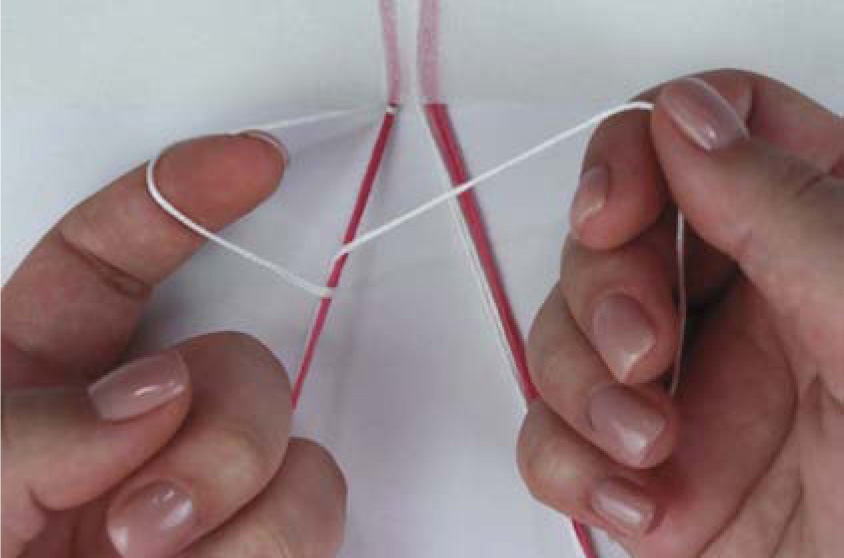
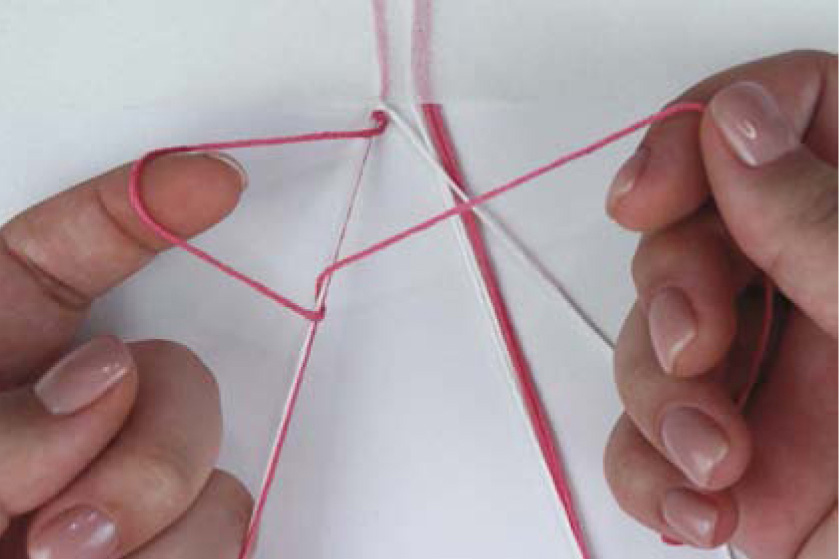
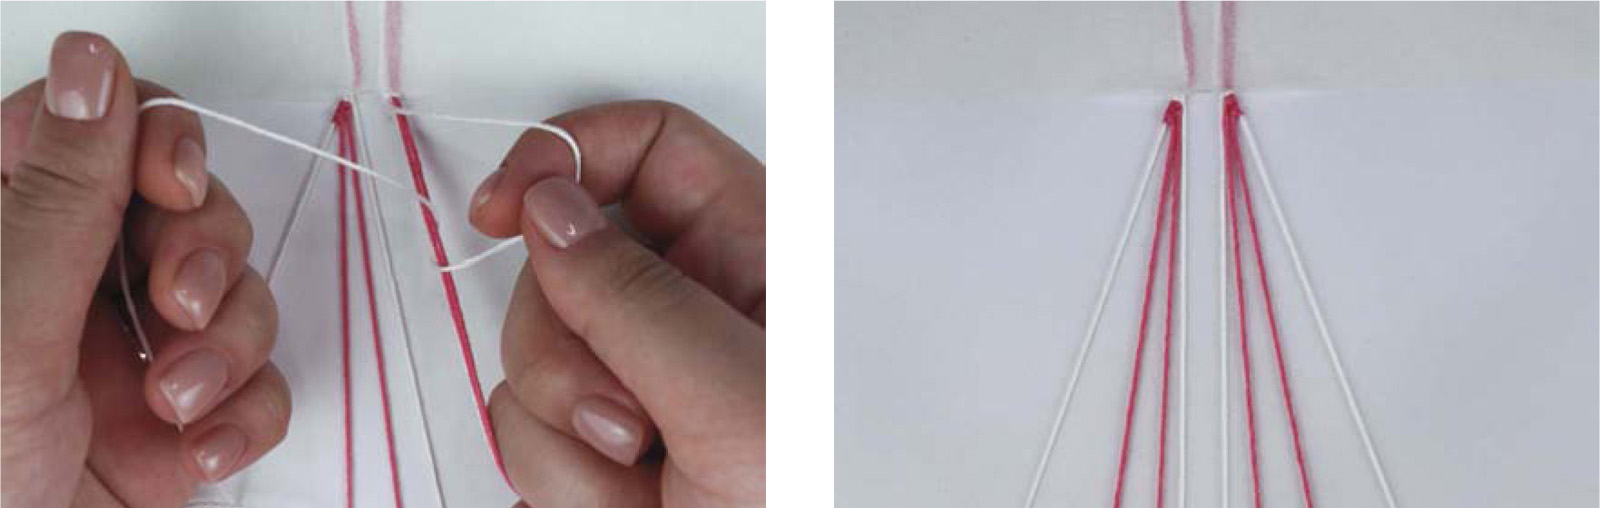
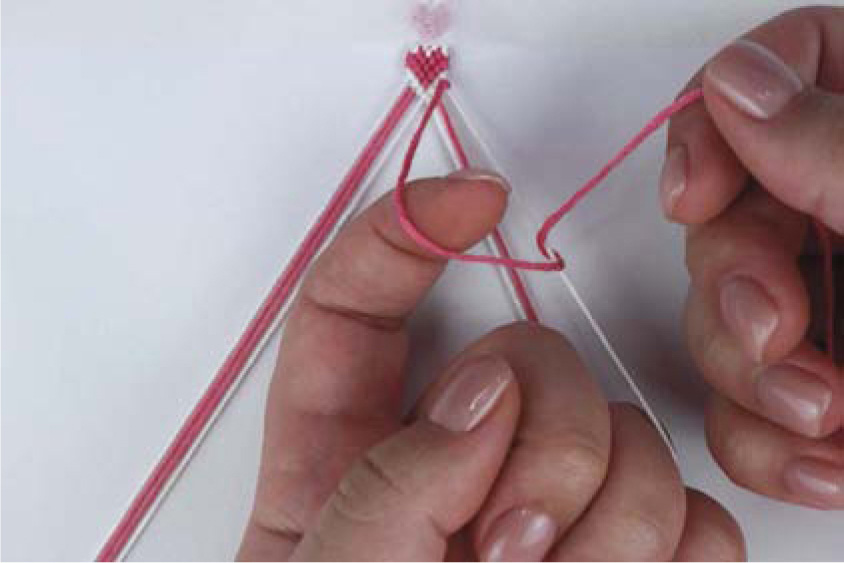
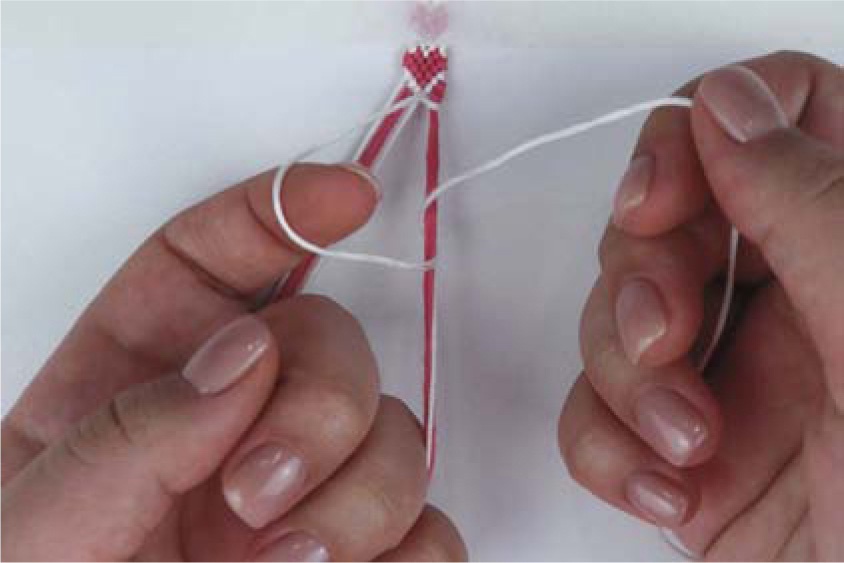
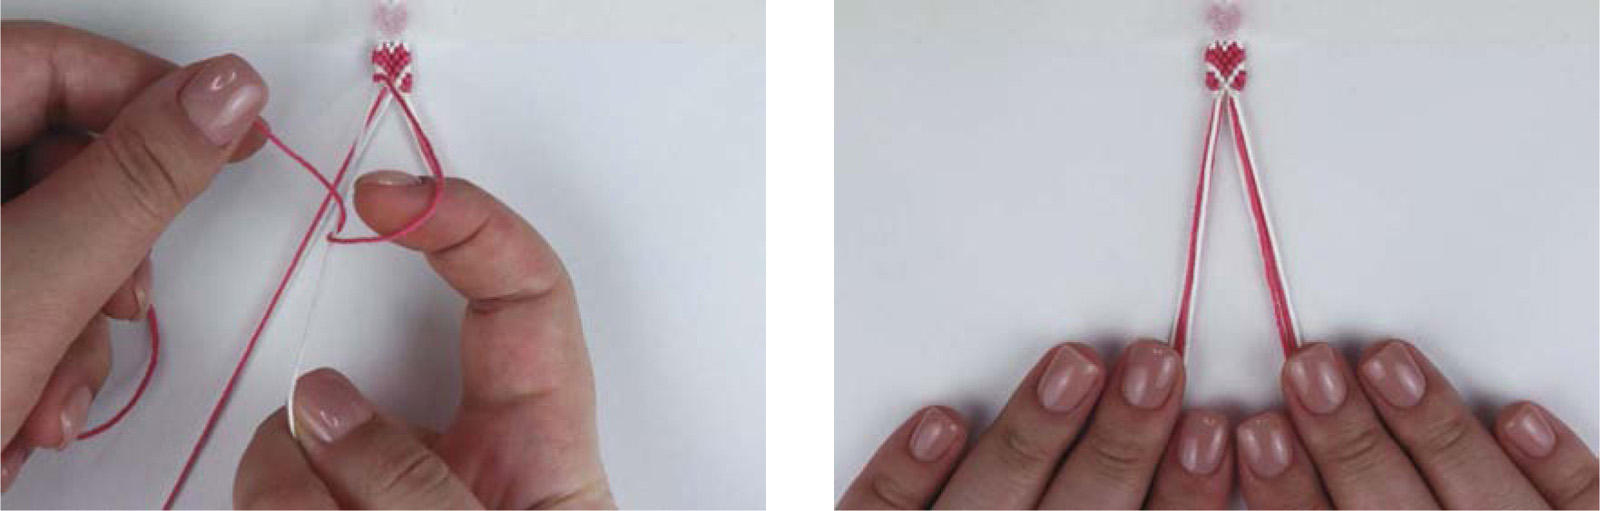
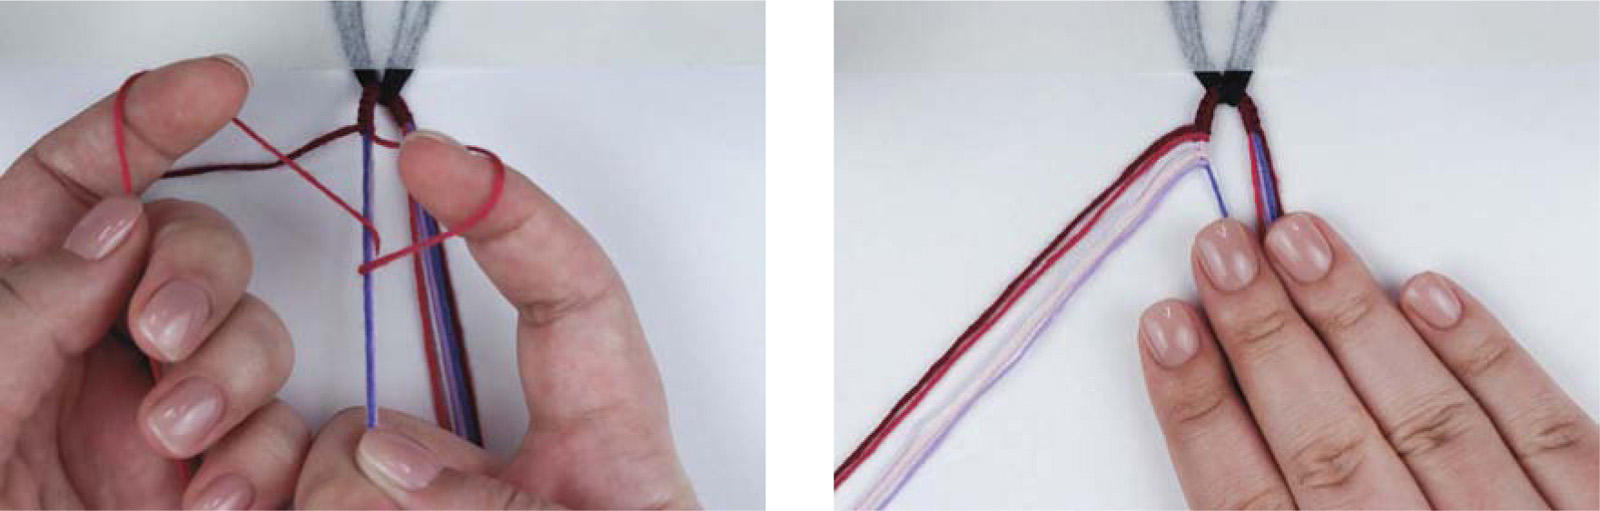
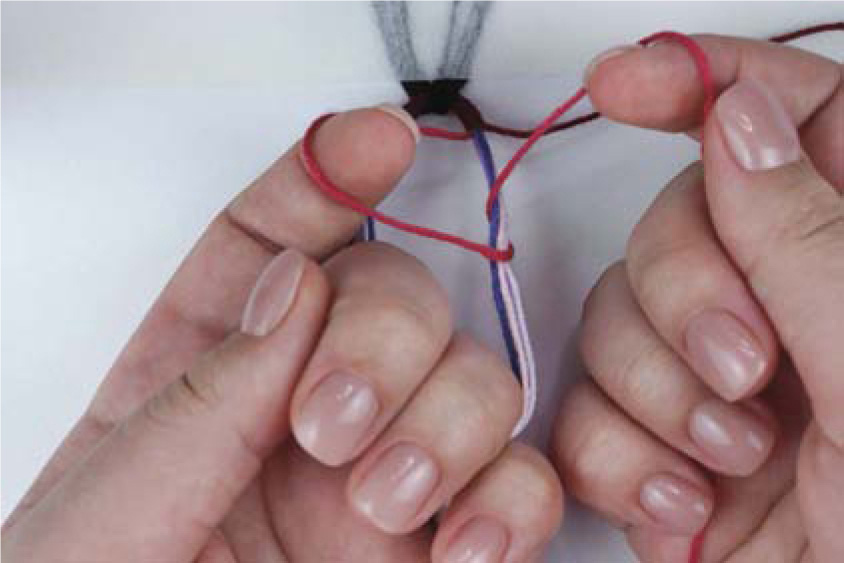
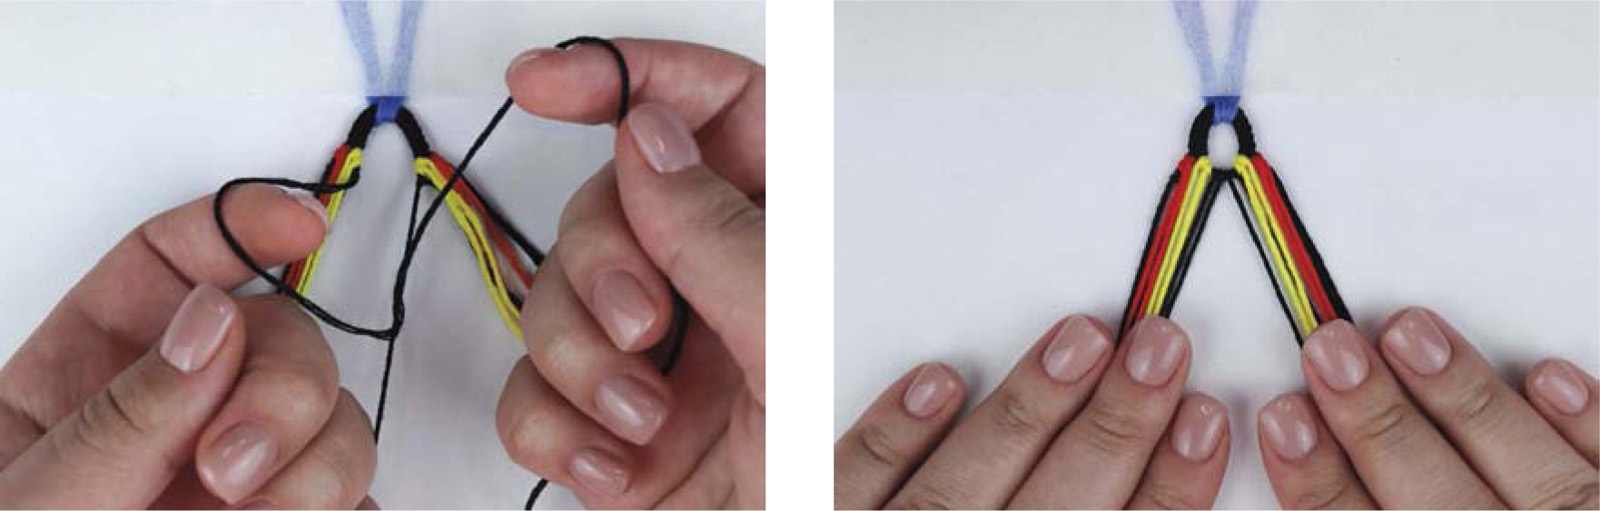
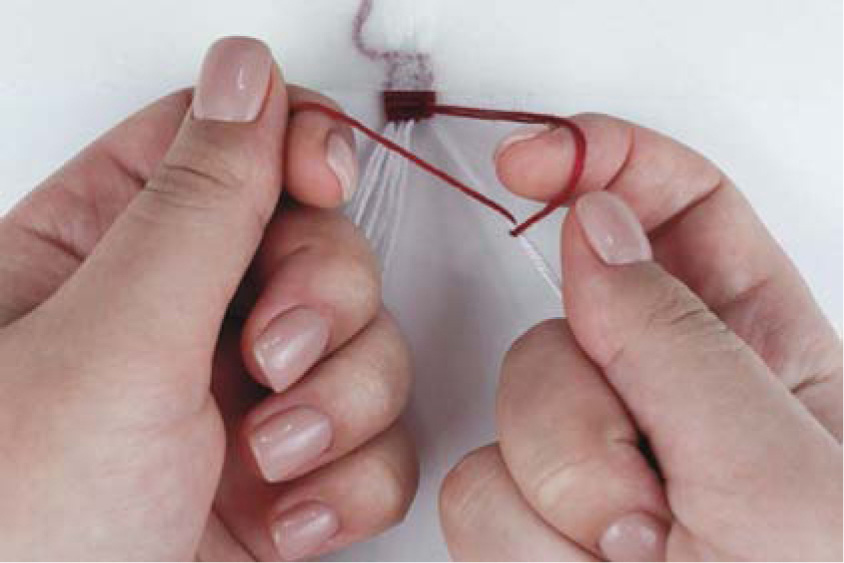
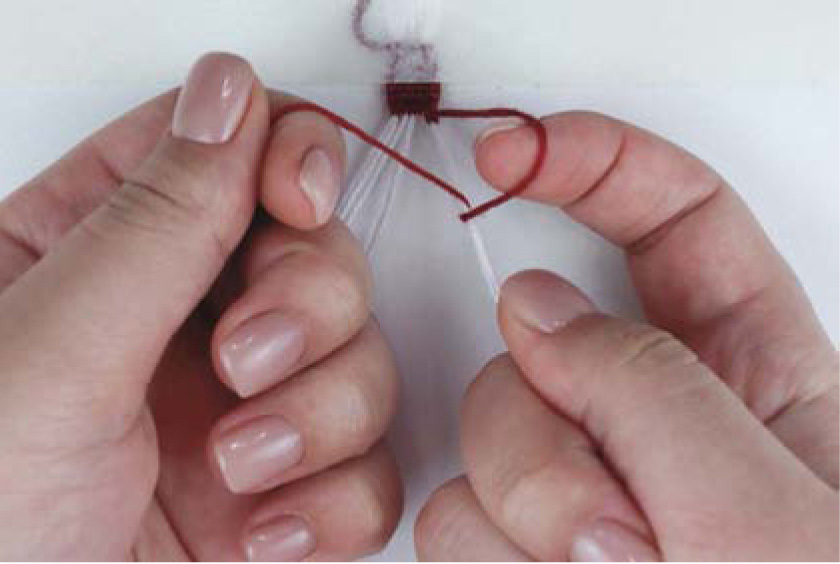
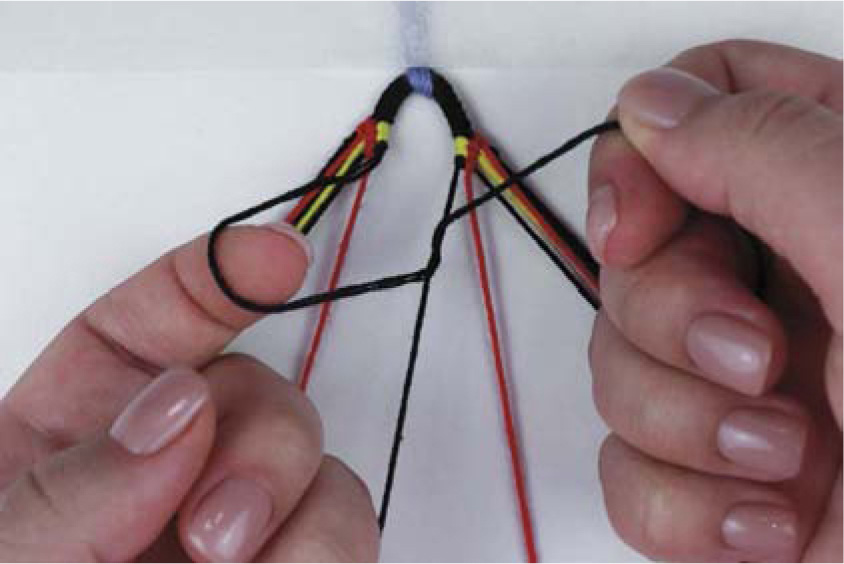
- 1.Once you have decided on your pairs, fold both strings in half and link them together at the fold, as shown in this picture.
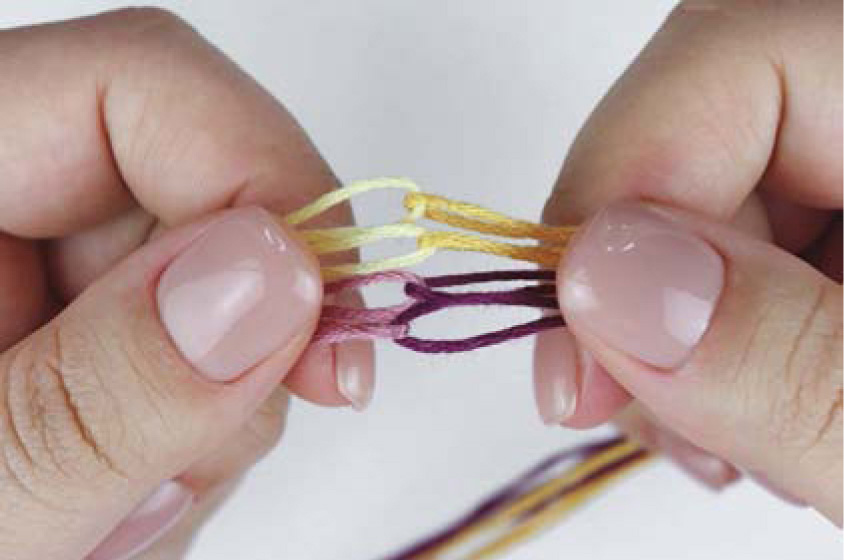
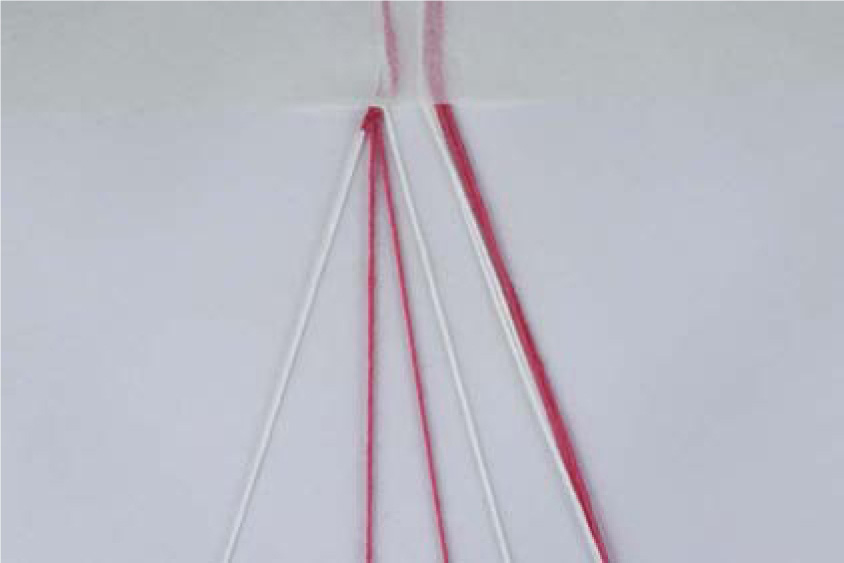
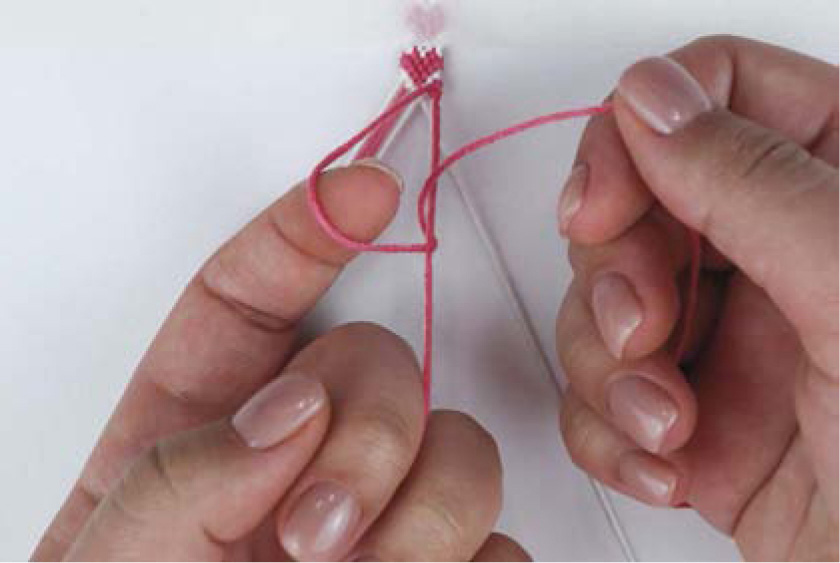
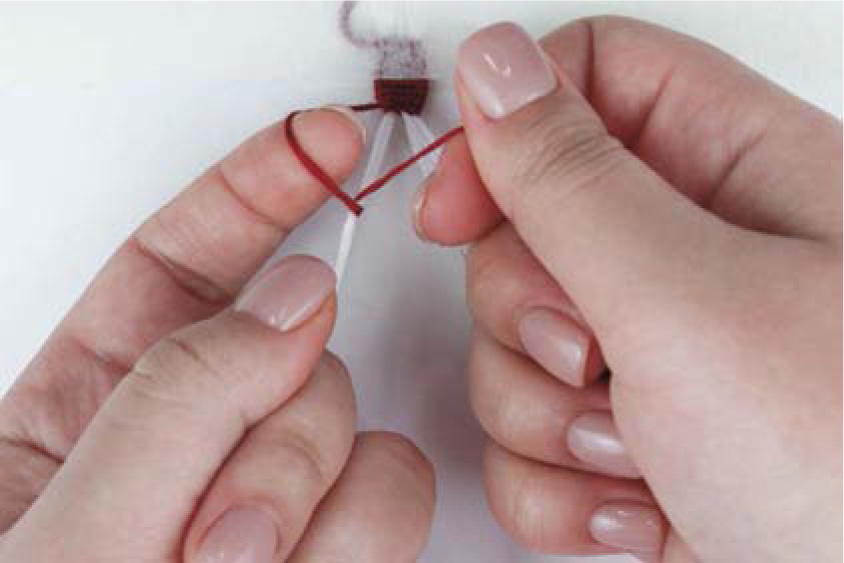
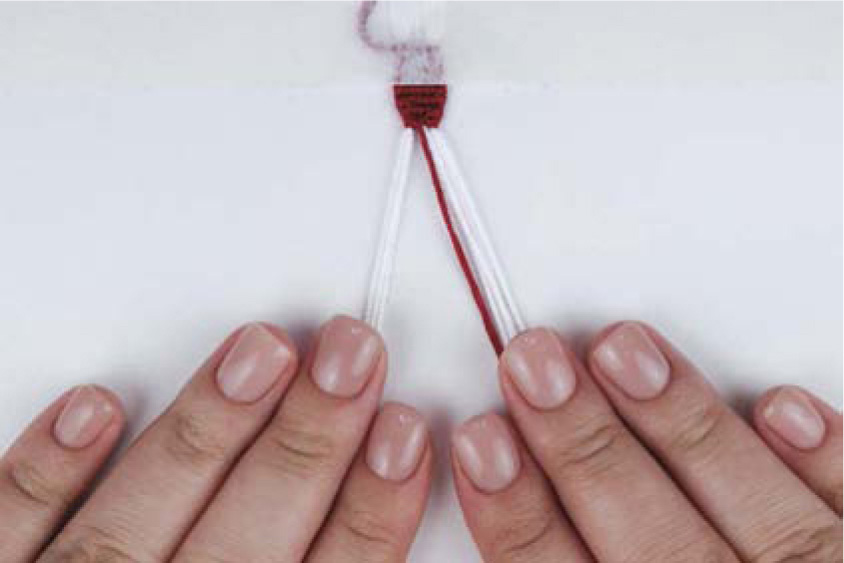
- 2.Repeat this step for any pair of strings that needs balancing. These linked pairs of strings can now be folded again at the link and can be placed together with the rest of the strings to create a loop. Make sure that when you are folding these new linked pairs you are placing the colors on the correct sides according to your pattern.
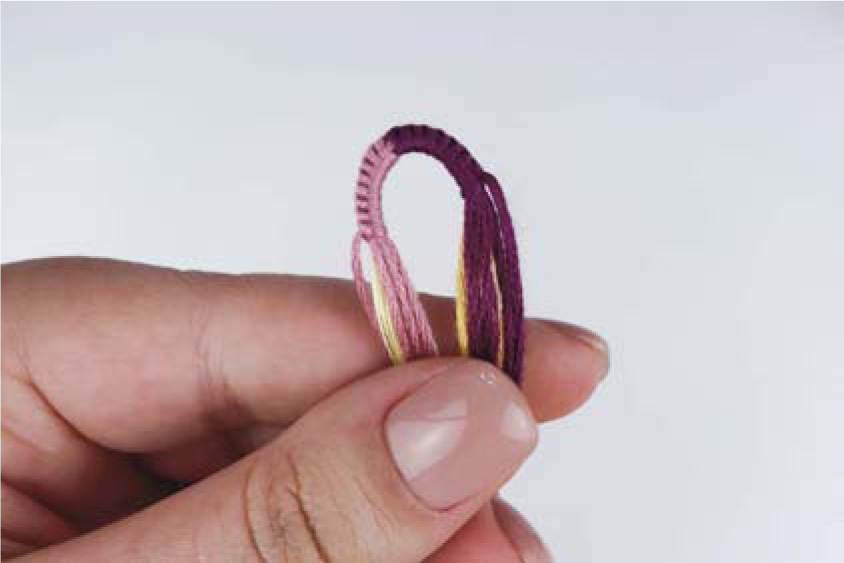
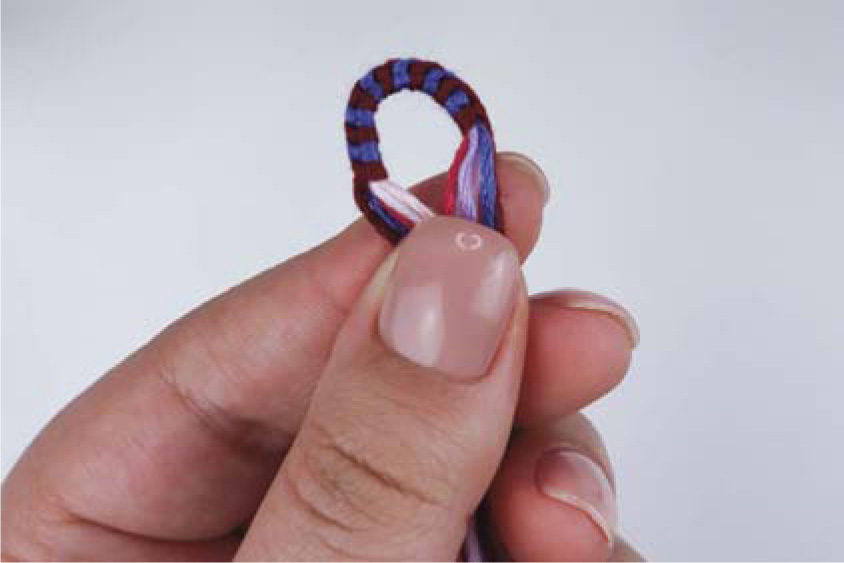
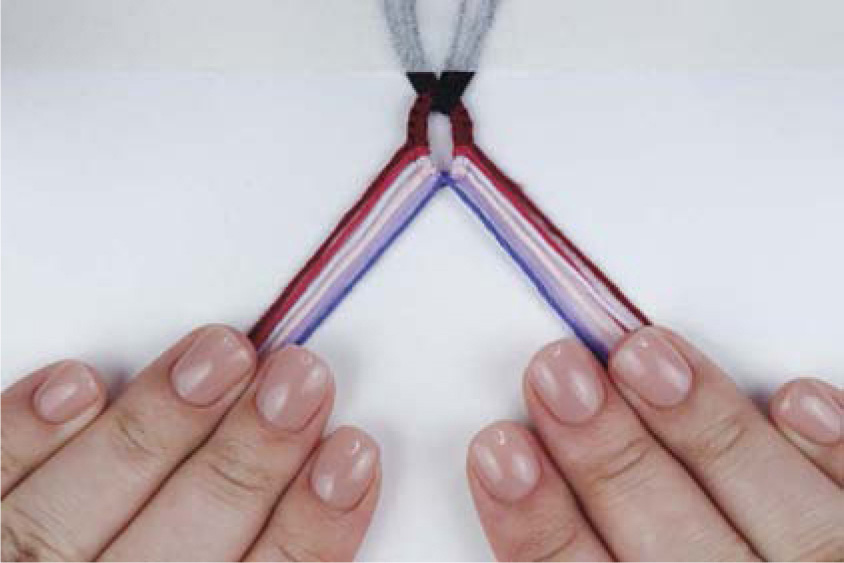
- 3.Once all of your strings are in their correct positions, you can proceed with making your loop as normal. However, if all of your strings are paired, as in my case, you’ll have to make half of your loop as normal on one side, flip it, and do the other half of the loop as normal on the other side. This results in a beautiful split-colored loop.
Removal Loop
The removal loop is useful for patterns in which you have an odd number of strings per color. In combination with the pairing loop, these techniques cover almost all possible patterns, meaning you can create a loop for any pattern you want if you are willing to go to these additional lengths.
The idea of the removal loop technique is that for the color you need an odd number of strings for, you fold the string anyway, creating two strings. However, you then hide and/or cut off the extra end, leaving just one end to be used within the bracelet. Make sure the long end is on the correct side of the loop for you to make your bracelet according to your pattern.
I recommend making the extra end that you will cut off rather short as you don’t want to waste string. There are also different ways to hide this extra end. The most common way is to simply pull the extra end back while making the first few rows of the bracelet and then cut it off after. Alternatively, you could cut the end but still leave a bit and glue it to the back of your bracelet to keep it secure.

Another way is to wait until the loop has been created and then pull on the long end of the string that you want to keep until the extra end that you want hidden is lost under the loop itself.
Whichever way you choose to hide your extra end, the result leaves you with an odd number of strings per color to start knotting your bracelet.
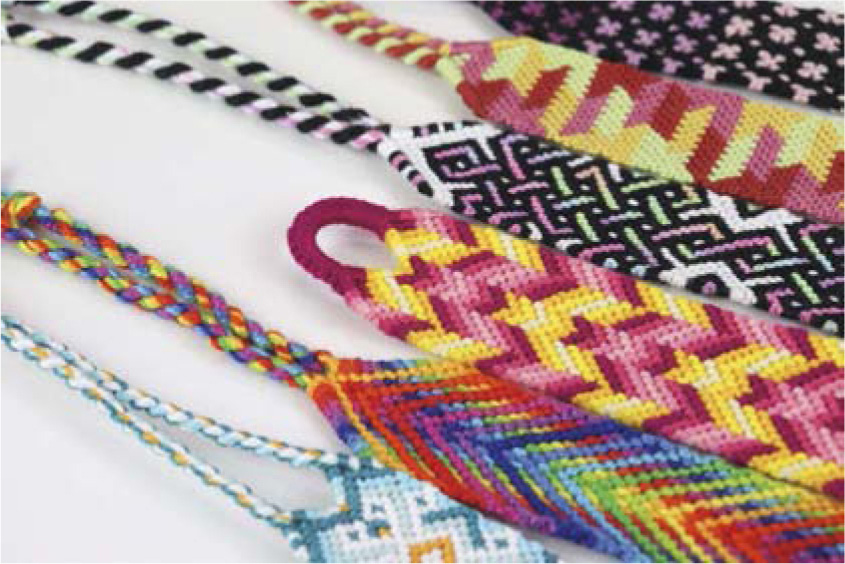
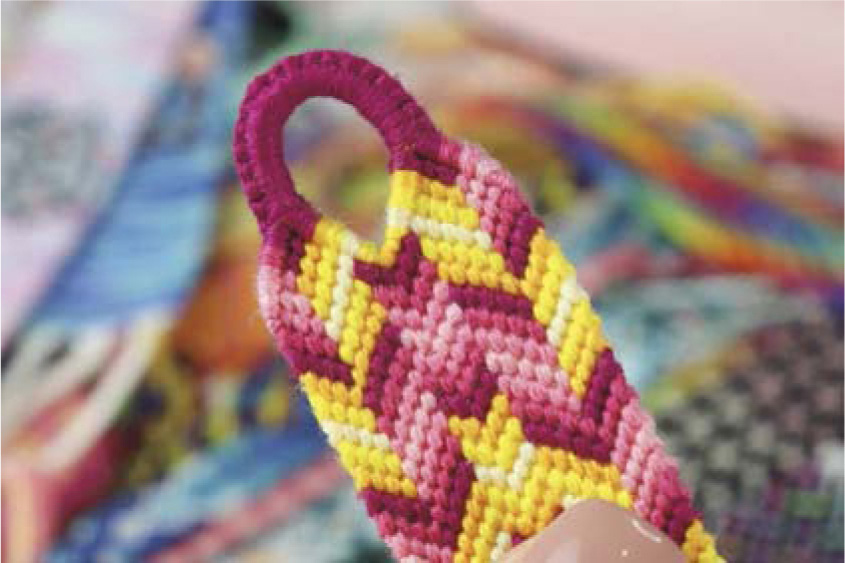
TRIANGLE ENDS
I love triangle ends (sometimes called shaped starts) on friendship bracelets. The triangle end is my most-used end for finishing my bracelets and, along with the basic loop, is another favorite for beginning my bracelets. In this section I will teach you how to create triangle beginnings and ends as well as how to decide at what spot in the pattern you would like to create them.
Whichever type of triangle ends you decide to make, be sure to always leave enough string coming off of it so that after your triangle end has been created you will have enough string left to create your tie of choice.
TRIANGLE ENDS FOR NORMAL PATTERNS
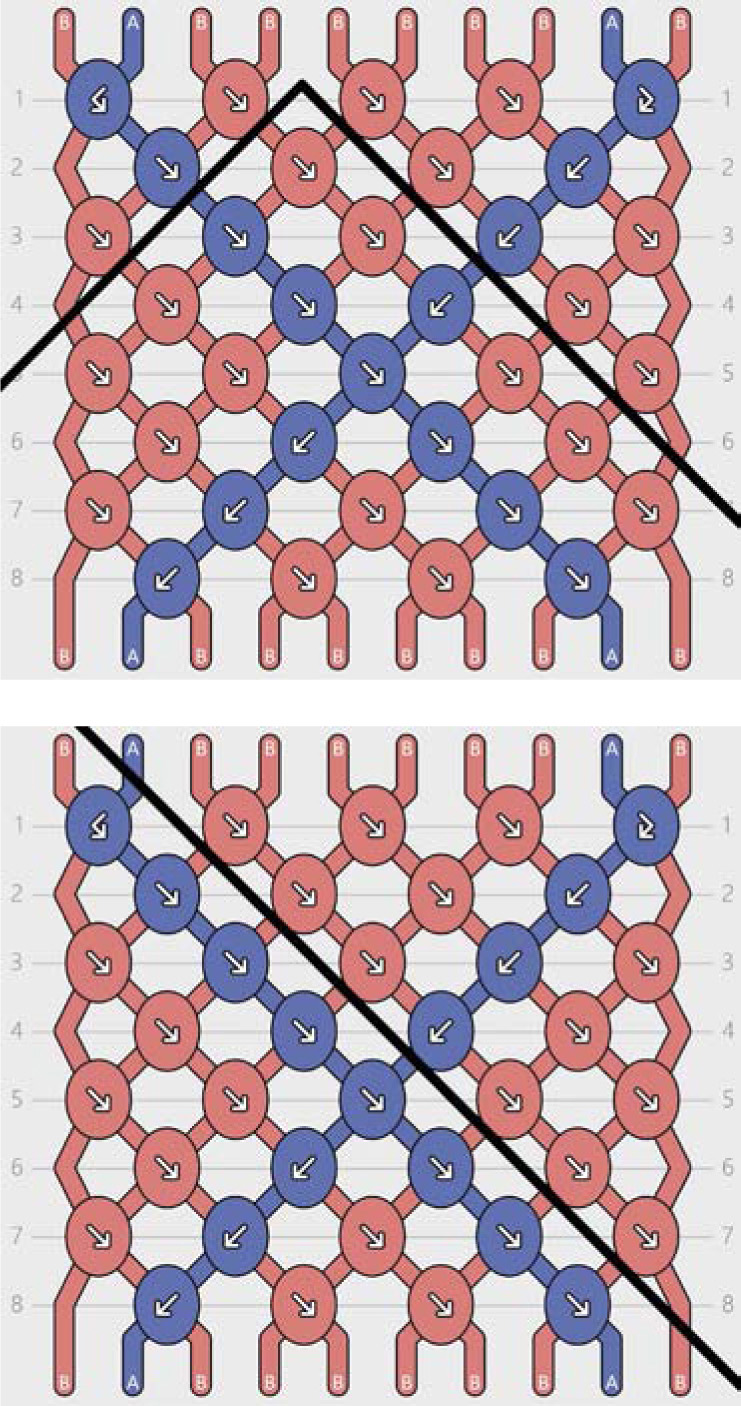
The structure of normal patterns is perfect for triangle ends since it is diagonal. This type of knot structure makes it easy to draw diagonal lines through the pattern to determine a placement for your triangle end.
Placement
There is never a right or wrong placement for any triangle end in any pattern. Placement is entirely subjective and depends on both the pattern itself and what you are trying to achieve with the shaped end.
I prefer to use my triangle ends to complement the design of the pattern itself. If a pattern has a triangle or diamond shape within it, I will most likely place my triangle end at that point to complement the design.
Unfortunately, not all patterns have a clear point for a triangle start. Most people gravitate toward having the point of the triangle end at the center of the pattern. However, there is no rule to say this always has to be the case. You can choose any point in the pattern to be the tip of your triangle end. Your triangle does not have to be symmetrical, and one side can be a little or even significantly longer than the other.
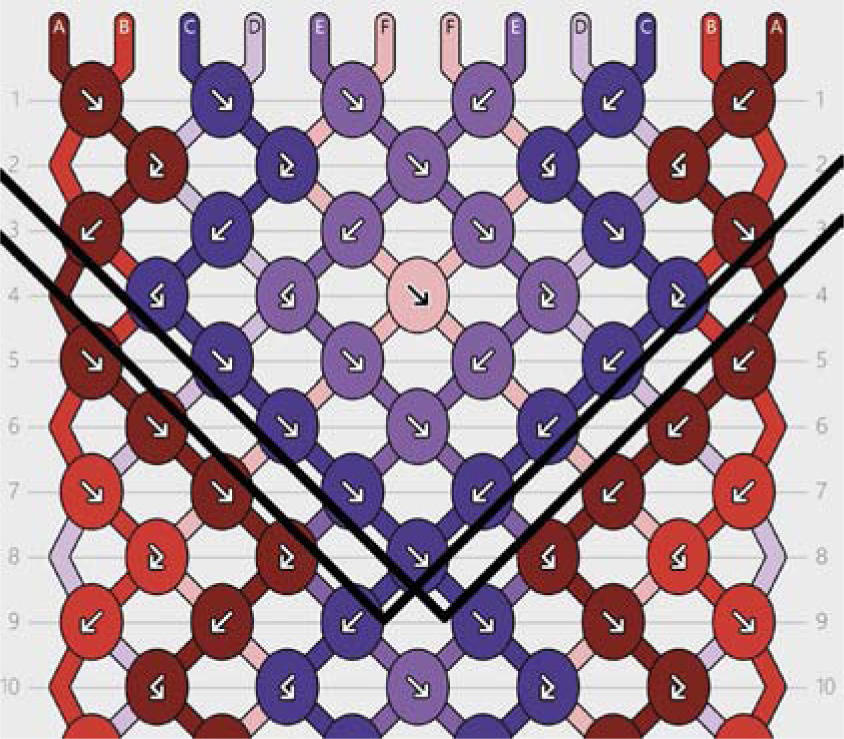
Your triangle end can also be inverted, in the shape of a V. This is how you can create what is known as a teardrop loop. This type of loop is explained later in this chapter. When I make teardrop loops I also try to find points within the pattern that naturally form a V shape so that I can use the shape of the loop to complement the design, but, this is not always possible.

The most common type of teardrop loop will have the tip of the loop at the center of the pattern. However, as with regular triangle ends, there is no rule to say this is a requirement, and your teardrop loop can also have one edge longer than the other. This is a matter of personal preference.
When making two triangle ends after a loop, which is my favorite way to start a bracelet, the shape of the start resembles the letter M. As with other types of triangle ends, I try to use this type of start to complement the design of the pattern, so I look for areas within it that naturally form the M shape. Oftentimes the result is that the edges of the triangle ends are uneven, with the outer edges often longer than the inner edges.
Triangle ends look the same at either end of a friendship bracelet. However, during the knotting process, different methods are used to create each end. At the start, all your strings are together, and you need to bring them out one by one to widen the bracelet. At the end, all your strings are spread out and you need to bring them together to a point to finish your bracelet. Let’s discuss both techniques.REGULAR TRIANGLE ENDS
START
Triangle ends for alpha patterns look the same on either end of the bracelet. However, as with triangle ends for normal patterns, different techniques are used at the start and at the end of the bracelet. Let’s discuss both techniques.TRIANGLE END
TEARDROP LOOP

TRIANGLE ENDS AFTER A LOOP
Triangle Ends for Alpha Patterns
REGULAR TRIANGLE ENDS
START
Narrowing down your bracelet and bringing your strings to a point in an alpha is the same as doing a triangle end at the start of the bracelet, but in reverse.
END
TRIANGLE ENDS AFTER A LOOP
Creating triangle ends after a loop in an alpha pattern uses the same technique as creating regular triangle ends for alphas. The difference is that you need to create two triangle ends after a loop and therefore you need two leading strings. The easiest solution to this is to use the string you used to create the loop as a leading string on both the left and the right.
The direction in which you start knotting your triangle end is important since you want one leading string to end up at the edge of the bracelet when you run out of strings. This leading string will be used as the main leading string in your pattern, and the other leading string will end up in the center of the bracelet, making it easier to hide.
To figure out the direction in which you need to start making your triangle end, first separate your strings into two bundles the same way as was described in the regular alpha triangle ends section. Once you have done this, count the strings in a single bundle. If the number is odd, then the direction of your first row will match the direction of your last row. If the number is even, the direction of the last row will be opposite to that of the first row.
Make sure to start both of your triangle ends in such a way that one leading string ends up on the edge and the other ends up in the center.
Create your triangle ends as described in the previous section on both the left and right side of the loop.
Once you are done, grab the leading string that ended up in the middle and pull it back and off to the side. You can now connect the two triangle ends by taking the leading string that is on the edge and knotting it along all the base strings. If the leading string is on the left, you will make forward knots, and if it is on the right, you will make backward knots. At this point you are ready to start creating your pattern, and after making a few rows, you can either cut the extra leading string off from the back or glue it to the back of the bracelet to keep it secure.

Occasionally when I create triangle ends after a loop, I like to start making the bracelet itself without first connecting the two triangle ends together. Only when the strings within the bracelet reach the center of the pattern and I need to make knots onto the strings that need tying together do I actually tie them together. This means that once I do finally connect the two triangle ends, I can instantly go over that connection with additional knots from other strings to help make that connection stronger and reduce the likelihood of it coming undone.
TIES
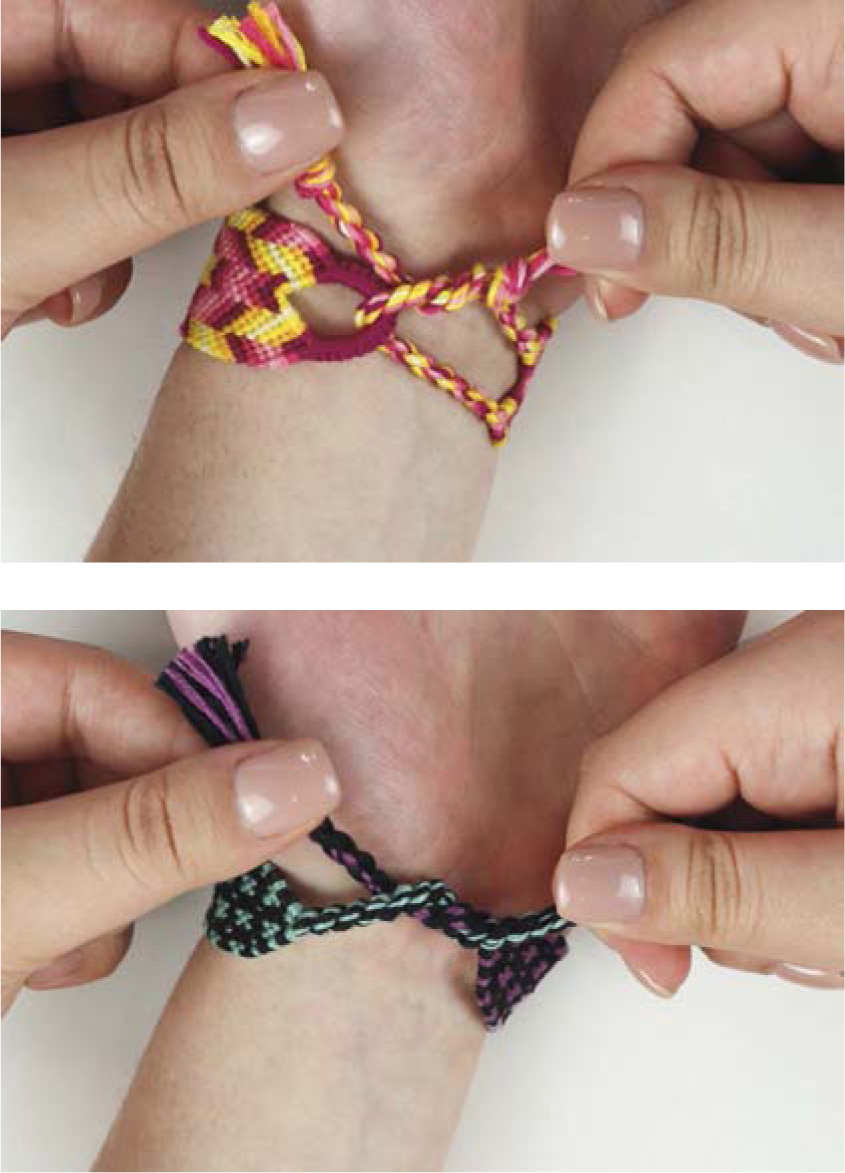
Ties are an important aspect of your bracelet both aesthetically and functionally. Ties are what you will use to secure a bracelet on a wrist. It is best to have at least two ties so that you can thread one through a loop and tie it together with the other one, or you could have one tie on each end of your bracelet and tie them together on a wrist.
As with everything else discussed in this chapter, there are many different ways to create ties for your bracelet. In this section I will explain how to make the two types of ties I use most commonly.
BRAIDED TIES
Braided ties in friendship bracelets use the same techniques as braids for hair, and thus, there are many options to choose from when creating these braids. Let’s look at the basic three-strand braid.
- 1.Start by separating your strings into three groups. To create a balanced braid, it is best that each group have the same or a similar number of strings. Begin by taking the group of strings on the left and placing it between the two other groups.
- 2.Next, grab the group of strings on the right and place it between the two other groups.
- 3.Continue alternating grabbing the left or right groups of strings and placing them between the other two groups until the braid reaches the length you desire. Once that length is reached, do an overhand knot at the end of the braid, and cut off the excess strings. Your braid is complete!
TWISTED TIES
When it comes to ending my bracelets, twisted ties are my personal go-to. They are one of the quickest and simplest ties to make and they look great with every pattern.
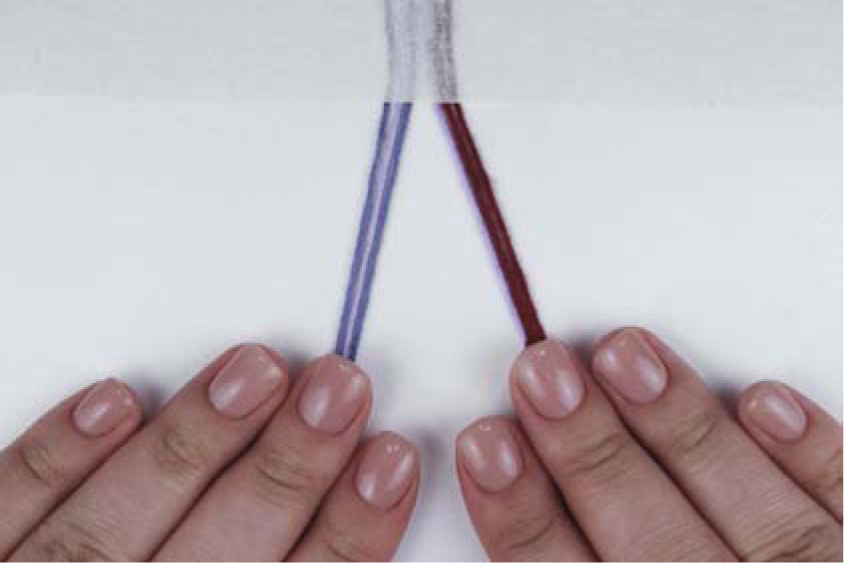
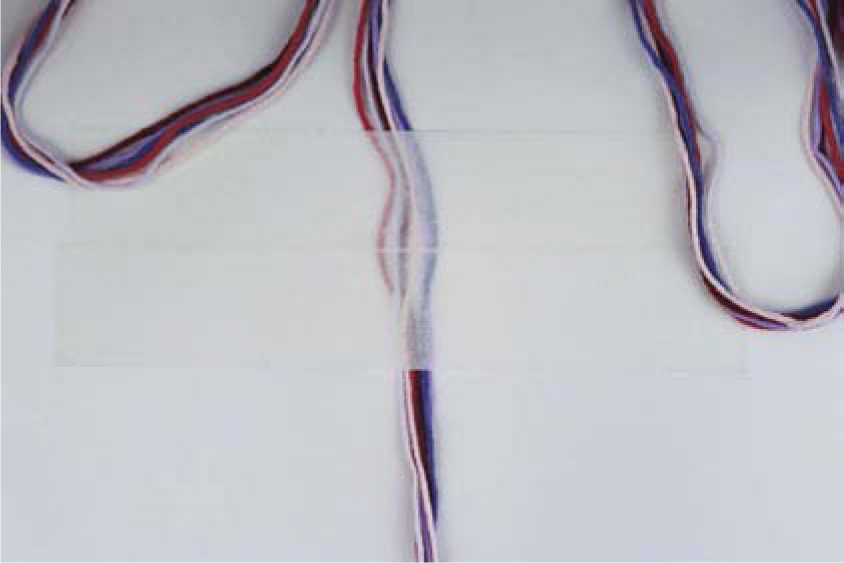
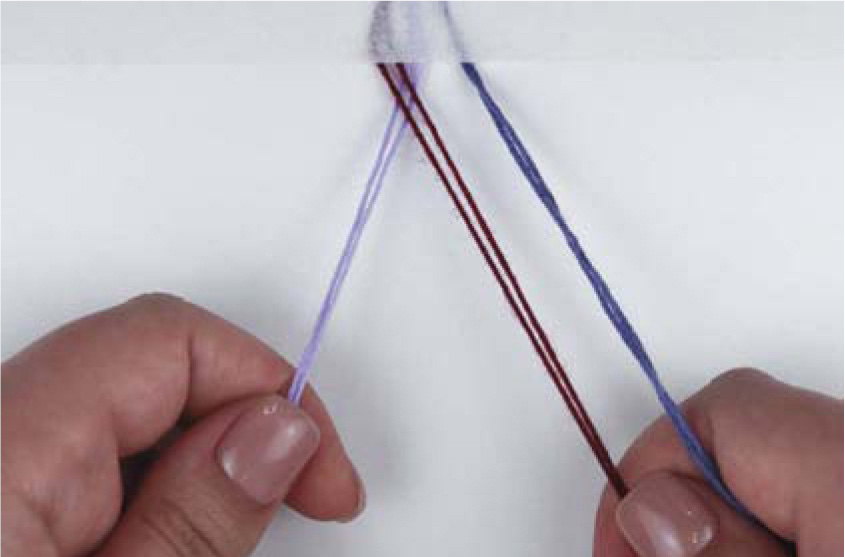
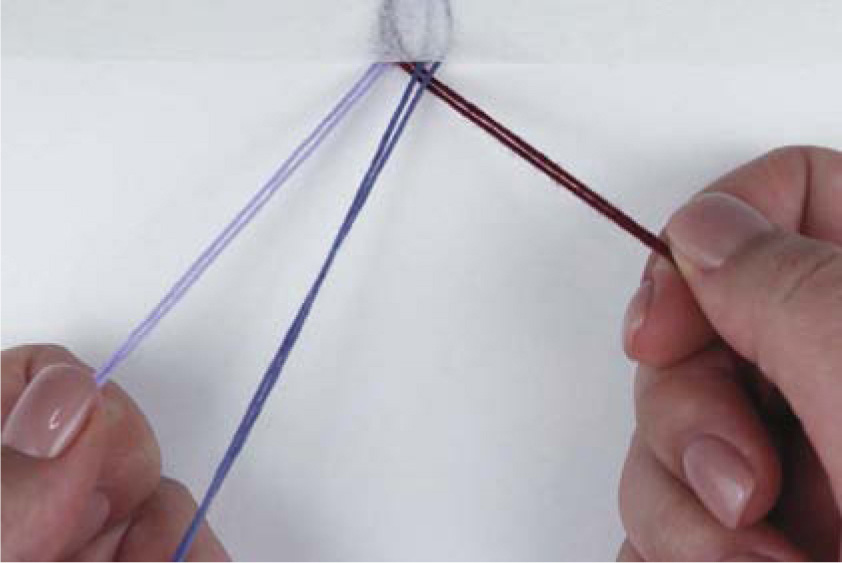
- 1.Start by separating your strings into two groups. I like to separate my strings by color when I can so I can complement the bracelet itself with the ties. The groups don’t have to be even but, of course, that helps if you want to create an even tie.
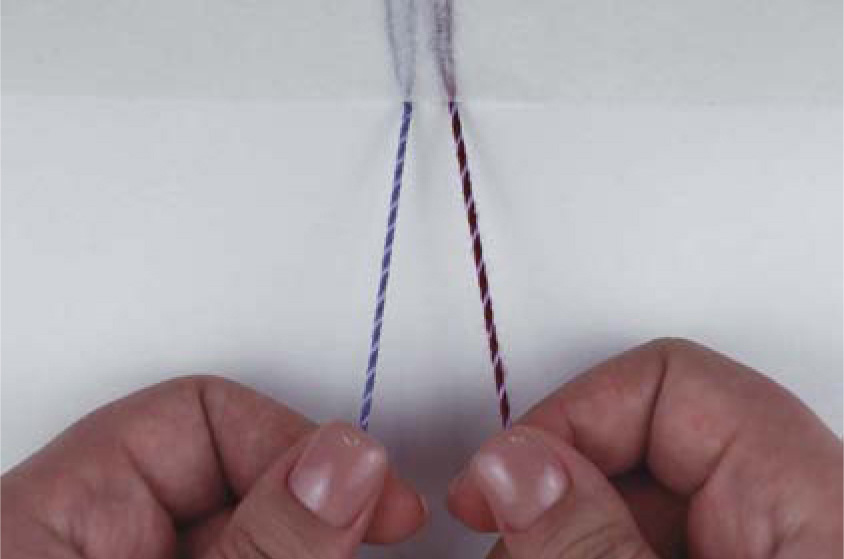
- 2.Twist both groups of string as much as you can in the same direction and make sure to keep holding the strings so they don’t untwist.
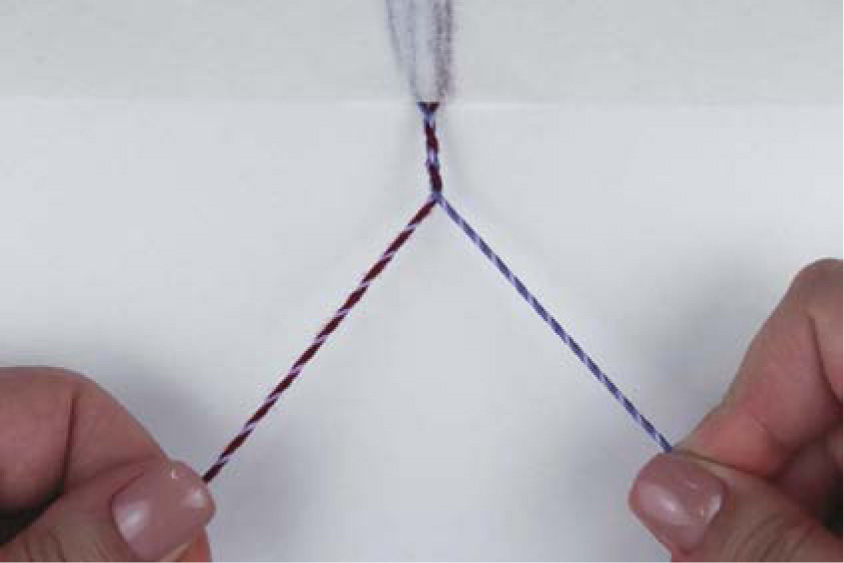
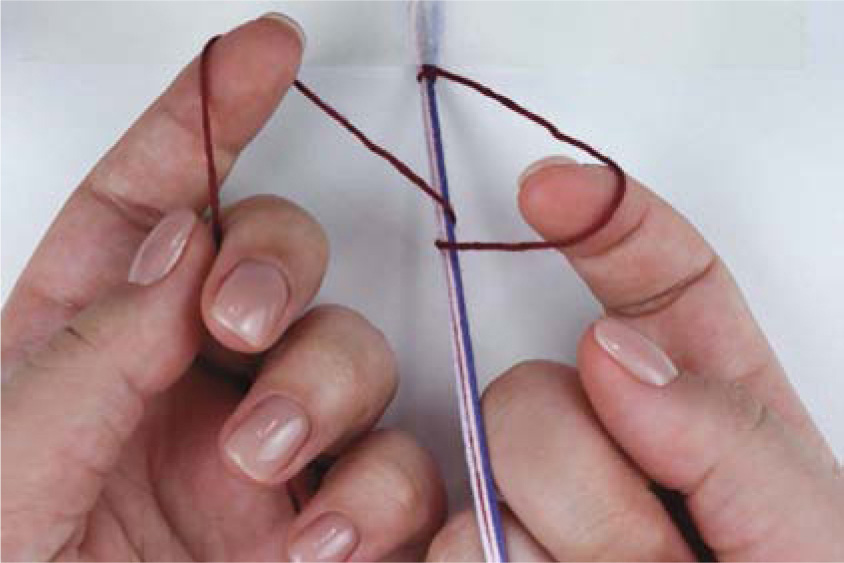
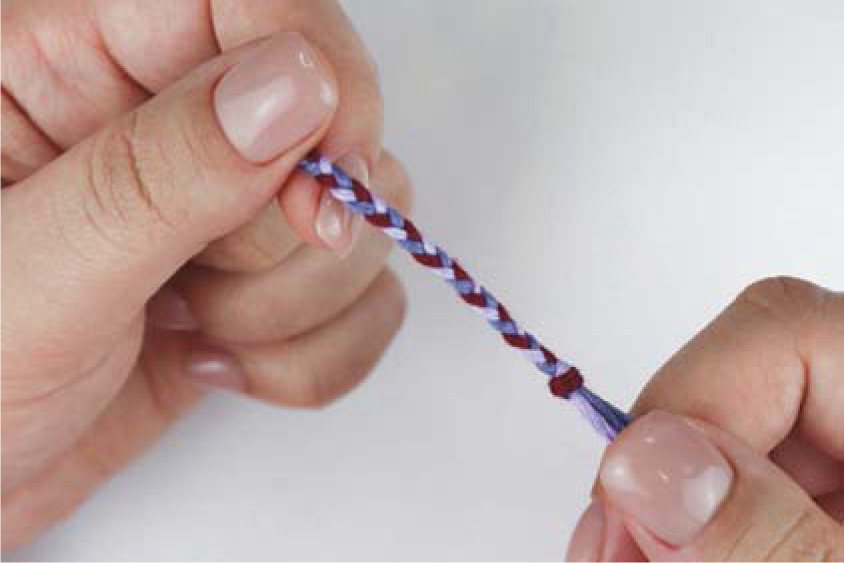
- 3.After you have twisted both groups of string, start twisting them onto each other in the direction opposite to the direction you twisted them in individually. So, if you twisted the individual ties clockwise, you would twist them onto each other counterclockwise.
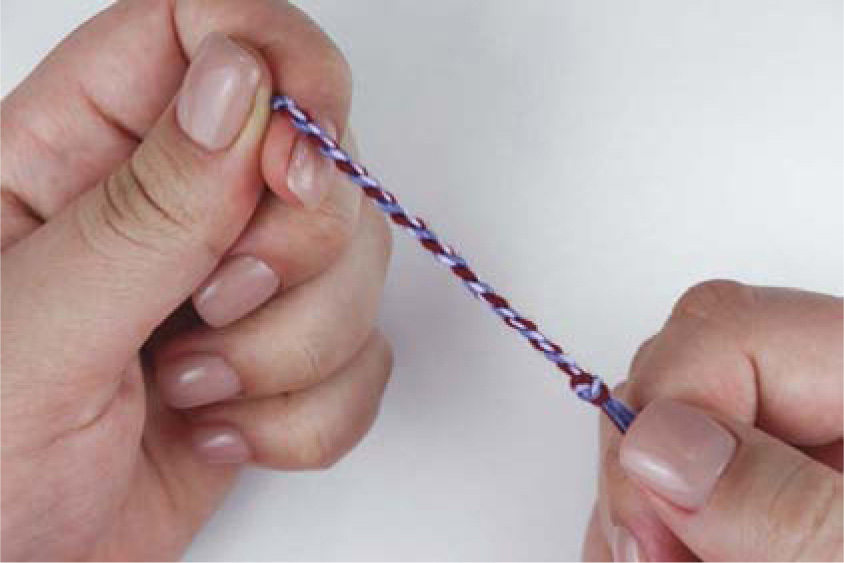
- 4.Once your tie has reached the length you desire, make an overhand knot at the end and cut off the excess string. Your tie is complete!