CHAPTER 11Embellishments
There are endless ways you can expand on your friendship bracelets. Various techniques, designs, and materials can take your bracelet making to another level.
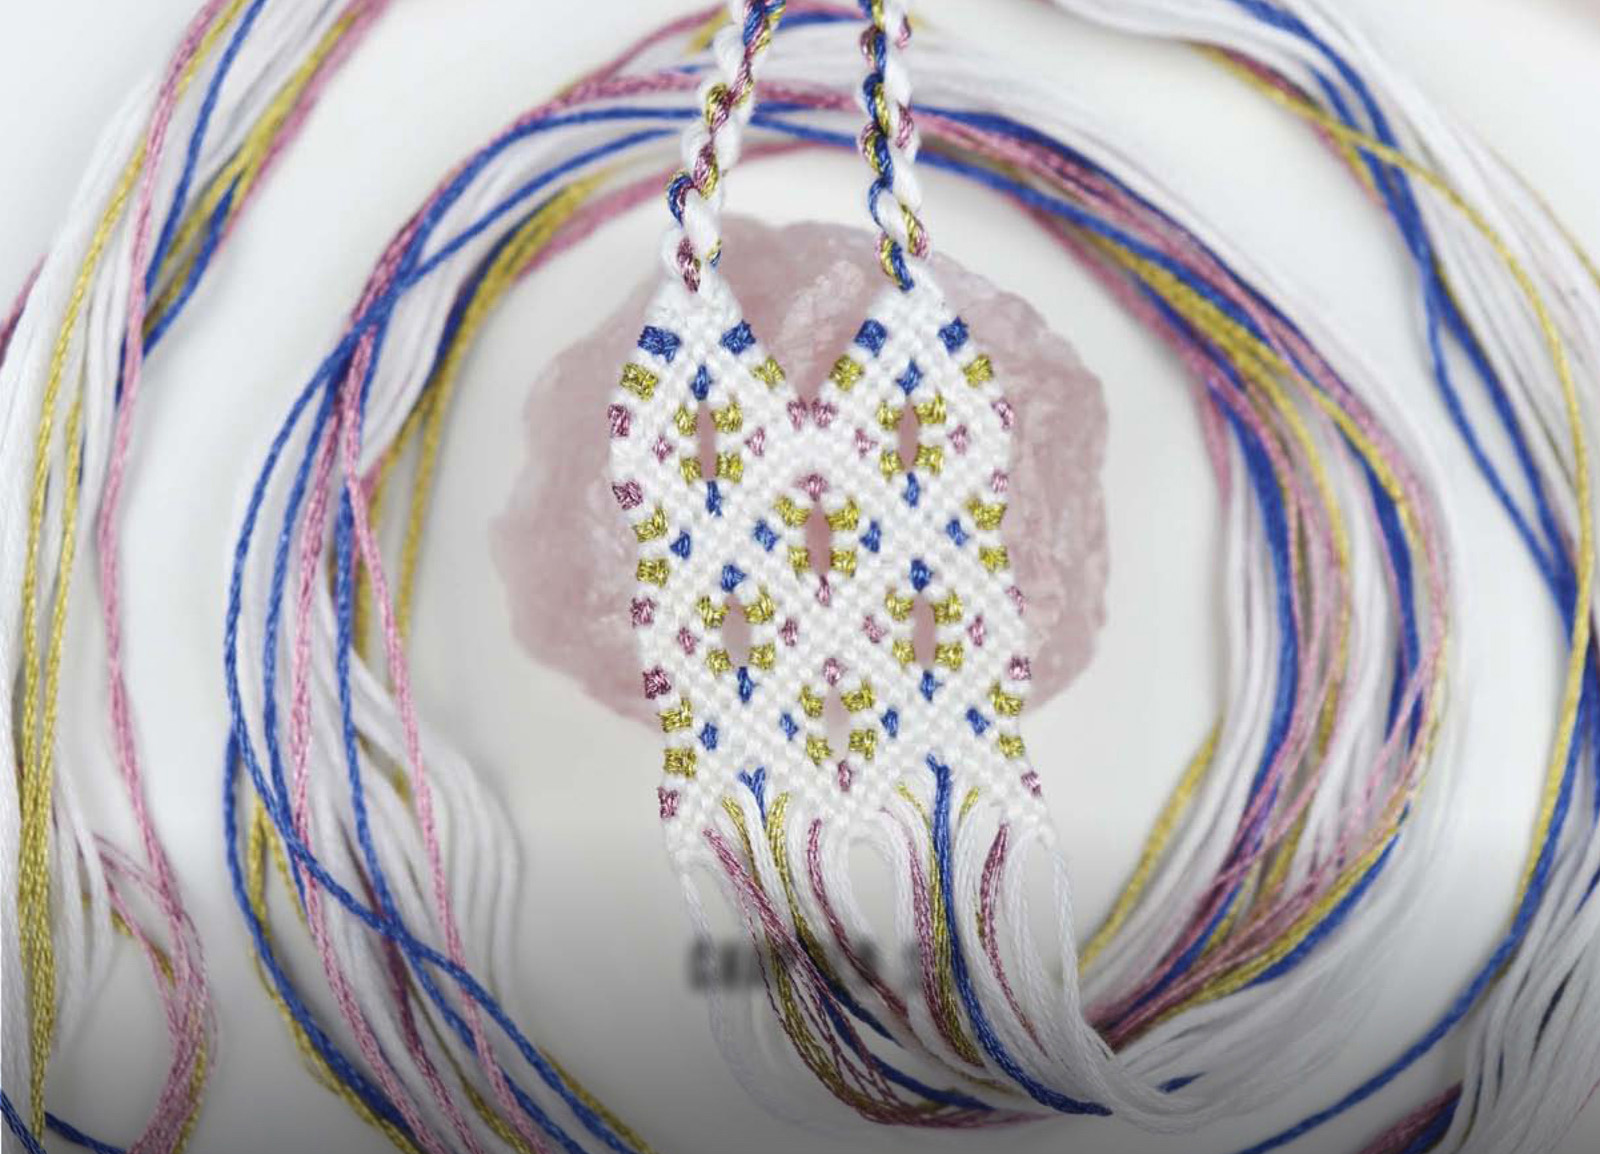
SHAPED BRACELETS
Shaped bracelets can be made from any pattern using what is essentially the triangle ends technique. Modifying the pattern to create a shaped bracelet can be a fun way to accentuate a part of the design or simply to make a bracelet stand out more.
NORMAL PATTERNS
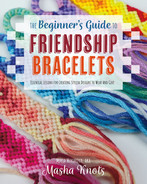
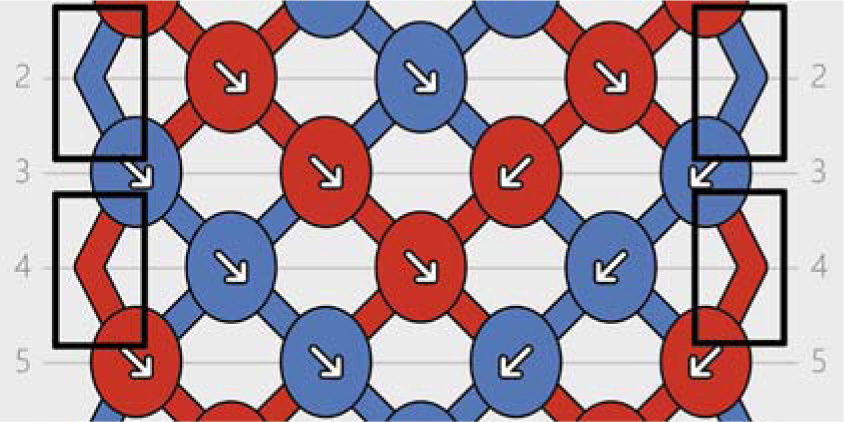
Choosing the placement of the shaped part of a bracelet is the same as choosing the placement for a regular triangle end. The shape is completely up to you. It can be symmetrical or lopsided, it can complement the natural shape of the pattern, or it can cut through at any place you like. The shape can cut through to the middle, or it could just be at the edges, or perhaps even in the center, creating a hole within the bracelet.
Once you have chosen a placement for your shape, I recommend you draw a line on your pattern to help you keep track. Creating the shape is identical to creating triangle ends. Where your shape widens, bring more strings into the bracelet like in a regular triangle ends start, explained on page 104. Where your shape contracts, remove strings from your bracelet by doing a triangle end, explained on page 106.
ALPHA PATTERNS
Choosing the placement of the shaped part of an alpha bracelet is as simple as choosing the parts of the pattern you wish to leave in and ignoring the rest.
The technique for creating a shaped alpha bracelet is also the same as the technique for creating triangle ends in alpha bracelets. Choose the number of base strings based on the width of the widest part of your bracelet.
Figure out the width of your first row and subtract two. Leave the resulting number of individual base strings for the first row.
After that, count how many more base strings you will later need on the left and on the right sides of the pattern and leave that number of strings on each side in a bundle.
To widen your bracelet, follow the same steps as you would when starting your bracelet with a triangle end, explained on page 104. To make your bracelet narrower, follow the same steps as you would to finish your bracelet with a triangle end, explained on page 106. Make the rest of the pattern as normal.
SWITCHING COLORS IN A NORMAL PATTERN
As bracelet makers, we tend to accept switching colors in an alpha bracelet as a given since that is the main feature of such a bracelet. However, we tend to forget that the same technique can be used in normal bracelets as well. Switching colors within your normal bracelet can help you create really beautiful designs and can add variety to your bracelet making.

The process of switching colors in a normal pattern is identical to the process of replacing a broken or short string, explained on page 120. The only difference is that instead of replacing a string with another string of the same color, you would bring in a string of a different color.
I find switching strings in simple, repetitive, and perhaps even in two-toned patterns to be the most interesting. This technique takes what is otherwise a rather simple pattern and brings it to another level by introducing different colors. I also like to play with color gradients in such patterns, creating an illusion of it being all one color-changing string.
DOUBLING OR HALVING NORMAL PATTERNS
Every once in a while, you will stumble across a pattern that you really love but for one reason or another it doesn’t fit the dimensions of the bracelet you are aiming to create. Modifying a pattern to make it wider or narrower can be the solution for this problem in many cases.
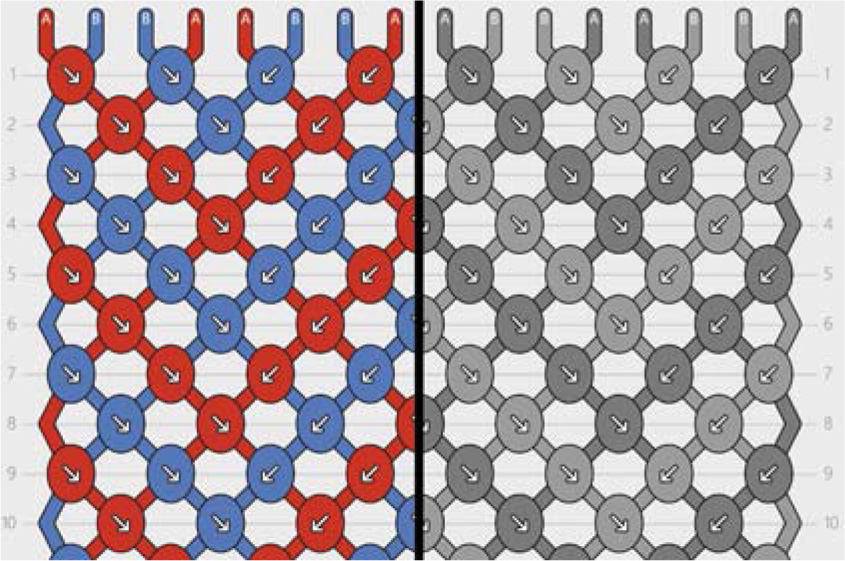
DOUBLING A PATTERN
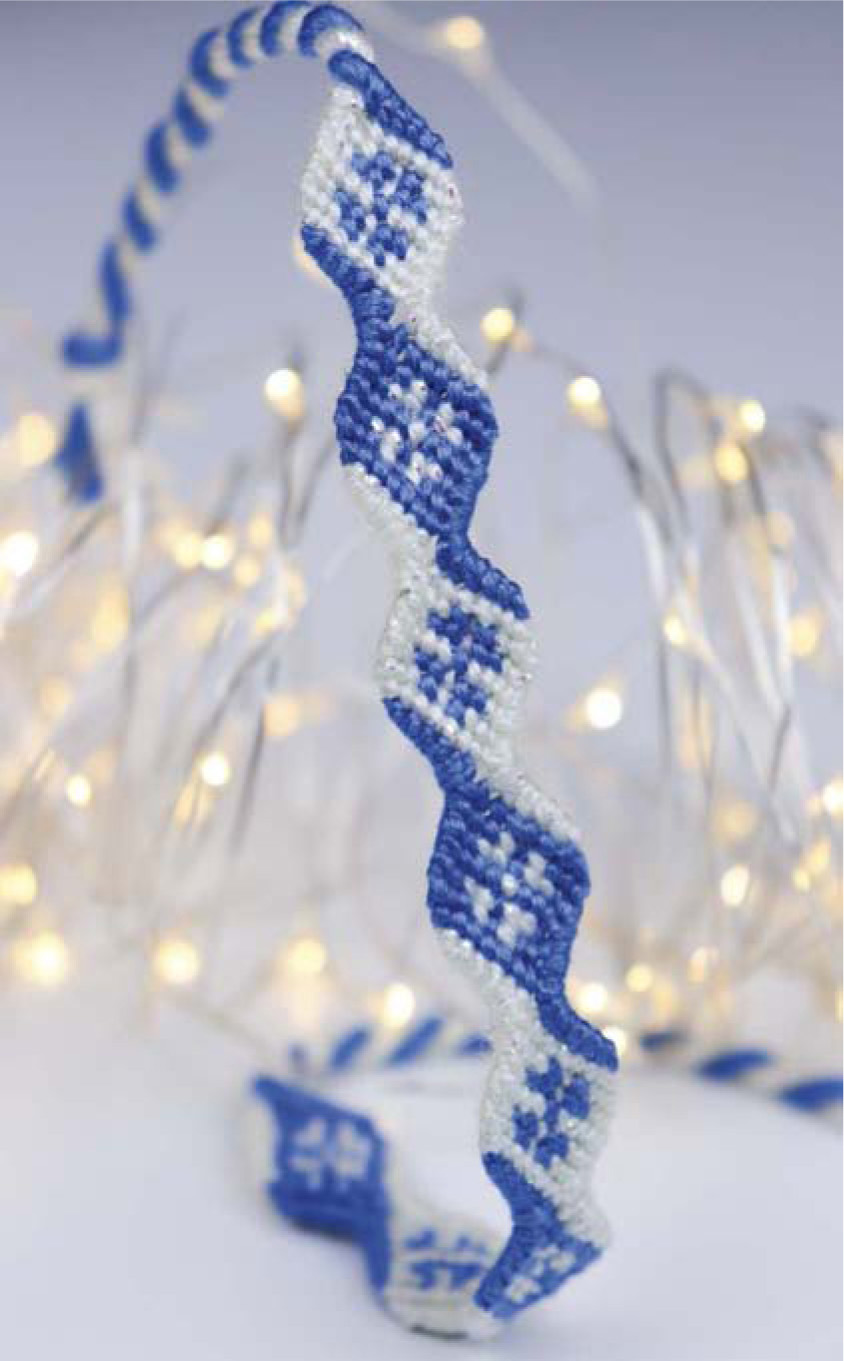
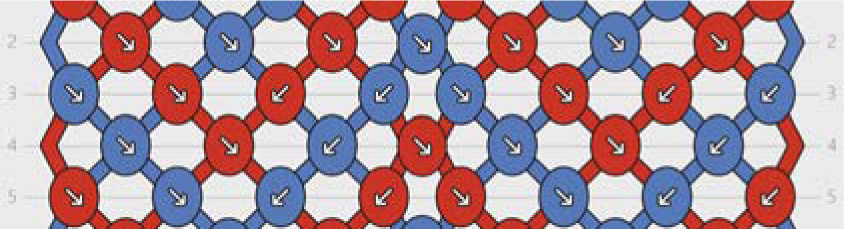
You can double the width of any pattern, but it is easier to do on some patterns than others. The easiest pattern to double is one with an even number of strings and one in which the strings that stick out on every even row are the same color on the left and on the right for each row.
Doubling a pattern like this only requires you to literally copy and paste the pattern side by side and fill in the strings that stick out in the middle with any knot between them, since they are the same color.
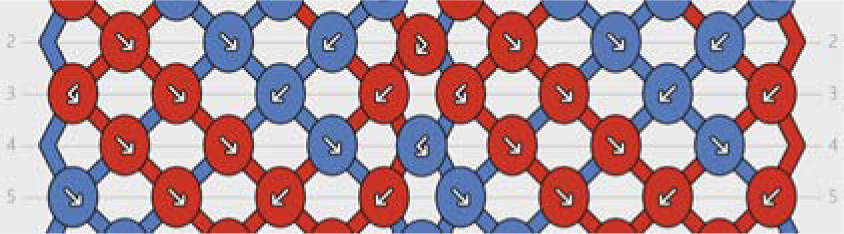
If the pattern has an even number of strings but the strings sticking out on even rows aren’t the same color on one or multiple rows, the technique is still similar. Double the pattern by copying and pasting it side by side and then fill in the strings that stick out in the middle with knots between them. However, this time those center knots must be reverse knots. Choose on a case-by-case basis whether you want that to be a forward-backward or backward-forward knot, depending on which color you would like to show up in the bracelet.
If you copy and paste your pattern and put the two copies side by side, and you notice that it doesn’t quite line up based on the design itself, you can always shift one of the copies up or down to align in better.
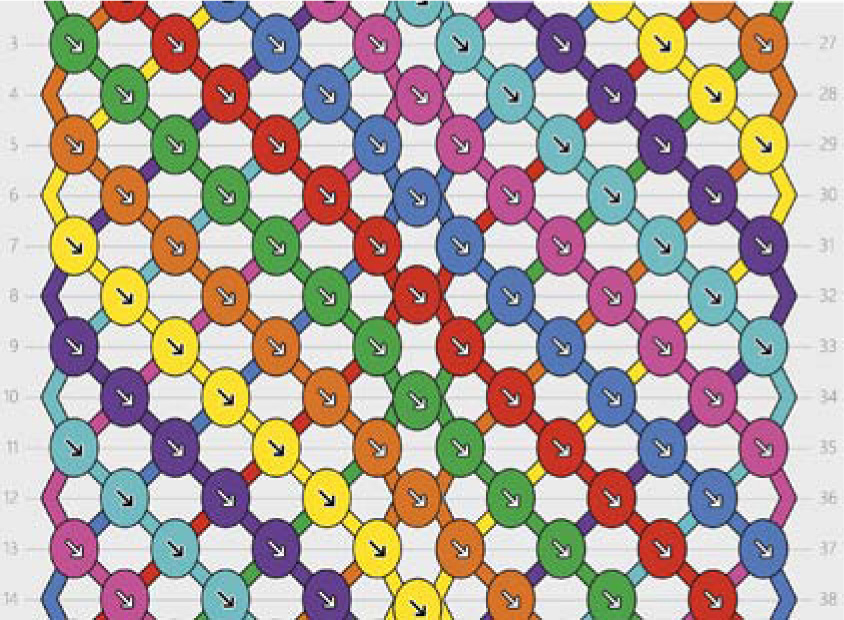
You could even flip the pattern upside down and try aligning it that way to create a new design.
If your pattern has an odd number of strings, you will need to add an extra string for the doubling technique work, making the total number of strings an even number. Copy and paste your pattern, line the patterns up in the way you want, and then place an extra string between the two copies. Make forward-backward knots with the strings that stick out of the left copy onto this extra string and make backward-forward knots with the strings that stick out of the right copy. This is very similar to the straight edge technique, explained on page 86.
HALVING A PATTERN
Halving a pattern only really works when the original pattern is symmetrical. If that is the case, then all the knots in the central column of the pattern should be made between strings of the same color. Simply imagine or draw a line going right through the center of the pattern.
Discard the right side of the pattern and focus solely on the left side. Ignore the half knots that are left on the right side of the pattern and imagine them simply as strings sticking out of the sides, like on the left. Make your bracelet according to this new pattern.
CHARMS
Enhancing your bracelets with the use of charms can be really beautiful. There are so many different types of charms out there that fit any theme or style. Some charms can even be woven within the bracelet itself, creating a unique look for your bracelet.

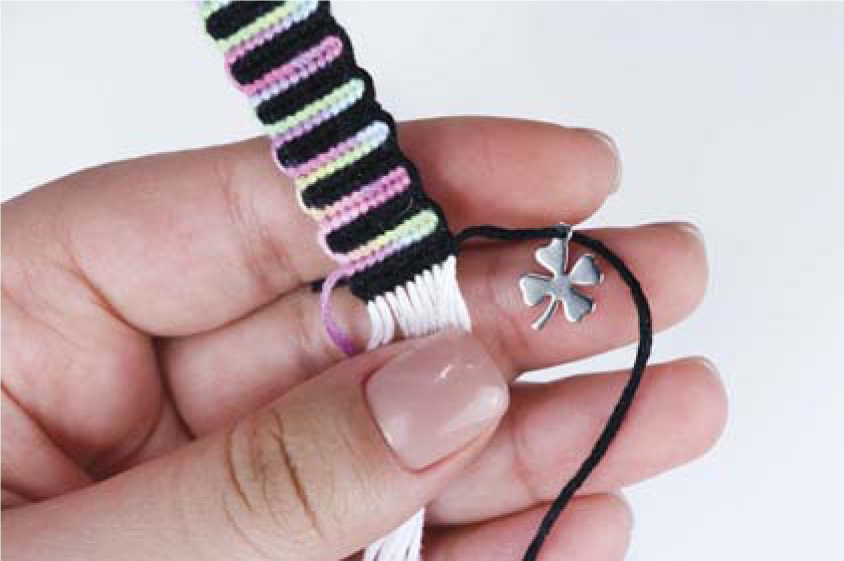
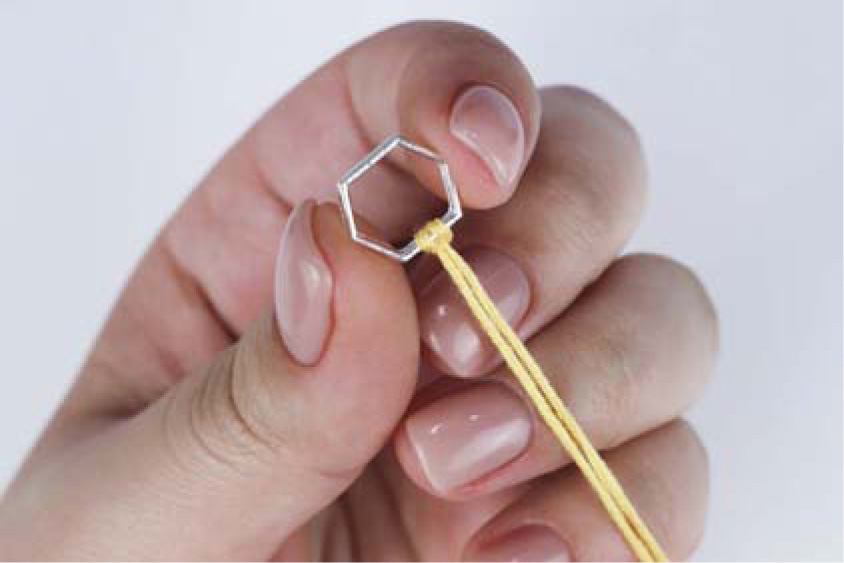
If the charm you want to use has a loop on it, simply thread your string through the loop and continue making the bracelet as normal. Use a needle threader if you are having trouble.
If your charm has edges to which you can attach strings, use a lark’s head knot (explained on page 27) to attach strings to it on either side and make half the pattern on one side and the other half on the other side.
There are other ways to attach charms and even beads, which you can learn more about from other resources.
OTHER EMBELLISHMENTS
There are, of course, many other embellishments you can add to your friendship bracelets. Using bracelets to make watch bands or collars for pets, embroidering an additional layer of a design onto a bracelet, and making frilly edges are all ways to add variety to your bracelets. Once you become more comfortable with knotting, I urge you to experiment with your bracelets. Perhaps you’ll be the one to create the next hit bracelet technique that every bracelet maker will be inspired to try!