
CHAPTER 10Common Mistakes and How to Fix Them
Making mistakes is a natural part of learning. As a beginner bracelet maker, you are bound to make many mistakes when knotting friendship bracelets. In fact, I still make mistakes while I knot! Every bracelet I have ever created holds its secrets when it comes to all the little things I messed up and had to fix while making it. Let’s go over some of the most common mistakes.
RUNNING OUT OF STRING OR REPLACING A BROKEN STRING
Miscalculating how much string you will need to create a bracelet and having a string run out in the process of knotting is an annoying mistake to make. Having a string snap during the knotting process can also be frustrating. However, both are easily fixable by simply inserting a new string into your bracelet.
In an alpha bracelet, replacing a string of the same color uses the same technique as inserting a new string of a different color. This is covered in chapter 7.
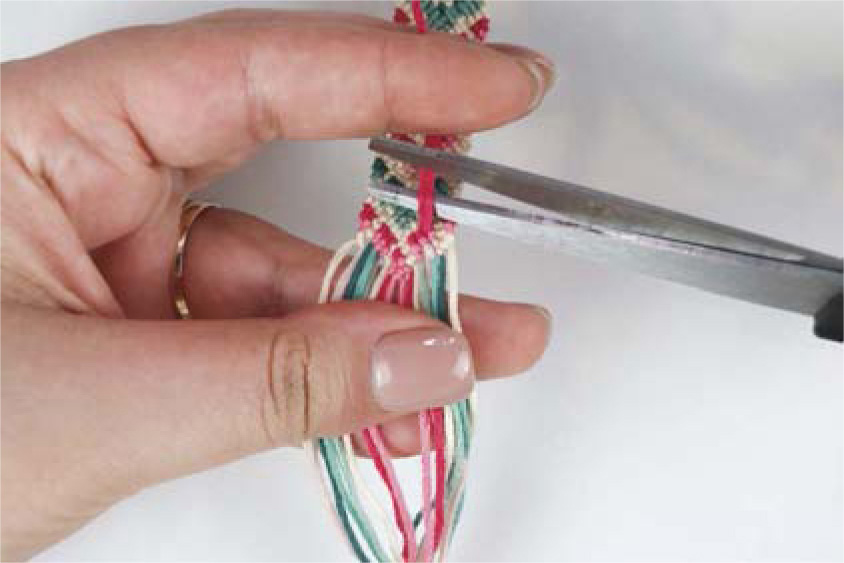
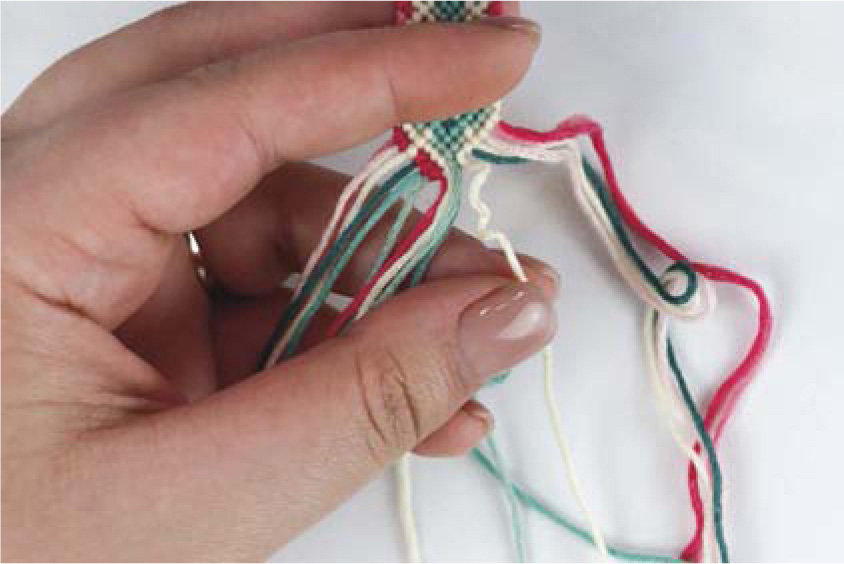
With normal patterns, the technique to replace a string is even easier. Cut a new string and secure it behind your bracelet. Place the old string behind the bracelet, move it out of the way, and then simply make a knot with the new string.

After a few more rows have been made and your new string is secure within the bracelet, you can cut off the ends from the back of your bracelet. Don’t worry—it won’t come undone.
MAKING AN INCORRECT KNOT
Making an incorrect knot is probably the most common mistake a bracelet maker makes, and it is the mistake I make in every bracelet I create. Fortunately, it is also easy to fix when noticed quickly.
Grab a safety pin and gently insert it in the middle of your knot, separating the two halves of your knot. Carefully pull down on the knot, loosening it as you go.

Once you have undone half of your knot, place your safety pin above the knot and repeat the process. You will be left with a curly string and can resume making your bracelet.
WRONG COLOR POPPING THROUGH
Occasionally when making a bracelet, you might notice that while you are making a knot of one color, the string of a different color (the one you’re making a knot onto) is popping through the knot.

Fortunately, this is also an easy mistake to fix. Simply pull on the string that popped through—maybe hold the knot with your finger to help with the tension—and the string should pop right back out of the knot.

ISSUES WITH STRING TENSION
If you see lines of string within your bracelet between knots, or there are large holes between your knots, you need to practice your string tension. The first half of the knot positions the knot. Getting that first half of your knot right and in the correct position will eliminate extra string showing between your knots and will close up any large holes you might have.
If your knots are inconsistent in size, with some being more elongated than others, pay closer attention to the second half of your knot. The second half of the knot secures the knot in place and is responsible for the shape and size of the knot. For the bracelet to look neat and for the design to come out well, consistency in knot shape and size is key.
When tying your knots, grabbing the string closer to the knot itself rather than farther away will help with precision.

FLIPPING A BRACELET
Flipping your bracelet as you are making it can be a common problem for beginner knotters, unless you are making the Flip Flop bracelet, of course. Securing your bracelets with tape or anything that holds the entire bracelet in place, rather than just the beginning of it, can minimize the potential for this mistake. Unfortunately, it can still occur.
As a beginner you may find it hard to tell which side of the bracelet is the front and which is the back as you aren’t yet familiar with how bracelets should look. Additionally, in other forms of bracelet making, what we as friendship bracelet makers consider to be the back is actually considered the front, which can further confuse beginners.
In friendship bracelet making, the front of the bracelet has knots that look like small ovals and the back has knots that look like small loops. When making your bracelet, check every once in a while that your knots look consistent and that you haven’t accidentally flipped your bracelet.

Of course, there are other mistakes you can make as a bracelet maker. As I am unable to cover all possibilities within this book, I urge you to do some further reading and perhaps find online communities where people can help you with any problems that arise as you create your designs, as I suggested in the introduction.