
CHAPTER 7Alpha Bracelet Patterns
Normal and alpha patterns are the two most popular friendship bracelet pattern types. The unique feature of alpha patterns is their horizontal knot structure. Alpha bracelets are created in a motion similar to weaving. Interchangeable leading strings make rows of forward knots made onto unseen base strings followed by rows of backward knots onto those same base strings. Making knots of different colors on different base strings is what creates the design.
PATTERN ELEMENTS
Looking at a pattern can be overwhelming for a beginner. Let’s break down each element of the pattern and analyze its function.
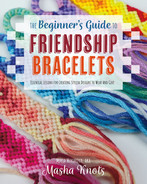
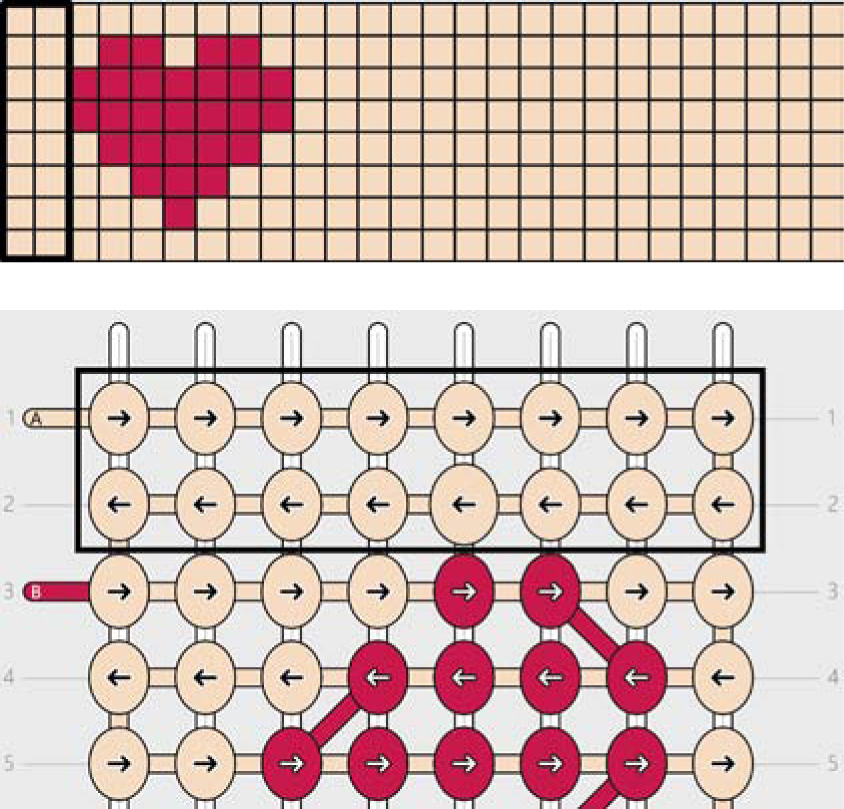
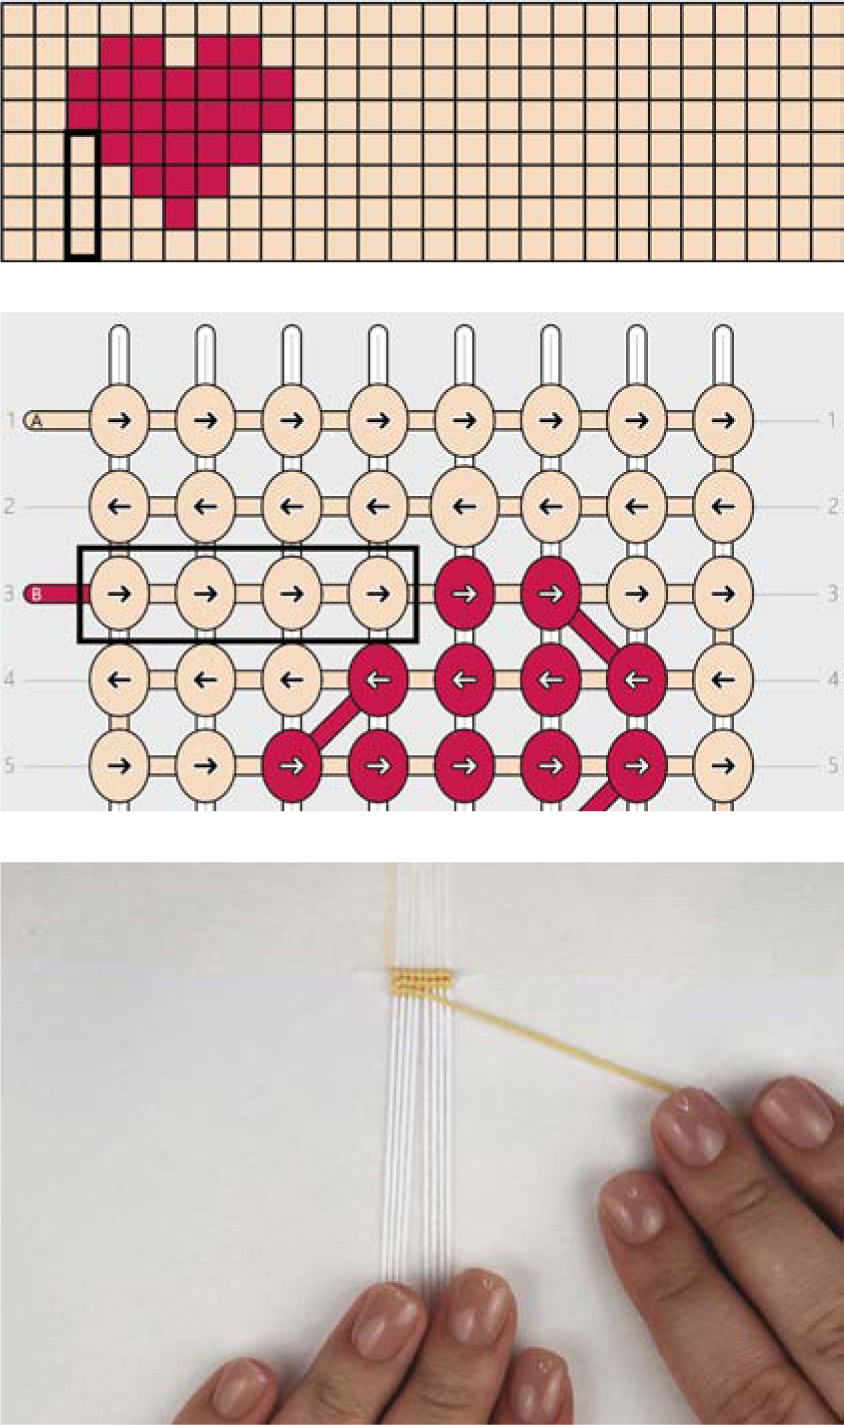
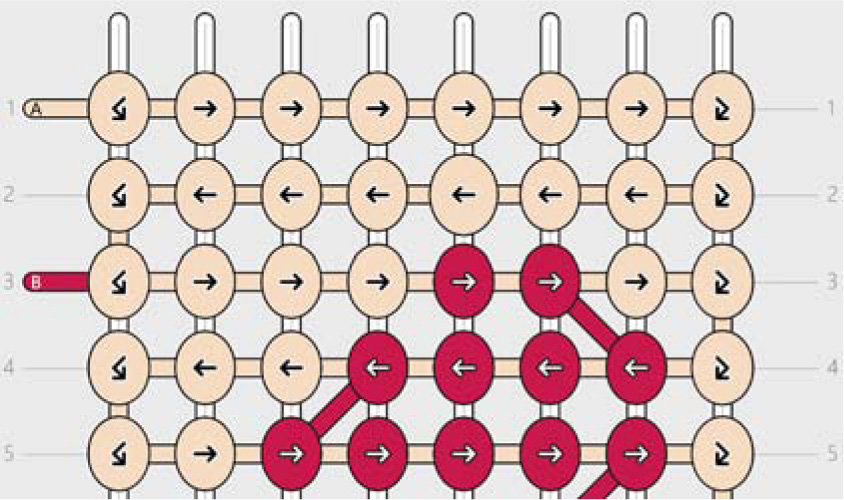
Alpha patterns can be represented in multiple ways. The two most common types are via a grid or via a knot structure. Knots in a grid pattern are represented by squares or pixels. In a knot structure, knots are represented by circles with arrows in them that show the direction of movement for that row.
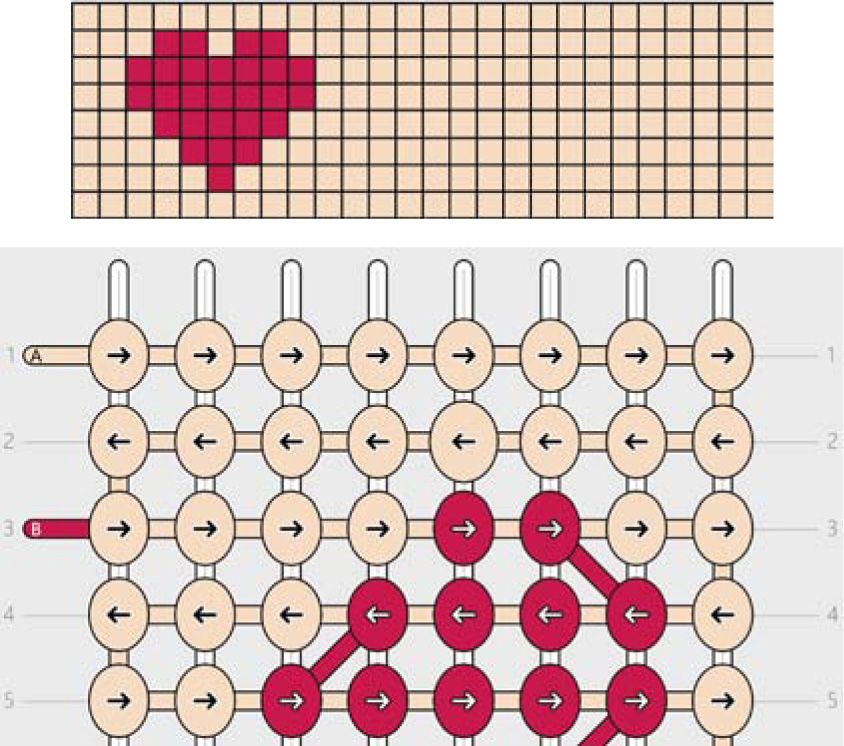
To figure out how many base strings are needed, you can count the number of squares in one row of the grid or the number of knots in one row of the knot structure.
The number of colors you need to create a bracelet corresponds with the number of colors you can see within the pattern. I recommend counting the colors and picking the strings you would like to use for the bracelet before you start making the bracelet itself. The first color that appears in your pattern will be the color of your first leading string.
In a knot structure there are also horizontal lines going through each row with numbers to the left and right of them. These lines represent the rows, and the numbers correspond to the number of the row itself.
Occasionally, on the left and on the right edge of a knot structure you can see lines sticking out from the pattern with a letter on it. These lines represent strings, and the letter corresponds to a color to help you differentiate between similar colors. The row at which these lines appear tells you during which row this string will first and last be used.
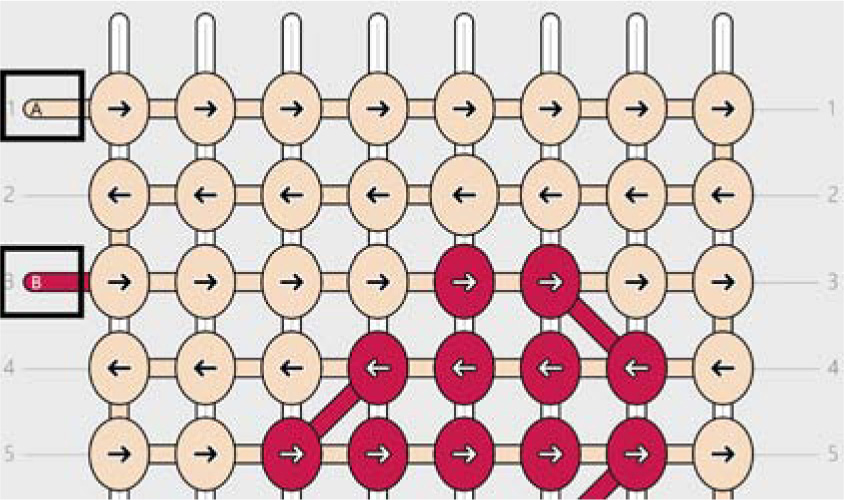
The lines going between the rows of a pattern in a knot structure represent the movement of strings within a bracelet. If you find this confusing, you can simply ignore this element; however, some people find the visualization of the movement of strings helpful to understand how alpha patterns work.

In chapter 8 I will discuss how to calculate string lengths, and in chapter 9 I will demonstrate how to create different types of starts for alpha patterns. For simplicity, all the examples in this chapter will use both base strings and leading strings that are 1 yard long. We will start by taping our strings to a table, starting with our leading string on the left followed by our base strings. Leave about 6 inches on the top to create your ties later.
Reading Alpha Patterns and the Flat Alpha Technique
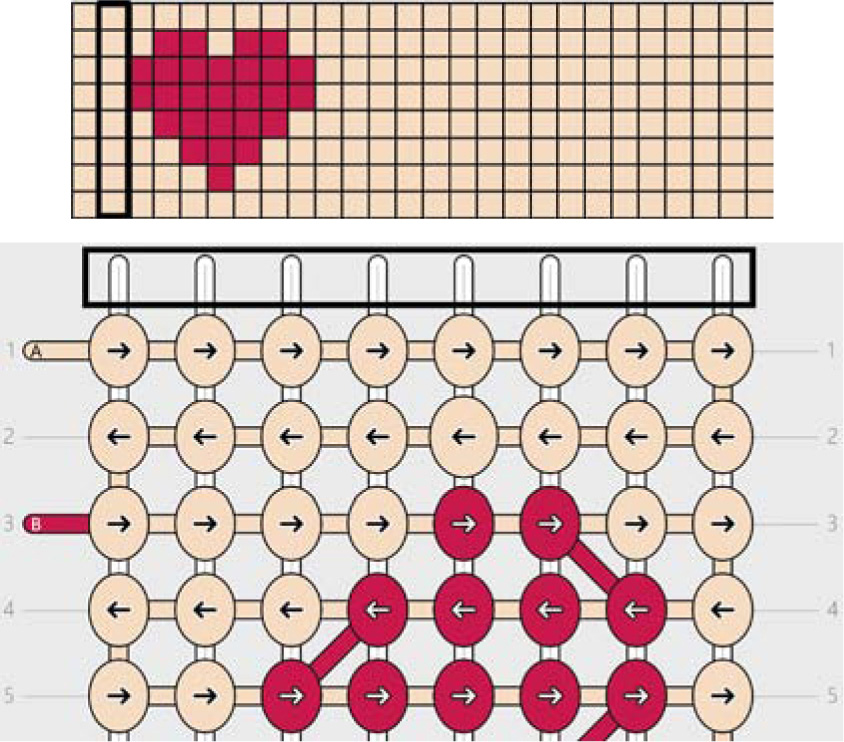
- 1.Let’s first examine the mechanics of creating knots onto base strings with a leading string. In the pattern I am making, the first two rows have only one color: the color of the first leading string.
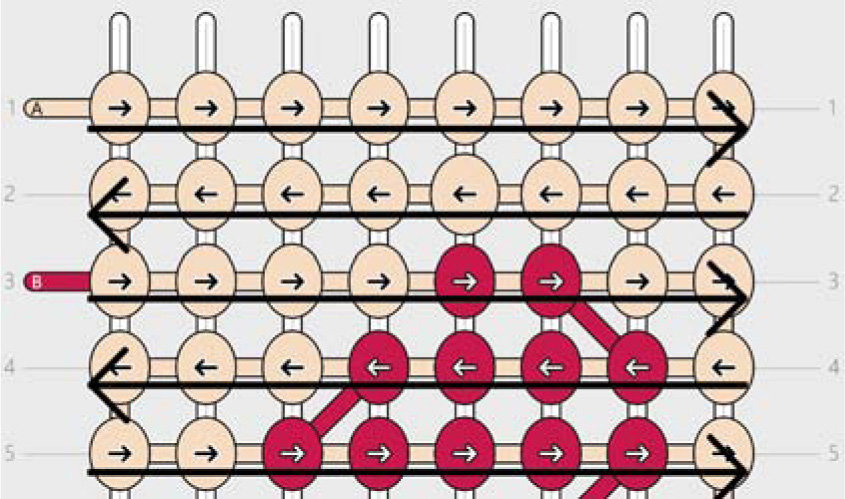
- 2.The leading string is to the left of the base strings. This means the direction of the first row will be moving toward the right. Typically, all alpha patterns start with the leading string at the left. This is represented in knot structure patterns since in the first row the knots point to the right. If you want to start in the other direction, you can as it rarely makes a difference.
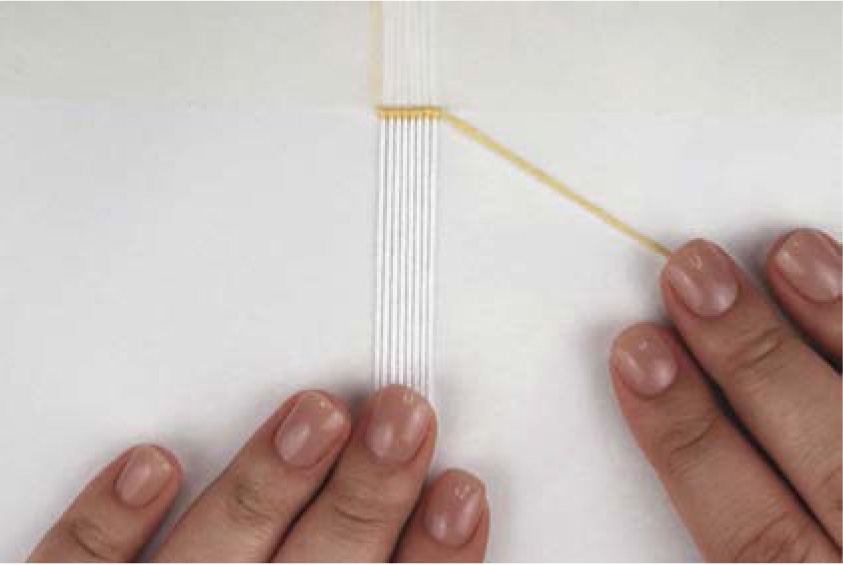
- 3.Since the first row is directed toward the right, start by making a row of forward knots with the leading string onto all the base strings individually until you reach the end of the row.
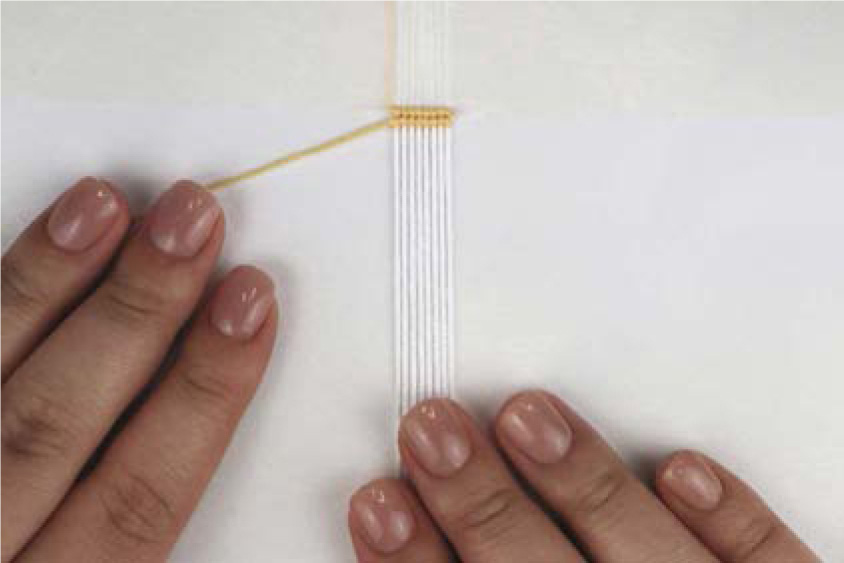
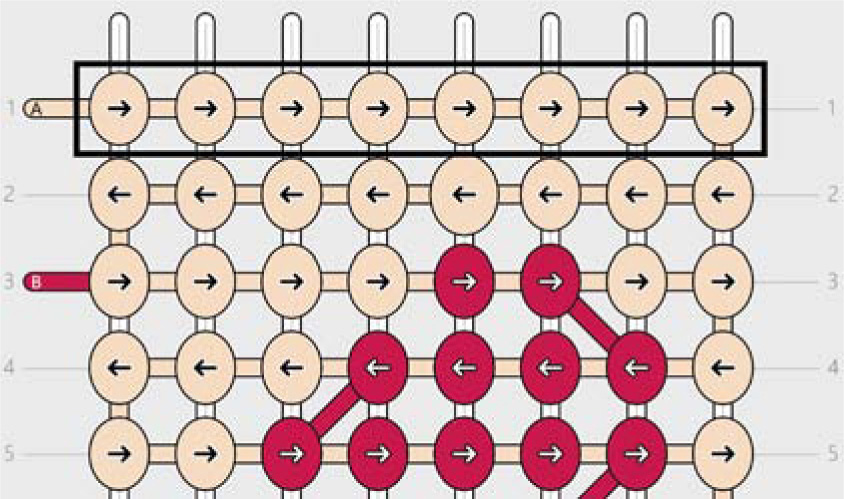
- 4.The first row is complete. The leading string is now to the right of the base strings. This means the next row will be directed toward the left. Since the next row also consists only of knots of the color of our current leading string, make a row of backward knots with the leading string onto all the base strings individually until you reach the end of the row.
- 5.Now the leading string is once again to the left of the base strings, meaning the direction of the next row will be toward the right. The row direction changes with every row as the leading string moves along the base strings in a weaving motion.
- Continue making these empty rows (i.e., rows without color changes) for as long as your pattern suggests. My pattern has a new color introduced on row 3.
- The new color is introduced at the fifth base string from the left. This means you need to make four knots with the current base string before changing leading strings. Make four forward knots.
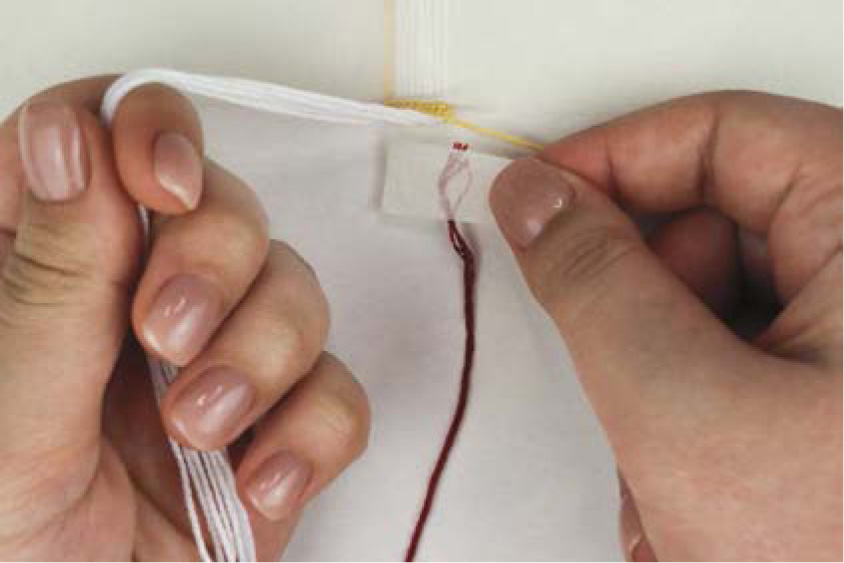
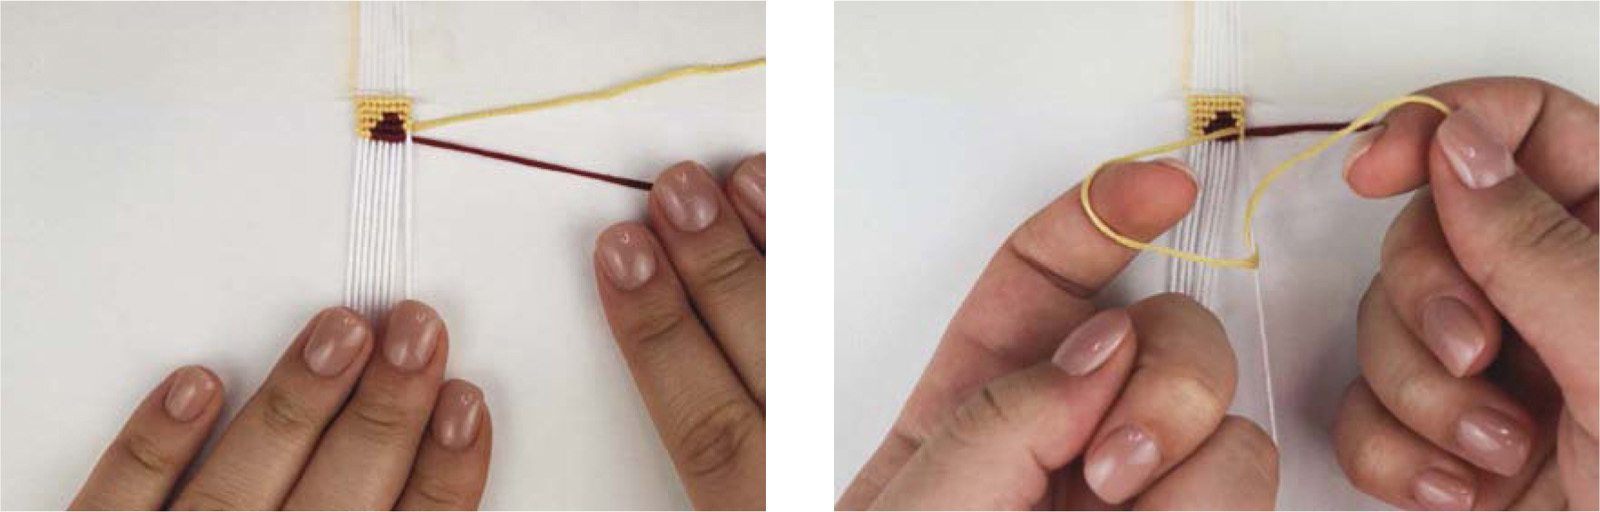
- 6.Time to add in the new color. For simplicity, cut the new leading string to be 1 yard long. Tape the new leading string behind the bracelet, leaving a small tail of string to cut off later.
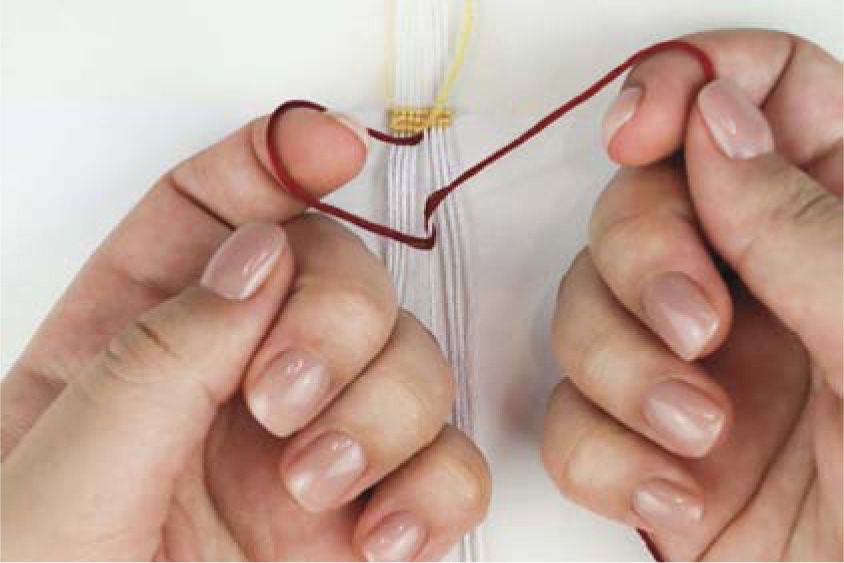
- 7.Take the new leading string from behind the bracelet and make the first half of a forward knot, or if the color switch is in the other direction on your pattern, make the first half of a backward knot.
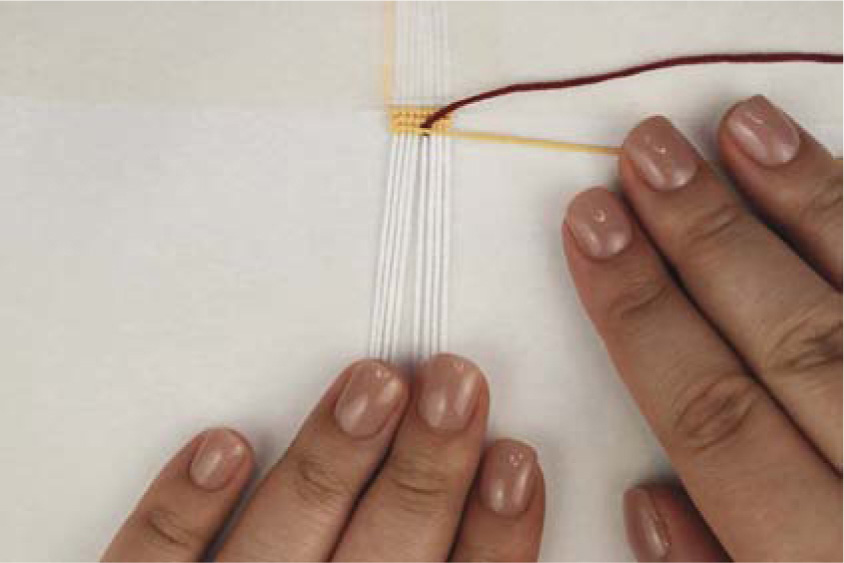
- 8.Take the previous leading string and place it under the new leading string but over the base string that the leading string is in the process of making a knot onto. Drag it across and leave the old leading string pointing sideways.
- 9.Take the new leading string and finish making the knot, ignoring the old leading string.
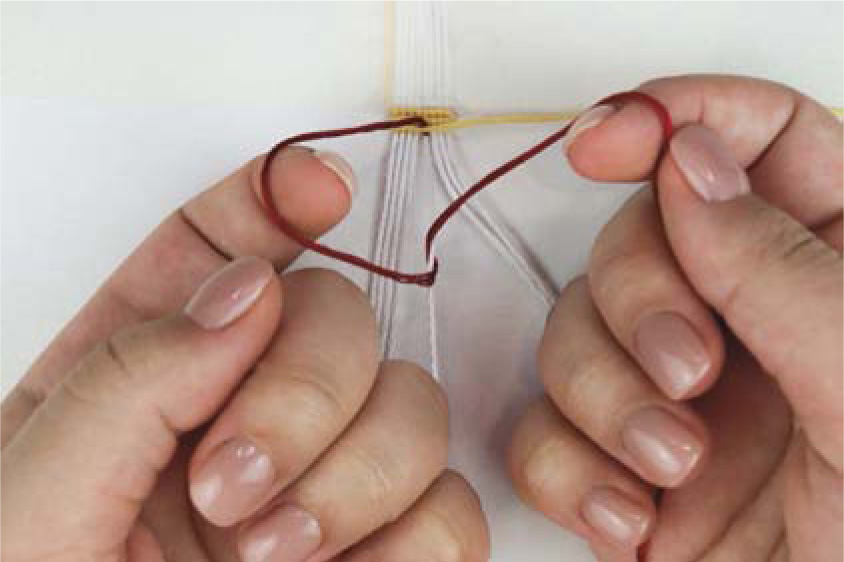
- 10.Your new leading string has been successfully knotted into your bracelet. Take the old leading string and place it behind the bracelet, pulling it slightly so it doesn’t show up in the bracelet beyond this point.

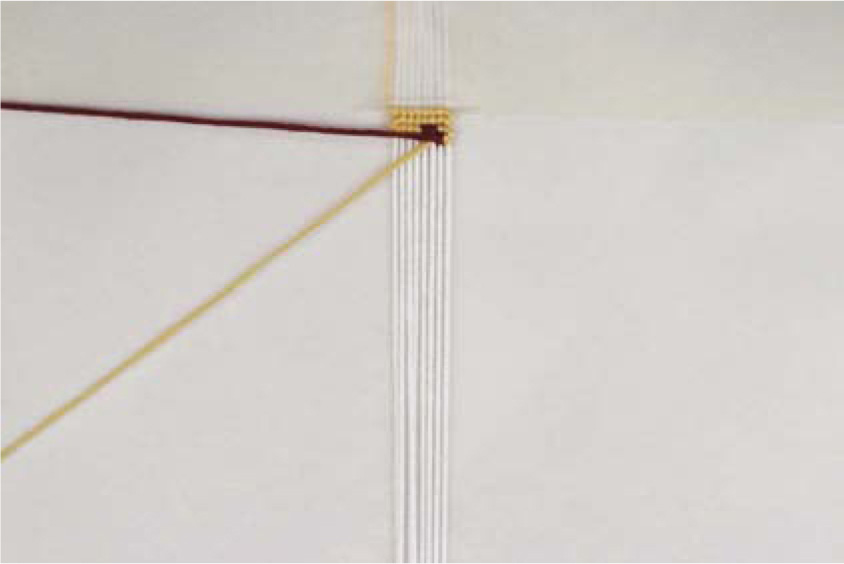
- 11.This method of switching strings threads the old leading string through the first knot of the new leading string, tying the bracelet together into one cohesive piece and ensuring that no extra bumps or ridges are created when changing colors within the bracelet.
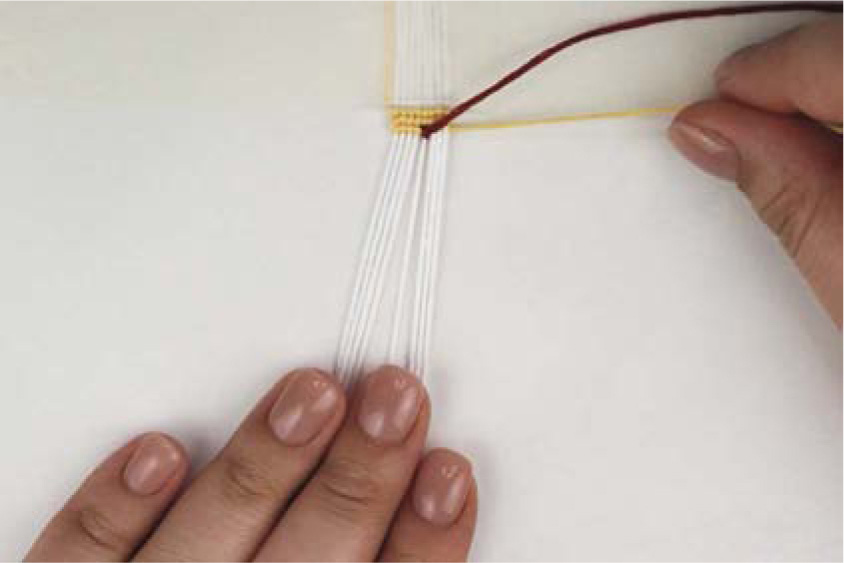
- However, there are some nuances when using this method of switching strings. If the first knot of your new leading string happens to be the last knot of the row it is being introduced in, you cannot switch strings in the way previously described as doing so will result in the tail of your previous leading string sticking out from the side of your bracelet and it will be difficult to hide.
- 12.Instead, simply tuck the previous leading string behind the bracelet prior to introducing the new leading string and then do a regular knot with the new string onto the last base string.
- 13.This doesn’t apply to cases in which the string switch happens on the second knot of the row. While it may look similar due to the position of the knot, it is different because of the knotting direction of the row. Switching leading strings by threading the previous one through the knot of the new one works in this case as the previous string will point inward rather than outward once the knot is complete.
- 14.The described method of switching leading strings doesn’t only apply to switching to different colors. Alpha patterns use up a lot of strings and eventually your string will run out and you will have to replace it with a string of the same color. Switching an old, short, leading string to a new longer one of the same color is the same as switching two strings of different colors.
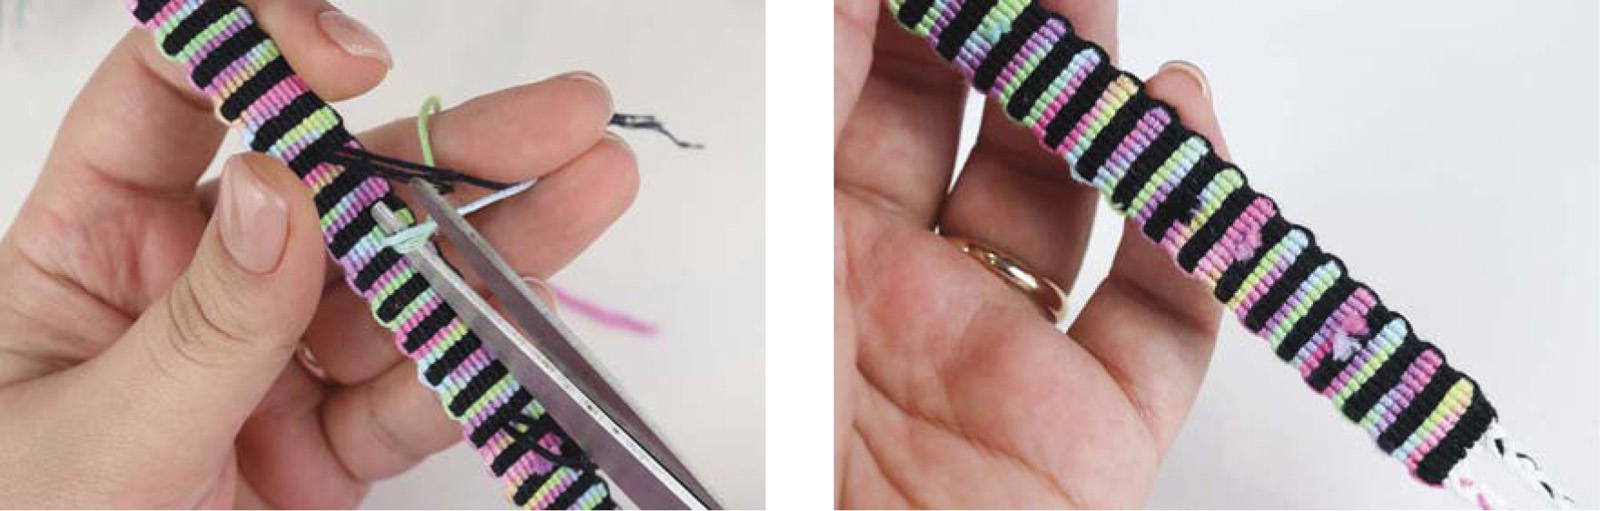
- Once you have created some rows to secure your new strings in place, you can cut off the tails of strings from the back of your bracelet. Some people glue the tails of strings to the back of the bracelet, but I just cut mine down quite short. This is a matter of personal preference.

Since backs of alpha bracelets hide the ends of strings and the color switches, the backs don’t look as good as the fronts. Some people sew fabric to the backs of their alpha bracelets to hide the strings. This is also a personal preference.
LETTER ALPHAS
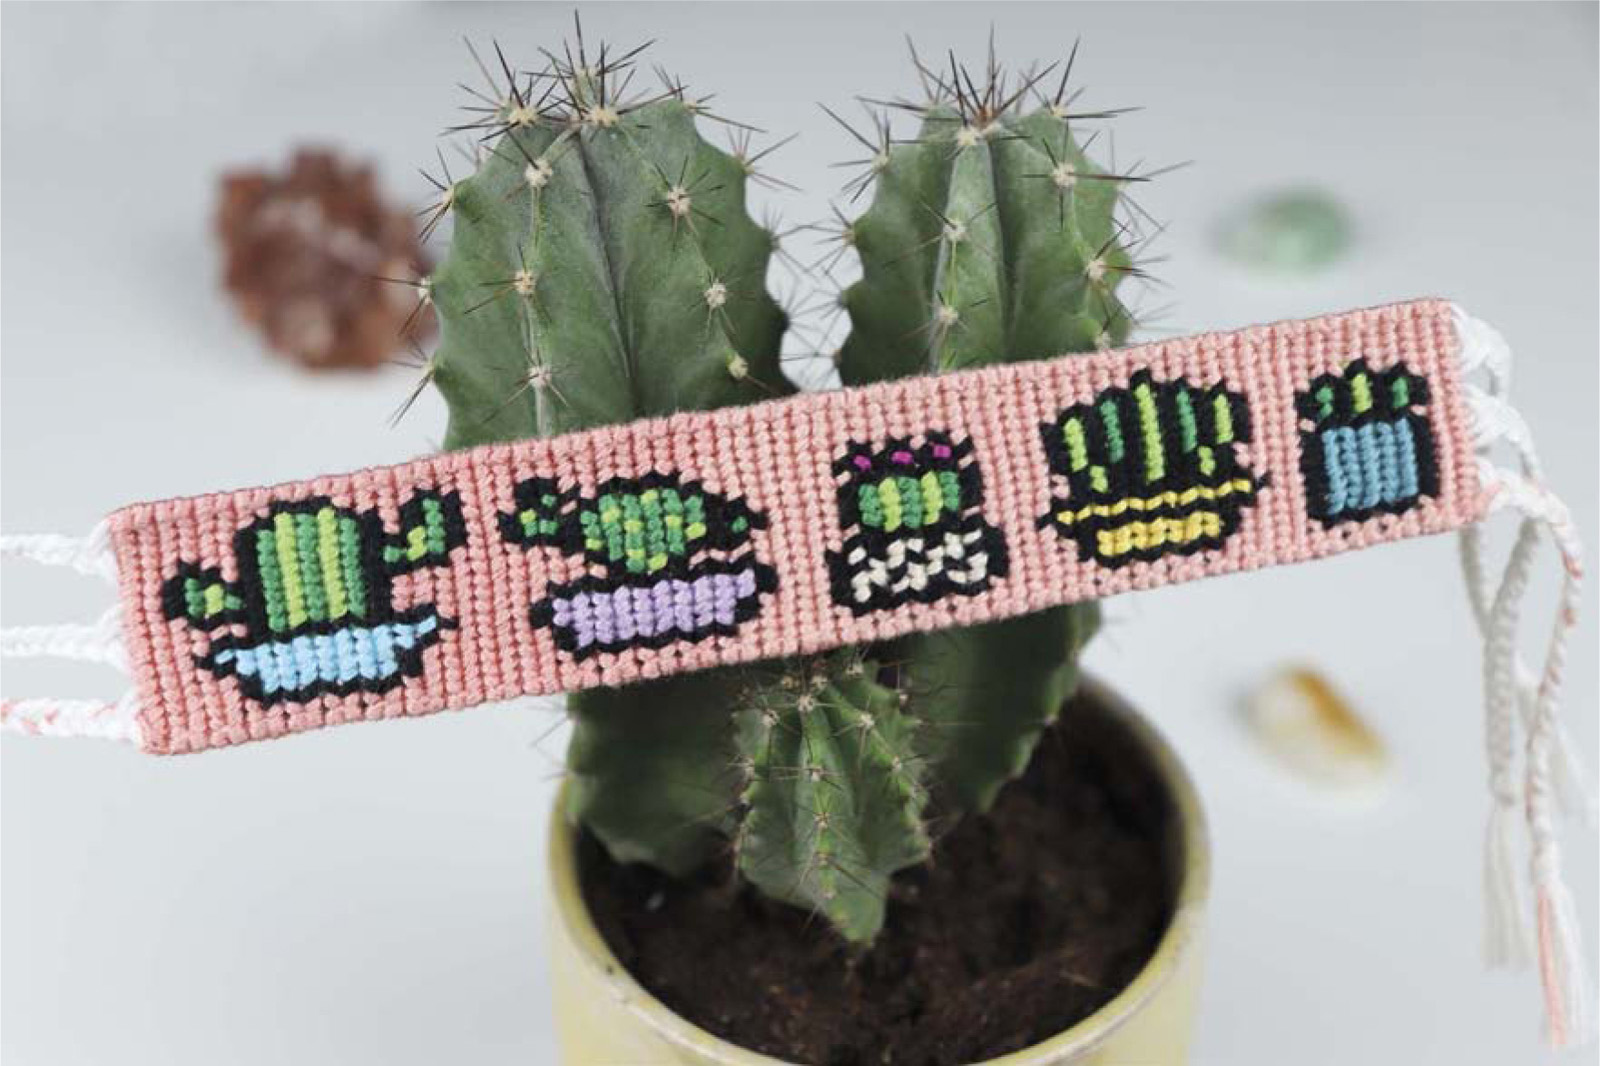
Alpha patterns are perfect for creating bracelets with text. Your friend’s name, the title of your favorite TV show, or even a beautiful quote—you can make it as a bracelet!
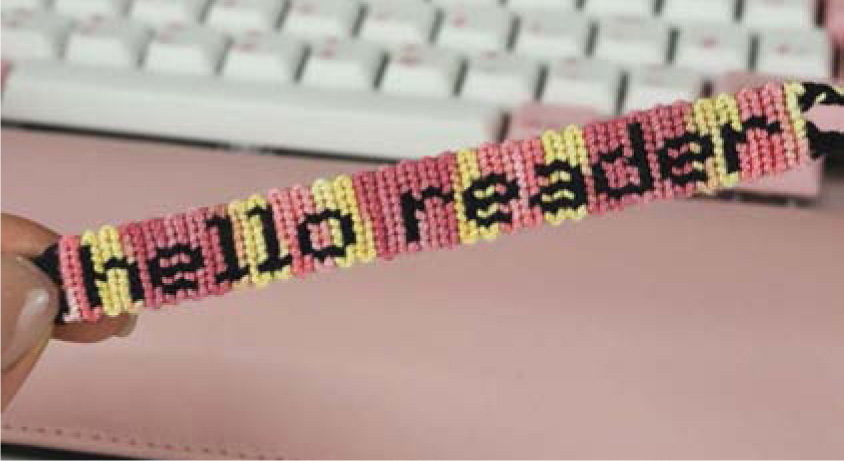
There are plenty of patterns out there that might already have the phrase you want within them. Some of these have decorations or alterations to the letters, making them even more special. However, not every phrase or name has a pattern already made for it. This is where alphabet patterns come in. An alphabet pattern is a type of alpha pattern that has the full alphabet, and sometimes numbers and other symbols, on them. Such patterns can be used to generate any word or phrase, so you can create a bracelet that says whatever you wish.

To understand how to align the letters within a pattern, we must first look into the basics of typography. Letters have various heights. The x-height, which is the height of the letter x, is the distance between the baseline and the median line or the tops of the main body of lowercase letters. The parts of letters that extend above the x-height are called ascenders and the parts that descend below the x-height are called descenders.
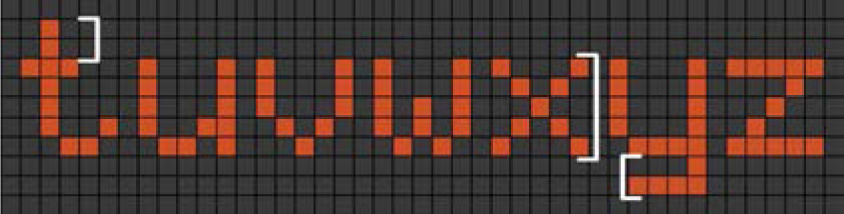
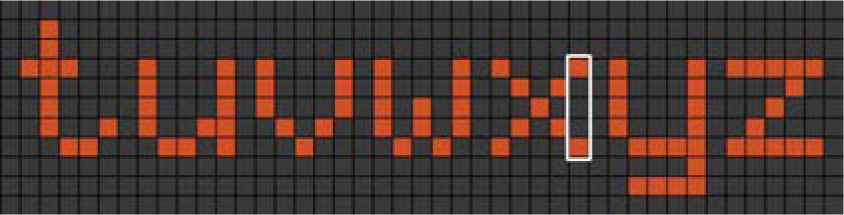
To figure out the x-height of a specific alphabet pattern, simply count the number of knots in one column of a lowercase x letter. This will be equivalent to the number of base strings needed to knot an x-height letter.
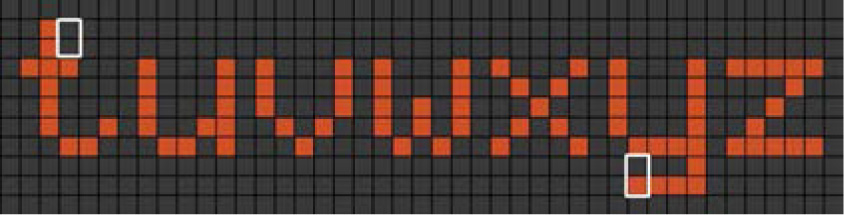
In order for your text to look centered within your bracelet, the distances from the top and bottom of your x-height to the edges of your bracelet should be the same.
If your word or phrase contains only letters of the x-height, simply take the number of base strings needed for the x-height and add an even number of base strings for the edges. The more strings you add, the more distance there will be between your letters and the edges of the bracelet.
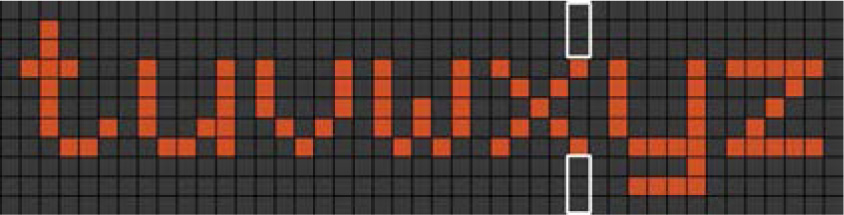
If your word or phrase contains letters with ascenders or descenders, make sure you leave enough room for these. To figure out the height needed for an ascender or descender, count the number of knots in one column starting from the x-height.
Once you have figured out the number of base strings required to make your bracelet, you can start knotting your design by following the pattern for one letter at a time. Make sure to always keep track of where the x-line is relative to your base strings so that your text appears on one line.
STRAIGHT EDGE TECHNIQUE
When making only forward knots or only backward knots within an alpha bracelet, you may notice that the bracelet ends up with bumps along its edges.

To keep the edges of an alpha bracelet straight, make only backward-forward knots on the left edge string of your bracelet and make only forward-backward knots on the right edge string of your bracelet.
Remember that each reverse knot counts only for one row. So, if you are finishing a row of forward knots with a forward-backward knot, you need to make another forward-backward knot onto that same base string again to start the next row.
The use of the straight edge technique is determined by personal preference, and some knotters prefer the look of their bracelets without it.
DESIGNING ALPHA PATTERNS
Alpha patterns are essentially pixel art. Create an empty grid on your computer and set its dimensions to be the same as the pattern you wish to create. There are websites online to help you do this. Alternatively, you could use a piece of graph paper and simply draw edges to represent the borders of your pattern. Once you have a base, fill in the squares or pixels with the colors you want, creating your design.
Typically, the goal is to create a beautiful design in as few knots as possible so you can comfortably make and wear it as a bracelet. Bigger designs can also be fun and can be made into wall hangings or even used for other crafts such as cross stitch.
Pixel art techniques and skills are transferable to the creation of alpha patterns. However, you must remember that it could be difficult to color match strings to a pattern if there are multiple similar colors within the pattern, so shading could be difficult.
Websites exist that allow you to upload an image and convert it into an alpha pattern. This method is great to achieve a rough outline of what the final pattern might look like, but it requires heavy editing and tweaking to make sure the design doesn’t have too many similar colors or random knots.
Some websites also allow you to upload custom fonts to be converted into either alphabet patterns or simple words or phrases. Oftentimes these patterns will require manual tweaking, but they can provide a great starting point.
Regardless of how you create your pattern, online spaces and communities are a great way to share your designs with fellow knotters and to find the designs of others. Read more about online communities in chapter 1.