CHAPTER 4Basic Friendship Bracelet Knots
In this chapter we will look at the four main knots used in friendship bracelet making as well as the lark’s head knot, which is sometimes used to attach strings to a keychain or dowel, and the overhand knot, which is often used to create a beginner’s loop or to tie off your strings at the end of your bracelet.
There are four basic knots used in friendship bracelet making that you will likely find in every pattern you decide to make. Each of these knots has a different function within the bracelet and is represented by a specific type of arrow in a pattern. These bracelet knots each consist of two half knots. The way each half knot is made is what differentiates each full knot from one another.
Typically, knots are made between two individual strings but in some cases, they can be made between one string and a group of multiple strings or between two groups of multiple strings. However, knots using multiple strings can’t be well represented in a pattern. If a bracelet or a technique requires knots between multiple strings, it would be what we call a “special bracelet” or a “bracelet technique” and would usually require a separate tutorial. If you are making bracelets based on patterns alone, it is more than likely that the represented knots are to be made between two individual strings.
The four basic knots are as follows:
- •The Forward knot
- •The Backward knot
- •The Forward-Backward knot
- •The Backward-Forward knot
Let’s take a closer look at these four basic knots.
The Forward Knot
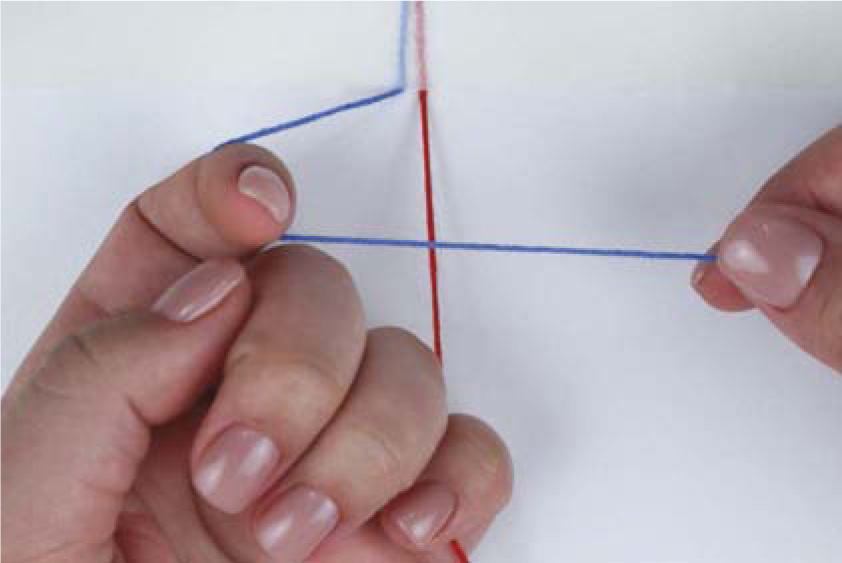
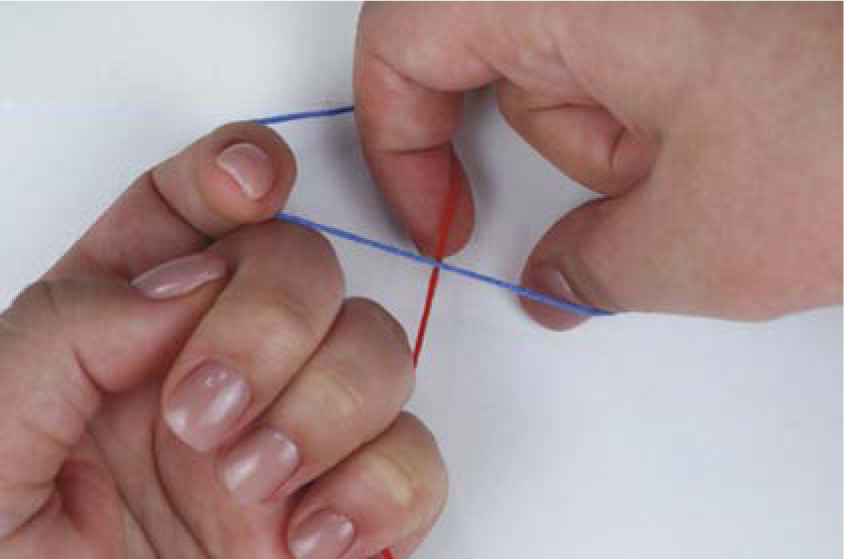
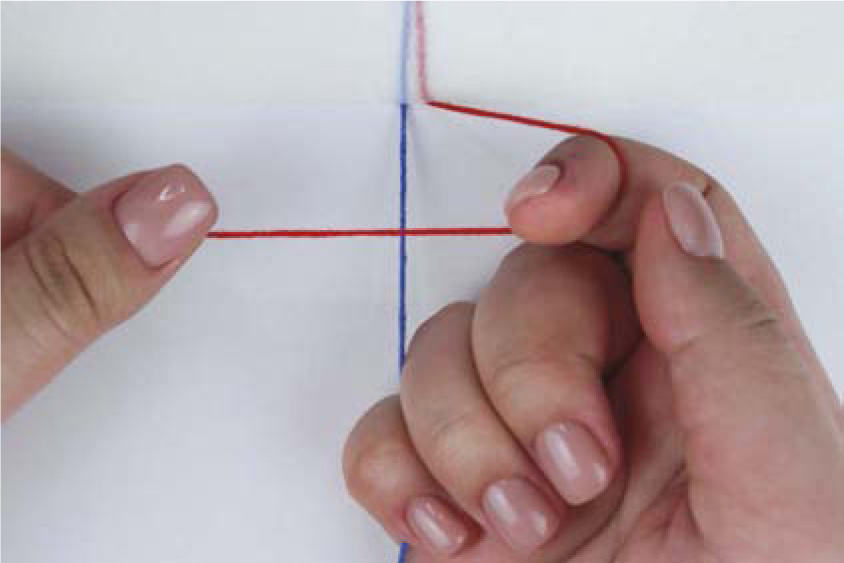
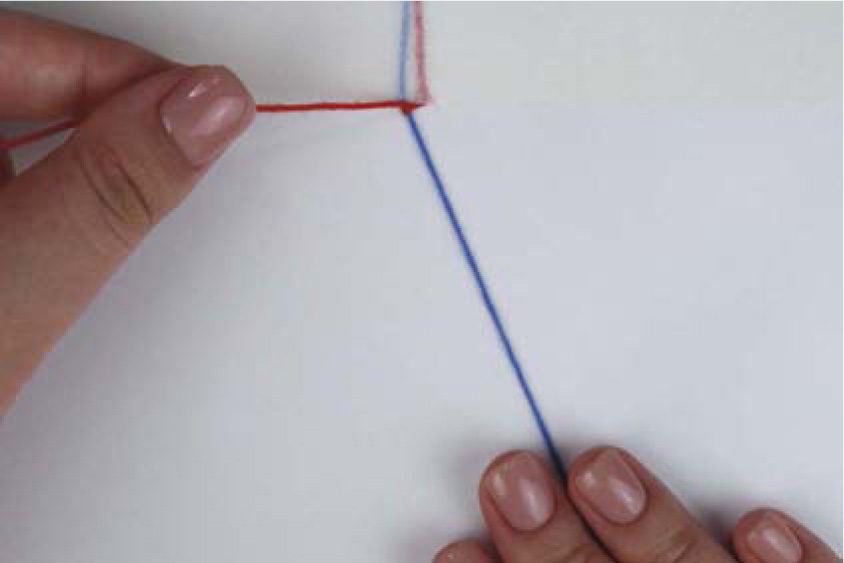
- 1.Take the string you will be making a knot onto. At the start it will be the one on the right. Grip it with the pinky finger on your left hand. Pull the string toward you slightly so it is a little tight, making it easier to work with.
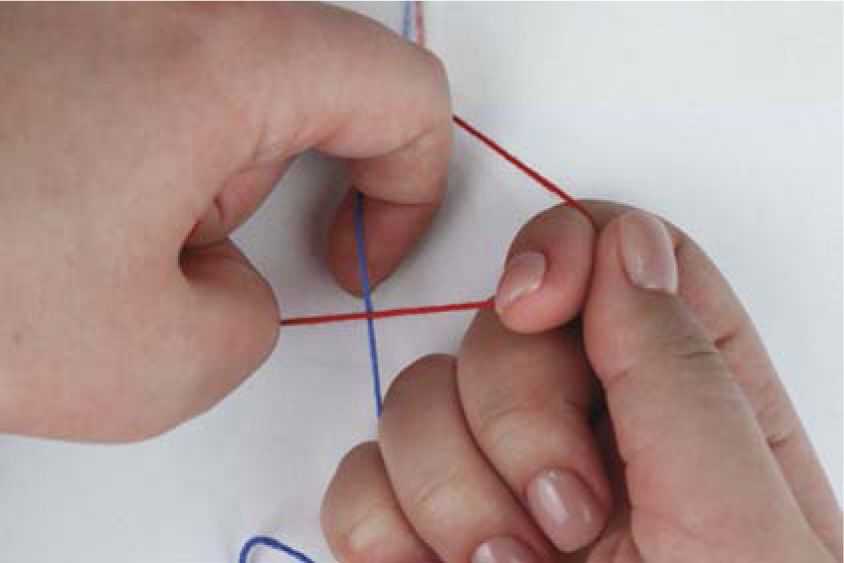
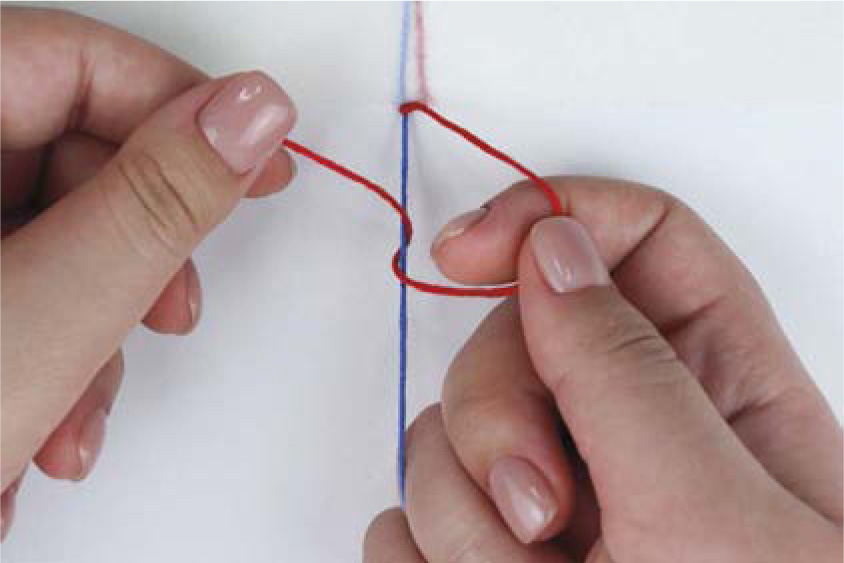
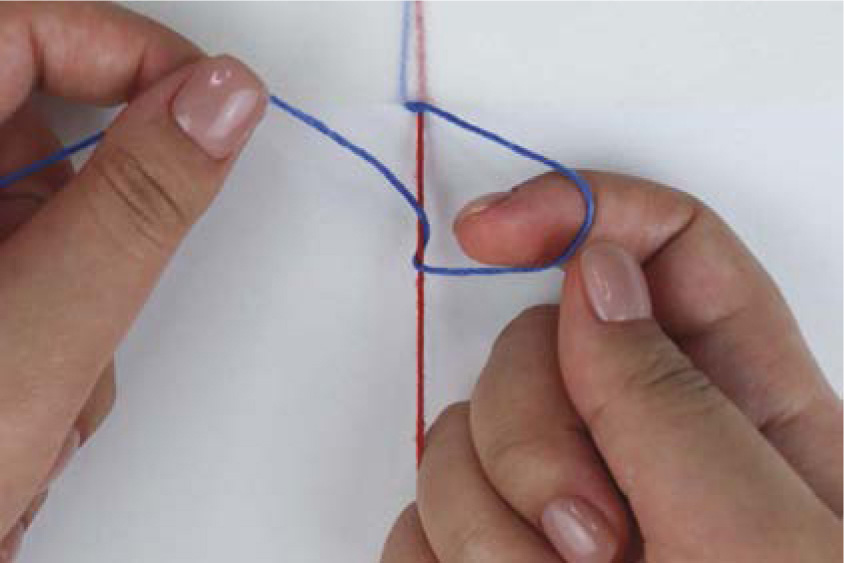
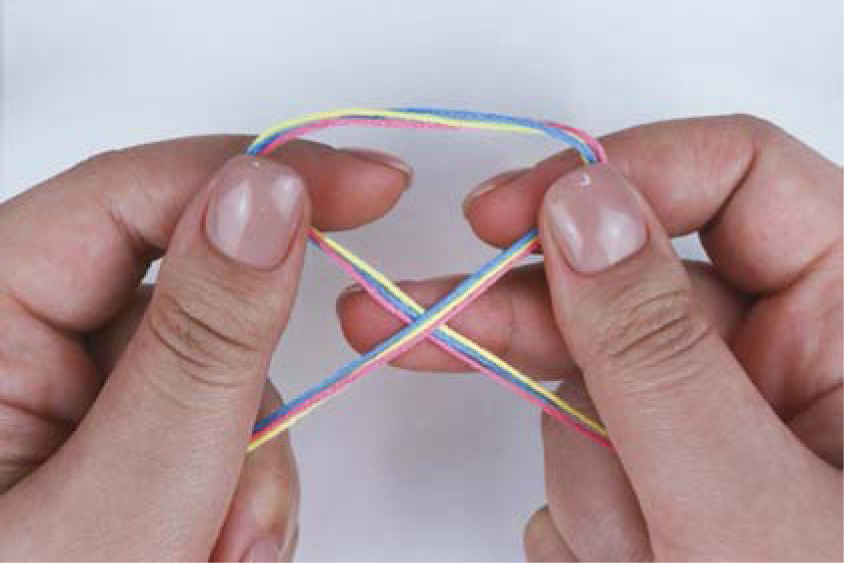
- With your right hand, take the string you will be making the knot with. At the start it will be the string on the left. Stick out your left index finger and loop the string over it with your right hand. Drag the left string across the right string so the left string is on top. The result should look like you’re making the shape of the number 4 with your strings.
- 2.Now extend your right index finger and put it into the loop of the “4” shape that you created and push it under the string you’re making your knot onto.
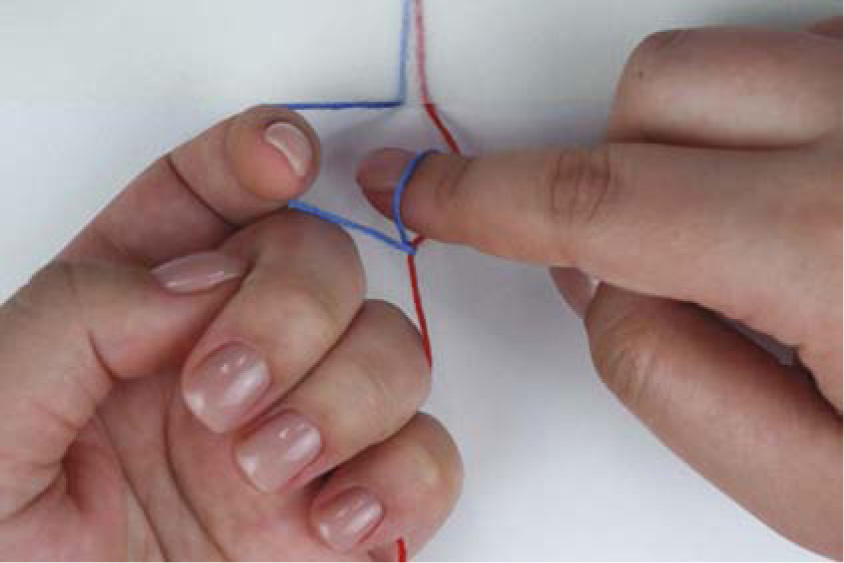
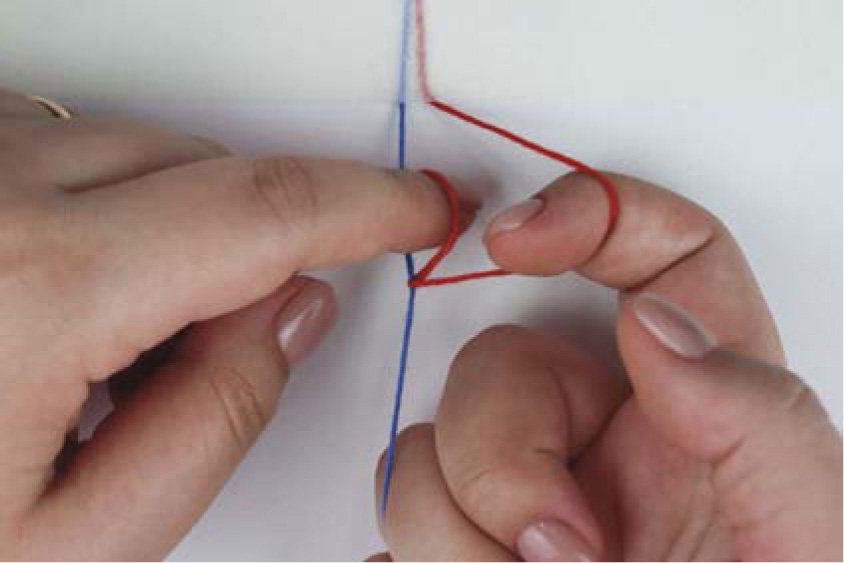
- 3.Still using your right index finger, use your nail to catch the string you’re making the knot with.

- 4.Use your right index finger to twist the string you’re making the knot with and pull it through and out of the loop.
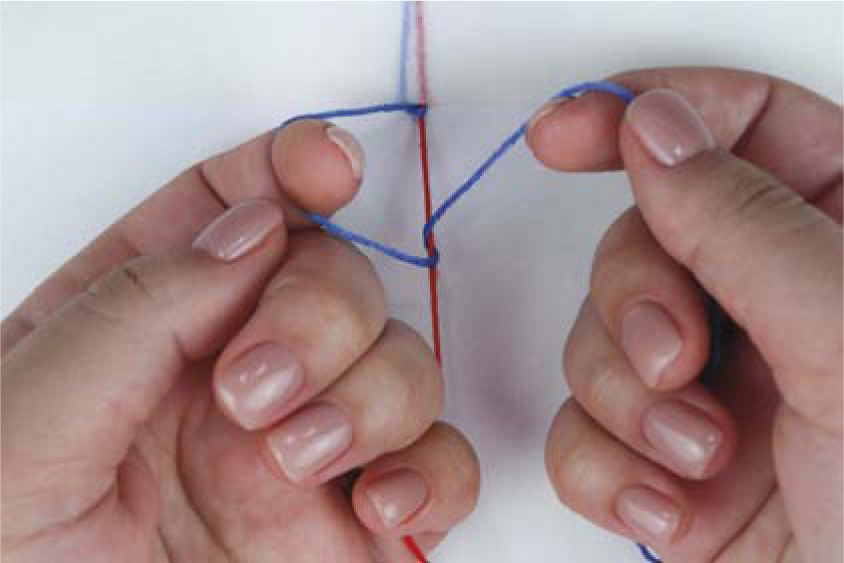
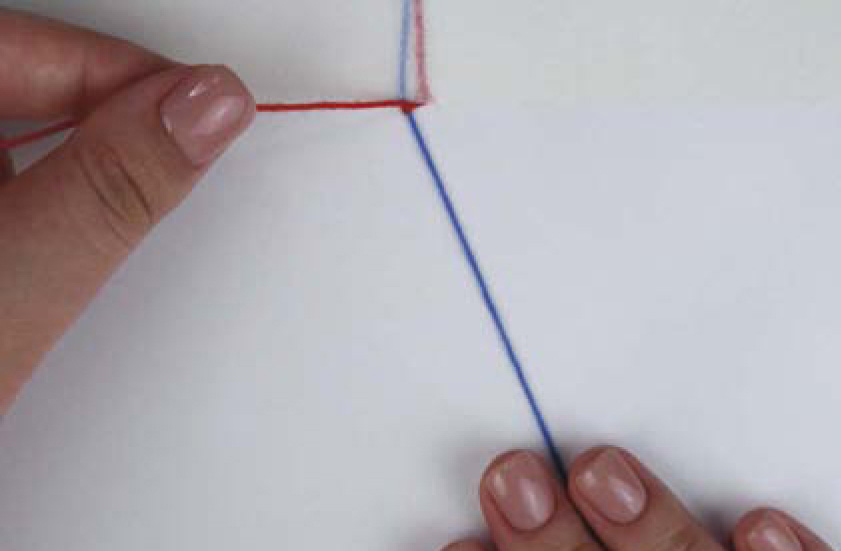
Before we continue, let’s pause and have a look at what the knot looks like at this point. All we’ve done is twist the string we’re making the knot with (the left string originally) onto the other string (the right string originally).

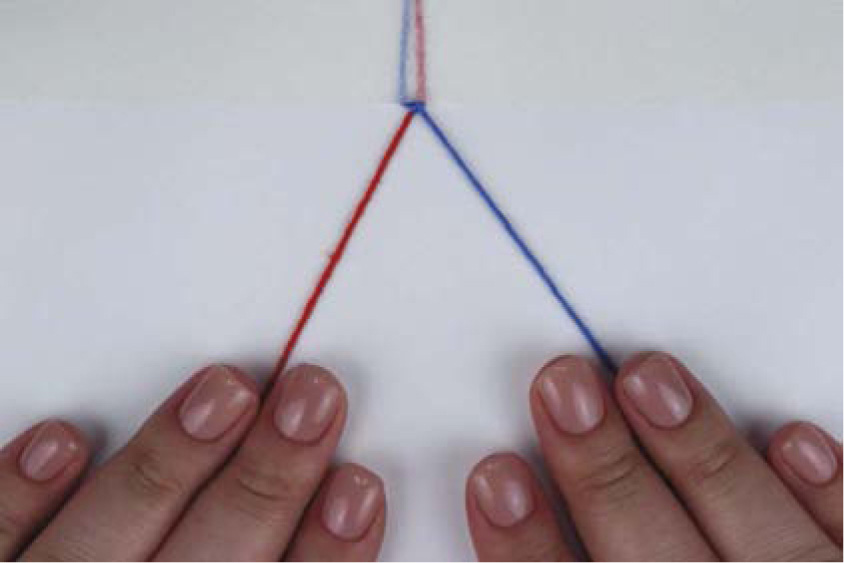
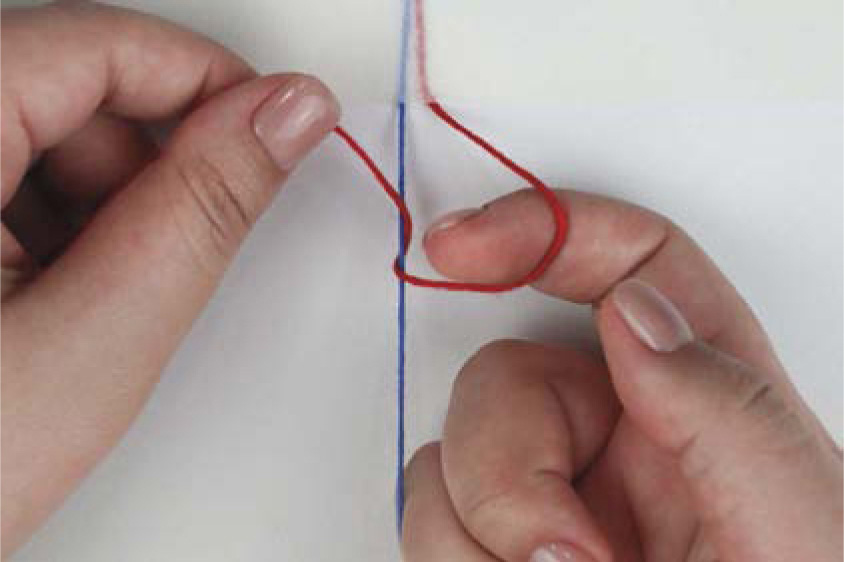
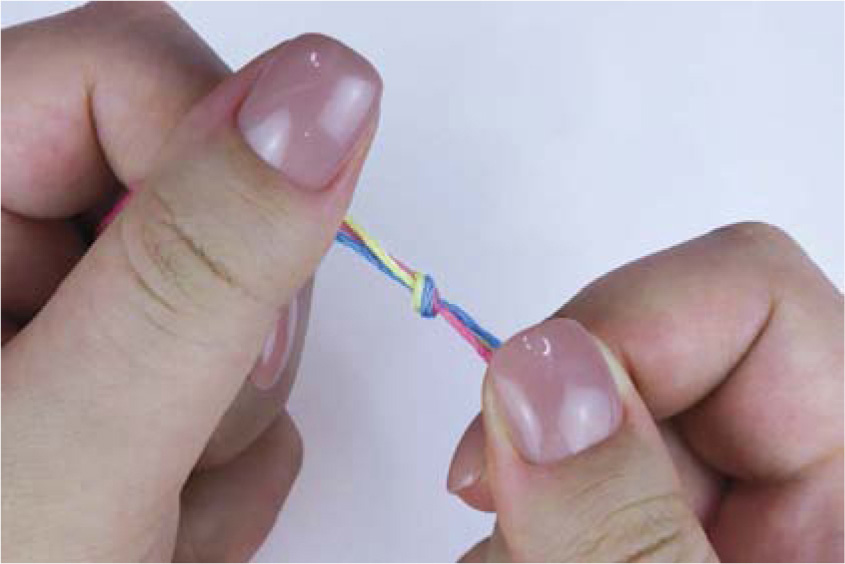
- 5.Pull the string you’re making the knot with up until it sits where you would like the finished knot to be. At this point we have created the first half of the forward knot.
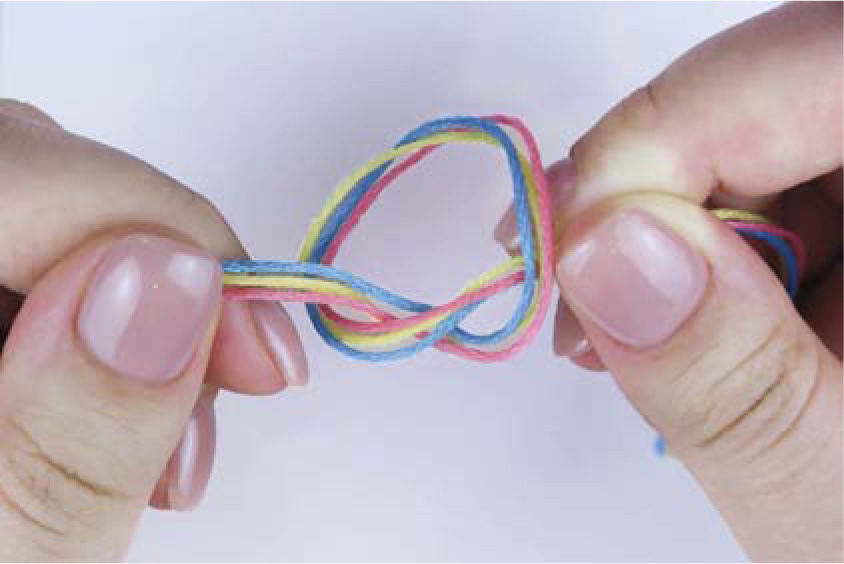
- 6.To create the second half of the knot, we must repeat steps 1–5. The second half should look something like the image above.
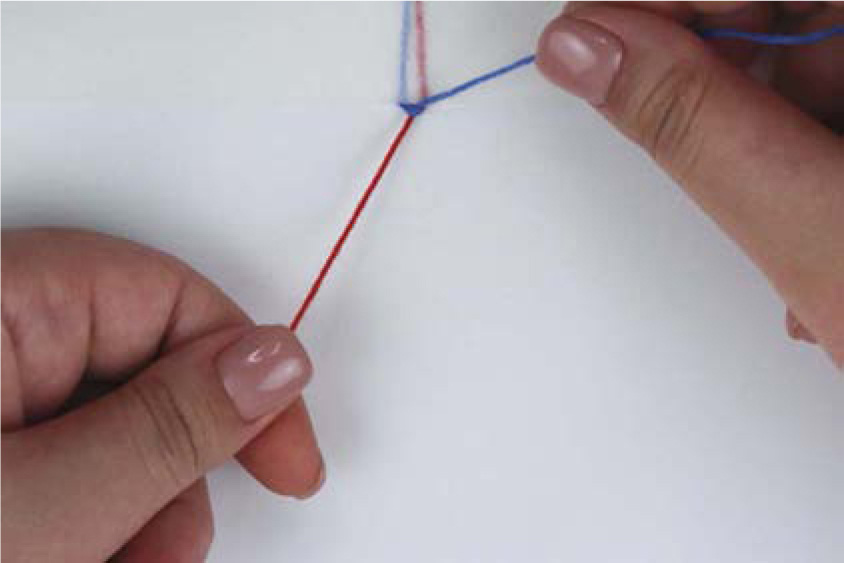
- 7.To complete the knot, pull the string up once more. The forward knot is now complete! Notice how the strings have switched positions and the knot is the color of the string that was originally on the left.
The Backward Knot
- 1.Take the string on the left—the string you will be making the knot onto—and grip it with the pinky finger on your right hand. Pull the string toward you slightly so it is a little tight, making it easier to work with.
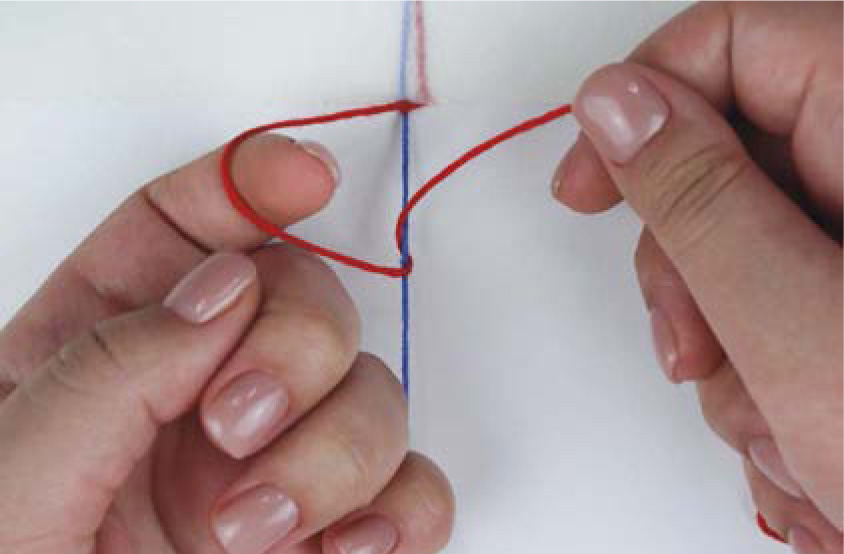
- With your left hand, take the string you will be making the knot with. At the start it will be the string on the right. Stick out your right index finger and loop the string over it with your left hand. Drag the right string across the left string so the right string is on top. The result should look like a mirror image of the shape of the number 4 with your strings.
- 2.Now extend your left index finger and put it into the loop of the mirrored “4” shape that you have created and push it under the string you’re making your knot onto.
- 3.Still using your left index finger, with your nail catch the string you’re making the knot.
- 4.Use your left index finger to twist the string you’re making the knot with and pull it through and out of the loop.
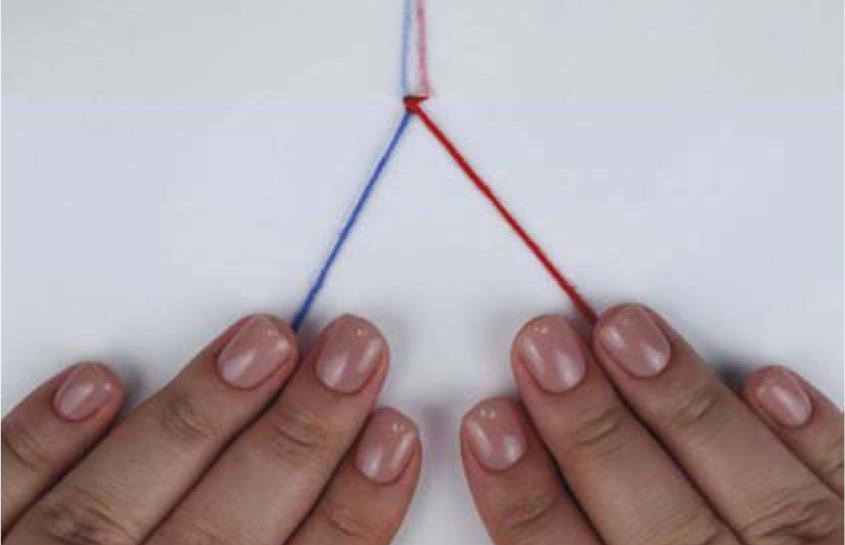
Before we continue, let’s pause and have a look at what the knot looks like at this point. As with the forward knot, all we’ve done is twist the string we’re making the knot with (the right string originally) onto the other string (the left string originally).
- 5.Pull the string you’re making the knot with up until it sits where you would like the finished knot to be. At this point we have created the first half of the backward knot.
- 6.To complete the knot, we must repeat steps 1–5. The second half of the knot should look something like this example.

- 7.To complete the knot, pull the string up once more. The backward knot is now complete! Notice how the strings have switched positions but, opposite to the forward knot, the knot itself is the color of the string that was originally on the right.
The Forward-Backward Knot
- 1.First, follow steps 1–5 of the forward knot. This first half knot will look identical to the first half of a regular forward knot.
- 2.Continue by making half of a backward knot as described in steps 1–5 of the backward knot. Use the same string to make the knot with as you did for the half forward knot. I like to switch hands at this point so that is how I will be demonstrating. Once you’ve created the second half knot your knot should look like this picture.
- The forward-backward knot is now complete! Unlike the forward knot or backward knot, the strings have stayed in their original positions, but the knot created is the color of the string on the left.
The Backward-Forward Knot
- 1.First, follow steps 1-5 of a backward knot. The first half knot will look identical to the first half of a regular backward knot.
- 2.Continue by making half of a forward knot as described in steps 1–5 of a forward knot. Use the same string to make the knot with as you did for the first half backward knot. I like to switch hands at this point, so this is how I will be demonstrating. Once you’ve created the second half knot, your knot should look like this example.
- The backward-forward knot is now complete! Just like with the forward-backward knot, the strings stayed in their original positions, but the knot created is the color of the string on the right.
The Lark’s Head Knot
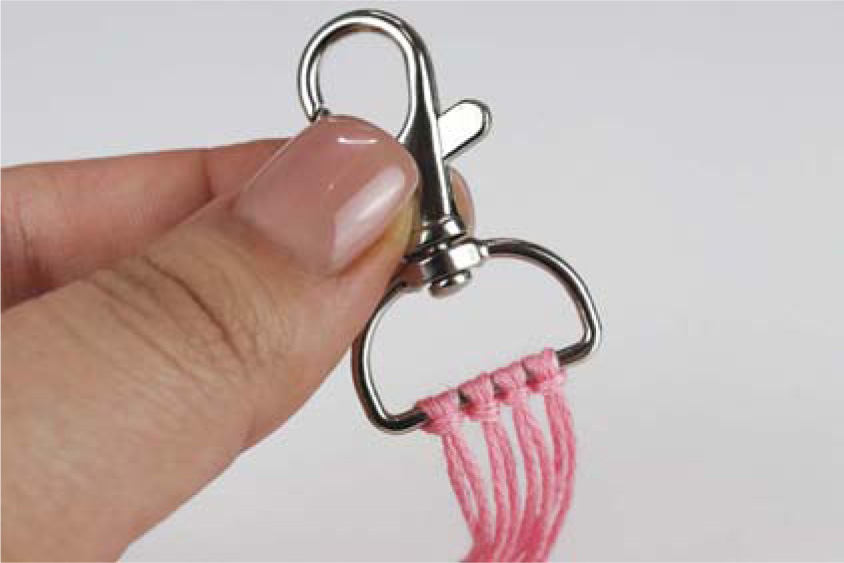
- 1.The lark’s head knot is commonly used to attach strings to something like a keyring or a dowel. To create a lark’s head knot, simply fold your string and place it under whatever you want to attach it to.
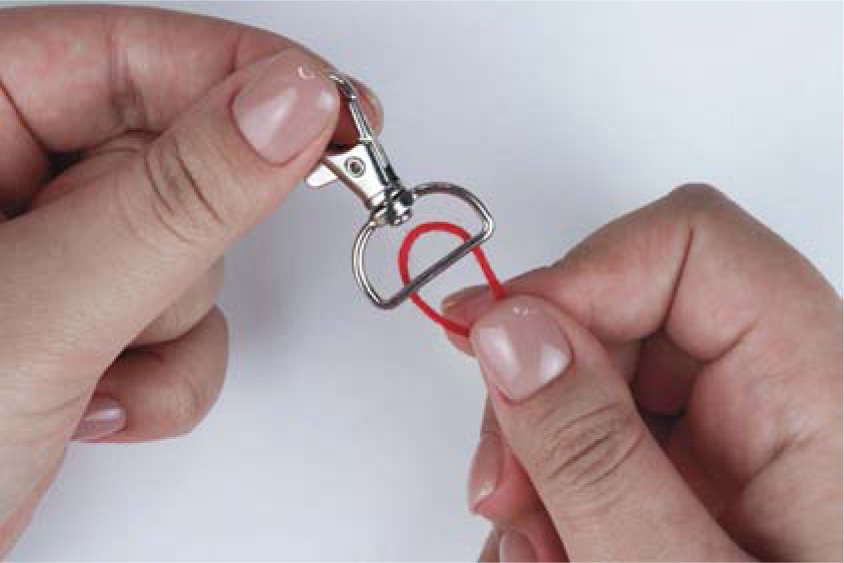
- 2.Grab the loop of the string and fold it over what you are attaching it to.
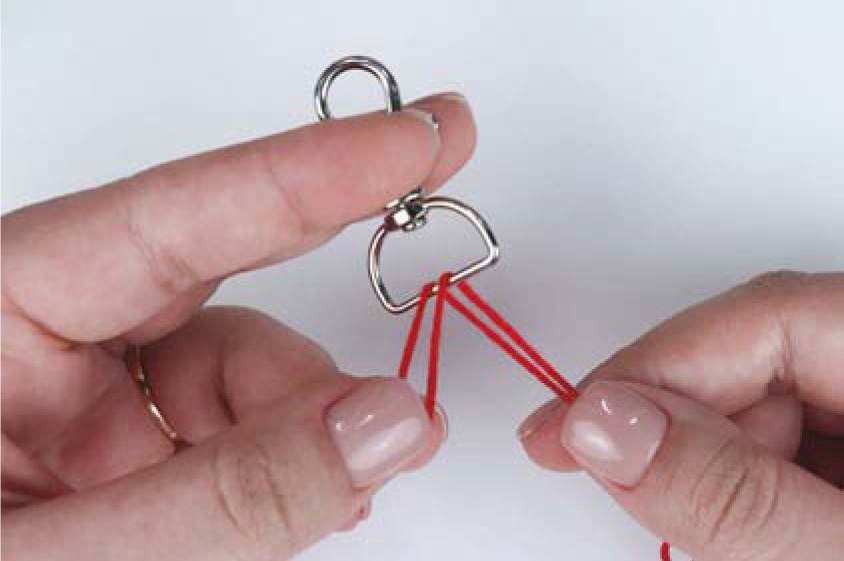
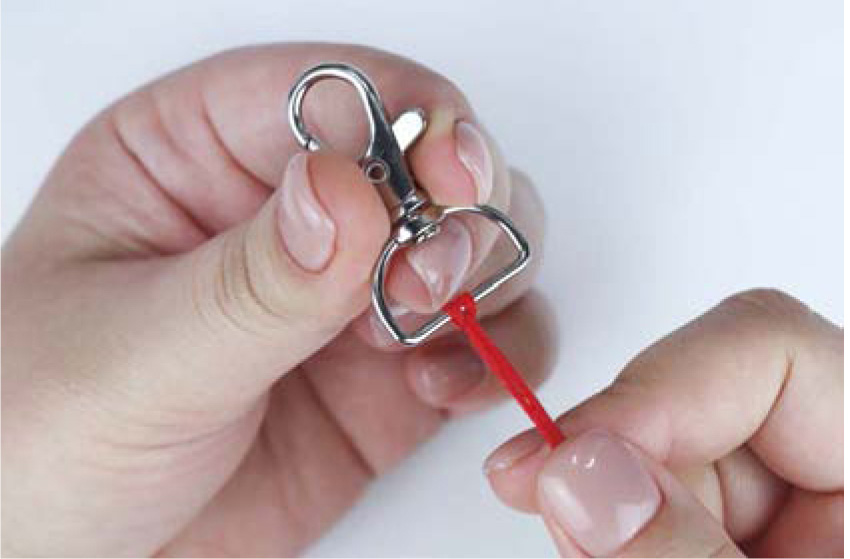
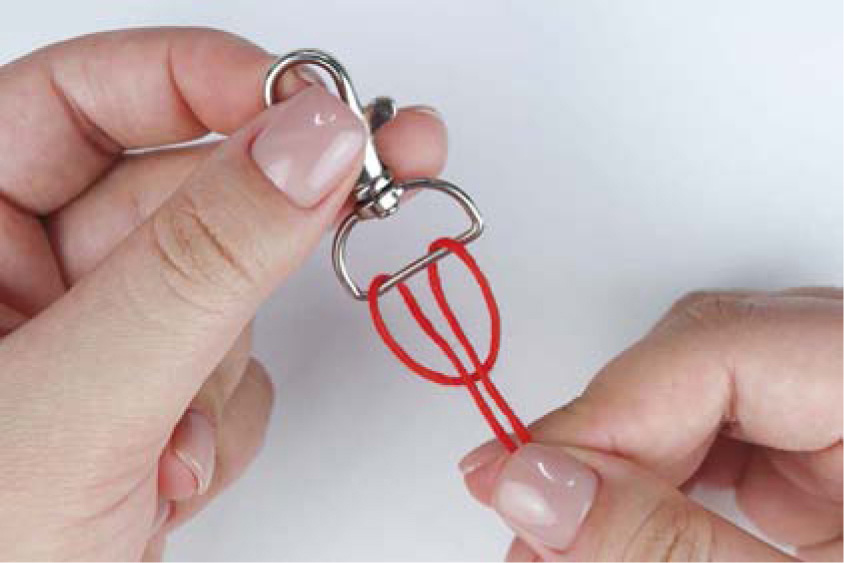
- 3.Pull the ends of your strings through the loop. Your lark’s head knot is now complete.
The Overhand Knot
- 1.Fold one group of ends of your strings over the other to create a loop.

- 2.Grab the ends that are on the bottom and put them through and under the loop.
- 3.Pull on both groups of ends to tighten the knot. Your overhand knot is now complete.