
CHAPTER 6Normal Bracelet Patterns
Normal patterns are one of two main types of patterns in friendship bracelet making. The unique feature of normal patterns is their diagonal knot structure and that the strings within a normal pattern all work together to create the design.
PATTERN ELEMENTS
Looking at a pattern as a beginner can be overwhelming. Let’s break down each element of the pattern and analyze its function.
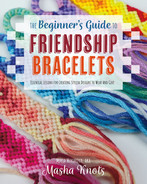
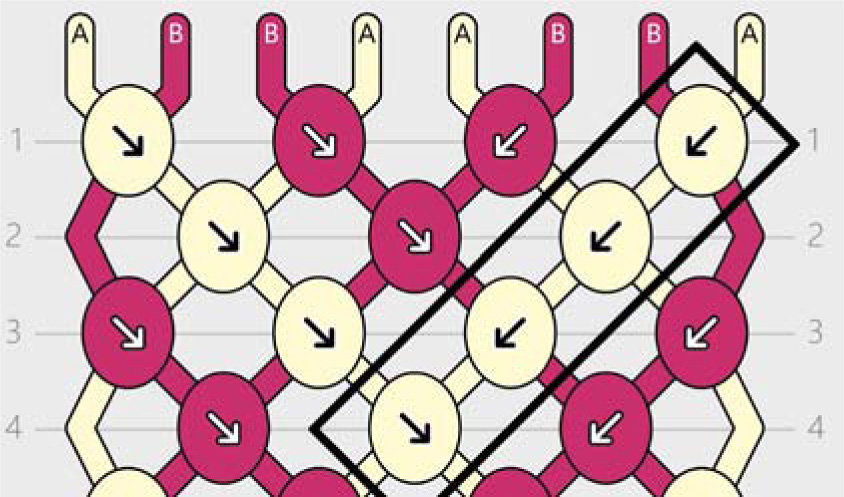
At the top, above the pattern, you can see the pattern preview. This represents what a bracelet would look like if it were to be made using that pattern. Pattern previews are what you see when you are searching for a pattern to create

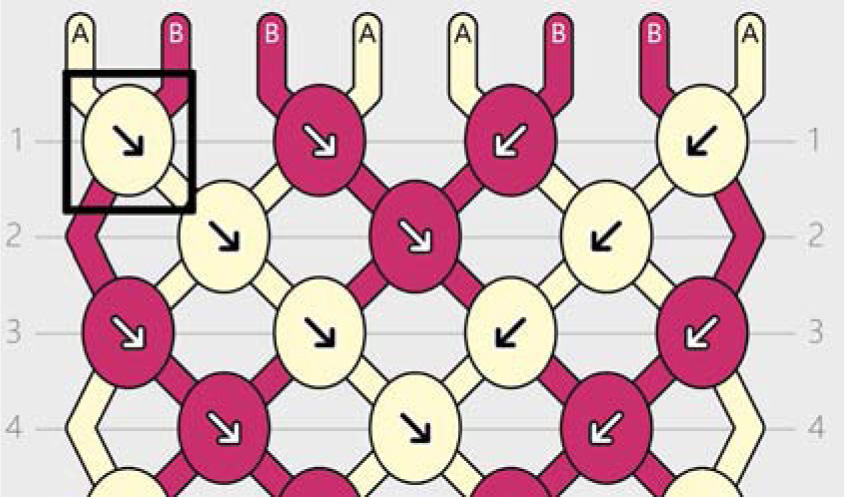
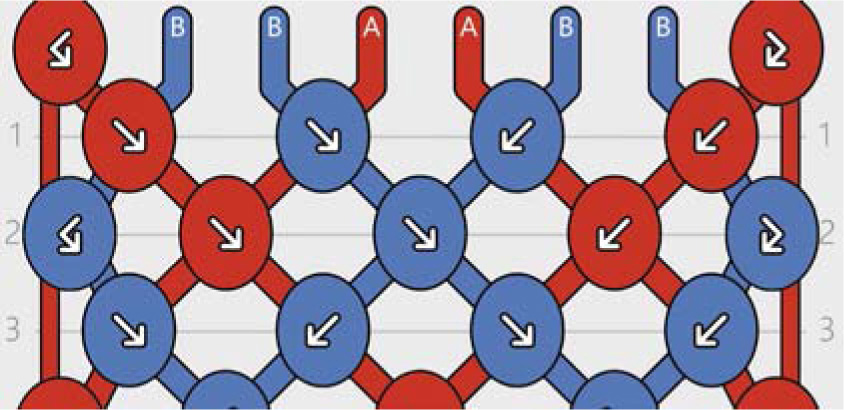
At the top of the pattern itself you can see lines sticking out from the pattern. These lines represent the strings. The number of strings, their colors (which have letters assigned to them to help differentiate similar colors), and the order in which they appear is used to determine which strings you need to cut and how to set them up to start knotting.

The circles with arrows inside them represent individual knots. The color of the circle represents the color of the knot and the arrow within the circle represents the type of knot. There are four types arrows in total and each corresponds to a type of knot.
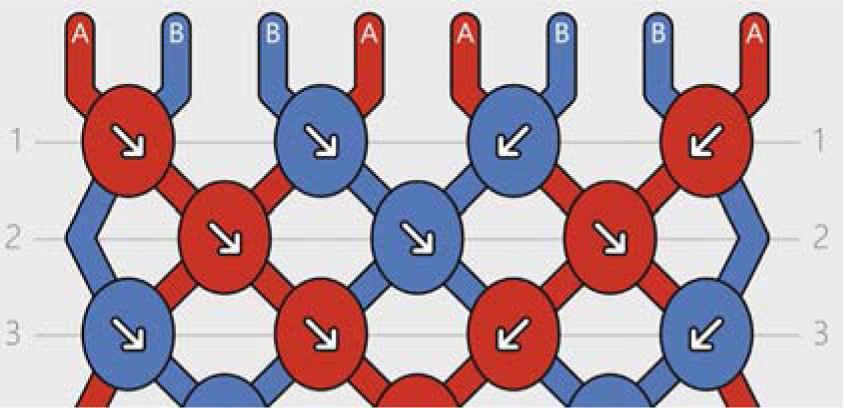
Some patterns intentionally have missing knots within them. These are represented by an absence of a knot in a space where a knot should be. Simply do not make a knot in that space and continue doing the rest of the pattern as normal. Only make knots that are represented within a pattern.
There are also lines at the bottom of the pattern. A bracelet pattern represents only a section of the full bracelet. To create a full bracelet, you would have to repeat the pattern multiple times. The lines at the bottom match up to the lines at the top so once you reach the bottom of your pattern you can continue by following the pattern from the top again.
For most patterns, the colors of the strings at the bottom match the colors of the strings at the top. However, for some patterns the colors change. In such cases it is important to pay attention to the knot types (represented by arrows) rather than knot colors. If the colors of the strings at the bottom of your pattern are in different positions than the colors of the strings at the top, continue repeating the pattern based on the knot types and don’t pay attention to the colors. For a beginner, I recommend checking if the pattern you want to make has matching colors at the beginning and end as it is one less thing to think about when you are just starting out.

The diagonal lines in between the knots represent strings moving within your bracelet in the process of creating it. Taking note of these while knotting can help you figure out which strings are taking part in which knot, and it also helps give you a clear picture of how your strings move within the bracelet.

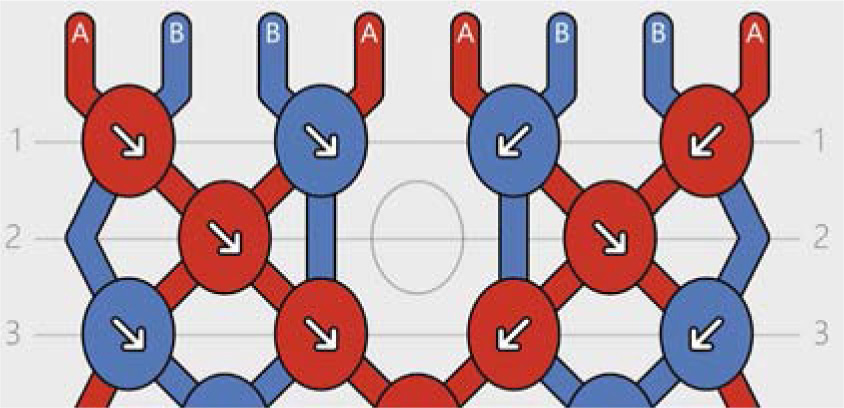
The faint horizontal lines you see represent rows. The numbers on the left and on the right of these lines help keep track of the row numbers, which is useful for reference.
The last pattern element to discuss are the lines that stick out to the left and right of the pattern from every other row. These lines also represent strings, and due to the structure of normal patterns, the leftmost and rightmost strings do not participate in making knots on every other row.

The best way that I can explain why this happens is with the use of a LEGO bricklaying analogy. If you were to lay LEGO bricks directly on top of each other than the wall wouldn’t be connected and with a single push it would come apart. Same thing holds true in normal patterns: If all of the strings participated in all of the rows then there would be no connection between pairs of strings, and they would not form a single bracelet and would instead be separate and come apart.

If the bricks on every other row are placed with a slight offset so they sit atop the center of the seam between two bricks from the previous row, a stack of bricks becomes one secure cohesive wall. This is similar with bracelets. If in every other row, the leftmost and rightmost strings do not participate in knot creation and instead the other strings create knots in the spaces between the knots of the previous row, a bracelet is formed. All the strings are now woven together into a single, cohesive bracelet.

READING NORMAL PATTERNS
There are various ways to read normal patterns. Typically, beginners start by learning the row-by-row method to help understand pattern structures and how to actually create a bracelet using them. Reading patterns row by row was the method I used when I first started out making bracelets. However, I now much prefer the segment knotting method. The segment knotting method does exactly what it sounds like: It allows for knotting to be done in sections, instead of by individual knots within a row. Segment knotting allows for quicker, more versatile, and more enjoyable bracelet making. In this section, I will explain how to use both methods using the example of the Chevron bracelet, which was explained in chapter 5.

Row by Row Method
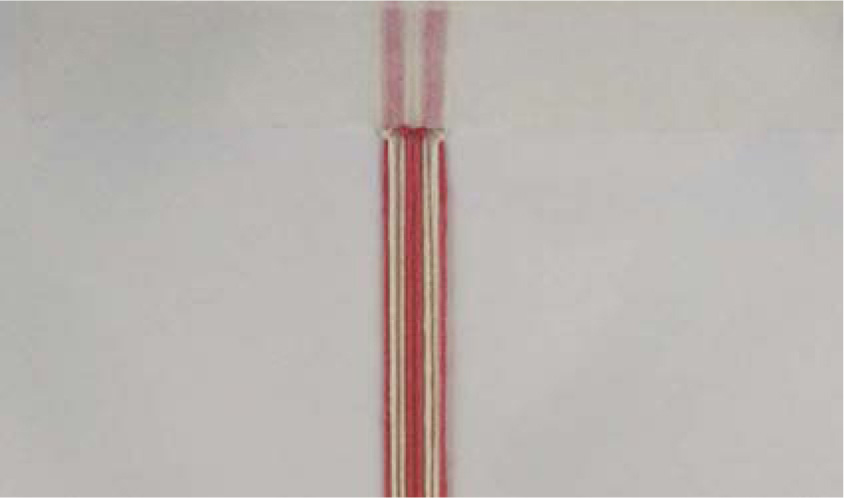
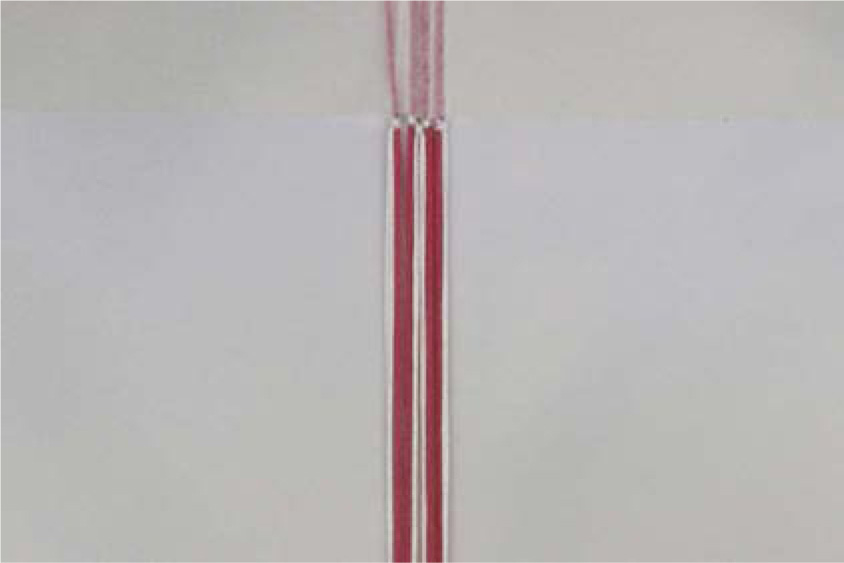
- 1.In this section, for simplicity, cut your strings to be 1 yard long, start at row 1 by arranging our colors based on the pattern shown, and tape your strings down with masking or painter’s tape, leaving a 6-inch tail for the ties you’ll create later.
- 2.The row-by-row method works by reading patterns left to right and row by row. Start by identifying the first knot in the first row.

- 3.Then identify the two strings that make up that knot.

- 4.Next, find those strings within the strings that you cut and arranged, and make the knot that is represented in the pattern using these two strings.
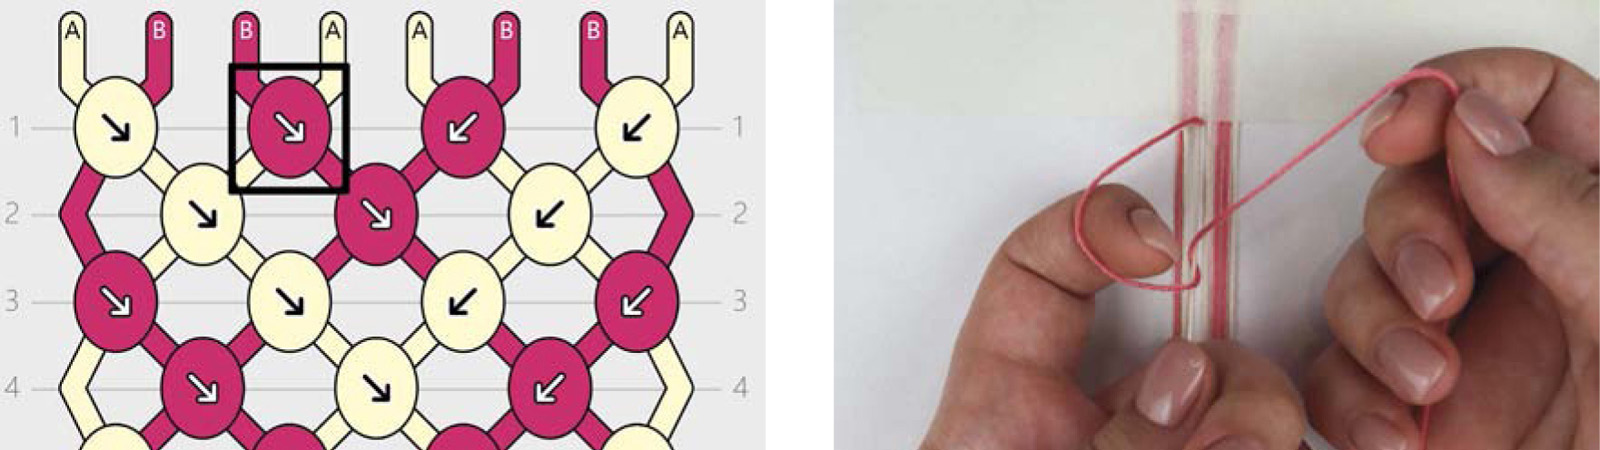
- 5.Move on to the second knot within the row. Identify the two strings that make up the knot as well as the type of knot being made. Find those strings within the strings you arranged and make the knot that is represented in the pattern.
- 6.Move on to the next knot within the row and repeat the steps until you finish the row.

- 7.Once the row is finished, move on to the next row in the pattern. The next row will be an evenly numbered row. You can tell this by the number of the row, which is written on the pattern, and by the fact that the two strings on the edges do not participate in this row.

- 8.Start by putting the two strings that are on outermost edges off to the sides so they don’t get in the way while you are making this row.

- 9.Again starting on the left, identify the first knot within this row. Next, identify the strings that make up this knot. These are represented by the lines going into the knot on the pattern. The strings going into this knot should come from two different pairs of strings from the previous row. Identify the type of knot being made.

- 10.Find the needed strings within your bracelet and use them to make the knot that is represented in the pattern.

- 11.Move on to the next knot in this row and repeat these steps, moving on to the next knot after that and repeating the knots again until the row is complete.
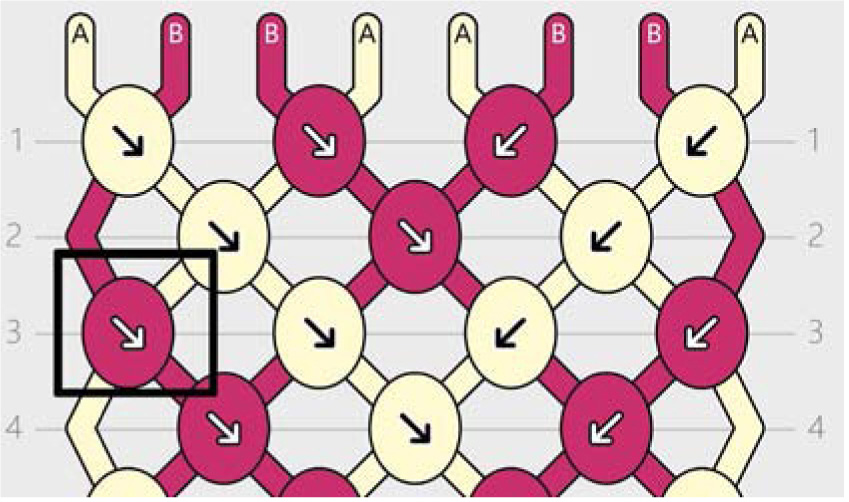
- 12.Once the second row is complete, bring back the strings from the edges and start making the next row by making the leftmost knot first.
Continue making your pattern in such a way until your bracelet reaches the length you desire, at which point you can finish your bracelet in any way you like.
SEGMENT KNOTTING METHOD
In the previous chapter I explained how to make a Chevron bracelet, which is the pattern that I recommend all beginners to start with. As you were reading about the row-by-row method above, explained with the example of the Chevron pattern, you probably noticed that method of creating the pattern is complex. The row-by-row method has many steps and requires you to change the pairs of strings you are working with between each knot. The way I originally explained how to make the Chevron bracelet in chapter 5 is easier in comparison as there were only two repeating steps: a row of forward knots to the right with one string followed by a row of backward knots to the left with another string. This way of making the bracelet is, in fact, the segment knotting method.
The main principle of segment knotting is making as many knots as possible with one string in one go. This reduces the amount of time spent switching the strings to create knots and, with practice, also reduces the amount of time spent reading the pattern itself.
Let’s once again look at the Chevron pattern as an example. The first string in the pattern is used to make a series of forward knots to the right, along the other strings. This is one segment of the pattern and it can be done in one go provided the other strings in the bracelet are in the correct positions.

The last string in the pattern does a mirror image of the steps above: a series of backward knots are made to the left, along the other strings, where the string meets the first string, and they are knotted together.
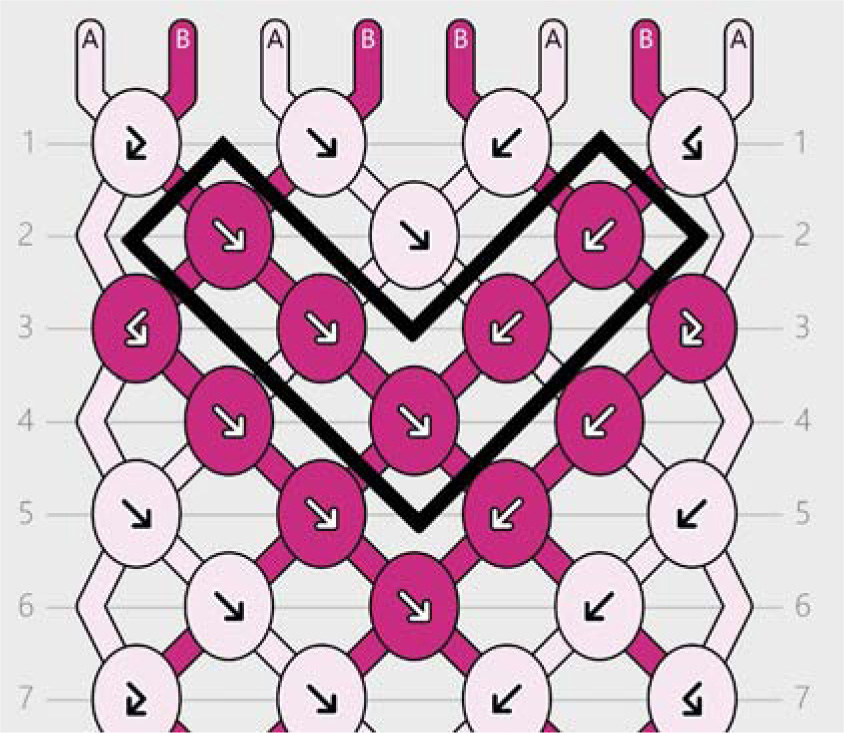
The tricky part with segment knotting is figuring out the order in which to make the segments. Strings in normal patterns work together to create the design and while there is no correct way to segment knot—meaning you can first knot the side on the left, then the right and vice versa—the segments you are planning to knot depend on the other strings within the bracelet being in the correct positions for that. Let’s look at the heart pattern for example.
In this pattern we can quickly identify a segment, perfect for knotting in one go: the mini chevron shape starting at row 2.
However, since we agreed to start at row 1 in this section, we can’t simply start knotting at row 2, so we must first get the other strings into the correct positions. First, we need to arrange our strings according to the pattern and make the knots that appear before the chevron shape. In this case, we need to make a forward-backward knot between the first pair of strings, a mini chevron in the center with the strings of the background color, and a backward-forward knot between the last pair of strings.
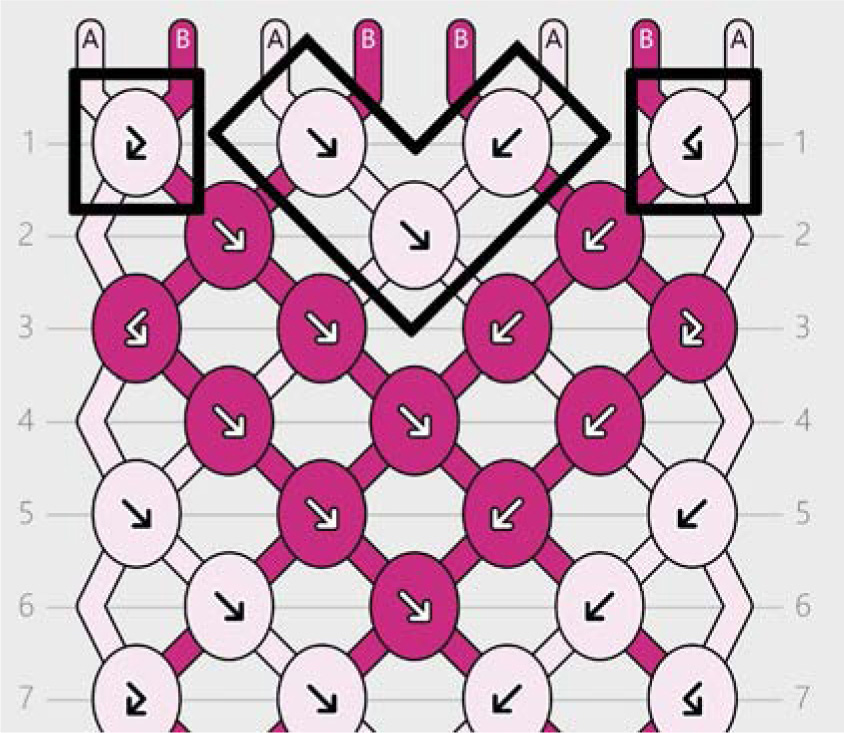
Now that this has been done, the strings are all in the correct positions to create the mini chevron we discussed earlier.
And once that is also knotted, you can start thinking about which other knots within the pattern you can group into segments. The chevron that starts with a reverse knot on either side on row 3 stands out to me.

After that is done, continue making the bracelet by finding sections of the pattern you can make in one go and keep knotting until your bracelet reaches the length you want.

This is an example of the thought process that goes into determining how to group knots into sections. Segment knotting can be tricky. A good way to practice recognizing sections and understanding how they are interconnected is by watching video tutorials for bracelets you want to make that include the pattern on the screen and have a visual representation of the section that is currently being explained. All my video tutorials on specific bracelet patterns have this visualization to help you understand the pattern and segment knotting in general. Check out my YouTube channel if you need further guidance.
STRAIGHT EDGE TECHNIQUE
Straight, even edges are often a desired look for friendship bracelets. Some patterns naturally form a straight edge, while others, structurally, make it very difficult even for experienced bracelet makers to keep a straight line. Keeping your knot tension consistent throughout your bracelet and making sure not to leave extra string between knots can help keep your bracelet edges straight, however, bumpy edges is often simply a result of the pattern itself.

The straight edge technique can be a useful tool to help keep bracelet edges straight even with tricky patterns. This technique is not necessary in every pattern and using it is a matter of personal preference. Some knotters prefer not to use it, while others use this technique in nearly every bracelet. I believe it is a useful technique to know and at least try in your bracelets to see if it fits your knotting style. In this section I will teach you the straight edge technique.
The key to this technique is the use of edge strings that are never used to make knots with and are only used to make knots onto. On the left, only backward-forward knots are made onto the left edge string and on the right only forward-backward knots are made onto the right edge string. This ensures that the strings you are making knots with never go past the border of the pattern. By making reverse knots onto the edge strings the string that made the knot always points inward, toward the center of the bracelet once the knot is complete.
Start by looking at your pattern and all the knots along its edges. If all of the knots at the edges of your pattern are made between two strings of the same color—or if there are knots made between strings of different colors, but these knots are only backward-forward knots on the left edge and forward-backward knots on the right edge—you can simply convert all the knots on the left edge into backward-forward knots and all the knots on the right edge into forward-backward knots. This won’t change the pattern since when two strings are the same color you can make any knot between them, but it will change the knotting structure, creating a straighter edged bracelet.

If some or all the knots at the edges of your bracelet are made between strings of different colors and don’t already fit the straight edge technique, you will need to add two more strings to your bracelet to act as edge strings.

These two extra strings won’t be making any knots and will only act as the stabilizing edge strings onto which knots are made. Because of this you can choose any color for these edge strings, as they won’t be visible within the bracelet. However, I recommend using a color that is already used somewhere within your bracelet since these strings will be visible in the ties of your bracelet. Also, if there is a gap between knots on the edge strings you don’t want an unusual color to peek through. Cut these strings to be the length of the finished bracelet plus the length of the ties on either end and place one on the left edge and the other on the right edge when arranging the strings for your pattern.
Every evenly numbered row of a pattern will have two unused strings, one at each edge. These will be the strings that make the reverse knots onto the edge strings. I find it helpful to print a screenshot of my pattern (or use a digitally drawing tool) and draw two lines, one at each edge, representing the added edge strings. Then for each unused string on even rows in the original pattern, draw backward-forward knots on the left side and forward-backward knots on the right side.
By doing so, you will be making additional knots and your bracelet will become wider by two knots. However, your pattern won’t change much visually. The unused strings on every other row are already represented in the pattern preview as the angled strings on the edges. Without this technique, you will never see these strings as actual knots in that spot.
If you don’t mind the extra work and knots, the straight edge technique is a great way to help keep your bracelet edges straight.
DESIGNING NORMAL PATTERNS
Designing your own normal pattern is a great way to express your creativity but can also be a bit complicated. There are multiple ways to design normal patterns. In this section I will explain how to do so via a grid.
Normal patterns have a diagonal knot structure so start by drawing two staircase-like lines to represent the borders of your pattern. The row line in this case will be diagonal, therefore, to represent a pattern with an even number of strings, make sure the number of knots per row alternates. To represent a pattern with an odd number of strings, make sure the number of knots per row stays the same.
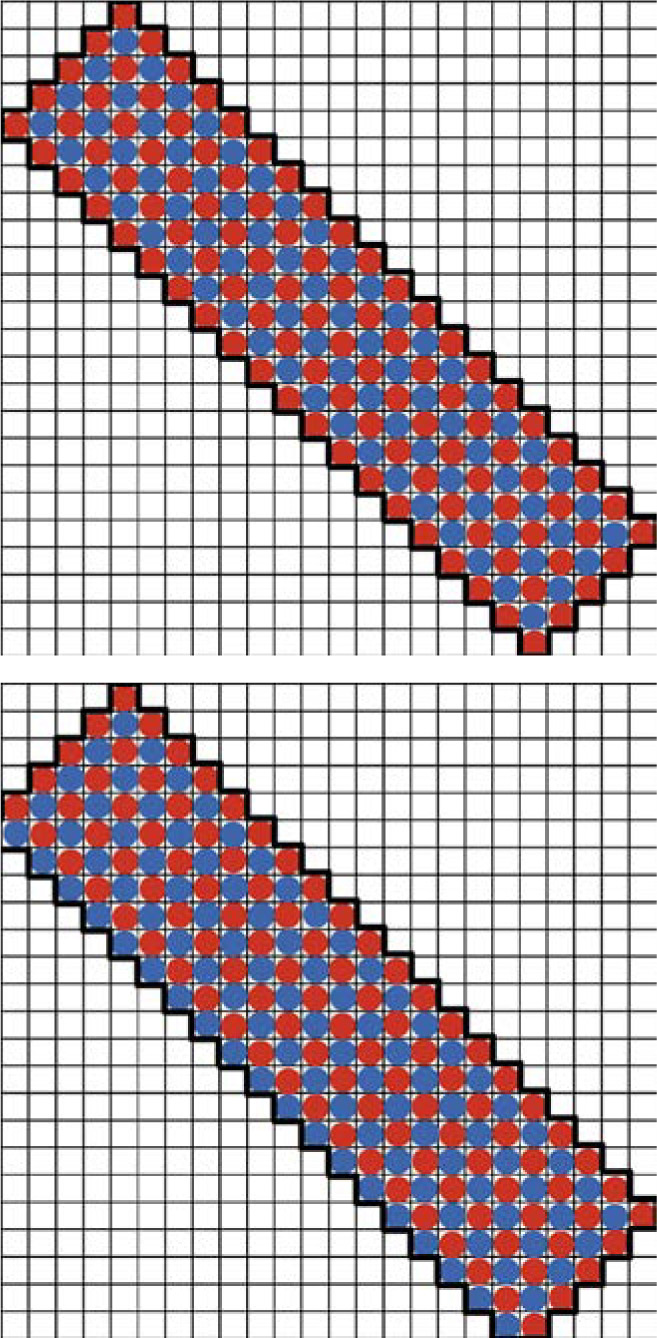
Draw your pattern within the borders and repeat it at least once.
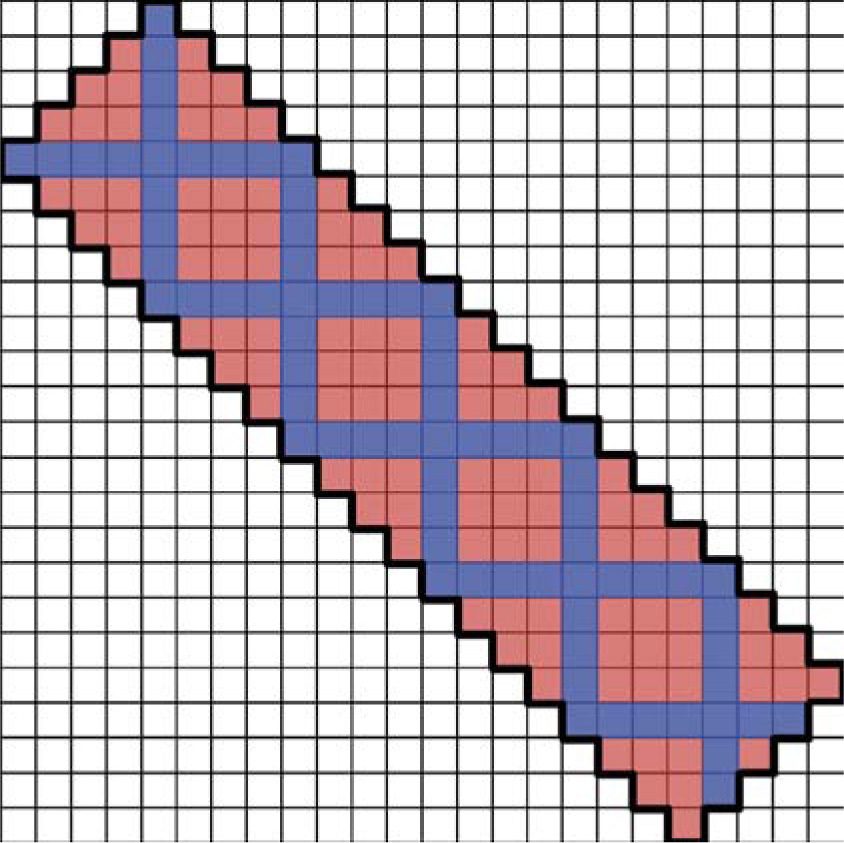
Now draw lines to show where your pattern repeats.

Let’s focus on this part of the pattern. Draw an empty pattern with the decided number of strings and rows, leaving the string colors and the knot arrows blank. Color in the knots according to your design.
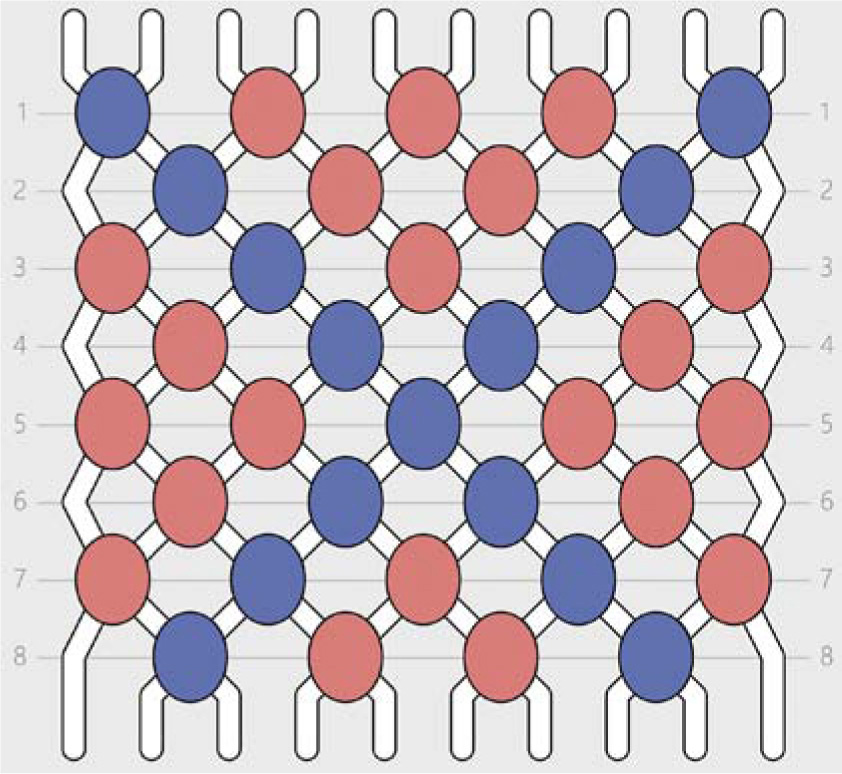
Now for the hardest part: Figure out the paths of your strings and which knots you need to make to create the design. Remind yourself of the four basic knots as well as their representations and functions by rereading chapter 4. If you are making a knot using two strings of the same color, remember this can be any knot as the result will always be the same. If you are making a knot with two strings that don’t need to switch places, perhaps a forward-backward or a backward-forward knot might help. Make sure you line up your strings at the top and bottom of the pattern in such a way that the colors either line up one to one or that even with the colors changing, the pattern will still turn out the way you want. This step is definitely the hardest part of normal pattern creation and its success requires practice and understanding of normal pattern structures.

Once you have designed your pattern, you can upload it online to share with fellow knotters. Read more about online communities in chapter 1.
