
CHAPTER 5Simple Bracelets
Before you start learning about reading bracelet patterns, it is a good idea to make a few simple bracelets to practice the basic friendship bracelet knots. In this chapter I will explain how to make a few of my favorite beginner-friendly bracelets. The bracelets in this chapter are organized in order of difficulty, from easiest to hardest. I recommend you start with the Classic Chevron bracelet before trying any other bracelets in this chapter.
Classic Chevron Bracelet

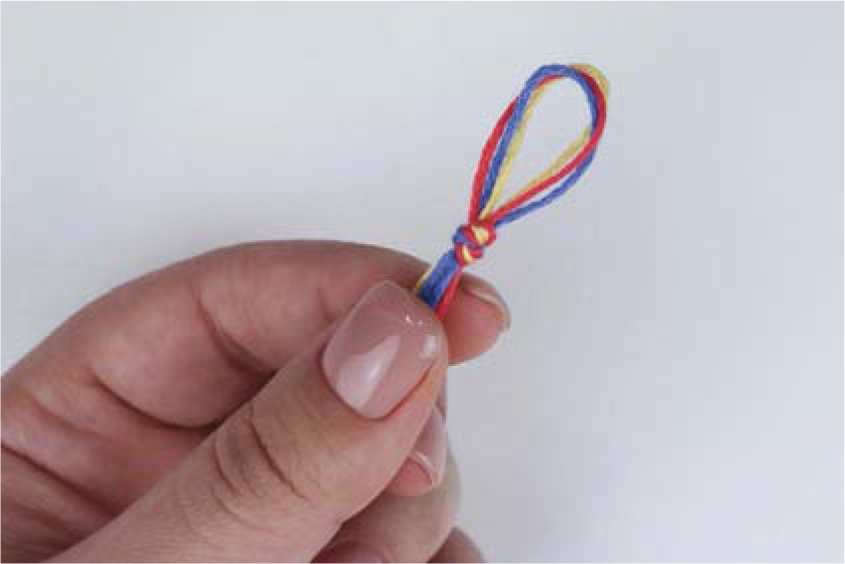
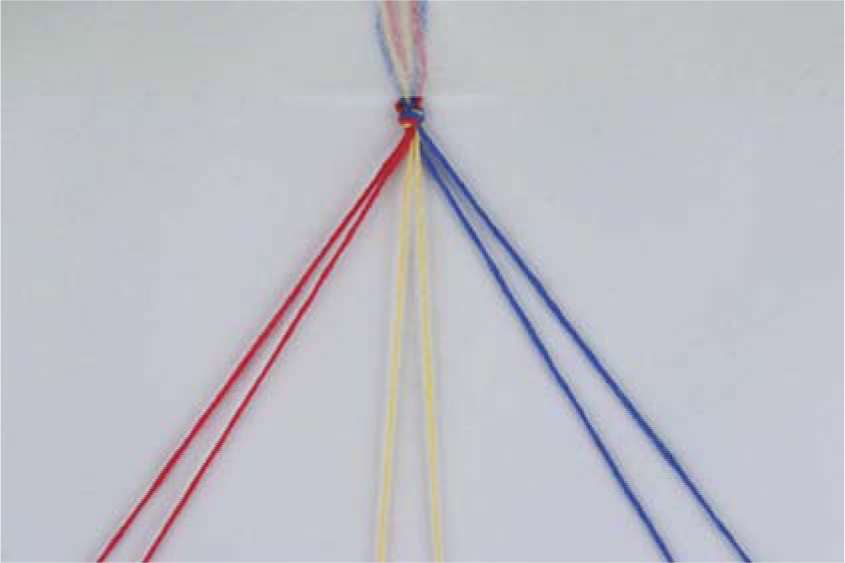
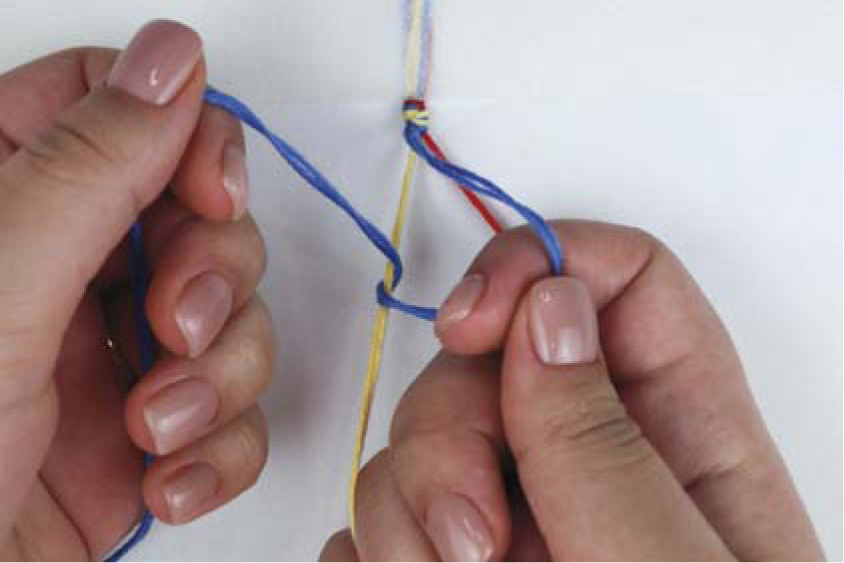
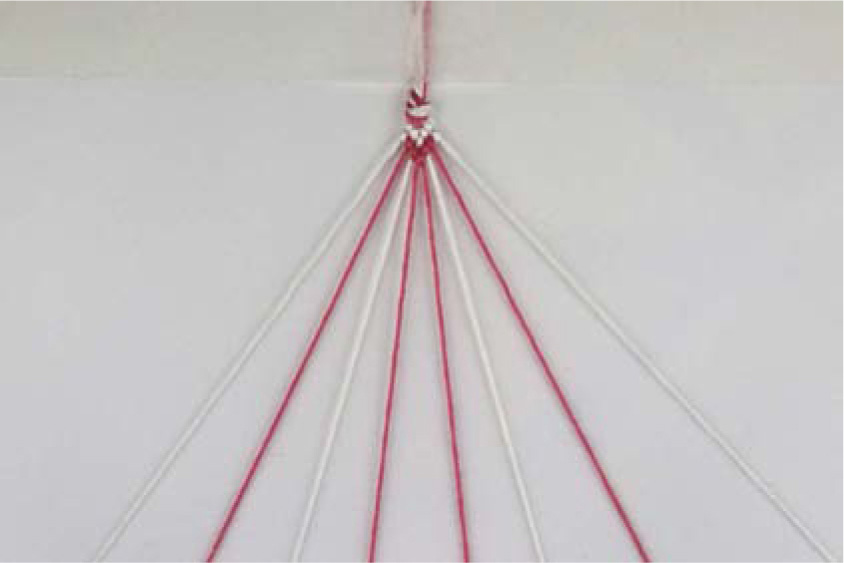
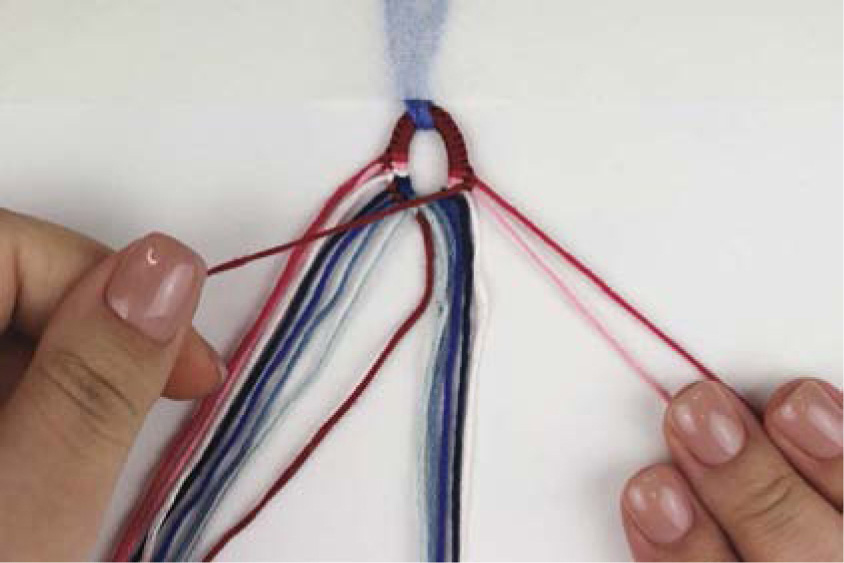
- 1.Start by arranging your strings. Separate them into two bundles with one string per color in each and lay them out symmetrically in the order that you want them to appear in your bracelet. Blue, pink, and yellow for me.

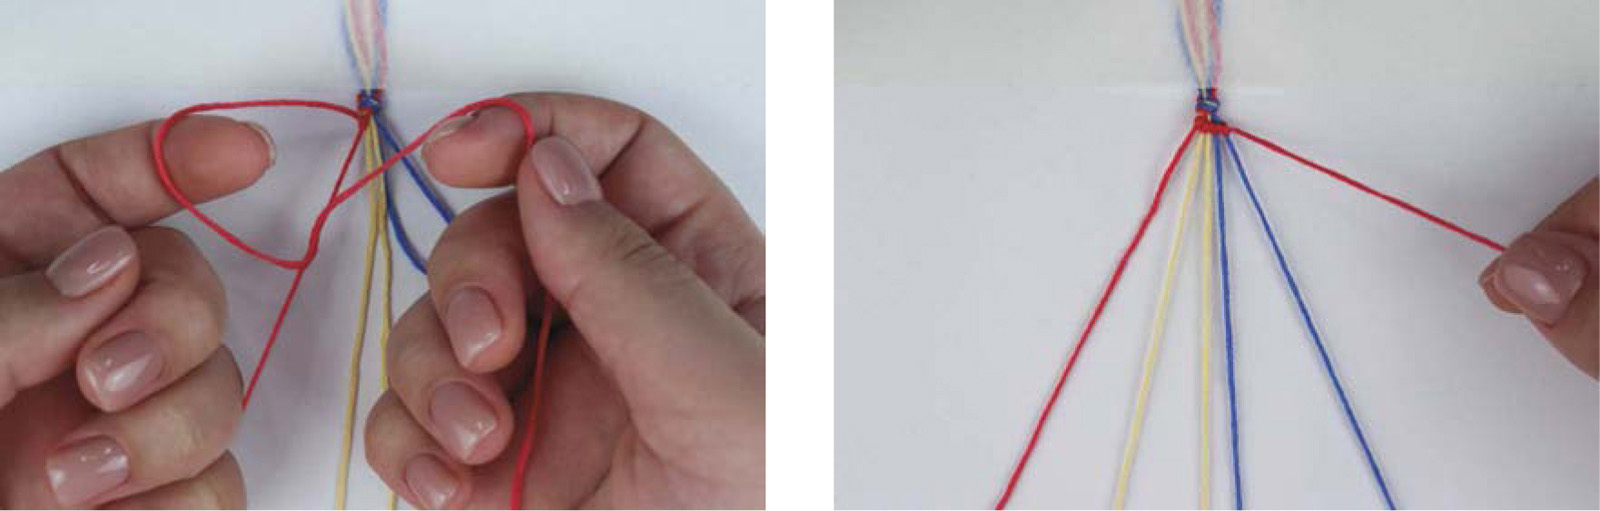
- 2.Grab the outermost string on the left side and make a forward knot onto the next string, which is just to the right of it.
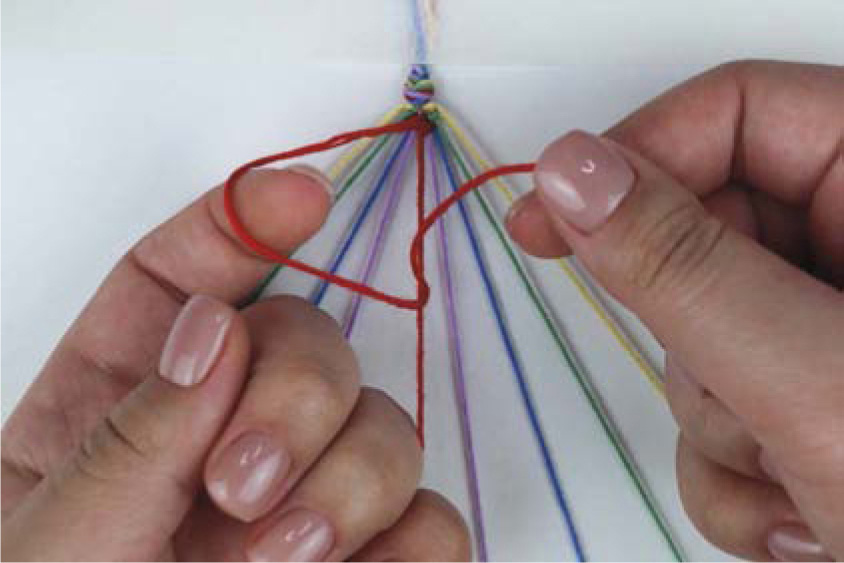
- 3.Grab the next string and do another forward knot onto it with the same string. If you have more strings, continue making forward knots onto them in order until your string reaches the middle.

- 4.Next, grab the outermost string on the right side and do a backward knot onto the string that is just to the left of it.

- 5.Grab the next string and do another backward knot onto it with the same string. If you have more strings, continue making forward knots onto them in order until your string reaches the middle.

- 6.Once both of the strings are in the middle, make a knot between them. This can be any kind of knot as knots made with two strings of the same color will always be the same. Here I’ll just make a forward knot.

The first row after a beginner’s loop may look a bit wonky as the strings are just spreading out after a knot, but as long as you pay attention to the string order and the knots that you are making, it will even out as you go along. Repeat these steps over and over until your bracelet reaches the length you want. Once you’re done, you can create ties for your bracelet, which are explained in chapter 9.
Vertical Wave

- 1.Start by determining the width of your bracelet by choosing several base strings. The more base strings, the wider your bracelet will be, the more strings you will need, and the longer it will take to complete. For this tutorial I will make my bracelet 10 strings wide. For simplicity, cut your base strings to be 1 yard in length. These base strings do not need to be the same color as the strings within your bracelet since these will be visible only in the ties of your bracelet. Secure the strings to your workspace, leaving enough extra string at the top to create your ties once you finish your bracelet.

- 2.Choose the two colors you want to alternate within your bracelet. Cut one string per color to be about 5 feet in length. You will likely have to replace your strings during the knotting process. Place these strings on your workspace—one to the left of your base strings and the other to the right of your base strings. These will be your leading strings.

- 3.Grab the left leading string and make a row of forward knots along each of the base strings.

- 4.Once you reach the end, bring that leading string back by making a row of backward knots onto those same base strings.

- 5.Next, grab your right leading string and make a row of backward knots along each of the base strings.

- 6.Once you reach the end, bring that leading string back by making a row of forward knots onto those same base strings.
Continue repeating these steps until the bracelet reaches the length you want. Once you’re done, you can create ties for your bracelet. These are explained in chapter 9.REPLACING STRINGS


Chinese Staircase

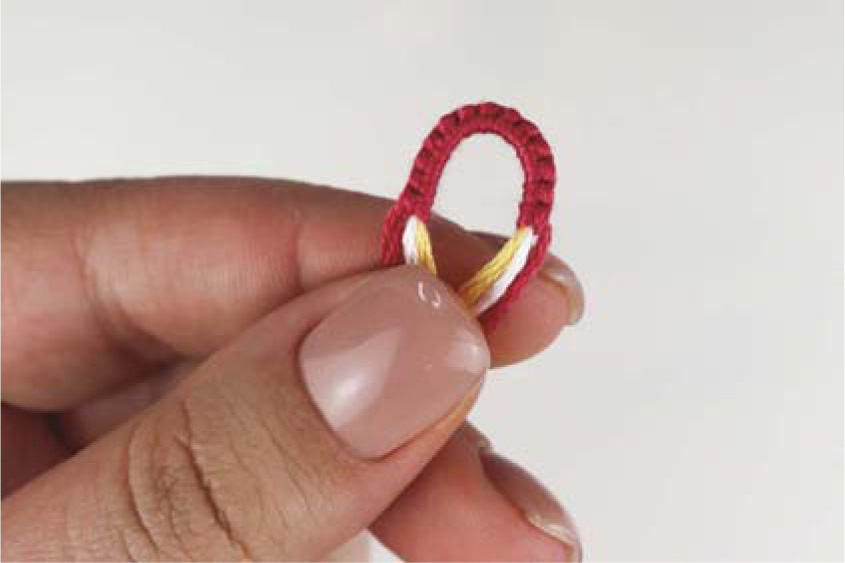
- 1.Start by choosing your colors. The more colors you choose, the thicker your bracelet will be and the longer the strings will need to be. For this tutorial I will choose three colors. For simplicity, cut one string per color, 1 yard in length. Make an overhand knot, leaving enough length at the end to make ties with once you finish your bracelet.

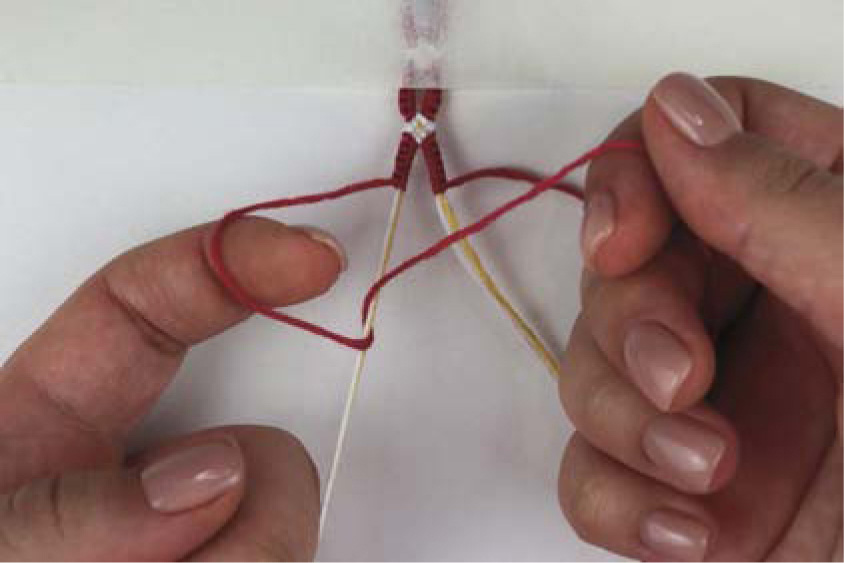
- 2.Separate one string from the bundle and make a forward knot with it onto the entire bundle of strings at the same time.

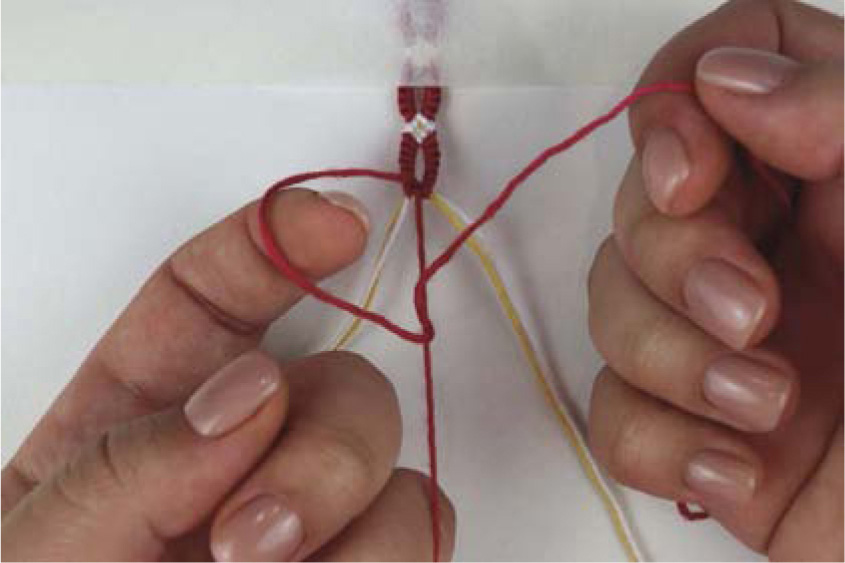
- 3.Continue making forward knots with this string onto the other strings. You will notice that the knots will start to coil around the bundle. This is what gives the Chinese staircase its name, as it resembles a staircase.
- 4.When you want to switch to a different color, simply place your string down to join the bundle and bring out the string you want to switch to and make a forward knot with that string onto the entire bundle of strings, now including the previous string.
Continue making knots and switching colors until the bracelet reaches the length you want. Once you’re done you can create ties for your bracelet. These are explained in chapter 9.
Candy Stripe
- 1.Start by choosing your colors. The more colors you choose, the wider your bracelet will be and the longer your strings will need to be. For this tutorial I will choose three colors. For simplicity, cut two strings per color, each 2 yards in length. Fold the strings in half and make a beginner’s loop, explained in chapter 9.
- 2.Secure your strings to your workspace and arrange them in the order you want them to appear within the bracelet. I want to make two rows per color, so I will double up on my strings. If you would like to do one row per color, you can do that by spreading out the two strings of the same color.
- 3.Take the outermost string on the left side and make a row of forward knots along the rest of the strings in order.
- And that’s it—there is just one type of repeating row to this bracelet. Simply repeat that step over and over until the bracelet reaches the length that you want. Once you’re done, you can create ties for your bracelet. These are explained in chapter 9.

Due to the structure of the pattern, candy stripe bracelets tend to curl. Don’t worry—it’s not just you. If that bothers you, you can try ironing the bracelet, though it shouldn’t be a problem if you were to wear the bracelet with a curl.
Half n’ Half Chevron

- 1.Start by choosing your colors. For this tutorial I will go with four colors: three colors for the left side to alternate and three black for the right side. For simplicity, cut one string per color for the alternating colors and three strings for the black, all 1 yard in length. Make an overhand knot, leaving enough string to make ties with later.

- 2.Arrange your strings by separating them into two bundles, the alternating colors on the left and the three black strings on the right.

- 3.Grab the outermost string on the left and make forward knots with it along the rest of the strings in the bundle until it reaches the center, just like in a Classic Chevron.
- 4.Next grab the outermost string on the right and make backward knots with it along the rest of the strings in the bundle until it reaches the center, just like in a Classic Chevron.

- 5.Once both strings are in the center, make a forward-backward knot with the string on the left onto the black string. This knot reverses the color string back to the left side of the bracelet, and this one knot is what is responsible for the Half n’ Half look.
The first row after a beginner’s loop may look a bit wonky as the strings are just spreading out after a knot, but as long as you pay attention to the string order and the knots you are making, it will even out as you go along. Repeat these steps until the bracelet reaches the length you want. Once you’re done, you can create ties for your bracelet. These are explained in chapter 9.
Refracted Chevron

- 1.Start by choosing your colors. For this tutorial I will choose five colors. For simplicity, cut one string per color, 2 yards in length. Fold the strings in half and make a beginner’s loop, explained in chapter 9.

- 2.Arrange your strings by separating them into two bundles symmetrically, in the order you want them to appear in your bracelet.

- 3.Grab the two outermost strings on the left and do a backward knot with the one that is closest to the center onto the one that is on the edge.

- 4.These two strings have now switched places. Grab the next string, the one to the right of the first two, and do another backward knot with it onto the string that is now second from the edge.

- 5.These strings have now also switched places. Now grab the string that we have so far only made knots onto, the green one in my case, and make forward knots onto the remaining strings to the right of it in this bundle until this string reaches the center, just like in a Classic Chevron bracelet.

- 6.Mirror these steps on the other side. Grab the two outermost strings on the right and make a forward knot with the one that is closest to the center onto the one that is on the edge.

- 7.These two strings have now switched places. Grab the next string, the one to the left of the first two, and make another forward knot with it onto the string that is now second from the edge.
- 8.These strings have now also switched places. Now grab the string that we have so far only made knots onto, the green one in my case, and make backward knots onto the remaining strings to the left of it in this bundle until this string reaches the center, just like in a Classic Chevron bracelet.
- 9.Once the two strings are in the center, make any knot between them, since they are the same color. I will just make a forward knot.
The first row after a beginner’s loop may look a bit wonky as the strings are just spreading out after a knot, but as long as you pay attention to the string order and the knots you are making, it will even out as you go along. Repeat these steps until the bracelet reaches the length you want. Once you’re done, you can create ties for your bracelet. These are explained in chapter 9.
Rag Rug

- 1.Start by choosing how wide you want your bracelet to be. I want mine to be six strings wide. Cut your base strings to each be 1 yard long and then tape them down to your workspace.
- 2.Decide which color you want for the first row within the bracelet. As mentioned previously, scrap thread is great for this bracelet, so I will just go with a random color I have a scrap of. If you are cutting a new string for this, don’t make it any longer than 4 inches. Either tape this leading string down to the left of your bracelet or hold it in place with your finger and then use it to make a row of forward knots along the base strings.

- 3.Once that is done, grab the next color and do the same thing. Repeat these steps over and over until the bracelet reaches the length that you want. Once you’re done you can create ties for your bracelet. These are explained in chapter 9.
- 4.Next, grab a pair of scissors and carefully trim the excess string to be the same length on both sides. Your bracelet is now complete!
Zipper

- 1.Start by choosing two colors and a color for some base strings, which won’t be seen within the bracelet but will be seen in the ties. You can adjust the number of base strings to make your bracelet wider or narrower. In this tutorial I will use two base strings and two strings for each color, each 1 yard long. Make an overhand knot, leaving enough length to use for the ties later, and then secure your bracelet to your workspace.

- 2.Arrange your strings so your base strings are in the center and the color strings are to the left and right of them.
- 3.Start with both of the color strings on the left and make a forward-backward knot onto both base strings at the same time.
- 4.Then with both color strings on the right, make a backward-forward knot onto both base strings at the same time.
Repeat these steps over and over until the bracelet reaches the length you want. Once you’re done, you can create ties for your bracelet. These are explained in chapter 9.

Flip Flop

- 1.Start by choosing your colors. The more colors you choose, the wider the bracelet will be and the longer you will need to cut your strings. I will use six colors in this tutorial. Cut one string per color and cut them to be 1 yard long. Make an overhand knot, leaving enough strings to make ties out of later, and secure your bracelet to your workspace.

- 2.Arrange your strings on your workspace in the order you would like them to appear within the bracelet.

- 3.Start by using the string on the left edge and use it to make a row of forward knots along all of the other strings.
- 4.Once you have finished the row, flip the bracelet over. To do this I need to first remove my tape.
- 5.Once the bracelet is flipped, the string you just made a row with should once again be on the left edge of your bracelet. Make another row of forward knots with this string onto the other strings.

- 6.Once the second row is finished, flip your bracelet once again.

- 7.Your string should be on the left edge again. Make one last (third) row of forward knots with this string onto the other strings.
At this point you are done with making knots with this string. Do not flip your bracelet at this stage. Simply repeat these steps for the next color and then the next color after that until your bracelet reaches the length you want. Once you’re done, you can create ties for your bracelet. These are explained in chapter 9.
Heart

- 1.Start by choosing a color for the heart color and a color for the background. For simplicity, cut two strings per color, each 2 yards in length. Fold the strings in half and make a beginner’s loop, explained in chapter 9.

- 2.Secure your strings to your workspace and arrange them symmetrically with two strings of the background color at the edge on either side and all four strings of the heart color in the middle.

- 3.Start by making a Classic Chevron row with the two outermost strings. Make forward knots on the left side, backward knots on the right, and once they reach the center make any knot in between the two strings.

- 4.Next, grab the outermost string on the left and make a forward-backward knot onto the next string to the right of it.

- 5.Do the reverse on the right side. Grab the outermost string on the right and make a backward-forward knot onto the next string to the left of it.
- 6.Next, do a mini chevron with the two strings we just made knots onto. With the second string from the edge on the left, make forward knots along the rest of the strings on the left side until it reaches the center, and then with the second string from the edge on the right make backward knots along the rest of the strings on the right side until it reaches the center. When the strings meet in the center, make a knot between them.

- 7.Finally, for the last row grab the second string from the edge on the left and make a backward-forward knot onto the string on the edge, followed by forward knots along the rest of the strings on the left side.

- 8.Do the reverse on the right side by grabbing the second string from the edge on the right and making a forward-backward knot onto the string on the edge, followed by backward knots along the rest of the strings on the right side. Once that is done, make a knot between the two strings in the center.
Repeat these steps over and over until the bracelet reaches the length you want. Once you’re done, you can create ties for your bracelet. These are explained in chapter 9.

Chain Link Candy Stripe

- 1.Start by choosing your colors. I chose the six colors of the rainbow. Cut two strings per color (or one, if you want a thinner stripe), each 1 yard in length. I think the best way to start this bracelet is via a straight start, simply by taping strings down to a workspace, leaving enough strings for ties. Secure the strings onto your workspace and arrange them in the order you would like them to appear within your bracelet.
- 2.Start by making a regular Candy Stripe and continue to do so until you go through all of your colors. Next we will make the chains that sit between the woven parts of the bracelet. Grab the first two strings on the left, which should both be of the same color, and make a forward knot.
- 3.Once that is done, make another forward knot between those same strings.
- 4.Then make three more forward knots after that so there are five in total.

- 5.Grab the next pair of strings, which should also be the same color, and repeat the process, making five forward knots in a chain.

- 6.Do the same thing for all of the string pairs.
Once this is done, you can resume making your Candy Stripe as normal. You can make more or fewer knots for the chain itself to either elongate or shorten the chains; just be sure to make the same number of knots for each chain. Repeat these steps over and over until the bracelet reaches the length you want. Once you’re done, you can create ties for your bracelet. These are explained in chapter 9.
Distorted Chevron

- 1.Start by choosing your colors. I recommend choosing two gradients for this bracelet, four strings per gradient, eight strings in total. For simplicity, cut your strings to be 2 yards long, one string per color. Make a teardrop loop, explained in detail on pages 108–109, and arrange your strings symmetrically in the order you would like to see them appear within your bracelet. For me that would be the strings of the first gradient from darkest to lightest followed by the strings for the second gradient from darkest to lightest.
- 2.Once that is done, grab the outermost string on the left and make two forward knots, beginning the chevron shape.

- 3.For the third knot, make a backward knot onto this string instead.

- 4.Then continue with the chevron, making three forward knots with the original string.

- 5.After that, make another backward knot, which will bring your original string into the center.
- 6.Mirror these steps on the right side. Starting with the outermost string make two backward knots, starting a chevron shape.

- 7.For the third knot, make a forward knot onto this string instead.

- 8.Then continue with the chevron, making three backward knots with the original string.

- 9.After that, make another forward knot, which will bring your original string into the center.

- 10.Once that is done, make a forward knot between the two strings in the center.
Repeat these steps over and over until the bracelet reaches the length you want. Once you’re done, you can finish the bracelet however you like and create ties for your bracelet. I made triangle ends. Chapter 9 explains this technique, as well as the technique for the ties.

Daisy Chain
- 1.Start by choosing your colors—two colors for the daisy itself and one color for the background. Cut one string per color. For simplicity, make the background string 3 yards in length and the others 2 yards in length. Make a basic loop, explained starting on page 96, using 13 knots of the background color. I chose 13 knots because I will be making six knots on each side of the bubble. Thirteen is six times two plus one extra knot for the tip of the loop, to connect the two sides of six. If you are making more or fewer knots for your bubble in the bracelet, multiply the number of knots you plan to make by two and add one to get the number of knots you will need for the initial loop.

- 2.Arrange your strings symmetrically with the background strings on the edges followed by the strings for the middle of the daisy (yellow in my case), and then the strings for the daisy itself (white in my case) in the middle.

- 3.Start by making a knot between the two white strings. Make this knot carefully as this knot connects the two halves of the loop. It may be a bit challenging at first.

- 4. Next, with the white string on the left, make a backward knot onto the yellow string followed by a backward-forward knot onto the background string. With the white string on the right, make a forward knot onto the yellow string followed by a forward-backward knot onto the background string.

- 5.Once this is done, make a knot between the two yellow strings.

- 6.Next, make a mini chevron with the white string: Make a forward knot with the left white string onto the yellow string, then a backward knot with the right white string onto the yellow string, and then a knot between the two white strings in the center.

- 7. Now it’s time to make the bubbles. The number of knots you make for the bubble is going to determine how big it is. I will make six knots since this is what works best for me with my knotting tension and strings. You can make more or fewer knots if you wish, as explained above.
- Starting on the left, make forward-backward knots with your background string onto both strings of the flower at the same time. I am making six knots.

- 8.Repeat that on the right side with backward-forward knots. Be sure to make the same number of knots on this side as you did on the left side.

- 9.Once that is done, you can start making another flower. Repeat these steps over and over until your bracelet reaches the length you want. Personally, I make 11 flowers plus the loop at the top and at the bottom of the bracelet. You can make it longer or shorter if you wish.
- You could finish this bracelet on a flower and simply make ties after that, but I like to finish this bracelet with another loop. To finish your bracelet with a loop, you need to finish it after you have created a bubble but haven’t yet connected it together with the flower.
- 10.Grab the background string on the left and make half a forward knot onto both strings of the flower, just like for the bubble. Do the same on the right side but make half of a backward knot there.
- 11.Once that is done, connect the two background strings in a forward knot.
Your bracelet is now complete. Now you can create ties for your bracelet. These are explained in chapter 9.