
Say good-bye to the world of hardware and say hello to GNS3! It’s a whole new way to learn networking. In this chapter, I’ll guide you through the process of installing a basic GNS3 system on Microsoft Windows, Mac OS X, and Ubuntu Linux.
A basic installation consists of the GNS3 application and a few helper applications. On Windows and OS X, all prerequisite applications come bundled in the GNS3 installer package, which is available from the GNS3 website (http://www.gns3.com/).
When installing on Linux, you can download and install GNS3 through a platform-specific package manager or directly from source code. The principles used for installing from source code can be applied to just about any Unix-based system, and it is a great way to ensure that you have the latest software.
The requirements for running GNS3 are largely determined by the operating system you’re installing on, the model and number of routers you want to use in your projects, and whether you integrate external programs like QEMU or VirtualBox into your designs. Most computers purchased in the last few years should be able to run this base installation without a hitch.
That said, if you decide to move beyond creating projects using only Cisco routers and incorporate other virtual environments into your GNS3 designs (such as Linux, BSD, ASA, IDS, or Juniper), you’ll want as much horsepower as you can get your hands on. The more memory and processing power you have, the better everything will run because programs like QEMU and VirtualBox require RAM to run their guest operating systems, and they compete with your native operating system for CPU time. You’ll also need additional disk space to store your guest operating systems.
You can visit the GNS3 website to verify the requirements for your operating system, but a good rule of thumb for a simple base install is the following:
1.5 GHz processor
4GB RAM
250MB free disk space
These are the minimum specifications, and a system that has them should be able to run a simple GNS3 topology using a handful of Cisco routers. Of course, as your projects become larger and more complex, GNS3 will benefit greatly from a more powerful system.
Note
If the installation instructions look overwhelming right now, never fear! Jump ahead to the GNS3 Appliances to learn how to download a pre-built GNS3 appliance, and dive right in.
Compared to other operating systems, installing GNS3 on top of Windows is a no-brainer. The Windows installer package includes almost all of the applications GNS3 needs, plus a few extras not found on other platforms, and everything installs with little user intervention.
The Windows installer includes a few extra useful applications, including QEMU, used for Juniper and ASA; Wireshark, a popular network monitoring program; PuTTY, a Windows terminal emulation program; and VPCS, a simple DOS-like command simulator for testing connectivity using the ping and traceroute commands. The installer contains both a 32-bit and a 64-bit version of GNS3, and it should install the correct version automatically.
Follow these steps to install GNS3 on Windows:
Download the GNS3 all-in-one installer from the GNS3 website (http://www.gns3.com/) and launch it to begin installation.
Click Next on the Setup Wizard screen, and click I Agree on the License Agreement screen.
Select the folder where you want the installer to place a shortcut to the application on the Start Menu, and then click Next. (The default folder is GNS3.)
You can then choose the components to include in your installation, as shown in Figure 2-1. The default option installs all components to create a fully functional GNS3 system, including Wireshark, VPCS, and QEMU. To save disk space, or if you don’t need these added features, uncheck those options. WinPCAP is required for NIO Ethernet cloud connections, and Dynamips is required to create projects using Cisco routers and switches. Make your selections and then click Next.
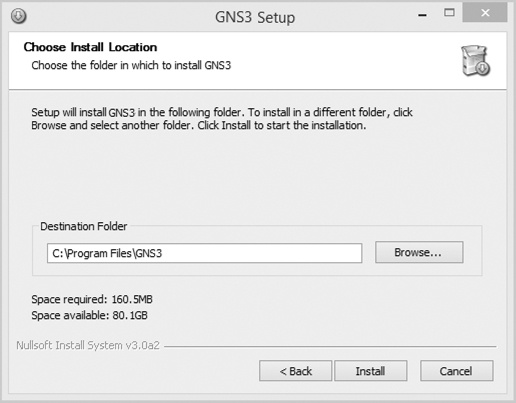
You should see the Choose Install Location screen, as shown in Figure 2-2. To install GNS3 to an alternative location, enter the new location in the Destination Folder field and click Install.
Continue following all the prompts to complete the installation. I recommend you accept all default settings.

GNS3 is supported only on Intel-based Macs running OS X. You should probably make sure you have the latest version of OS X before you run GNS3.
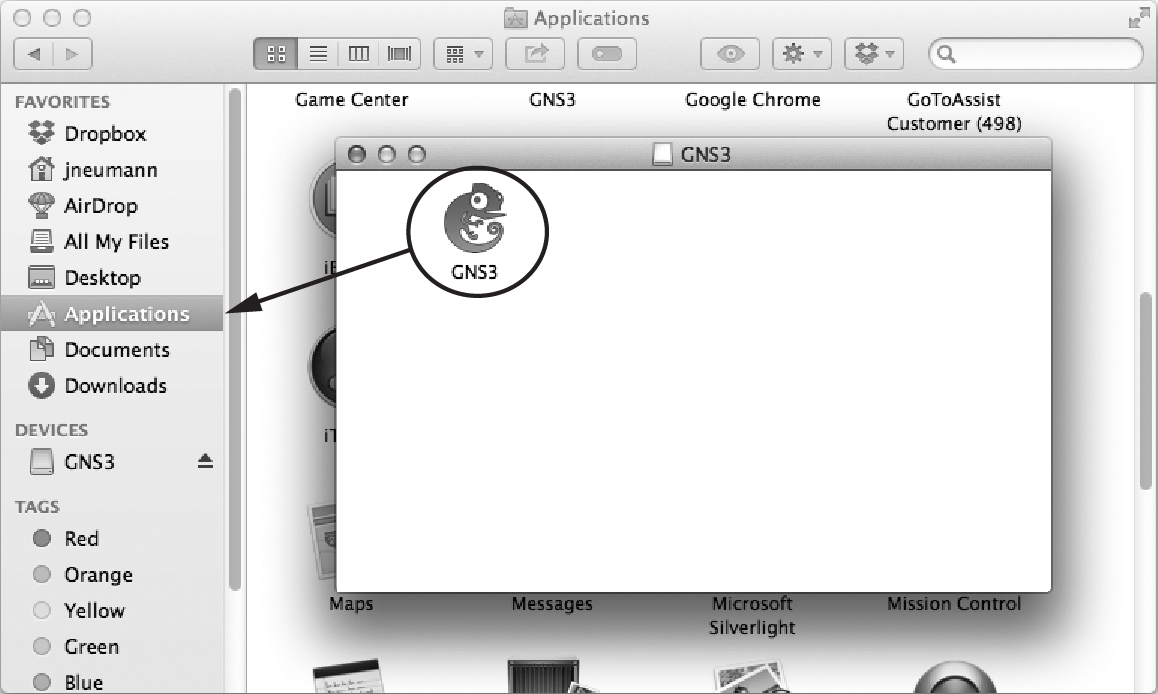
To install the GNS3 application on OS X, download the appropriate installer from the GNS3 website (http://www.gns3.com/), and then double-click the installer and a DMG disk image file will appear on your desktop. Double-click the image file to open the GNS3 folder, and drag the GNS3 icon to your Applications folder, as shown in Figure 2-3.
To run GNS3 on current OS X versions, you might have to right-click the installed application icon and select Open the first time you run it. You’ll be prompted with a dialog warning you that the package is from an unidentified developer and asking if you’re sure you want to open the application. Click the Open button to circumvent this OS X Gatekeeper feature. GNS3 will start normally from then on, without any warnings.
GNS3 runs well on many different Linux distributions, but there’s an unfortunate lack of documentation for most of them. In this section, I’ll strip away the mystery and show you how simple it is to get GNS3 running on a Unix-based platform. I’ve chosen to cover Ubuntu because it’s one of the most commonly used distributions.
There are two ways to install GNS3 on Linux. You can install a bundled package through your package manager or you can install from source code. Using a packaged install is quick and easy, but the downside is that you’re stuck with whatever version of GNS3 has been ported to your specific platform, which may not be the latest version. This is where a source install comes in handy. Installing from source requires only a few extra steps and provides you with the latest version of GNS3. Even though I highly recommend installing from source code, we’ll cover both methods here.
To install GNS3 using the Advanced Package Tools, open the terminal program and enter the following command:
$ sudo apt-get install gns3When prompted, enter your password. The output from this command displays a list of packages that will be installed and shows how much disk space will be used by the installation. The installer prompts you to confirm that this is okay before proceeding. When confirmed, the packages are installed and GNS3 is ready to run.
You can start the application from the terminal program by entering gns3 or launching GNS3 from your display manager’s application menu. You’re now ready to configure GNS3.
Installing from source code ensures that you get the latest version of GNS3 and is, in my opinion, the best way to install GNS3 on Unix-based systems. No matter which version of Linux you’re using, you should be able to use these instructions as a guide to get GNS3 up and running on your system. In the following example, I’ll use Ubuntu Linux as a framework, but keep in mind that these instructions can be applied to just about any Unix-based distribution. The primary difference between distributions is the dependencies that are required and how you install them. Be sure to check the GNS3 website for the latest dependency requirements.
I’ve installed GNS3 on Solaris, FreeBSD, OpenBSD, Ubuntu, Mint, OpenSUSE, Fedora, Fuduntu, Debian, Arch, Gentoo, Kali, Netrunner, and PCLinuxOS, so I’m sure you can run it on your system, too!
Download and unzip the installation files from the GNS3 website (http://www.gns3.com/).
When you download GNS3 for Linux, you’re provided a ZIP file that contains the Linux source code. Upon extracting the file you will see individual ZIP files for each program that GNS3 uses. Unzip the GNS3 source file using the following command, replacing x with your version of the file:
$ cd ~/Download
$ unzip GNS3-x-source.zip

dynamips-x.zip
gns3-gui-x.zip
gns3-server-x.zip
vpcs-x.zip
iouyap-x.zip
Next, you will update the Ubuntu package manager.
Updating your package manager’s index files ensures that you install the most current versions of the dependencies. On Ubuntu, open the terminal program and enter:
$ sudo apt-get updateGNS3 dependencies and package names are specific to each distribution of Linux, so you’ll need to download the ones for your operating system. You also might want to check the GNS3 website beforehand as dependencies can change over time. On Ubuntu, enter the following commands:
$ sudo apt-get install python3-dev
$ sudo apt-get install python3-setuptools
$ sudo apt-get install python3-pyqt4
$ sudo apt-get install python3-ws4py
$ sudo apt-get install python3-netifaces
After installing all the python packages, move on to Dynamips.
You’ll need to install a few more packages on your Ubuntu system before compiling Dynamips:
$ sudo apt-get install libpcap-dev
$ sudo apt-get install libelf-dev
$ sudo apt-get install uuid-dev
$ sudo apt-get install cmake
Next, unzip the source code file, compile, and install Dynamips using the following commands. Replace x with your version of the software.
$ unzip dynamips-x.zip
$ cd dynamips-x
$ mkdir build
$ cd build
$ cmake ..
$ make
$ sudo make install
When you’re finished, you should have a file named dynamips in your /usr/local/bin/ directory. Change the program’s ownership to root and the file permissions to executable. This permits Dynamips devices to connect to the Internet or to live hardware like Cisco switches using your PC’s Ethernet adapter.
$ sudo chown root /usr/local/bin/dynamips
$ sudo chmod 4755 /usr/local/bin/dynamips
For folks who are concerned about security, there is an alternative. You can achieve the same functionality without providing root-level permissions to Dynamips. The following works on Ubuntu and should work on most systems running a Linux kernel 2.2 or greater. This method does not work on BSD-based systems.
$ sudo apt-get install libcap2
$ sudo setcap cap_net_raw,cap_net_admin+eip /usr/local/bin/dynamips
Next, you’ll install the GNS3 server and GUI source files.
GNS3 consists of two main applications: a server application and a GUI application. The server application runs in the background on your PC and is generally not seen by normal users. It runs and manages all the helper applications, such as Dynamips, QEMU, and VirtualBox. The GUI application provides the frontend user experience, and it’s where you interact with GNS3.
$ unzip gns3-server-x.zip
$ unzip gns3-gui-x.zip
To complete the install, run the GNS3 setup script for each application. This step requires elevated root-level privileges, so have your root password handy. Start with the GNS3 server.
$ cd gns3-server-x
$ sudo python3 setup.py install
Next, install the GNS3 GUI application.
$ cd gns3-gui-x
$ sudo python3 setup.py install
When the installation finishes, the application is installed under /usr/local/bin/.
Next, install the Virtual PC Simulator (VPCS) by unzipping the vpcs ZIP file and running the mk.sh installer script. This software simulates a simple host PC and can be used to test routers in your projects.
$ unzip vpcs-x.zip
$ cd vpcs-x/src
$ ./mk.sh
$ sudo cp vpcs /usr/local/bin
The final step is specific to Ubuntu and a few other Linux distributions, and it is necessary due to their implementation of the Gnome Desktop. Without this command, the program will run fine, but some of the menu icons won’t display in GNS3.
$ gconftool-2 --type Boolean --set /desktop/gnome/interface/menus_have_icons TrueTo start the program, enter the following terminal command:
$ gns3That’s it! You’re now ready to move on to configuring GNS3 and creating projects.
An alternative to installing GNS3 on your PC is to use a preconfigured GNS3 appliance. A GNS3 appliance is simply a virtual machine that comes with GNS3 already installed. GNS3 appliances are extremely flexible because they run using an application like VirtualBox. VirtualBox is free and runs on most operating systems (including Windows, OS X, Linux, and FreeBSD).
There are several advantages to running GNS3 in a virtual environment. The primary ones are ease and portability. Most of the setup work has been done for you and you’ll have a portable GNS3 installation that can be moved from one PC to another. If you buy a new computer, you can copy the appliance to the new PC and everything should run exactly as before, regardless of the hardware or operating system your new computer is running.
On the other hand, your host machine needs to have a fast processor and plenty of RAM if you want your guest OS and GNS3 to run well, especially if you create large or complex projects. And because you’re emulating the guest OS’s hardware, your project might take a slight performance hit depending on the underlying hardware.
There are several GNS3 appliances to choose from, but I recommend GNS3 WorkBench (http://rednectar.net/gns3-workbench/), shown in Figure 2-4. The developer has done a good job making the interface clean, and configuration is fairly straightforward. Built on top of Linux, GNS3 WorkBench comes with GNS3, Wireshark, and VPCS preinstalled. It also comes with a bunch of exercises and preconfigured labs to help you prepare for Cisco’s CCNA certification exams. Many of the labs contain problems to troubleshoot, with the objectives clearly spelled out.

GNS3 WorkBench assumes the user has a minimal level of Linux experience, but some previous Linux experience is helpful. Linux shell scripts are included to assist you with installing Cisco IOS, and the labs are designed so that they only need a couple of IOS images to work. As a bonus, the developer has included a bunch of exercises from the GNS3 Vault. The GNS3 Vault website (http://www.gns3vault.com/) is dedicated to all things GNS3, has a strong focus on Cisco education, and provides practice exercises for anyone preparing for Cisco CCNA or CCNP certification.
GNS3 WorkBench is free and available only as a VMware virtual machine. However, you can import the virtual Disk Image and run the appliance using VirtualBox. If you have a desire to natively run the appliance using VMware, visit their website (http://www.vmware.com/) and verify that your platform is supported. Otherwise, I recommend using VirtualBox (http://www.virtualbox.org/) because it supports more platforms—specifically, Windows, Linux, FreeBSD, and OS X—and is free for all of them.
Before you begin, make sure your workstation has 10GB of hard disk space free and that you’ve installed VirtualBox. To install GNS3 WorkBench under VirtualBox, download the GNS3 WorkBench appliance from the GNS3 website (http://www.gns3.com/), and follow these steps:
Launch VirtualBox and create a new virtual machine by clicking New from the startup screen. After the wizard opens, click Continue to begin.
Name your virtual machine, choose Linux as the Operating System and Ubuntu as the Version (as shown in Figure 2-5), and then click Continue.
Adjust the memory settings as required and click Continue to advance to the Virtual Hard Disk dialog. Then, check the Use existing hard disk radio button, click the yellow folder icon, and browse to the location where you saved your GNS3 Workbench files. Select the file named GNS3 WorkBench.vmdk, be sure there’s a check next to Start-up Disk, and click Continue, as shown in Figure 2-6. This is the virtual equivalent of removing a hard drive from one PC and installing it in another.
Click Next and Complete to finish the Install.
Finally, launch GNS3 WorkBench and install the guest additions. Guest additions software provides the hardware drivers for your new virtual machine. Click Devices ▸ Install Guest Additions and follow the onscreen instructions. On FreeBSD, guest additions are installed via the virtualbox-ose-additions package.


Note
If your host PC has extra RAM, you may want to give GNS3 WorkBench 2GB of RAM (or more), instead of the 1GB default. 1GB of RAM is minimal for GNS3. Increasing the available memory will improve performance.
After you complete the install, click Start to boot up Ubuntu. Instructions on how to configure and use GNS3 WorkBench should appear.
In this chapter, you’ve learned that GNS3 can be installed on just about any operating system and that you don’t need a PhD in Computer Science to do it. That’s not to say it installs as easily on every system. Some Linux distributions, for example, may not have a GNS3 package at all (or the available package may be too outdated to meet your needs), but that’s the beauty of open source software: you can install directly from the source code. Another potential pitfall is that all the necessary dependencies—or the proper version of those dependencies—might not be available for your operating system version, and that’s a guaranteed showstopper. In that case, I recommend you use an appliance like GNS3 WorkBench, or use VirtualBox and install a guest operating system that, like Ubuntu, fully supports GNS3.
With GNS3 installed, you’re ready to move on to the next chapter where you’ll learn how to configure GNS3 and create projects.