
12. Editing Tables
You can do all kinds of things to make your table and its data look good. Sometimes you might need to nudge a row or column size to add a little space around the cell contents, or add and subtract cells, columns, and rows. Other times, your table might require a complete makeover with new fonts and styles. Or how about changing the table border style and color to really add some pizzazz? In this chapter, we’ll delve into the many ways you can make adjustments to your table’s appearance and structure.
For starters, any of the regular formatting tools you use to change the appearance of your document text can be applied to your table data, too. You can change the fonts, sizes, positioning, color, and so forth using the Home tab to access basic formatting tools. In addition to the basics, Word adds two new tabs to the Ribbon when working with tables: Design and Layout. Grouped under the heading of Table Tools, these tabs offer an array of tools for working specifically with tables and table elements. You’re about to learn how to apply these tools, so get your table ready for company.
Selecting Table Parts
Before you can apply formatting or other changes to your table data, you need to learn how to select the various parts of your table. Selecting table parts is akin to selecting regular document text: Much clicking and dragging is involved. Figure 12.1 shows an example of a selected row; notice all the row cells are highlighted in gray signifying selection.

FIGURE 12.1 You can easily select parts of the table in order to apply formatting or make other modifications.
Use these selection techniques to select parts of the table:
• To select a single word or number, double-click the data.
• You can also select a cell by moving the mouse pointer to the left border of the cell until the pointer looks like a thick arrow icon, then click.
• You can also triple-click to select a cell.
• Drag across multiple cells to select them.
• To select an entire row, move the mouse pointer to the left border of the row until it takes the shape of a thick arrow pointer, then double-click.
• To select an entire column, click the top border of the column (the mouse pointer turns into a thick downward-pointing icon when you’re hovering over the column border).
• To select the whole table, click the tiny square in the upper-left corner of the table.
• You can also use the Layout tab’s Select drop-down menu to select parts of your table.
To deselect any selected area or item in a table, just click anywhere outside the selected element.
Changing Column Widths and Row Heights
Every column and row is resizable in a table. You can expand and contract columns and rows to modify the appearance of your table. For example, if the cell contents look too tight, adjust the column width, or if you need to insert more lines of text in a cell, you can adjust the row height to fit more text. Many scenarios arise that require some tweaking of table columns and rows, so let me show you how to manage them when they happen.
Resizing by Dragging
One of the most direct ways to change the column width or row height is to just move the border yourself. You can do this by dragging the row or column border. Move your mouse pointer over the border you want to adjust until the icon changes to a double-sided arrow pointer, as shown in Figure 12.2. Next, click and drag the line to the size you need. When you drag a row or column border, it affects the entire row or column. Depending on what line you’re dragging and which direction, the column width grows or shrinks, or the row height gets taller or smaller.
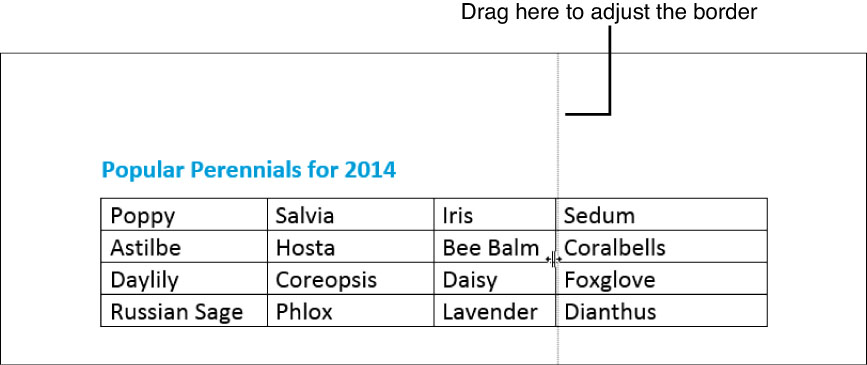
FIGURE 12.2 Manually dragging a column or row border is an easy way to adjust your table.
Using the Tab Tools
You can also adjust the cell size using the controls found on the Layout tab, one of the two Table Tools tabs displayed whenever you work with a table. Grouped under the heading of Cell Size, shown in Figure 12.3, you can see and set measurements for columns and rows. The first measurement (Table Row Height) shows row height, and you can adjust it using the spinner arrows or you can type in a precise measurement (based on inches). The second measurement (Table Column Width) shows column width, and again, you can click the spinner arrows or type in a value to change the setting. Simply click in a cell in the row or column you want to change, then specify another value on the Layout tab.
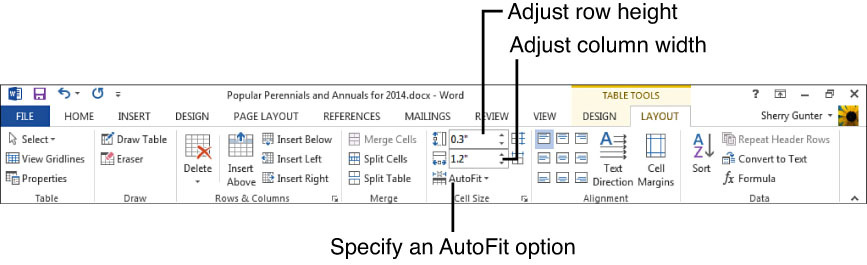
FIGURE 12.3 You can also use the tools on the Layout tab to adjust your table.
Under the Table Row Height and Table Column Width controls on the Layout tab sits the AutoFit command, shown in Figure 12.3. AutoFit does exactly as its name suggests—it automatically adjusts the row or column to fit the content, resizes to fit the page, or lets you set a fixed width. Click the AutoFit drop-down arrow and make your selection. AutoFit Contents is the default setting unless you specify something else.
Using the Table Properties Dialog Box
Yet another way to set column width and row height is through the Table Properties dialog box, shown in Figure 12.4. You might use this route if you want to set a few additional options along with resizing your columns and rows, such as controlling how a row or column breaks across pages, or specify a minimum width or height, or change the measurement from inches to percentage.

FIGURE 12.4 You can also use the Table Properties dialog box to adjust rows and columns.
To open the dialog box:
• Click the tiny Table Properties icon in the corner of the Cell Size group of tools on the Layout tab.
• Or right-click the table and choose Table Properties from the pop-up menu.
• Or click the Properties button on the Layout tab.
Next, click either the Row tab or the Column tab within the dialog box to view the associated settings.
Here’s something interesting about the Table Properties dialog box: The Row and Column tabs both offer two buttons labeled Previous and Next that you can use to set different row height or column width values for each row or column in your table. Set a value for the current row or column, then click the Previous or Next button (depending on which direction in the table you’re going) and set another value for the next row or column.
Adding and Deleting Columns and Rows
An essential part of working with tables is the ability to add and subtract columns and rows. For example, you might need to add some columns to include more data in a table, or you might want to remove rows you no longer need. As usual, you have several ways to add and delete columns and rows. I’m going to show you all the major methods; you can pick the one that you like the best.
Let’s start with adding rows and columns. One technique that’s quick and easy is to just move your mouse pointer over to the left of a row line, as shown in Figure 12.5, and click. Word inserts a new row immediately. If it’s a new column you want, move the mouse pointer over the top of a column border line, as shown in Figure 12.6, until it becomes a plus icon, then click to instantly insert a column.
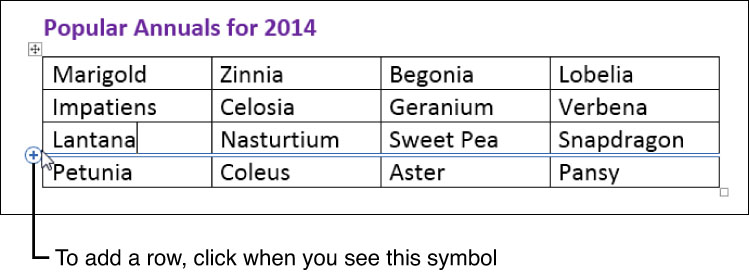
FIGURE 12.5 You can instantly insert a row by hovering to the left of the row border.

FIGURE 12.6 You can instantly insert a column just by hovering over the column border.
My favorite method is the right-click technique. Right-click a cell in the column or row to display the pop-up shortcut menu, click the Insert command, and then click an Insert option (see Figure 12.7). You can insert a column to the left or right of the current location in the table, or insert a row above or below the current location.
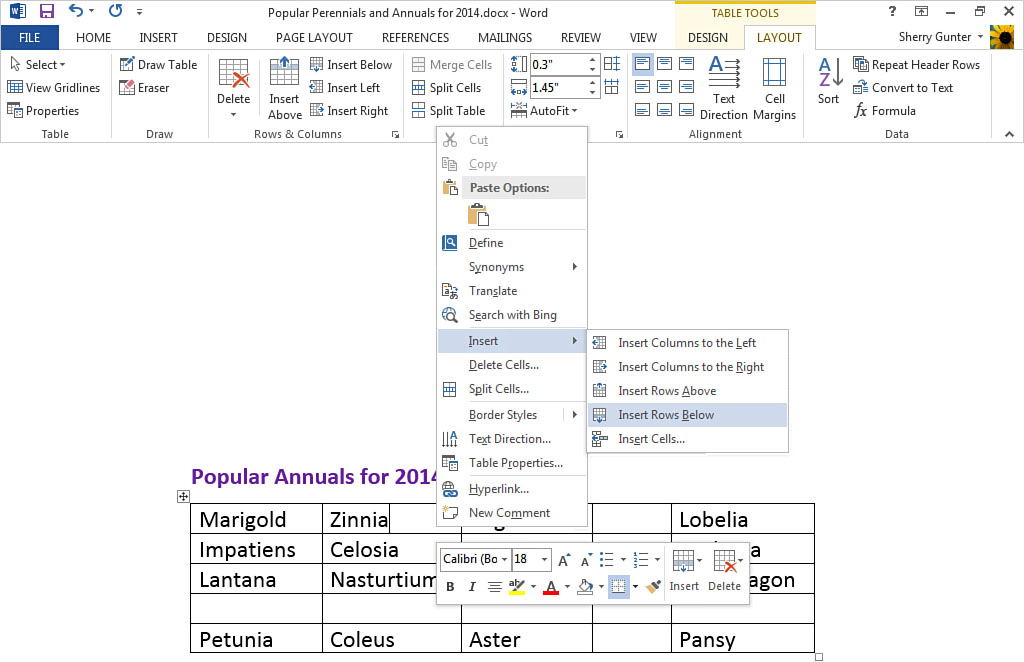
FIGURE 12.7 Right-click a row or column and choose an Insert option from the pop-up menu.
Just as easy as the right-click method is to click what you want to do using the tools on the Layout tab, shown in Figure 12.8. Grouped under the Rows & Column heading of tools on the tab are four Insert commands. Here’s what each one accomplishes with a simple click:
• Insert Above Adds a new row directly above the current row.
• Insert Below Adds a new row directly below the current row.
• Insert Left Adds a new column directly to the left of the current column.
• Insert Right Adds a new column directly to the right of the current column.

FIGURE 12.8 You can also use the tools on the Layout tab to add and remove columns and rows.
If it’s removal you want, you can click the Delete button on the Layout tab, shown in Figure 12.9, and remove columns and rows using the Delete Columns or Delete Rows commands. To remove multiple columns or rows, first select them, then activate the appropriate command.

FIGURE 12.9 Use the Delete command to remove columns and rows.
Do you want to add multiple rows and columns? That’s easy—first select the number of columns or rows adjacent to the spot where new columns and rows are to be inserted. Now when you activate the Insert command, Word inserts the same number of new rows and columns. (Repeat, if necessary; for example, if you want to insert four columns but can’t select that many because you have only three columns, select two of the columns and then choose Insert twice.)
You can also remove multiple rows or columns by selecting them before applying a deletion technique.
You can also use Word’s mini toolbar to add rows and columns. The toolbar often appears when you’re performing various tasks, and if you’re performing tasks in a table, the Insert and Delete buttons are added so you can quickly add or remove a row or column you’re currently working with in the table. To use the toolbar, click the Insert or Delete button and choose an option.
Another method for adding and deleting cells involves a dialog box. You can use the Insert Cells or Delete Cells dialog boxes to change your table. Both dialog boxes look the same, but one is obviously for adding to the table, and the other is for deleting. To open the Insert Cells dialog box, shown in Figure 12.10, click the Table Insert Cells icon (the tiny icon in the bottom-right corner of the Rows & Columns group of commands on the Layout tab, pointed out in Figure 12.8). You can also access the dialog box by right-clicking and choosing Insert, Insert Cells. From the dialog box, click the Insert entire row or Insert entire column option and click OK to activate the change.

FIGURE 12.10 The Insert Cells dialog box.
To open the Delete Cells dialog box, shown in Figure 12.11, click the Delete button and chose Delete Cells. You can also right-click the row or column and choose Delete Cells from the pop-up menu. From the dialog box, click Delete entire row or Delete entire column and click OK.

FIGURE 12.11 The Delete Cells dialog box.
You can learn more about deleting individual cells in the next section.
![]() Tip
Tip
Did you make a mistake and delete the wrong column or row? No problem; just click the Undo button on the Quick Access toolbar (upper-left corner of the program window, above the Ribbon’s tabs).
Did you draw a custom table using the Draw Table command? You can draw more lines in the table using the same drawing mode to create more columns, rows, and split cells. Just click the Draw Table button on the Layout tab and start drawing in new lines. You can use the Eraser tool to erase lines and remove columns and rows. Learn more about drawing your own tables in Chapter 11, “Adding Tables to Word Documents.”
Adding and Deleting Cells
Adding and removing columns and rows might seem like a no-brainer, but adding and removing individual cells might require a little more thinking. When you insert a new row, you’re inserting new cells spanning the entire table. However, some table structures you work with might only require an additional cell, not a bunch of cells. You can choose to add and delete individual cells in a table.
The Delete Cells dialog box, which you were introduced to in the previous section, lets you remove a cell and specify how you want the other cells to adjust. For example, if you remove a cell in a column, you might want the cells below the deleted cell to shift up, filling the hole created by the removal process.
To access the Delete Cells dialog box, right-click over the cell you want to remove and choose Delete Cells. You can also click the Delete button on the Layout tab and choose Delete Cells. Either method opens the dialog box shown in Figure 12.12. Click either Shift cells left or Shift cells up, and then click OK to apply the changes to your table.

FIGURE 12.12 The Delete Cells dialog box is useful for removing individual cells in a table.
![]() Note
Note
Naturally, you might assume the Delete key on your keyboard deletes table elements, such as cells, but that’s not the case. Pressing Delete only deletes the cell contents. Pressing Insert also doesn’t insert table elements.
![]() Tip
Tip
Do you need to delete the whole table? Click the Layout tab and click the Delete button, then click Delete Table.
The Insert Cells dialog box, shown in Figure 12.13, works in a similar fashion, except your table cells are making room for the new cell you add. Start by clicking where you want to insert a new cell, then right-click and choose Insert, Insert Cells, or just click the Table Insert Cells icon (see Figure 12.8 to identify this icon). Next, click either Shift cells right or Shift cells down; click OK to apply the changes.
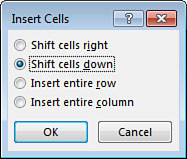
FIGURE 12.13 The Insert Cells dialog box is useful for adding individual cells in a table.
Merging and Splitting Table Cells
Two of the coolest table commands, in my humble opinion, are Merging Cells and Splitting Cells. You can use the Merge Cells command to turn two or more separate table cells into one big cell. For example, you might combine two side-by-side cells to create a large cell for a title across the top of your table, or combine two cells vertically to insert a large logo or picture. Figures 12.14 and 12.15 show a before and after merge effect.
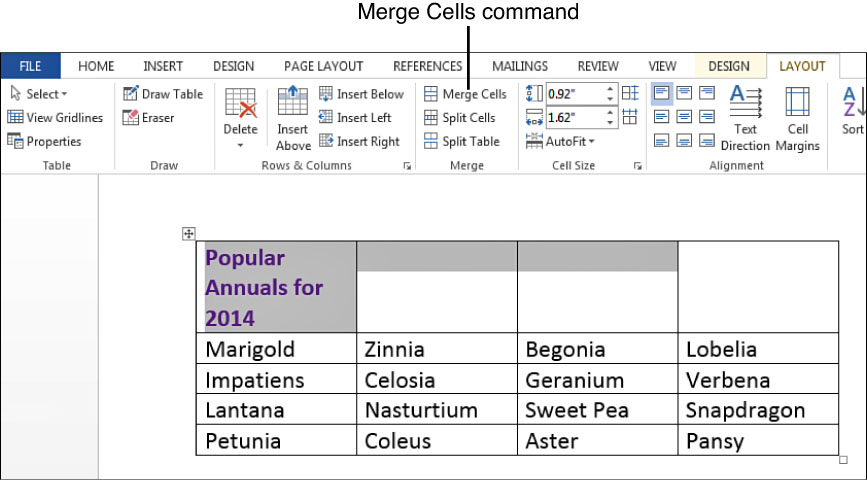
FIGURE 12.14 Before a merge.

FIGURE 12.15 After a merge.
To merge cells, follow these steps:
1. Select the cells you want to merge.
2. Click the Layout tab.
3. Click Merge Cells (see Figure 12.14).
Word immediately merges the cells, including any content each might have held.
Splitting cells is the reverse of merging them. When you split a cell, you are creating two new separate cells out of one cell. Figures 12.16 and 12.17 show the before and after results of splitting cells.
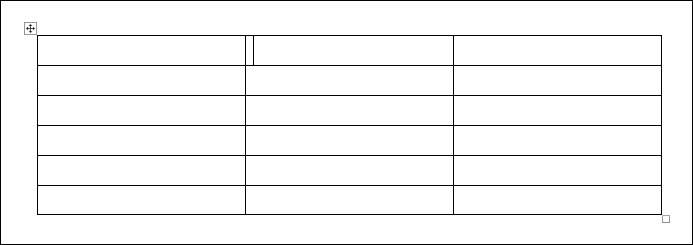
FIGURE 12.16 Before a split.

FIGURE 12.17 After a split.
To split cells, follow these steps:
1. Select the cells you want to split.
2. Click the Layout tab.
3. Click Split Cells and the Split Cells dialog box opens, as shown in Figure 12.18.

FIGURE 12.18 Specify how you want to split a cell using the Split Cells dialog box.
4. Specify the number of columns or rows you want to create; type in a number or click the spinner arrows to set a number.
5. Click OK.
Word immediately splits the cells.
![]() Tip
Tip
You can also split a table into two separate tables using the Split Table command on the Layout tab. When activated, this command splits the table at the current cursor location.
Changing Cell Alignment and Margins
Don’t forget you can use any of Word’s formatting tools to make your table data look nice, such as changing the font, size, color, and so forth. You can also change the way in which text is positioned within a cell, or as we like to say in the table business—alignment. The Layout tab (one of the two specialty Table Tools tabs) offers all the alignment options as buttons listed under the Alignment group of tools (see Figure 12.19). Not only do these commands pertain to horizontal positioning of text (left, center, and right), but also the vertical positioning (top, center, bottom). To assign an alignment to a cell, click in the cell or select the group of cells and activate an alignment setting.

FIGURE 12.19 Control cell alignment using the alignment buttons on the Layout tab.
Here are the alignments you can apply:
• Align Top Left Aligns cell text to the top-left corner.
• Align Top Center Centers cell text and aligns it to the top of the cell.
• Align Top Right Aligns cell text to the top-right corner.
• Align Center Left Centers text and aligns it to the left side of the cell.
• Align Center Centers text vertically and horizontally in the cell.
• Align Center Right Centers text and aligns it to the right side of the cell.
• Align Bottom Left Aligns cell text to the bottom-left corner.
• Align Bottom Center Centers cell text and aligns it at the bottom of the cell.
• Align Bottom Right Aligns cell text to the bottom-right corner.
Word automatically assigns some default margins to your table cells, giving them a little bit of breathing space between the text and the sides of the cell. You can make adjustments to these inner margins using the Table Options dialog box, shown in Figure 12.20. Click the Cell Margins tool on the Layout tab to open the dialog box.

FIGURE 12.20 You can control cell margins using the Table Options dialog box.
You can change the margin settings by clicking the spinner arrows or by typing in a value (measured in inches). Click OK to exit the dialog box and apply the changes to the current cell. Be sure to select the entire table if you want to apply the margins to all the cells.
![]() Note
Note
You can use the Text Direction button on the Layout tab to change the direction of text in a cell, thus creating text that reads vertically in the cell. Each click of the button rotates the cell’s text.
Repositioning and Resizing Tables
When you insert a table into your document, some default settings are in play regarding its positioning on the page. Mainly, the table is automatically left-aligned on the page itself, and no text wrapping is applied. Text wrapping refers to how text flows around an object you add to a page, such as a picture, logo, drawn shape, or in this case, a table. You can fine-tune the positioning aspects of your table, as well as resize it on the page, as I am about to show you.
To find positioning controls for the entire table, open the Table Properties dialog box to its Table tab, shown in Figure 12.21. You can use the options on this tab to set a different alignment and turn on text wrapping, which is helpful for a smaller table that you want paragraphs to flow around. You can even use the Table Properties dialog box to indent the table’s position from the left margin or set a preferred width for the table.

FIGURE 12.21 The Table Properties dialog box offers positioning settings for the table.
To open the Table Properties dialog box, click the Layout tab and click the Properties command.
If the Table tab is not displayed, click it to view its contents. After you make changes to the settings, click OK to exit the dialog box and apply them to the current table.
You can move a table and drop it anywhere you want it to appear in your document. When you click inside a table, the table icon appears in the upper-left corner of the table, as shown in Figure 12.22. You can click and drag the icon to move the table.
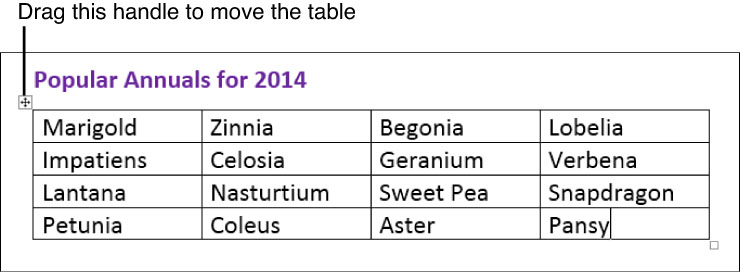
FIGURE 12.22 Use the table’s selection handle to drag the table to a new location.
You can also resize a table by dragging the bottom-right corner of the table, shown in Figure 12.23. Resizing a table automatically resizes all the rows and columns in the table to fit.

FIGURE 12.23 Resize a table using its bottom-right handle.
Dressing Up a Table with Table Styles and Borders
If you need to speed up your table design work without all the effort of applying various formatting, consider assigning a style instead. Table styles let you dress up a table using one of Word’s built-in table designs that include colors, borders, background cell shading, fonts, and more. You can find the Table Styles gallery on the Design tab (the other specialty tab under the Table Tools options). Take a look at a full view of the gallery, shown in Figure 12.24.
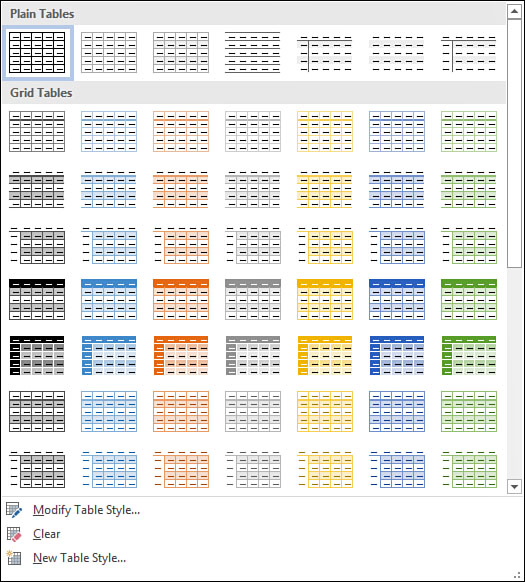
FIGURE 12.24 The Table Styles gallery offers a variety of preset table formatting.
A style gives your table an instant makeover. For example, Figure 12.25 shows a simple table, and Figure 12.26 shows the same table with a style applied. As you can see, a style adds immediate impact and gives the table visual depth and emphasis in the document. Styles are a great way to make your table stand out, plus you can tweak the style after you assign it to make the table look the way you want. As part of Word’s Quick Parts, templates, and built-ins, table styles are easily modified.

FIGURE 12.25 Before a table style.

FIGURE 12.26 After a table style.
To assign a preset style, follow these steps:
1. Click anywhere in the table you want to format.
2. Click the Design tab (see Figure 12.27).

FIGURE 12.27 Use the Design tab to make changes to your table’s design and style.
3. Click a style.
Word immediately applies the chosen style. You can preview all the styles from the Table Styles gallery simply by moving your mouse pointer over each style. Word previews the effect on the current table.
You can modify an existing table style and save it as a new style in the gallery. Start by applying all the necessary formatting to the table, then click the New Table Style button at the bottom of the full Table Styles gallery. This opens the Create New Style from Formatting dialog box where you can type in a name for the style, and change any other settings as needed. Click OK when you finish, and Word adds the style to the gallery. Now it’s ready to go the next time you need it.
To the left of the Table Styles gallery sit the Table Style Options. You can turn these on or off to customize your table style. For example, if you choose a style with banded rows, you can turn off the shading for the bands to change the appearance of the style. You can experiment with the options to see what looks best on your particular table.
To the right of the Table Styles gallery is a Shading drop-down menu, shown in Figure 12.28. Click the button to display a palette of background shading you can add to your table cells. You can apply shading to a selected cell or the entire table.

FIGURE 12.28 Add background shading to your table with the Shading drop-down palette.
The far-right side of the Design tab offers a variety of tools to create borders in your tables (see Figure 12.29). You can change the border style, line thickness, and color, and create custom borders for certain sides of a cell. For example, to change the border style, click the Border Styles drop-down arrow and choose from the Theme Borders gallery. You can experiment with the various formatting features here to create just the right framework for your table or table cells.

FIGURE 12.29 Use these tools to experiment with different borders for your table.
![]() Note
Note
There’s plenty more you can do with your tables than just decorate them. You can use the Data group of tools on the far-right side of the Layout tab to sort table data, repeat header rows across multiple page-spanning tables, add formulas to perform mathematical equations (such as summing a column of numbers), or convert a table back into regular document text. But don’t get too carried away. There’s a point at which a table can become so complicated that you would save time by creating the table in Microsoft Excel and embedding it into your Word document.