
Lesson 13: Advanced Blending Techniques

In this lesson, you will explore methods used to blend objects to create realistic appearances and artistic effects. You will use the Blend tool and create advanced gradients using the gradient mesh options, and use symbols to create a surface texture.
What you’ll learn in this lesson:
- • Combining objects using the Blend tool
- • Applying a gradient mesh
- • Creating symbols
- • Using the symbolism tools
Starting up
Before starting, make sure that your tools and panels are consistent by resetting your workspace. See “Resetting Adobe Illustrator CC Preferences” in the Starting up section of this book.
You will work with several files from the ai13lessons folder in this lesson. Make sure that you have loaded the ailessons folder onto your hard drive from www.digitalclassroombooks.com/epub/illustratorcc. See “Loading lesson files” in the Starting up section of this book.
Using the Blend tool
The Blend tool and Make Blend command allow you to create a blend, which is basically a transition between two or more selected objects. Blends are often desirable when there are objects overlapping each other that you might want to have a more combined look instead of appearing more separated, and just kind of sitting on top of one another. To see the blending in action, you’ll start by working on the seeds of an apple illustration.
1 In Illustrator CC, choose File > Open. When the Open dialog box appears, navigate to the ai13lessons folder and select the ai1301.ai file. Click Open.
2 Select the Zoom tool (![]() ) from the Tools panel, then click and drag a marquee around the area of the seeds to zoom in more closely.
) from the Tools panel, then click and drag a marquee around the area of the seeds to zoom in more closely.
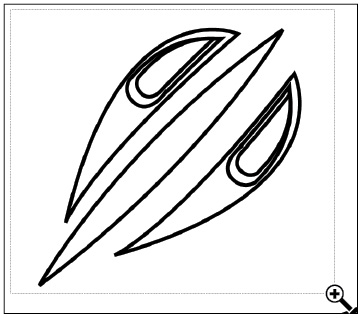
Zoom in on the inner parts of the apple.
3 Choose the Selection tool (![]() ) and click the innermost portion of the seed on the upper-left. To see your selected area with more detail, you might want to view the edges of the selected image. To do so, choose View > Show Edges. If you find that you don’t like the edges, choose View > Hide Edges.
) and click the innermost portion of the seed on the upper-left. To see your selected area with more detail, you might want to view the edges of the selected image. To do so, choose View > Show Edges. If you find that you don’t like the edges, choose View > Hide Edges.

Select the inner part of the apple’s seed, then show the edges.
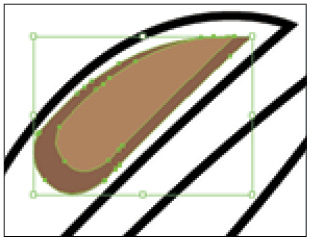
4 With the inner portion of the seed selected, make sure the fill is active in the Tools panel. Open the Swatches panel by clicking the Swatches button (![]() ) in the dock on the right side of the workspace. Click the Swatches panel menu button (
) in the dock on the right side of the workspace. Click the Swatches panel menu button (![]() ) in the upper- right corner of the panel and choose Small List View, so that you can see the swatch names to apply as you explore this lesson. Choose the swatch Inner Seed from the Swatches panel to apply it to the fill of the seed. Next, you will remove the stroke color.
) in the upper- right corner of the panel and choose Small List View, so that you can see the swatch names to apply as you explore this lesson. Choose the swatch Inner Seed from the Swatches panel to apply it to the fill of the seed. Next, you will remove the stroke color.

Make sure the fill is active, then select a color from the Swatches panel to color the seed.
5 To remove the stroke, select the Stroke icon (![]() ) in the Tools panel. Just below the Stroke icon, click the None button (
) in the Tools panel. Just below the Stroke icon, click the None button (![]() ) to remove the stroke from the seed. Removing the stroke eliminates an adverse effect that can occur on the blend when you combine both objects together depending on the look you’re trying to achieve. In the case of the seeds, you want a smooth blending of color rather than harsh edges that the stroke would create.
) to remove the stroke from the seed. Removing the stroke eliminates an adverse effect that can occur on the blend when you combine both objects together depending on the look you’re trying to achieve. In the case of the seeds, you want a smooth blending of color rather than harsh edges that the stroke would create.
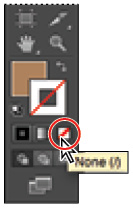
Remove the stroke.
Next you will color the part of the seed located below the area you filled with color and then finish by blending the two together to complete the fill process.
6 Using the Selection tool, select the part of the seed just below the area you just filled.

Select the outer part of the seed.
7 Make sure the fill is active in the Tools panel and choose the Outer Seed swatch from the Swatches panel to apply it to the fill. Once the dark brown is applied, remove the stroke by selecting the Stroke icon, then clicking the None button below it.

Color the outer part of the seed.
Next, you will blend the two together to create a smooth transition of color between both objects.
8 Keeping the bottom part of the seed selected, press and hold the Shift key on your keyboard and click the light brown part of the seed with the Selection tool so both parts of the seed are now selected.
Select both the inner and outer part of the seed.
9 With both objects selected, choose Object > Blend > Make or use the keyboard shortcut, Ctrl+Alt+B (Windows) or Command+Option+B (Mac OS).
10 Deselect both images by choosing Select > Deselect and take note of the transition of color between both objects.
Repeat steps 2-9 for the next seed to the lower-right. You’ll come back to more blend options with the Blend tool shortly.
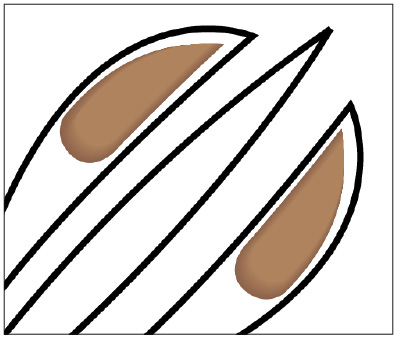
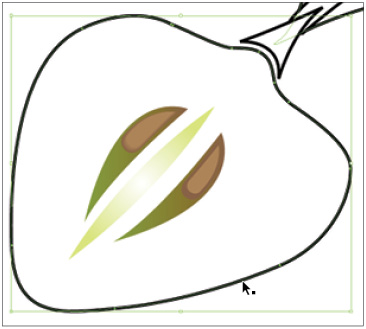
The colored seeds.
11 Choose File > Save As. When the Save As dialog box appears, navigate to the ai13lessons folder and type ai1301_work.ai into the Name text field, then click Save. The Illustrator Options dialog box appears, click OK to continue.
Applying a gradient
Next, you will be applying some gradients to fill in the other shapes that make up the various components of the sliced apple.
1 Select the cutout area just below the top-left seed.

Select the hollow part of the apple.
2 At the bottom of the Tools panel, make sure the fill is active and select the Gradient button to apply a gradient fill to the cutout.

Click the Gradient button to fill the hollow section.
3 Select the Stroke icon (![]() ) in the Tools panel, then click the None button (
) in the Tools panel, then click the None button (![]() ). Next, you’ll change the colors of the gradient to more realistic colors.
). Next, you’ll change the colors of the gradient to more realistic colors.
4 Open the Gradient panel by choosing Window > Gradient or by clicking the Gradient button (![]() ) in the dock on the right side of the workspace.
) in the dock on the right side of the workspace.
5 In the Gradient panel, undock the panel by clicking and dragging the tab of the panel to separate it from the dock. For more information on altering the workspace, please take a look at Lesson 2, “Getting to Know the Workspace.” This makes it easier to use both the Gradient and Swatches panels at the same time.
6 Choose Window > Swatches to open the Swatches panel or select the Swatches icon (![]() ) in the dock.
) in the dock.
7 With the cutout of the apple still selected, make sure the fill is active in the Tools panel so you can change the gradient color values of the image.
8 In the Gradient panel, you’ll notice a color ramp at the bottom of the panel and two Gradient Sliders. The Gradient panel has more options that appear in the panel. If you can’t see the other options, click the panel menu button (![]() ) in the upper-right corner of the panel and choose Show Options from the menu that appears.
) in the upper-right corner of the panel and choose Show Options from the menu that appears.

Expand the options of the Gradient panel.
When the gradient is first applied, the colors are set to black-and-white by default. You will be changing the colors in the gradient by using the Gradient panel and the Swatches panel.
9 Start by clicking the white Gradient Slider on the left to select it.
10 From the Swatches panel menu, you will drag and drop swatches over the color stops in the Gradient panel to create the gradient. Click and hold the swatch Back of Seed Green and drop it directly over the White color stop in the Gradient panel.

Drag the color swatch from the Swatches panel onto the white color stop in the Gradient panel.
11 Now, click and drag the Back of Seed Brown swatch from the Swatches panel over the Black color stop in the Gradient panel.
To create the gradient in the next cutout, you will use a shortcut method with the Eyedropper tool.
12 Select the cutout to the bottom-right. With the cutout selected, choose the Eyedropper tool (![]() ) from the Tools panel.
) from the Tools panel.
13 Using the Eyedropper, click the fill of the first cutout. The second cutout should inherit all the color properties from the first one.

Use the Eyedropper tool to copy the gradient of the first hollow area to the second.
The slit in the apple between the seed cutouts will be where you will apply the next gradation.
Applying radial gradients
You’ll now apply a radial gradient instead of the default linear gradient. You can change gradient patterns easily in the Gradient panel.
1 Choose the Selection tool (![]() ) from the Tools panel and select the slit between the cutouts.
) from the Tools panel and select the slit between the cutouts.
2 Apply a gradient fill like you did in step 2 of the last exercise. You’ll notice that it applies the gradient using the same color values from the previous gradient that was applied. You will change the colors just like you did before, only this time you’ll also change the type of gradient.
 To add another slider, click below the color ramp in the Gradient panel. To remove a slider, click and drag down on the slider.
3 Click and drag the White color swatch over the left color stop.
4 Click and drag the Center color swatch over the right color stop.
5 To change the pattern of the gradient, choose Radial from the Type drop-down menu just above the color ramp.

Change the type of gradient to Radial.
6 Finish the process by setting the stroke value of the object to None. When finished, the image should look similar to the figure below.

The finished seeds.
As you can see, there are some nice color and shading options available when you use gradients. For more information about standard gradients, refer to Lesson 4, “Adding Color.”
7 Choose File > Save to save your work.
Applying gradients using Illustrator’s Gradient Mesh options
While standard gradients are really nice for shading, they don’t offer the flexibility you might need for more complex shading alternatives. With the Gradient Mesh options that are available in Illustrator, you’ll find that you can get much more detailed with the shading and color placement of the gradient. You will start by modifying the apple core area with a gradient mesh.
1 Using the Selection tool (![]() ), select the apple core area just below the seed cutouts and the slit in the middle. If necessary, choose the Zoom tool (
), select the apple core area just below the seed cutouts and the slit in the middle. If necessary, choose the Zoom tool (![]() ) and zoom out to view the apple core area.
) and zoom out to view the apple core area.
Select the core of the apple.
2 Choose Object > Create Gradient Mesh.
3 In the Create Gradient Mesh dialog box, type 3 into the Rows text field and 2 in the Columns text field. Choose Flat from the Appearance drop-down menu and type 100 in the Highlight text field. Select the Preview check box to see the results, then click OK.
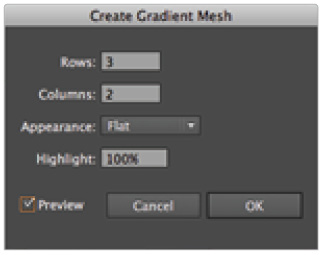
Gradient Mesh settings.
Once the mesh has been established, you can use different tools to modify it, including the Mesh tool and the Direct Selection tool.
4 Choose the Direct Selection tool (![]() ) from the Tools panel. You’ll notice anchor points on the mesh, click the anchor point at the top of the middle division line. You’ll also see that handles for the anchor points appear when you select it with the Direct Selection tool.
) from the Tools panel. You’ll notice anchor points on the mesh, click the anchor point at the top of the middle division line. You’ll also see that handles for the anchor points appear when you select it with the Direct Selection tool.
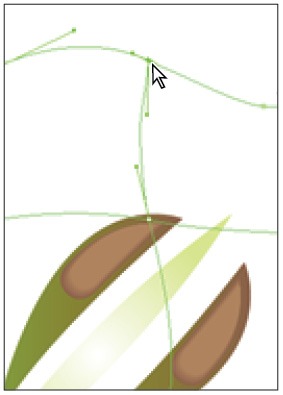
Select the anchor point to reveal its handles.
5 With the anchor point selected, make sure the Fill icon (![]() ) is active in the Tools panel and the Swatches panel is visible. Choose Inner Apple 1 from the Swatches panel for the Fill color.
) is active in the Tools panel and the Swatches panel is visible. Choose Inner Apple 1 from the Swatches panel for the Fill color.

Select Inner Apple 1 from the Swatches panel to apply it to the anchor point of the apple.
You can see how the gradient spreads and diffuses from the point of selection. Next, you’ll add some more colors to see how they blend together.
6 Click the next anchor point below the top one and select Inner Apple 2 from the Swatches panel.
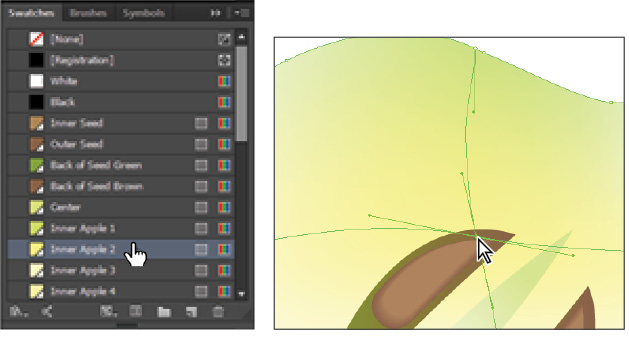
Select another anchor point in the gradient mesh and choose Inner Apple 2 from the Swatches panel.
7 Select the next anchor point down and select Inner Apple 3 from the Swatches panel.
 If you’re having trouble selecting the anchor points on the mesh, zoom in more closely with your Zoom tool (
![]() ), as anchor points can be tricky to select at times.
), as anchor points can be tricky to select at times.
8 Select the bottom anchor point at the base of the line and choose Inner Apple 4.
Clicking one point at a time can take awhile. Sometimes you’ll want to apply the same color to multiple points (such as at the edge of the image). You can select multiple points by pressing and holding Shift on your keyboard and clicking the different points using the Selection tool. Another alternative is to use the Lasso tool to click and drag a marquee around the points you’d like to select.
9 Select the Lasso tool (![]() ) from the Tools Panel.
) from the Tools Panel.
10 Click and drag a marquee around the anchor points on the lower-right portion of the apple core. Choose Inner Apple Edge from the Swatches panel.
11 Using the methods you’ve just discovered, apply Inner Apple Edge to the remaining anchor points of the apple core to finish coloring it.

Add more color to the anchor points of the apple.
Adjusting the Mesh
Once you’ve applied the mesh, you can keep adjusting by using the Direct Selection tool or the Lasso tool to select the points you want and update the color. You can also grab the points and move them to adjust the spread of color.
1 Using the Direct Selection tool (![]() ), select the second anchor point on the middle division line. Choose a different shade of color and then drag the anchor point to move it. Notice how the color updates immediately and how the spread of the gradient is affected by moving the anchor point.
), select the second anchor point on the middle division line. Choose a different shade of color and then drag the anchor point to move it. Notice how the color updates immediately and how the spread of the gradient is affected by moving the anchor point.
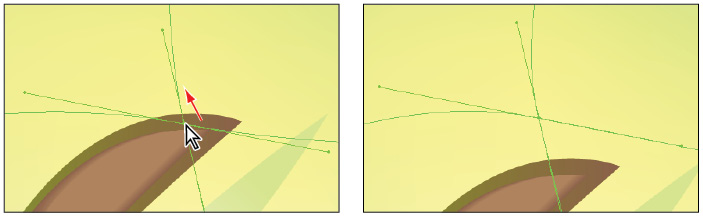
Select an anchor point and watch as the color updates when you move the anchor point.
2 Choose File > Save to save the file.
Revisiting Blend options
You started the process working with the Blend options. Next, you’ll explore how you can control the transition of color between the blended objects using specified steps or smooth color options to help expand the choices you’ll have during the process.
1 Choose the Selection tool (![]() ) from the Tools panel and select the triangular shape just above the apple core. From the Swatches panel, choose the Triangle swatch for the fill and set the stroke value to None.
) from the Tools panel and select the triangular shape just above the apple core. From the Swatches panel, choose the Triangle swatch for the fill and set the stroke value to None.
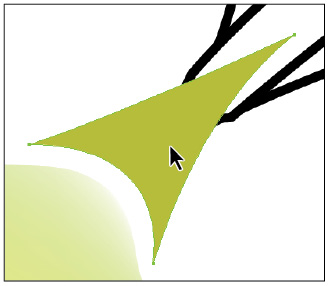
Select, then color the triangle object above the apple’s core.
2 Make sure the fill is active and select the stem above the triangular shape. From the Swatches panel, choose the Stem swatch. Set the stroke to None.
Select, then color the apple’s stem.
3 Choose Select > Deselect.
Last time you used the menu to create the blend; this time you will use the Blend tool and investigate some of the other options available to you.
4 Double-click the Blend tool (![]() ) in the Tools panel. The Blend Options dialog box appears.
) in the Tools panel. The Blend Options dialog box appears.
5 From the Spacing drop-down menu, choose Specified Steps and leave the steps set to the default of 8. Click OK.

Blend Options.
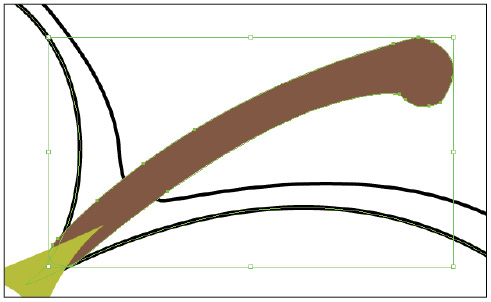
6 Click once on the triangular shape, then click once on the stem and notice the results of the blend.
The blend between the two objects.
You can see the effect of the specified steps gives the appearance of the blend a kind of morphing effect between the shapes. While this creates a pretty cool and funky way of transitioning between the shapes, this isn’t really the desired effect for the apple. Now, you’ll try this using a smooth color transition.
7 Choose Edit > Undo Make Blend.

Choose Edit > Undo Make Blend.
8 Double-click the Blend tool in the Tools panel to open the Blend Options dialog box. Set the Spacing value back to Smooth Color and click OK.
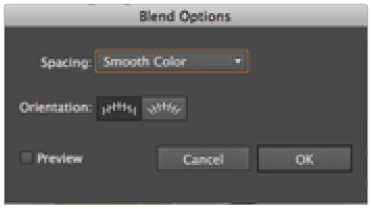
Choose Smooth Color from the Spacing drop-down menu.
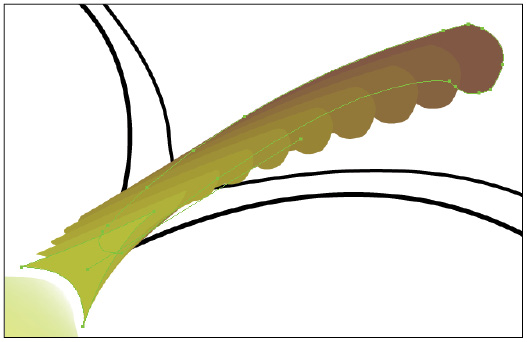
9 Click once on the triangular shape, then click once on the stem and take note of the difference. You are back to that smooth transition of color again. Another thing you’ll see is the way the blend affects the nature of each image, where the images widen a bit to blend the underlying framework of each shape together to form one overall merged image.

The two objects blended together.
 Keep in mind that the Blend tool can distort the underlying framework of the images you’re blending. This might have an impact on how you draw images that you’re considering blending together.
As you have seen, the Blend tool doesn’t just create smooth color transitions, it can also create new shapes. You’ll finish the sliced apple with a bit more gradient mesh work.
More mesh work
You’ll apply another gradient mesh and continue to adjust the mesh by selecting multiple points on the grid at the same time.
1 Start by selecting the inner part of the sliced apple with the Selection tool (![]() ).
).

Select the inner part of the sliced apple.
2 Choose Object > Create Gradient Mesh. In the Create Gradient Mesh dialog box, type 3 in the Rows text field and 3 in the Columns text field. Leave the other settings at their defaults and click OK.
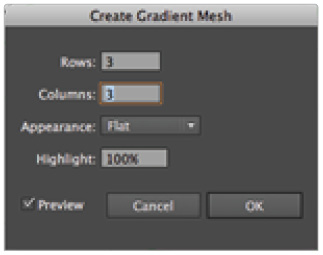
Set the Rows and Columns for the Gradient Mesh.
3 With the grid still active, choose the Direct Selection tool (![]() ) from the Tools panel.
) from the Tools panel.
4 Using the Direct Selection tool, click one of the anchor points that’s on the outside edge of the gradient mesh grid. You’ll see handles appear on the point once you select it.
5 Press and hold the Shift key and continue to select the rest of the anchor points on the outside edge of the grid until all the anchor points on the outside edge of the grid are selected.

Select the outer anchor points of the gradient mesh.
6 Once they’re all selected, make sure the fill is active in the Tools panel then select Middle Apple from the Swatches panel.

Select Middle Apple from the Swatches panel to color the apple.
7 Choose File > Save to save your work.
Leave the center of the sliced apple set to white; the overall effect of the gradient works well to create some depth. Next, you will wrap up the sliced apple by finishing the outside framework.
Overlapping images
Overlapping images can make the selection process very difficult when it comes to working with multiple gradient mesh objects. You’ll start out this time by locking the inner part of the apple shape.
1 Choose the Selection tool (![]() ) from the Tools panel and click the inner part of the sliced apple (the part of the apple you just finished with the last grid). Shift+click the apple core, the seeds, and the stem.
) from the Tools panel and click the inner part of the sliced apple (the part of the apple you just finished with the last grid). Shift+click the apple core, the seeds, and the stem.
2 Choose Object > Lock > Selection. Now the inner part of the apple is locked in place, which is going to make the selection process for the next grid a lot easier.

Lock the selection.
3 Using the Selection tool, click the outer framework of the sliced apple.
4 Choose Object > Create Gradient Mesh. In the Create Gradient Mesh dialog box, type 6 into the Rows text field and 3 into the Columns text field. Leave the other settings at their defaults and click OK.

Set the Gradient Mesh options.
5 Choose the Direct Selection tool (![]() ) from the Tools panel. Select the anchor points on the right side of the apple’s outer framework by Shift+clicking each anchor point as you did before.
) from the Tools panel. Select the anchor points on the right side of the apple’s outer framework by Shift+clicking each anchor point as you did before.
6 Choose Outer Apple Right from the Swatches panel.
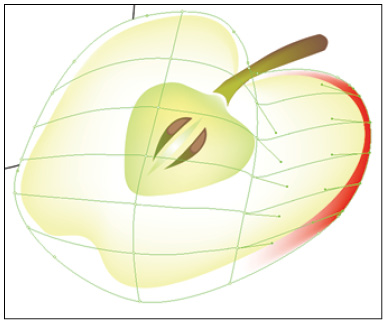
Choose Outer Apple Right from the Swatches panel to color the outer part of the apple.
7 Using the Direct Selection tool, select the anchor points at the bottom of the shape.
8 Choose Outer Apple Bottom from the Swatches panel.

Choose Outer Apple Bottom from the Swatches panel to color the outer part of the apple.
9 Select the anchor points on the left side of the apple shape. Choose Outer Apple Left from the Swatches panel.
Choose Outer Apple Left from the Swatches panel to color the outer part of the apple.
10 Select the remaining anchor points at the top of the apple shape and choose Outer Apple Top from the Swatches panel.

Choose Outer Apple Top from the Swatches panel to color the outer part of the apple.
11 Choose Select > Deselect, then choose File > Save to save your work.
Applying a gradient mesh using the Mesh tool
In addition to applying a gradient mesh through the Object menu, there’s a more visual way of pointing and clicking to apply the mesh, add grid segments and choose colors using just one tool.
Again, when there are overlapping images that each have grids, it can make the selection and application process a bit tricky. You can temporarily hide images to get them out of your way to ease the process. That’s what you’ll do to get things rolling—you’ll hide the sliced apple and then continue from there.
1 From the Object menu, choose Object > Unlock All to unlock the components of the apple that you locked earlier so you can re-select them.
 You can’t select a locked object again unless you unlock it first.
2 Choose the Selection tool (![]() ) from the Tools panel and Shift+click the remaining parts of the sliced apple that you completed earlier.
) from the Tools panel and Shift+click the remaining parts of the sliced apple that you completed earlier.
3 Choose Object > Hide > Selection.
 You can reveal a hidden object at any time by choosing Object > Show All.
Now that the sliced apple is out of the way, you can turn your attention to the next apple. The last time you applied the gradient mesh, you went through the Object menu, this time, you’ll go for the Mesh tool.
4 Select the Mesh tool (![]() ) from the Tools panel.
) from the Tools panel.
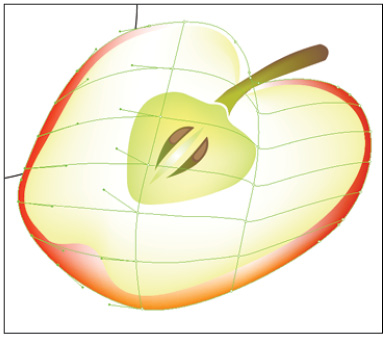
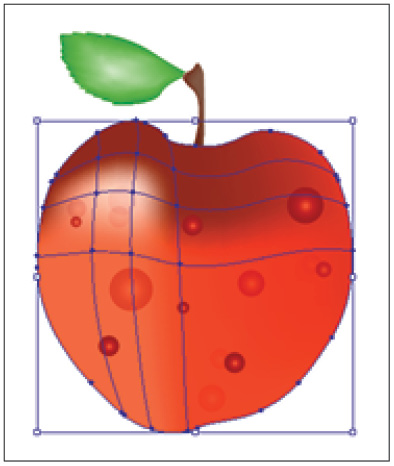
5 Using the Mesh tool, move over the upper-left body of the apple and click it. A grid appears the moment you click with the Mesh tool using the last color used as a fill. If the Gradient Mesh appears with a color, undo this step, press the D key on the keyboard to get your default fill of white, then click with the Gradient Mesh tool again.
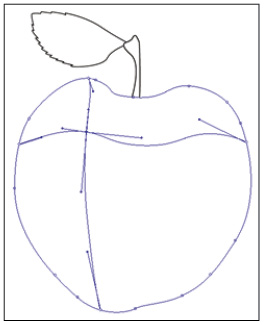
Use the Mesh tool on the whole apple.
6 Click to the right and a little higher from where you clicked the first time and then to the left and a little lower. You add new segments to the grid each time you click.
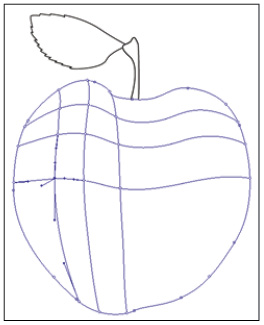
Add more segments to the apple using the Mesh tool.
 To remove a line segment, press and hold the Alt (Windows) or Option (Mac OS) key and click the segment you want to remove when you see the minus sign next to the Mesh tool.
Unfortunately, you cannot select multiple anchor points with the Mesh tool to apply color to multiple points at once. You will use something else this time instead of the Direct Selection tool.
7 To select multiple points this time, select the Lasso tool (![]() ) in the Tools panel.
) in the Tools panel.
8 Using the Lasso tool, click and drag a marquee around the anchor points on the right side of the grid.

Make a selection on the right side of the apple.
9 Select Apple Right from the Swatches panel. Continue to make selections using the Lasso tool on the bottom, left, and top of the apple, and apply the correct swatches; Apple Bottom 1, Apple Bottom 2, Apple Left, and Apple Top. Remember to include the inner anchor points.

Apply the swatches to the remainder of the apple.
10 Choose File > Save to save your work.
Next you will fine-tune the gradient mesh with the Mesh tool to modify the shading.
11 Select the Mesh tool (![]() ) from the Tools panel. With the tool selected, click one of the anchor points toward the left side of the grid and select Apple Highlight 1.
) from the Tools panel. With the tool selected, click one of the anchor points toward the left side of the grid and select Apple Highlight 1.
 Be careful when making your selection; it’s easy to accidentally add a new segment to your grid.
12 Now click the anchor point to the right of the one you just selected and choose Apple Highlight 2 from the Swatches panel.
13 With the Mesh tool still selected, click and drag on the point that you have currently selected. Notice that you can move the point to adjust the spread of the resulting gradient.
14 Continue to add additional shading on the apple and use the Mesh tool to click and drag the points until you’re happy with the shading.
15 Choose Select > Deselect to take a look at your shading.
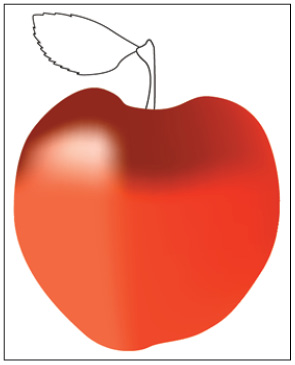
Finish adding shading to the apple.
16 To make further changes to a grid once it’s been de-selected, choose the Direct Selection tool (![]() ) from the Tool panel and click the object with the grid. The Direct Selection tool will reactivate the grid.
) from the Tool panel and click the object with the grid. The Direct Selection tool will reactivate the grid.
17 Choose File > Save to save your work.
Finishing up with the Mesh tool and automatically adding a Highlight
You’ll continue to shade the remaining parts of the apple with the Mesh tool.
1 Select the Zoom tool (![]() ) and zoom in on the area of the stem of the apple.
) and zoom in on the area of the stem of the apple.
2 Choose the Mesh tool (![]() ) from the Tool panel and then click the stem of the apple to apply a mesh.
) from the Tool panel and then click the stem of the apple to apply a mesh.

Apply a mesh to the apple stem.
3 Using the same methods as you used for the body of the apple, apply the Stem 2 swatch from the Swatches panel to different anchor points on the stem until you have the stem shaded as you like.
 Don’t forget to zoom in and out to make selecting the points on the grid easier to select. Staying zoomed out can make the selection process with the grid much more difficult.
4 Choose Select > Deselect when finished to take a look at your work.

The shaded stem.
To finish the shading process, you’ll apply the mesh to the leaf of the apple. This time you’ll add one more touch by adding a highlight to the mesh as you apply the gradient mesh.
5 Choose the Selection tool (![]() ) from the Tools panel and select the leaf of the apple. Before applying the mesh this time, you’ll first fill in the leaf with the Leaf swatch.
) from the Tools panel and select the leaf of the apple. Before applying the mesh this time, you’ll first fill in the leaf with the Leaf swatch.
6 With the leaf selected, select the Leaf swatch from the Swatches panel. You’ll go back to the menu to apply the mesh this time.
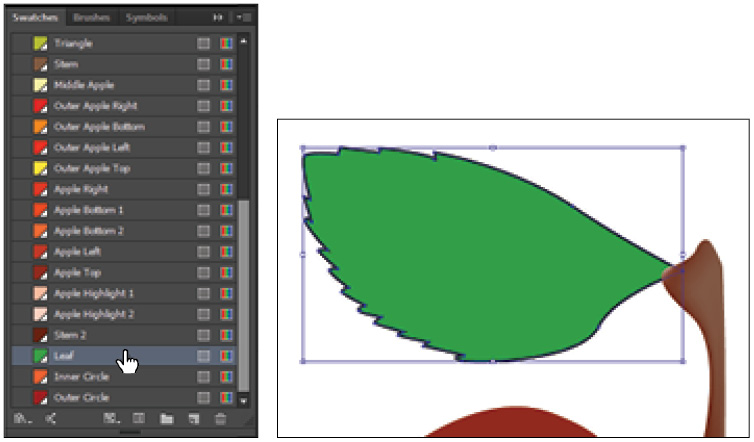
Set the color of the leaf in the Swatches panel.
7 Choose Object > Create Gradient Mesh. In the Create Gradient Mesh dialog box, type 8 in both the Rows and Columns text fields.
8 Choose To Center from the Appearance drop-down menu and set the Highlight value to 75%. Click OK.
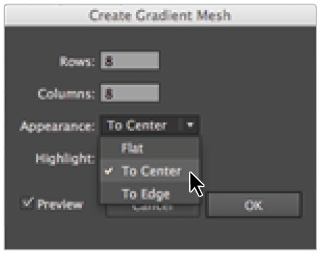
Set the Gradient Mesh options.
9 Choose Select > Deselect and then save your work.
 To apply a highlight while creating a gradient mesh, you must first fill the object with a fill color other than white before choosing the Highlight option in the Create Gradient Mesh dialog box.
The apple’s shading is done, and you’re almost finished. You’ll complete the exercise by stylizing the apple’s surface a bit using the Symbol tools.
Using the Symbol tools
Symbols are essentially reuseable art objects that are built into Illustrator. Think of them as your own personal clip art library that comes with the program. You can either use the symbols in Illustrator or you can create your own that can be saved within the program to be used later on. In addition to the symbols themselves, they come with a series of tools that can be used to apply the symbols to your project as well as modify properties of the symbols, such as their size, color, position, rotation, and more.
 For more information about symbols, see Lesson 10, “Working with Symbols.”
You’ll start the process by creating the object you want to convert into a symbol and then start to incorporate the symbol tools to apply and modify the symbol to the artwork.
1 Choose the Ellipse tool (![]() ) from the Tools panel. If necessary, click and hold the Rectangle tool (
) from the Tools panel. If necessary, click and hold the Rectangle tool (![]() ) to reveal the hidden Ellipse tool.
) to reveal the hidden Ellipse tool.
2 Using the Ellipse tool, draw a small circle next to the apple (pressing and holding Shift while you draw will produce a perfect circle).

Using the Ellipse tool, create a small circle next to the apple.
3 Fill the circle with a gradient by clicking the Gradient button (![]() ) at the bottom of the Tools panel.
) at the bottom of the Tools panel.
4 The Gradient panel should have opened for you when you applied it to the circle. If not, choose Window > Gradient to open it.
 You can change the colors of the gradient in the gradient panel by double-clicking the color stop to open its color properties.
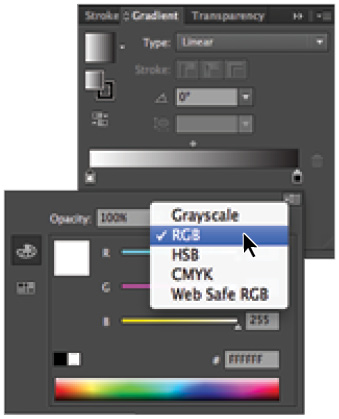
5 Double-click the left color stop.
6 Once the Gradient Slider panel appears, click the panel menu button (![]() ) in the upper-right corner and choose RGB for the color mode. Type a value of 255, 100, 46 respectively in the R (Red), G (Green), and B (Blue) text fields.
) in the upper-right corner and choose RGB for the color mode. Type a value of 255, 100, 46 respectively in the R (Red), G (Green), and B (Blue) text fields.
Gradient Slider color settings.
7 Click back on the Gradient panel to close the Gradient Slider panel. Double-click the right Gradient Slider, click the panel menu button in the upper-right corner and choose RGB for the color mode and type values of 158, 0, and 0 in the R, G, and B text fields using the same procedure as listed in the previous step.
8 In the Gradient panel, choose Radial for the pattern of the gradient.

Set the gradient to Radial.
Next you will adjust the gradient to stylize the radial gradient.
9 Using the Zoom tool (![]() ), zoom in on the gradient and then slide the diamond-shaped Gradient Slider (the one above the other two in the panel) to the left a bit to collapse the radial gradient a little.
), zoom in on the gradient and then slide the diamond-shaped Gradient Slider (the one above the other two in the panel) to the left a bit to collapse the radial gradient a little.

Edit the gradient.
10 Finish the image by setting the Stroke value to None.
Creating a symbol
Next, you’ll make the image a symbol, and then start to use it on the artwork to create a texture on the apple.
1 Choose Window > Symbols to open the Symbols panel.
2 Once the panel is open, choose the Selection tool (![]() ) from the Tools panel and then select the gradient circle and drag it into the Symbols panel.
) from the Tools panel and then select the gradient circle and drag it into the Symbols panel.
3 In the Symbol Options dialog box, type Gradient Circle in the Name text field. Leave the other settings at their defaults and click OK.

A Symbol Options dialog box appears when creating a new symbol.
 Once you’ve created a symbol, you can then save it to use in other projects. To do so, click the panel menu button (
![]() ) in the upper-right corner of the Symbols panel and choose Save Symbol Library and then name the library. To use the library with your symbols in other projects, choose Open Symbol Library from the panel menu and then navigate to the place where your library is saved to open it.
) in the upper-right corner of the Symbols panel and choose Save Symbol Library and then name the library. To use the library with your symbols in other projects, choose Open Symbol Library from the panel menu and then navigate to the place where your library is saved to open it.
4 With the Selection tool (![]() ), click the gradient circle on the artboard and delete it. You’ll be reapplying it to the artwork in a different way.
), click the gradient circle on the artboard and delete it. You’ll be reapplying it to the artwork in a different way.
5 Zoom out a bit so you can see the whole apple.
6 Select the Symbol Sprayer tool (![]() ) from the Tools panel.
) from the Tools panel.
Before you apply the symbol, you’ll adjust the Symbol Sprayer tool settings.
7 Double-click the Symbol Sprayer tool to open the Symbolism Tools Options dialog box. Set the Diameter value to approximately 13mm and click OK.

Symbolism Tools Options.
8 Make sure the Gradient Circle is selected in the Symbols panel (you must select the symbol) and then click and drag with the Symbol Sprayer over the surface of the apple to paint the symbol on top of the apple.
 The more you click and drag, the more instances of the symbol are created. Each copy of the symbol on the artboard is referred to as an instance.

Paint the Gradient Circle symbols over the apple.
9 Choose File > Save to save your work.
Modifying a symbol’s appearance
Next, you’ll use a few more symbol tools to adjust the symbol’s appearance. You’ll find a number of tools that can be used to alter the symbol; you will use tools that will affect size and transparency.
1 Using the Zoom tool (![]() ), zoom in on the apple, then choose the Symbol Sizer tool (
), zoom in on the apple, then choose the Symbol Sizer tool (![]() ) from the Tools panel. If necessary, click and hold the Symbol Sprayer tool (
) from the Tools panel. If necessary, click and hold the Symbol Sprayer tool (![]() ) to reveal the hidden Symbolism tools.
) to reveal the hidden Symbolism tools.

Select the Symbol Sizer tool from the Tools panel.
 If you click and hold any of the gradient circle symbol instances on the apple, they’ll start to enlarge.
2 Press and hold the Alt (Windows) or Option (Mac OS) key and then click and hold one of the gradient circles on the apple to adjust its size and make it smaller. Let go of the mouse when you’re satisfied with size.
3 Keep re-sizing various instances of the gradient circles to adjust the look of them to your liking.

Resize the symbols.
Now you’ll work on the transparency a bit.
4 Select the Symbol Screener tool (![]() ) from the Tool panel.
) from the Tool panel.
 The more you click and hold with the Symbol Screener, the more transparent the image becomes.
5 Click the different instances of the gradient circle on the apple to adjust them to varying degrees of transparency. Keep in mind, the longer you hold, the more transparency is applied. To undo some of the transparency, press and hold the Alt/Option key and click the object again.
Add transparency to the symbols.
Let’s finish up by taking a look at everything together.
6 Choose Select > Deselect to deactivate the selected symbols.
7 Zoom out a bit. To reveal the hidden images, choose Object > Show All.
8 Choose File > Save to save your work.

The finished image.
Now you’ve gotten the circles to blend in a bit with the apple itself, giving the images a more natural combined appearance.
Self study
Continue experimenting with the Blend tool by drawing two different objects that are two different colors. Select the Blend tool and try blending them together in different ways. Try this with different shapes, different colors, and different positioning each time.
Review
Questions
1 How do you access the blend options for the Blend tool?
2 How can you apply a gradient mesh?
3 How do you turn an image that you’ve created into a symbol?
Answers
1 To access the blend options for the Blend tool, double-click the Blend tool.
2 To apply a gradient mesh, use the Mesh tool from the Tools panel or select an image and choose Object > Create Gradient Mesh.
3 To turn an image you’ve created into a symbol, select the image with the Selection tool and then drag it into the Symbols panel.