

We want to let you in on a secret ... blending modes. Oh sure, you’ve probably heard of them.. . but do you use them? Not just twice a year like the fine china.. . every job, every project, every comp, all the time? Pros live for blending modes.. . the artistic possibilities are incredible. Blending modes are fast, easy, and powerful.. . they are also woefully mistreated and underused. Please join our crusade to restore blending modes to their proper place in the After Effects design hierarchy.

Depending upon manufacturer (and even version number), blending modes may go by other names. They may be called layer modes, composite modes, apply modes, or transfer modes. All have the same meaning. It doesn't matter what you call blending modes, just that you use them.

Want quick access to your mode switches? To toggle between them, press F4. This shortcut works whether or not the Timeline window is selected. If you'd like to leave the modes out permanently, contextual click on the Timeline columns, and choose Modes.
Part of the reason beginners pass on blending modes is that they are hard to use if you don’t know which one you want. Find an obscure list; scroll down (forever) only to discover you need to pick a different one. There's a much better way to experiment.
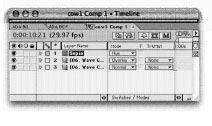
![]() Highlight the layer or layers you want to blend.
Highlight the layer or layers you want to blend.
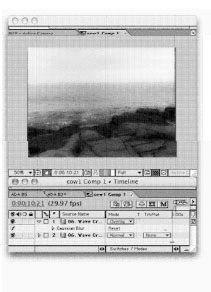
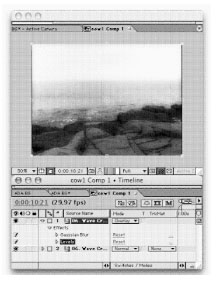
![]() Press Shift+= (Shift Plus Equal) to scroll through the list..
Press Shift+= (Shift Plus Equal) to scroll through the list..
![]() To move backward, press Shift+- (Shift Plus Minus) to return to a passed blending mode.
To move backward, press Shift+- (Shift Plus Minus) to return to a passed blending mode.

Okay, you're hooked and want to know about modes, but, boy, do those entries in online help make your head hurt. Here's what you need to know about modes.
• The underlying colors are the colors on the layer below that you want to change.
• Layer colors are original colors in the layer where blending modes will be used.
• Resulting colors are what occur when blending mode is applied.
Just because you can do something doesn’t mean you should. While you can change the mode of the bottom-most layer, you cannot actually blend the bottom layer of a composition. Remember, in order to blend, you must have an underlying layer. If you change the mode for the bottom layer, After Effects ignores the switch.

You’ll notice that After Effect's blending mode menu has a few classic modes. These are to preserve compatibility with After Effects 5.0 and earlier projects. The 'house that Photoshop built’ changed blending modes in After Effects 5.5 to achieve consistency across product lines. For easier use, avoid classic modes unless needed for an old project.

When compositing two or more objects that have their own alpha channels, you sometimes get a dirty edge. This problem is more visible when the objects have soft edges or are being animated. The solution? Composite layers normally, but be sure to n n VI set the top layer(s) to the Alpha Add blending mode. This mode goes a long way in achieving visibly better edges when combining alpha channels.

This obscure mode is there for getting better alpha channels where bright light is involved (such as lens flares or light effects). It will prevent clipping of the brightest color values, thus making a better composite. Feel free to try it when compositing elements created with other software packages or with extremely bright fill areas.
![]() Select the footage in the project window and press Cmd+F (Ctrl+F) to launch the Interpret Footage Command.
Select the footage in the project window and press Cmd+F (Ctrl+F) to launch the Interpret Footage Command.
![]() Switch the interpretation from premultiplied-alpha to straight alpha..
Switch the interpretation from premultiplied-alpha to straight alpha..
![]() Select the layer that is to be the composite and switch its mode to Luminescent Premul..
Select the layer that is to be the composite and switch its mode to Luminescent Premul..

Need to quickly knock a color out of your background for compositing. Sure, if it was a color, you could try chroma keying it, but what if it's black or white? Luma key, right? Don't bother. Modes are much faster for a simple luminance key.
• For a white background, set the layer to Multiply.
• For a black background, set the layer to Screen.

Finally, the left hand knows what the right hand is doing. When you import a Photoshop file as a Comp, all of its blending modes come in properly. Both After Effects and Photoshop made some compromises. Photoshop CS adds the Hard Mix mode, while After Effects modified its Color Burn, Color Dodge, and Difference. The 'old modes are still there in AE; they are just preceded with the word Classic (in case you weren't feeling old enough already).

Using blending modes with 3D layers is a very different experience. There are SEVERAL new rules to keep in mind when you promote a layer to 3D.
• Use 3D Comp Views to determine actual order in Z-space. The order in the Timeline window does not change.
• When using the Standard 3D rendering plug-in, only those layers behind will be affected by the blending mode
• When using the Advanced 3D rendering plug-in, the mode is applied pixel-by-pixel. In other words intersection is taken into account. This produces more accurate blending.
• Layer Order in the Timeline window still affects track mattes. The layers must still be adjacent, however this may lead to unexpected results. Consider precomposing the two layers (but don't collapse).

So modes work on the way in, but if you want to write a layered PSD file out (Composition>Save Frame As> Photoshop Layers), there are a few modes that are not supported. After Effects will substitute the closest equivalent if you’ve used the following modes.
| Dancing Dissolve | > | Dissolve |
| Classic Color Burn | > | Color Burn |
| Add | > | Linear Dodge |
| Classic Color Dodge | > | Color Dodge |
| Classic Difference | > | Difference |
| Stencil Alpha | > | Not supported |
| Stencil Luma | > | Not supported |
| Silhouette Alpha | > | Not supported |
| Silhouette Luma | > | Not supported |
| Alpha Add | > | Not supported |
| Luminescent Premul | > | Not supported |
Blending Modes cannot be keyframed in the traditional sense. But hey, keep reading and we'll share a little secret. You can use multiple layers to achieve the effect and those can be keyframed.
![]() If you want to transition between multiple blend modes, create a set of footage for each set of modes. In other words, duplicate layer A and B for each mode you want to use.
If you want to transition between multiple blend modes, create a set of footage for each set of modes. In other words, duplicate layer A and B for each mode you want to use.
![]() Stack the layers so each Layer A is above Layer B. Repeat for each mode you intend to use.
Stack the layers so each Layer A is above Layer B. Repeat for each mode you intend to use.
![]() Adjust the mode of each layer A to taste. You will need to turn off visibility icons as you work..
Adjust the mode of each layer A to taste. You will need to turn off visibility icons as you work..
![]() Pre-compose the first instance of layer A and B.
Pre-compose the first instance of layer A and B.
![]() Repeat for each set of Layers A and B.
Repeat for each set of Layers A and B.
![]() When you have all of your pre-comps, you can transition between modes. This can be done with simple opacity keyframes. A nicer effect, however, is to use the gradient wipe effect with soft edges.
When you have all of your pre-comps, you can transition between modes. This can be done with simple opacity keyframes. A nicer effect, however, is to use the gradient wipe effect with soft edges.

Have a dark shot? Don't worry; blending modes can work wonders to lift detail out (without the problems associated with Image Adjustment effects).
![]() Duplicate the dark layer,.
Duplicate the dark layer,.
![]() Switch the top layer to Add mode.
Switch the top layer to Add mode.
![]() If the shot is still too dark, continue to duplicate the top layer (in Add mode) until satisfied.
If the shot is still too dark, continue to duplicate the top layer (in Add mode) until satisfied.
Need to put some life back into your washed-out video clips? You can use blend modes to increase saturation and contrast. Simply duplicate the washed out layer on the track above itself, and change blending modes. Be sure to experiment with several different modes to get alternative looks. Different source footage may require different modes, but this is a fun way to improve the quality of your footage.
On several occasions, there has been a crazy notion passed around that Digital Video signals can be somehow manipulated (mangled) into a film-look. While we don’t subscribe to this belief, it is quite possible to achieve a nicer look for your flat video images.
The trait that people often are trying to achieve with their "film-look" filters, or recipes, is an increase in Saturation (or intensity of color). This look can be easily accomplished in After Effects.
![]() Select the clip that you’d like to process using the "film-look.".
Select the clip that you’d like to process using the "film-look.".
![]() Press Cmd+D (Ctrl+D) to duplicate the shot
Press Cmd+D (Ctrl+D) to duplicate the shot
![]() With the clone highlighted, apply a Gaussian Blur effect. Crank t.c filter up between a radius of 15 and 90 pixels. Don’t worry if it looks over-done..
With the clone highlighted, apply a Gaussian Blur effect. Crank t.c filter up between a radius of 15 and 90 pixels. Don’t worry if it looks over-done..
![]() Switch to modes and try different blending modes such as Overlay, Soft Light, or Multiply. In fact you may want to try all of the different modes to see which one you like. Depending on your source, you may need to use different modes.
Switch to modes and try different blending modes such as Overlay, Soft Light, or Multiply. In fact you may want to try all of the different modes to see which one you like. Depending on your source, you may need to use different modes.
![]() Adjust the opacity of the top clip to taste.
Adjust the opacity of the top clip to taste.
![]() If you plan to animate or move the shhot, pre-compose it first.
If you plan to animate or move the shhot, pre-compose it first.
![]() In After Effects 6.5 be sure to check out the new Add Grain effect to complete the 'look.'
In After Effects 6.5 be sure to check out the new Add Grain effect to complete the 'look.'
So you want to create a blown-out look and still keep your clip broadcast legal.
Here's a quick way to do it.
![]() Select the clip that you'd like to process using the blown-out look..
Select the clip that you'd like to process using the blown-out look..
![]() Press Cmd+D (Ctrl+D) to duplicate the shot.
Press Cmd+D (Ctrl+D) to duplicate the shot.
![]() With the clone highlighted, apply a Gaussian Blur effect. Crank the filter up to a radius around 25 pixels.
With the clone highlighted, apply a Gaussian Blur effect. Crank the filter up to a radius around 25 pixels.
![]() Adjust the opacity of this layer down to about 35 percent. (These numbers will vary depending on your image.)
Adjust the opacity of this layer down to about 35 percent. (These numbers will vary depending on your image.)
![]() Apply a Levels Effect (Effect>Adjust>Levels). Lower the Input White slider to about 200 and raise the Gamma to around .75.
Apply a Levels Effect (Effect>Adjust>Levels). Lower the Input White slider to about 200 and raise the Gamma to around .75.
![]() Now the fun begins. Set the Blending mode to Add. You will see that your whites are starting to get blown out. Adjust the Opacity of the blended layer to taste..
Now the fun begins. Set the Blending mode to Add. You will see that your whites are starting to get blown out. Adjust the Opacity of the blended layer to taste..
![]() Pre-compose the two layers together by selecting both and pressing Shift+Cmd+C (Shift+Ctrl+C)
Pre-compose the two layers together by selecting both and pressing Shift+Cmd+C (Shift+Ctrl+C)
![]() Make the shot broadcast-safe by choosing Effects>Video>Broadcast Colors. Ah ha.. .a blown-out image that still caps at 100 IRE.
Make the shot broadcast-safe by choosing Effects>Video>Broadcast Colors. Ah ha.. .a blown-out image that still caps at 100 IRE.
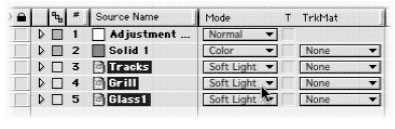
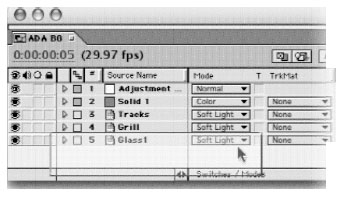
Looking for a cool way to stylize your shot? Make it a duotone, which is a printing technique where one of the inks (usually black) is substituted with another color.
![]() Highlight the shot (or shots) you’d like to stylize..
Highlight the shot (or shots) you’d like to stylize..
![]() Add a new solid by choosing Layer>New Solid or pressing Cmd+Y (Ctrl+Y).
Add a new solid by choosing Layer>New Solid or pressing Cmd+Y (Ctrl+Y).
![]() Set the solid to Color or Hue mode to tint the footage.
Set the solid to Color or Hue mode to tint the footage.
You can also experiment with other blending modes for additional looks.
After Effects Photo Filter Layers

Users of Photoshop CS have a new tool called Photo Filter Adjustment Layers. These try to simulate Photographic Effects such as Warming or Cooling. After Effects 6.5 adds the ability to import Photo Filter Layers from Photoshop, as well as create new ones. If you haven’t switched yet, the same technique can easily be accomplished in After Effects using Solids and Blending Modes.
To make a shot warmer (or counterbalance blue video), do this:
![]() Create a new solid by pressing Cmd+Y (Ctrl+Y) and pick a less-saturated Orange or Red from the Color Picker.
Create a new solid by pressing Cmd+Y (Ctrl+Y) and pick a less-saturated Orange or Red from the Color Picker.
![]() Set the layer to the Overlay Blending Mode.
Set the layer to the Overlay Blending Mode.
![]() Set the Opacity to 30 percent and adjust to taste.
Set the Opacity to 30 percent and adjust to taste.
To make a shot warmer (or counterbalance blue video), do this:
![]() Create a new solid by pressing Cmd+Y (Ctrl+Y) and pick a saturated Orange Blue or Turquoise from the Color Picker.
Create a new solid by pressing Cmd+Y (Ctrl+Y) and pick a saturated Orange Blue or Turquoise from the Color Picker.
![]() Set the layer the Soft Light Blending Mode..
Set the layer the Soft Light Blending Mode..
![]() Set the Opacity to 40 percent and adjust to taste.
Set the Opacity to 40 percent and adjust to taste.
In After Effects 6.5, Photo Filter layers can now be imported from Photoshop or created within After Effects.

Everyone wants to get more life from his or her plug-in collection. Now you can-by using adjustment layers and blending modes.
![]() Select the shot that needs processing.
Select the shot that needs processing.
![]() Go to the Layer in Point by pressing the letter I
Go to the Layer in Point by pressing the letter I
![]() Add a new Adjustment Layer by choosing Layer>Adjustment Layer
Add a new Adjustment Layer by choosing Layer>Adjustment Layer
![]() Select the footage shot again and jump to the layer out point by pressing the letter 0.
Select the footage shot again and jump to the layer out point by pressing the letter 0.
![]() Highlight the adjustment layer and press Option+] (Alt+]) to trim the adjustment layer to match the duration of the shot..
Highlight the adjustment layer and press Option+] (Alt+]) to trim the adjustment layer to match the duration of the shot..
![]() Add any filter you'd like to use (those from the Channel, Image Control, and Stylize categories work well).
Add any filter you'd like to use (those from the Channel, Image Control, and Stylize categories work well).
![]() Adjust the effect so it is very pronounced.
Adjust the effect so it is very pronounced.
![]() Cycle through blend modes on the adjustment layer by pressing Shift+= or Shift+- to achieve new looks.
Cycle through blend modes on the adjustment layer by pressing Shift+= or Shift+- to achieve new looks.
![]() Adjust the Opacity of the adjustment layer to blend back more of the original shot.
Adjust the Opacity of the adjustment layer to blend back more of the original shot.
![]() If needed, pre-compose the two layers.
If needed, pre-compose the two layers.