
9. Managing Styles
The two previous chapters have covered CSS and how it works with your Web pages. After you’ve gotten the hang of CSS, though, you’ll find that you’re spending too much time trying to figure out which styles affect which sections of the page. Or you’re trying to keep track of where your styles are (inline? internal? external?) and in what order they apply to your site. Or maybe it’ll be that you’re testing styles, but don’t want to change your entire site yet.
No matter what your particular issue, Dreamweaver has made it simple and straightforward to manage moving, duplicating, debugging, and deleting styles.
Renaming Styles
It’s a good idea to give styles a descriptive name of your choosing. You may want to rename a style because your site has changed, or maybe you just don’t like the style names in the default CSS layouts. Whatever the reason, they should have meaningful names.
To rename a style for a class
1. In the HTML tab of the Property Inspector, choose Rename from the Class pop-up menu ![]() . The Rename Style dialog appears
. The Rename Style dialog appears ![]() .
.

![]() Choose Rename from the Class pop-up menu to give a style a new name.
Choose Rename from the Class pop-up menu to give a style a new name.
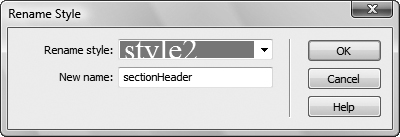
![]() Type the new name in the field to rename your style.
Type the new name in the field to rename your style.
or
In the CSS Styles panel, find and select the rule you want to rename ![]() . Right-click on the rule name and select Rename Class from the context menu
. Right-click on the rule name and select Rename Class from the context menu ![]() . The Rename Class dialog appears
. The Rename Class dialog appears ![]() .
.

![]() You can also rename styles from the CSS Styles panel.
You can also rename styles from the CSS Styles panel.

![]() In the CSS Styles panel, choose your style, right-click, and choose Rename Class.
In the CSS Styles panel, choose your style, right-click, and choose Rename Class.

![]() They may have different names, but the Rename Style dialog and the Rename Class dialog do the same thing.
They may have different names, but the Rename Style dialog and the Rename Class dialog do the same thing.
2. If the class you want to rename isn’t already selected, use the pop-up menu to choose it. Type a name in the New name field, and click OK.
3. If the style you chose is used in multiple places or it’s in an external style sheet that can affect multiple pages, you’ll be prompted as to whether you want to make this change everywhere ![]() . If you want this (you usually will), click Yes.
. If you want this (you usually will), click Yes.
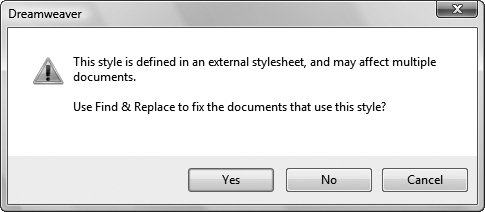
![]() If you want, Dreamweaver will update the name everywhere in your site after you rename a style.
If you want, Dreamweaver will update the name everywhere in your site after you rename a style.
If you click Yes, the Find and Replace dialog appears, with the parameters you need to search for and replace already filled in, and with the scope of the search set for your entire site. See the section “Finding and Replacing with a Specific Tag” in Chapter 4 to learn more about using this dialog.
If you click No, the Find and Replace dialog does not appear, and you will need to make any updates manually.
Tip
The two dialogs have different names, but they do identical tasks.
Deleting Styles
When you delete a style from a style sheet, the formatting of any element using that style immediately changes.
To delete a style
1. Open a document, and in the CSS Styles panel, choose the style name to delete.
2. Click the Delete CSS Rule button in the lower right of the panel. Note that you don’t have to click OK or accept anything—it just disappears immediately.
Tip
Even though you’ve deleted the style, any references to it will still exist in the document. That is, classes and ids aren’t removed from your pages when you delete rules that apply to those classes and ids.
Creating Rules from Inline Styles
Inline styles (first covered back in Chapter 7) are a handy way to test properties to see if using a particular bit of CSS does what you want it to do. However, remember that the main power of CSS is being able to apply it in many places in a document and many documents in a site—and if you’re only applying it to a single tag, you’re missing out on all that power. So while inline styles are great for quick tests, once your CSS has passed the test, it’s time to turn it into a rule.
To create a rule from an inline style
1. In your document, click anywhere within the area where the inline style is applied. In the CSS Styles panel, make sure that you’re in Current mode and that the Rules pane is visible by clicking the Show cascade button. You should see a rule called <inline style> ![]() .
.

![]() To turn an inline style into a rule, first find the
To turn an inline style into a rule, first find the <inline style> rule in the CSS Styles panel.
2. Right-click on the <inline style> rule and choose Convert to Rule from the menu.
or
Choose Format > CSS Styles > Convert Inline CSS to Rule ![]() .
.

![]() One way to convert the style to a rule is with Convert Inline CSS to Rule, found under the Format menu.
One way to convert the style to a rule is with Convert Inline CSS to Rule, found under the Format menu.
The Convert Inline CSS dialog appears ![]() .
.

![]() The Convert Inline CSS dialog lets you set all the options for your new rule.
The Convert Inline CSS dialog lets you set all the options for your new rule.
3. The first choice in that dialog is what type of rule you want to end up with ![]() :
:
• A new CSS class, where you get to choose the class name.
• A rule that applies to all tags of the given type; that is, if the inline style is applied to a <p> (paragraph) tag, you can apply that style to all paragraphs.
• A new CSS selector, where the default is a rule based on the location of the inline style.

![]() You can make a new class, a new selector, or a new rule that applies to all instances of a certain tag.
You can make a new class, a new selector, or a new rule that applies to all instances of a certain tag.
The last two are context-sensitive, so your defaults change depending on your inline style selection.
4. Next, you have a choice of creating the new rule in an external style sheet or in the head of the current document. Any currently linked external style sheets will be in the pop-up menu. If you don’t have any external style sheets, you can either create one here or put the new rule into the head of the current document (you’ll see how to move the internal rule to an external style sheet later in the chapter). Choose an option, click OK, and your new rule will be created.
Tip
It’s possible for the Rules pane to show more than one style named <inline style>, so make sure you’re choosing the correct one.
Tip
New in Dreamweaver CS5 is the ability to create a new external style sheet from the Convert Inline CSS dialog. If you want your new rule to be in a new external style sheet, you can either:
Follow the preceding steps to create a new rule, and then in the Convert Inline CSS dialog, enter a name for your new file. A dialog appears telling you it doesn’t exist and asking if you want to create it. If you do, click Yes and your new CSS file is created (containing your new CSS rule) and attached to the HTML page.
or
Follow the preceding steps to create a new internal rule, and then follow the steps in “Moving Internal Styles to External,” later in this chapter.
or
Follow the steps in the next task, “Creating a New External Style Sheet,” and then use the steps in this task to put the new rule into that style sheet.
Creating a New External Style Sheet
Up to now, we’ve covered how to create internal styles, but we also mentioned that internal styles may not always be the right choice. Here’s how to create a new external style sheet, either from scratch or using one of the many sample files that are included in Dreamweaver as a starting point.
To create a new external style sheet based on a sample file
1. From Dreamweaver’s menu, choose File > New. The New Document dialog appears.
2. If it wasn’t chosen by default, select the category Page from Sample. Under Sample Folder, select CSS Style Sheet to display a long list of style sheets in the center column ![]() . Choose any of them to see a preview and description in the right column.
. Choose any of them to see a preview and description in the right column.

![]() Dreamweaver comes with plenty of CSS designs for you to use as starting points.
Dreamweaver comes with plenty of CSS designs for you to use as starting points.
3. If you see a design you like, click Create. A new untitled style sheet document opens in Code view that contains the rules defined in the style sheet you selected. Save this file with a name that ends in .css.
To create a new external style sheet from scratch
1. Choose File > New. The New Document dialog appears ![]() .
.
2. In the New Document dialog, select Blank Page for the Category, CSS for the page type, and click Create. A new blank style sheet opens in Code view ![]() . Save this file with a name that ends in
. Save this file with a name that ends in .css.

![]() A blank CSS document, ready for you to add your rules.
A blank CSS document, ready for you to add your rules.
or
1. With a document open, click the Insert Div Tag button in the Common or Layout category of the Insert panel, and the Insert Div Tag dialog displays. Click New CSS Rule, and the New CSS Rule dialog opens ![]() .
.

![]() Use the Insert Div Tag dialog to open the New CSS Rule dialog.
Use the Insert Div Tag dialog to open the New CSS Rule dialog.
2. Enter any class, tag, id, or pseudo-class selector that you’d like in your new CSS file. Set the Rule Definition pop-up menu to (New Style Sheet File) and click OK. The Save Style Sheet File As dialog appears ![]() .
.
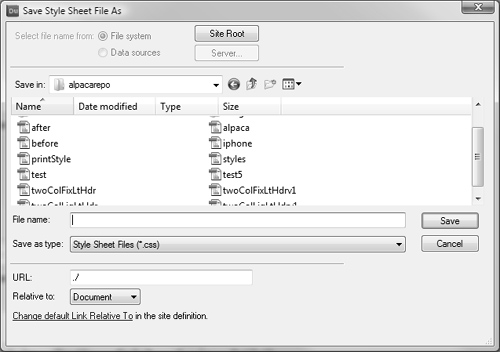
![]() If you said you wanted a new style sheet file, here’s where it’s actually created.
If you said you wanted a new style sheet file, here’s where it’s actually created.
3. Choose a filename that ends in .css, and click Save. The CSS Rule Definition dialog appears ![]() . Add the rules you want (as described in Chapter 7), click OK, and you’ll return to the Insert Div Tag dialog, with your new style sheet (including any rules you set) available as a Related File in the bar at the top of the current document
. Add the rules you want (as described in Chapter 7), click OK, and you’ll return to the Insert Div Tag dialog, with your new style sheet (including any rules you set) available as a Related File in the bar at the top of the current document ![]() .
.

![]() Now that you’ve created a new style sheet file, you need to add rules to it.
Now that you’ve created a new style sheet file, you need to add rules to it.
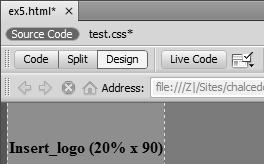
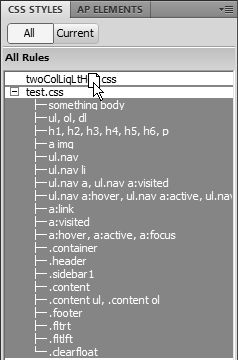
![]() The new style sheet appears in the Related Files at the top of the document window. In this case, the
The new style sheet appears in the Related Files at the top of the document window. In this case, the test.css file has an asterisk after its name, indicating that it needs to be saved.
4. (Optional) If you created a new style sheet using the Insert Div Tag dialog, and you don’t actually want to insert a new div, click Cancel to dismiss the dialog.
Tip
If you’ve created a new style sheet using the Insert Div Tag dialog, your new style sheet is automatically attached to your document. If you created the new style sheet any other way, you’ll have to attach it manually. That’s covered in “Attaching a Style Sheet,” later in this chapter.
Moving Internal Styles to External
There are a number of reasons why your pages might have internal styles instead of using an external style sheet: possibly they’re from an older site (when that was more common), or possibly you used internal styles to test your layout. But now your internal style sheet is ready to live on its own, so your styles need to come out of your Web page and into a stand-alone file, because external style sheets are much easier to maintain and a single sheet can apply to many different HTML pages in your site.
To move styles
1. Open the Web page that contains the style (or styles) you want to move. In the CSS Styles panel, make sure that you’re in All mode. Select the rules that you want to move, right-click, and choose Move CSS Rules from the context menu. The Move To External Style Sheet dialog appears ![]() .
.
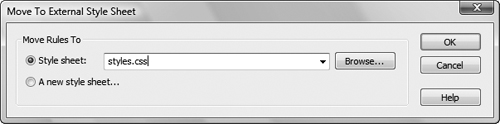
![]() To move a rule to an external style sheet, bring up the Move To External Style Sheet dialog.
To move a rule to an external style sheet, bring up the Move To External Style Sheet dialog.
2. If you are moving the rules to an existing external style sheet (the default), choose it from the pop-up menu and click OK. If the sheet you want isn’t listed, click Browse, find the sheet in the resulting Find Style Sheet File dialog, and click OK.
or
If you want to move the rules to a new style sheet, click A new style sheet and then click OK. You should be prompted with the correct place to save your file. Come up with a good, descriptive name (ending in .css) and click Save.
Your rules will be moved to the style sheet, and the style sheet will be attached to the current page (if that’s not already the case).
Tip
When you moved internal styles to external in versions of Dreamweaver prior to CS3, the styles were only copied, not moved. You no longer have to manually attach the style sheet and then delete the styles from the current document, because Dreamweaver does it all for you.
Tip
If your external style sheet already contains any rules with the same name as the rules you’re moving, Dreamweaver displays a dialog like the one in ![]() . You can choose if you want both rules in the style sheet or just the previous version.
. You can choose if you want both rules in the style sheet or just the previous version.

![]() If you’re moving a rule that might cause a collision, Dreamweaver warns you about the problem.
If you’re moving a rule that might cause a collision, Dreamweaver warns you about the problem.
Attaching a Style Sheet
It doesn’t do you any good to create a style sheet if your Web pages don’t know about it. For a Web page to use an external style sheet, that style sheet must be attached to the Web page.
To attach a style sheet
1. Click the Attach Style Sheet icon at the bottom of the CSS Styles panel (see figure ![]() in “Renaming Styles”).
in “Renaming Styles”).
or
Right-click in the CSS Styles panel and choose Attach Style Sheet ![]() .
.

![]() There are at least two ways to attach a style sheet from the CSS Styles panel.
There are at least two ways to attach a style sheet from the CSS Styles panel.
or
From the HTML tab of the Property Inspector, choose Attach Style Sheet from the Class pop-up menu (see figure ![]() in “Renaming Styles”).
in “Renaming Styles”).
2. The Attach External Style Sheet dialog appears ![]() . Click the Browse button to bring up the Select Style Sheet File dialog
. Click the Browse button to bring up the Select Style Sheet File dialog ![]() . Navigate to an existing style sheet, select it, and click OK.
. Navigate to an existing style sheet, select it, and click OK.

![]() Choose which style sheet you want to attach to your Web page and how you want to attach it.
Choose which style sheet you want to attach to your Web page and how you want to attach it.

![]() Choose which style sheet file to attach by browsing for it.
Choose which style sheet file to attach by browsing for it.
3. Back in the Attach External Style Sheet dialog, select Add as Link if it isn’t already chosen, and click OK to attach the style sheet. If your style sheet includes any rules that affect the active document, you’ll see those changes reflected immediately.
Tip
Take a look at the All Rules pane of the CSS Styles panel. Notice that your style sheet is now included, and all of its properties can be viewed.
Tip
You’re offered a choice of using link or import to attach your style sheet. Each has its advantages: link, the default choice, works in more browsers, for instance, whereas import allows you to nest style sheets (i.e., you can attach a style sheet using import, and then that style sheet can include an import of another style sheet, and so on).
Tip
You can use both link and import in the same document. That’s a handy way to use two style sheets, where the link attaches a bare-bones style sheet and the import attaches a more complex style sheet that very old browsers (such as Netscape 4.x) can’t handle.
Tip
When attaching a style sheet, you’re also offered a choice of Media in the Attach External Style Sheet dialog. Those choices include all, aural, braille, handheld, print, projection, screen, tty, and tv ![]() . It’s also acceptable to use no media type at all; in that case, the style sheet applies to all media types. And finally, you can also enter in a list of media types (comma-separated) if you want your style sheet to apply to some media types but not others.
. It’s also acceptable to use no media type at all; in that case, the style sheet applies to all media types. And finally, you can also enter in a list of media types (comma-separated) if you want your style sheet to apply to some media types but not others.

![]() Media options are set here. For instance, if you want your style sheet to only apply when the page is printed, choose the print media type.
Media options are set here. For instance, if you want your style sheet to only apply when the page is printed, choose the print media type.
Tip
If you set the media type for your style sheet, you can test it by choosing View > Style Rendering and picking which media type to view. When you do this, though, remember that few browsers offer full support for media types.
Drag-and-Drop Styles
If you’ve found all the methods so far for dealing with style management to be somewhat complicated, then here’s what you’ve been wishing you could do: drag and drop styles.
Moving styles inside a document
As mentioned in Chapter 7 in the sidebar “External, Internal, and Inline: Look Ma, It’s the Cascade,” where style rules are physically located determines which rules take precedence when there’s a conflict. If you have two rules that conflict inside a document (either a Web page or a style sheet) and you want the one that’s currently being overridden to dominate, all you have to do is drag that rule below the other.
To move a style inside a document
1. Open the Web page or style sheet that contains the style (or styles) you want to move. In the CSS Styles panel, make sure that you’re in All mode, select the rules that you want to move, and drag them to their new location ![]() . A blue line (a black line on the Mac) appears showing where the rules will be relocated.
. A blue line (a black line on the Mac) appears showing where the rules will be relocated.

![]() On a Mac, you can see which style you’re dragging while it’s being dragged.
On a Mac, you can see which style you’re dragging while it’s being dragged.
On the Mac, a ghostly version of the style name moves with the cursor. On Windows, a small document icon appears instead.
2. When you’re happy with the new location, release the mouse, and Dreamweaver moves the rules for you.
Moving styles from one document to another
Not only can you move styles inside a document, but you can also move them from document to document—whether the documents are style sheets or Web pages.
To move a style from one document to another
1. Open a Web page that either links to two style sheets or one that contains the style (or styles) and also links to an external style sheet. In the CSS Styles panel, make sure that you’re in All mode and that both files are displayed (if no external style sheet is displayed, follow the directions in “Attaching a Style Sheet”). Select the rules that you want to move, and drag them to their new location ![]() . A line appears showing where the rules will be relocated.
. A line appears showing where the rules will be relocated.
![]() On either platform, you can drag multiple style rules at one time.
On either platform, you can drag multiple style rules at one time.
2. When you’re happy with the new location, release the mouse, and Dreamweaver moves the rules for you.
Tip
If you want to copy a style rule (that is, you want it to end up in both the original document and the target document), hold down the Ctrl (Opt) key while dragging the rules.
Tip
If you’re moving a style rule into a document that already contains a rule with that name, you’ll get a warning dialog like the one in figure ![]() in “Moving Internal Styles to External.”
in “Moving Internal Styles to External.”
Using CSS Inspection
Laying out pages with CSS can be frustrating because it can be difficult to tell which elements are where and why. Thankfully, Dreamweaver has a few clever features that make creating CSS-based layouts much simpler. CSS inspection, added in CS5, is one of the handy ways to tell you just what’s going on in a selected area.
CSS inspection works with Live View mode to visually display the box model for an element. Hover over an element on your page, and it displays with an aqua background, yellow margins, lavender padding, and gray borders ![]() . But that’s not all—as you hover over various parts of your document, the CSS Styles panel (in Current mode) dynamically updates to display the rules currently in effect.
. But that’s not all—as you hover over various parts of your document, the CSS Styles panel (in Current mode) dynamically updates to display the rules currently in effect.

![]() Inspecting an element shows the margins, padding, and borders.
Inspecting an element shows the margins, padding, and borders.
Turning on Inspect mode
• Click the Inspect button in the Document toolbar to enable both CSS inspection and Live View ![]() .
.
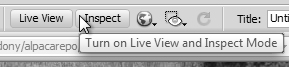
![]() One click turns on both Live View and Inspect mode.
One click turns on both Live View and Inspect mode.
or
Choose View > Inspect to enable both CSS inspection and Live View.
or
Press Alt-Shift-F11 (Opt-Shift-F11) to enable both CSS inspection and Live View.
or
While in Live View mode, right-click on the document and choose Inspect from the context menu ![]() .
.
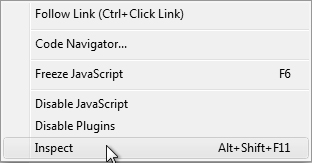
![]() When in Live View mode, you can inspect any element by right-clicking on it.
When in Live View mode, you can inspect any element by right-clicking on it.
Modifying styles with CSS inspection
1. While in Inspect mode, hover over any section of your document ![]() to display the box model for that element.
to display the box model for that element.
2. If you have a problem with how an element displays, click on the element, freezing Inspect mode. When CSS inspection is frozen, the colors remain visible and don’t change when you move the cursor.
3. In the CSS Styles panel, change a rule, and the colored borders around the element update to match your change.
4. Click anywhere in your document to get rid of the colors.
Tip
To leave both Inspect mode and Live View mode, just click the Live View button. You can’t be in Inspect mode if you aren’t also in Live View.
Tip
Dreamweaver has definite opinions about how you ought to work with CSS inspection, and says so every time you turn it on ![]() . If you click More Info, you’ll see
. If you click More Info, you’ll see ![]() , which says that if you’re in CSS Inspect mode, you should also be in Split mode with Live Code view on, and that the CSS Styles panel should display Current mode. If you get tired of seeing this, just select Don’t show me this message again.
, which says that if you’re in CSS Inspect mode, you should also be in Split mode with Live Code view on, and that the CSS Styles panel should display Current mode. If you get tired of seeing this, just select Don’t show me this message again.
![]()
![]() Dreamweaver wants you to know the right way to use Inspect mode.
Dreamweaver wants you to know the right way to use Inspect mode.

![]() But if you don’t want to see this suggestion again, you can turn it off.
But if you don’t want to see this suggestion again, you can turn it off.
Using the Visual Aids
If you’ve tried CSS Inspection and wished you could apply it to an entire page, you want what Dreamweaver refers to as Visual Aids.
![]() shows our example CSS-based page with all visual aids turned off, which is fine. But if we had a problem, it would be difficult to tell where each div begins and ends. That’s where the visual aids shine.
shows our example CSS-based page with all visual aids turned off, which is fine. But if we had a problem, it would be difficult to tell where each div begins and ends. That’s where the visual aids shine.

![]() Here’s our standard page.
Here’s our standard page.
The Visual Aids menu is found in the Document toolbar. Although it looks like a button, that little downward facing arrow means that it’s actually a pop-up menu. If you click it, you’ll see the options shown in ![]() . Or, you can choose View > Visual Aids, and then select any of the submenu options
. Or, you can choose View > Visual Aids, and then select any of the submenu options ![]() .
.

![]() Here’s the Visual Aids menu in the Document toolbar and your choices.
Here’s the Visual Aids menu in the Document toolbar and your choices.
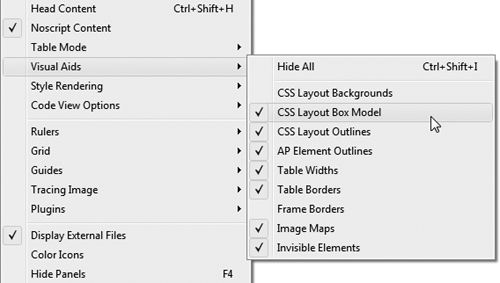
![]() Or, you can access it via the menu bar.
Or, you can access it via the menu bar.
To turn each visual aid on or off, choose it from the menu to toggle its check mark, or you can choose Hide All (Ctrl-Shift-I or Cmd-Shift-I) to turn them all off temporarily. For day-to-day use, we keep CSS Layout Backgrounds turned off and CSS Layout Box Model and CSS Layout Outlines on.
Here’s a rundown of the CSS-related items in these menus:
• CSS Layout Backgrounds: Put on your sunglasses and turn on CSS Layout Backgrounds ![]() . With this aid, Dreamweaver assigns a different background color for every layout block. If you’ve already set a background color, that will go away, as will background images—note that you can see the header logo, but you can’t see the header background color.
. With this aid, Dreamweaver assigns a different background color for every layout block. If you’ve already set a background color, that will go away, as will background images—note that you can see the header logo, but you can’t see the header background color.

![]() CSS Layout Backgrounds are gaudy but useful.
CSS Layout Backgrounds are gaudy but useful.
Dreamweaver’s documentation describes the color choices as “visually distinctive,” but we prefer to not beat around the bush: we just call them loud and bright. Sorry, but there’s no way to change the color choices. On the other hand, the garishness makes it very clear which div is which.
• CSS Layout Box Model: You’ve seen the Layout Box Model aid ![]() used previously. When enabled, it shows just the selected element, including its margin, borders, and padding. Here, the
used previously. When enabled, it shows just the selected element, including its margin, borders, and padding. Here, the a tag has varying amounts of padding on each side. When this visual aid is enabled, each is shown visually on the document along with the dimensions of the element.
![]()
![]() The CSS Layout Box Model shows you the exact limits of the currently selected element.
The CSS Layout Box Model shows you the exact limits of the currently selected element.
• CSS Layout Outlines: The CSS Layout Outlines option simply puts a dashed line around the border of each layout block ![]() . It can be tricky to see what your borders are set to when this is on, and you should also keep in mind that the dashed line includes the padding but excludes the margins.
. It can be tricky to see what your borders are set to when this is on, and you should also keep in mind that the dashed line includes the padding but excludes the margins.
![]() CSS Layout Outlines give you a subtle way of telling your elements apart.
CSS Layout Outlines give you a subtle way of telling your elements apart.
Experimenting with CSS Enable/Disable
Another way to debug CSS is to enable and disable rules. Adobe made this easy to do in CS5 with CSS Enable/Disable, which is available on the CSS Styles panel.
To use CSS Enable/Disable
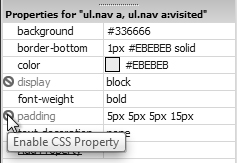
1. In the Properties pane of the CSS Styles panel, move your cursor just to the left of a property name. You should see a gray Disable CSS Property icon appear (it looks like the universal sign for “No,” the circle with the diagonal slash through it) ![]() . Click the icon, which will turn it red. If you are in Current mode, a red Disable CSS Property icon also appears next to the property name in the Summary pane
. Click the icon, which will turn it red. If you are in Current mode, a red Disable CSS Property icon also appears next to the property name in the Summary pane ![]() .
.
![]() Hover just to the left of a property, and the Disable CSS Property icon appears.
Hover just to the left of a property, and the Disable CSS Property icon appears.

![]() Disabling in either pane shows the result in both.
Disabling in either pane shows the result in both.
or
In the Properties pane of the CSS Styles panel, select a property. Underneath the Properties pane, in the bottom part of the panel on the right side, click the gray Disable button ![]() , which turns the CSS Property icon to the left of the property red. If you are in Current mode, a red Disable CSS Property icon also appears next to the property name in the Summary pane.
, which turns the CSS Property icon to the left of the property red. If you are in Current mode, a red Disable CSS Property icon also appears next to the property name in the Summary pane.

![]() You can also disable a property via the button at the bottom of the CSS Properties pane.
You can also disable a property via the button at the bottom of the CSS Properties pane.
or
With the CSS Styles panel in Current mode, find a property in the Summary pane that you want to disable. Click the gray Disable CSS Property icon to its left, which turns it red. In the Properties pane, the selected property will also display the red Disable CSS Property icon.
or
With the CSS Styles panel in Current mode, find a property in the Summary pane that you want to disable. Select the property, click the gray Disable button under the Properties pane, and the red Disable CSS Property icon appears next to the property name. In the Properties pane, the selected property will also display the red Disable CSS Property icon.
2. If your document is open in Design view, Dreamweaver displays the page without that rule. If you are in Code view, Dreamweaver scrolls the source to show the rule commented out. If you’re in Split view, you’ll see both ![]() .
.

![]() Disable rules in the CSS Styles panel, and you’ll see changes in both the page display and the CSS source code.
Disable rules in the CSS Styles panel, and you’ll see changes in both the page display and the CSS source code.
3. To reenable a disabled rule, click the red Disable CSS Property icon in either the Properties or the Summary panes ![]() .
.
![]() To reenable a property, simply toggle the icon.
To reenable a property, simply toggle the icon.
Tip
If you select a property or disable a property from the Summary pane, the Rules and Properties panes update to show the affected rule.
Tip
If the open document is an HTML file in Code or Split view, and the rule you disabled is in an external CSS file, the commented-out code doesn’t automatically display.
Tip
Disabled rules aren’t only disabled within Dreamweaver. If you disable a rule, save the file, and then upload your changes to the live server, the rule stays disabled until you enable it again. If you want similar functionality that only applies while testing, use design-time style sheets (described in the next task) instead.
Using Design-Time Style Sheets
It’s common when working with CSS-based layouts to want something to display in a particular way while you’re designing—but only while you’re designing; that is, during design time. You can tell Dreamweaver to use certain style sheets only at design time, and even to turn off certain style sheets only at design time.
As with the previous visual aids, you wouldn’t want your real Web site to look like that, but it’s handy while trying to do those last few tweaks or track down a problem. If you want something that Dreamweaver’s built-in visual aids don’t provide, design-time style sheets allow you to create your own.
To show a design-time style sheet
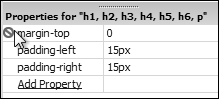
1. Create and save a new style sheet containing the style rules that should display only inside Dreamweaver. ![]() shows an example that contains two simple rules:
shows an example that contains two simple rules: p is set to display:block and h1 gets a background color of orange. See the “CSS Layout Blocks” sidebar for an explanation of why you’d want to modify the p tag.

![]() This very simple style sheet gives you extra information in Dreamweaver.
This very simple style sheet gives you extra information in Dreamweaver.
2. To choose a design-time style sheet, either choose Format > CSS Styles > Design-time ![]() , or right-click inside the CSS Styles panel and choose Design-time from the context menu
, or right-click inside the CSS Styles panel and choose Design-time from the context menu ![]() . The Design-Time Style Sheets dialog appears
. The Design-Time Style Sheets dialog appears ![]() .
.

![]() Design-time style sheets can be chosen from the Format menu.
Design-time style sheets can be chosen from the Format menu.
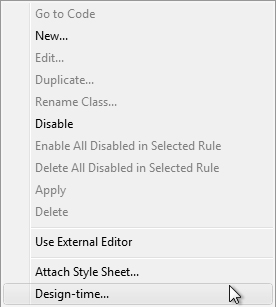
![]() Or they can be chosen from the CSS panel.
Or they can be chosen from the CSS panel.

![]() But either way, you end up at the Design-Time Style Sheets dialog.
But either way, you end up at the Design-Time Style Sheets dialog.
3. To add a style sheet that shows only at design time, click the upper plus button. The Select File dialog appears ![]() . Navigate to your new style sheet, choose it, and click OK.
. Navigate to your new style sheet, choose it, and click OK.

![]() The Select File dialog lets you choose your design-time style sheet.
The Select File dialog lets you choose your design-time style sheet.
4. Back in the Design-Time Style Sheets dialog, your new style sheet is now listed next to Show only at design time. If it’s correct, click OK.
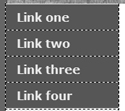
5. The Web page now appears with some slight changes ![]() : the
: the h1 title has an orange background, and paragraphs can be identified using the CSS Layout Box Model visual aid. If we use the CSS Layout Backgrounds visual aid ![]() , paragraphs are now clearly distinct from other elements on the page.
, paragraphs are now clearly distinct from other elements on the page.
![]() Now the
Now the h1 is all lit up.

![]() Paragraphs are delineated when the background visual aid is used.
Paragraphs are delineated when the background visual aid is used.
To hide a style sheet at design time
• Follow steps 2 through 4 from “To show a design-time style sheet” earlier, but click the lower plus button instead. Select a style sheet to hide, and click OK.
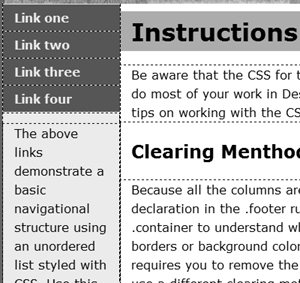
In ![]() , the main style sheet for the page has been hidden. This allows you to see the page without the effect of styles or to see the page with some styles but not others. This can be a big help when trying to track down CSS-related issues.
, the main style sheet for the page has been hidden. This allows you to see the page without the effect of styles or to see the page with some styles but not others. This can be a big help when trying to track down CSS-related issues.

![]() Style sheets can also be hidden, as shown on this plain page.
Style sheets can also be hidden, as shown on this plain page.
To remove a design-time style sheet
1. Bring up the Design-Time Style Sheets dialog as described earlier. Select the style sheet to remove and click the minus button above the style sheet name in either box of the dialog. If you have multiple style sheets to remove, continue to delete them in this way.
2. Click OK, and your Web page displays closer to the way it will appear on the Web.
Tip
When used in conjunction with Dreamweaver’s CSS layout blocks, design-time style sheets are an extremely powerful tool.
Tip
Despite how it looks, your document is not actually being changed, only the way the page is displayed. Design-time style sheets are not really added to or removed from your Web page: Dreamweaver handles it all internally.
Tip
Don’t forget that you also have the Style Rendering toolbar (covered in Chapter 1), which you can use to display your page as it would appear with print style sheets, handheld style sheets, projection style sheets, and so on. You can also use the Style Rendering toolbar to turn off the display of style sheets altogether.
Tip
It’s worth noting that when you remove design-time style sheets from your document, you’re not actually deleting the style sheet—you’re just removing the relationship between your page and the style sheet.
Putting It All Together
1. Make sure all your styles have a descriptive name. If not, rename them as needed.
2. Delete any styles you longer need.
3. Change all your inline styles to rules.
4. Create a new external style sheet from one of the sample files.
5. Create a new external style sheet from scratch.
6. Move all your internal styles to one or more external style sheets.
7. Attach an external style sheet to a Web page.
8. Drag and drop styles inside a document and from one document to another.
9. Use CSS inspection to inspect and modify the styles used by your Web page.
10. Turn on the CSS Layout Backgrounds visual aid and see where each div begins and ends.
11. If necessary, use CSS Enable/Disable to debug your styles.
12. Using the Design-Time Style Sheets dialog, add a design time-only style sheet and hide an existing style sheet.