
15. Inserting Pictures and Videos
Time to kick your graphics knowledge up a notch and start illustrating your documents with visuals that are a bit more complex in nature than the shapes and WordArt images covered in Chapter 14, “Adding Simple Graphic Elements.” I’m talking about digital pictures. Although they offer a great deal more in pixels, they aren’t any more difficult to add than simple graphic elements, such as shapes. However, the impact they bring to your documents is considerable. Pictures have the power to provoke, inspire, explain, and communicate in a glance. In this chapter, you learn how to tap into the vast collections of images available on the Microsoft Office website, as well as insert your own photographic images stored on your computer or memory device.
Pictures fall under the broad umbrella of graphic elements you can add to spruce up and complement your text. The term picture loosely covers any sort of detailed image, whether it’s computer-generated artwork from a drawing program or a photograph taken with a digital camera or scanned in using a scanner device. Whether you like to call them pictures, illustrations, images, or artwork, we’re still talking about the same type of visuals you can put to use in your own word-processing tasks.
Understanding Picture File Types
Before you dive head first into inserting pictures, I thought I would give you the scoop about picture file types. At first glance, this might not be anything you’re interested in, but knowing a few things about file formats for pictures might help you out when you’re searching for artwork to insert into your documents. The devices and programs used to make pictures determine what sort of file format is assigned to the picture file. Just as Microsoft Word makes document files (which utilize the .DOCX file extension), programs and devices that create pictures make different kinds of picture file formats. For example, my digital camera typically spits out JPEG files when I import them into a photo viewer program. Yours might assign another format, such as TIFF. A piece of clip art you download from the Office website might use the WMF format. Knowing the file type can help you as you organize and search for picture files on your computer and on the Web.
Figure 15.1 shows examples of four different picture file types. Your naked eye might not distinguish a great deal of difference between them, but behind the scenes in the coding, things become very different.

FIGURE 15.1 Picture files use different file formats. You had better know this for the quiz later.
Obviously, different graphic file types are used with different scenarios. For example, graphics for Web use don’t require the same quality settings as those used in professional printing. With everyone sharing picture files these days, though, either directly or over the Internet, file size and quality is an issue regardless of the scenario. Picture files are notoriously large in size because of all the colors and details needed to make them. Because of this, data compression techniques are employed to help keep picture file sizes down. Lossy compression and lossless compression are two such methods. Lossy compression reduces the file size by eliminating certain data, such as redundant information; but when uncompressed, some of the original data is gone. With lossless compression, everything in the file can be recovered when the file is uncompressed. Image file formats, like those described in the following list, apply these types of data compression methods to reduce the overall file size.
The most common picture formats you’ll encounter today are
• JPEG or JPG Stands for Joint Photographics Expert Group. JPG is commonly used on photos and similar types of illustration files. Its flexible compression levels let you control the file size. JPG is a good choice when you want a smaller file size for an image, but that means the quality is lower due to its lossy compression method. However, the quality loss might not be noticeable.
• TIFF or TIF Stands for Tagged Image File Format. TIFF is great for high-color, high-depth digital images, and its lossless compression format retains image quality no matter how many times you open and resave the file. TIF is the highest quality for commercial work.
• PNG Stands for Portable Network Graphics. PNG is a bitmap file format designed specifically for use with web pages. It was originally designed to replace the GIF format to save color information more efficiently. Although not as popular as JPEG and TIFF, it’s a good choice for lossless quality images.
• GIF Stands for Graphics Interchange Format. GIF is an older file format commonly used with simple graphics, such as logos, shapes, and icons. It also supports animation. It’s a bit limiting for today’s digital technology (it only supports 8-bit, 256 color at the maximum), but it still has its place on the Web for simple graphics.
• BMP Stands for Windows Bitmap. This file format is commonly used with Windows graphics. Also called raster or paint format, it’s not compressed, which results in a larger file size. BMP files aren’t very popular as web graphics.
• RAW This is uncompressed digital image data straight from your camera. It’s not been fiddled with or compressed in any way. You must convert RAW files to another file format in order to open them in a photo-viewing program. If you hand someone a RAW file, chances are they can’t read it; it has to be converted first. With Windows 7 and later, the Camera Codec Pack helps with reading RAW file types.
• DNG Stands for Digital Negative. DNG is a new open standard RAW format developed by Adobe, and just about every digital photo program can read DNG file types.
Hey, don’t think I didn’t notice your eyes glazing over after reading about all those file types. Just remember to flip back to the list if you ever need to identify one as you encounter different graphic files on your computer journey.
![]() Note
Note
A picture’s file format can tell you a lot about the compression, which in turn can tell you about the picture’s quality. Other file formats can tell you about the program from which it originates. You will run into other formats, such as Windows Metafile Format (WMF) for things such as clip art illustrations, but don’t let the formats throw you off. Lots of programs, like Adobe Illustrator, save artwork in a native file format (AI for Adobe Illustrator), so you’ll run across all kinds of different formats as you work with different graphic elements.
Inserting Images from the Internet
In the prehistoric days of early computing, digital artwork was quite rudimentary, jaggedy-edged and limited in color scope. It often looked like a caveman drew it rather than a highly qualified computer programmer. As time progressed, predrawn clip art began to proliferate among software manufacturers as clip art collections, allowing users to easily illustrate their files with cartoony-like graphics. The collections themselves used to install with software programs, such as Microsoft Word, and included a small variety of themes related to business, desktop publishing, and computer technologies. Eventually, full-blown photographic images—also called stock photography—made their way into clip art collections, too.
![]() Note
Note
Clip art got its name from the practice of clipping the artwork from existing printed art. Long before computers, printing people clipped artwork from other printed material and pasted it onto new publications. Now most publications are produced through desktop publishing software.
Today, most of the image collections offered with software programs are available online. Rather than clog up your computer’s hard drive with lots of images you might not ever use, you can access pictures on the Web instead and find just the right ones you want. With an Internet connection, you can peruse vast libraries of pictures, from drawings and illustrations to photographs and video clips.
You need an online connection and a Microsoft account to tap into the Office.com site and search for artwork. The Insert Pictures feature, shown in Figure 15.2, lets you search for pictures in the following sources:

FIGURE 15.2 The new Insert Pictures box lets you search for online pictures from several sources.
• Office.com Search through Microsoft’s own collection of royalty-free pictures.
• Bing Image Search Use this option to search for pictures on the Web using Microsoft’s Bing search engine.
• SkyDrive If you store pictures on your cloud account, you can use this option to look for picture files among your SkyDrive content.
That’s not all: If you use a Flickr photo sharing account, you can add it to the mix and search for digital pictures from it as well.
Thumbnails are miniatures of images. Rather than take up a lot of space with full-size images, most photo displays used in galleries, photo viewers, and search engines show smaller versions of the images. The term thumbnail also applies to files you view using Windows Explorer. For example, you can choose to view folder contents as thumbnails. This sort of gives you a glance at what the files contain without the inconvenience of a full-on screen-hogging view.
![]() Note
Note
Pictures offered through the Office.com site are royalty-free, which means you can use them for free. That’s not always the case with other web content. Be careful about randomly copying artwork from other sources or you might be in copyright violation.
You can always use the good old Copy and Paste commands to copy pictures into your documents from other sources.
Using Pictures from Office.com
To insert a picture from Microsoft’s online collection, follow these steps:
1. Click the Insert tab.
2. Click Online Pictures to open the Insert Pictures tool (see Figure 15.2).
3. Click in the Office.com Clip Art search field and type in a keyword or words for the type of picture you’re looking for.
4. Press Enter or click the Search icon.
5. A search results page lists any matches, similar to Figure 15.3. Use the scrollbar to look through the thumbnails.

FIGURE 15.3 Look through the search results to find the picture you want to use.
6. When you find one you want, click it. If you find more than one, press and hold the Ctrl key while clicking each image.
7. To download the picture, click Insert.
When the download is complete, Word inserts the picture into your document, much like what you see in Figure 15.4, and displays a new Format tab for working with the image. You might need to resize the picture right away to make it fit. More often than not, you’ll find yourself having to do this with any artwork you bring into Word. Drag a picture’s corner selection handle to resize the image. To move the picture around in the document, click and drag it.
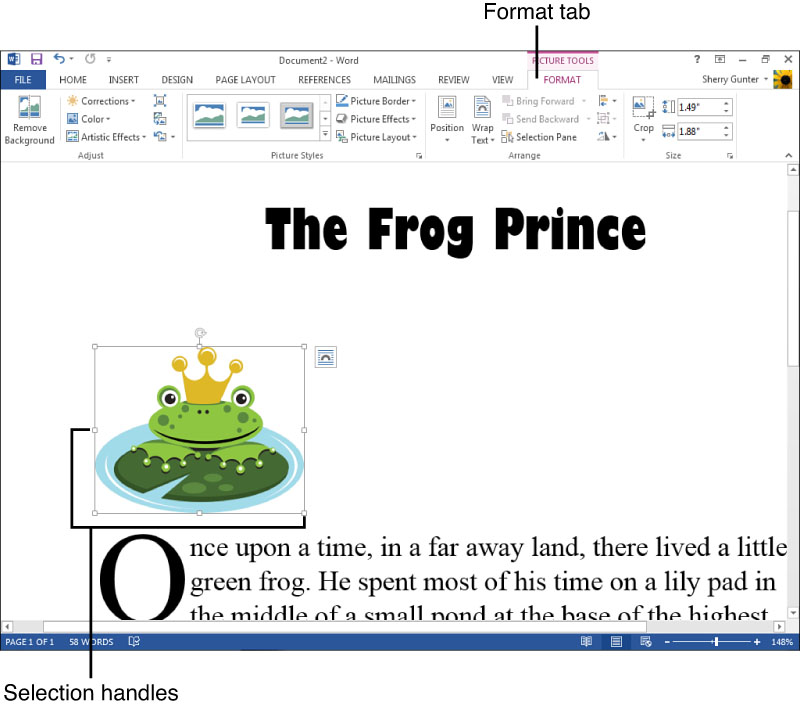
FIGURE 15.4 Word downloads the picture and inserts it for you. In this example, I inserted a clip art illustration.
If your initial search doesn’t result in any good matches on Office.com, try typing in another keyword or phrase in the Search box. Finding the right picture for an occasion might take a few tries. If you give up on searching, click the Back to Sites link in the upper-left corner to return to the main Insert Pictures screen and try another source.
![]() Tip
Tip
In Chapter 16, “Fine-Tuning Your Graphics,” you can learn how to apply some formatting techniques to your pictures, such as how to add shadows, 3-D effects, borders, and more.
Searching for Pictures Using Bing
Now let’s try searching for pictures using the Bing Image Search feature. As you might or might not know, the Bing search engine is part of Microsoft’s world domination plan, so all the Microsoft Office programs point you toward Bing any time you want to conduct a web search from within the programs.
To search the Web for pictures using Bing, follow these steps:
1. Click the Insert tab.
2. Click Online Pictures.
3. Click in the Bing Image Search field and type in a keyword or words for the type of picture you’re looking for, as shown in Figure 15.5.
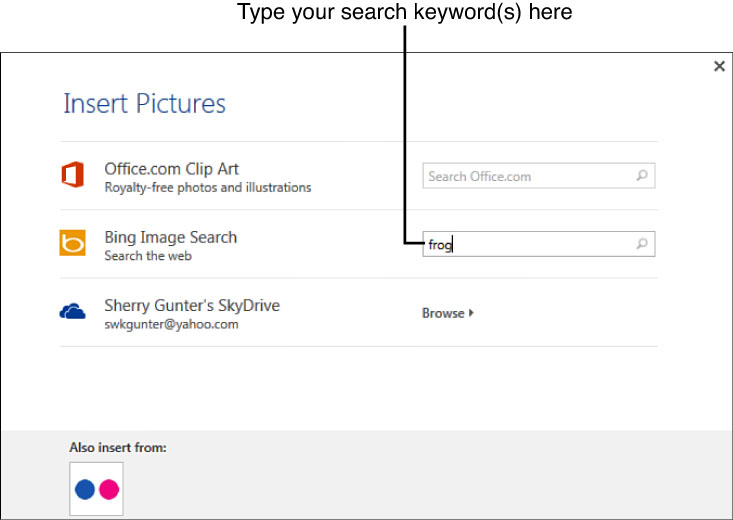
FIGURE 15.5 This time, let’s search with Bing.
4. Press Enter or click the Search icon.
5. A search results page lists any matches, similar to what you see in Figure 15.6.
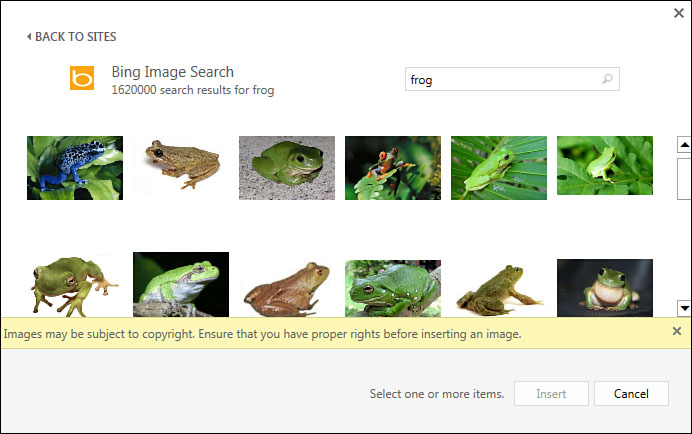
FIGURE 15.6 The results are images gathered from all over the Web that match your search criteria.
Use the scrollbar to look through the thumbnails. Notice this time there’s a big warning in the box about copyright material. Unlike the Office.com site, the items you search for using Bing are not necessarily royalty-free.
6. When you find a picture, click it to view its details, as well as a link to its web address you can use to learn more about the image.
7. Click Insert.
You can click a picture in your Bing search results to view a link to the source’s website. Look in the bottom-left corner to view the link. Click it and you can learn more about where the picture comes from and how to contact the owner to ask for permission to use it. It never hurts to contact the source and ask. If you notice you are not able to copy, download, or use the PrintScreen capture to nab an image, then it’s probably not supposed to be used by anyone else; stay away from protected images.
Searching for Pictures on SkyDrive
SkyDrive is Microsoft’s file-hosting service, and if you store your photos on your cloud account with Microsoft, you can insert pictures from SkyDrive and place them in your documents.
To search your SkyDrive account for pictures, follow these steps:
1. Click the Insert tab.
2. Click Online Pictures.
3. Click the Browse link under the SkyDrive option (see Figure 15.7).

FIGURE 15.7 Now let’s try searching your SkyDrive storage for pictures.
4. Open the folder containing your pictures and click the picture you want to insert (see Figure 15.8).
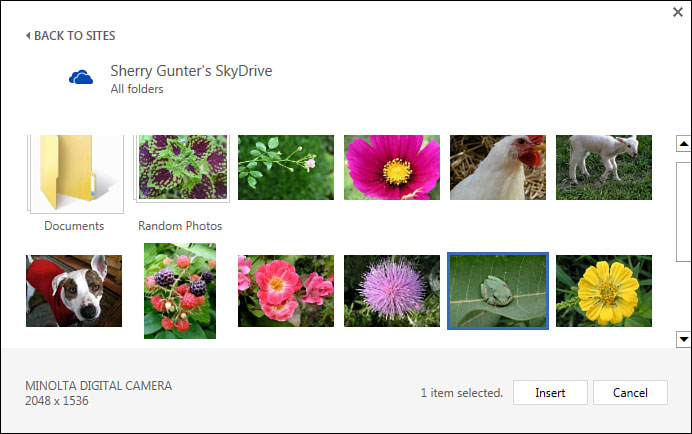
FIGURE 15.8 I’m looking for a frog picture, and I think this is the one.
5. Click Insert.
As soon as you click the Insert button, Word downloads the picture and inserts it into your document. You will probably need to resize the picture to fit; just drag a corner selection handle, pointed out in Figure 15.9, to resize the image.
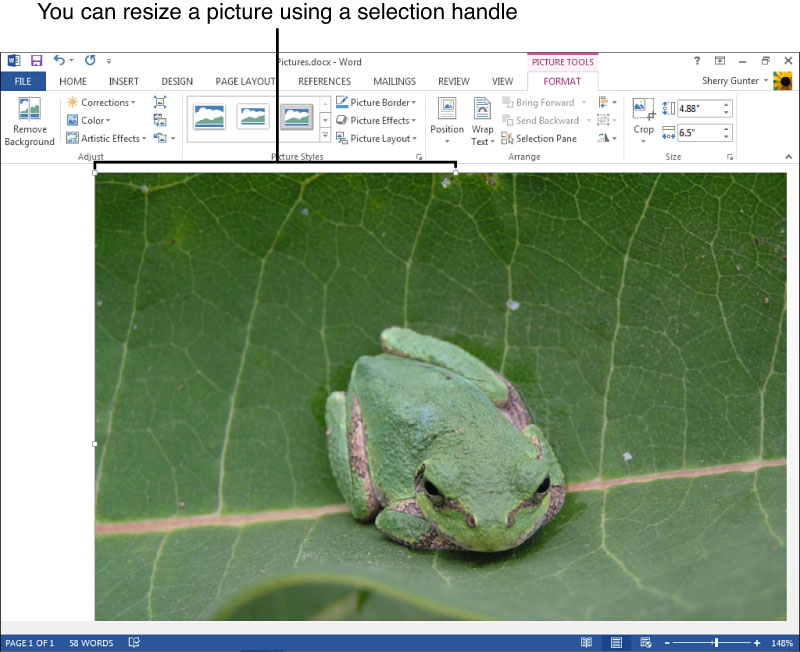
FIGURE 15.9 It’s a tree frog resting on a zinnia flower leaf, if you must know.
![]() Note
Note
Are you new to SkyDrive? If so, you might be wondering how to store pictures on the cloud. It’s easy. First use your favorite web browser to navigate to www.skydrive.com and log on to your account. Next, look for an Upload link at the top of the page and follow the onscreen directions to upload pictures from your computer to the cloud storage site. If you’ve activated the Windows SkyDrive folder on your computer (look for it listed under Favorites in the Explorer window), you can also drag files to it to store them in the cloud without having to open the browser.
If you have a Flickr account, click the Flickr icon at the bottom of the Insert Pictures window and follow the instructions to connect your account. If you don’t have a Flickr account, you can use the link to make one.
Inserting Your Own Pictures
You can access any image stored on your computer and insert it into a Word file. If you have a digital camera, you might end up being the only illustrator your documents need. Digital cameras make adding your own visual content easier than ever. You can transfer files from the camera to your computer’s hard drive, or you can store photos on a flash drive or memory card and access them from your PC.
To insert a picture stored on your computer or other plug-in devices, follow these steps:
1. Click the Insert tab.
2. Click Pictures to open the Insert Picture dialog box (see Figure 15.10).
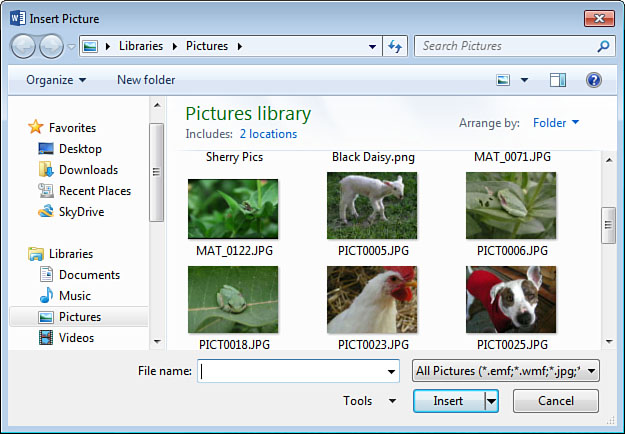
FIGURE 15.10 Use the Insert Picture dialog box to add pictures found on your computer.
3. Navigate to the folder or drive containing the picture you want to use and click the filename.
4. Click Insert.
After you add a picture, you can easily resize it by dragging its selection handles. You can also drag it around to move it to a new location in the document. Look for the familiar Layout Options icon that appears in the upper-right corner of a selected picture; you can use it to control text flow around a picture.
As soon as you insert a picture, the Picture Tools Format tab is added to the Ribbon. This specialized tab displays tools you can use to edit your picture. You can learn more about ways to modify an image in the next chapter.
You can store data, including pictures, on a wide variety of devices these days. Most digital cameras utilize memory cards, for example, that pop in and out of the camera as well as any card reader slots on a computer. Flash drives (also called thumb drives, stick drives, or key drives) are compact stick-like storage you can use by plugging into a USB port. Flash drives are incredibly handy for storing files and transferring them between computers and other devices. Writable CDs and DVDs let you save files using an optical disk drive. Lastly, if you have an external hard drive, you can plug it into your computer and store picture files. When you’re inserting pictures with the Insert Picture dialog box, you can navigate to any of these types of storage devices to retrieve a picture file. Just specify the appropriate drive listed in the left pane to view the contents.
![]() Tip
Tip
To remove any picture or video clip you insert, select it and press Delete.
Capturing Screenshots
You can use Word’s Screenshot tool to add a snapshot of any open window on your desktop and immediately insert it into a document. You can also use it to take a clipping of a portion of anything open on the desktop, such as a sticky note or a game screen.
For example, maybe you’re assembling a department budget in Excel and you want to grab a picture of your progress to include in a memo document you’re creating in Word. You can capture the Excel window as a screenshot and tuck it away in your Word document as an illustration of how things are going. Or how about this: You’re working on a report about a newly discovered iguana and want to grab a picture of the news story from your web browser window so you can read and reference it later. You can do this with the Screenshot tool. Pretty nifty, eh?
The feature keeps track of the current windows you have open, even though you’re busy working in Word. It also keeps track of multiple Word documents you have open, so you can use it to snap screenshots from one document to insert into another. The key to using the feature is to make sure the window you want to capture is not minimized on the Windows Taskbar, but open onscreen.
Ready to give this a whirl? Start by opening a program window or Windows feature you want to capture. Remember, it can be any kind of window—a game, a sticky note, the Windows calculator, a photo viewer, web browser, and so on.
Display the Word window and click the Insert tab. Now click the Screenshot drop-down arrow, as shown in Figure 15.11, and click the window you want to insert. Boom, that was fast—the captured window is immediately inserted! Figure 15.12 shows an example of a screenshot.
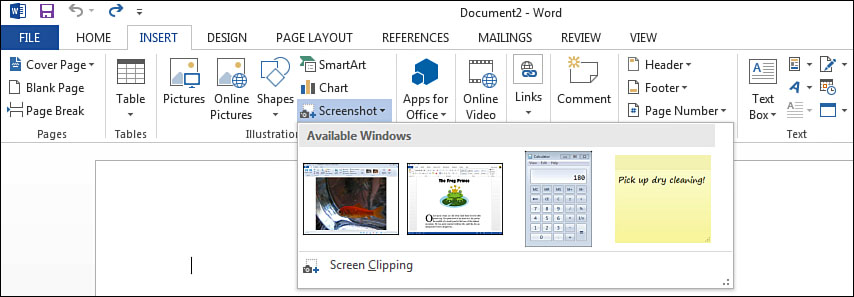
FIGURE 15.11 Use the Screenshot tool to add a screenshot of any open window or Windows feature.

FIGURE 15.12 The screenshot is immediately added to your document, complete with a border.
Capture the wrong screen? Just click the Undo button on the Quick Access toolbar or press Ctrl+Z to remove the pasted screenshot or clipping right away and try again with the right one.
Now let’s try out a screen clipping. Again, start by having the window open that you want to clip from, such as a photo album, web page, or game. Next, click the Insert tab and click the Screenshot drop-down arrow. Click Screen Clipping (see Figure 15.11 to locate this command). The first time you use the screen clipping tool, it’s a little odd because your screen turns a foggy white color and the mouse pointer turns into a crosshair icon, like you see in Figure 15.13, but that’s just your cue to drag across the clipping you want to capture. So, drag across the part of the screen you want to clip, as shown in Figure 15.14. The part you’re clipping becomes clear as you drag. As soon as you release the mouse button, the area you dragged over is inserted into your Word document, much like what you see in Figure 15.15. Don’t wait too long to drag over the clipping area or the function times out and you have to start all over again.
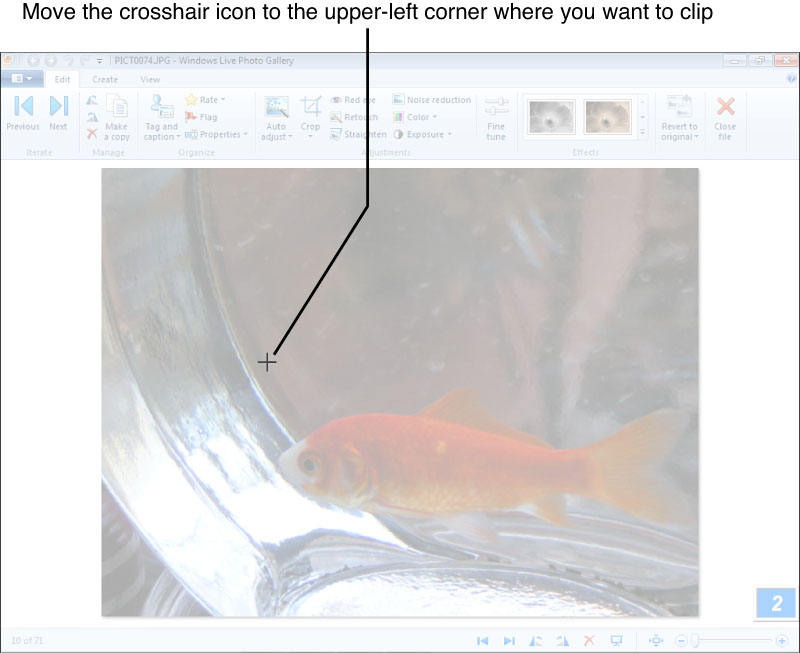
FIGURE 15.13 The first phase of the screen clip turns your screen foggy.
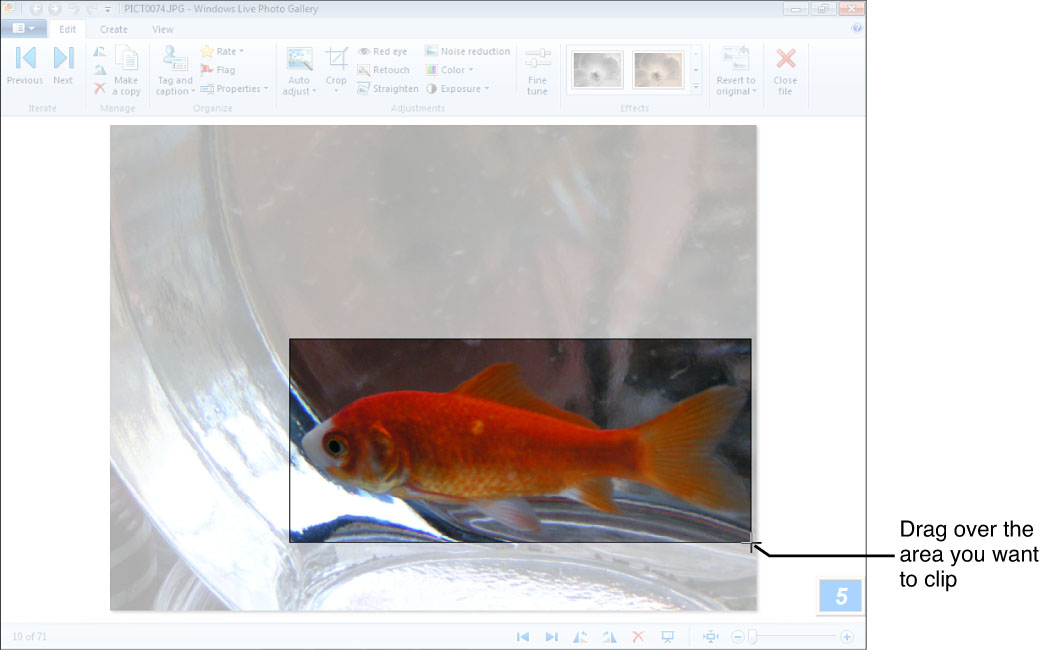
FIGURE 15.14 The second part of the process is to drag over the area you want to clip.

FIGURE 15.15 The screenshot is immediately added to your document.
Move the crosshair icon to the upper-left corner where you want to clip
I’ll bet you’re starting to see the future potential of this tool, right? Like any other graphic element you add to Word, the Format tab opens with your selected screenshot or clip, and you can apply picture attributes to the image. We’ll cover more on those in Chapter 16. You can also move and resize any screenshot or clipping in your document, treating it just like any other graphic element.
![]() Tip
Tip
Here’s something interesting—you can save an inserted screenshot or clipping as a new picture file to reuse again. Right-click over the image and choose Save as Picture. This opens the File Save dialog box and you can give the file a unique name and store it where you like. You can also specify a particular file format for the picture using the Save as type drop-down menu.
Embedding Videos
Adding dynamic content to your documents is easier than ever, and by dynamic, I mean video clips. You can watch the clips without having to exit the Word document. This means other people who open the document file can watch the clip as well. Let’s use that example about the iguana report again—say you want to include a video clip of the newly discovered lizard to show your readers what it looks like climbing a rock. You can insert the clip and treat it as a graphic element, which means you can move it, resize it, and apply some stylistic attributes (such as a border). The clip automatically displays a Play button that you, or another user, can click to play the clip.
Inserting a video embeds within the document. This means its information is included as part of the file when you save the document. Prior to this new feature, you could only insert links to videos. Of course, you can still insert links to videos stored elsewhere, but it’s just a link and not an actual embedded clip.
You can insert video from the following sources:
• Bing Video Search Use this option to search for videos on the Web using Microsoft’s Bing search engine.
• From a Video Embed Code Use this option if you know the specific embed code for the clip from its website.
• YouTube Use this option to look for clips on the YouTube site. This option isn’t set up by default; you’ll have to click the YouTube icon at the bottom of the window to include the service in your video options list.
To insert a video from an online source, follow these steps:
1. Click the Insert tab.
2. Click Online Video to open the Insert Video tool (see Figure 15.16).
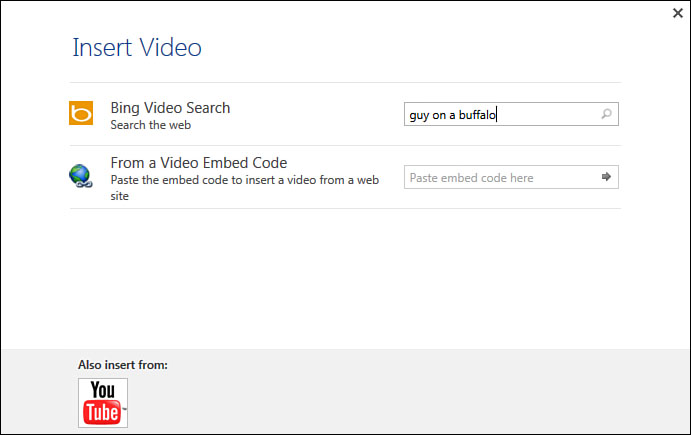
FIGURE 15.16 Start by choosing a source and typing in a keyword or words.
3. Click in the Bing Video Search field and type in a keyword or words for the type of video you’re looking for.
4. Press Enter or click the Search icon.
5. A search results page lists any matches, similar to what’s shown in Figure 15.17. Use the scrollbar to look through the thumbnails.
6. When you find one you want, click it.
7. To download and embed the video, click Insert.
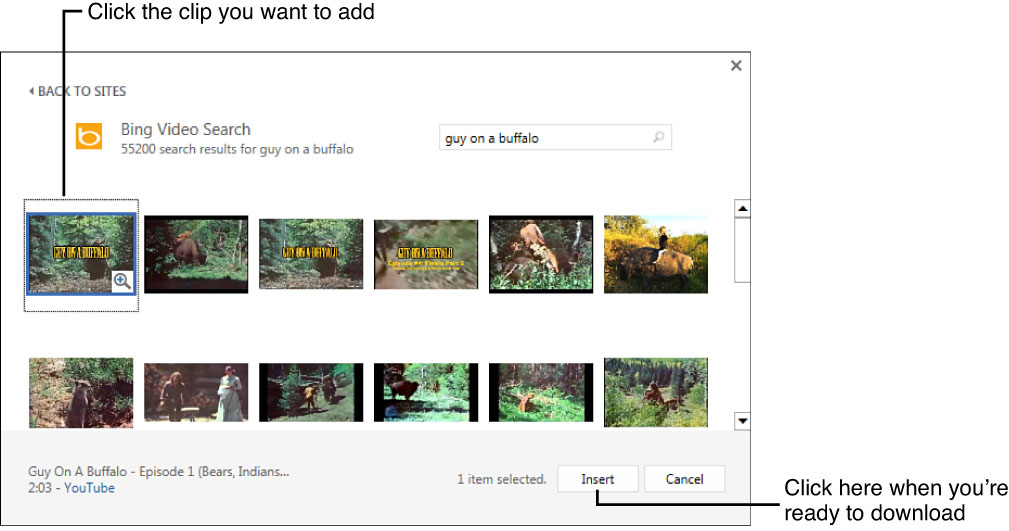
FIGURE 15.17 Look through the search results to find the video you want to use.
When the download is complete, Word inserts the video clip as a picture in your document, much like Figure 15.18, and displays the Format tab for working with the image. As always, you can resize and reposition the clip image area, if needed, or control the flow of text around the clip box.
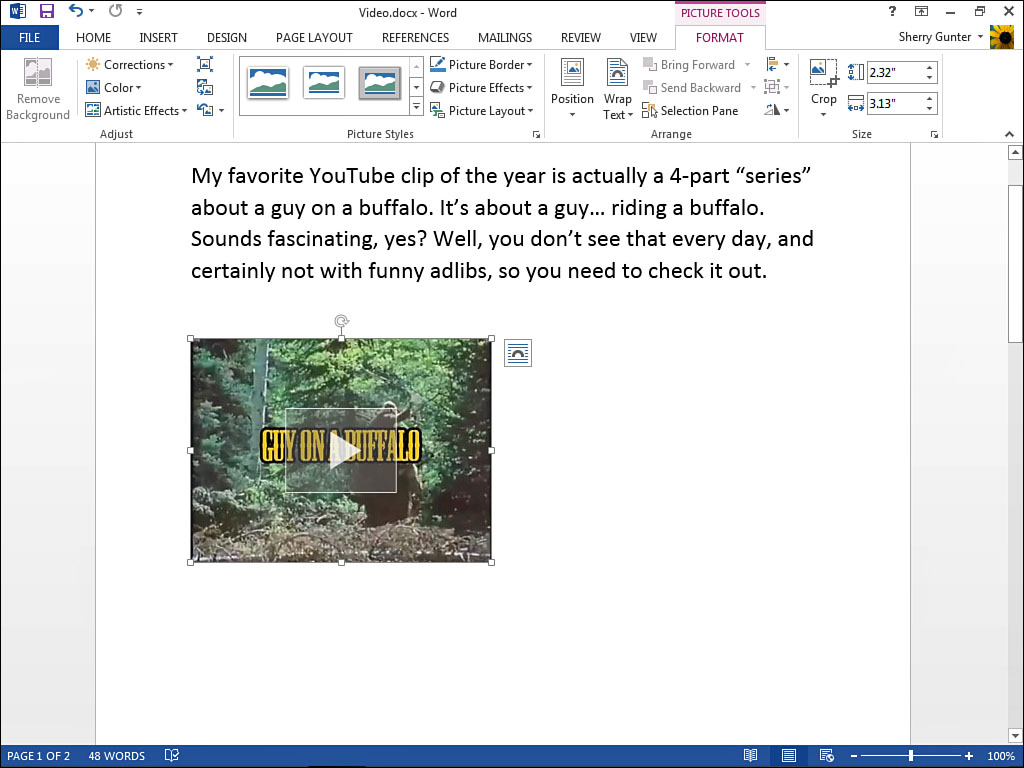
FIGURE 15.18 Word downloads the clip and inserts it for you.
To play the clip, click the giant Play button in the center of the clip (see Figure 15.18). Another window opens, as shown in Figure 15.19, along with additional playback controls. Click the Play button again to start the clip. You can click the Pause button to pause the playback, or click the Volume button to adjust the sound. To exit the clip, click anywhere outside the window.
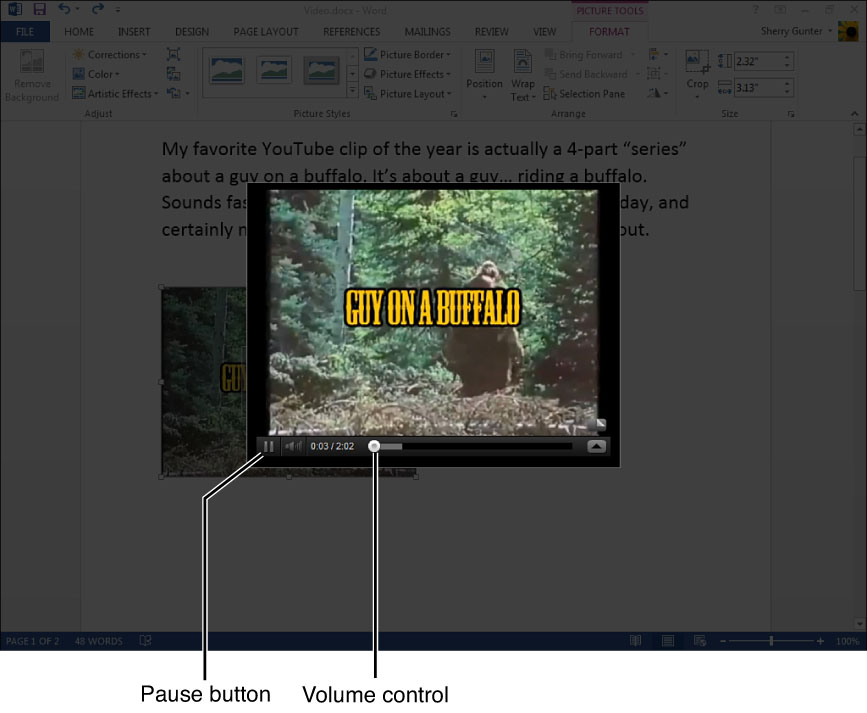
FIGURE 15.19 An embedded clip plays in its own special window.
To remove a clip you no longer want, select it and press Delete.