
13. Presentations with Keynote

In this chapter, you use Keynote to build and display presentations.
![]() Building a Simple Presentation
Building a Simple Presentation
You can’t have a suite of business apps without having a presentation tool, and Keynote is that tool on the iPad. The basics of using Keynote are the same as for Pages and Numbers. So let’s get right to making presentations.
Building a Simple Presentation
Keynote works best in horizontal screen orientation because presentations are usually given on horizontal screens. So after you launch Keynote, turn your iPad on its side. The way you manage documents in Keynote is exactly the same as you do in Pages and Numbers, including the ability to use iCloud to store your documents. If you need a refresher, refer to Chapter 11, “Writing with Pages.”
1. Tap the Keynote icon on the Home screen. If this is the first time you are using Keynote, you get a series of introduction screens. Continue until you are viewing an empty list of your presentations.

2. Tap the + button to create a new presentation.
3. Tap Create Presentation.

4. Choose a theme. We use Gradient for the task.

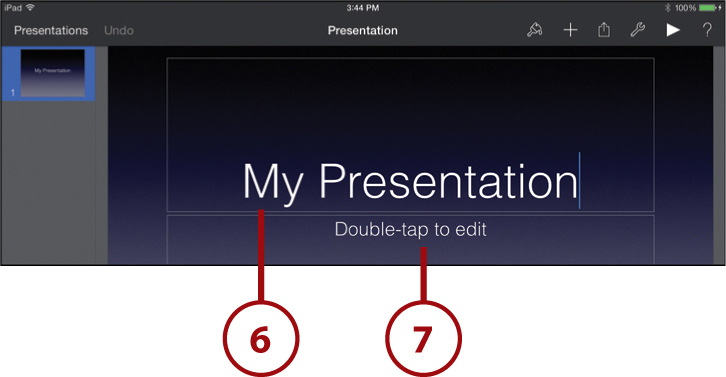
5. Double-tap the first line of text that reads Double-Tap to Edit.

6. Type a title using the on-screen keyboard.
7. Double-tap the subtitle area and type a subtitle.
8. Tap the + button at the top of the screen.
9. Tap the media tab. You are asked to allow permission to access your media, if this is the first time you’ve used it.
10. Choose a photo.

11. Tap the photo and use the blue dots at the corners and on the sides to resize the photo. Tap and drag in the middle of the photo to position it.

12. Tap the + button at the bottom-left corner to bring up a list of slides.
13. Tap any of the slide templates to add a slide. You now have two slides in your presentation.

Building Your Own Slide
You can remove items and add your own to any template. You can practice adding your own elements to a slide by using the blank template.
1. Start a new document or continue from the previous example. Tap + to add a new slide.
2. Scroll down in this list and choose the blank slide to the lower right.

3. Tap the + button at the top to add an element.
4. Tap the media button.
5. Select an album, and then select a photo from that album.

6. With the photo selected, grab one of the blue dots and shrink the image.
7. With the image selected, tap the paintbrush button and then tap Style.
8. Tap the bottom right of the six basic image styles or tap Style Options to customize the look of the photo even more.

Select All
To select all objects, tap a space with no objects. After a short delay, tap there again, and then you can choose Select All.
9. Add two more images using steps 3 through 8.

10. To select multiple items, use two fingers. Tap the first image with one finger and hold it. Use a second figure to tap the other two images to add them to the selection. Then drag all three images into a better position.
11. Tap the + button to add another element.
Tables and Charts Anyone?
You can also add tables and charts, even basic shapes, in the same way you would do it in Pages. There are a lot of similarities between using Pages and using Keynote.
12. Tap the shapes and text button.
13. Tap the first element, a plain text box.
14. Tap outside the menu to dismiss it.

15. Tap the text box to select it.
16. Drag it to a new position and expand it.
17. Double-tap in the text box to enter some text.

18. Close the keyboard and select the text box. With the text box selected, tap the paintbrush button.
19. Tap Text, and then change the font style and size.
20. Make the text bold by tapping B.

21. Tap outside the menu to dismiss it.
22. Your text is now bold. You now have a custom slide with three pictures and some text.

Adding Transitions
Just like other presentation programs, Keynote on iPad has a number of transition options. To practice working with transitions, start with a sample presentation, such as the one you have been working on, or create a new document with some sample slides.
1. Select the first slide on the left and then tap it again.
2. Tap the Transition button that appears.

3. Scroll through the transitions and pick one. Try Cube. The slide animates to show you the transition. It then returns.
4. Tap Options.

5. Select any options associated with the transition. For example, the Cube transition has a duration setting. If you don’t want to change any options, tap elsewhere to dismiss the menu.
6. Tap Done in the upper-right corner of the screen.

Magic Move
Another type of transition is the Magic Move. This is where objects on one slide are the same as the objects on the next, but they are in different positions. The transition between the slides moves these objects from the first position to the second.
1. Select a slide with several objects on it, such as three images. Tap it.
2. Tap Transition.

3. Choose Magic Move.
Unique Effects with Magic Move
The great thing about the Magic Move transition is that you can create some unique effects. For instance, in the example, you could bunch all the photos into a tiny space on the first slide and then spread them out in the second slide. The transition would make it seem like the photos are bursting out and falling into place.

4. Tap Yes to duplicate the current slide so that you have two identical slides from which to create the Magic Move transition.

5. Slides 2 and 3 are identical, and slide 3 is the current slide. Move the objects around to reposition them or resize them. The stars indicate which elements are taking part in the Magic Move. In this example, the images will be swapping places. The Magic Move transition causes them all to flow from one position and size to the other.

6. Tap the second frame.
7. Tap the arrow next to Magic Move and then tap play to preview the transition from slide 2 to slide 3. You need to tap the screen then to proceed from the second slide to the third one and see the transition.
8. Tap Done in the upper-right corner of the screen.

Object Transitions
In addition to the entire screen transforming from one slide to the next, you can also define how you want individual elements on the slide to appear.
1. Start off with a slide that includes a title and a bullet list. Tap the slide’s title text.
2. Tap Animate.

3. Tap the build in button.

4. Tap Blast to see a preview of the animation.

6. Tap build in.

7. Scroll down to Move In and tap it.
8. Tap Delivery. You can also explore the Options and Order parts of the menu, but for this task you leave those settings alone.

Don’t Build the First Object
A common mistake is to set every object to build, as you have in this example. Because the first object, the title, builds in, it means that nothing appears on the slide at first. You start off blank. Then the title appears and then the bullet items. Sometimes, though, you should start a slide with the title already on it.
9. Tap By Bullet and then tap Done in the upper-right corner of the screen. The effect works by first showing you a blank screen, and then when you tap the screen, the title appears with the Blast transition. Each of your next three taps makes a bullet appear.

Organizing Slides
As you create presentations on your iPad, you might discover you need to re-order your slides, but that’s no problem with Keynote. To practice, use a presentation that has several slides.
1. Create a presentation that includes several slides.
2. Tap and hold the third slide. It grows slightly larger and begins to follow your finger so that you can drag it down into another position.

Grouping Slides
There are two options when you drag a slide and place it back in the list. The first is to place it flush left, where it inserts normally. If you move the slide slightly to the right, though, you are grouping the slide with the one above it. Groups are a great way to put slides that belong together as a single element. That way, you can move them as one unit if you need to. To move them as a group, you close the group by tapping the triangle next to the parent slide. Then move the parent slide around, and all children come with it.
3. Drag slide 3 to the right so it inserts in a group owned by slide 2.

4. Tap the triangle on the left of slide 2 to close the group.

5. Tap slide 3 with your finger and continue to hold.
6. Use your other hand to tap slide 4 and then release your finger. You can now move this group of two slides as one unit.

7. Tap once to select a slide. Then tap a second time after a short delay to bring up a menu.
8. Use Cut, Copy, and Paste as you would while editing text. You can duplicate slides using Copy.
9. Tap Delete to remove a slide.
10. Tap Skip to mark a slide as one to skip during the presentation. This comes in handy when you want to remove a slide from a presentation temporarily, perhaps while presenting to a specific audience.

Playing Your Presentation
After you create your presentation, or if you want to preview what you’ve done, you can play your presentation.
1. With a presentation open in Keynote, tap the Play button.

2. The presentation fills the screen. Tap the center or right side of the screen to advance to the next slide. You can also tap and drag from left to right.
3. To go back to the previous slide, drag right to left.
4. Tap the left edge of the screen to bring up a list of slides.
5. Tap one of the items in the list to go directly to that slide.
6. Tap outside of the list of slides to dismiss the list.
7. Pinch in at the center of the screen to end the presentation and return to editing mode.

8. Tap and hold in the middle of the slide to bring up special pointer controls.
9. A row of tools appears at the bottom. Select a color of pen.
10. Now you can use your finger to draw on the slide.
11. You can undo drawing.
12. You can use the laser pointer dot instead of drawing.
13. While in this mode, you can use the arrow buttons to navigate between slides.
14. Tap Done to return to normal presentation mode.

>>>Go Further: Presenting On An External Display
